Sewing News LIVE ? Angela Wolf talking with Ashley Nell Tipton ? Winner of Project Runway Season 14 ? Ashley designs beautiful clothes for the full figured woman. She says: “My collection is a full figured collection for the woman in her 20’s or 30’s who is a chic...
Sewing News Live ? Interview with Ashley Nell Tipton Season 14 Winner Project Runway
Sewing News LIVE ? Angela Wolf talking with Ashley Nell Tipton ? Winner of Project Runway Season 14 ? Ashley designs beautiful clothes for the full figured woman. She says: “My collection is a full figured collection for the woman in her 20’s or 30’s who is a chic rocker! My collection is an artful combination of glamour and street fashion. I love color and I’m very inspired by curvy women and helping them feel good in their clothes. I want to offer plus size women the opportunity to wear fun colors and to avoid the pit-falls of only wearing black because many curvy girls think it is the only color that is slimming.”
You won’t want to miss this one ? Sponsored by @brothersews
Sewing News Live ? Interview with Ashley Nell Tipton Season 14 Winner Project Runway
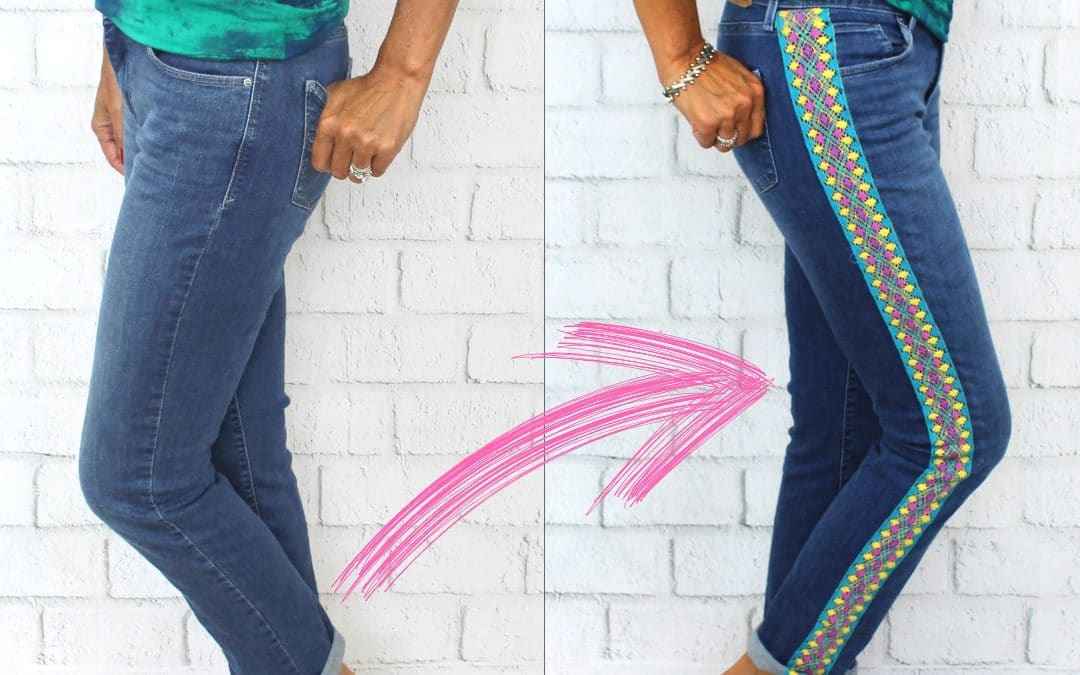
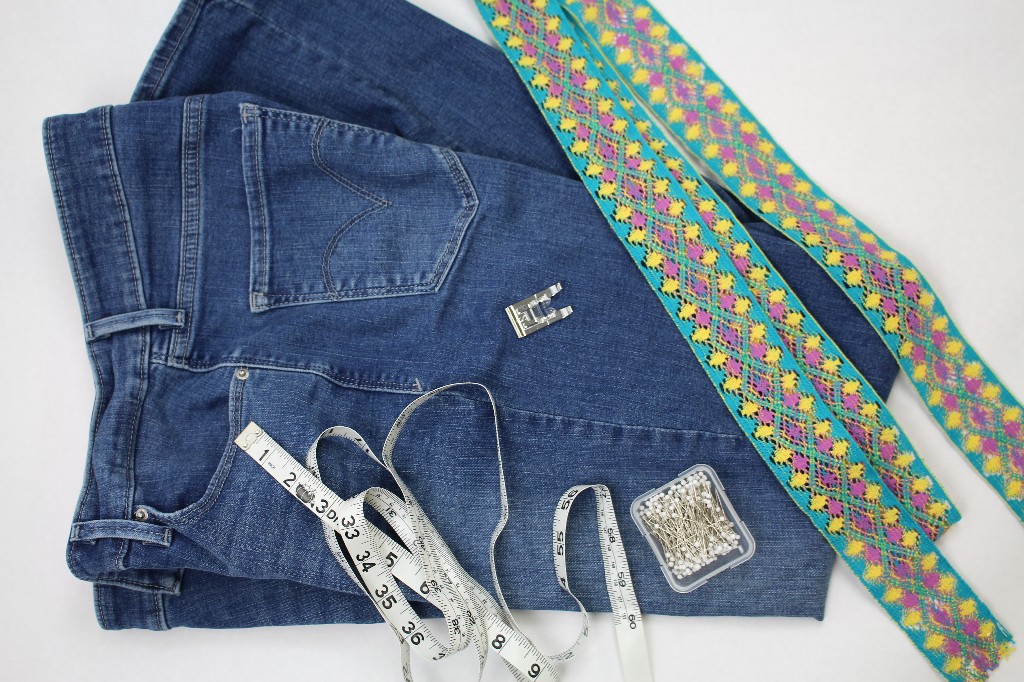
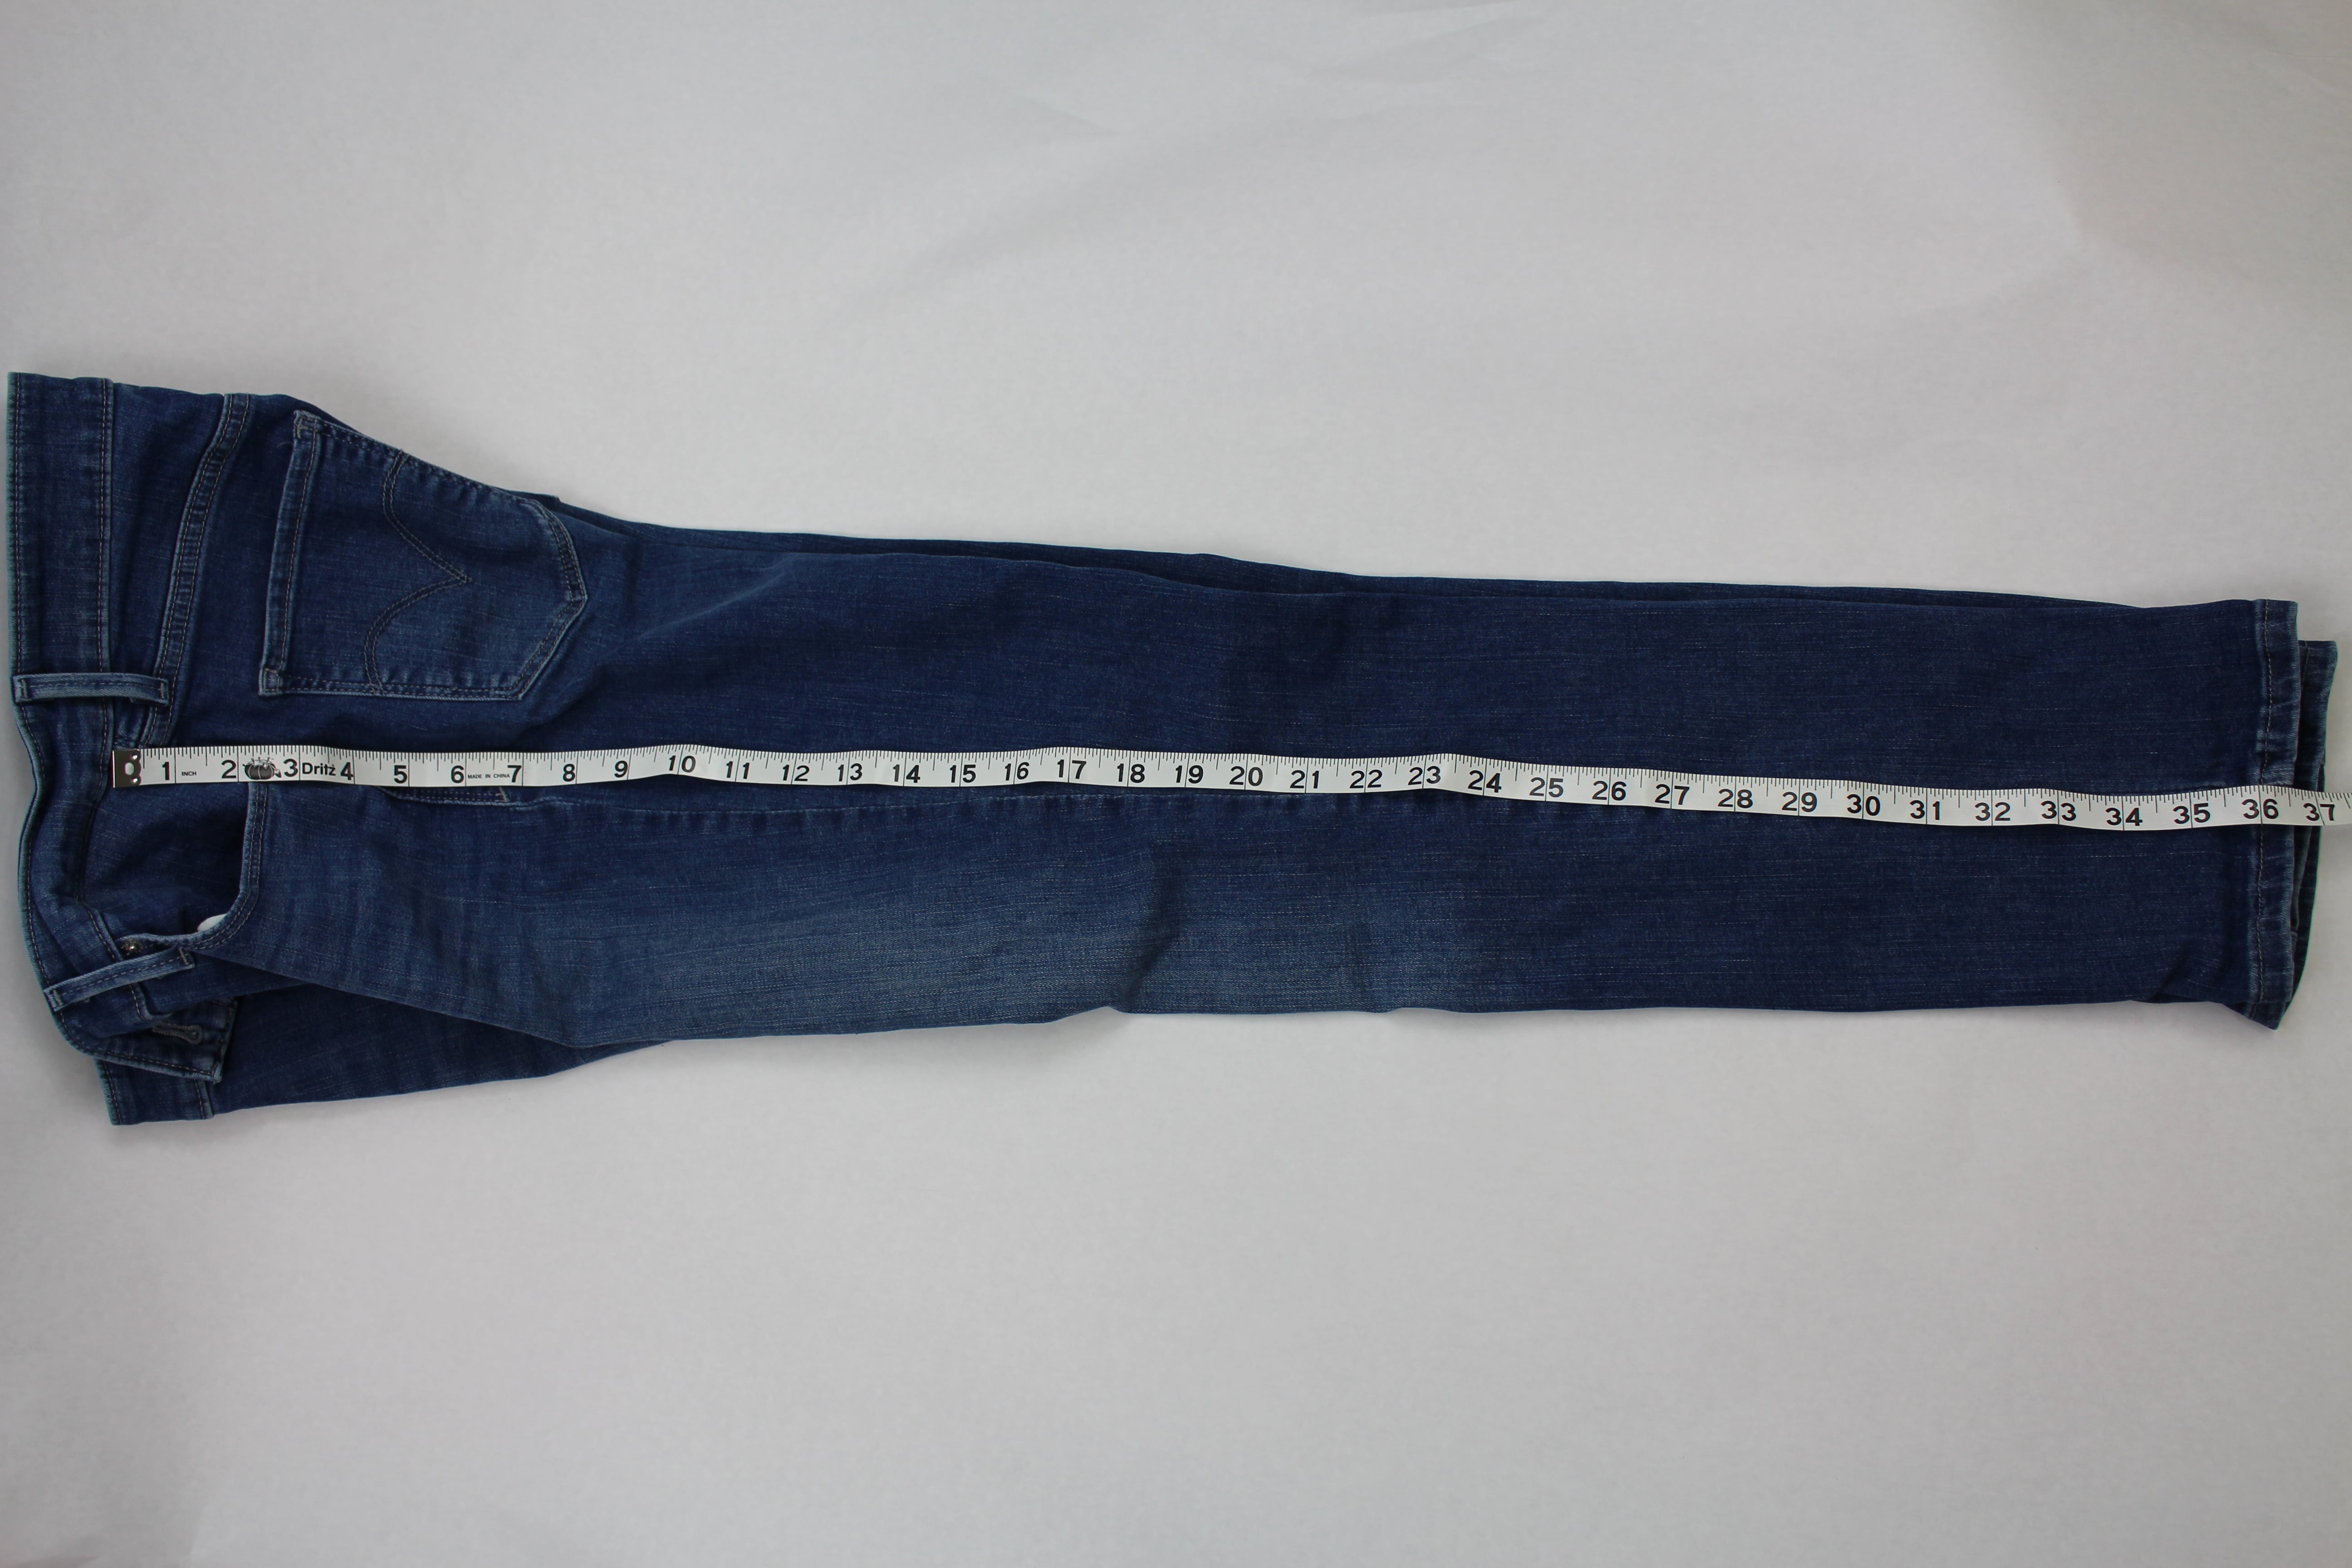
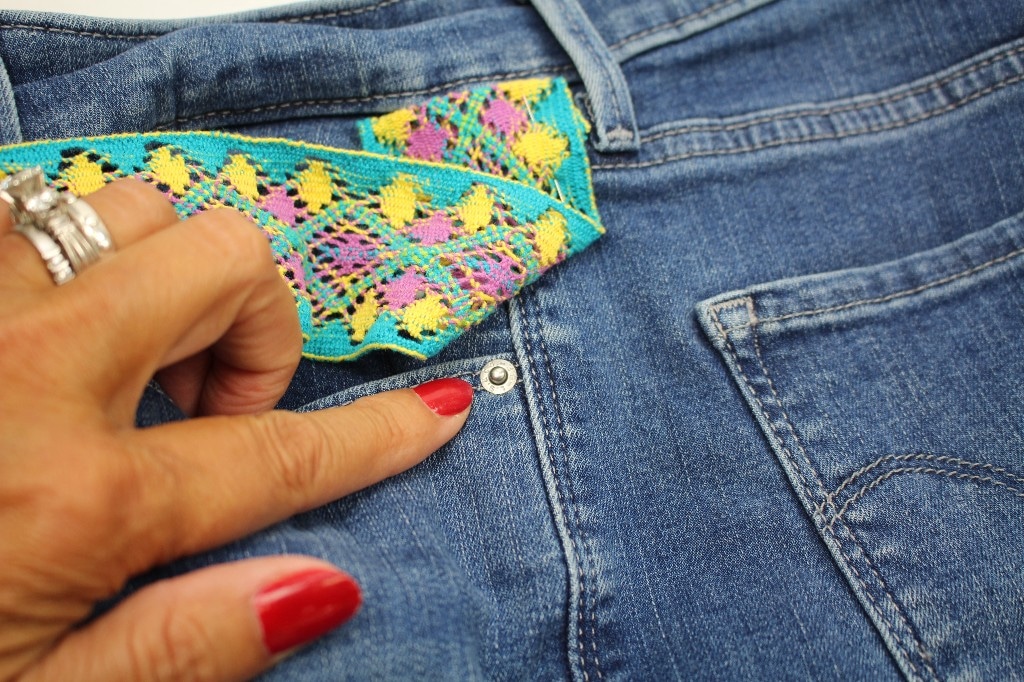
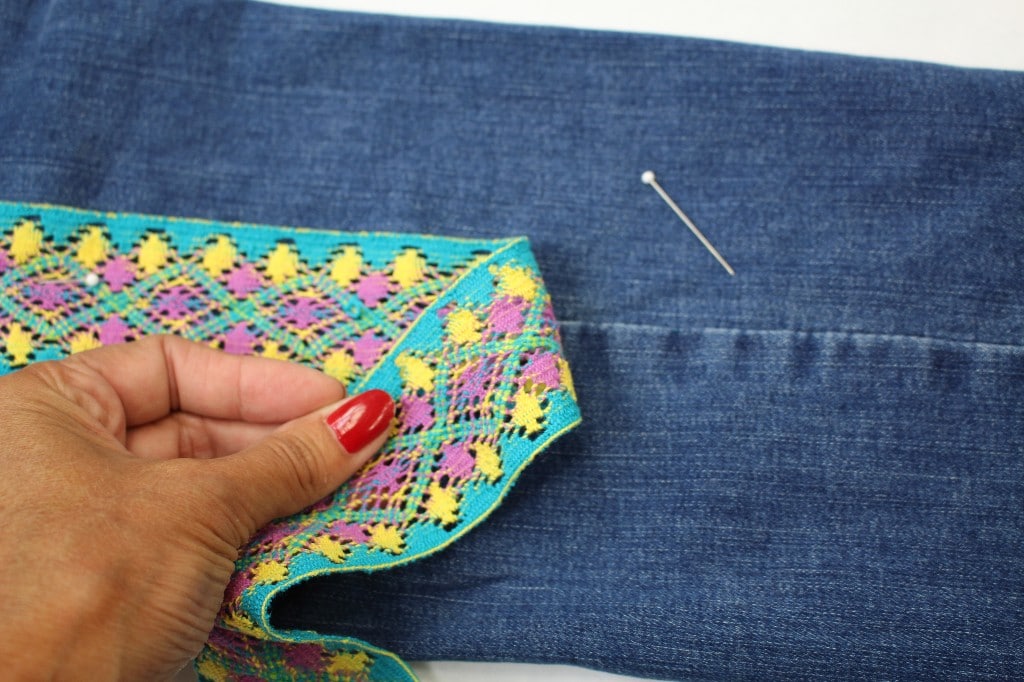
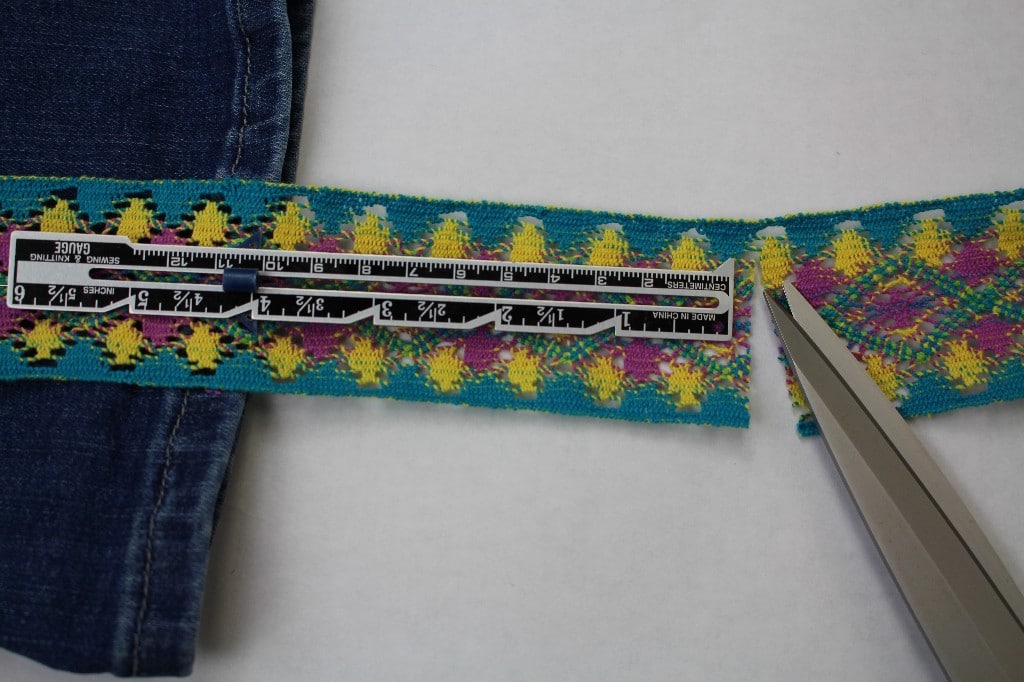
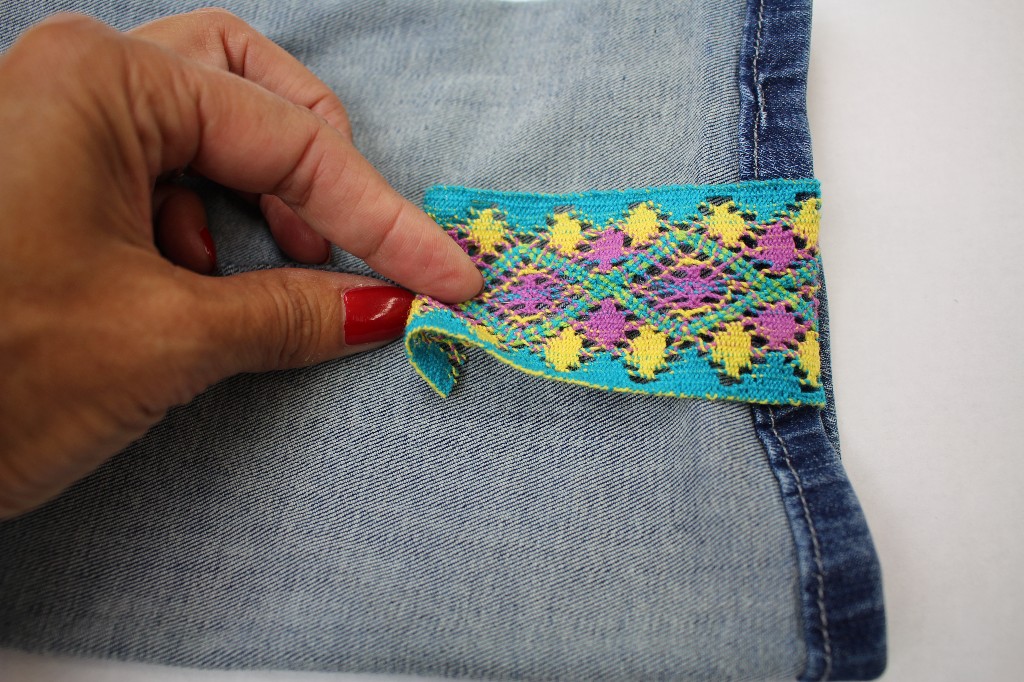
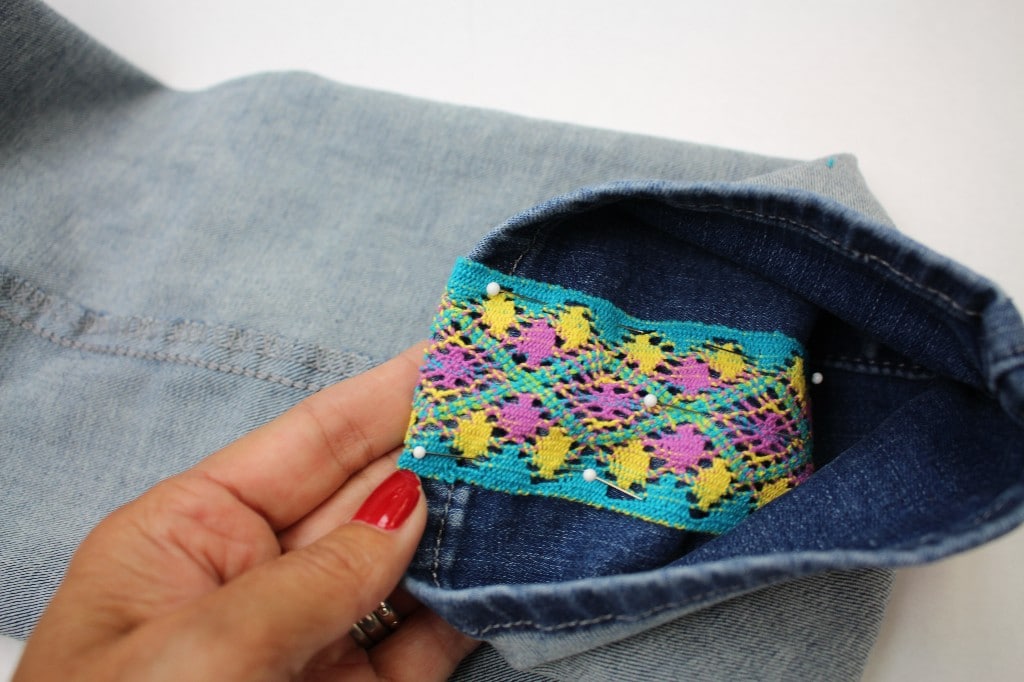
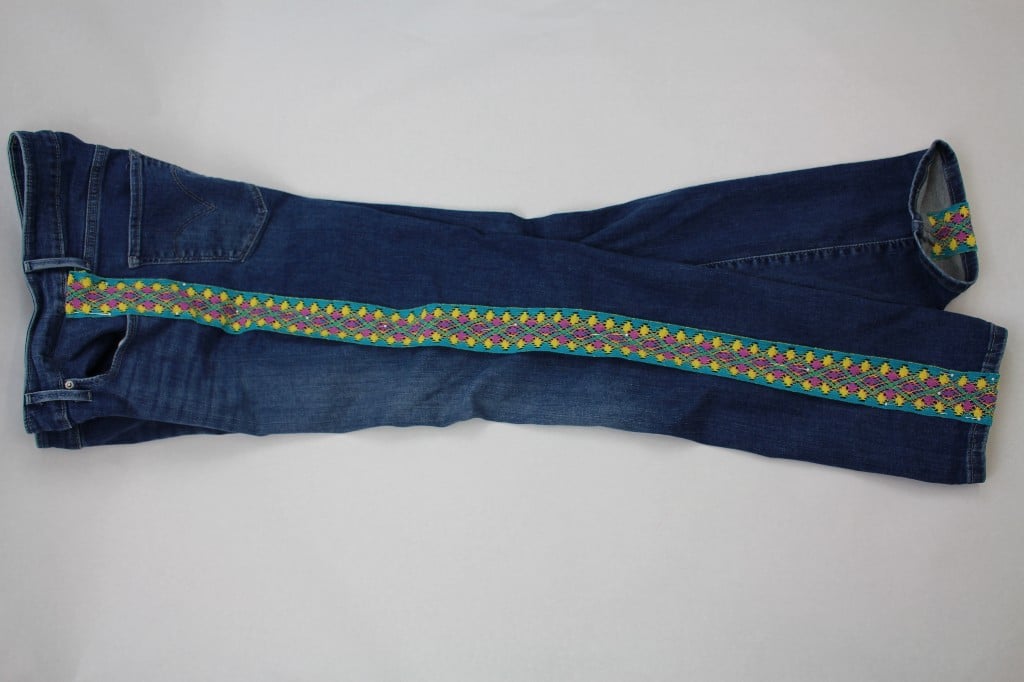
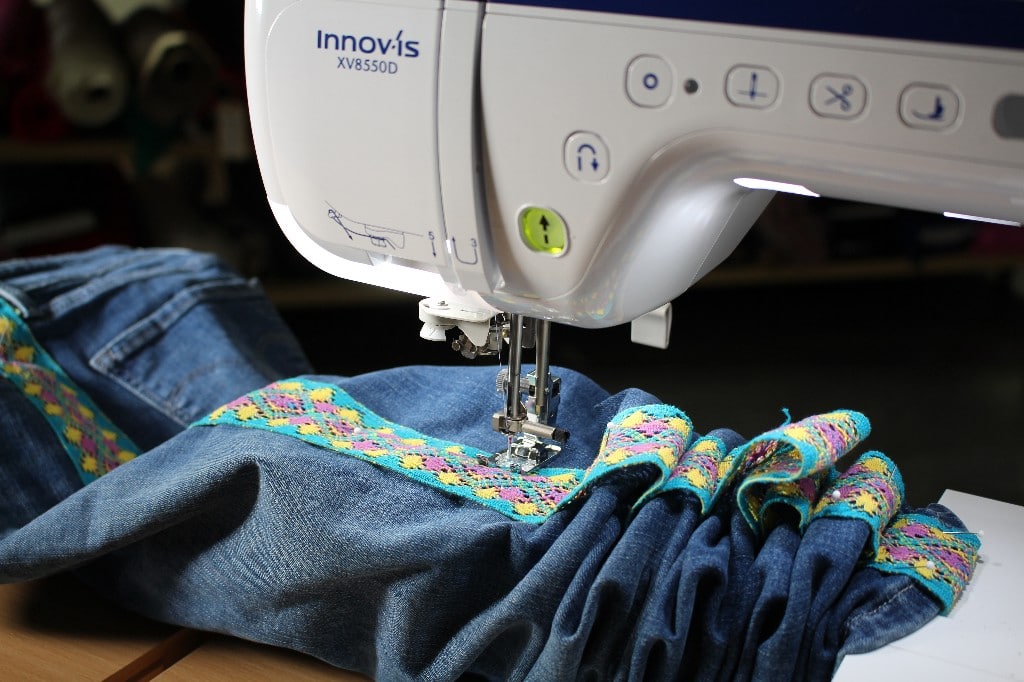
DIY: Refashion Jeans with Trim
Refashion Jeans with Trim You might have noticed some of the fashions of the late 60’s and 70’s making a comeback on the store shelves, from floral fabrics to embellished jeans. How about adding crocheted ribbon trim along the outside leg! This is so...
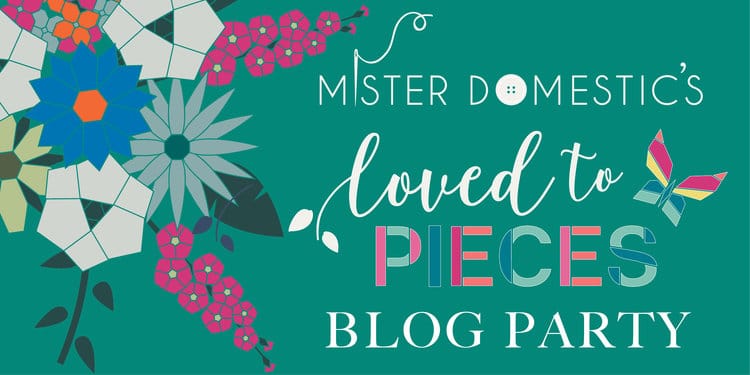
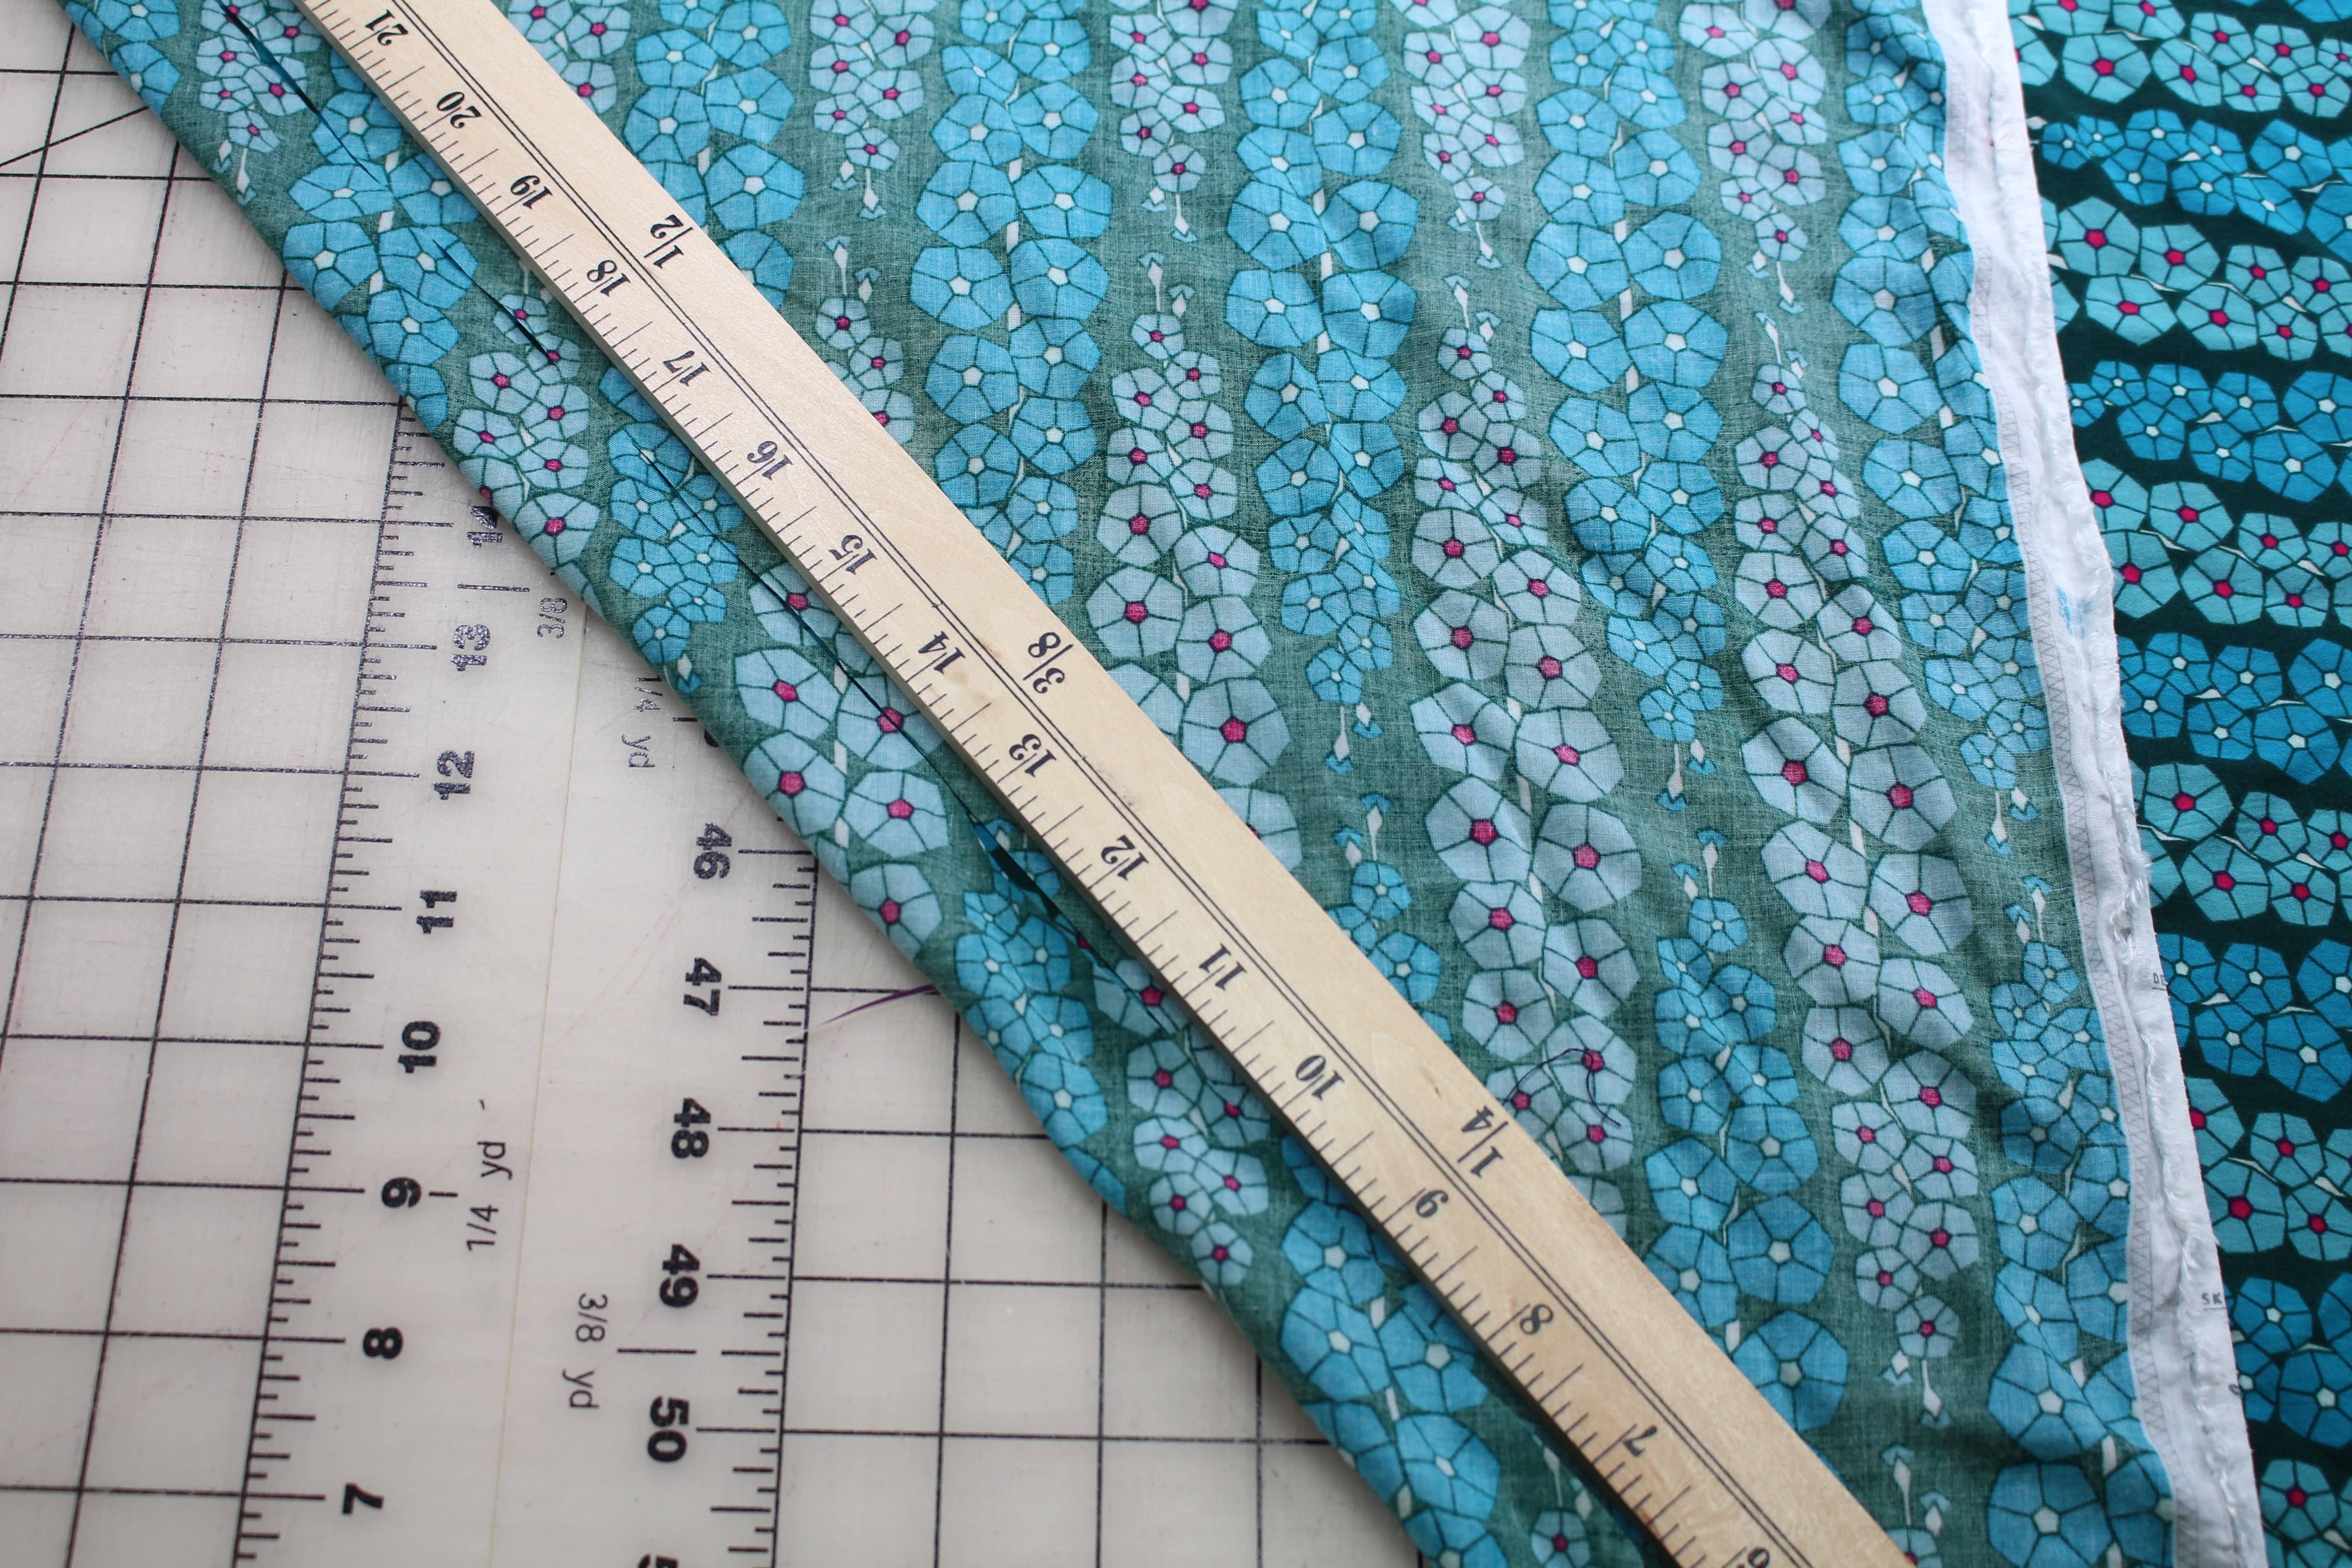
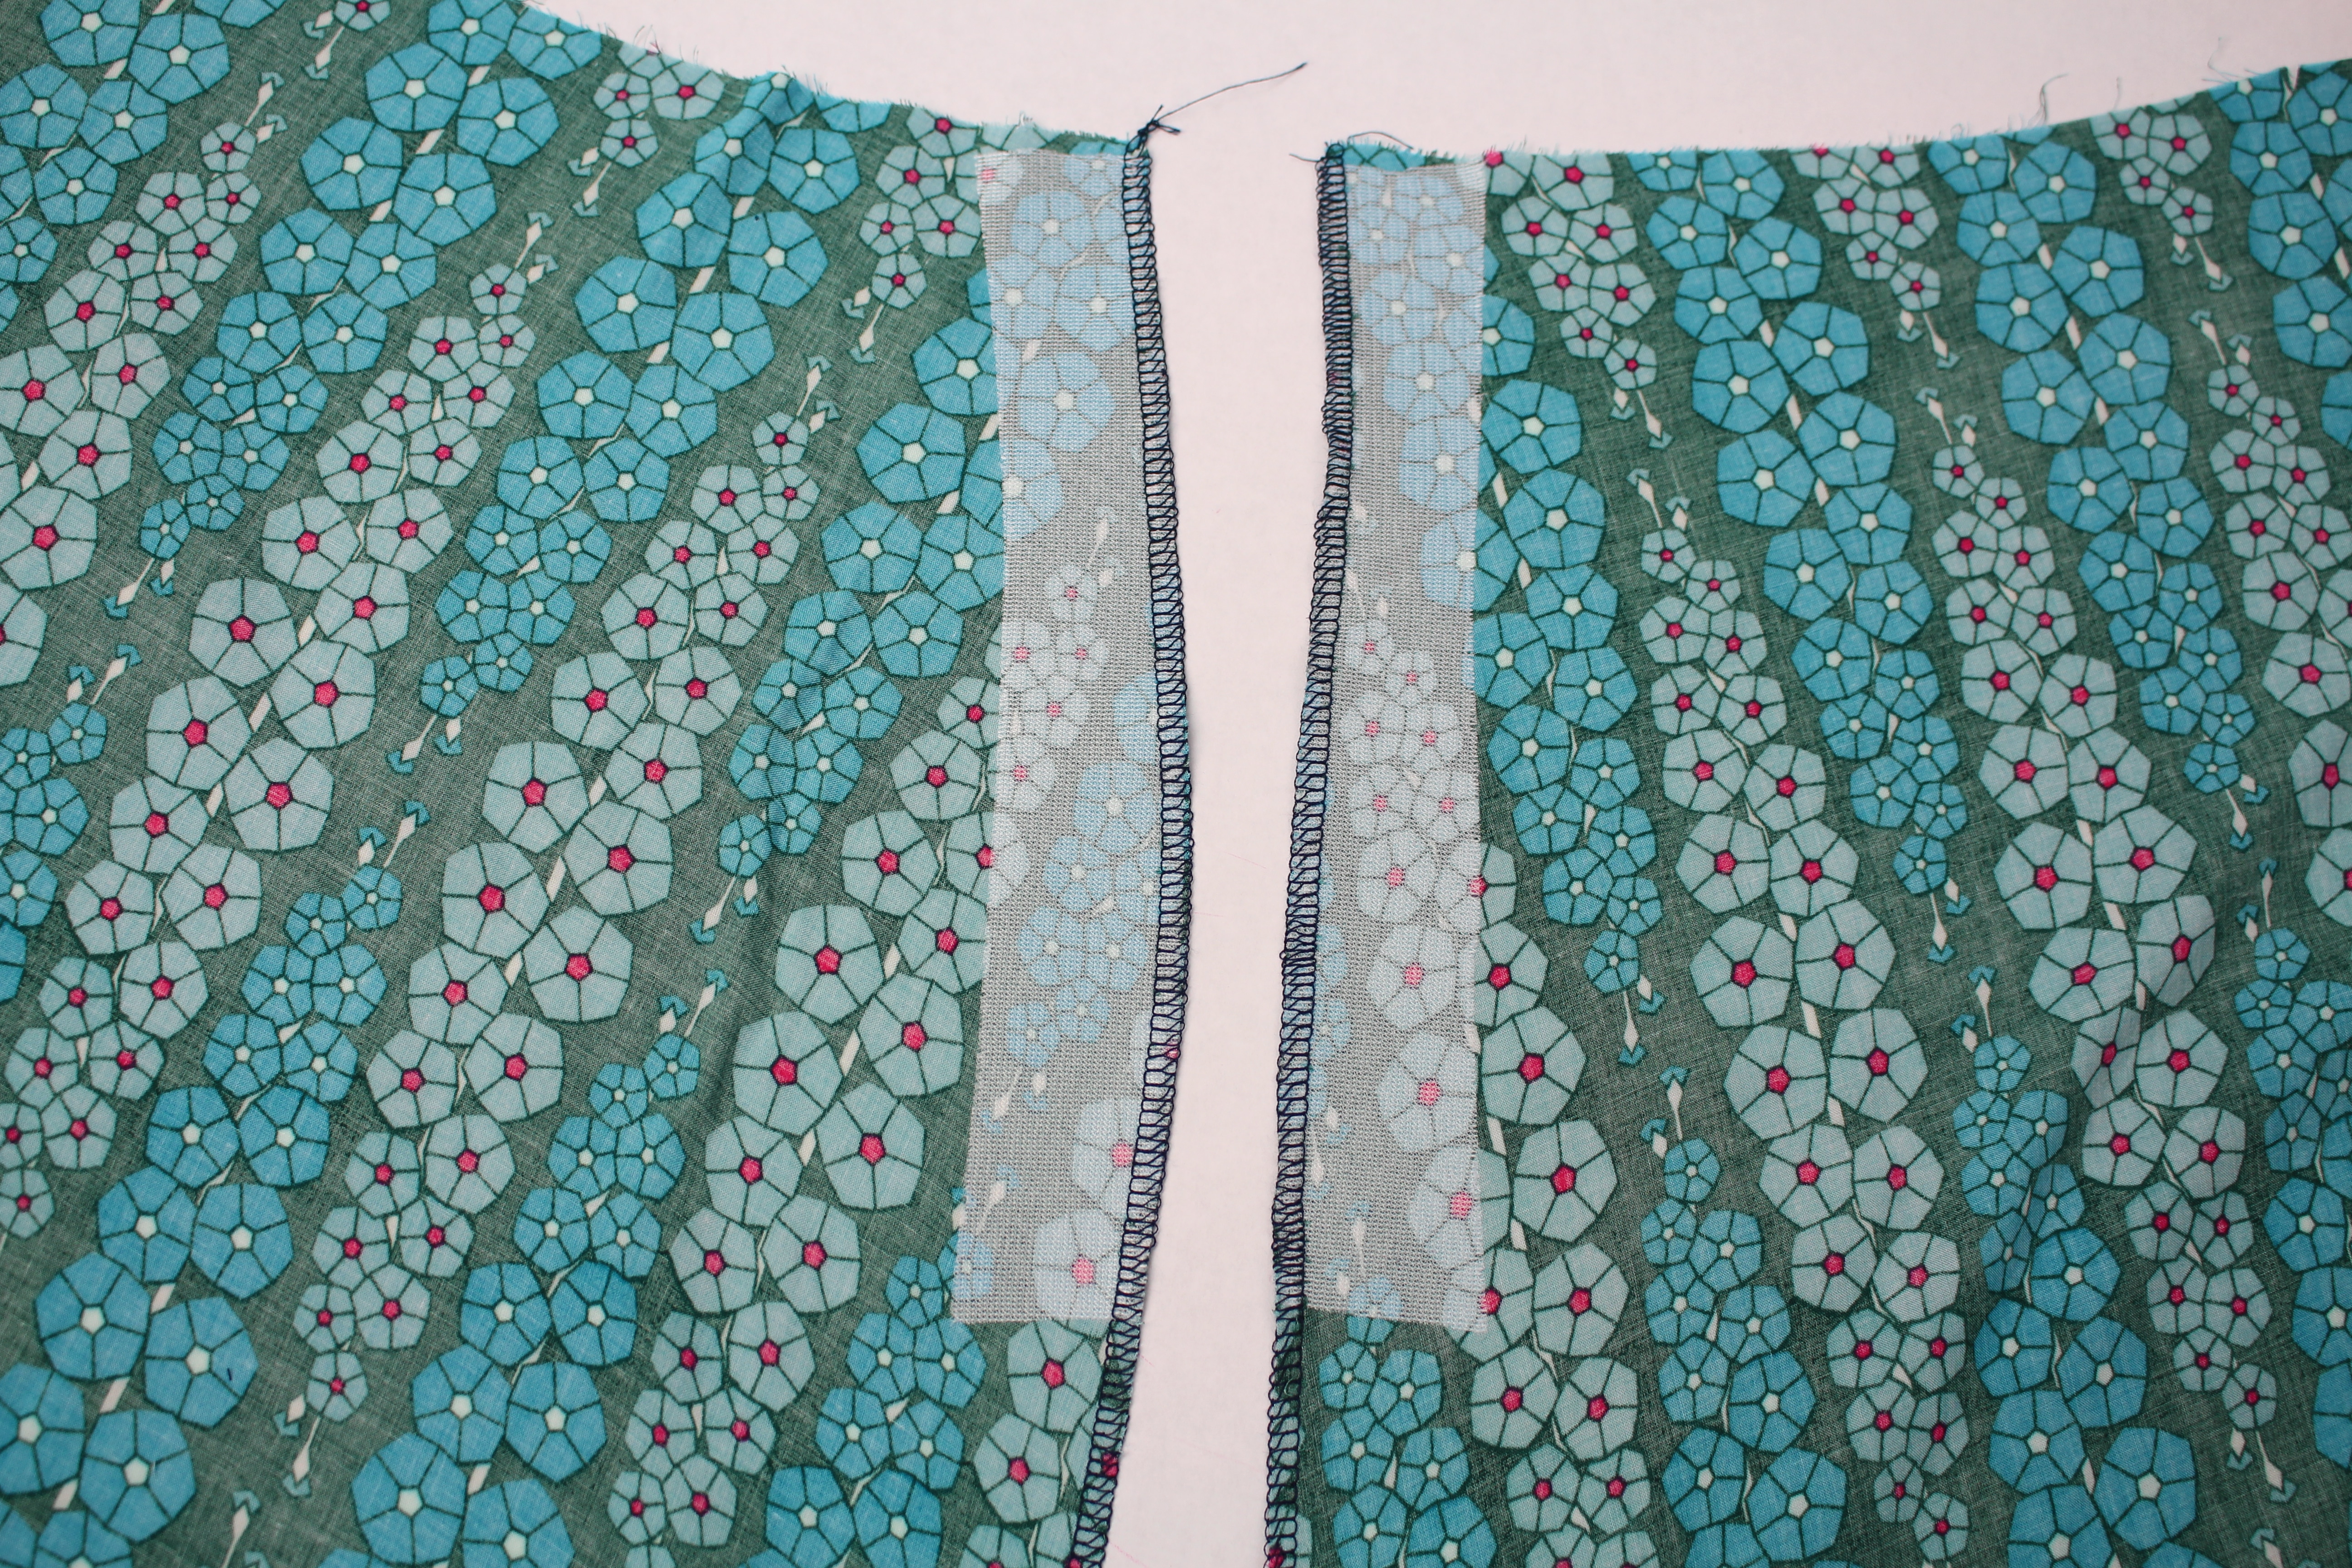
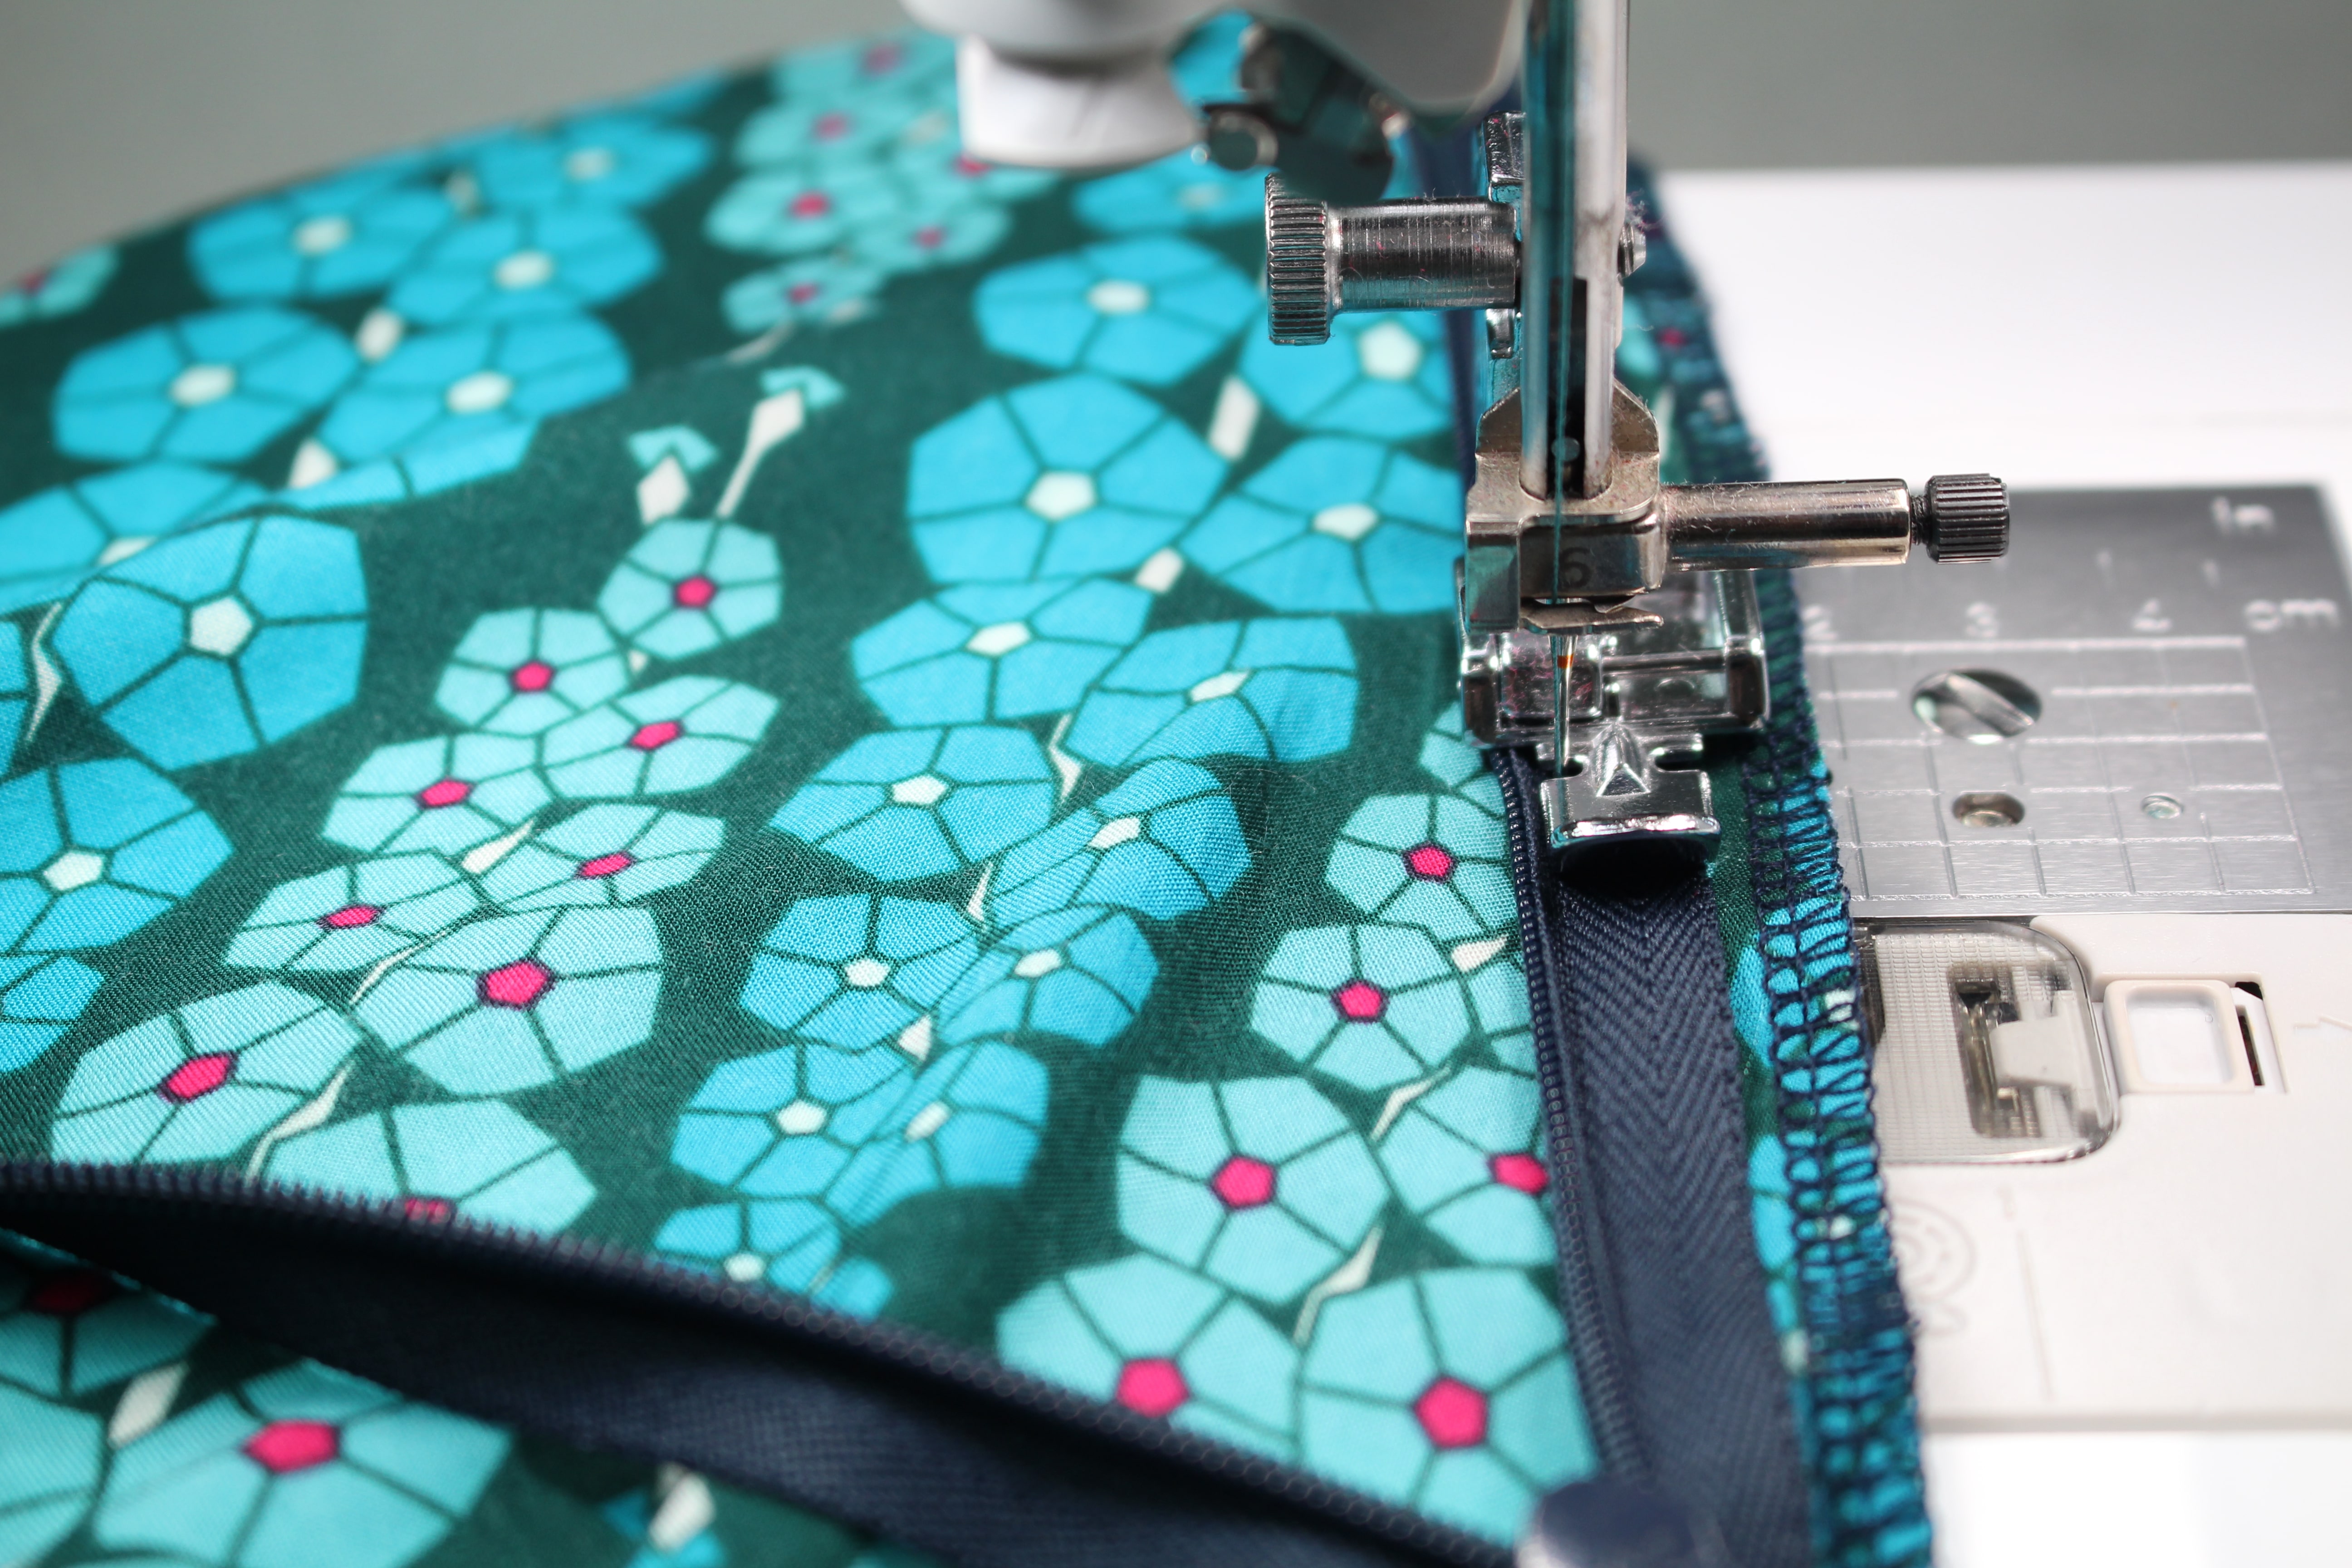
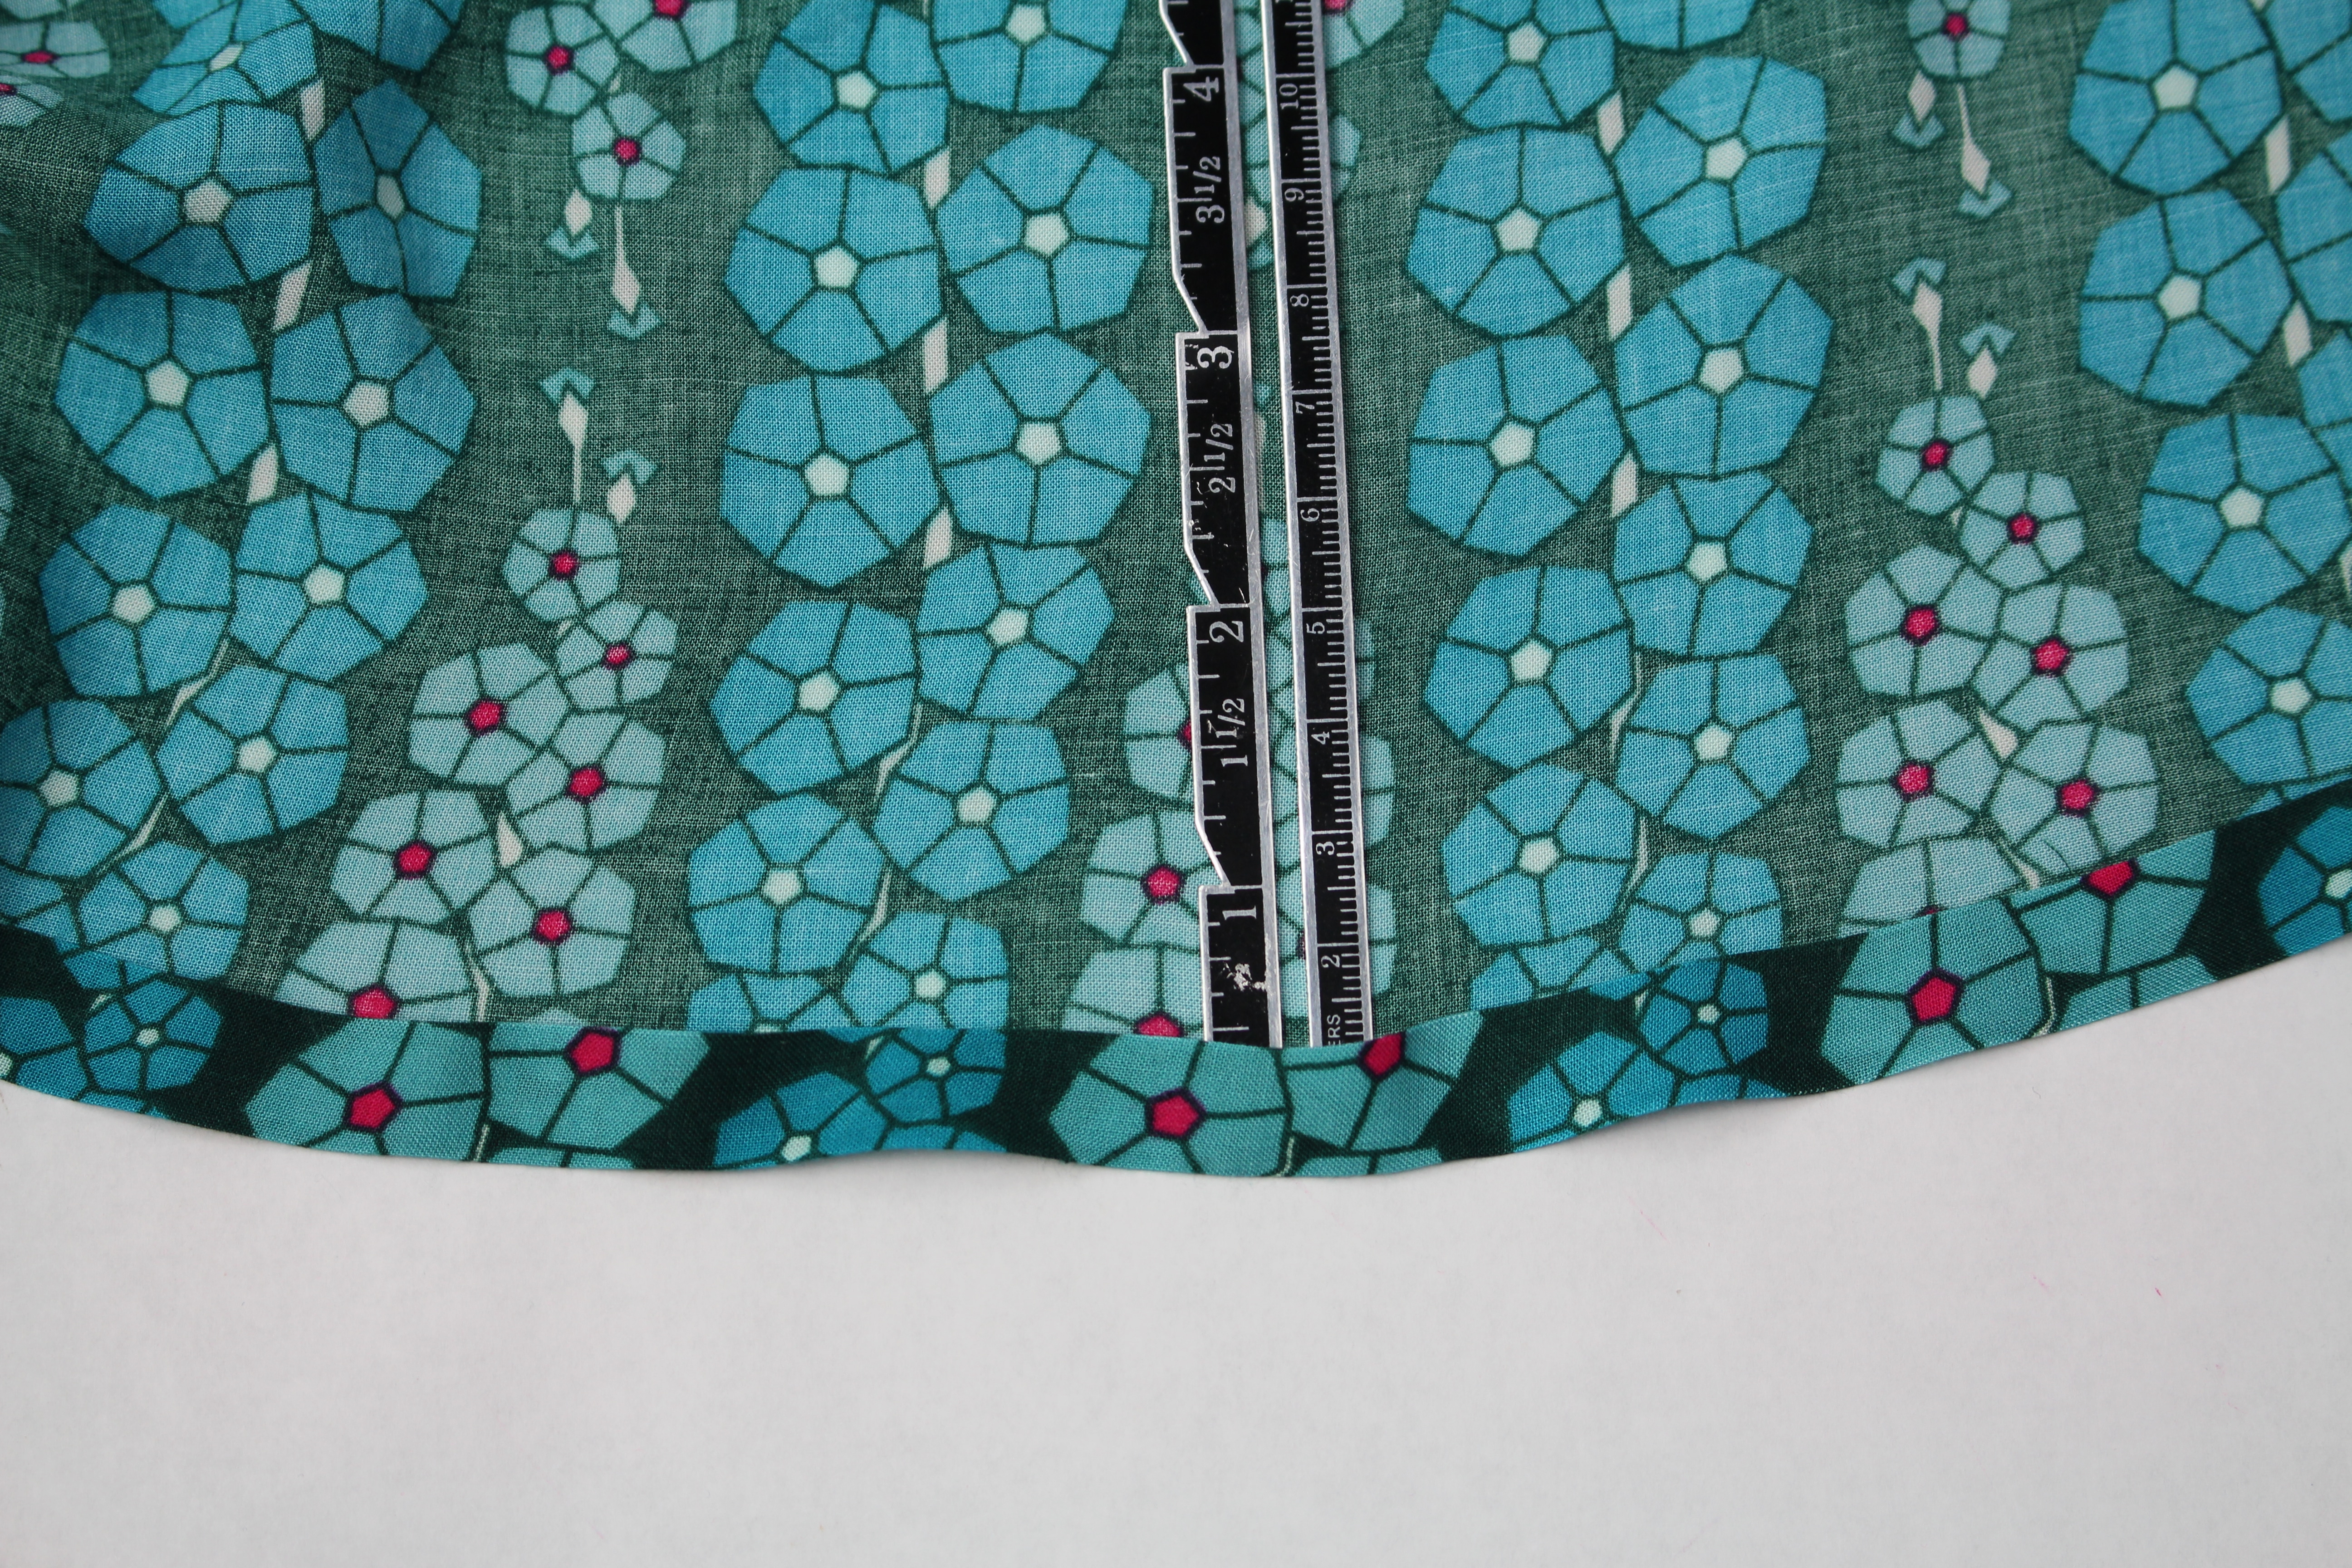
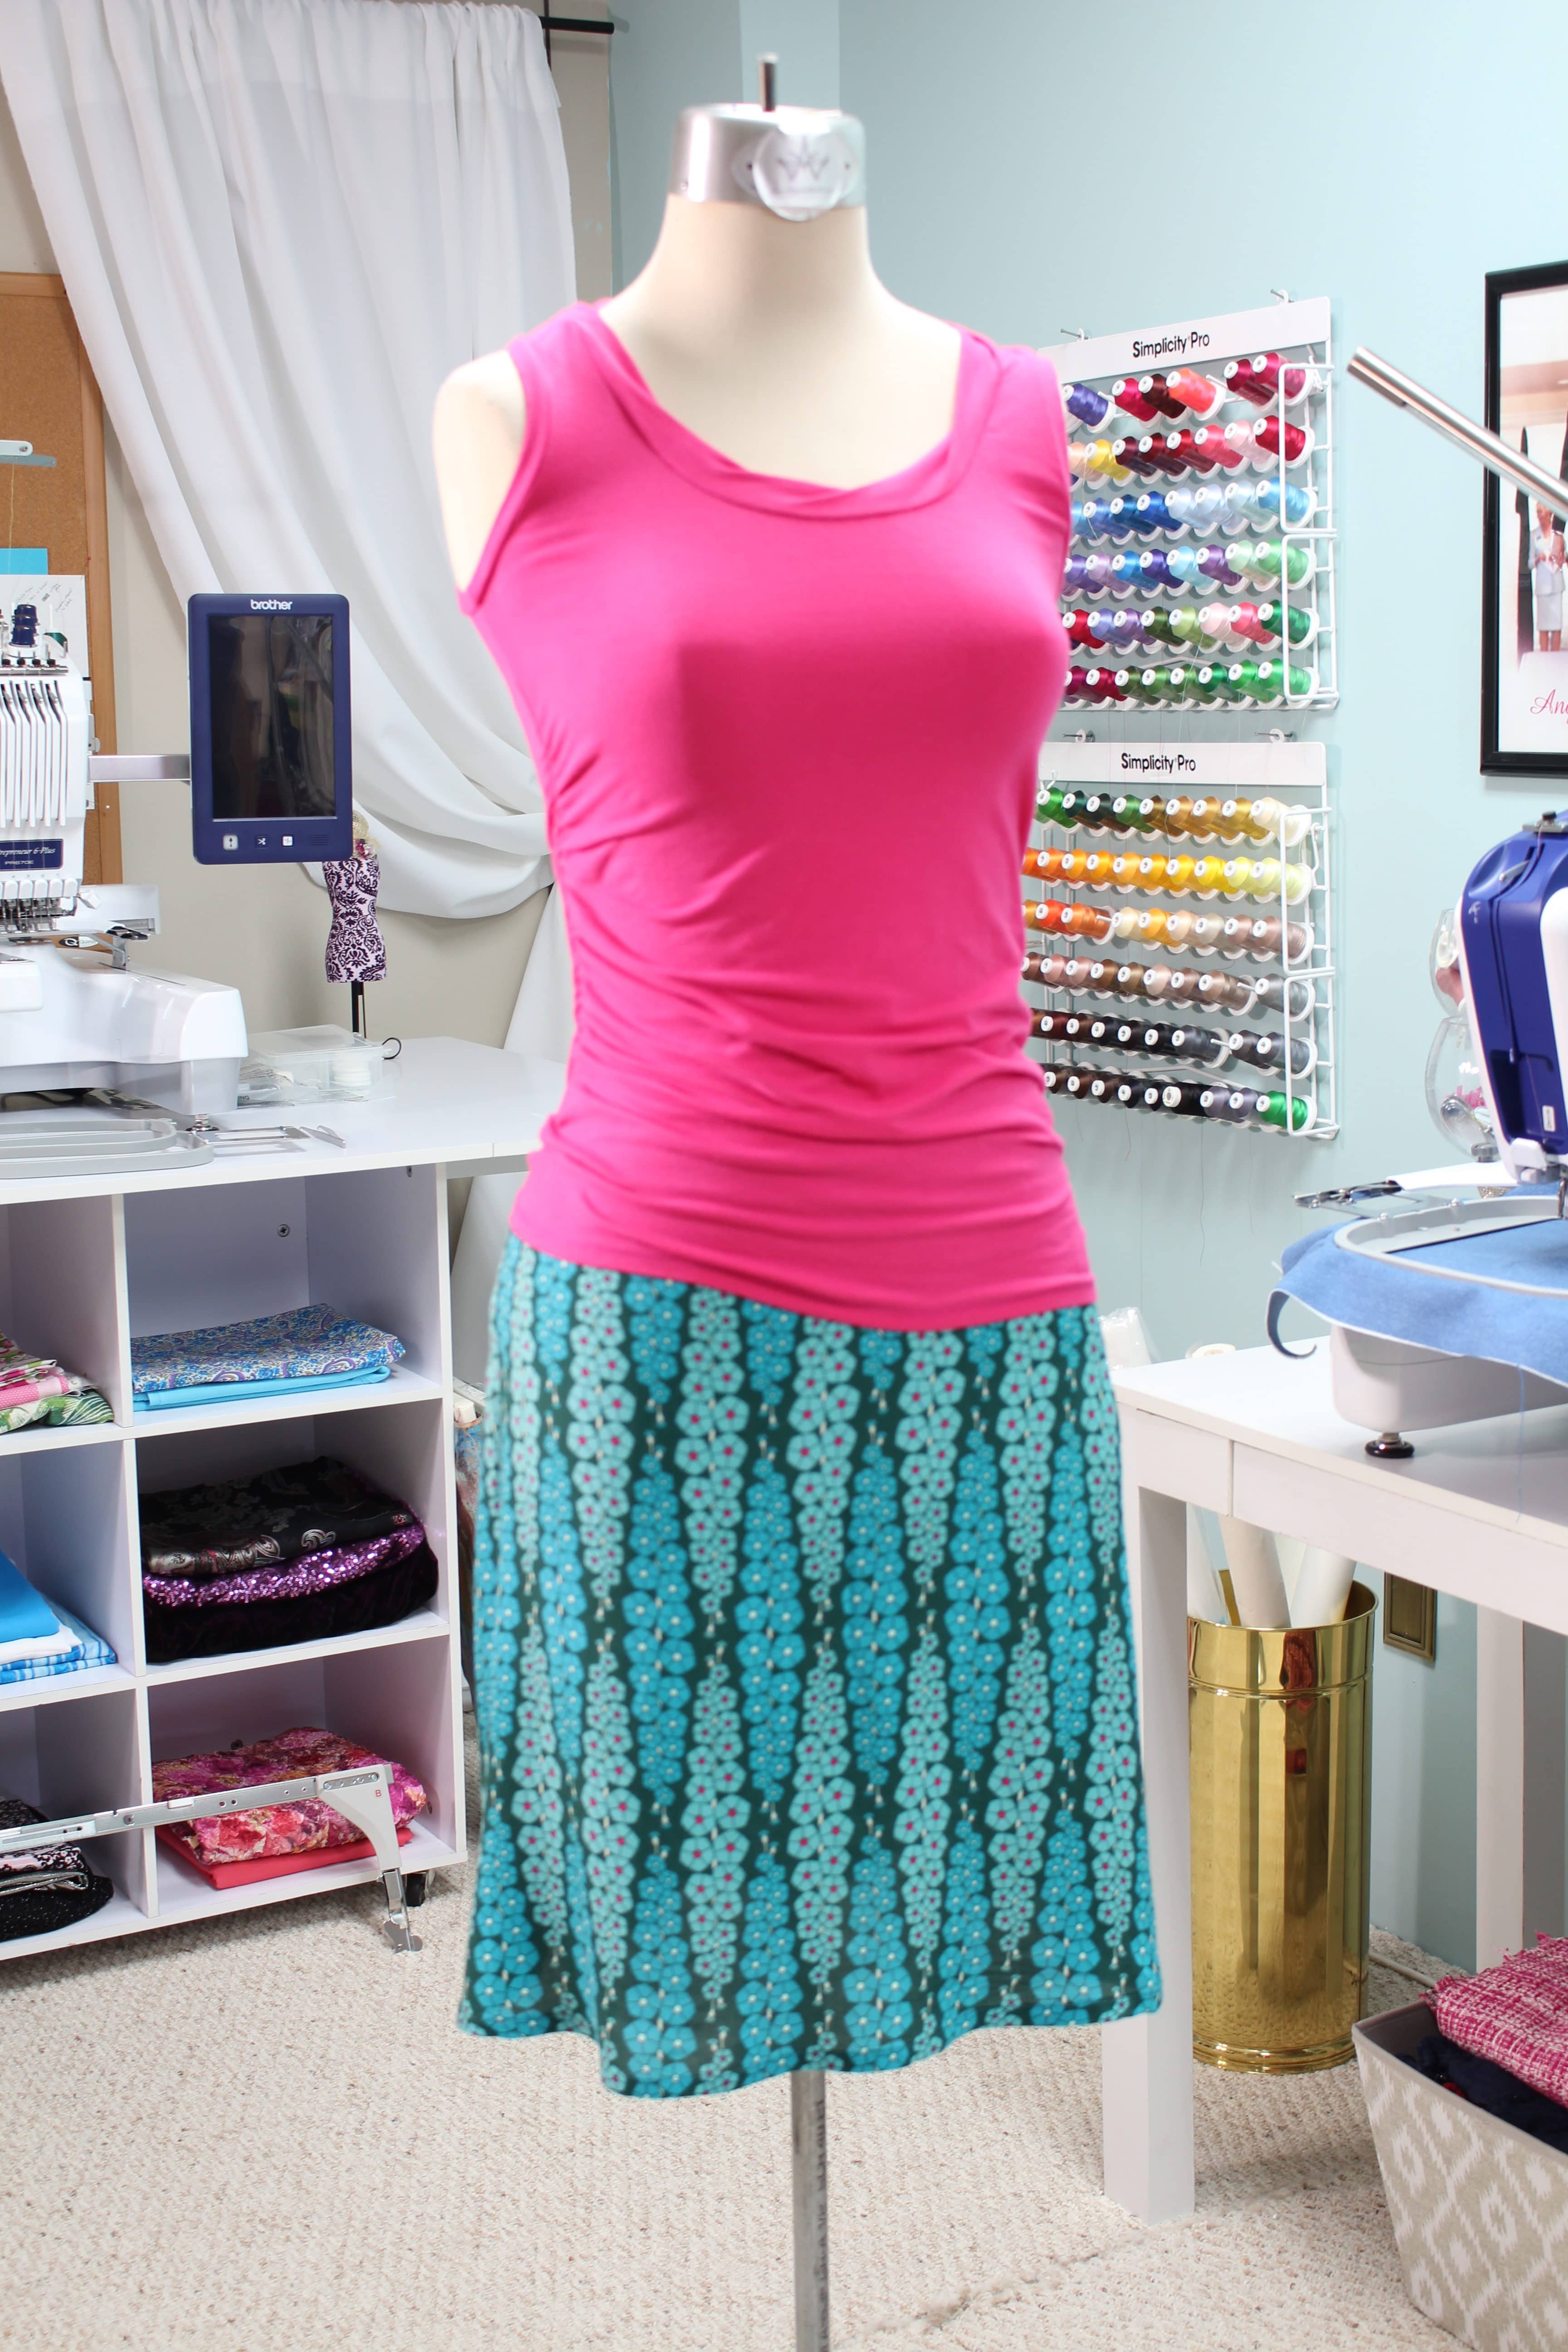
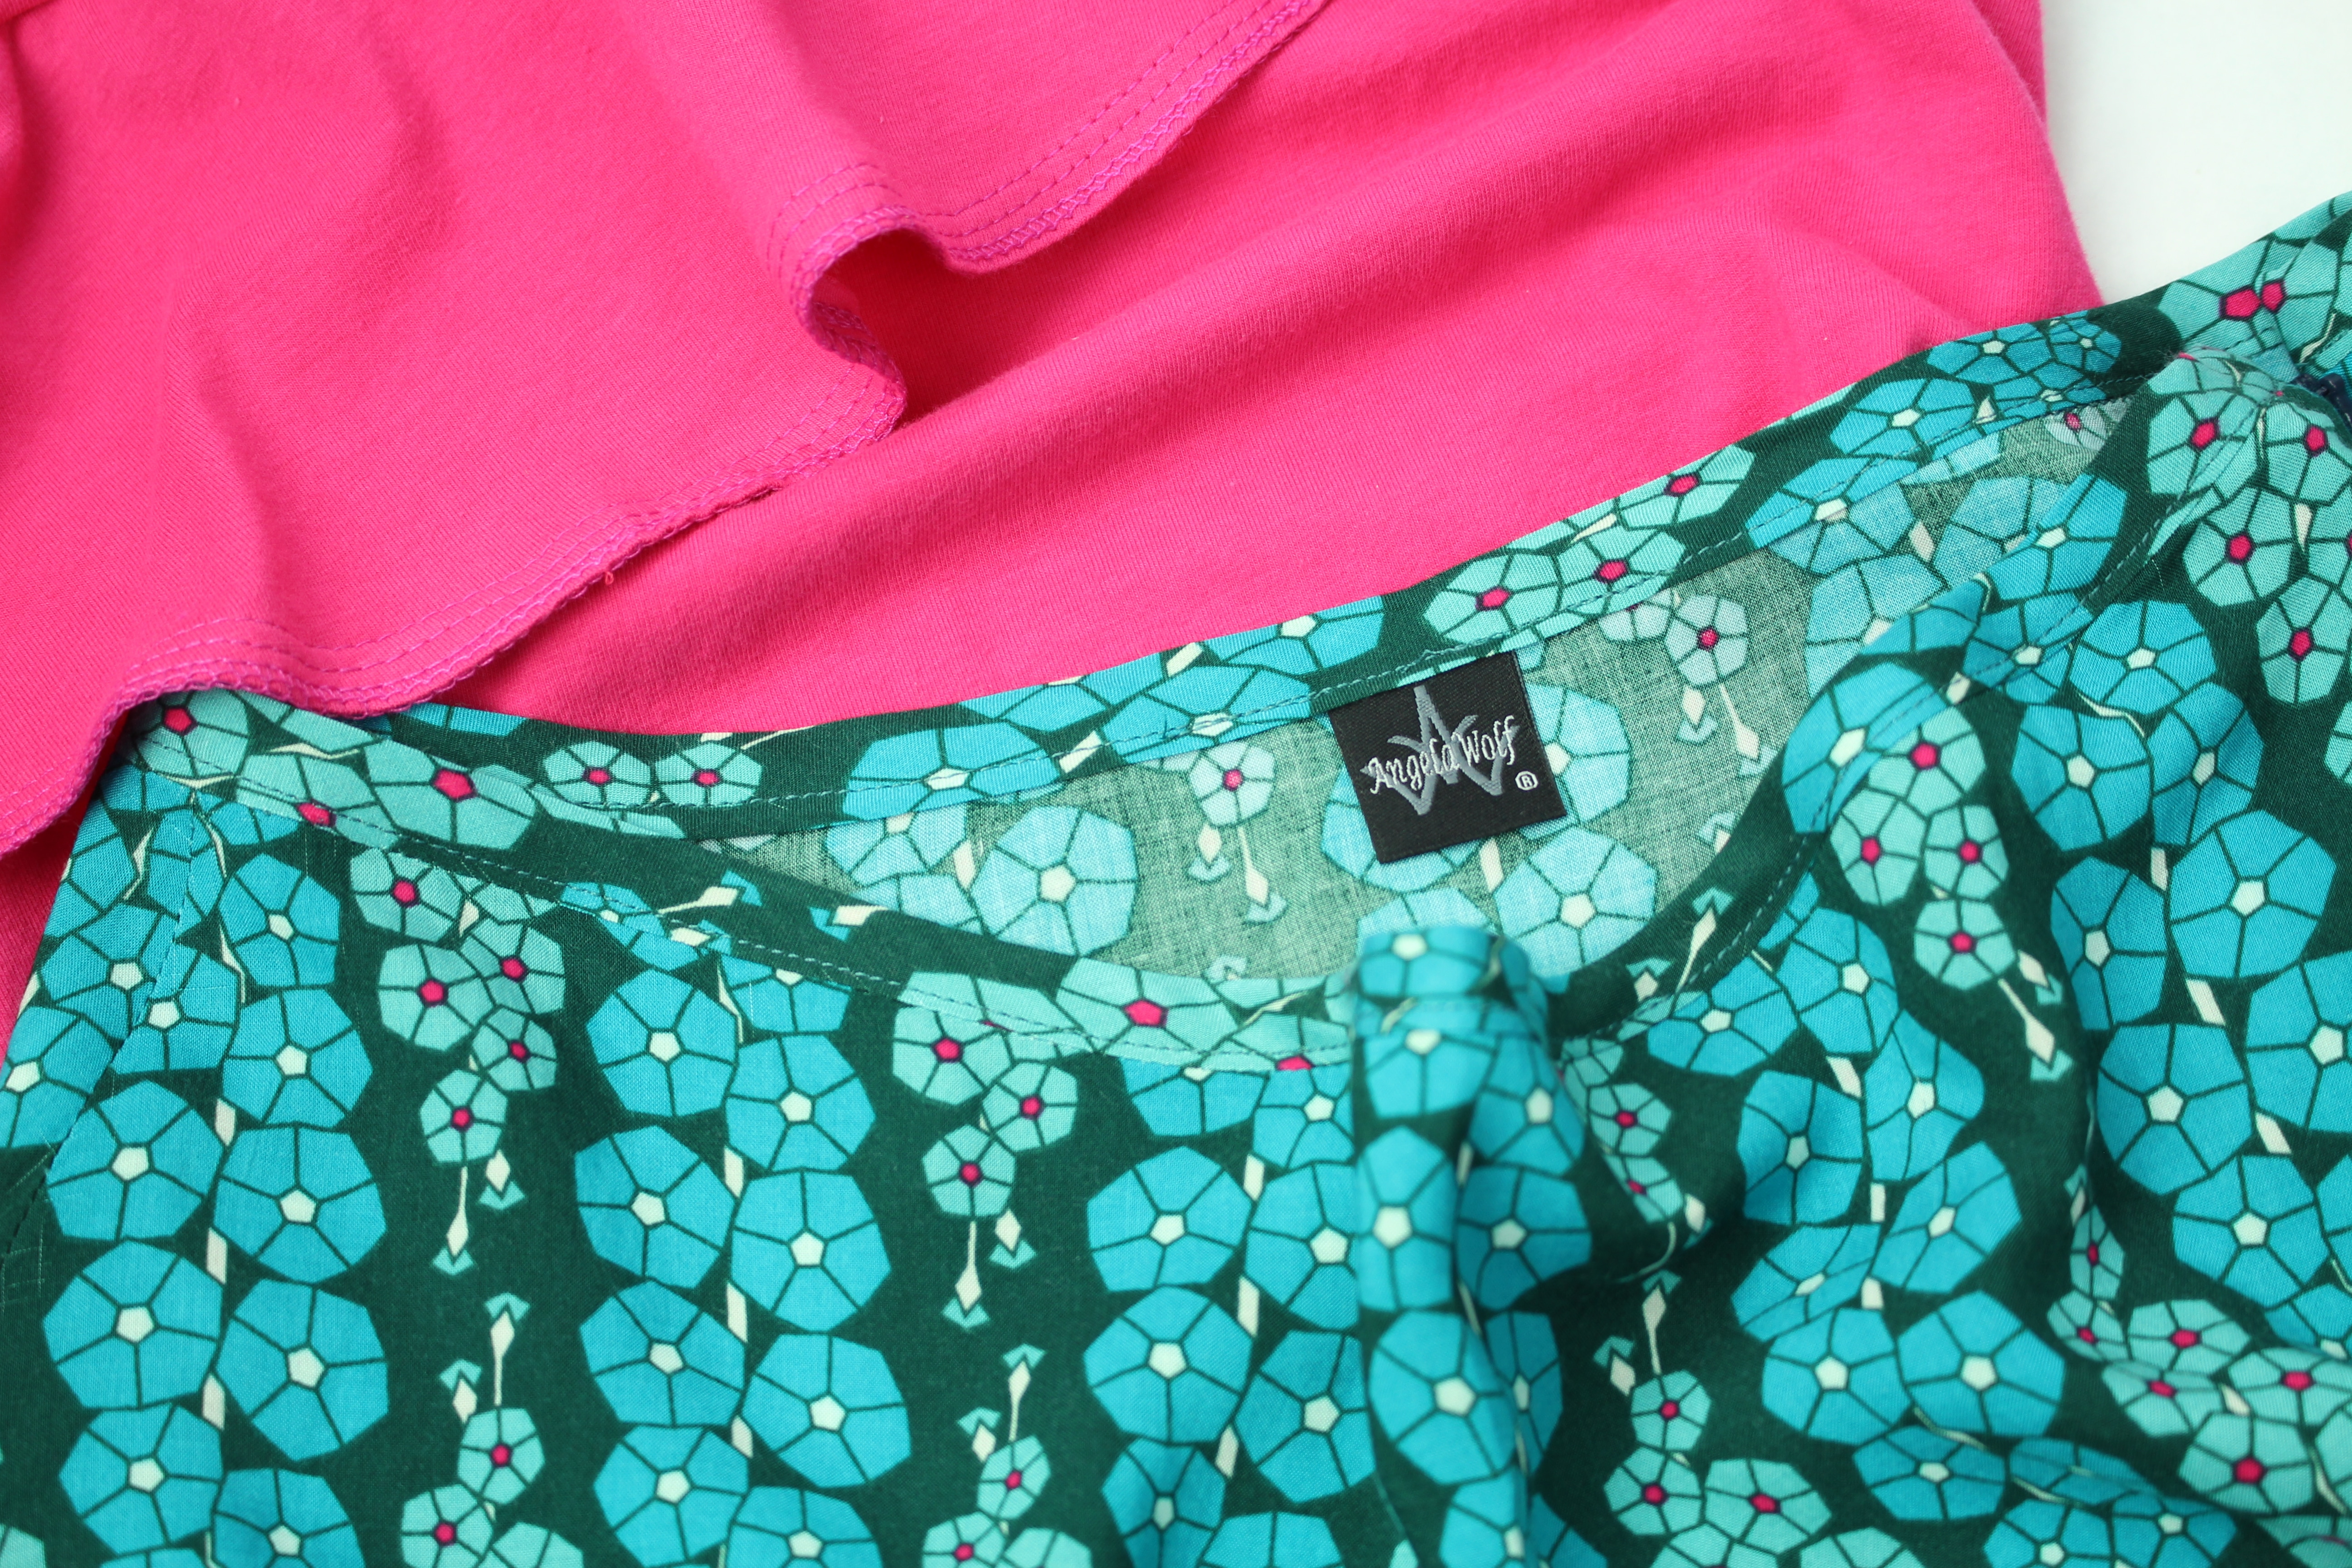
Kate Skirt Meets Loved To Pieces from Mister Domestic
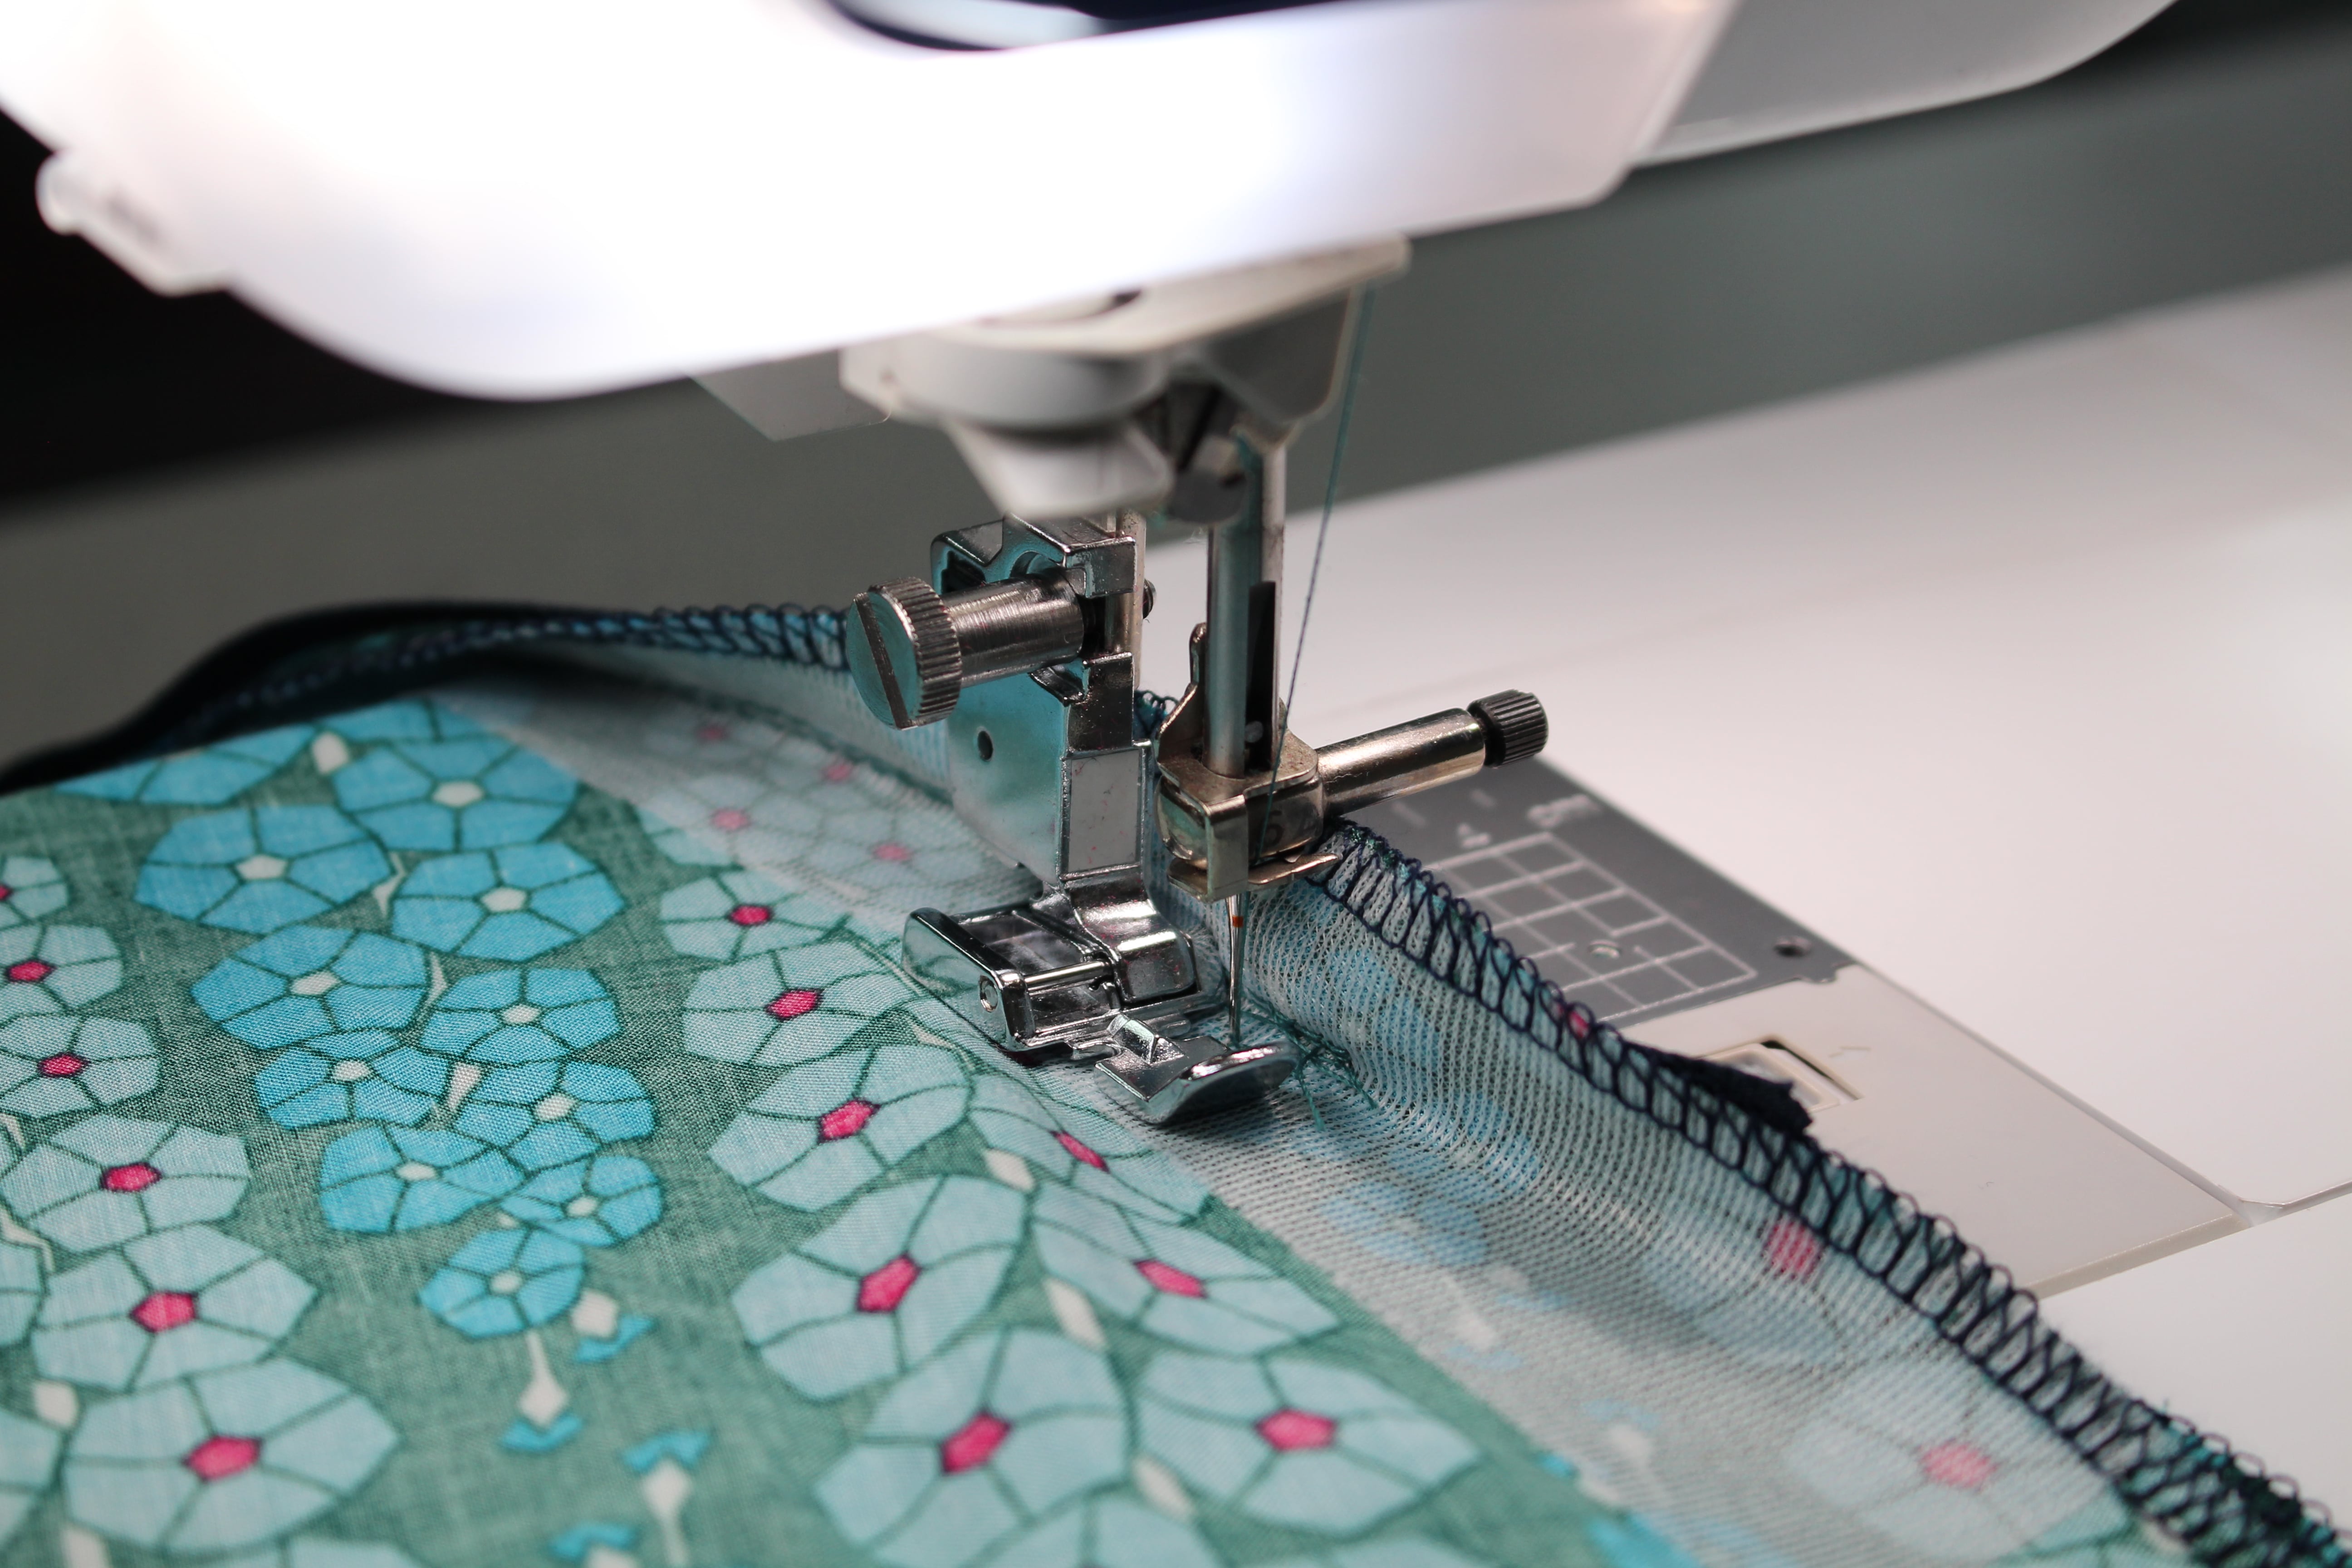
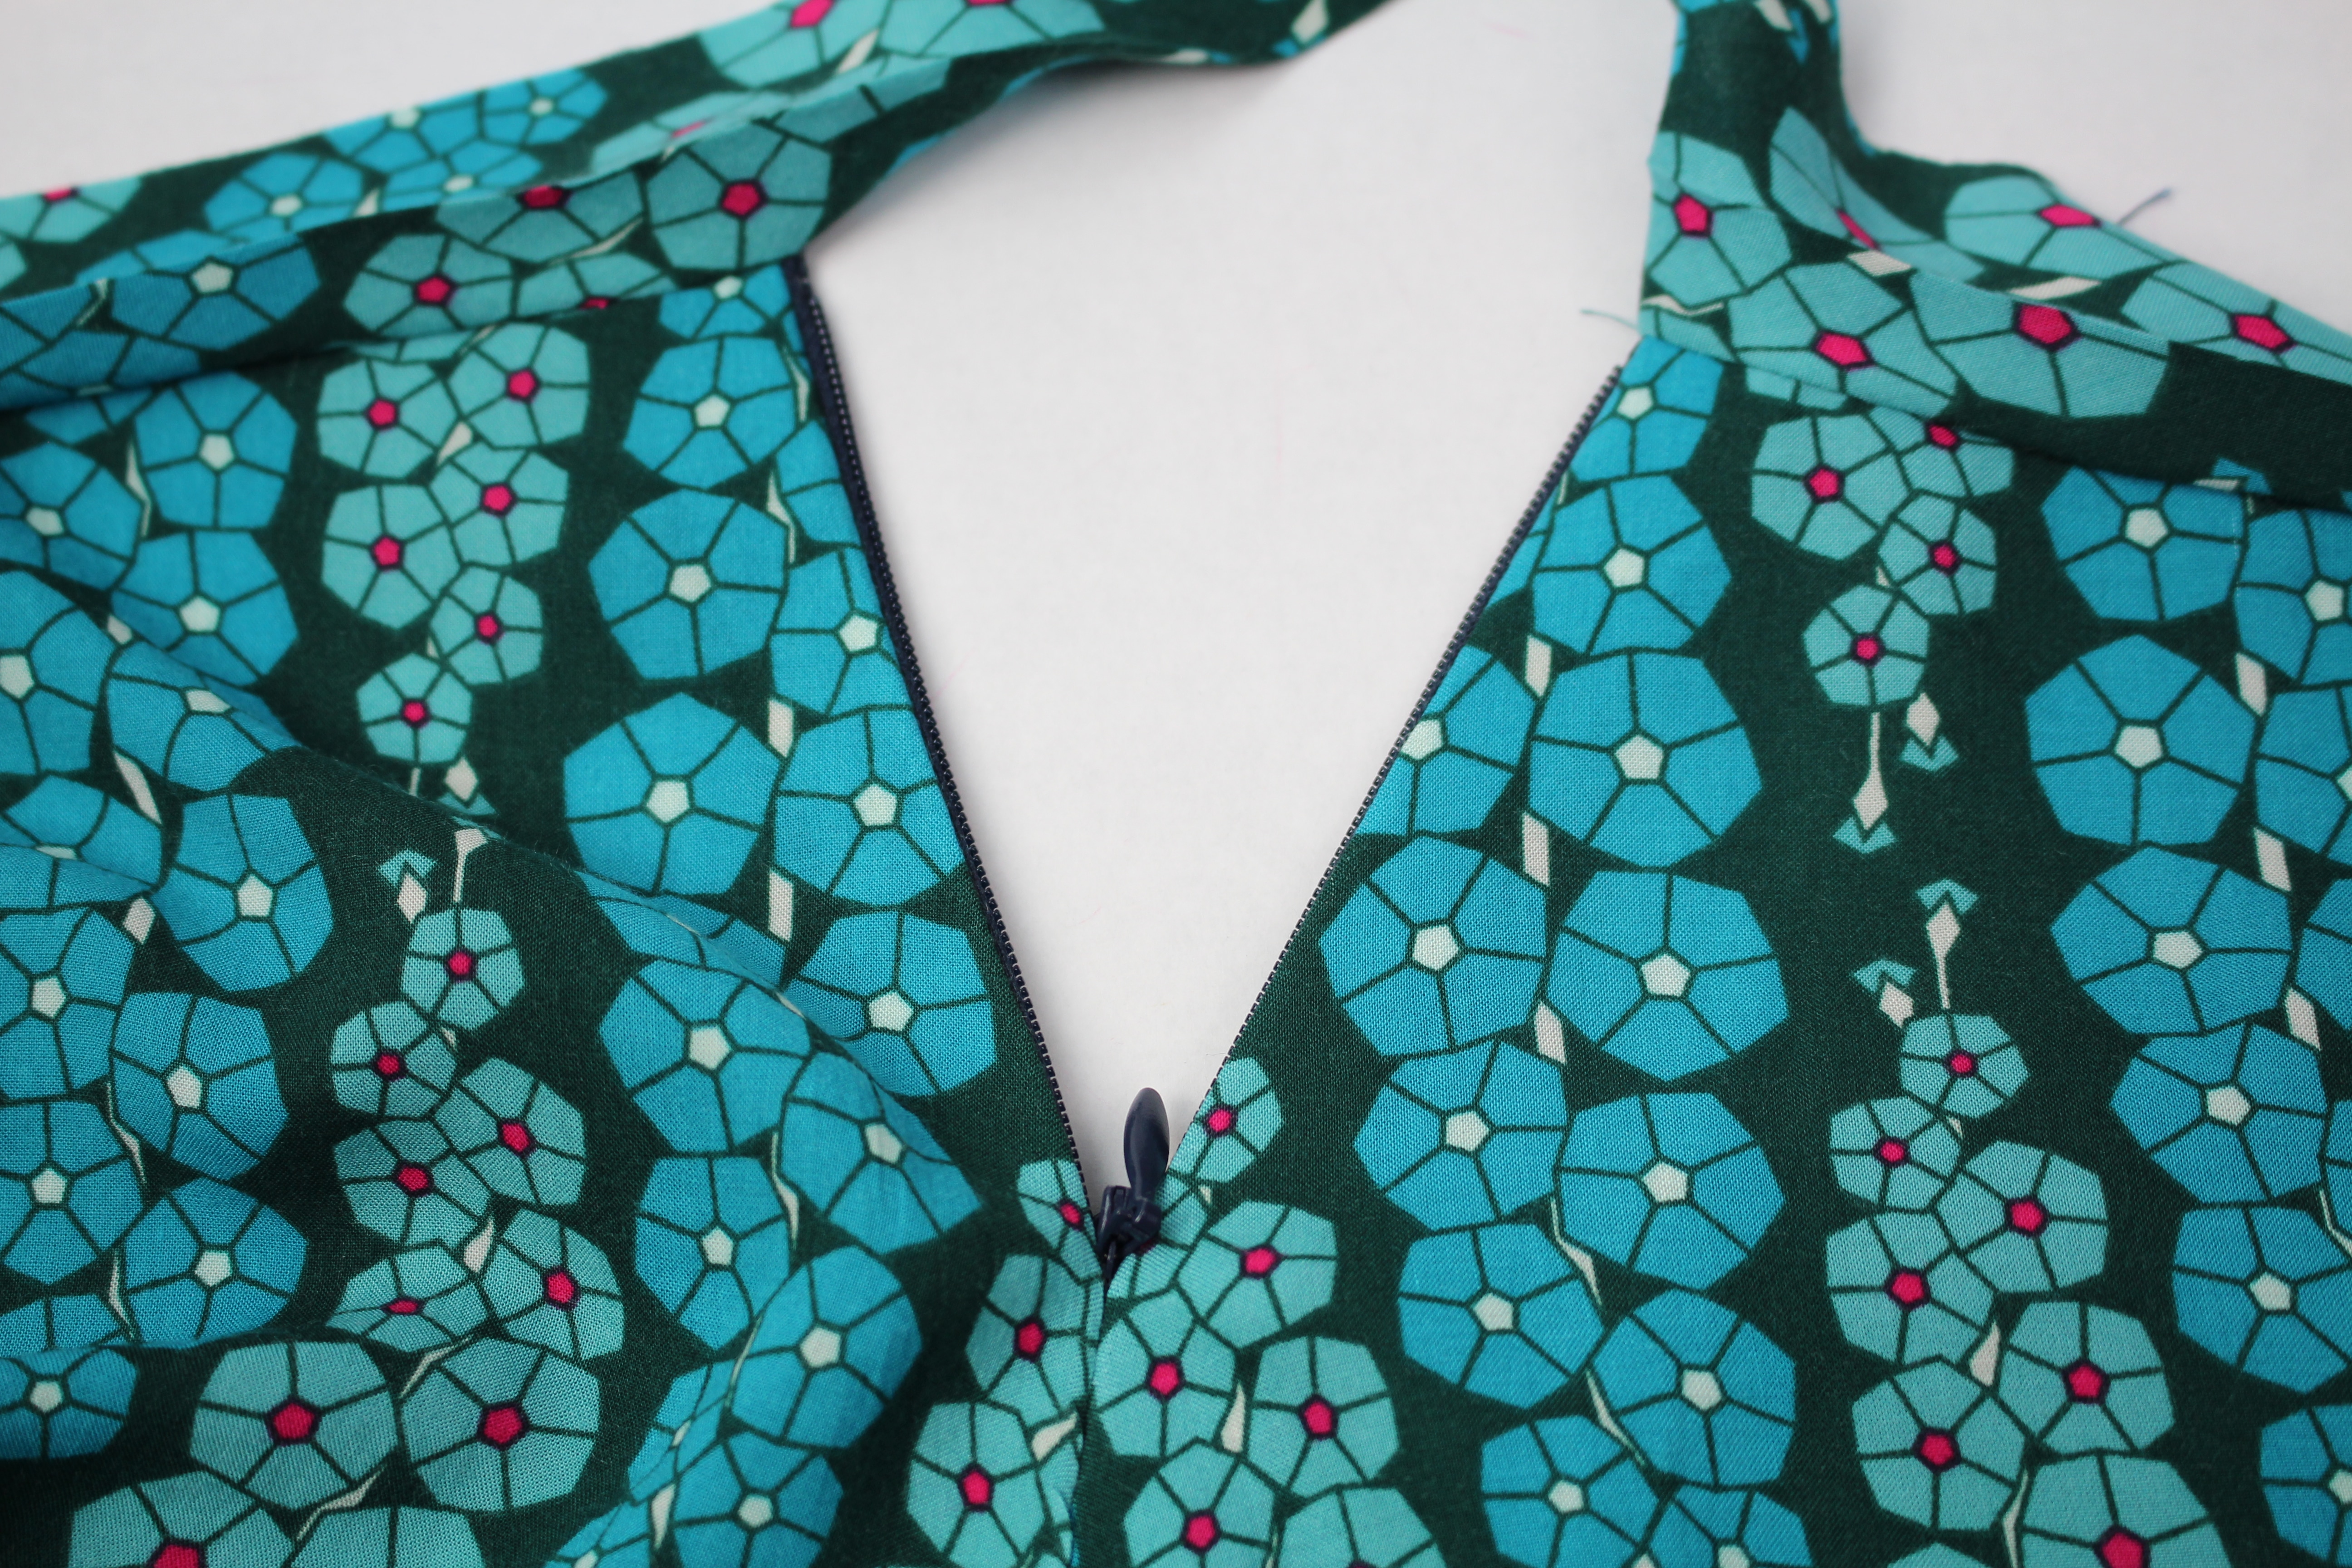
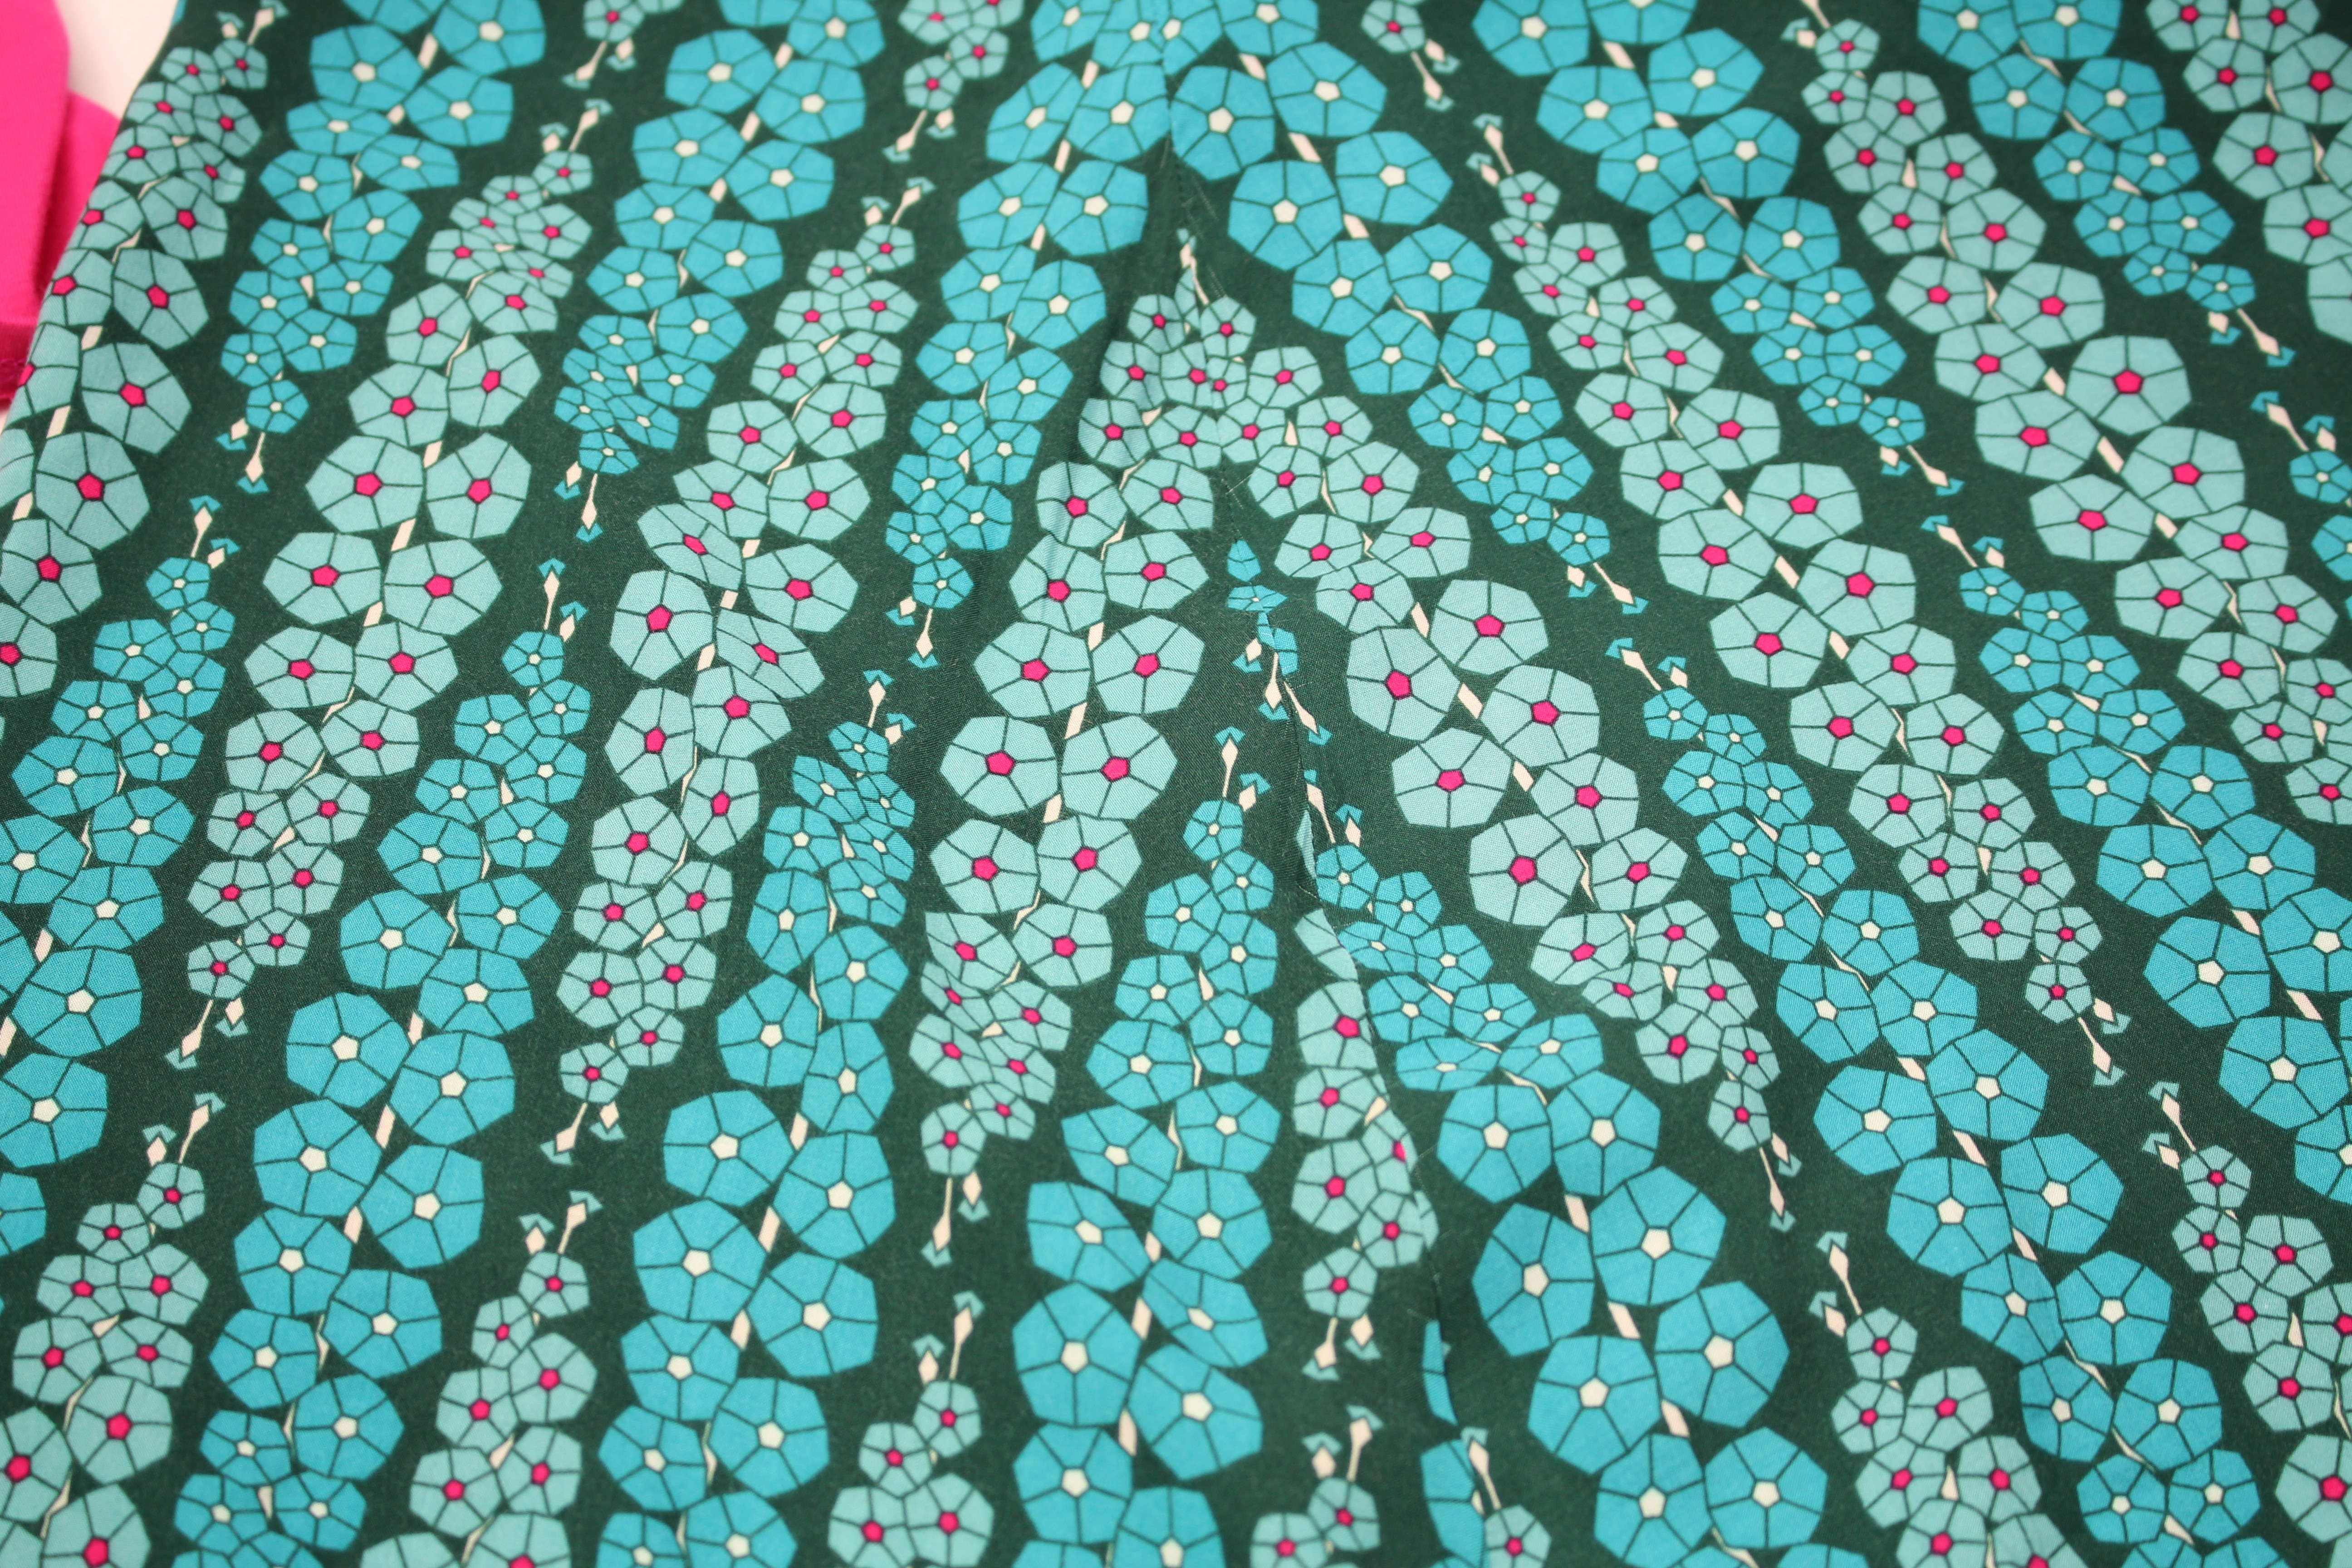
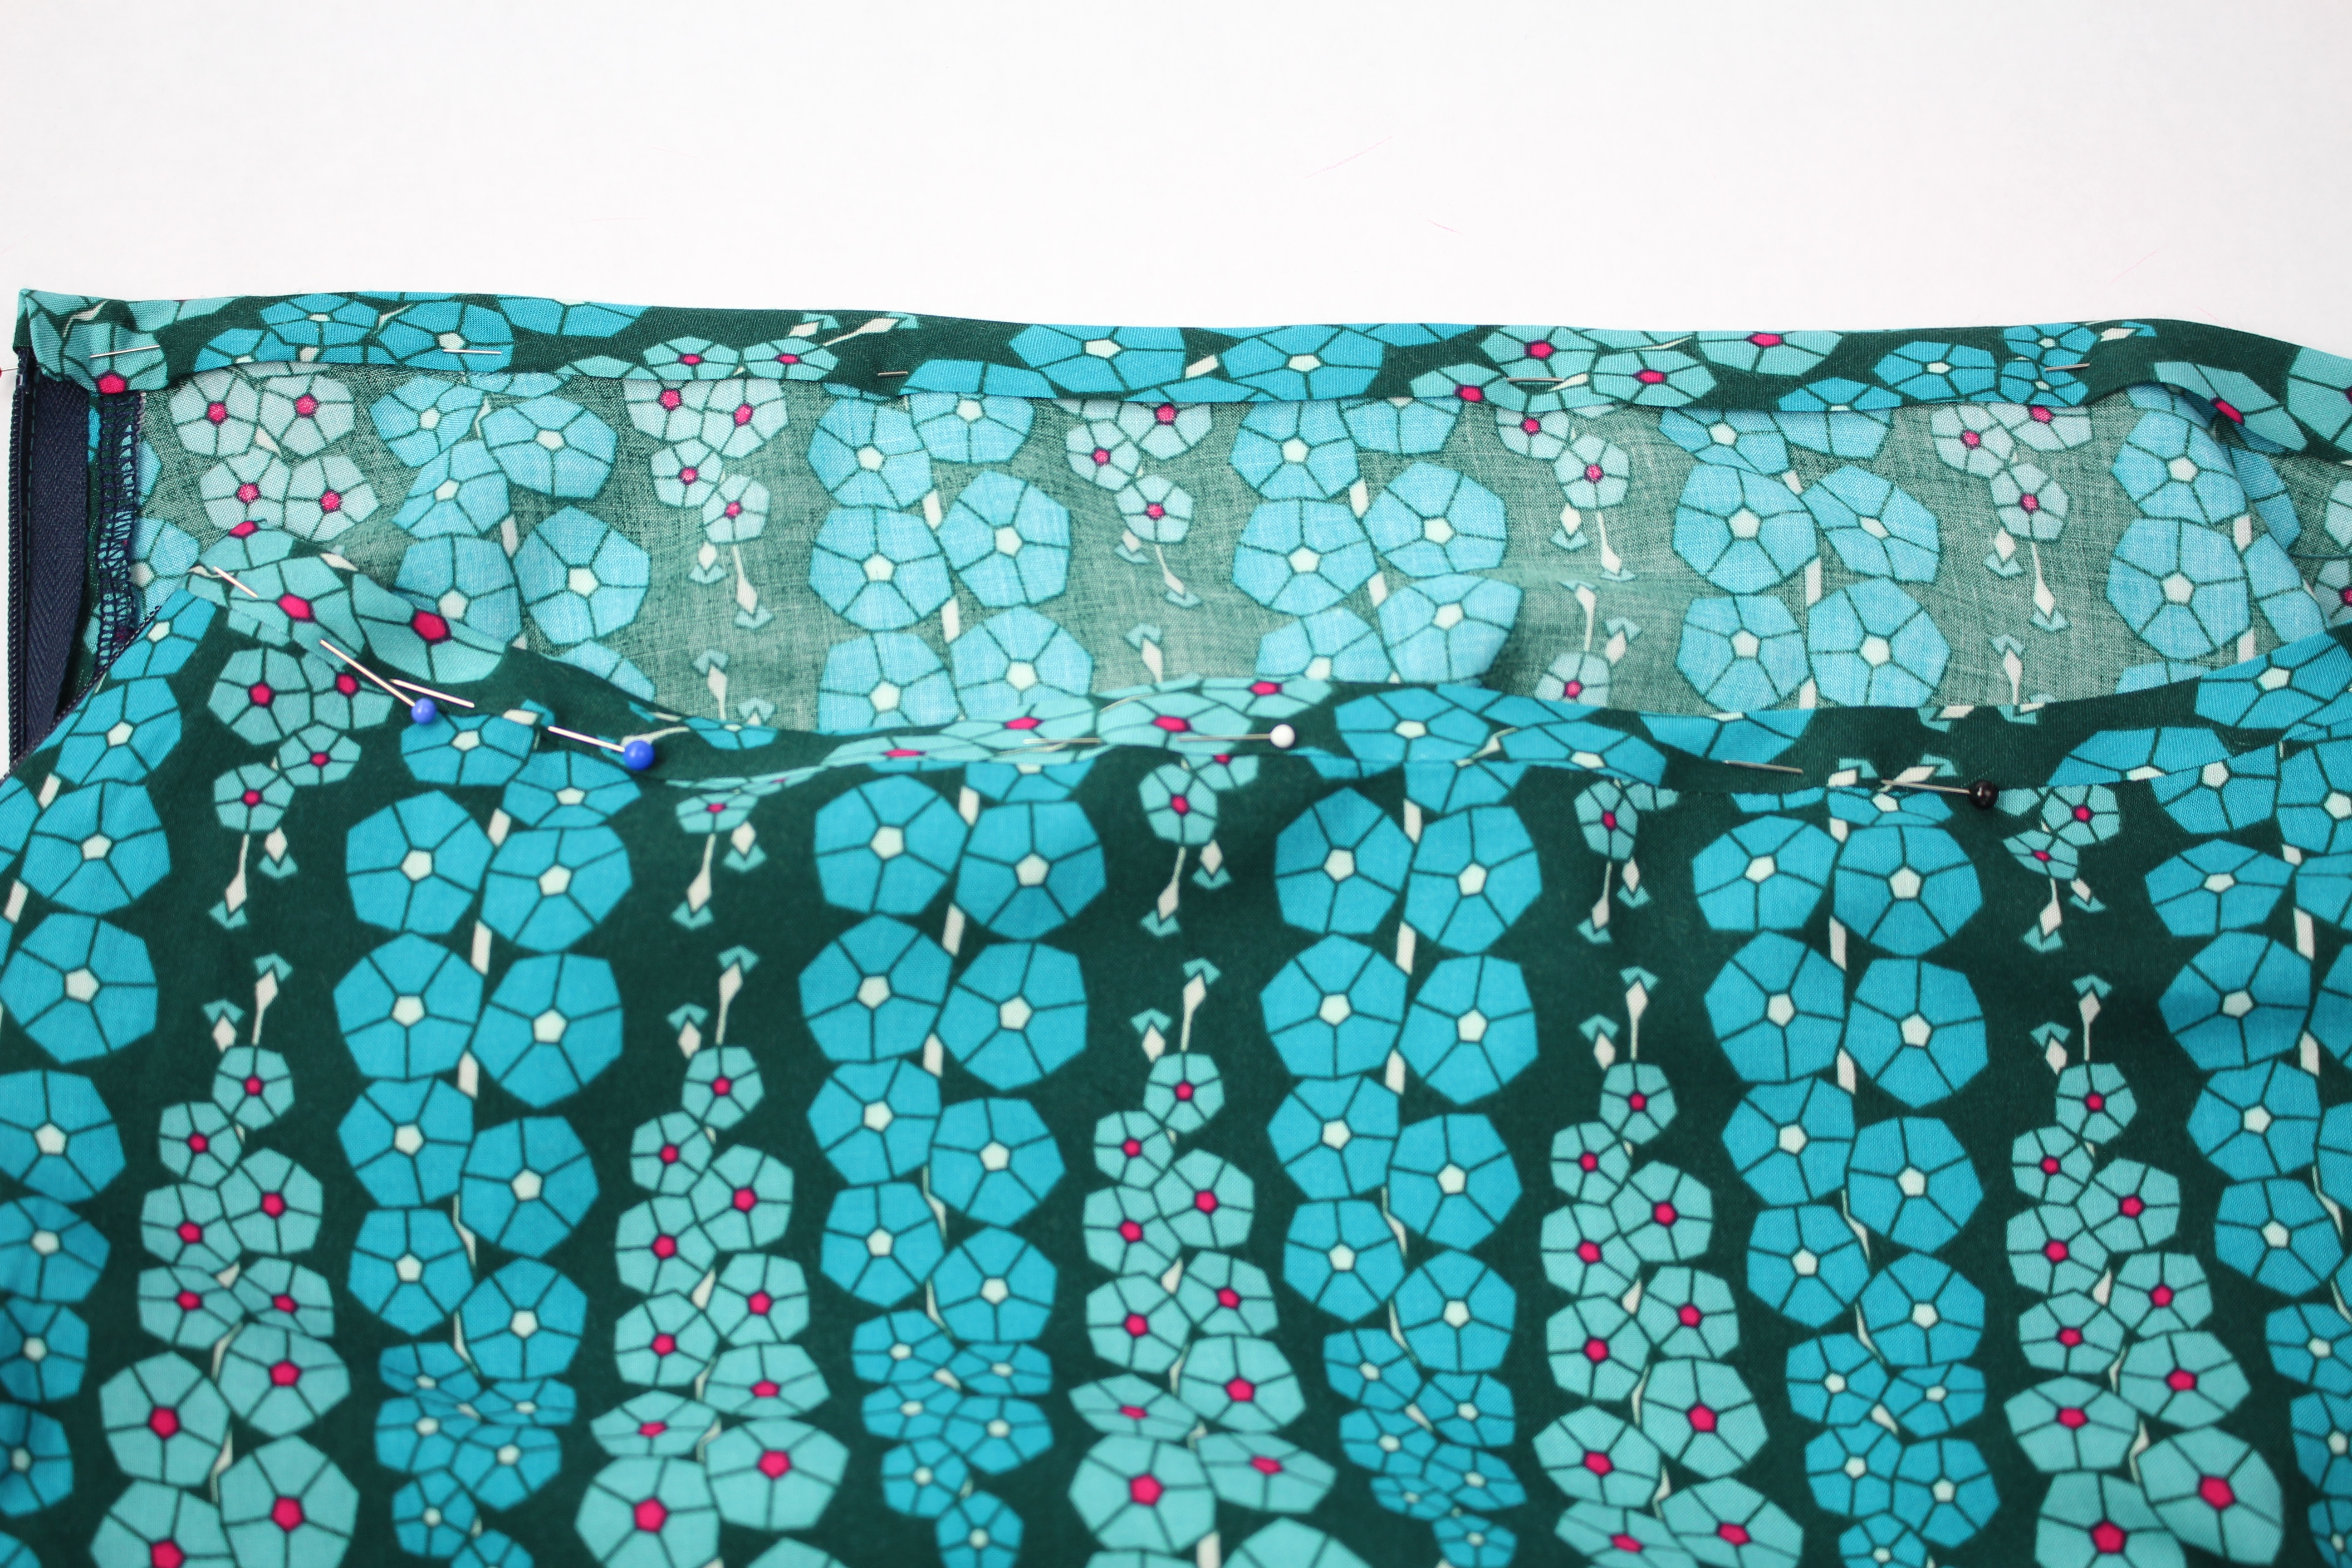
I am very excited to team up with Mathew Boudreaux (Mister Domestic) as part of his blog party launching his new fabric collection Loved to Pieces! I had the choice of many of his beautiful fabrics and chose a beautiful 100% rayon fabric to sew the Kate Skirt...
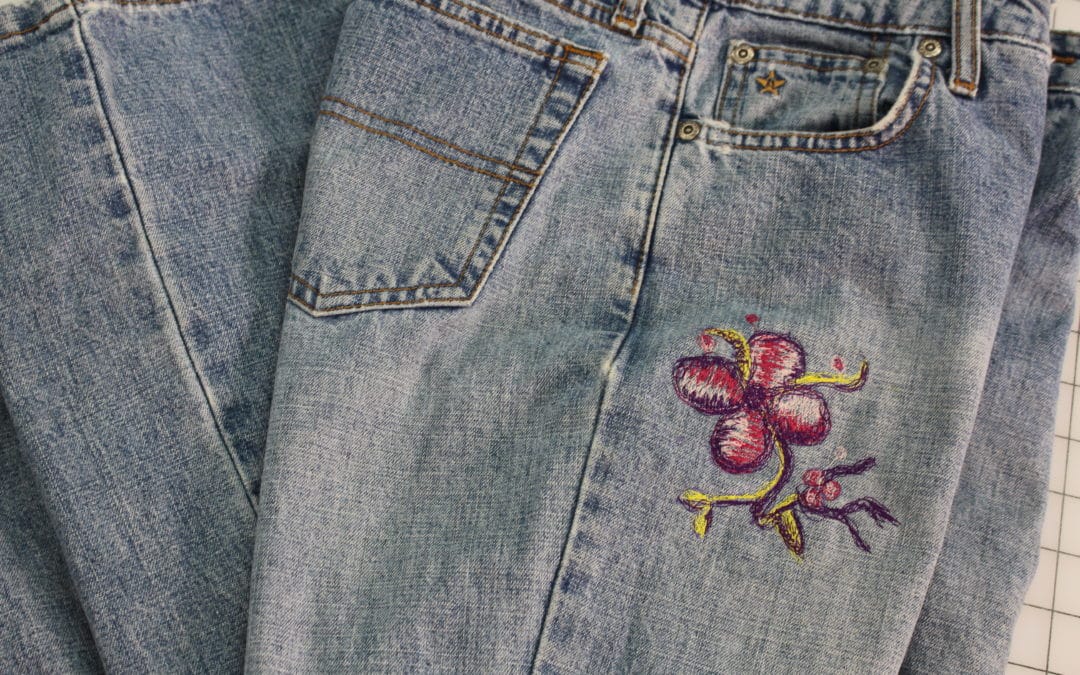
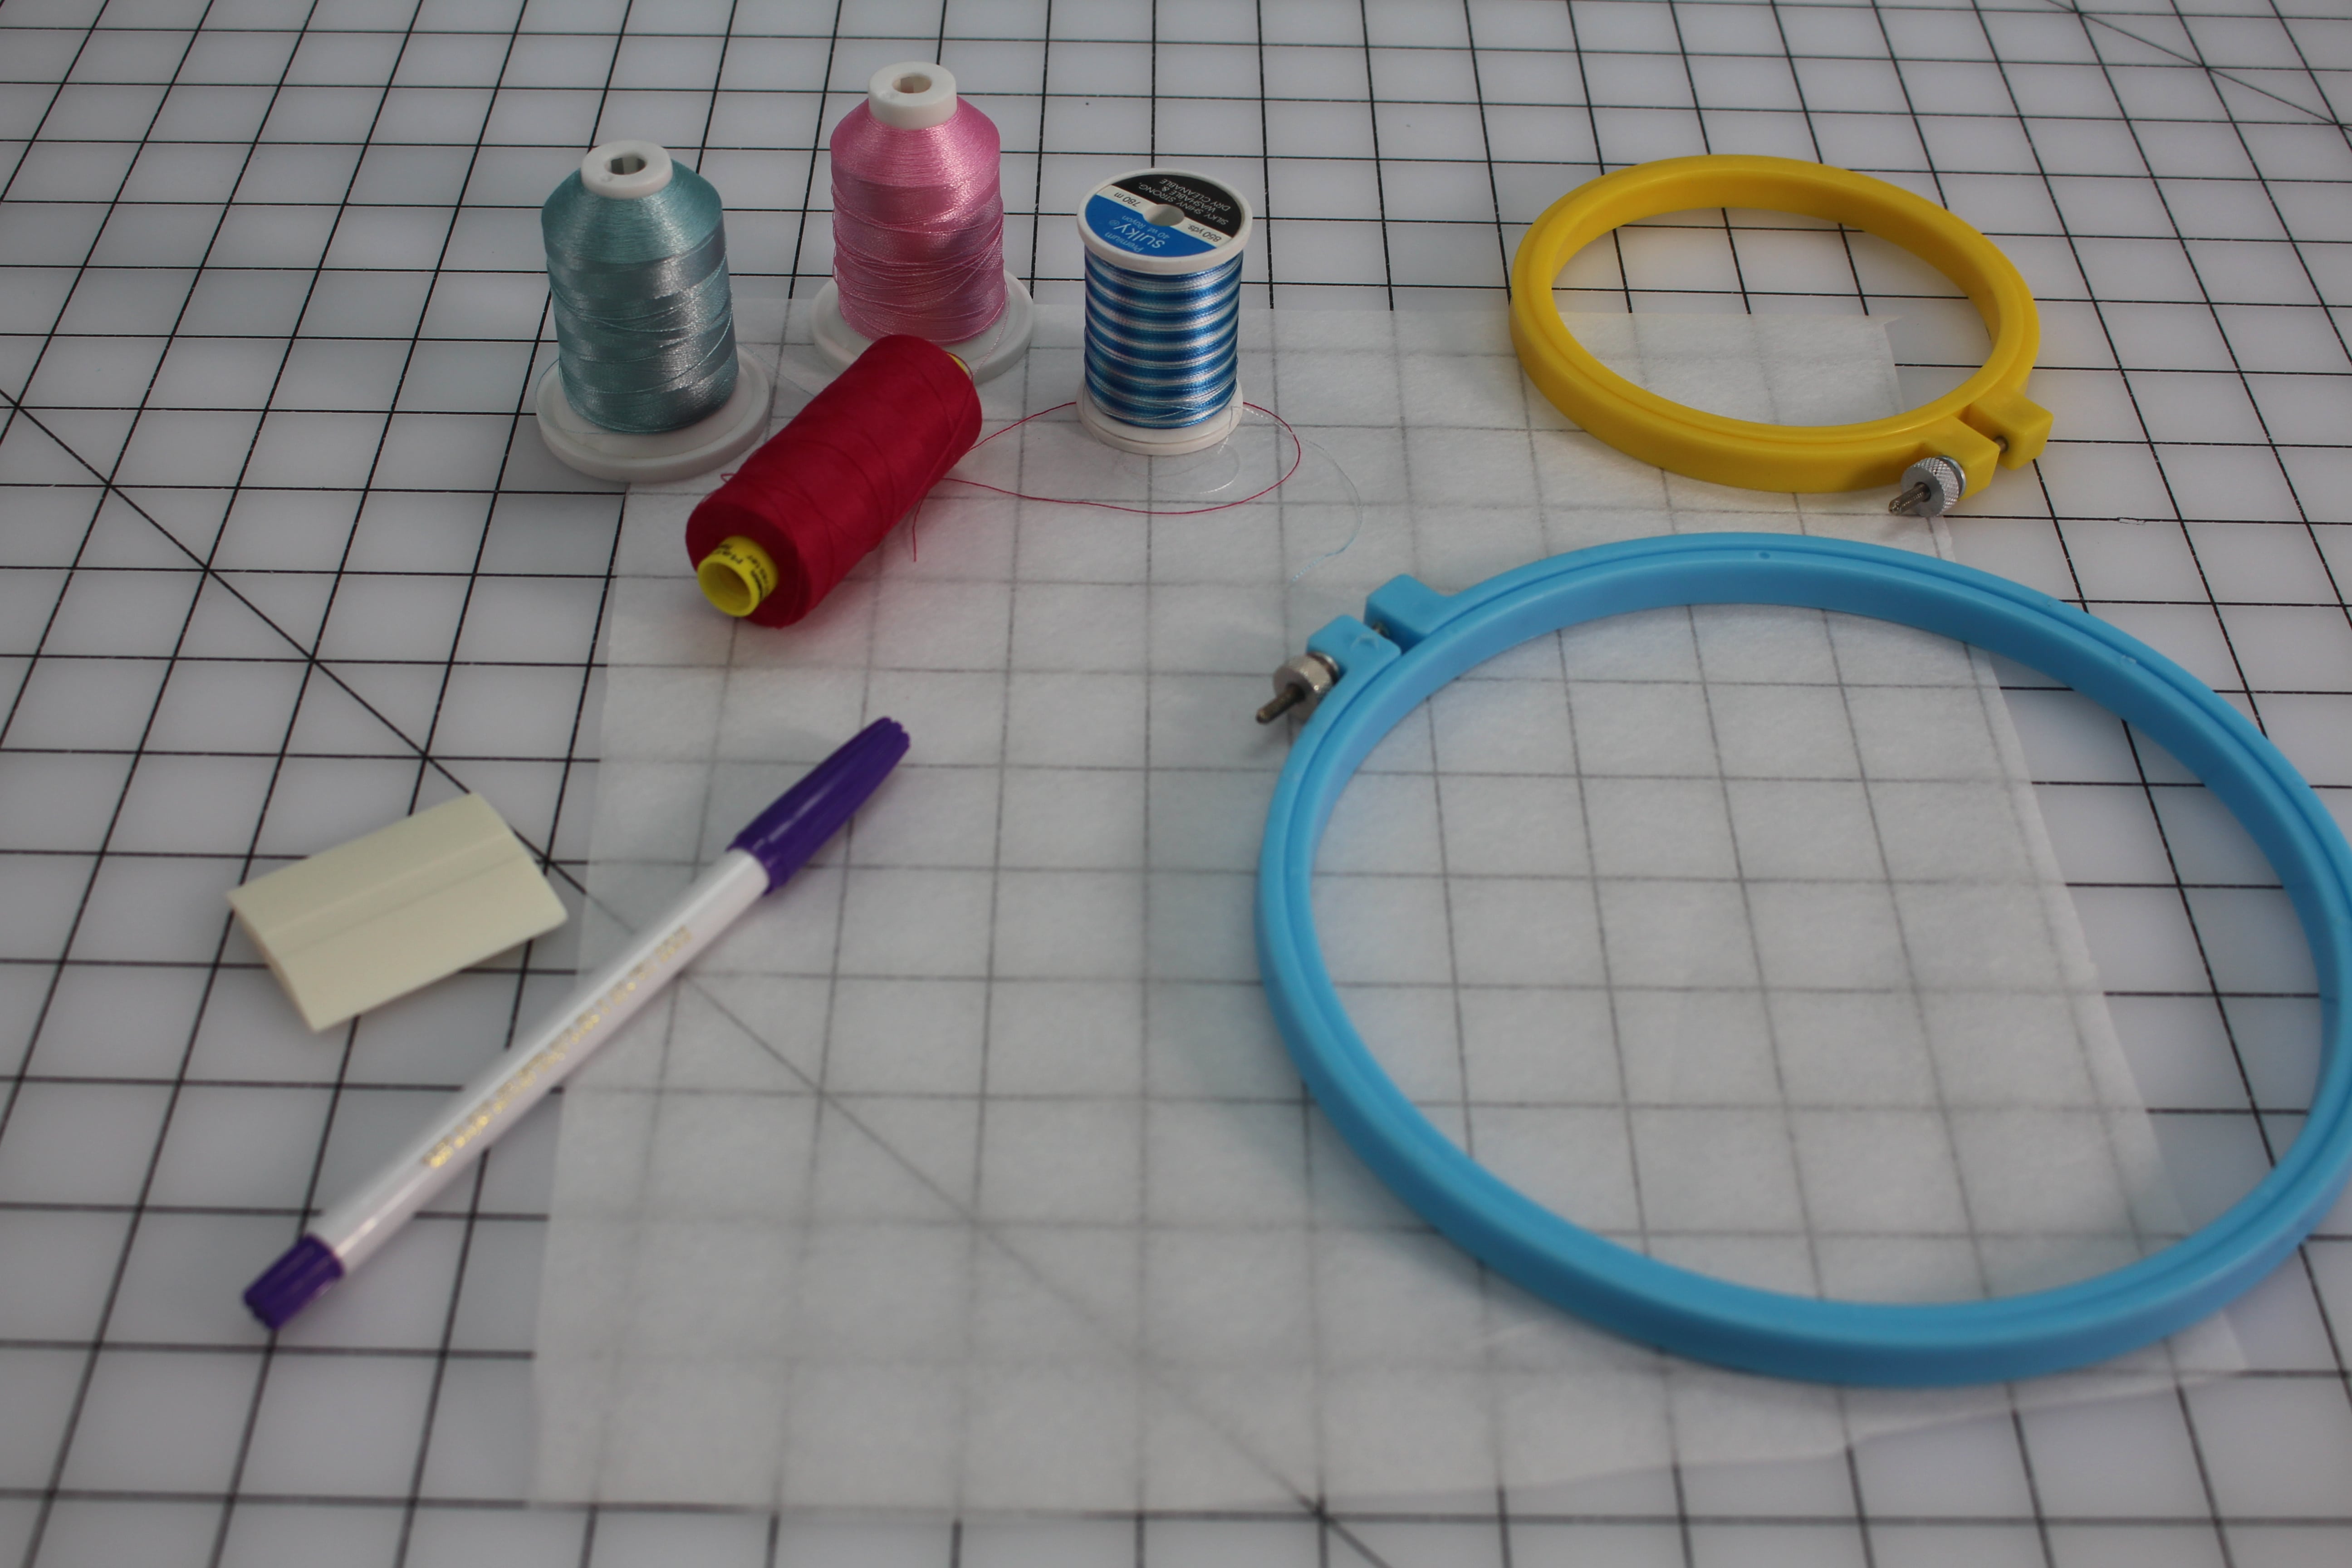
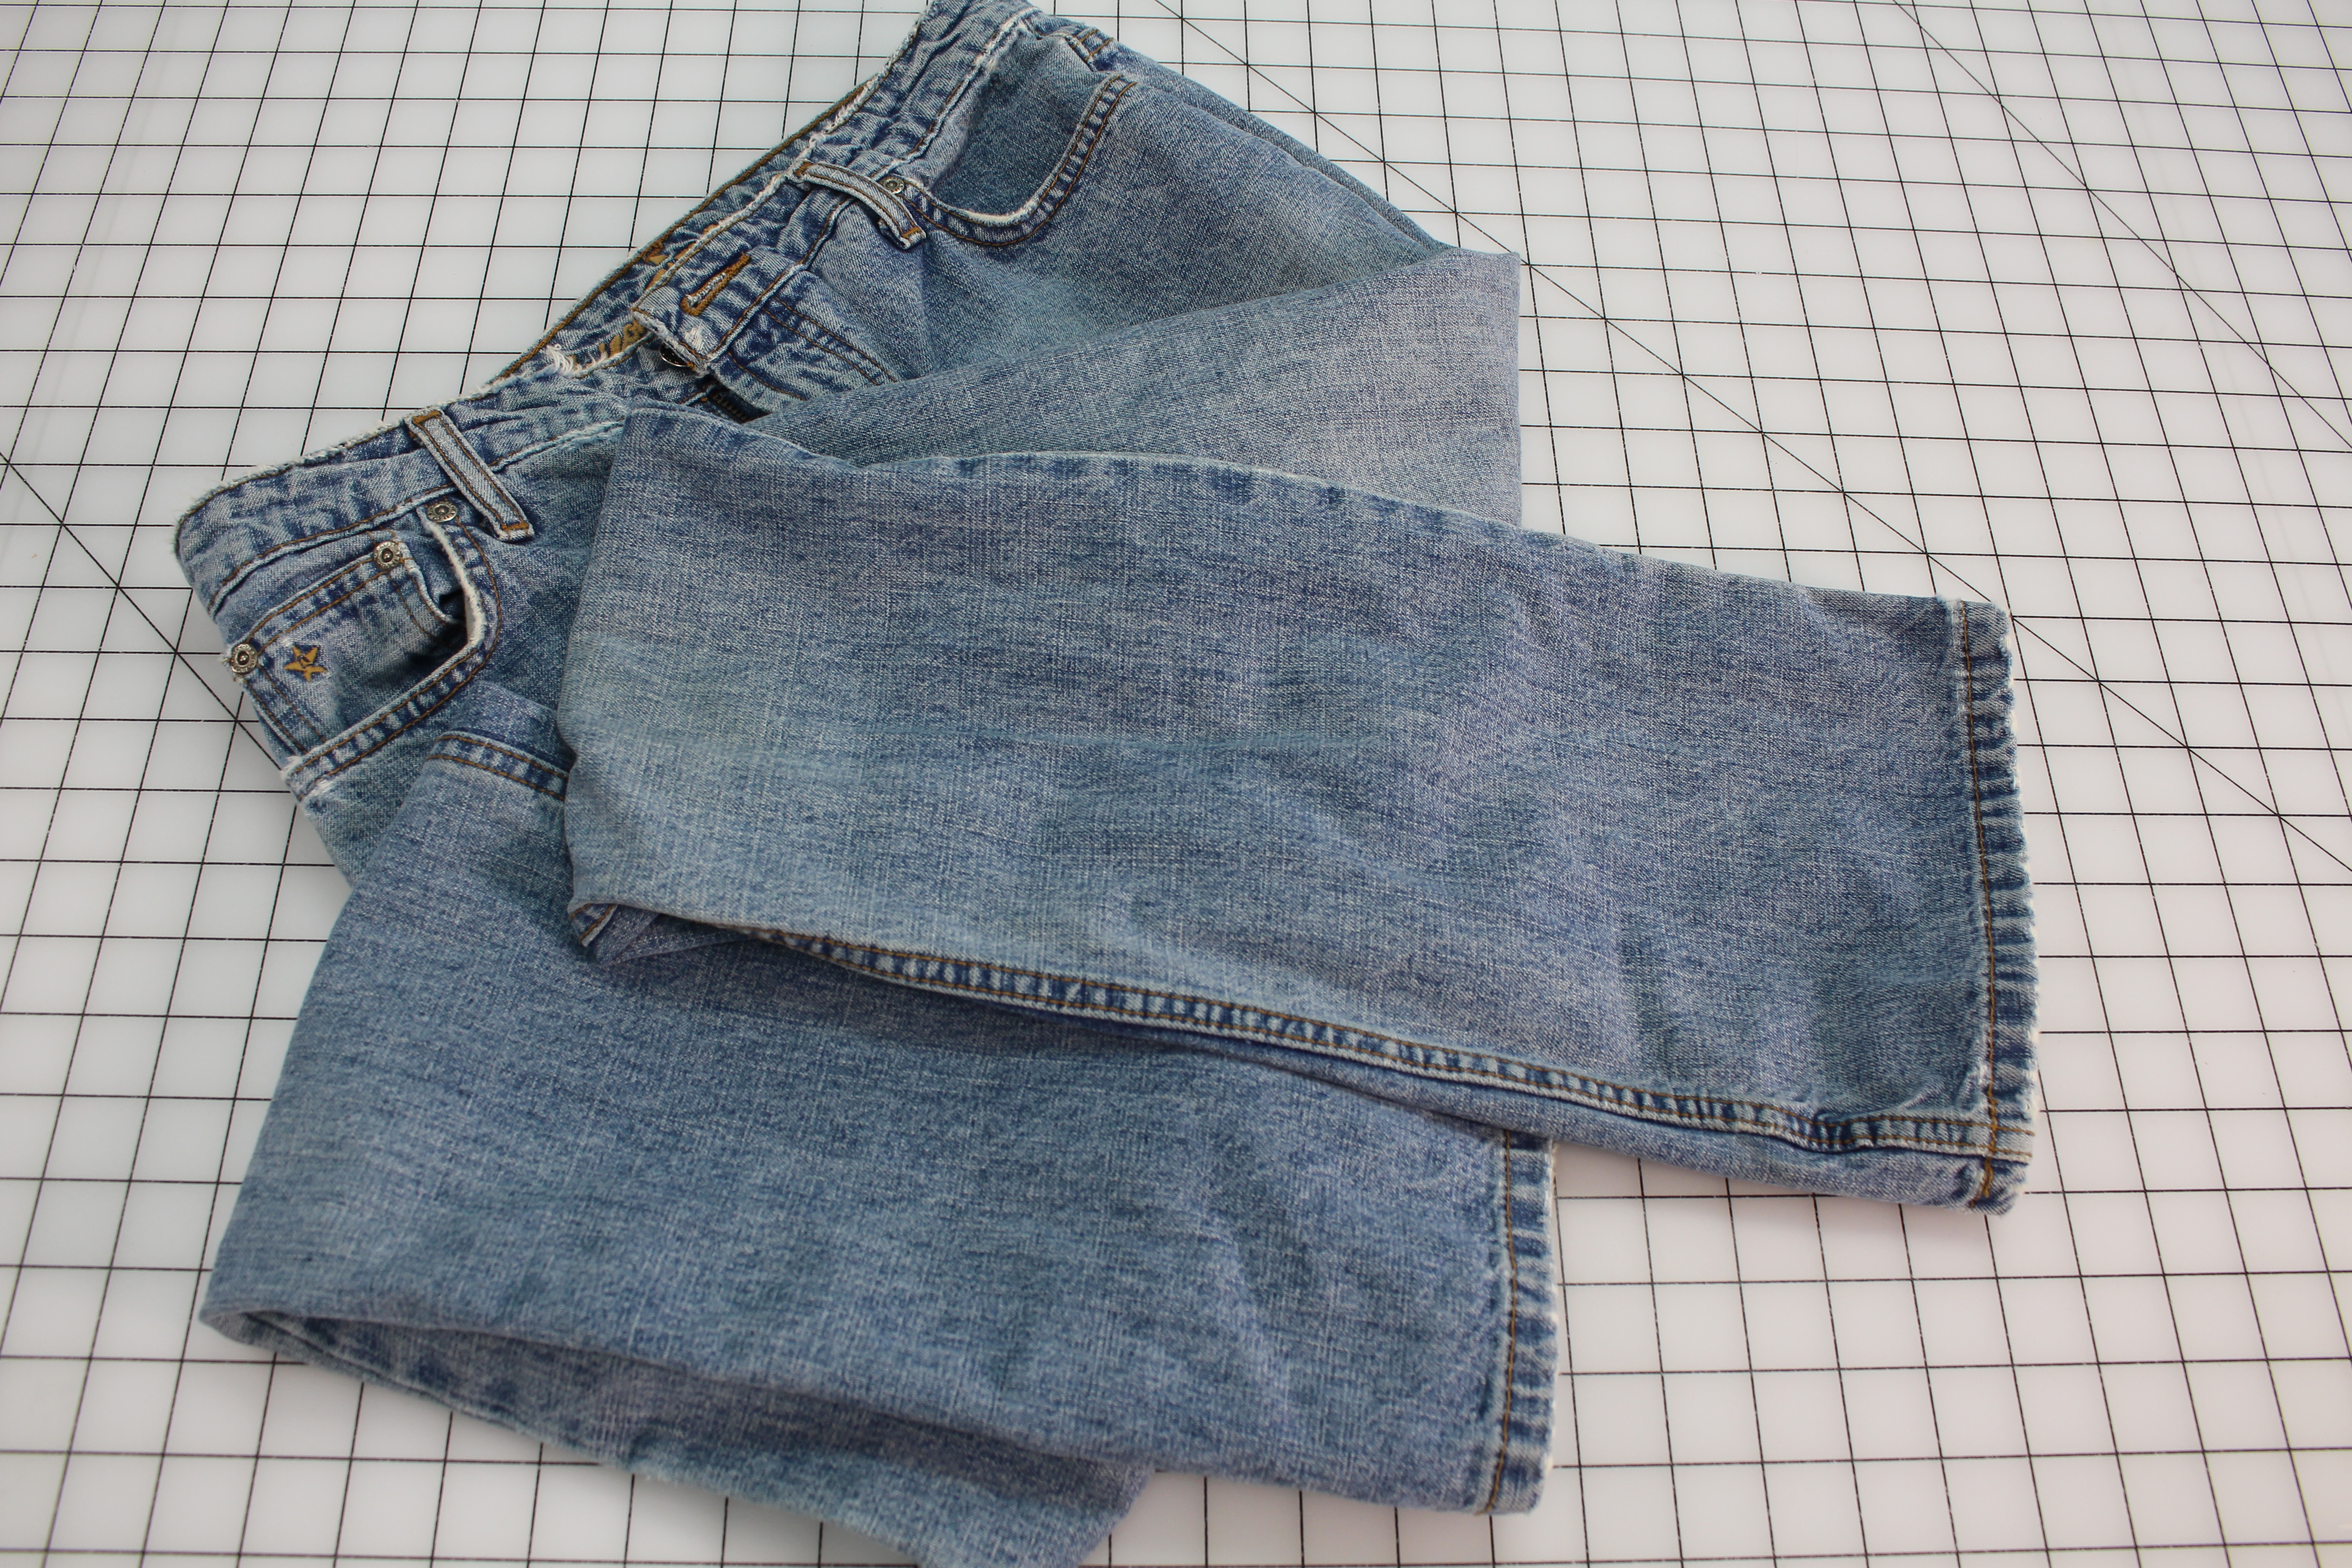
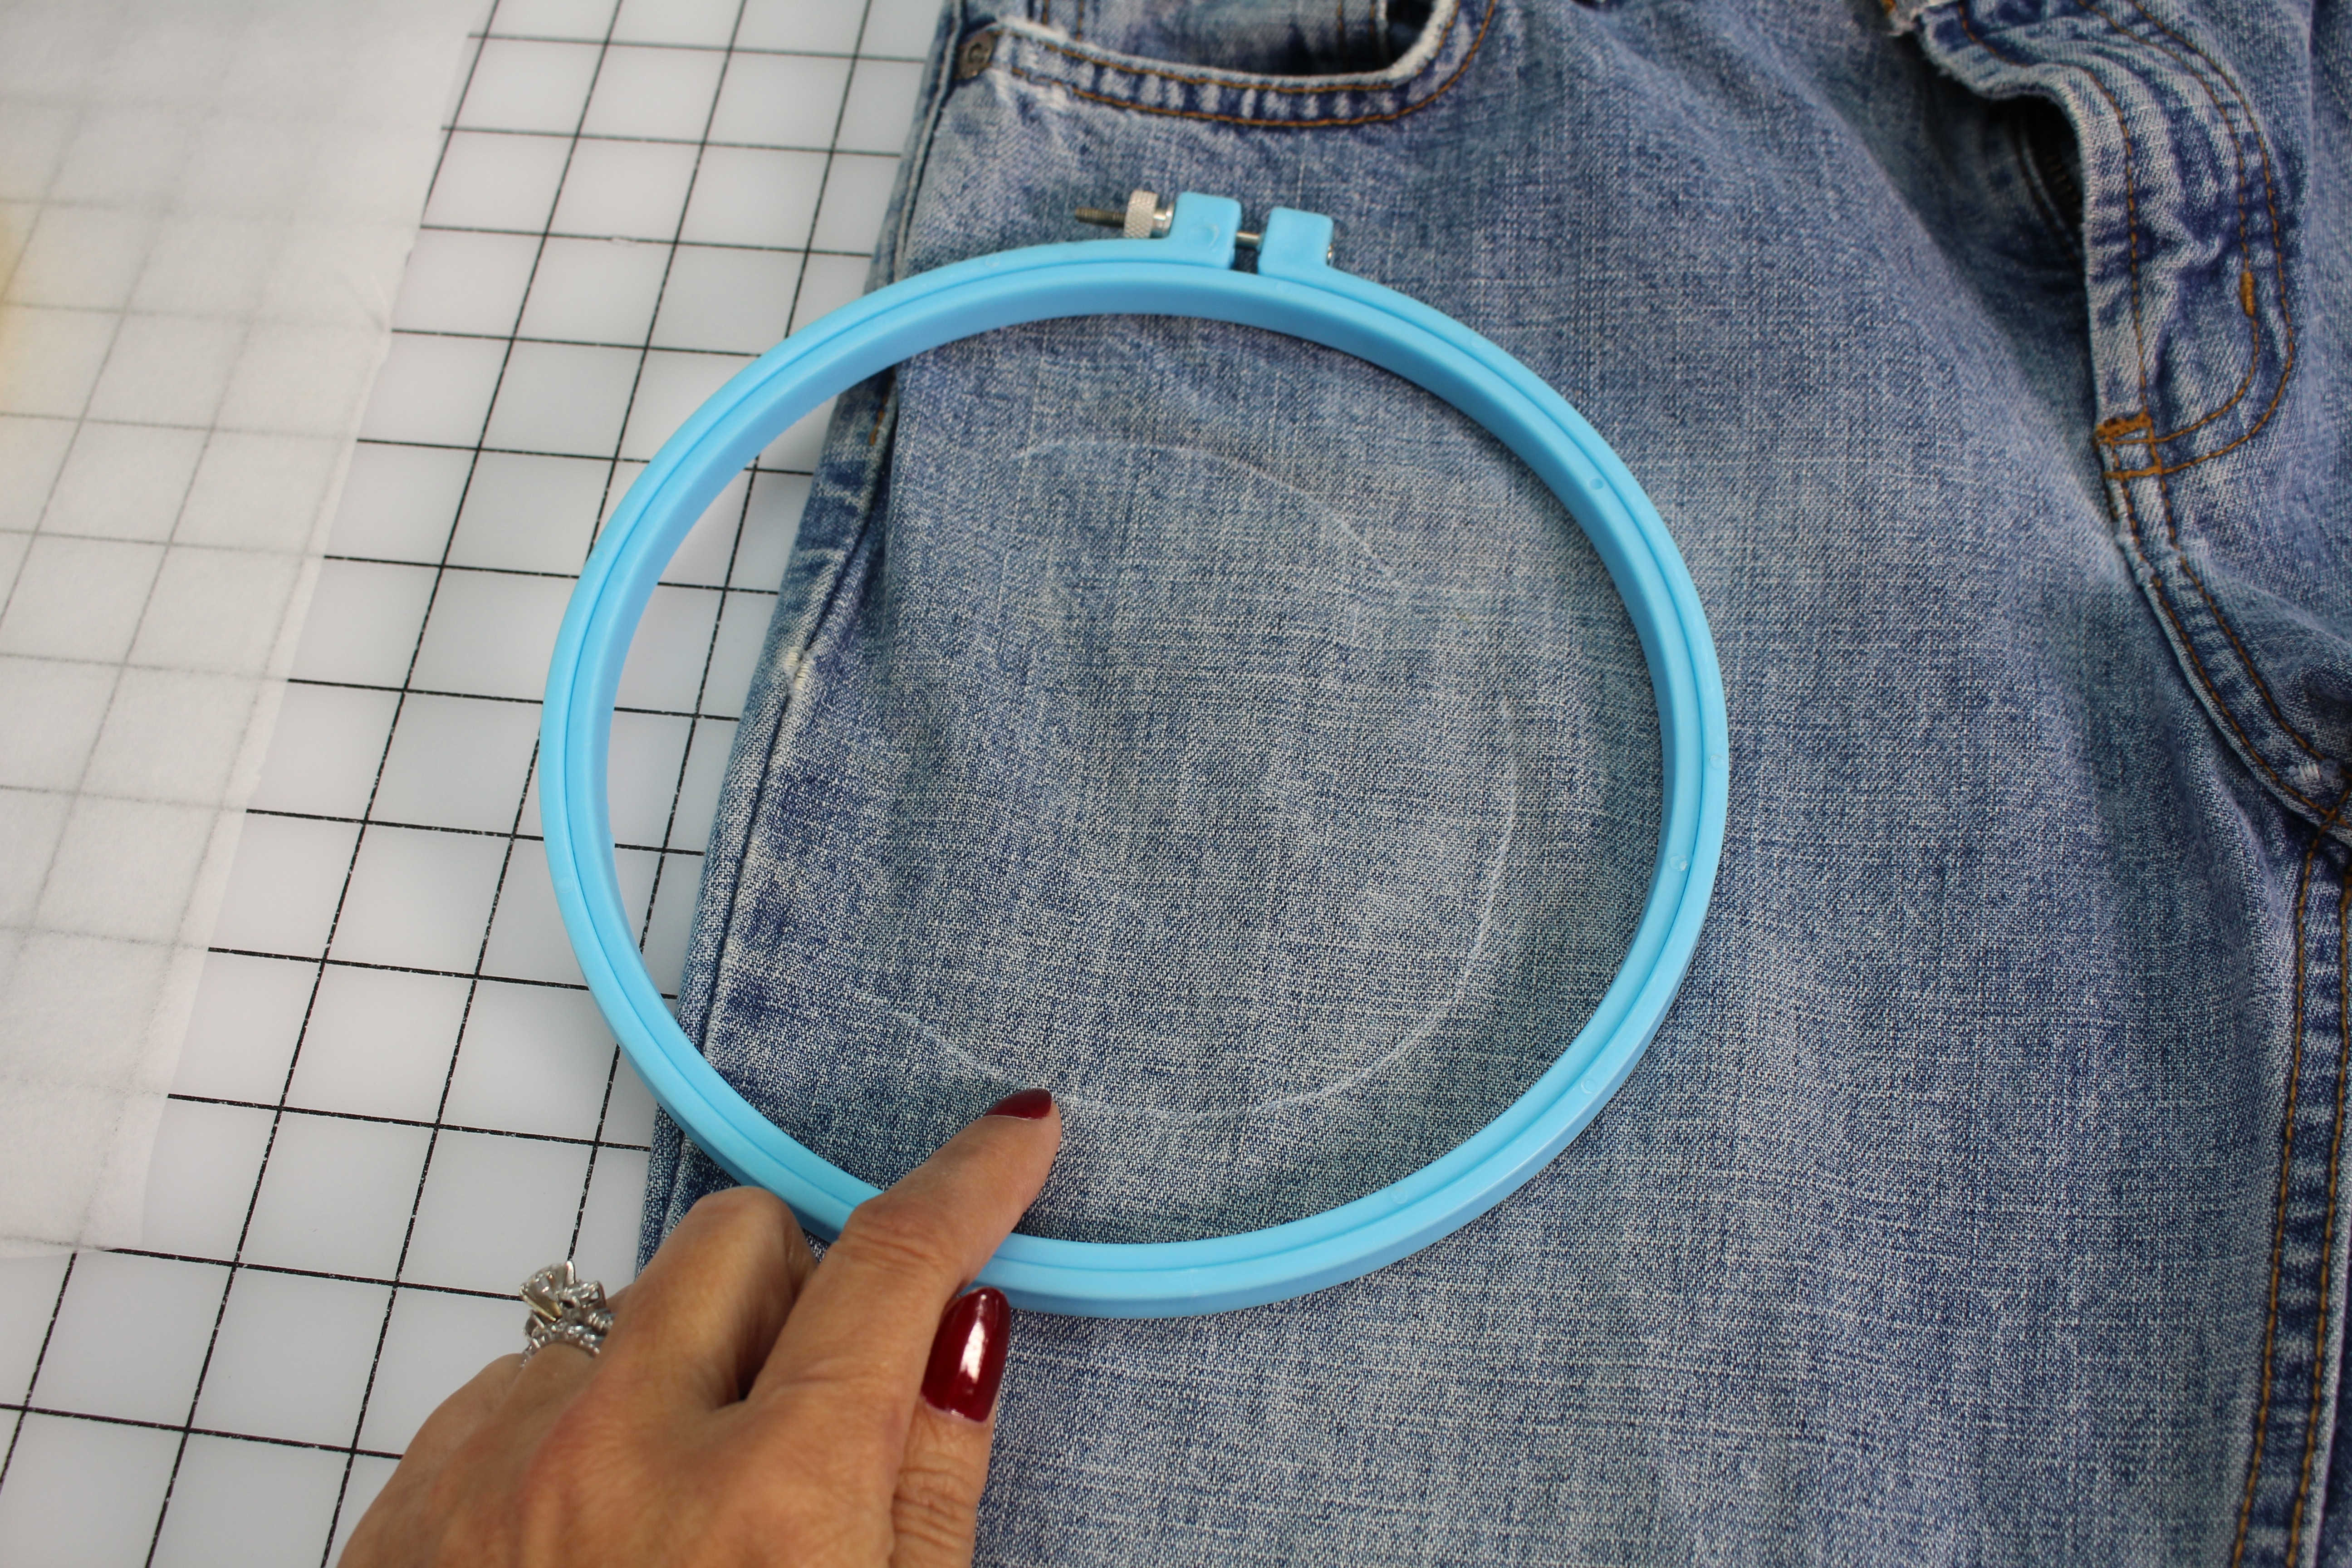
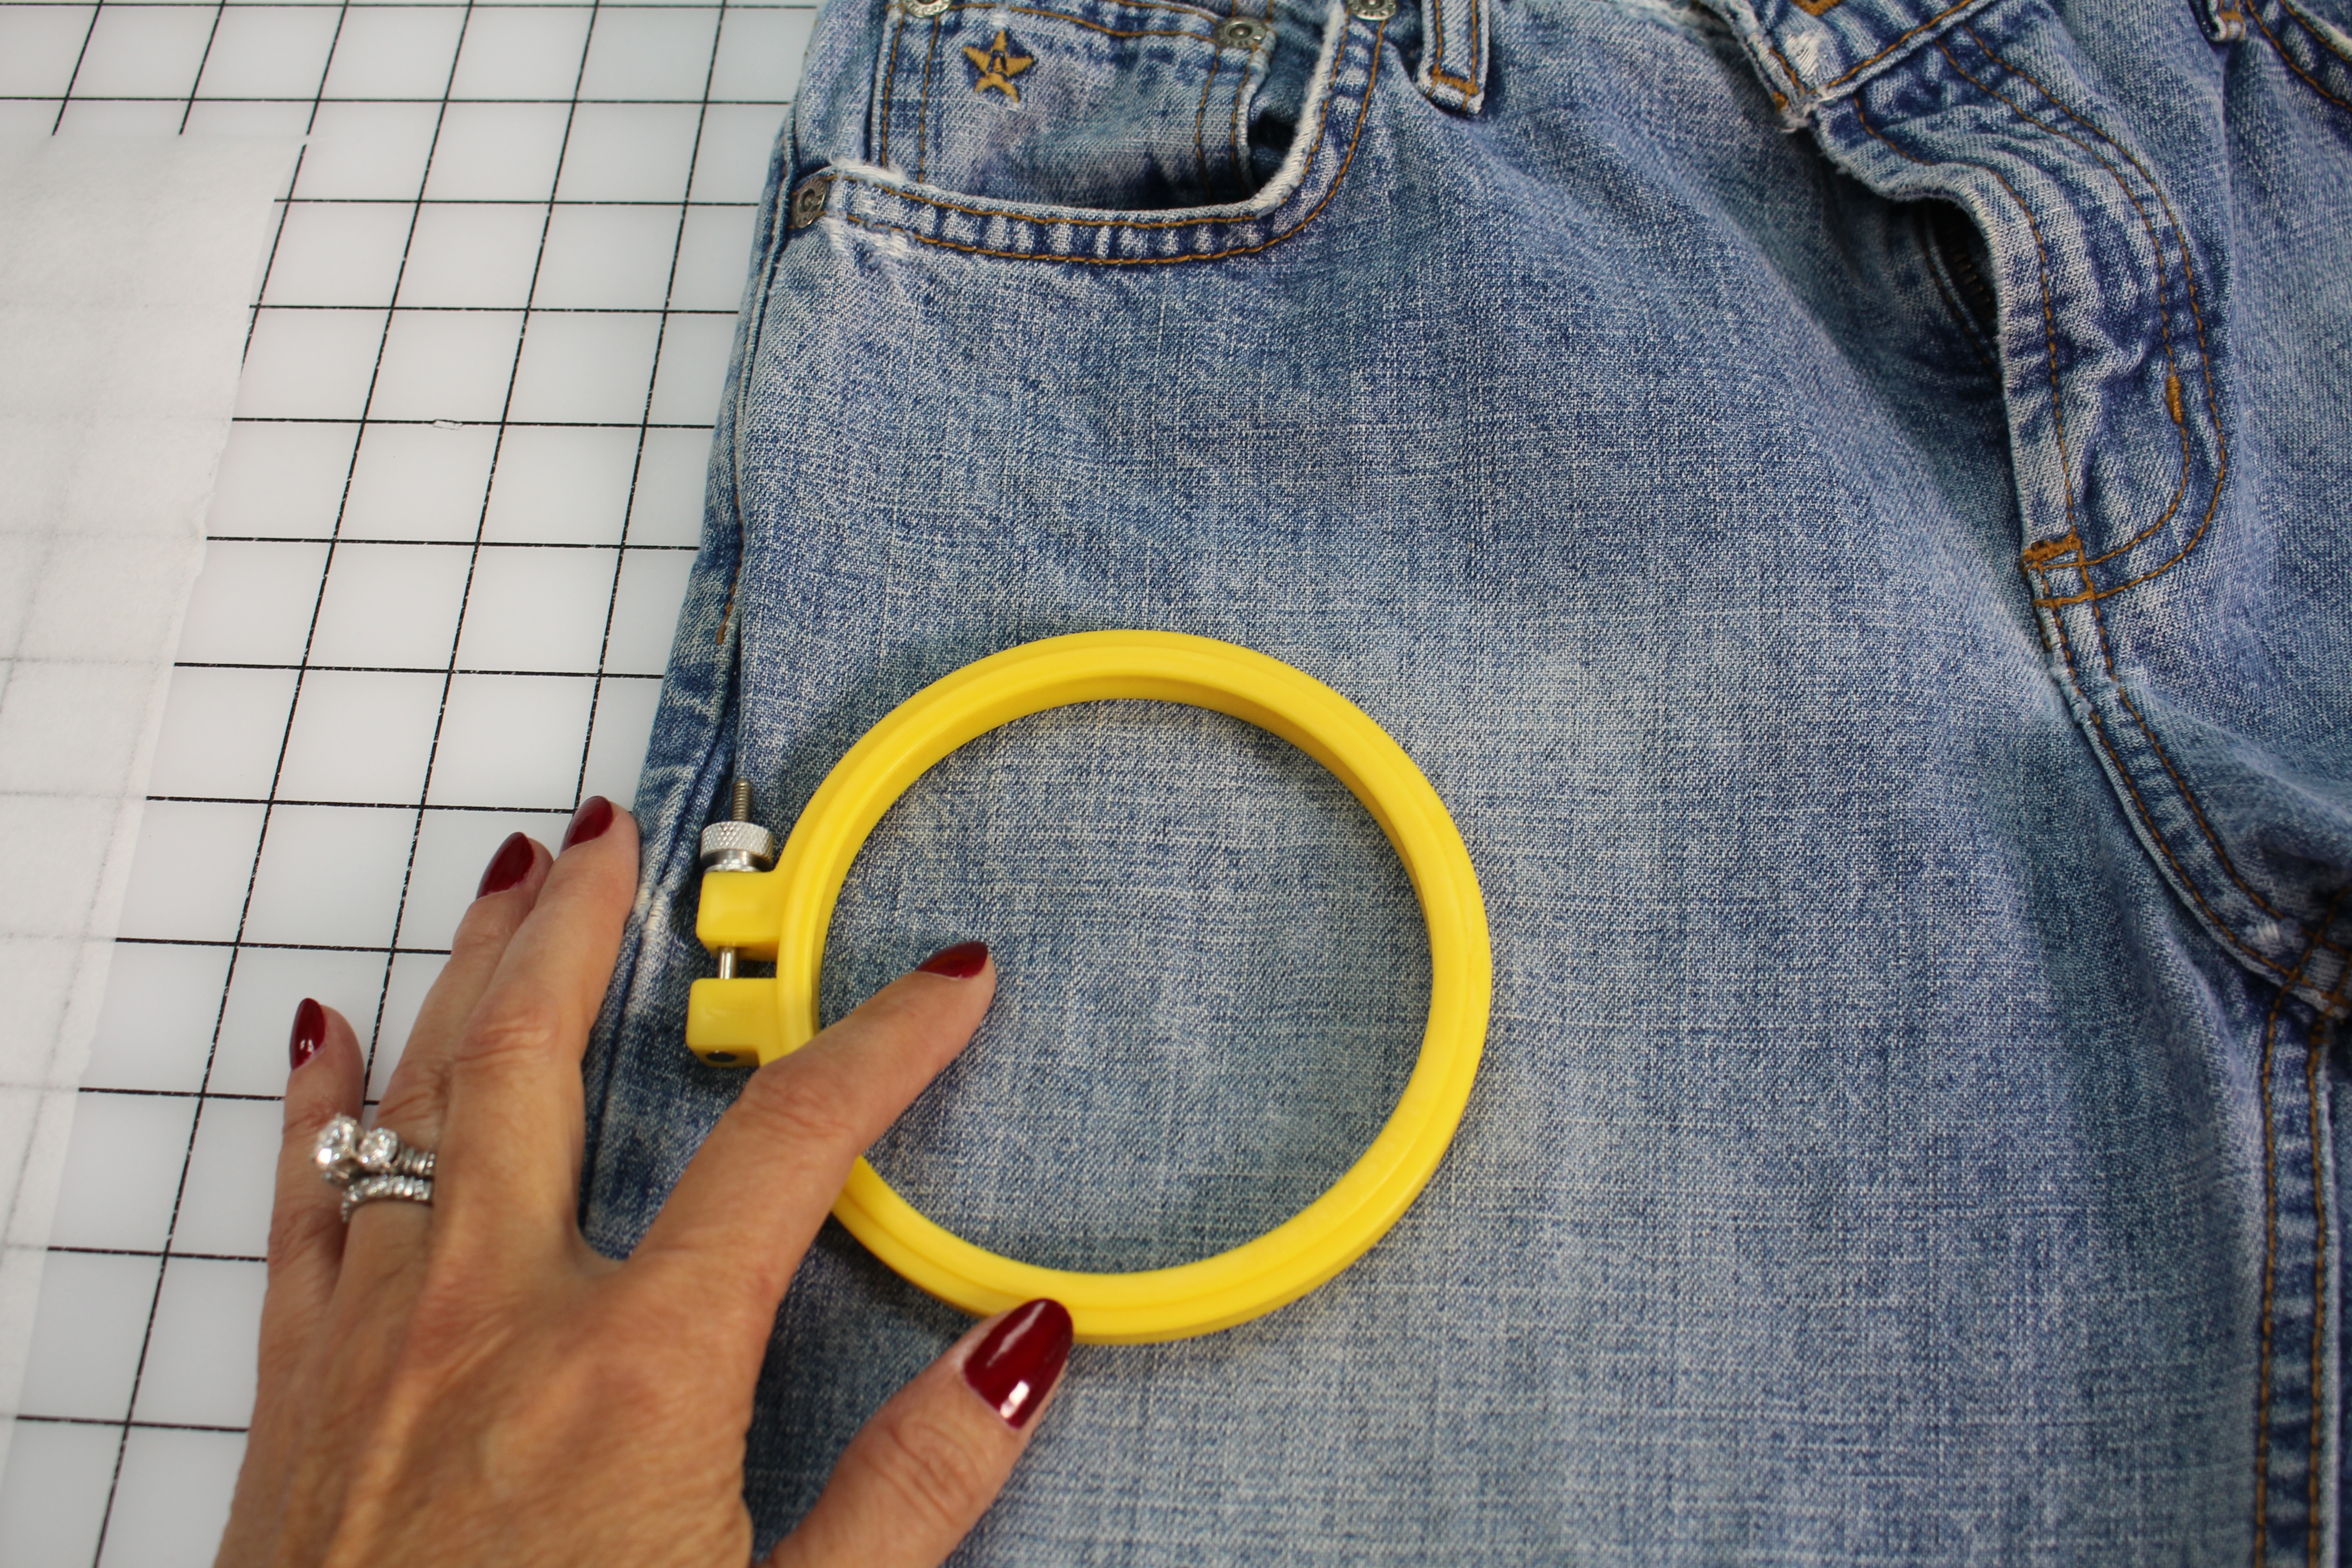
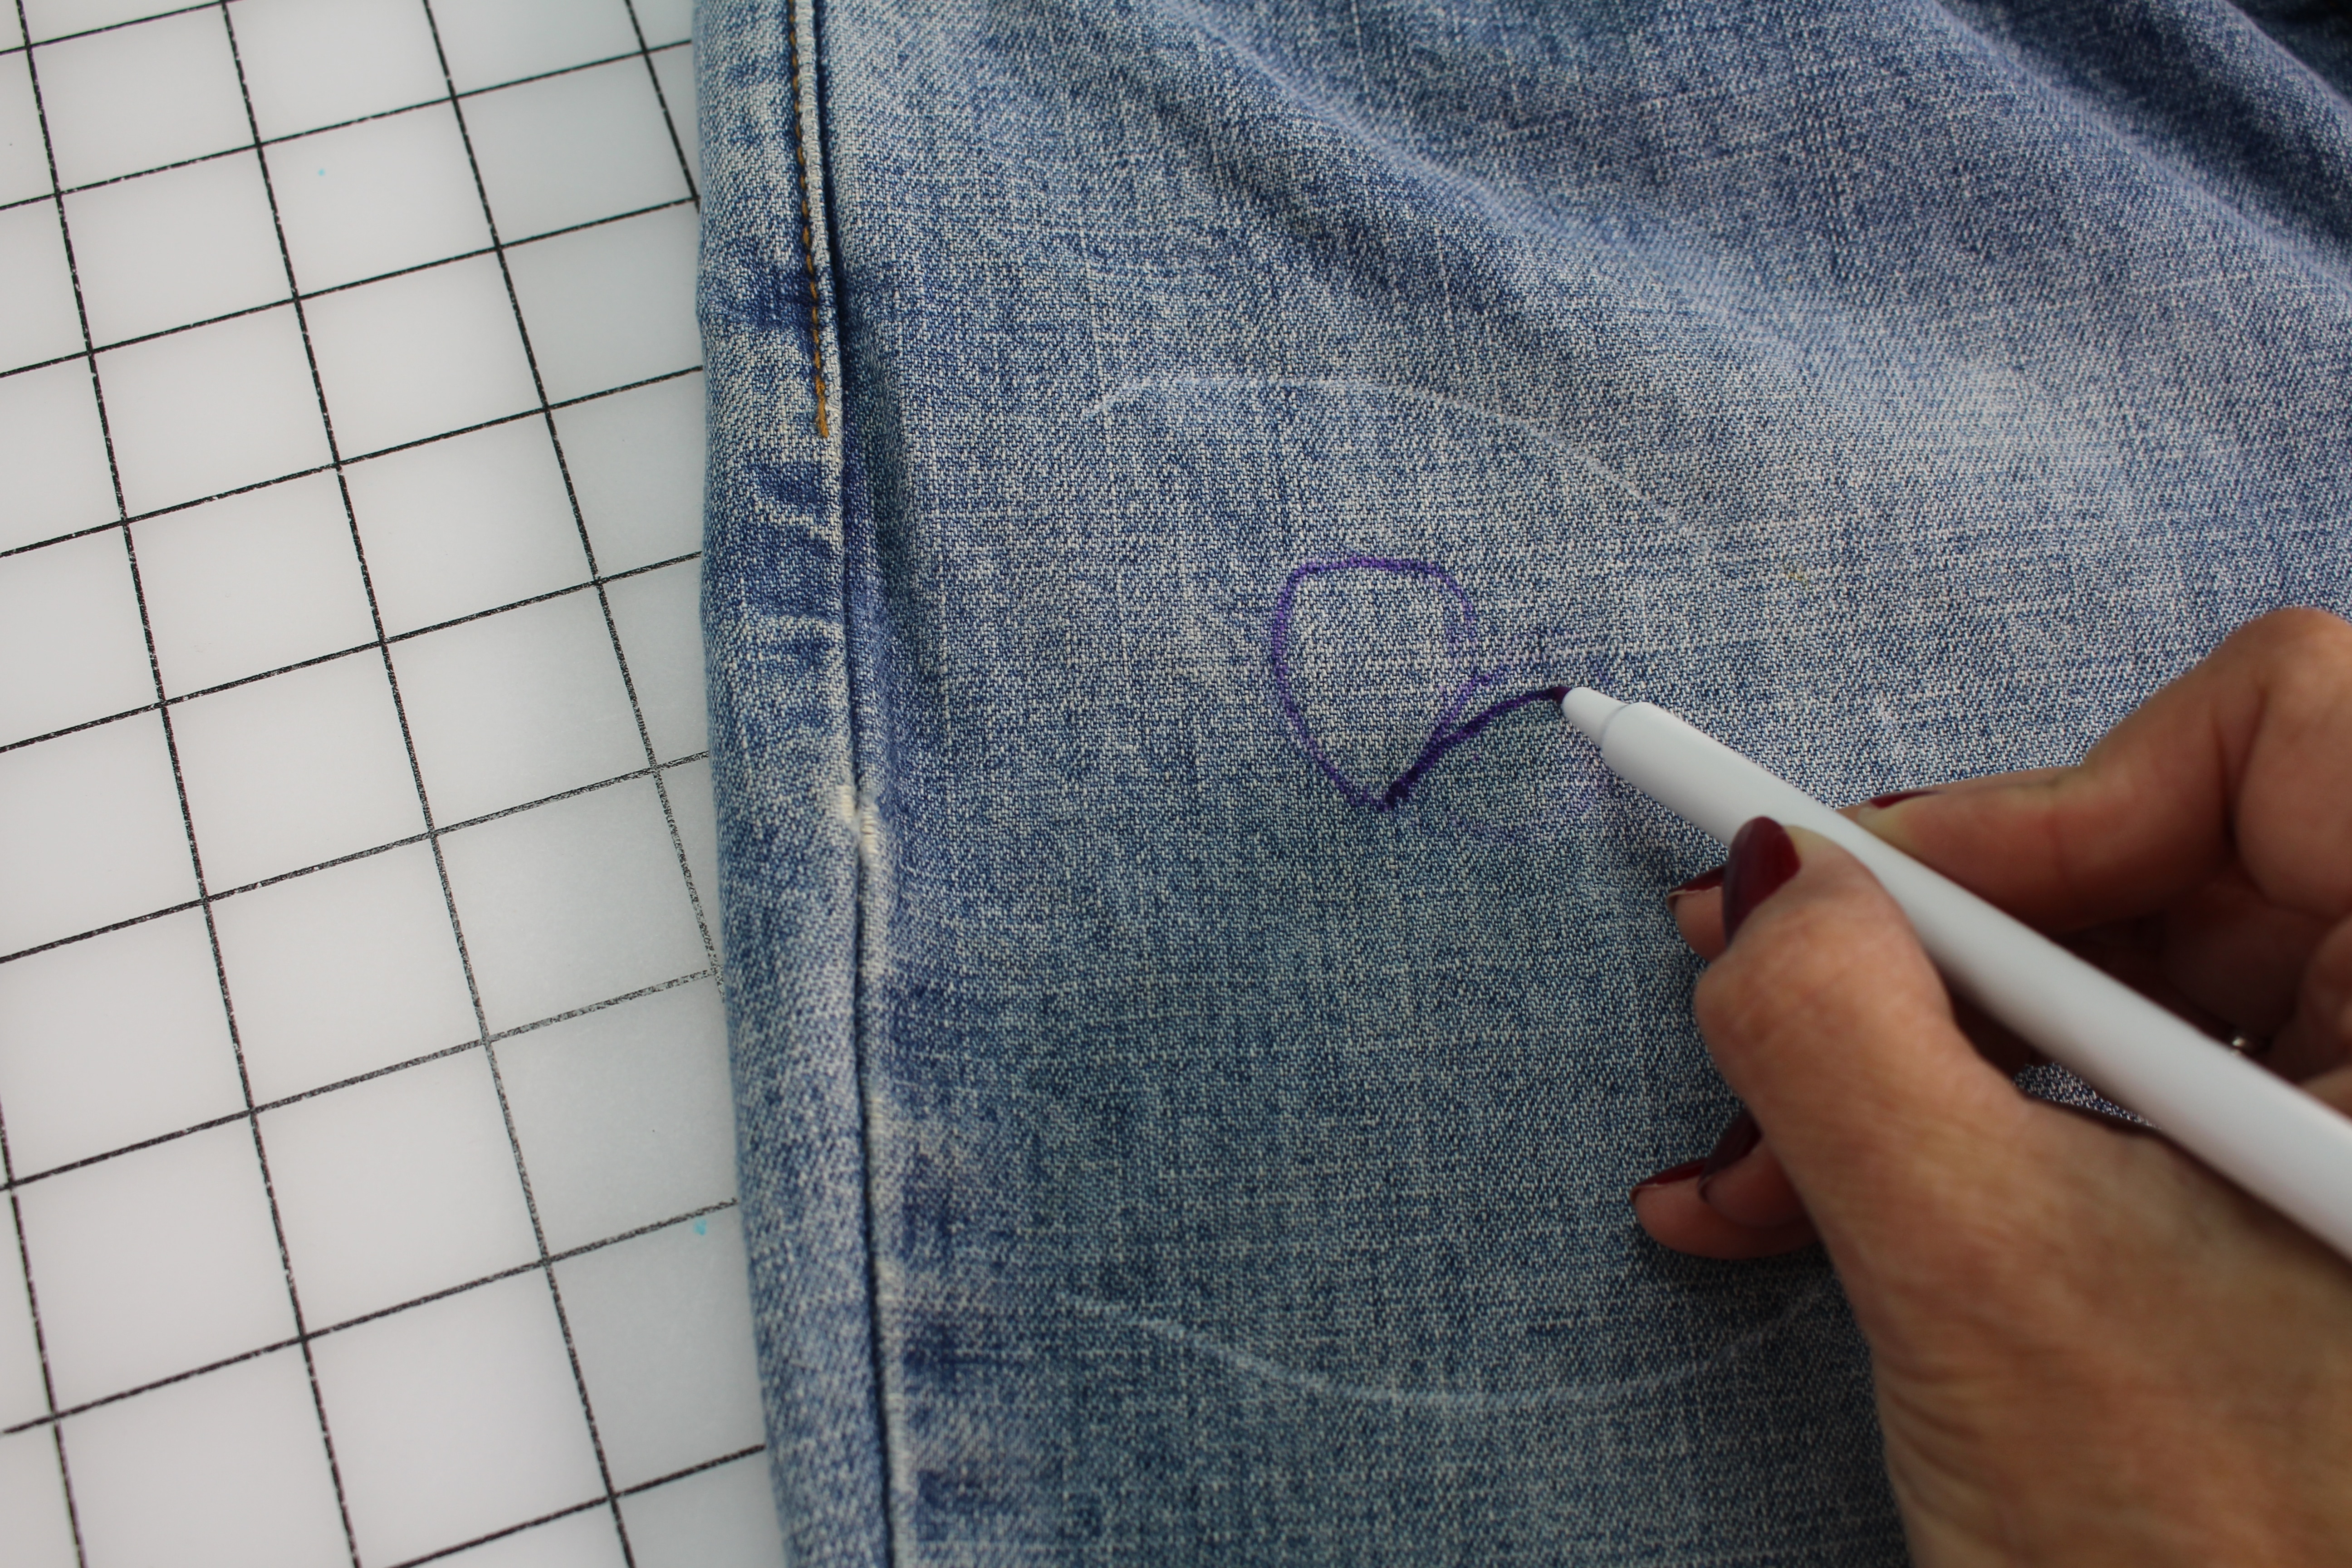
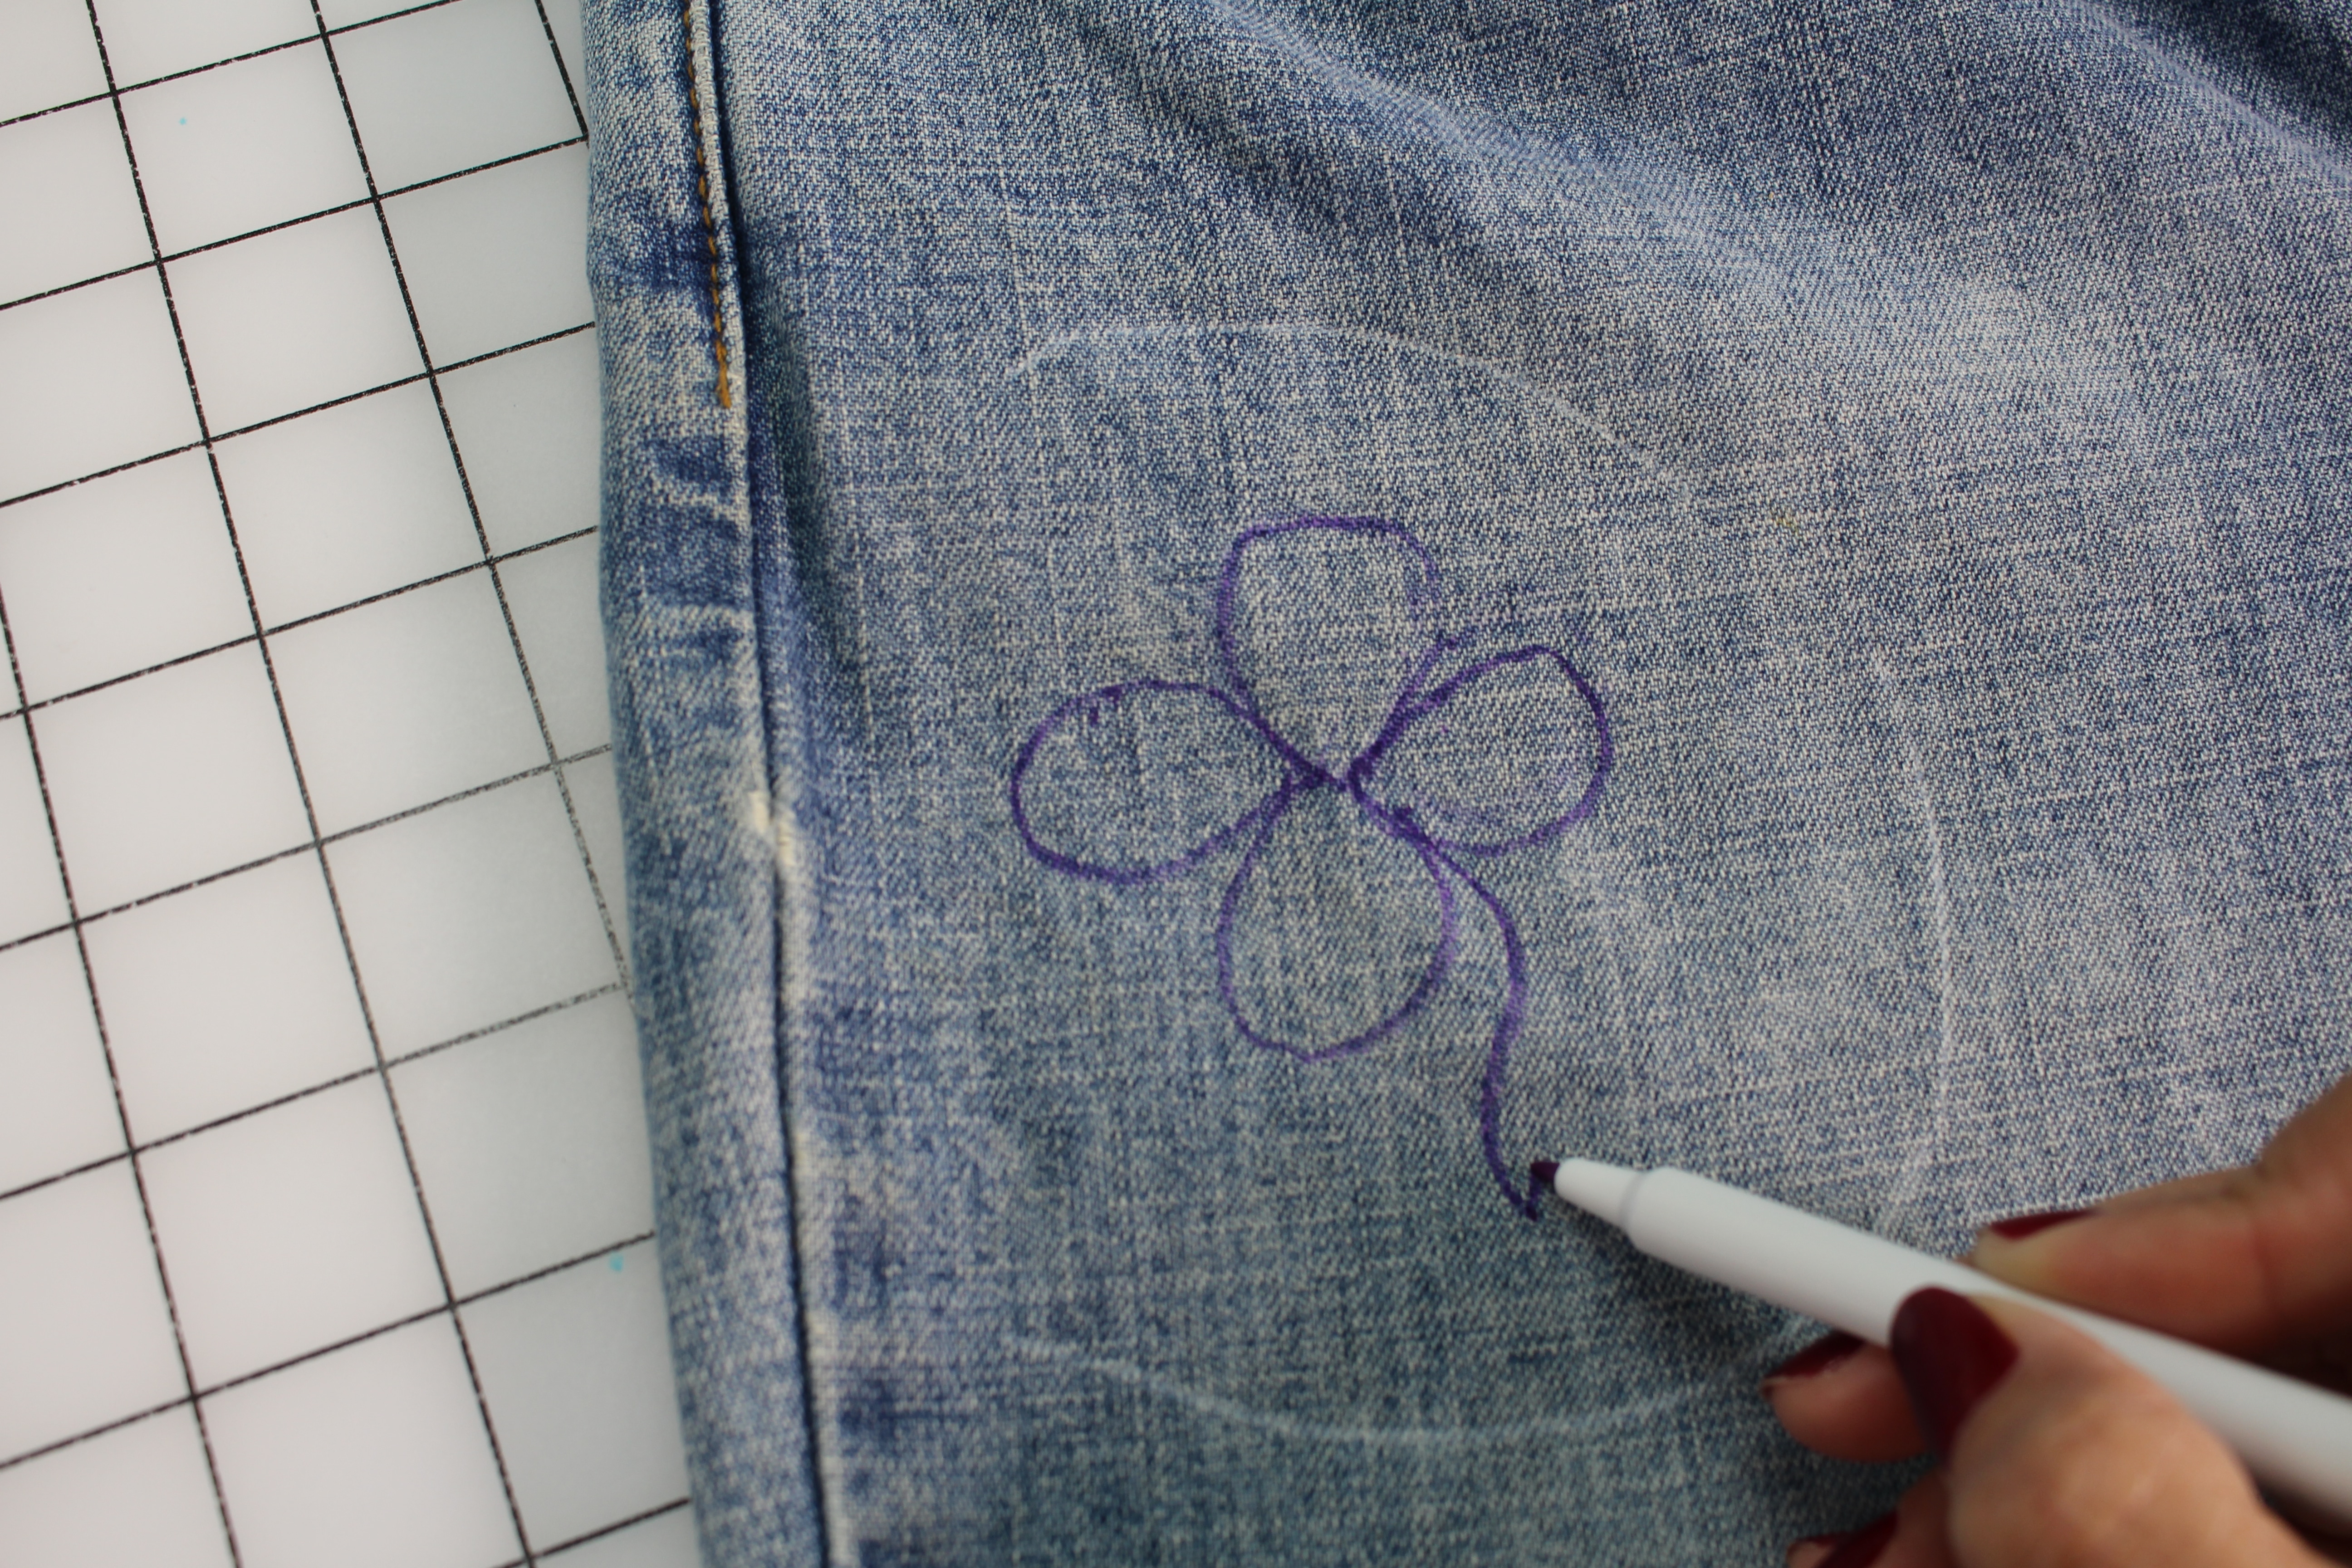
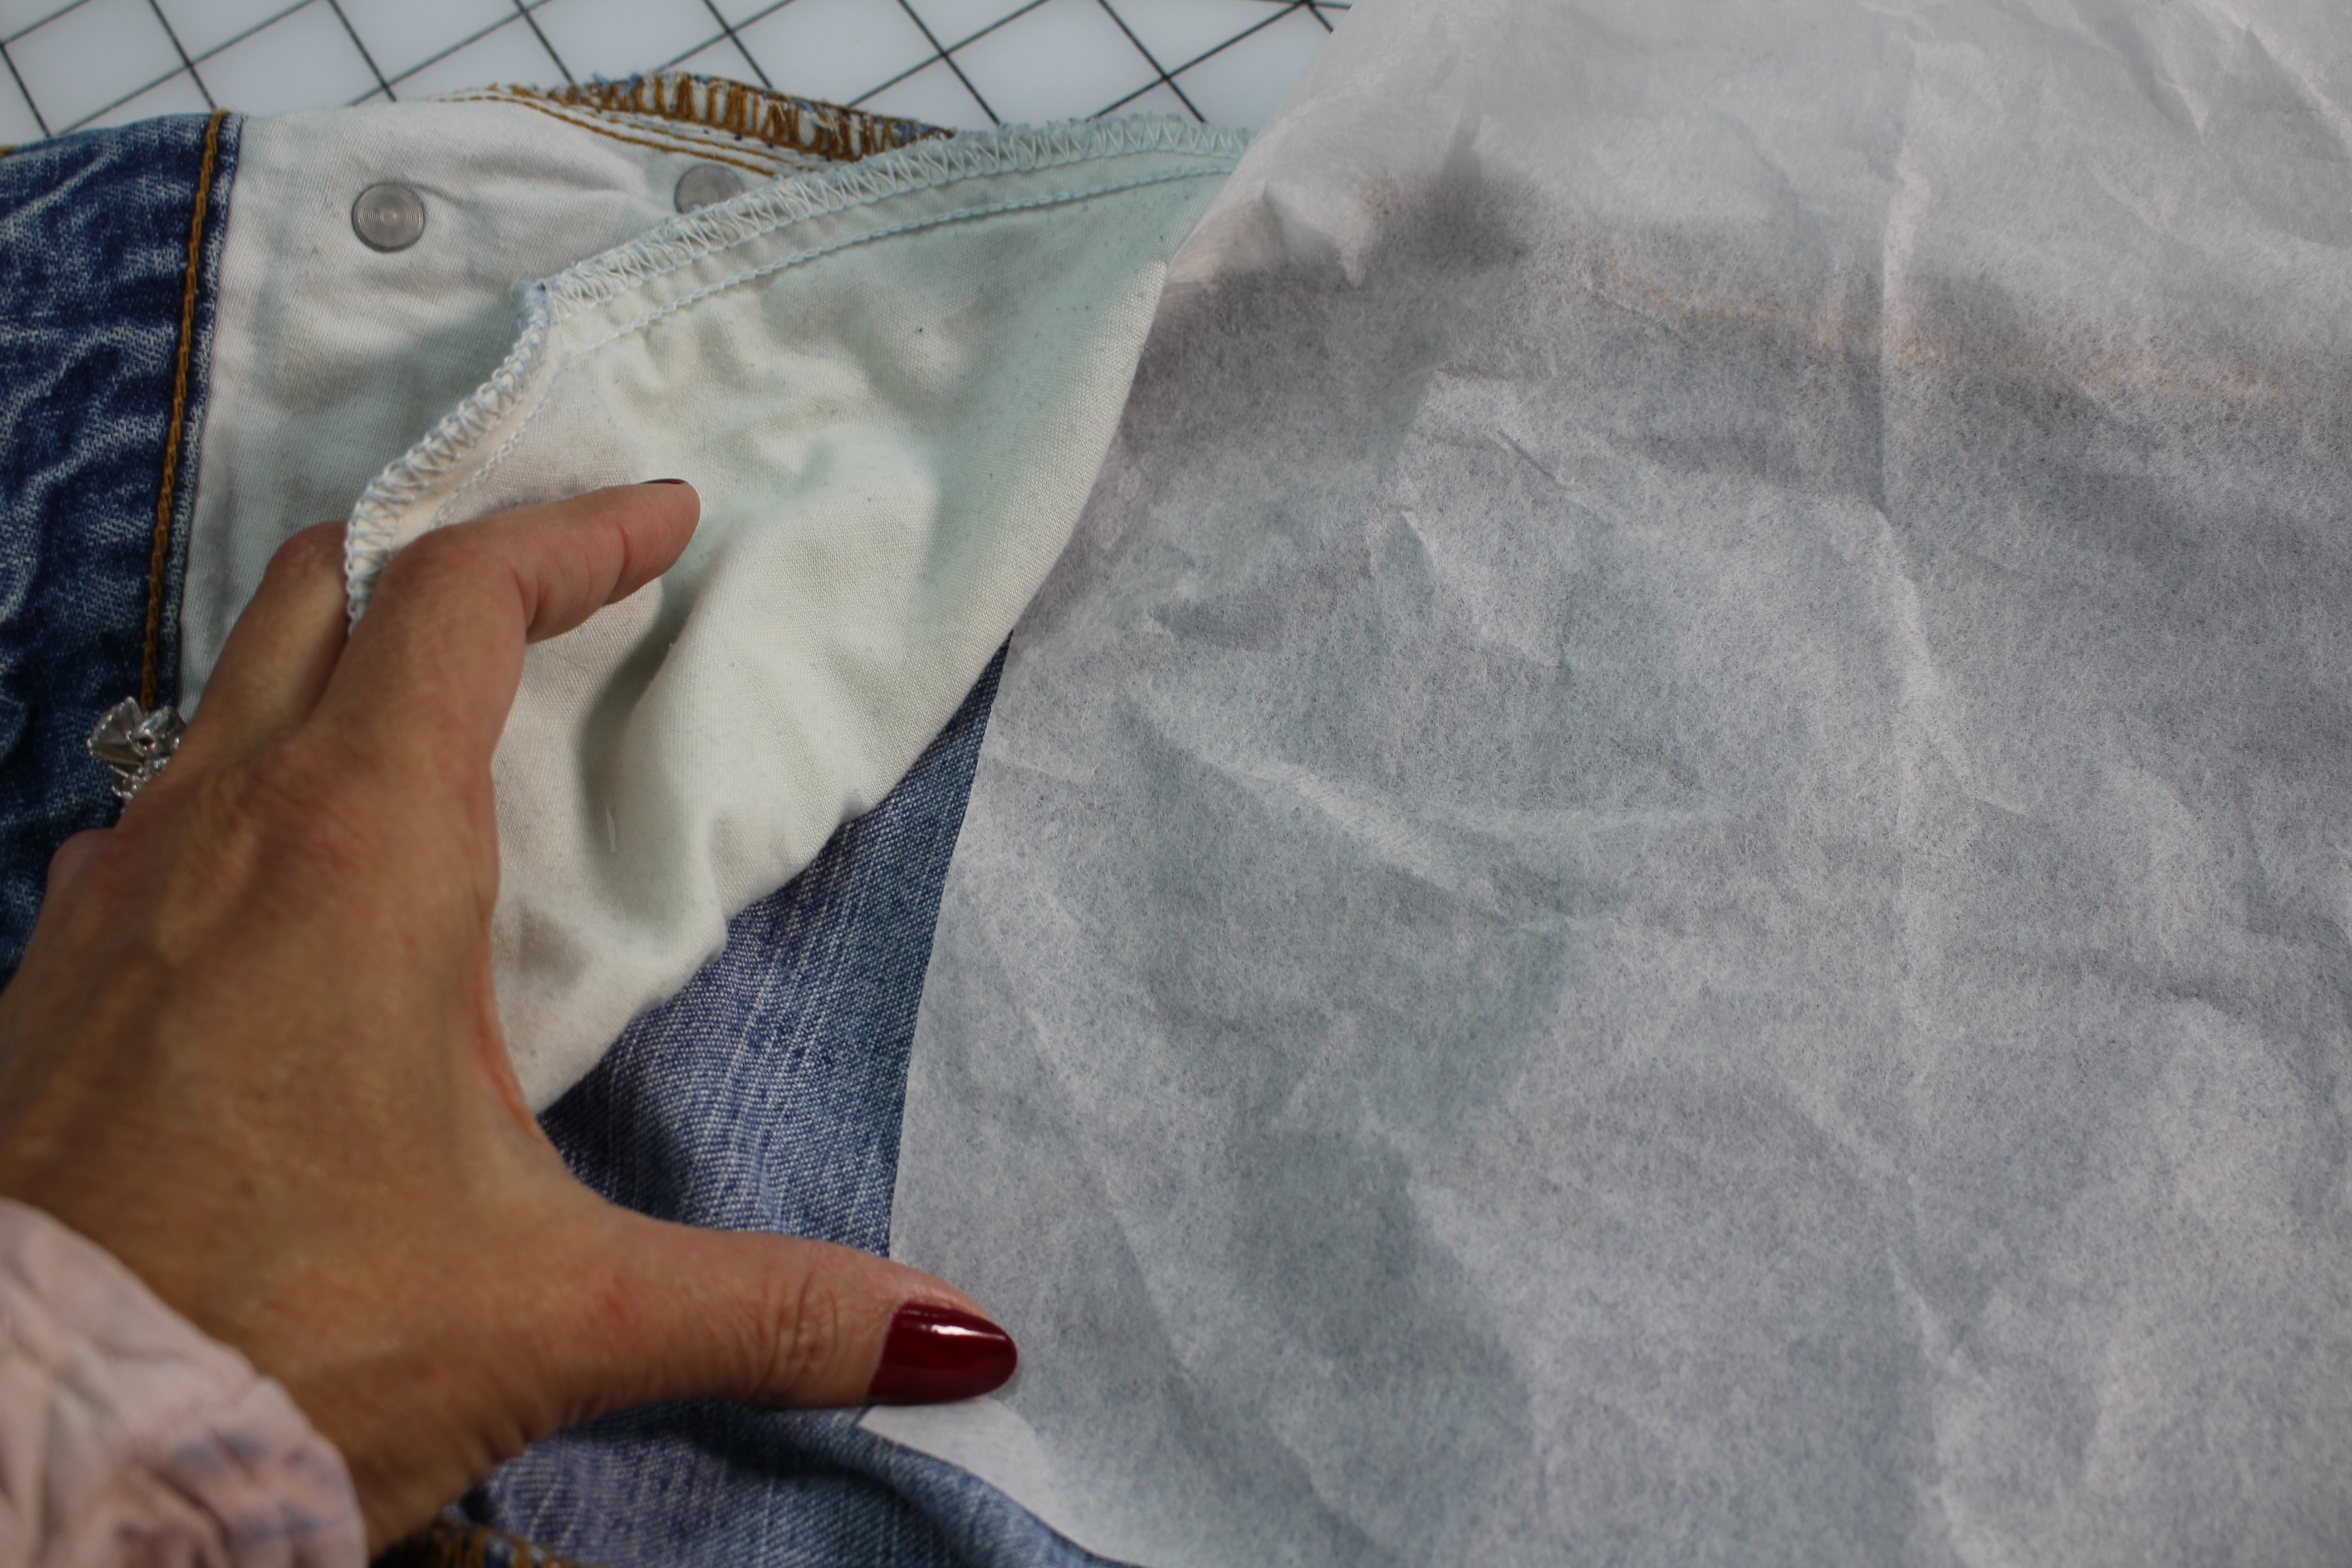
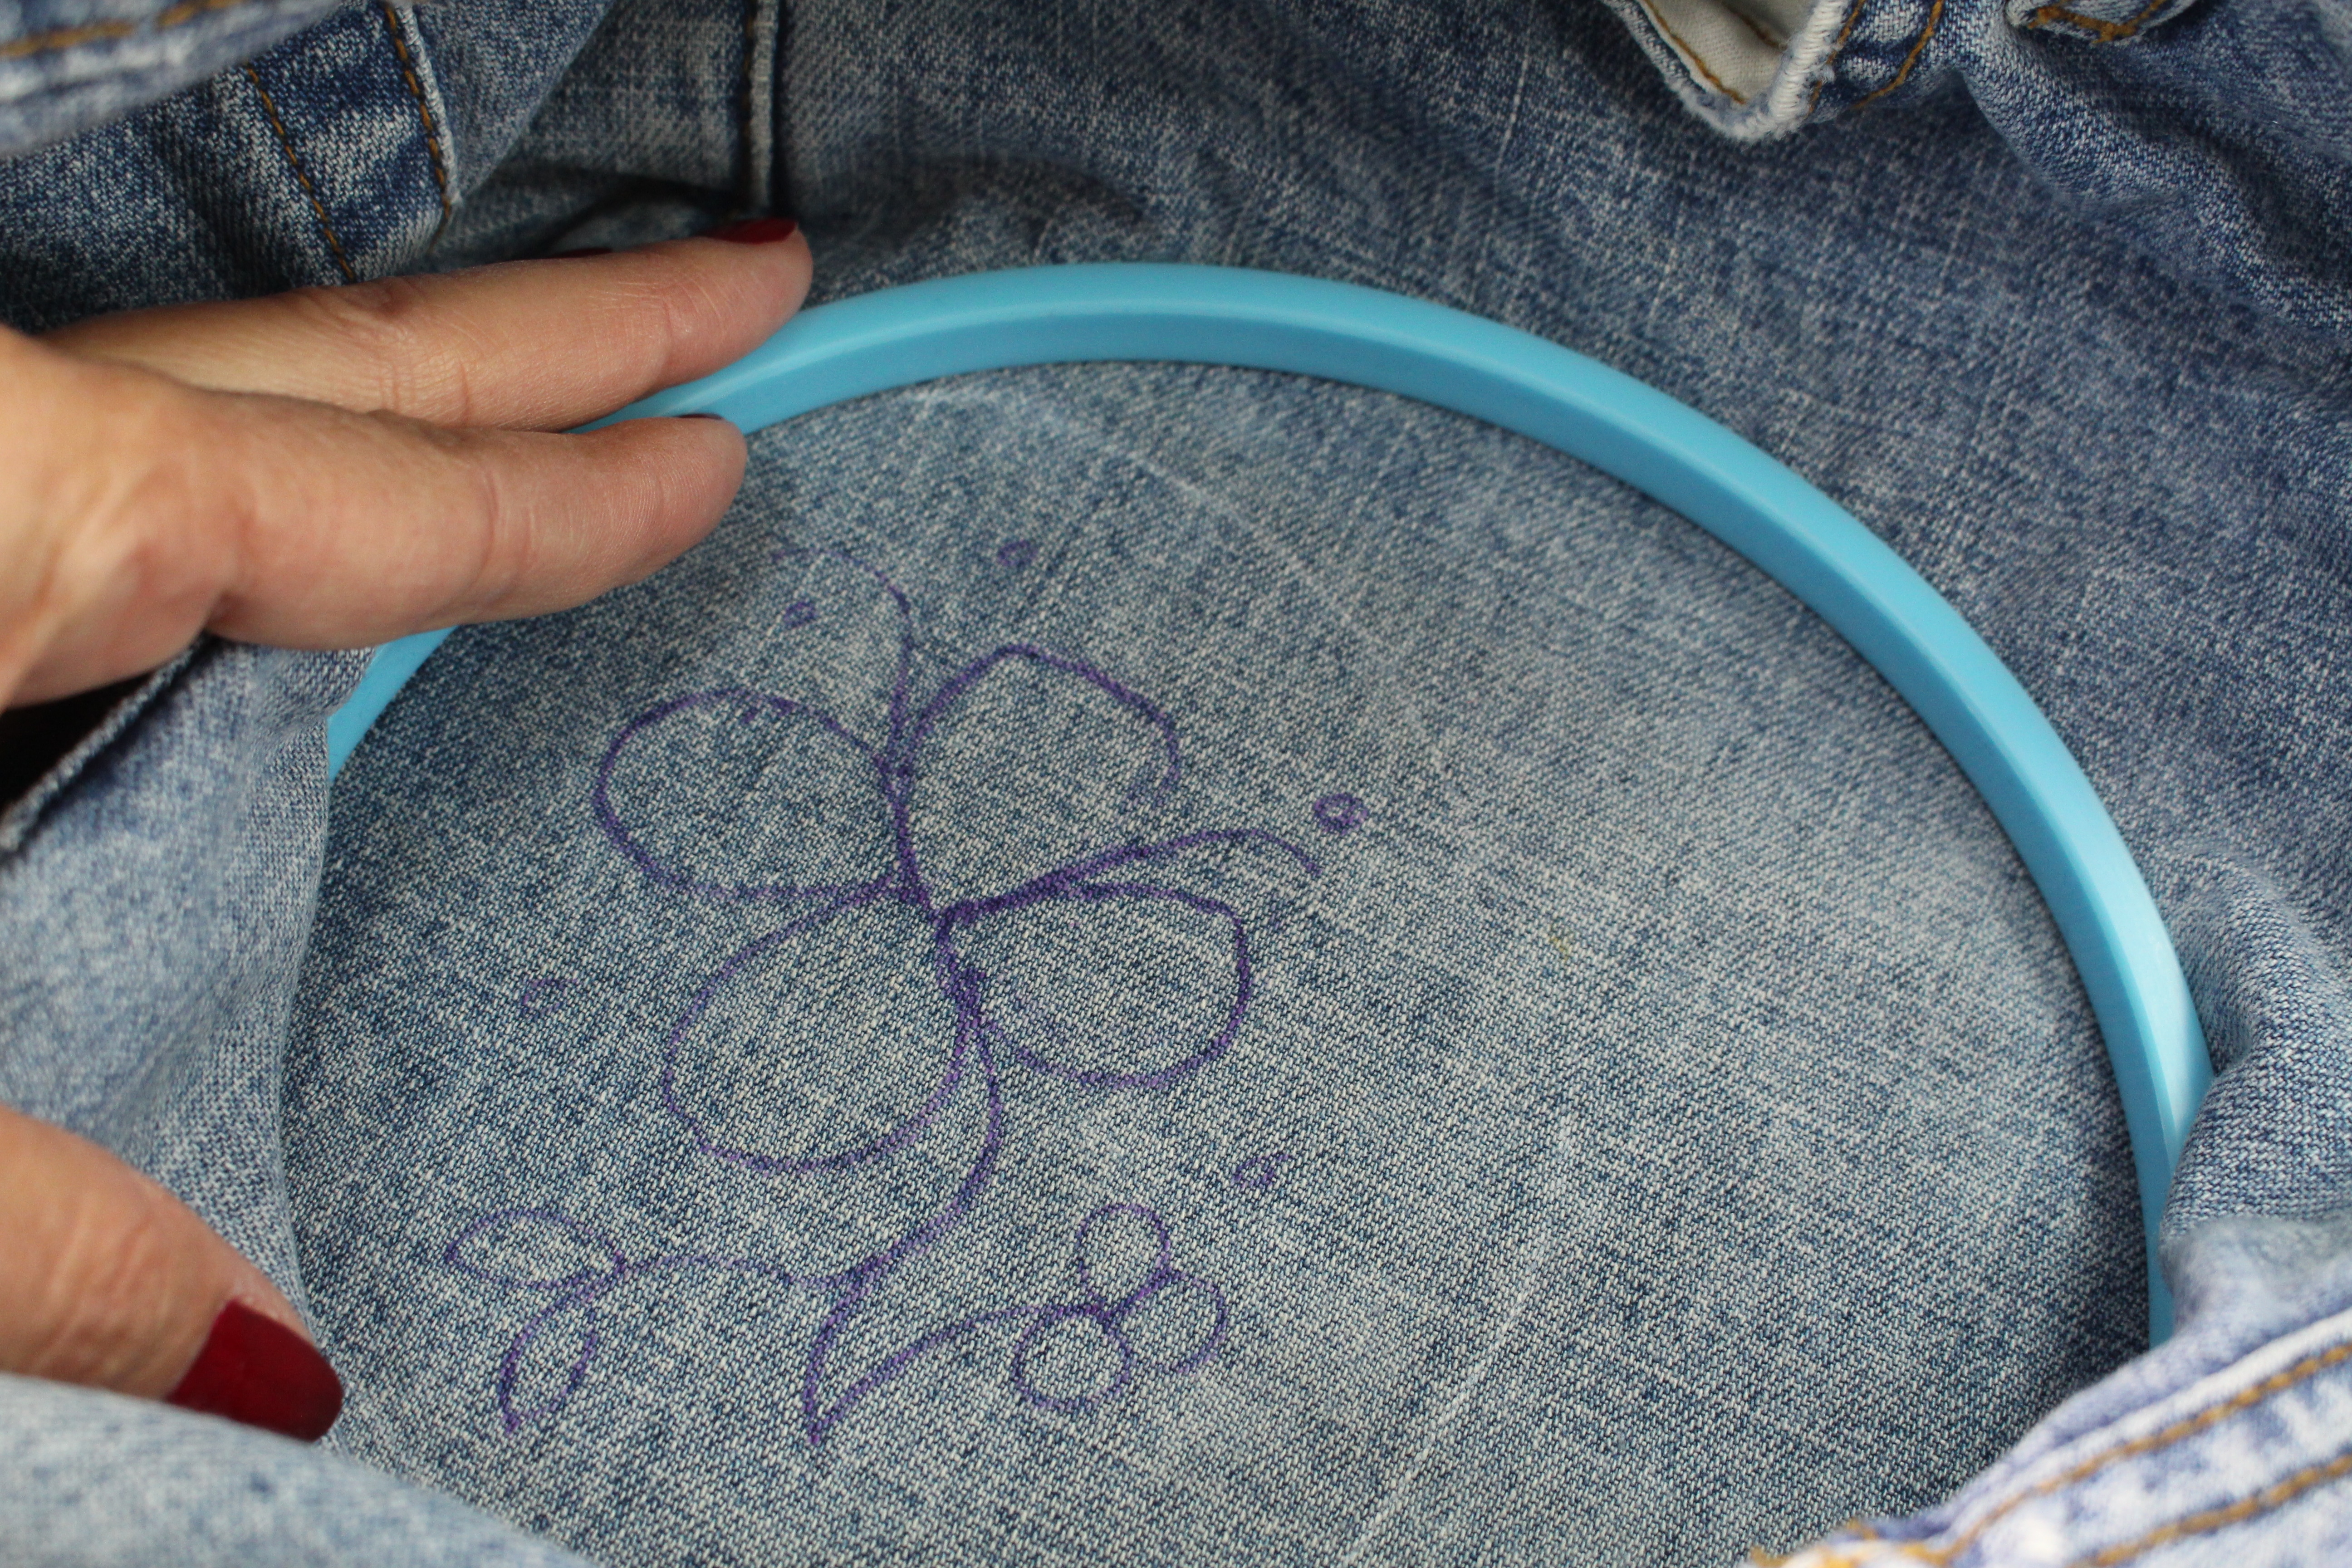
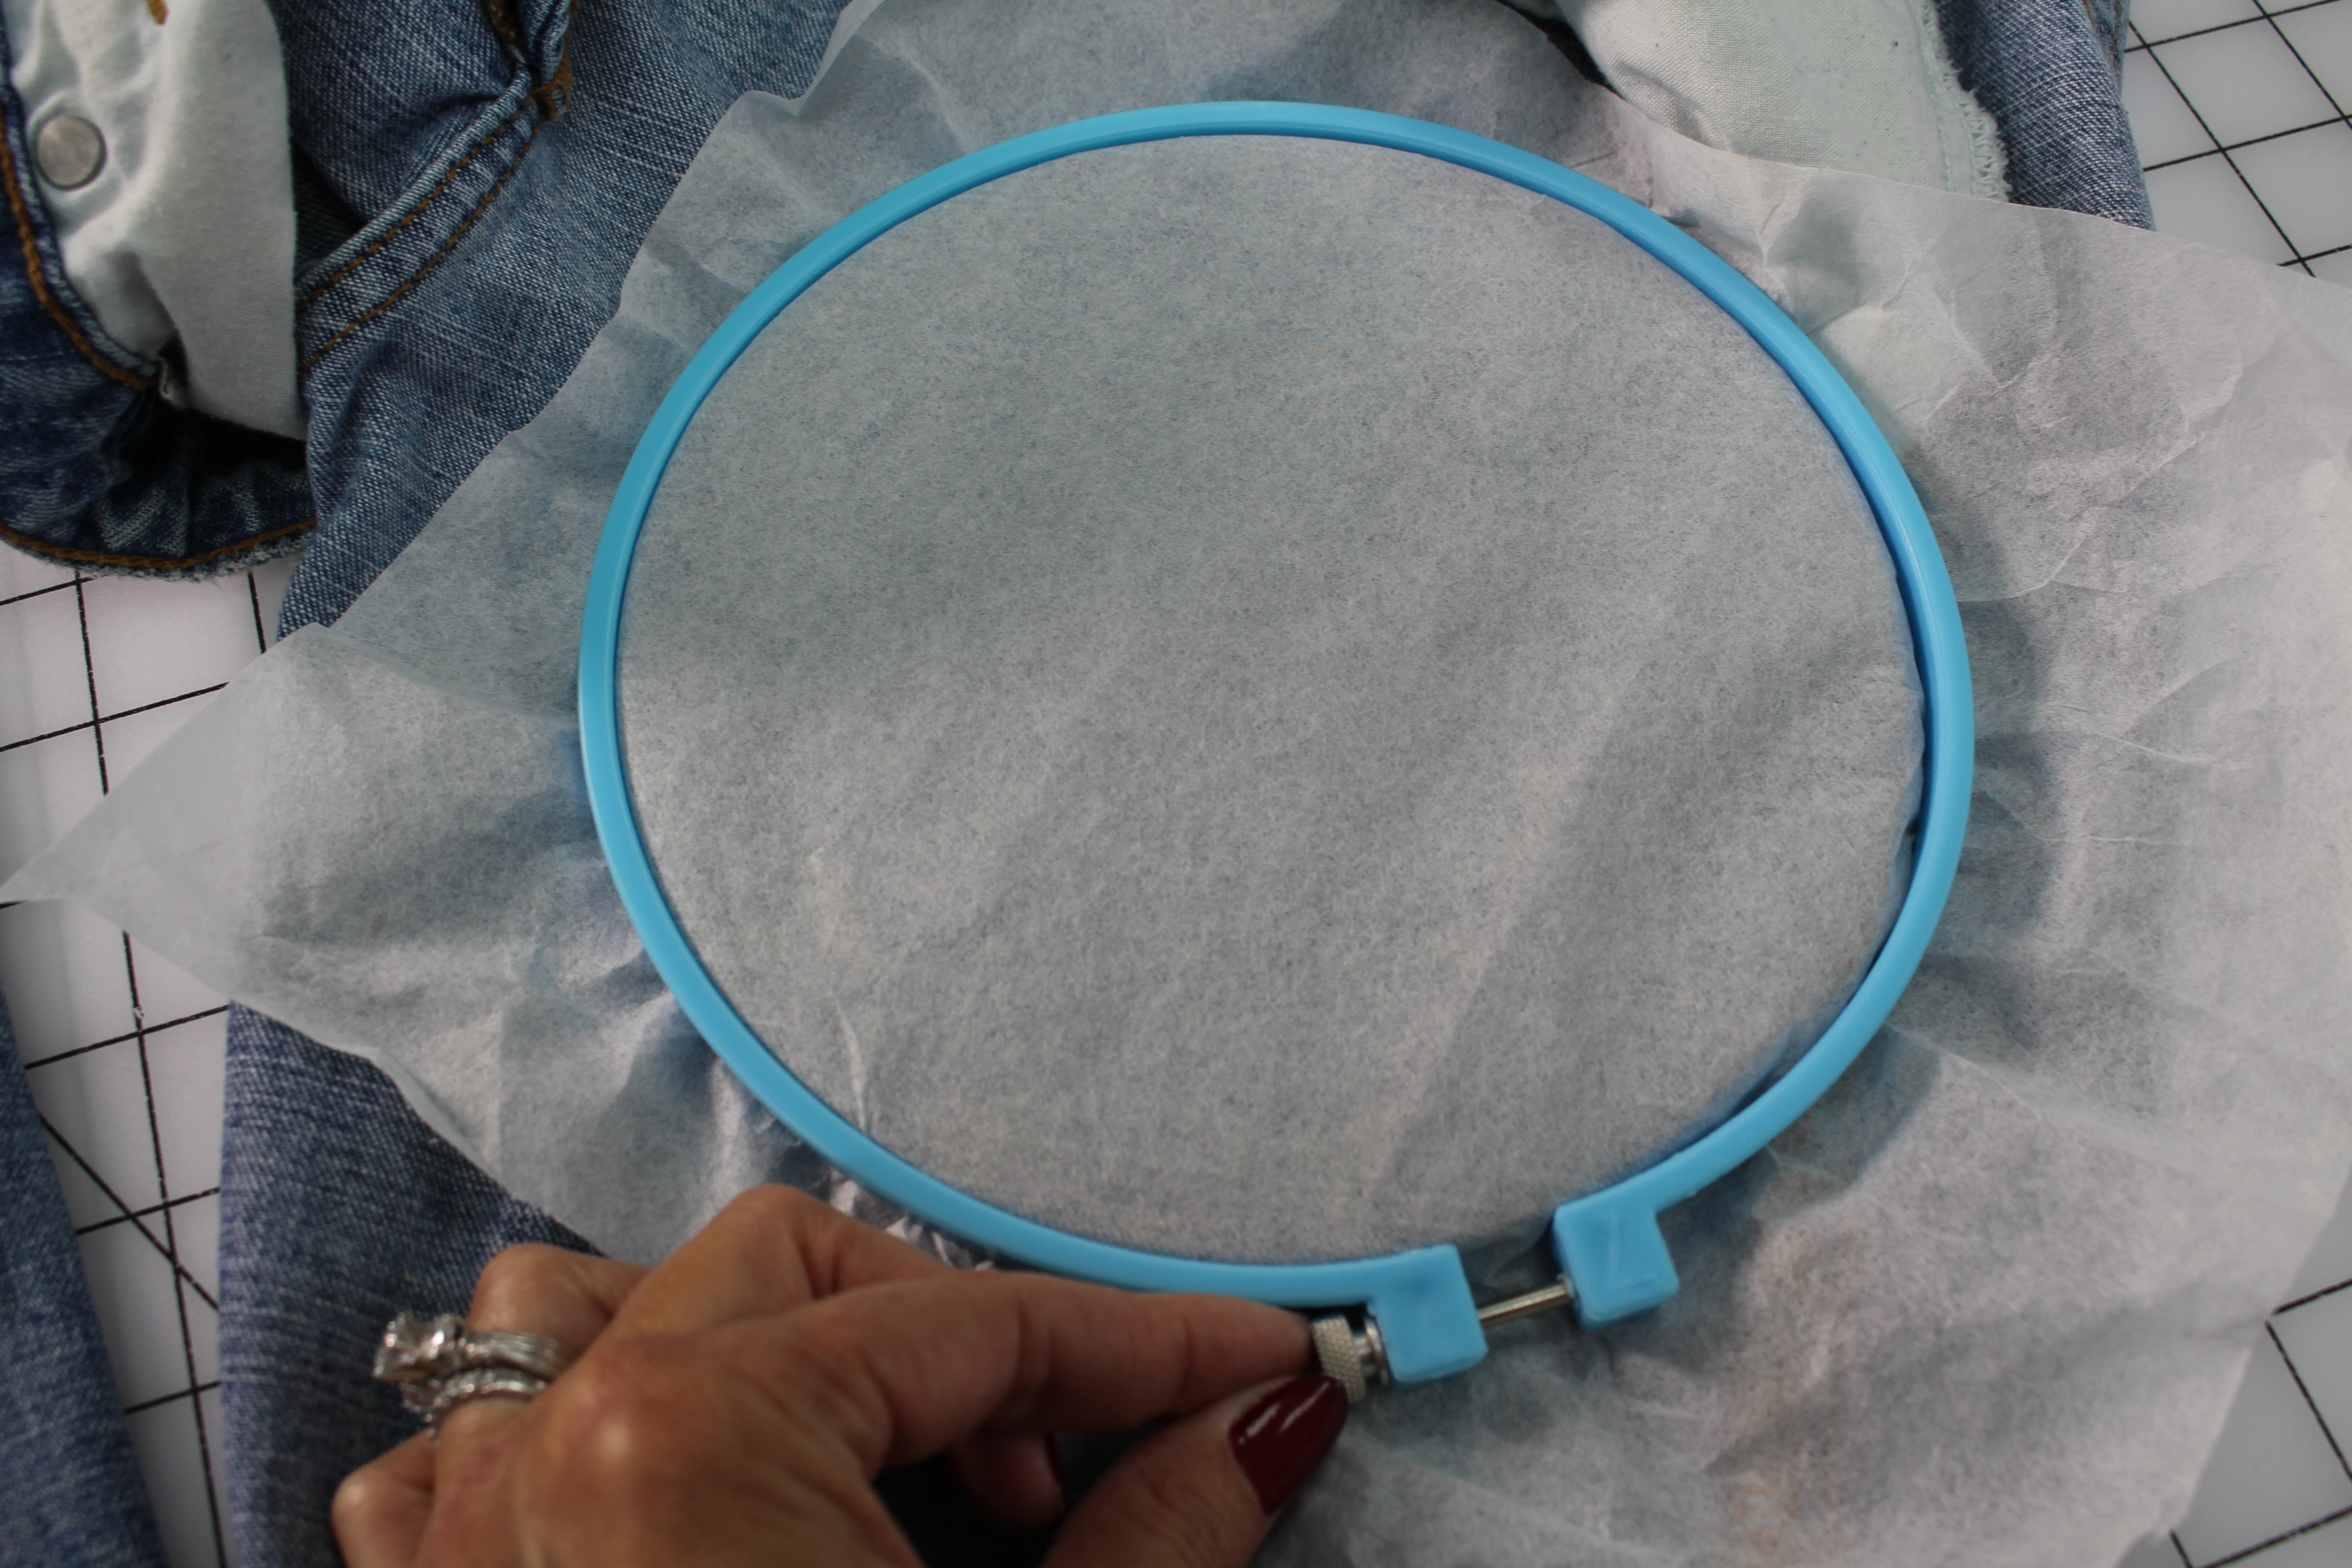
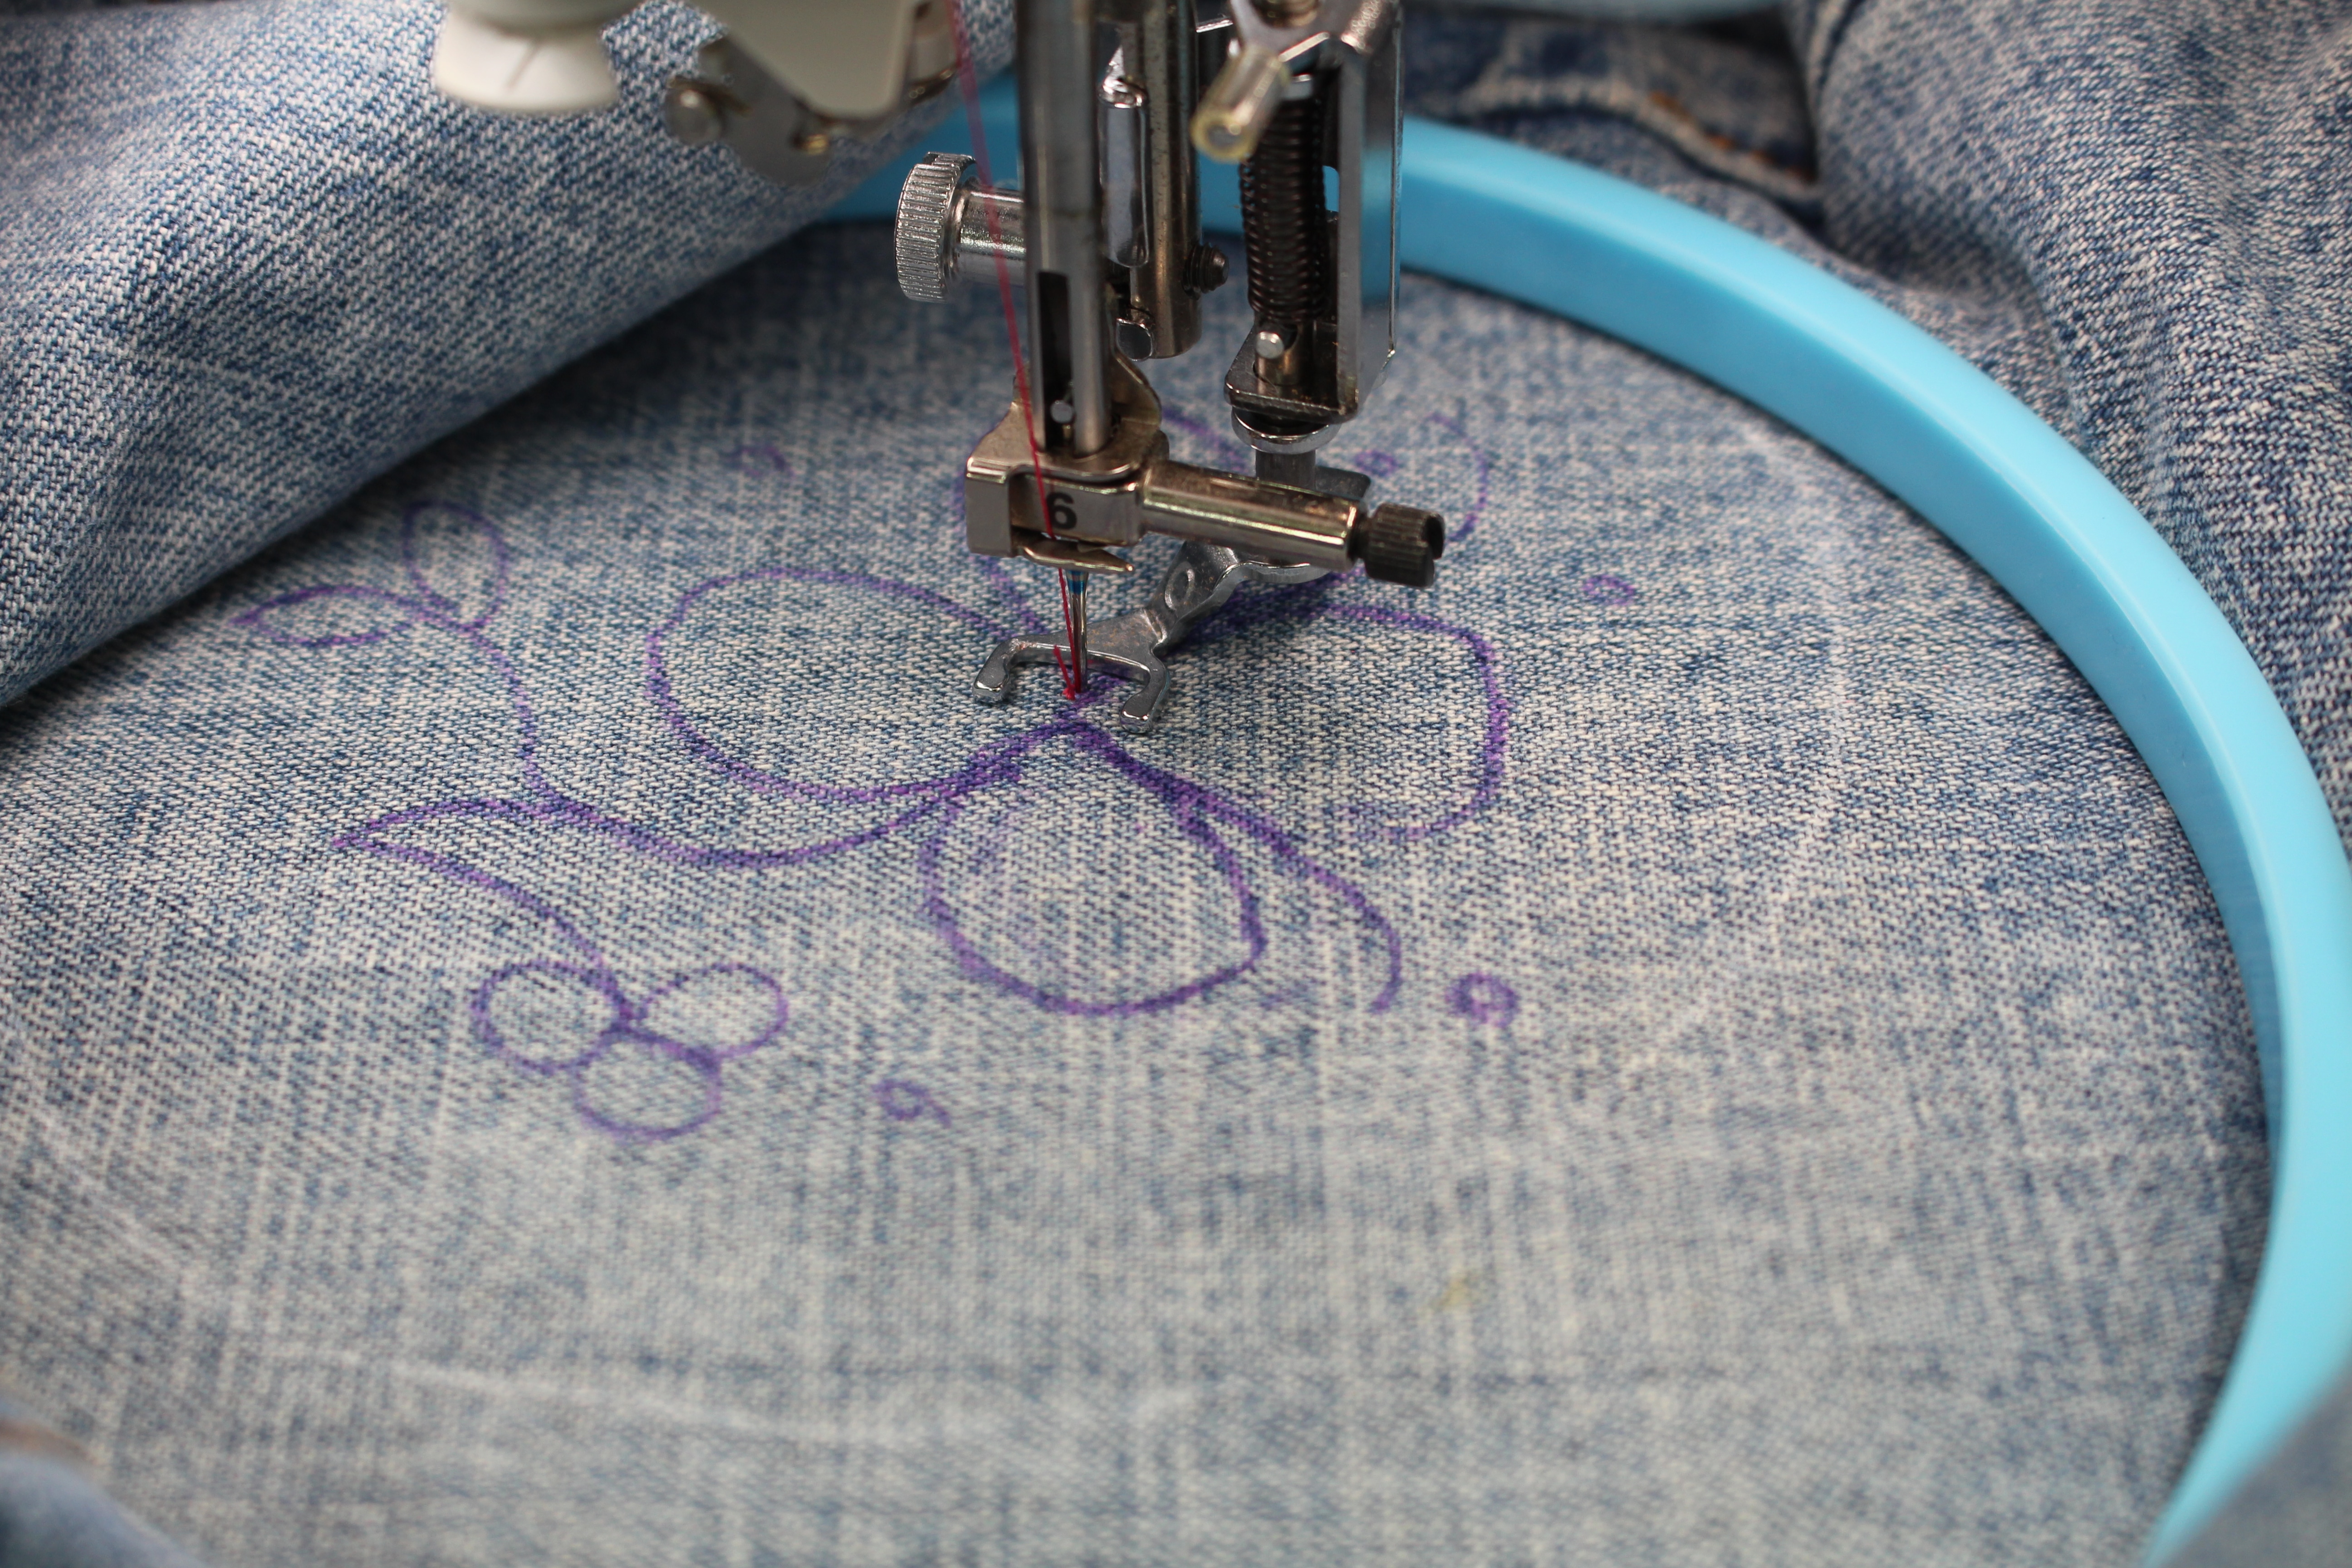
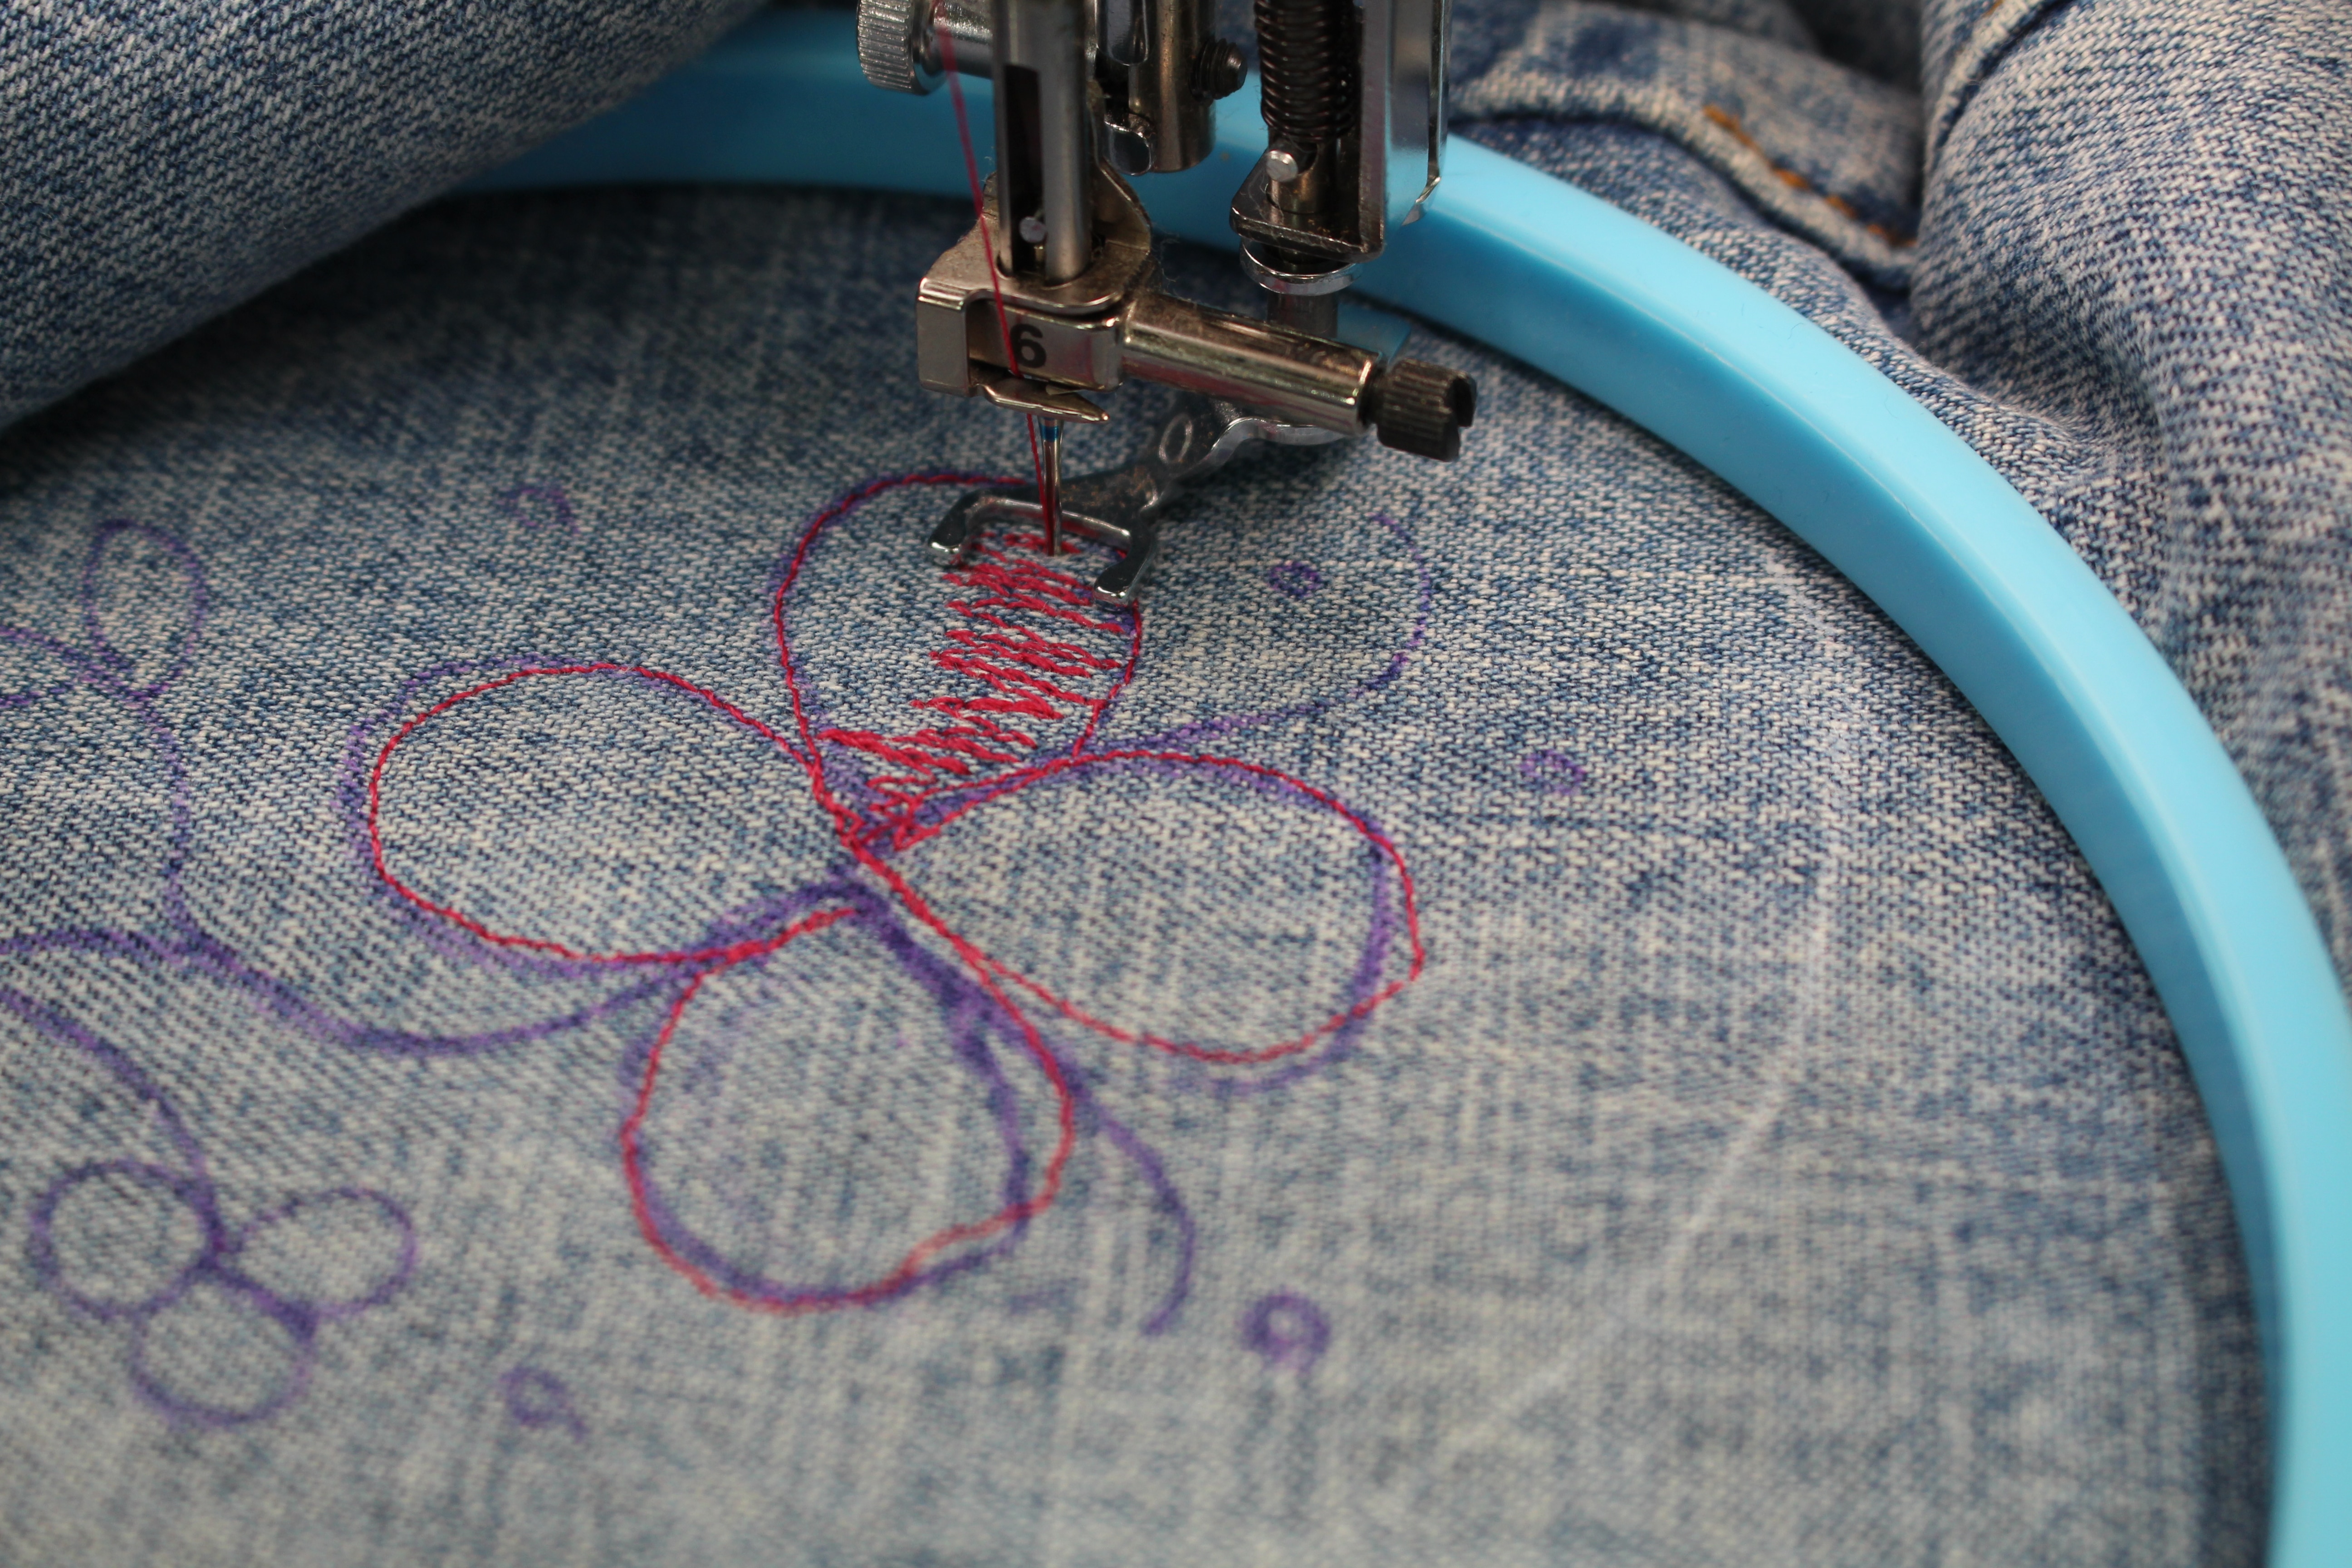
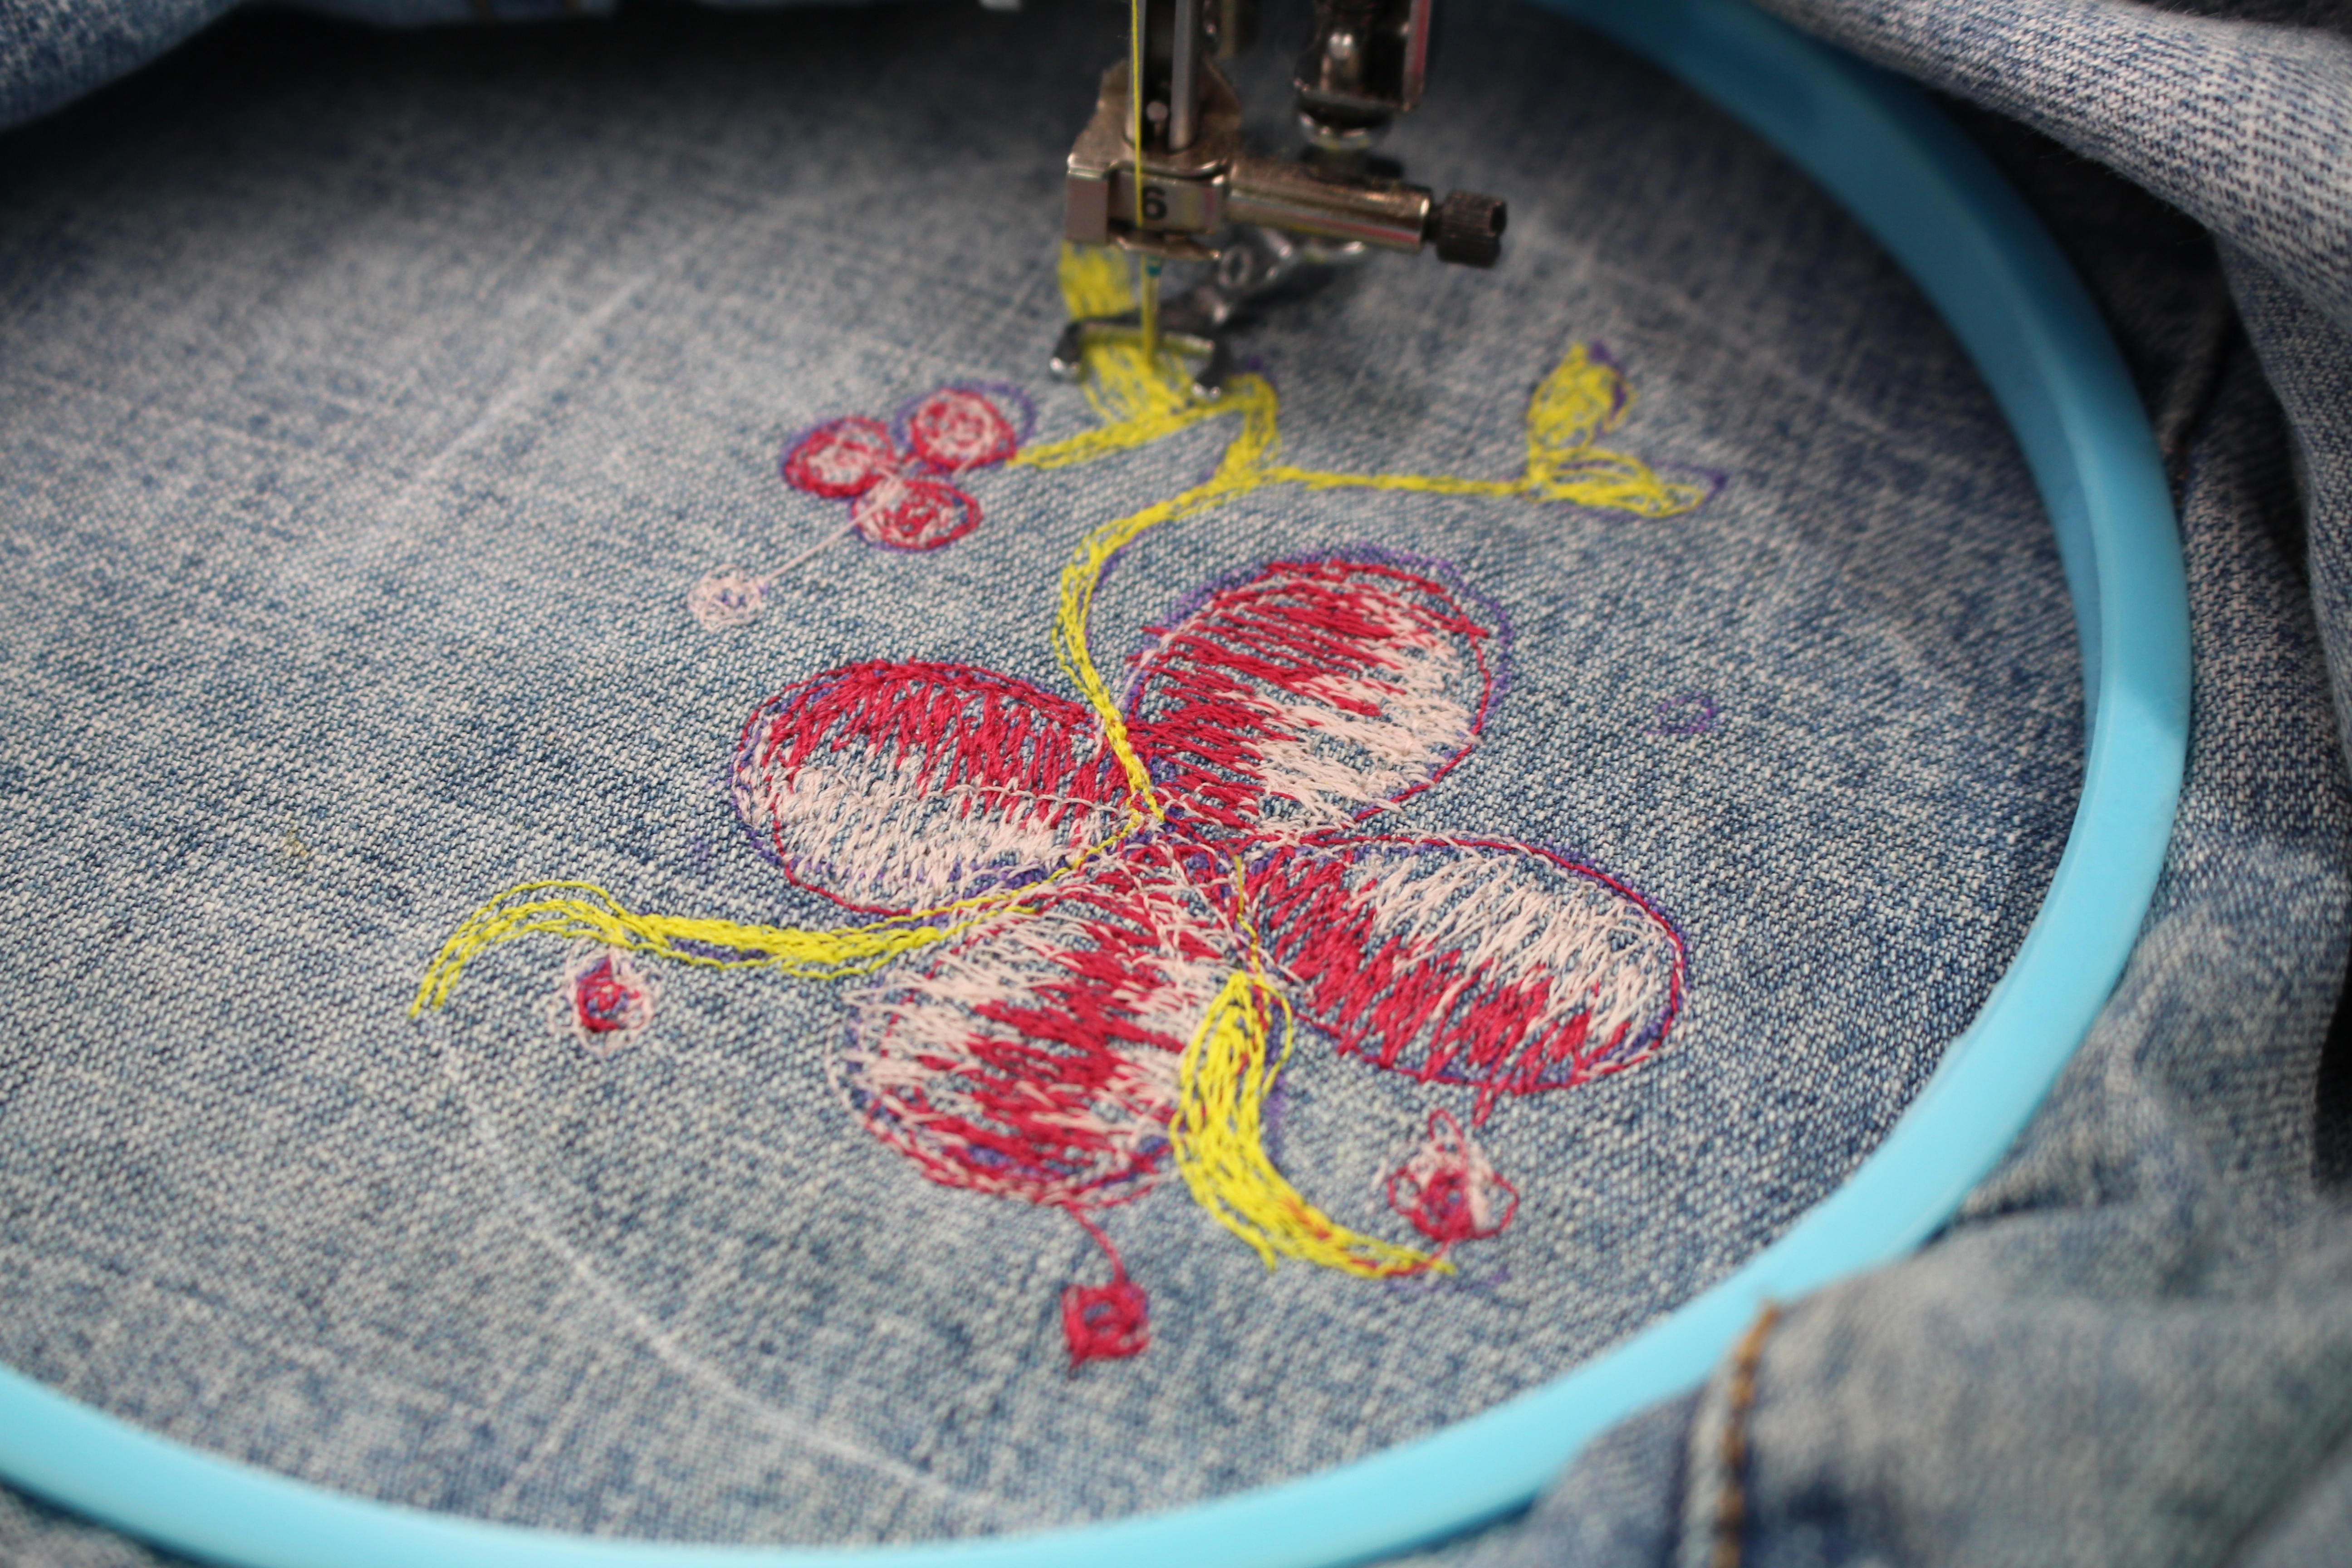
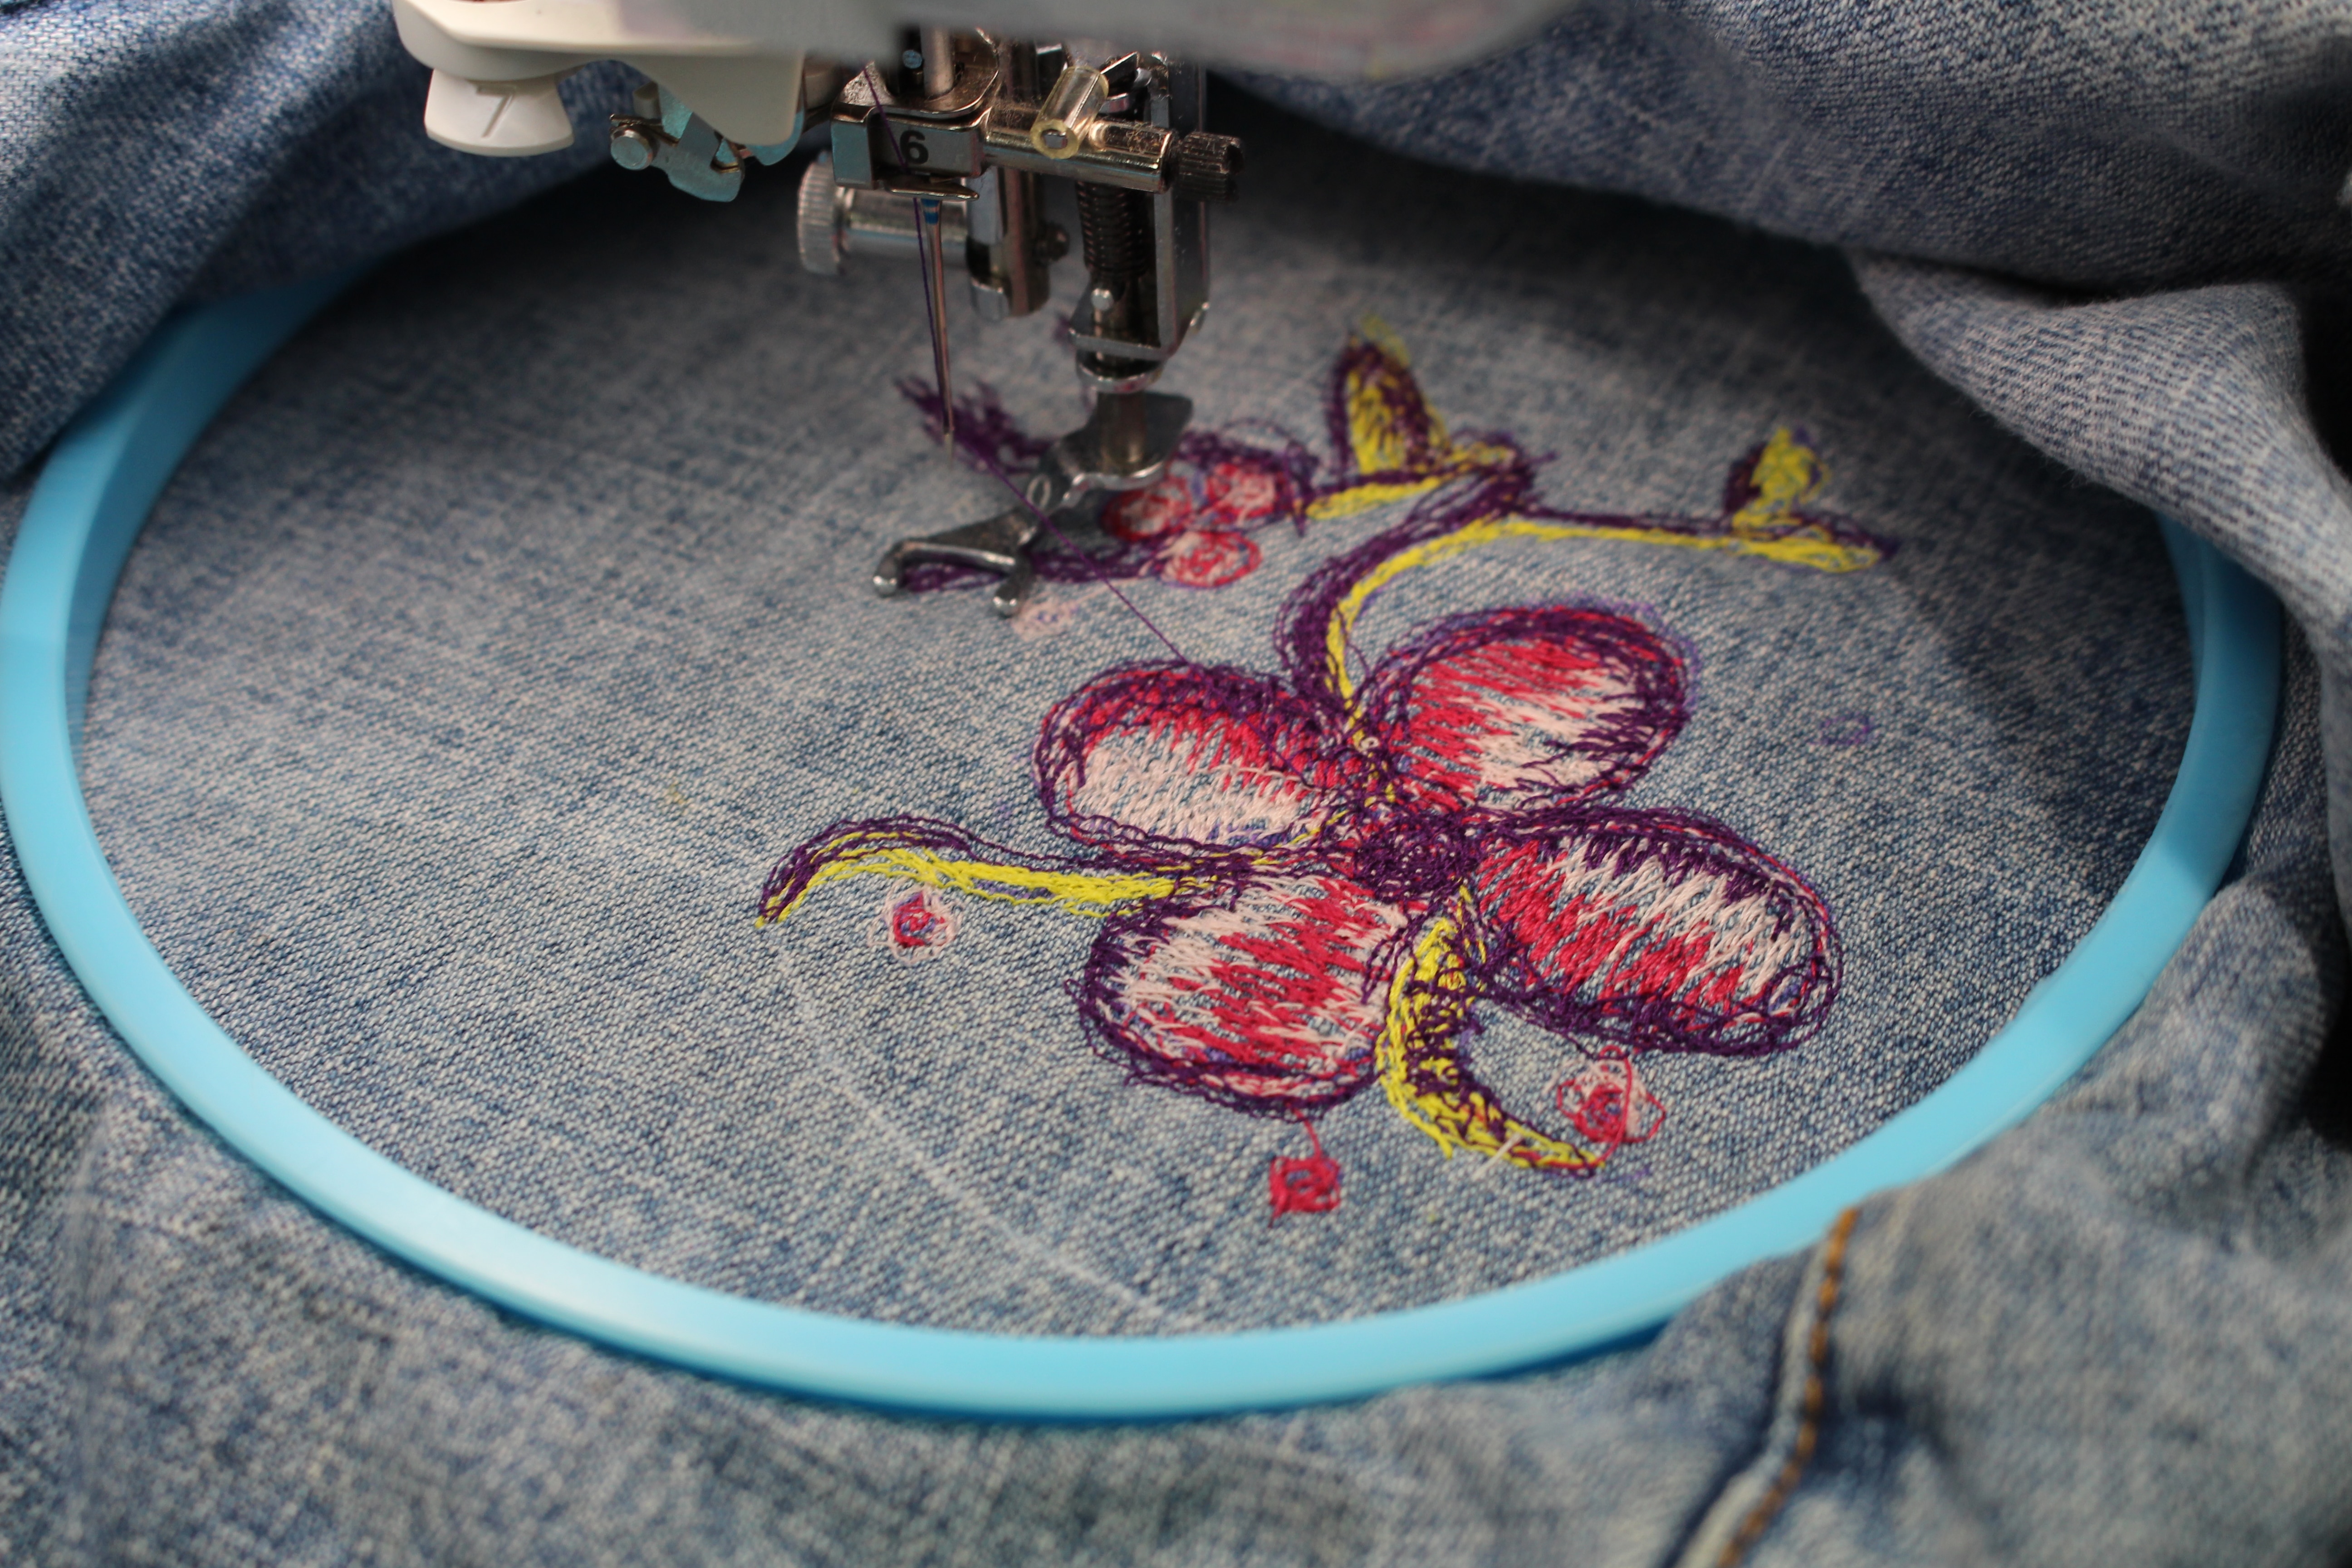
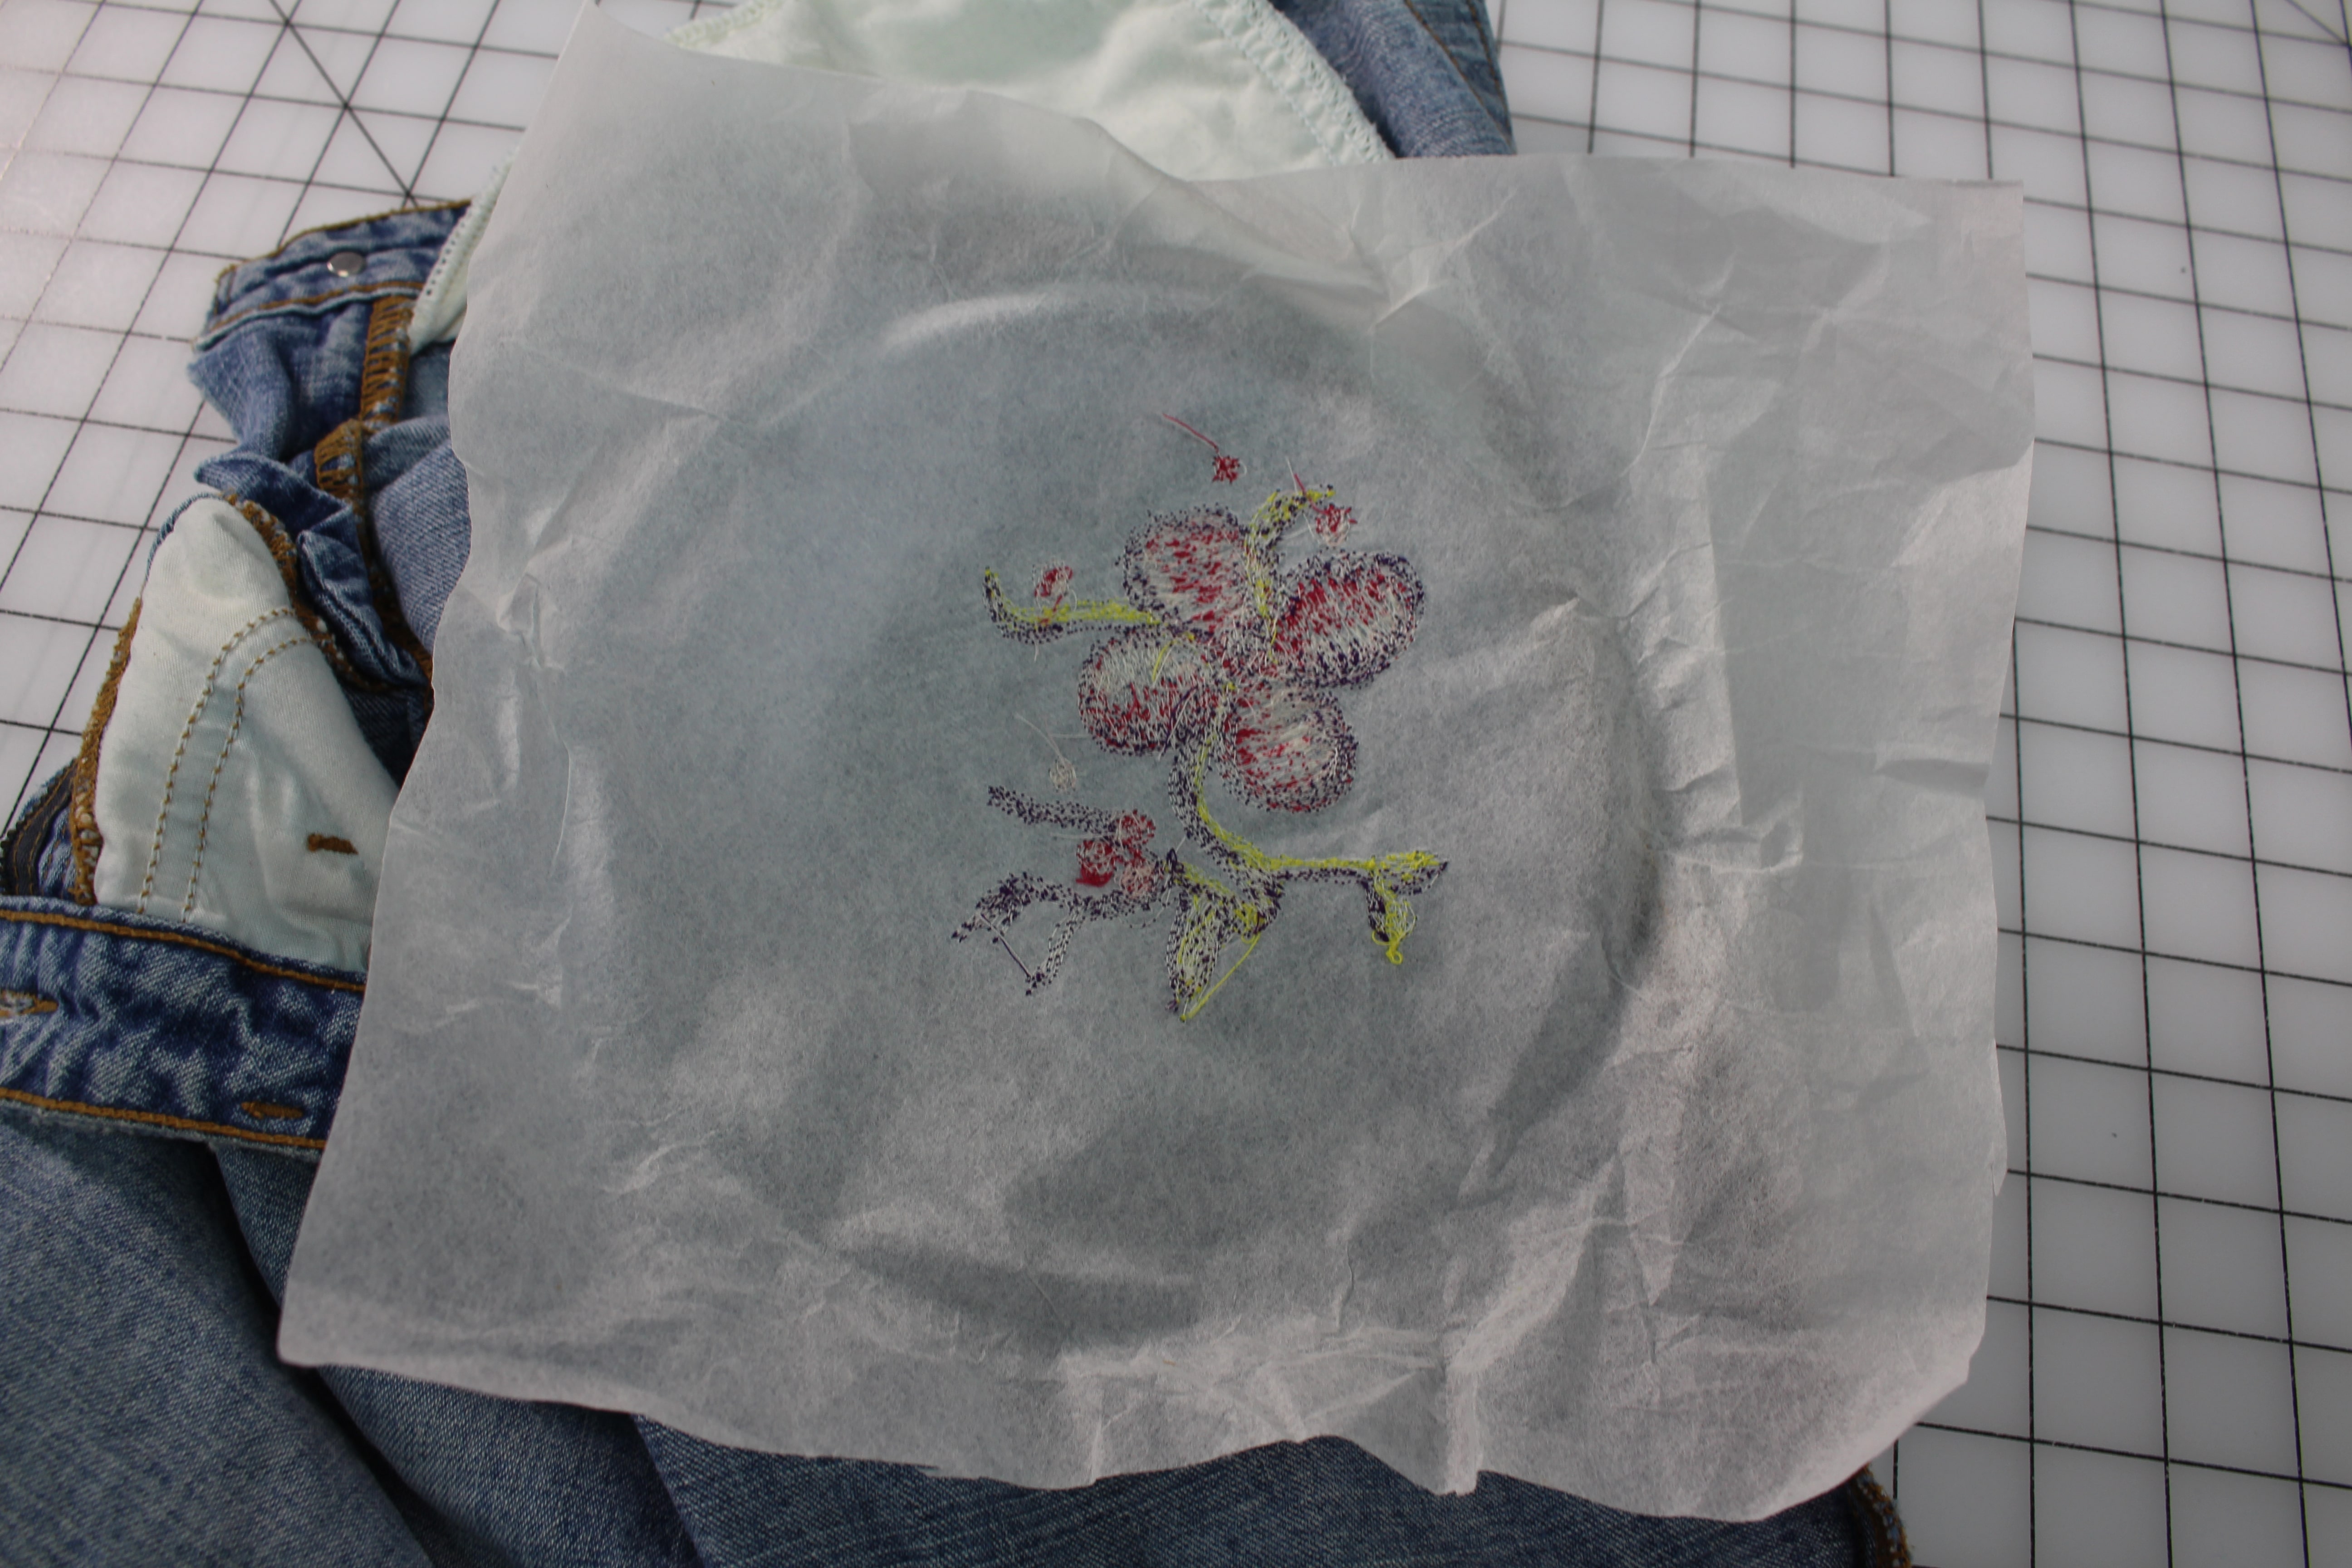
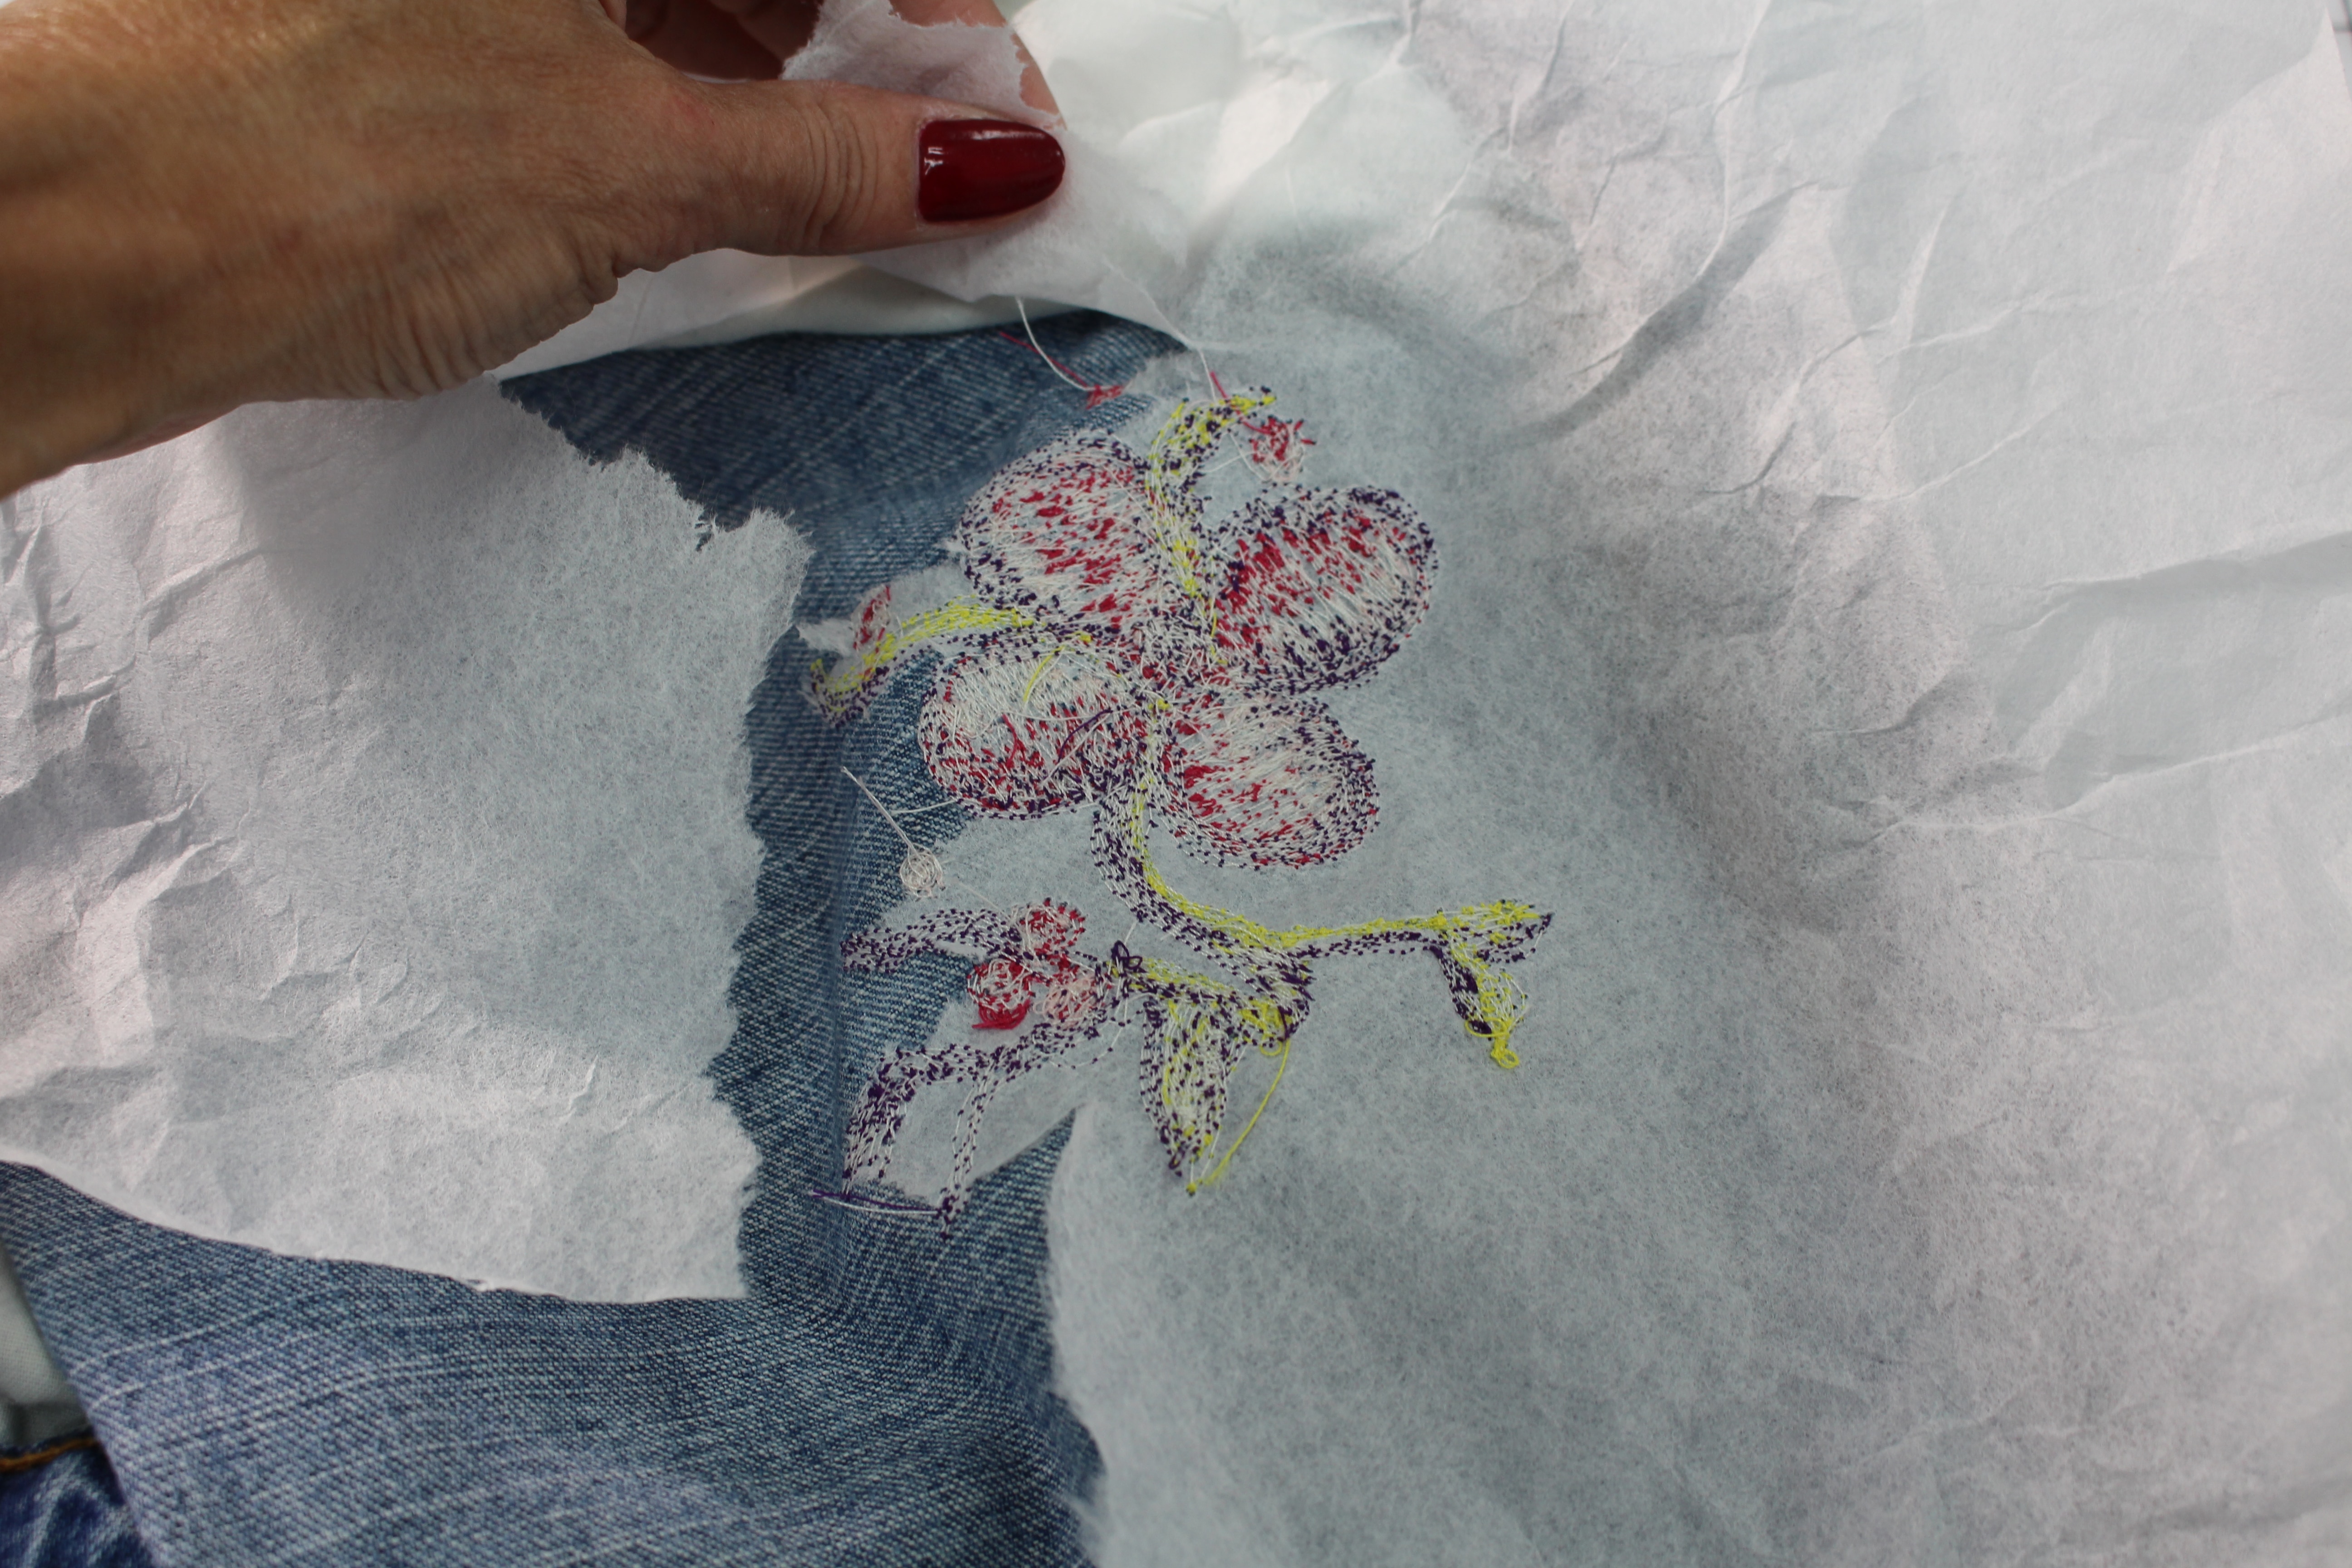
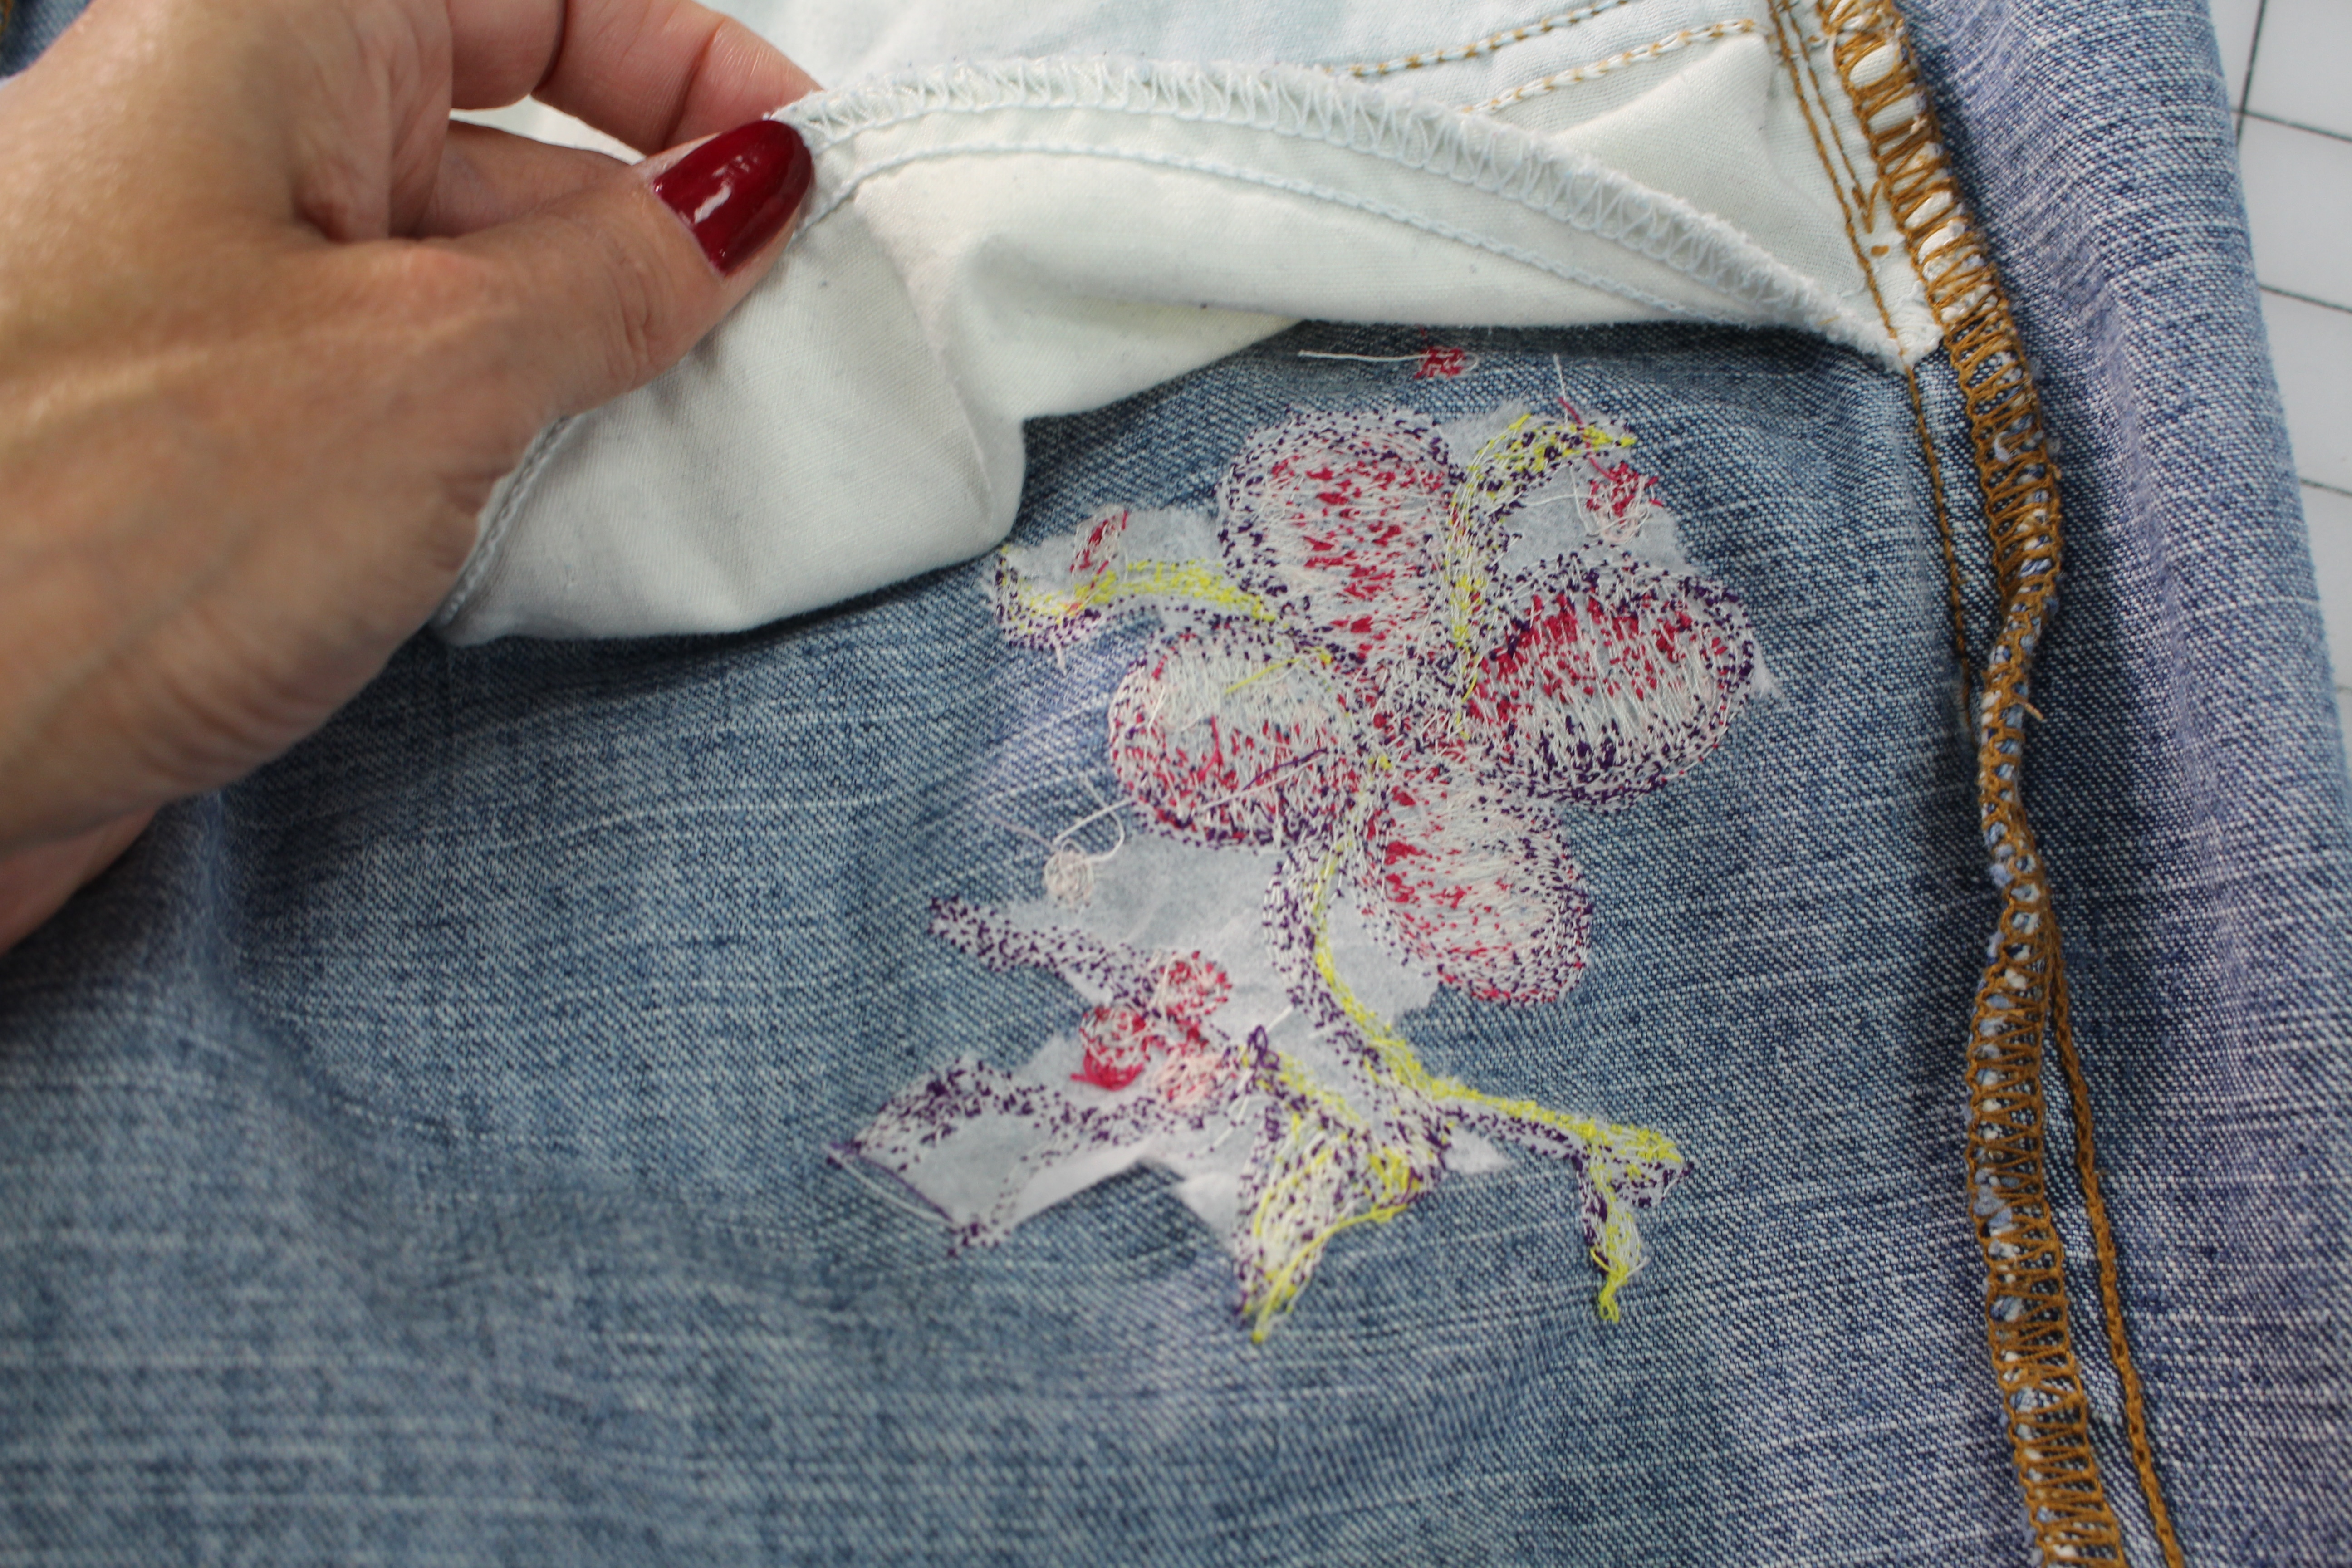
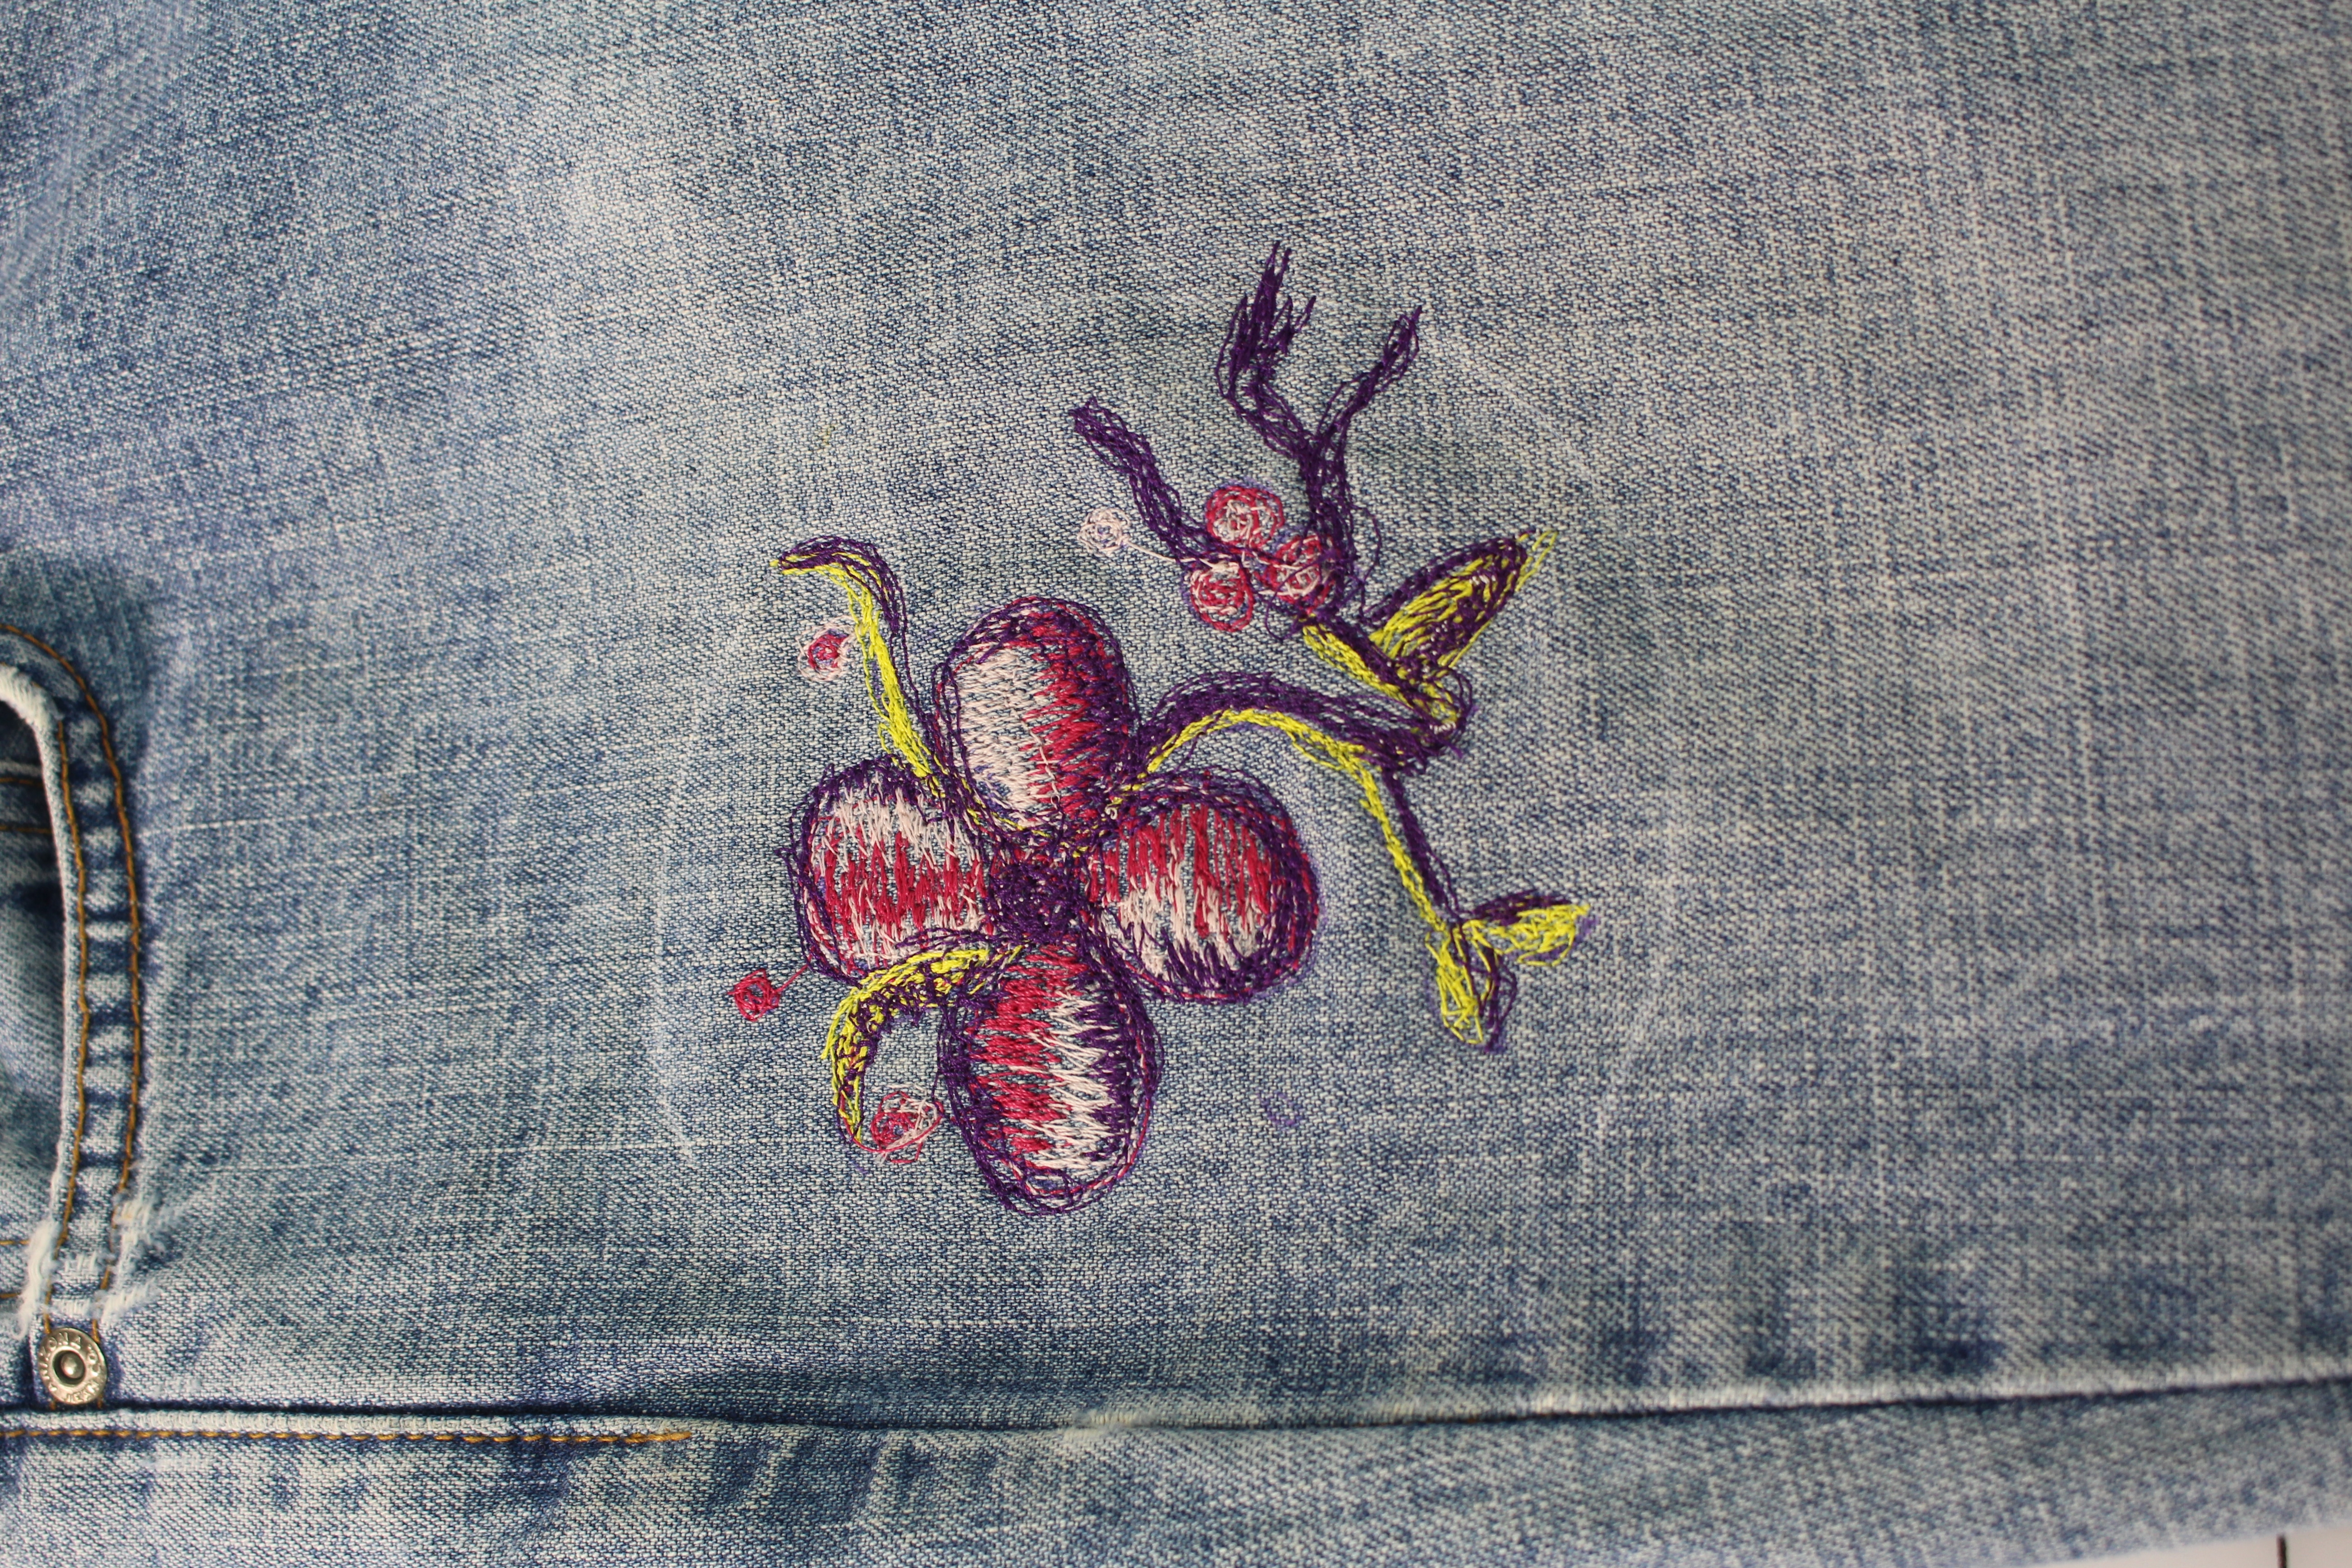
EMBELLISHING JEANS WITH FREE MOTION EMBROIDERY
Embellishing Jeans with Free Motion Embroidery An easy way to restyle or upcycle jeans is to add a touch of embroidery. Free motion embroidery, also referred to as thread painting, is so easy and you don’t even need an embroidery machine for this...
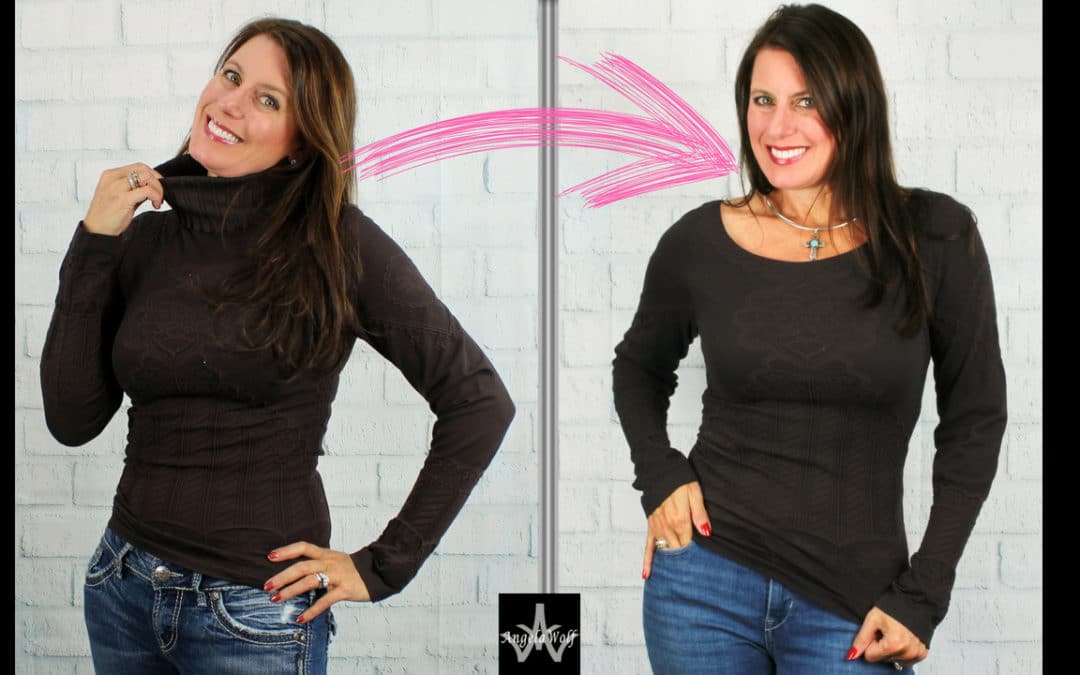
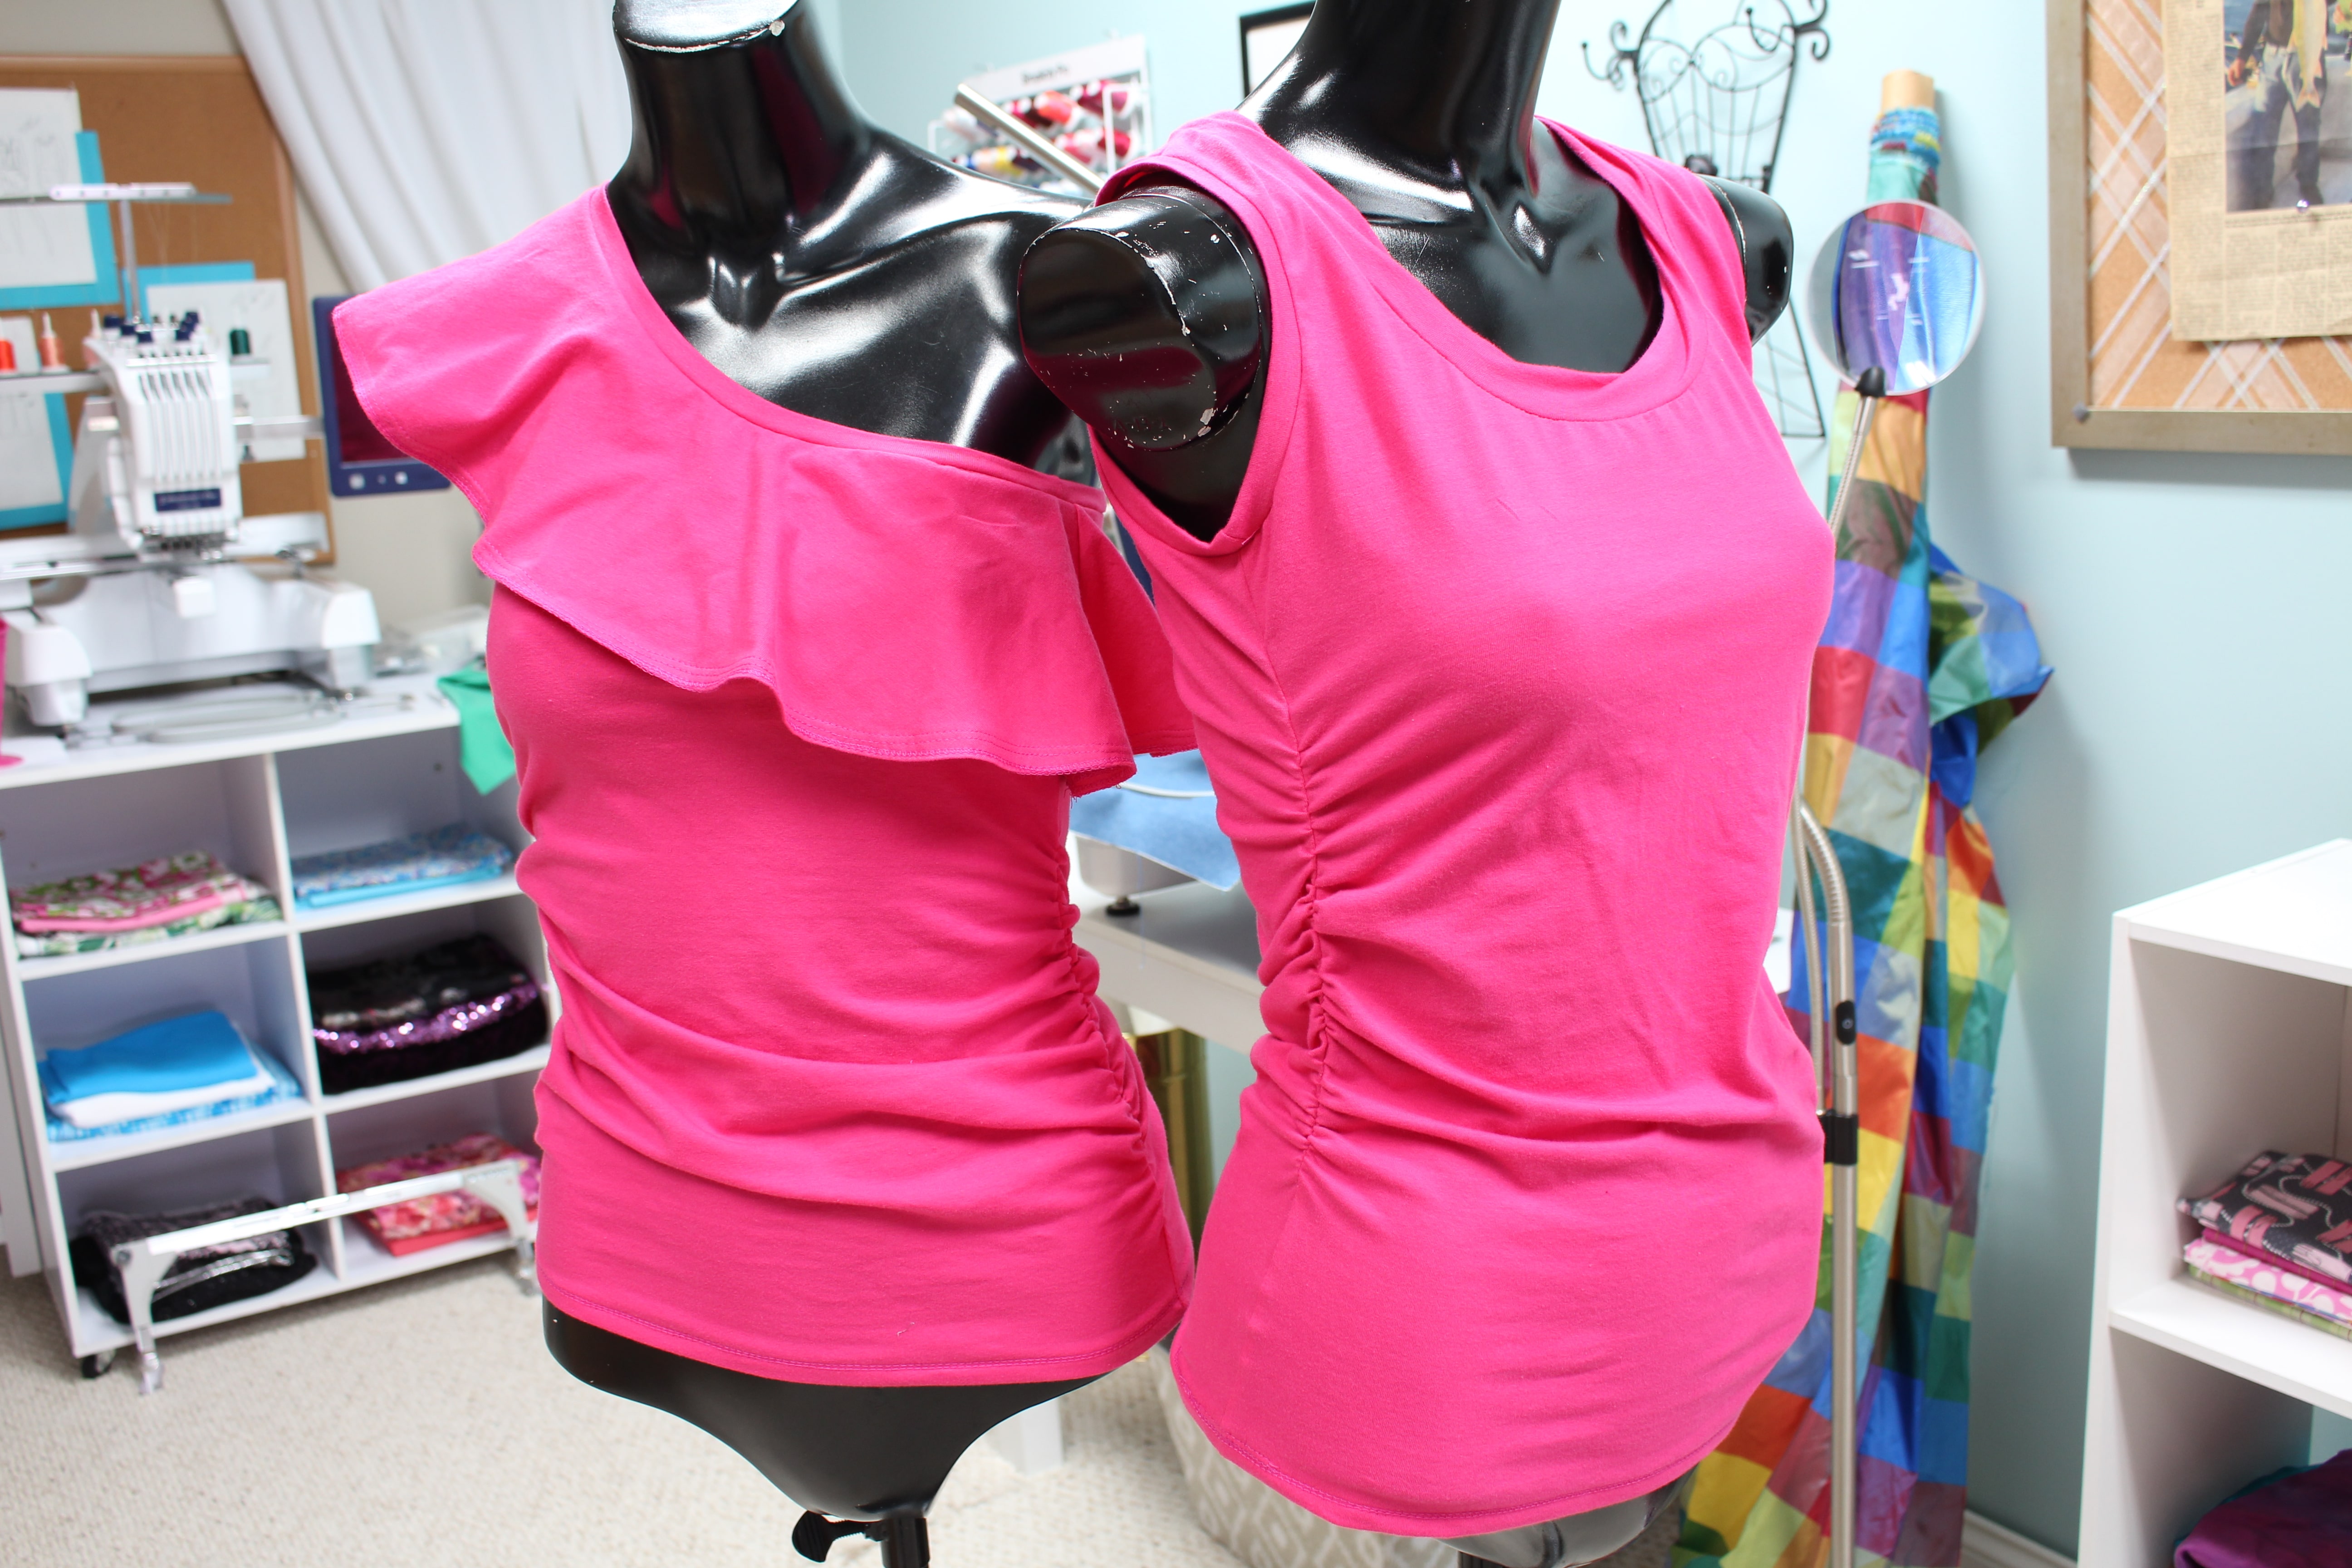
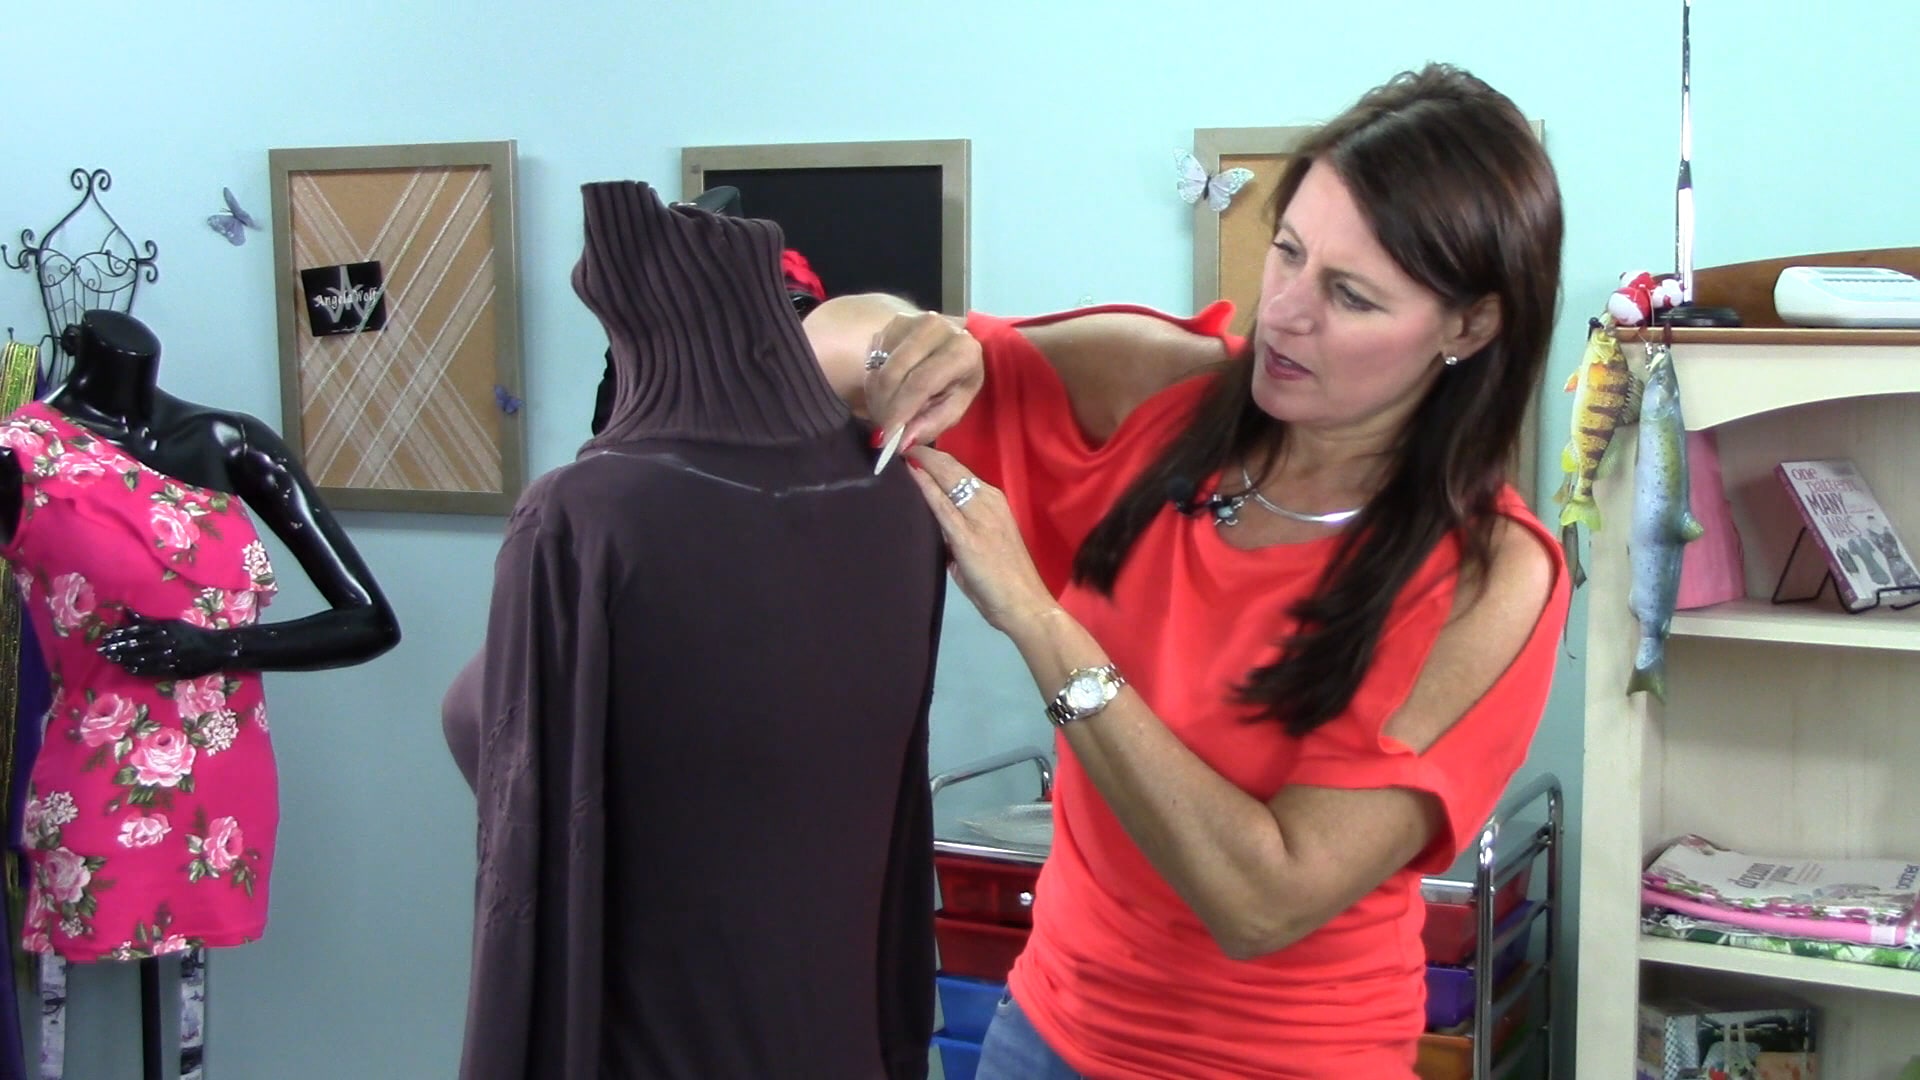
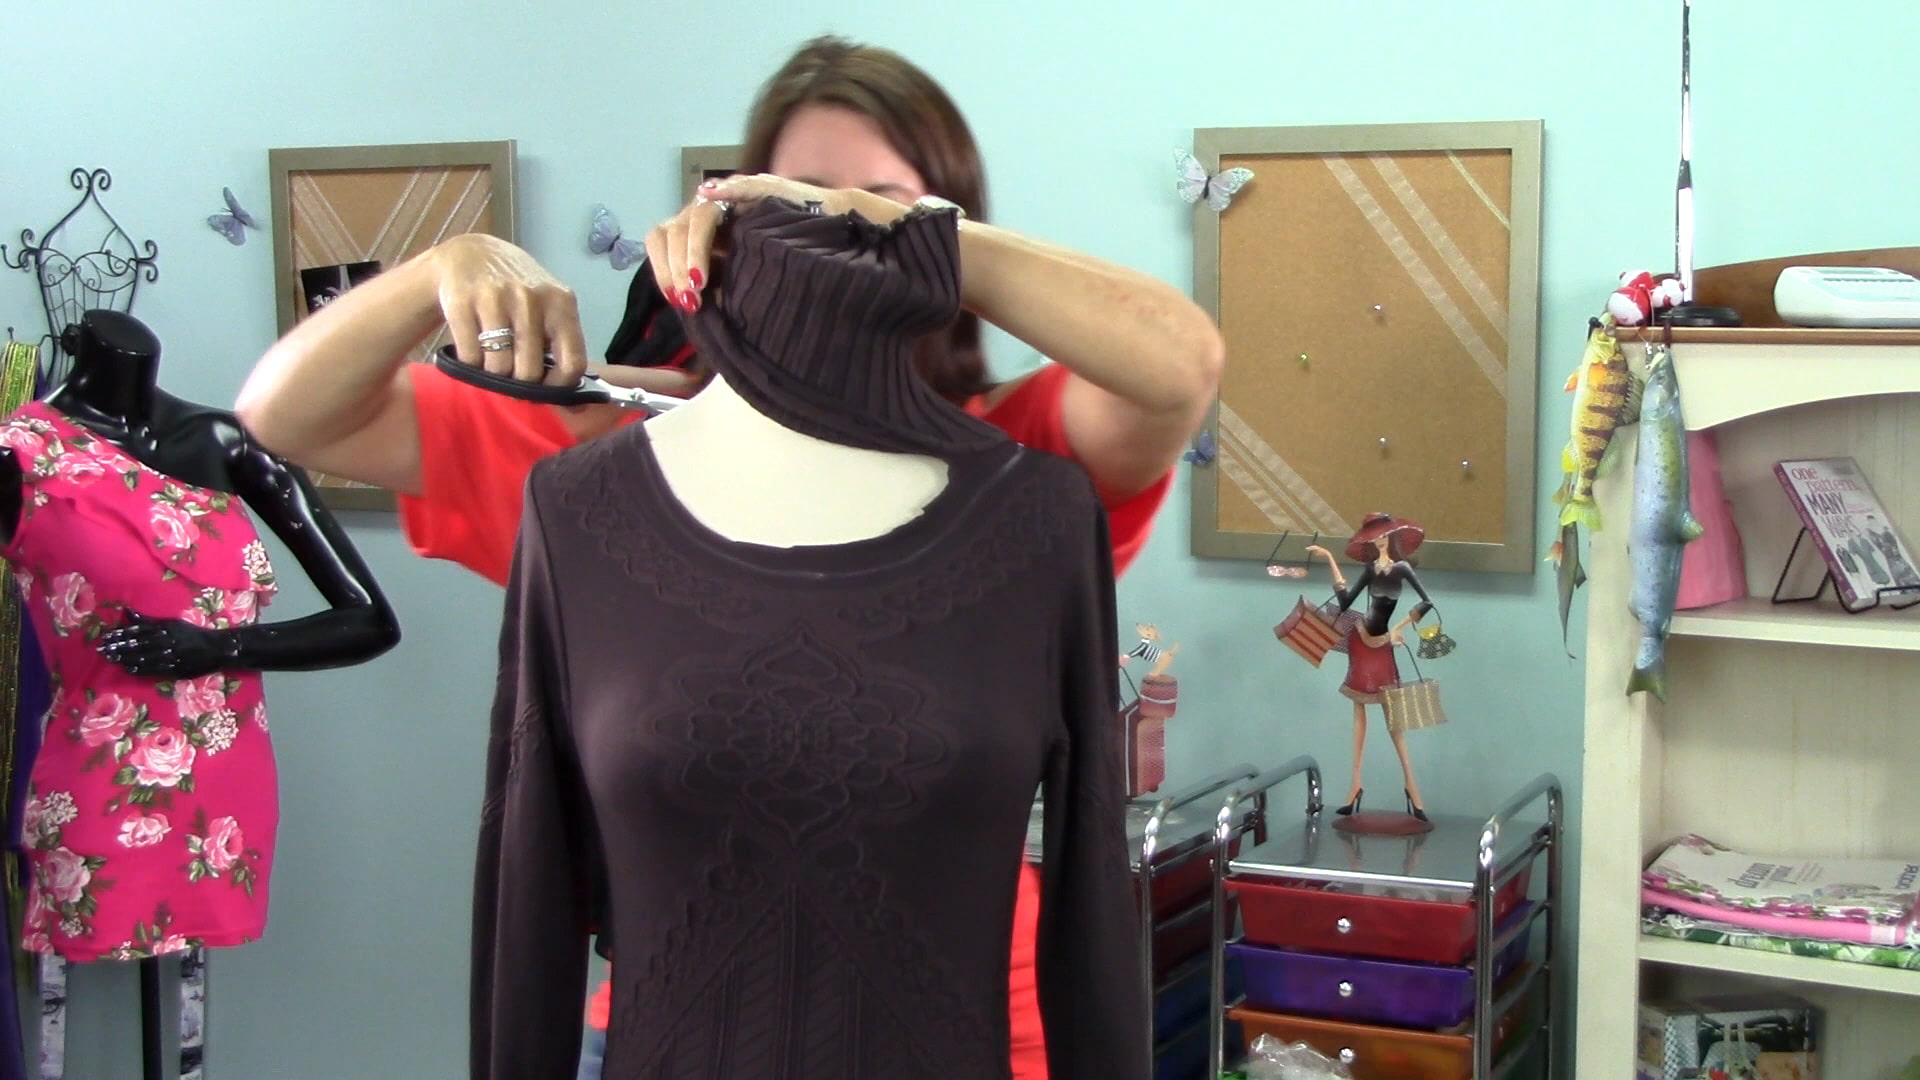
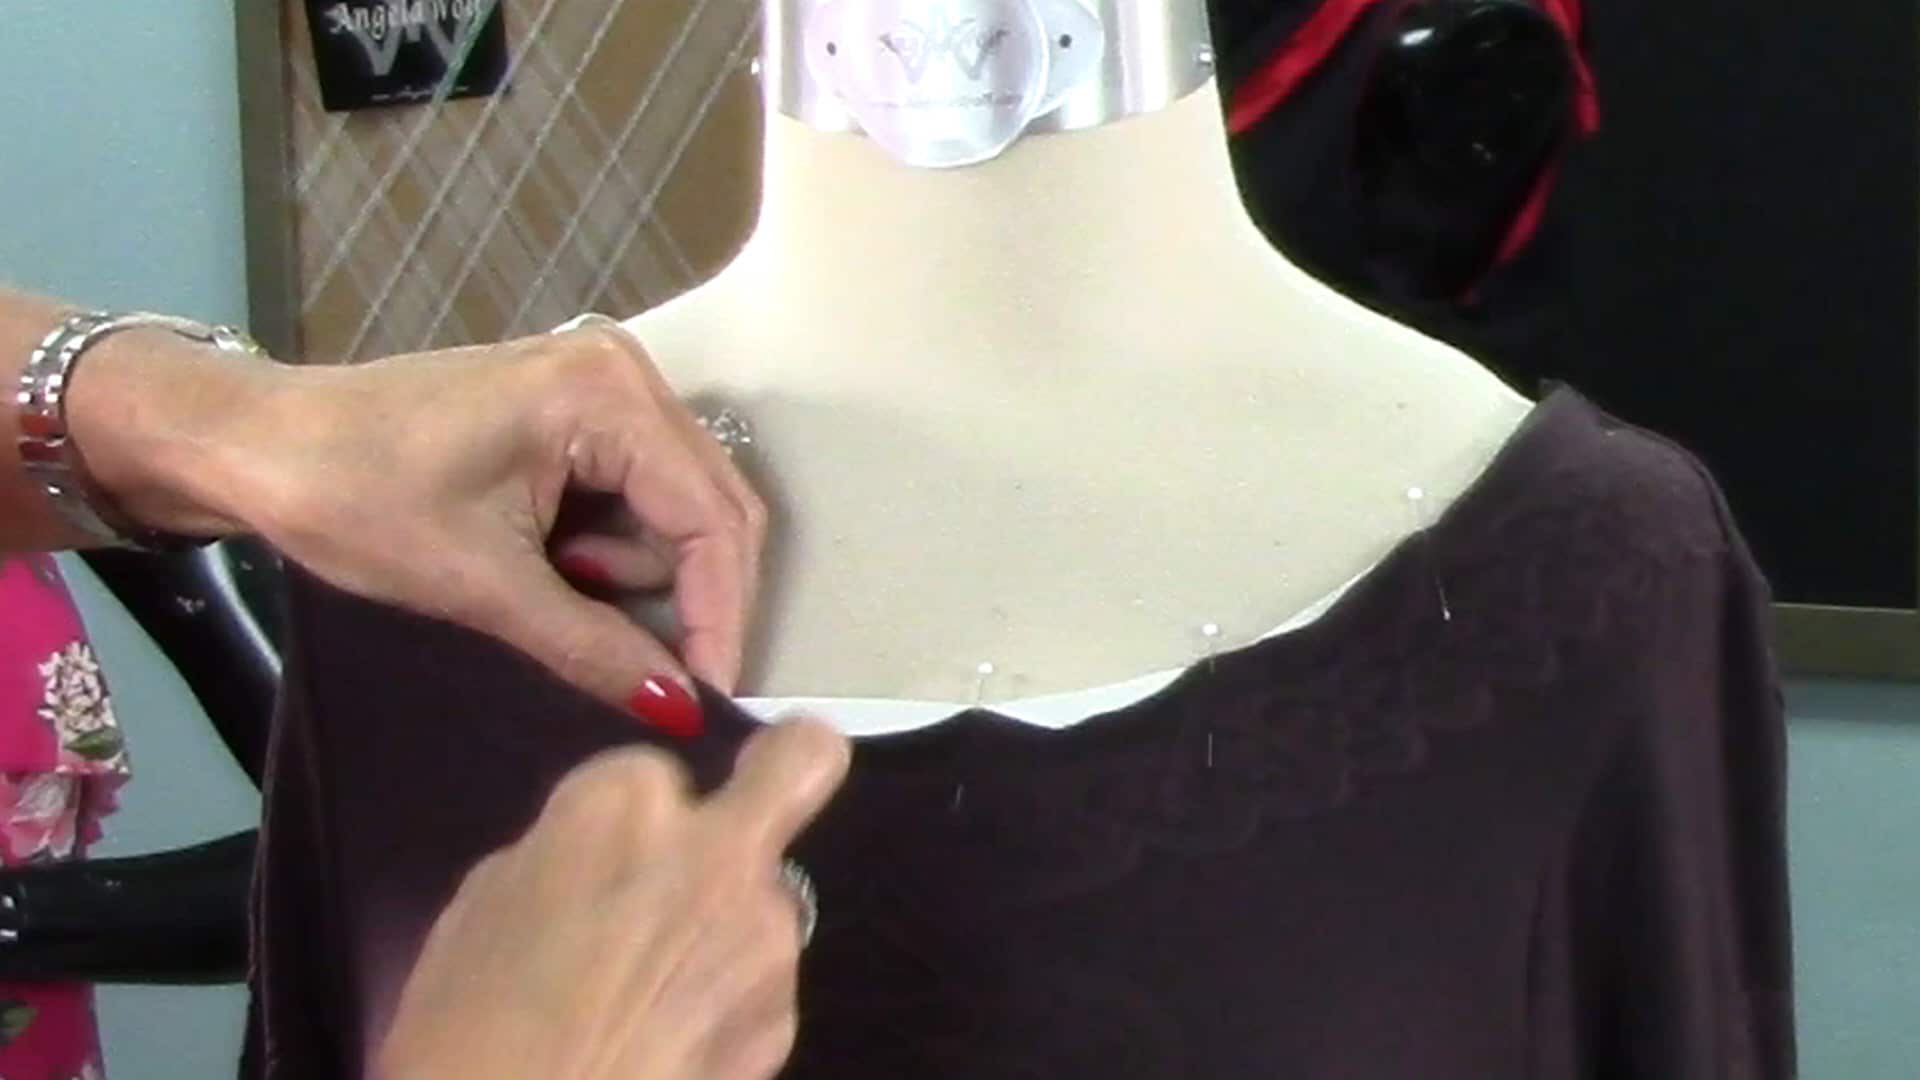
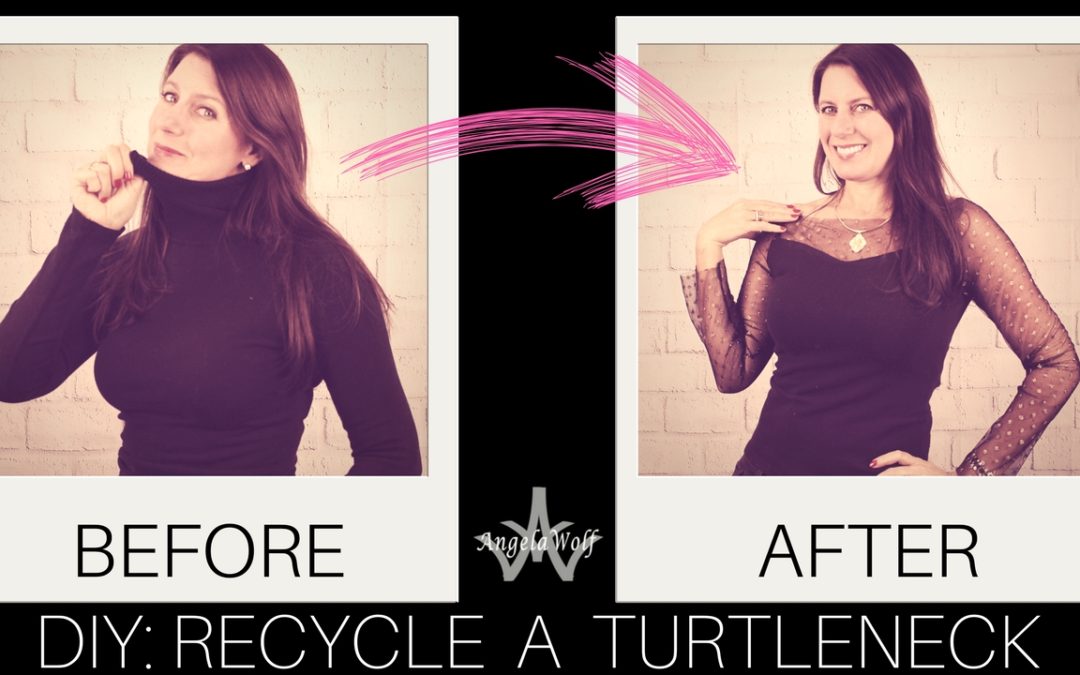
Tutorial: Transform a Turtleneck into a Boatneck
Transform a Turtleneck into a Stylish Boatneck Top Here is another recycle project for the turtlenecks in our closet and its easy - perfect for beginners! For this sewing tutorial I am using a turtleneck that has a design, but any tank top will work. ...
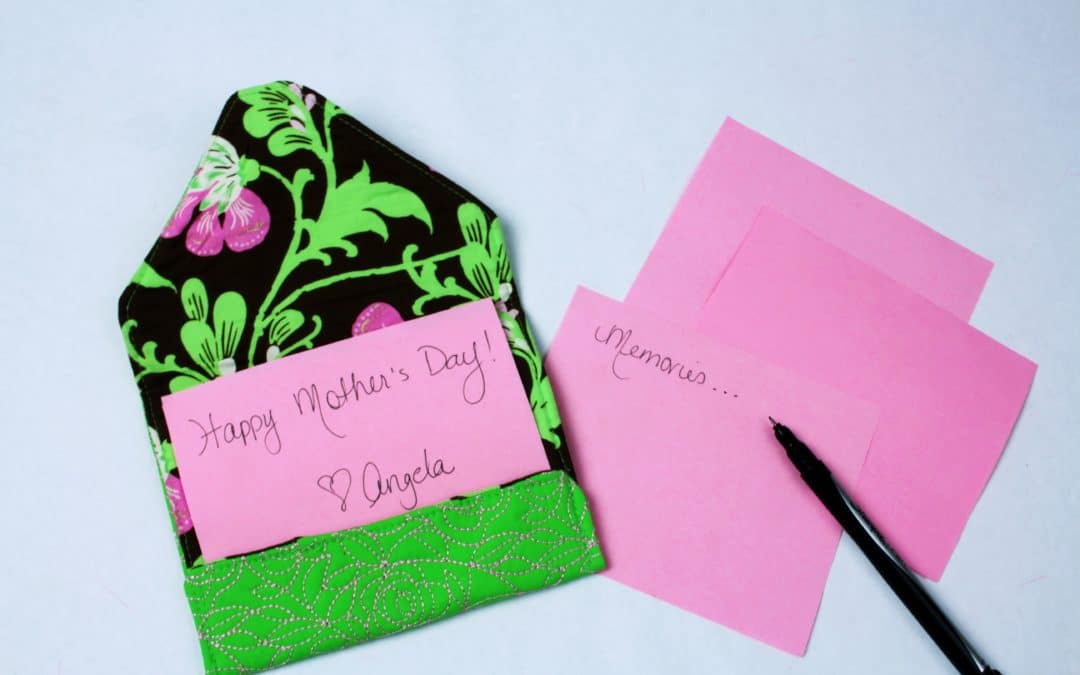
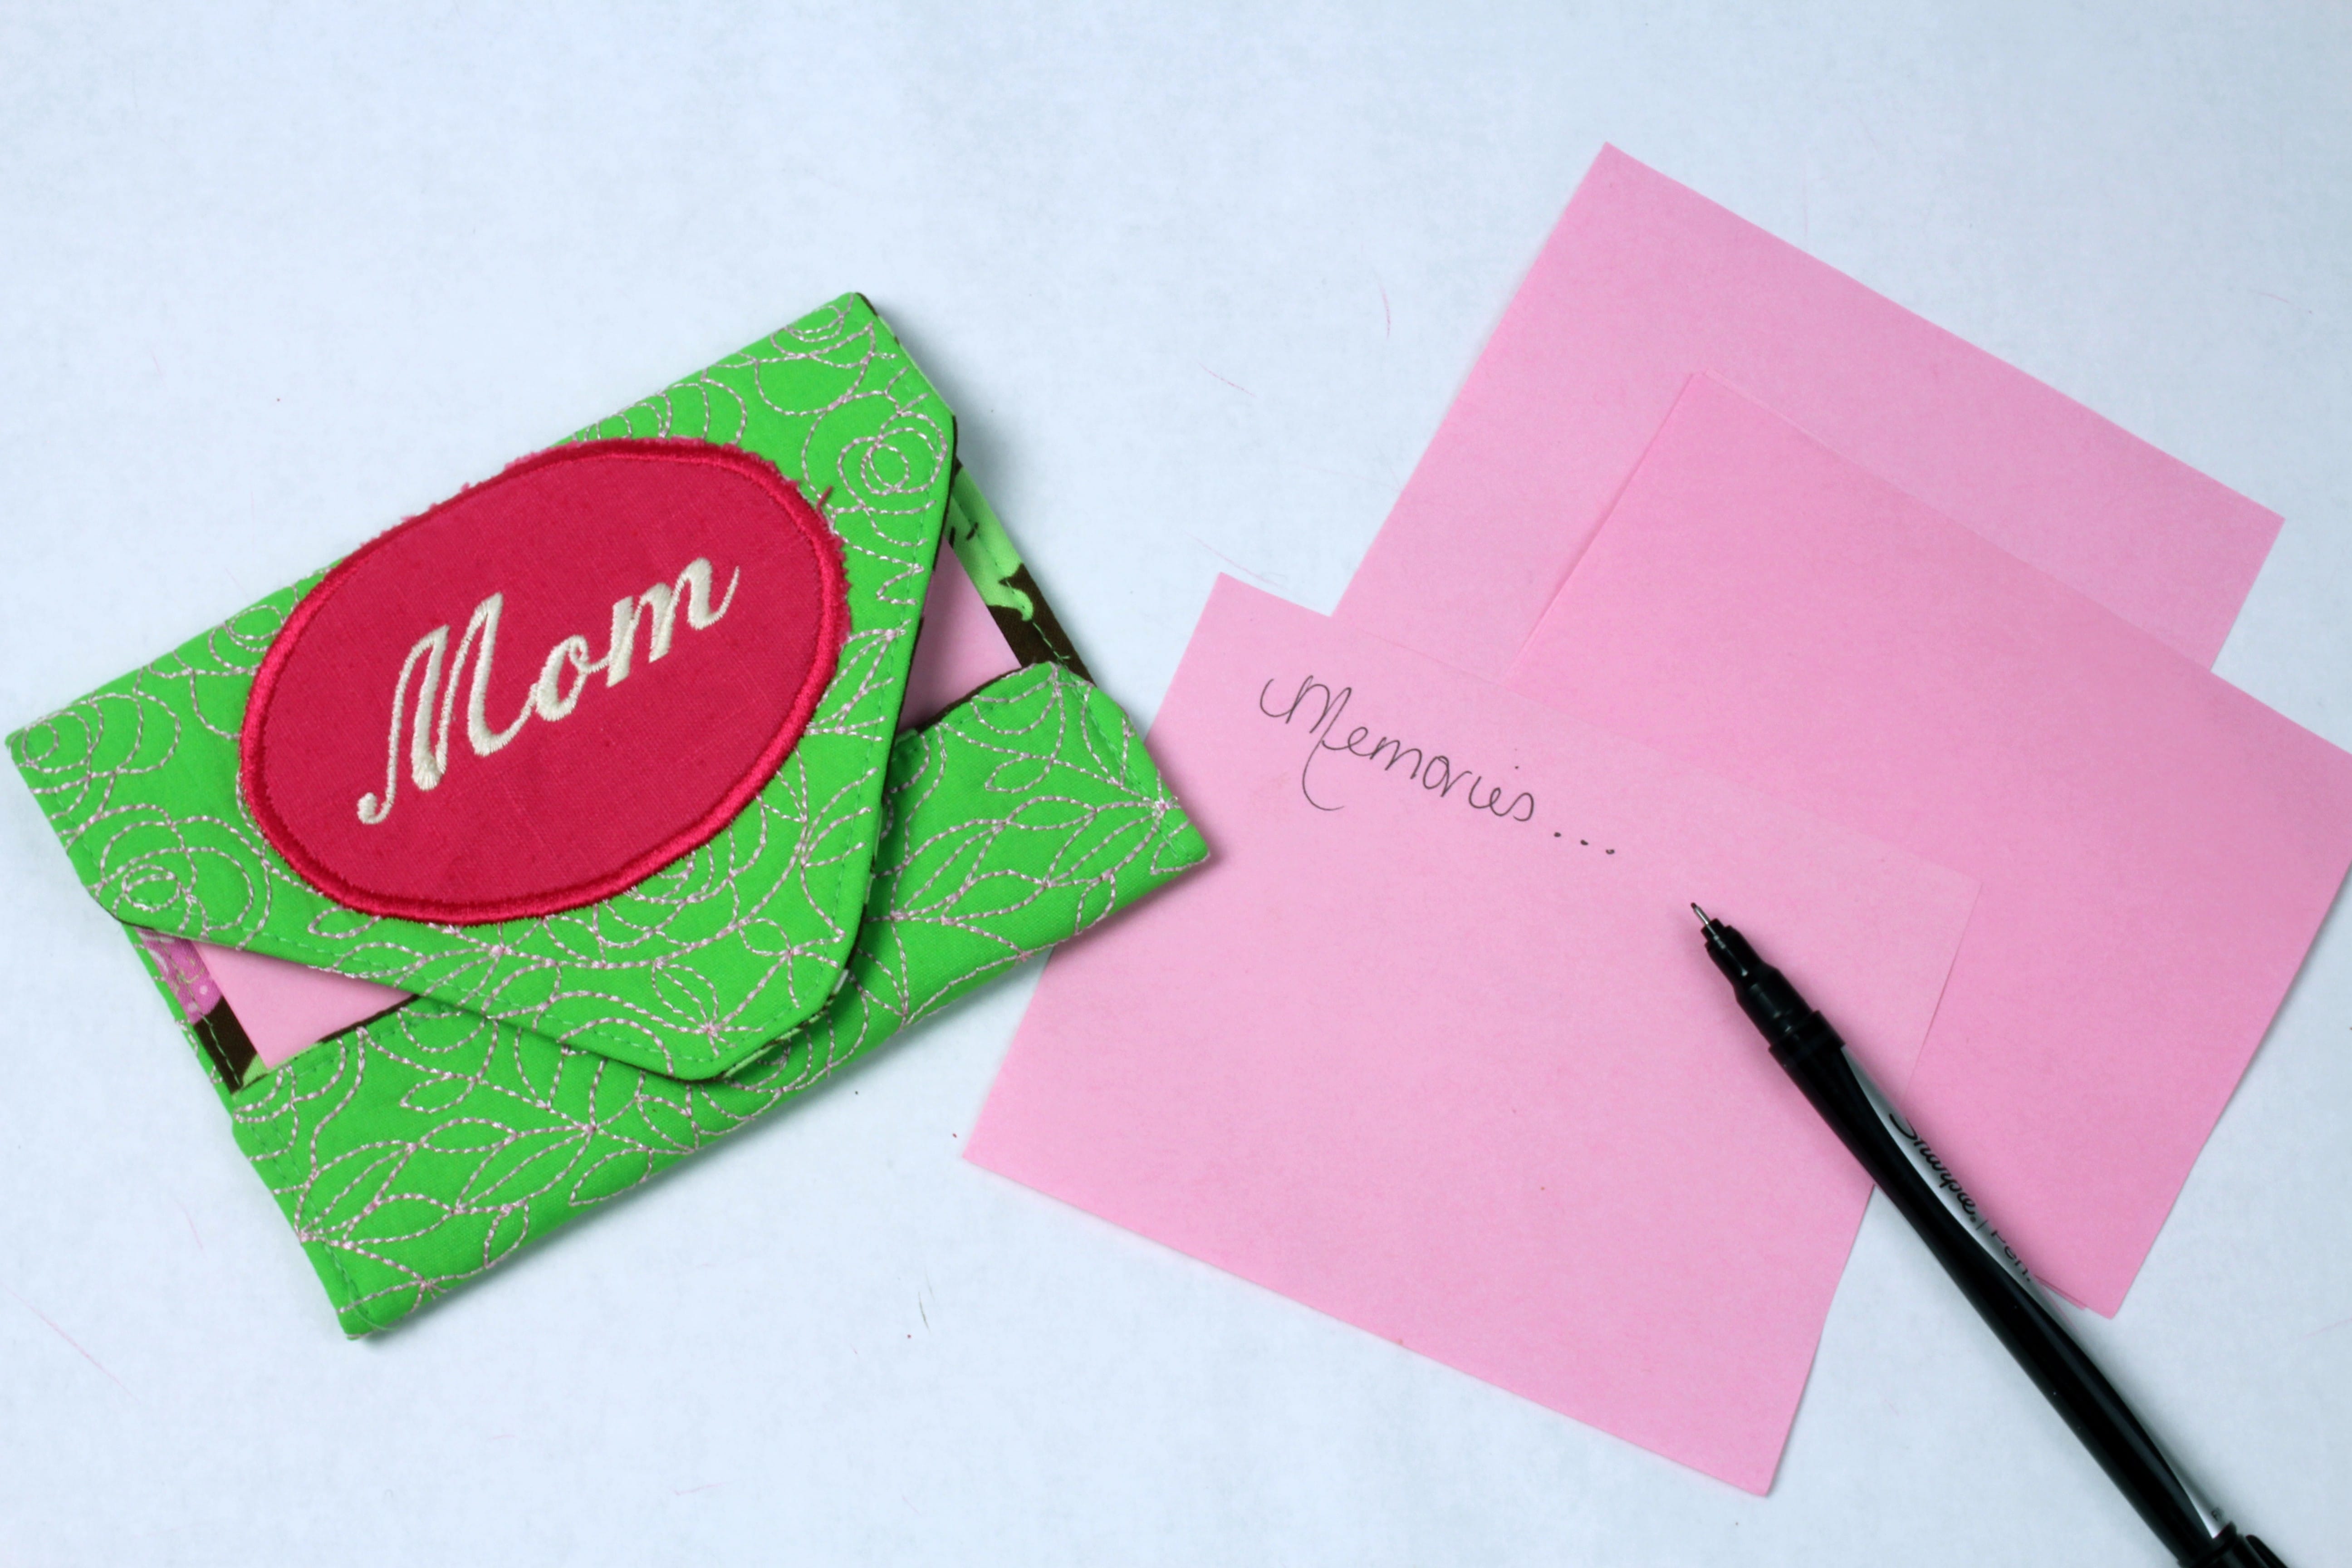
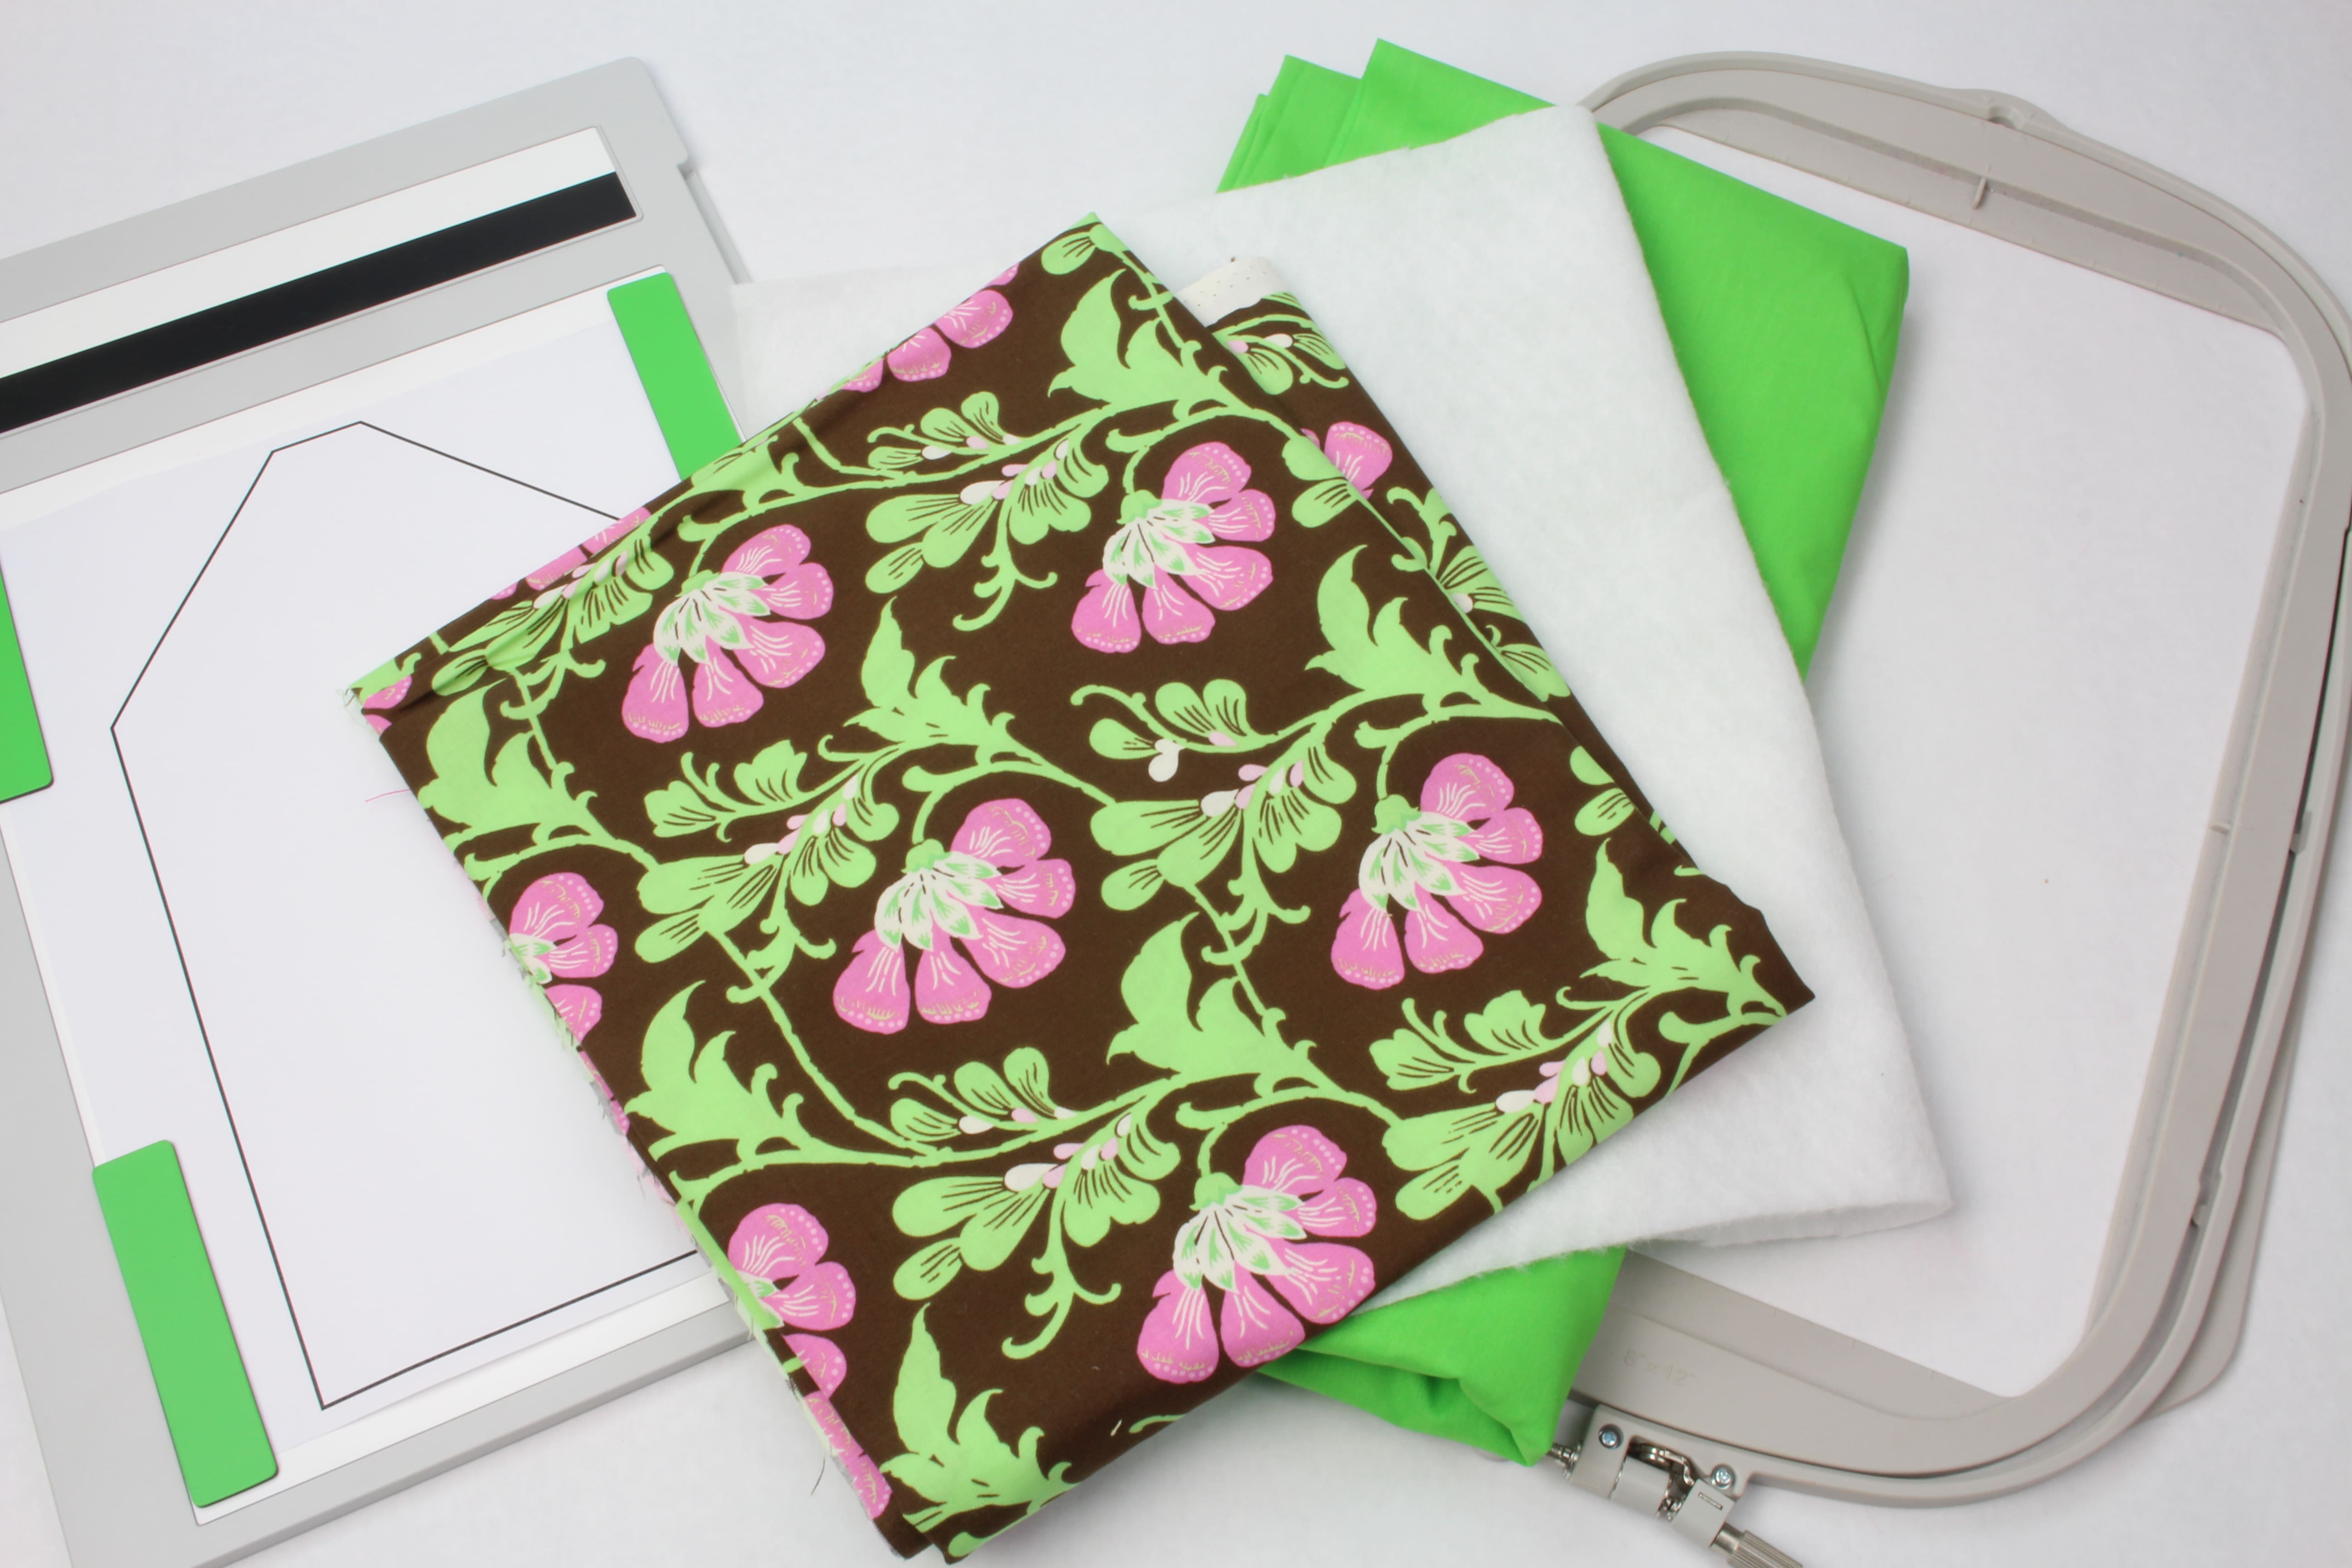
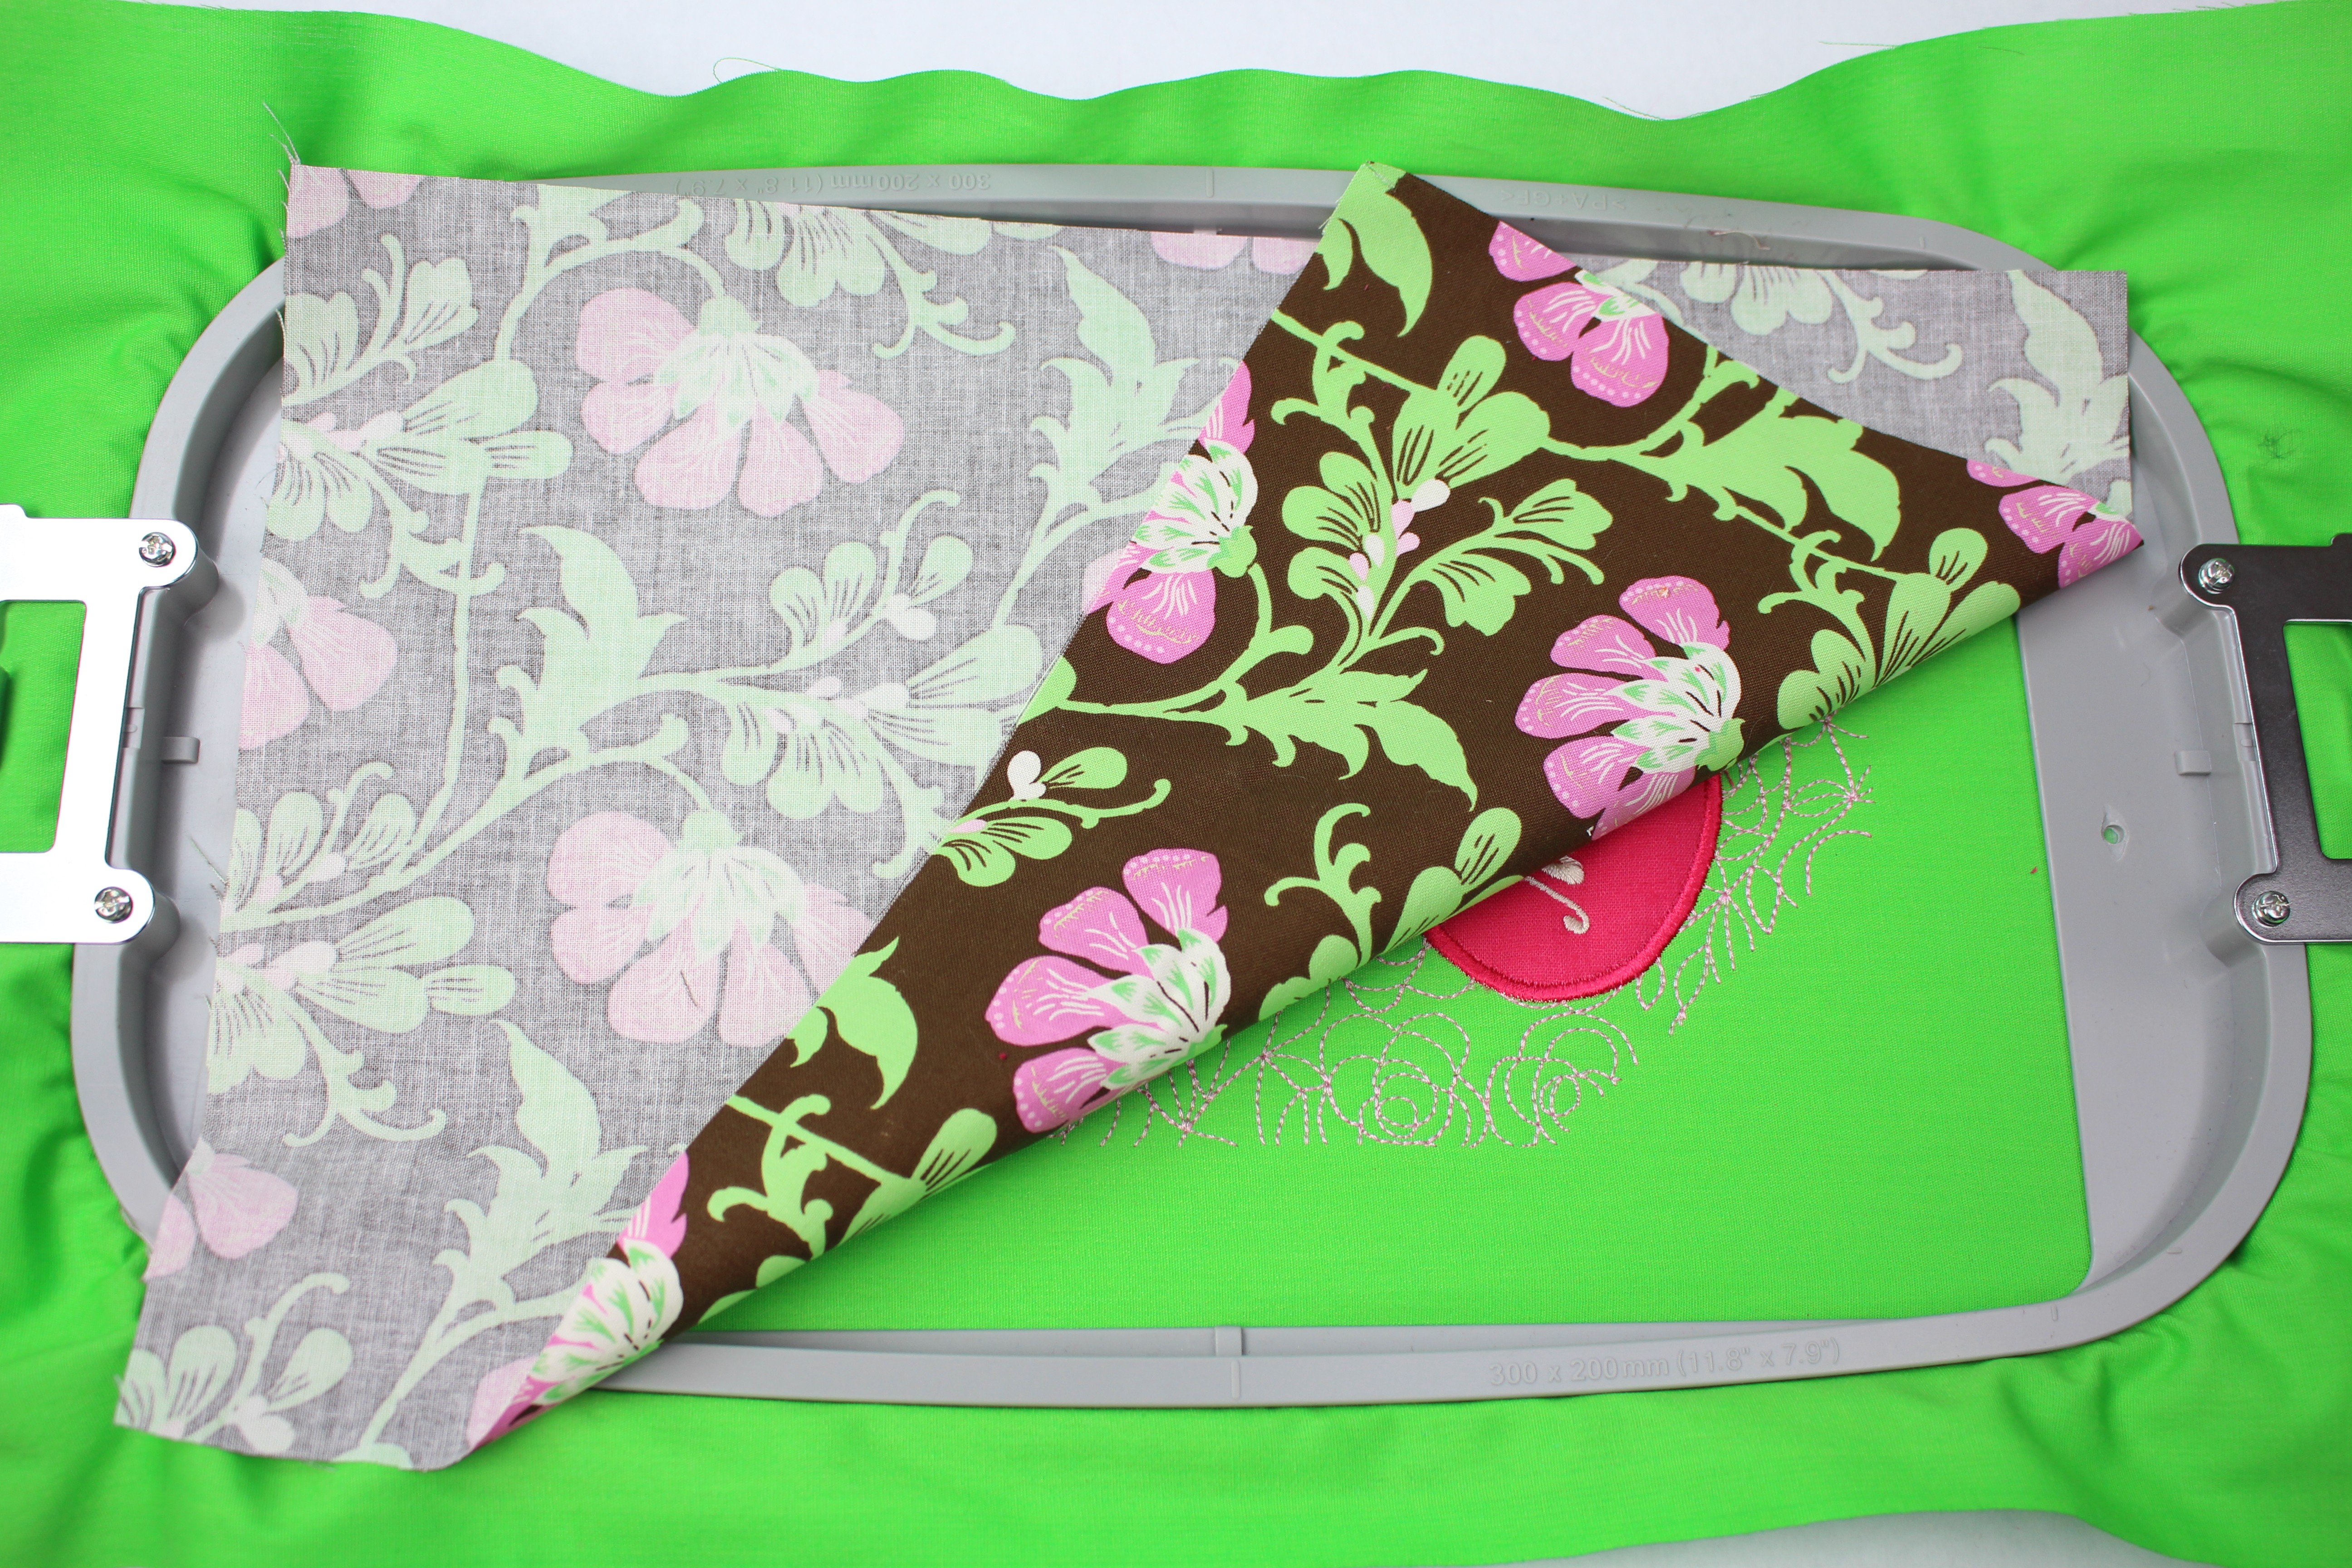
TUTORIAL: DIY CUSTOM MONOGRAM EMBROIDERED FABRIC ENVELOPE
Easy Sewing Project for Mother’s Day or Any Special Day ♥ I was recently going through memory boxes and came across letters from a few people so dear to my heart that have since passed away. This made me think, I hardly write letters anymore! An email,...
TUTORIAL: HOW TO SEW A FLATLOCK STITCH ON THE SERGER
Flatlock Stitching on a Serger There are so many stitches we can do with our serger / overlock machines! You might recognize the flatlock stitch as seen on sportswear or a decorative stitch used to connect two pieces of fabric. This stitch is fun and easy to do!...
DIY RESTYLE PROJECT: TURTLENECK MAKE OVER
I have a few turtlenecks that are made of beautiful fabrics, but I can’t stand the high, tight neckline. Time for another DIY recycle project to makeover this sweater! The look of see through fabric, embroidered, and embellished tulle are so trendy right now...

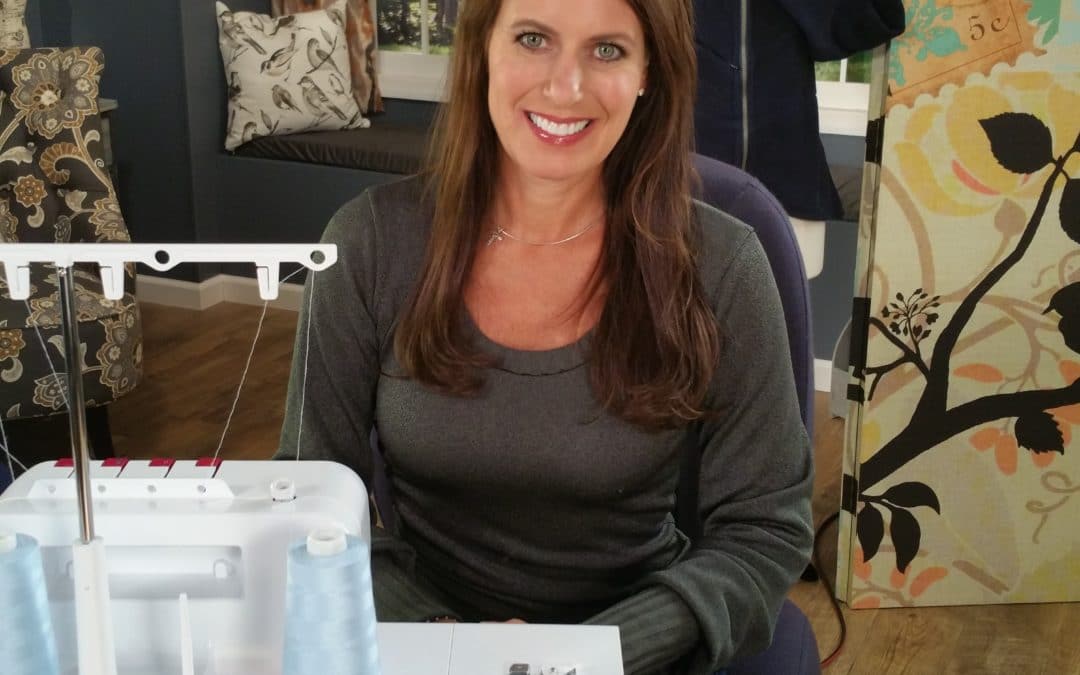
TUTORIAL: HOW TO THREAD THE BROTHER DOUBLE SIDED COVERSTITCH MACHINE CV3550
I was so excited to see this new double sided top coverstitch machine by Brother! I can think of so many applications for these decorative stitches including sportswear, decorative stitching, chainstitch, hemming knits, and so much more. I am going to...
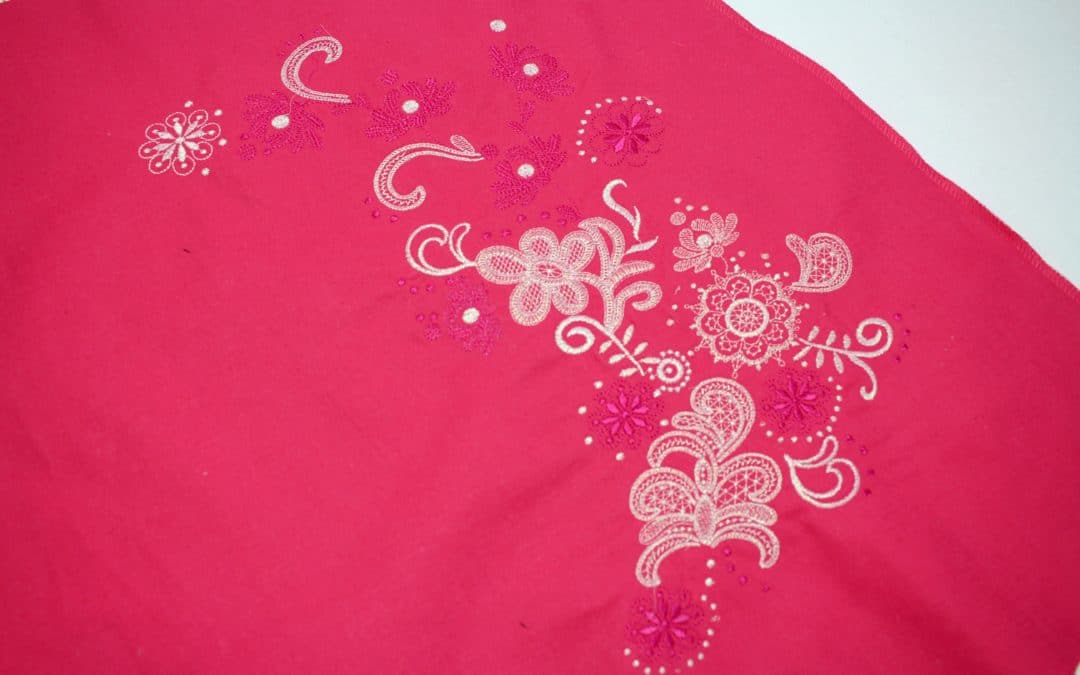
UPCYCLE ? DESIGN A SKIRT WITH EMBROIDERY
Embroidery is such a hot trend this spring! Whether you are sewing a skirt from scratch or recycling one from the back of your closet, adding a touch of embroidery can create an entirely fresh look. Keep in mind this would look great on a dress too ? ...