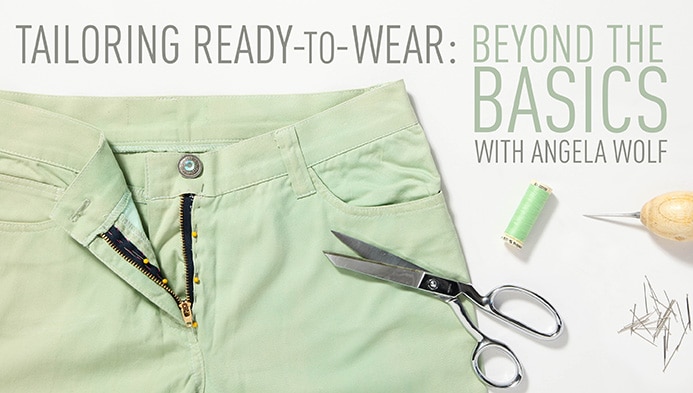
No Results Found
The page you requested could not be found. Try refining your search, or use the navigation above to locate the post.

There are so many stitches we can do with our serger / overlock machines! You might recognize the flatlock stitch as seen on sportswear or a decorative stitch used to connect two pieces of fabric. This stitch is fun and easy to do!
Supplies:
Use the blind hem foot – alter the settings on the foot to stitch across half of the fabric.
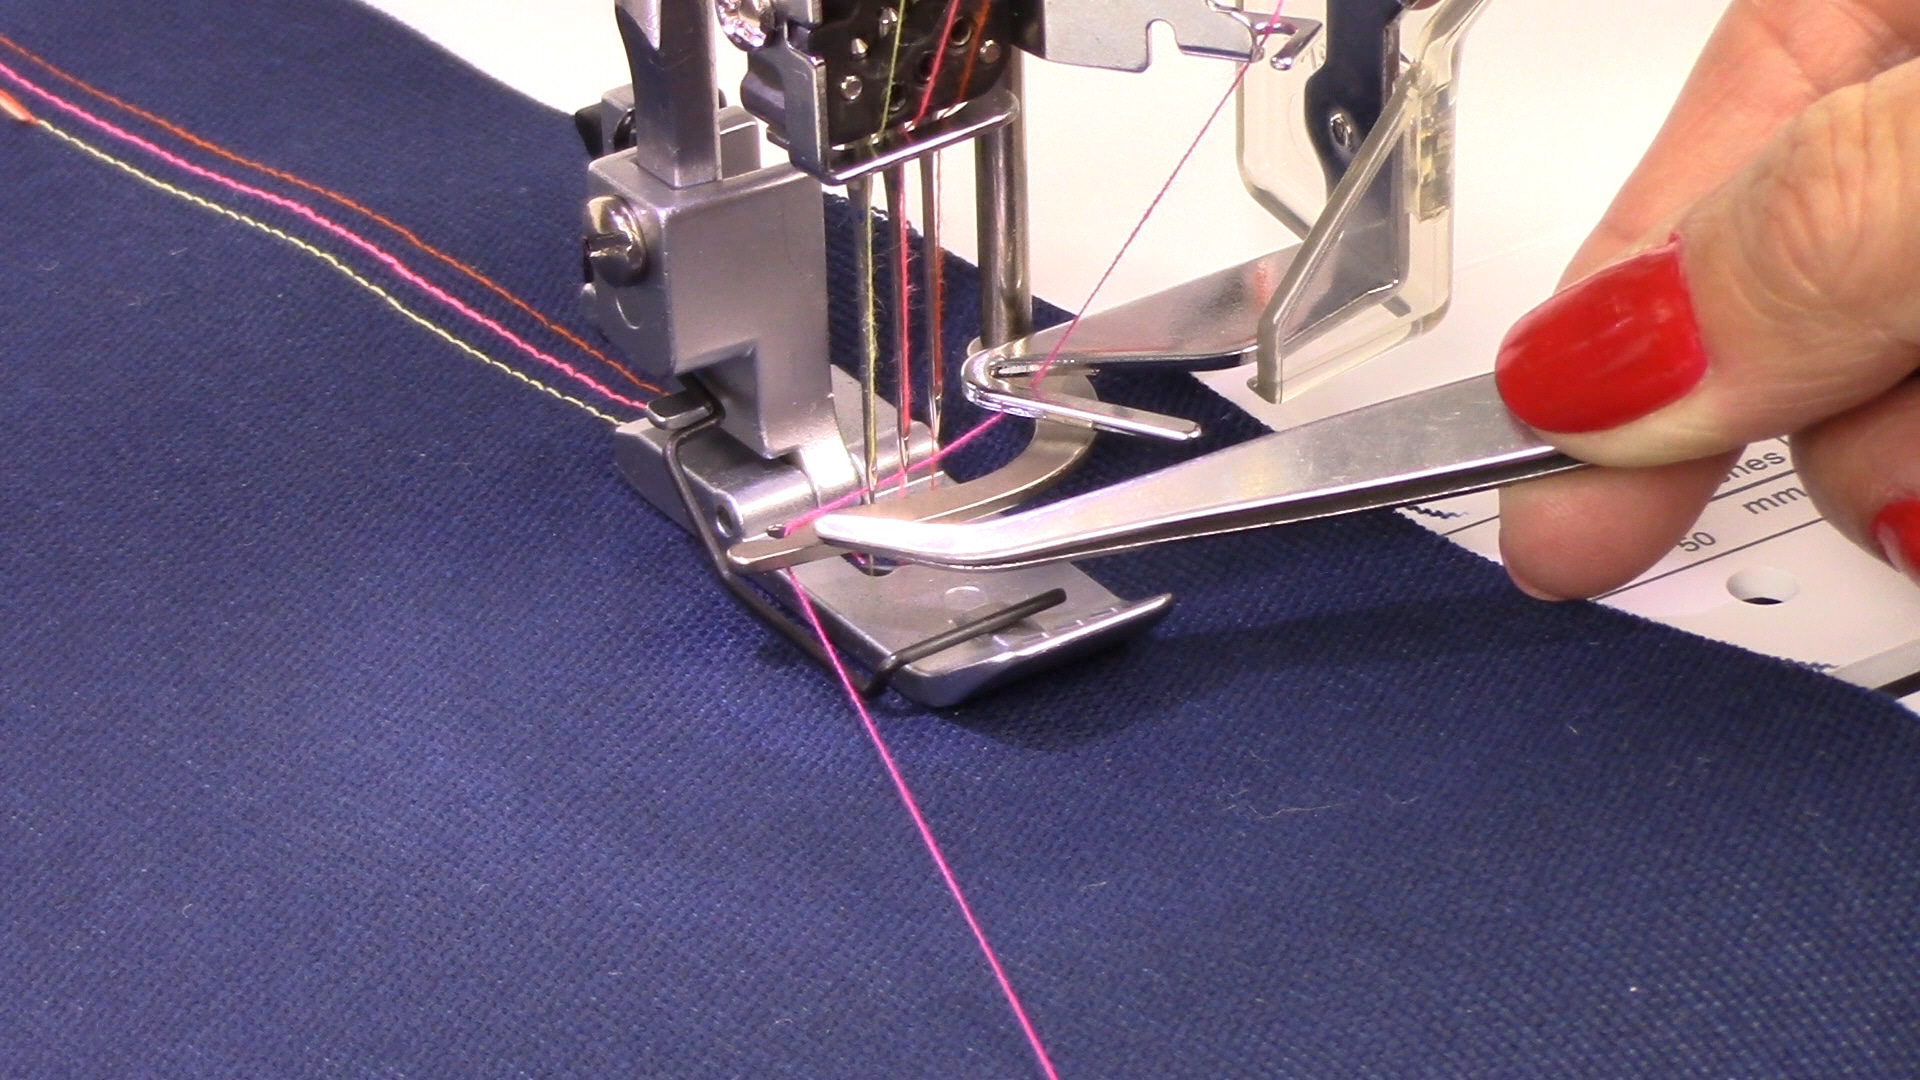
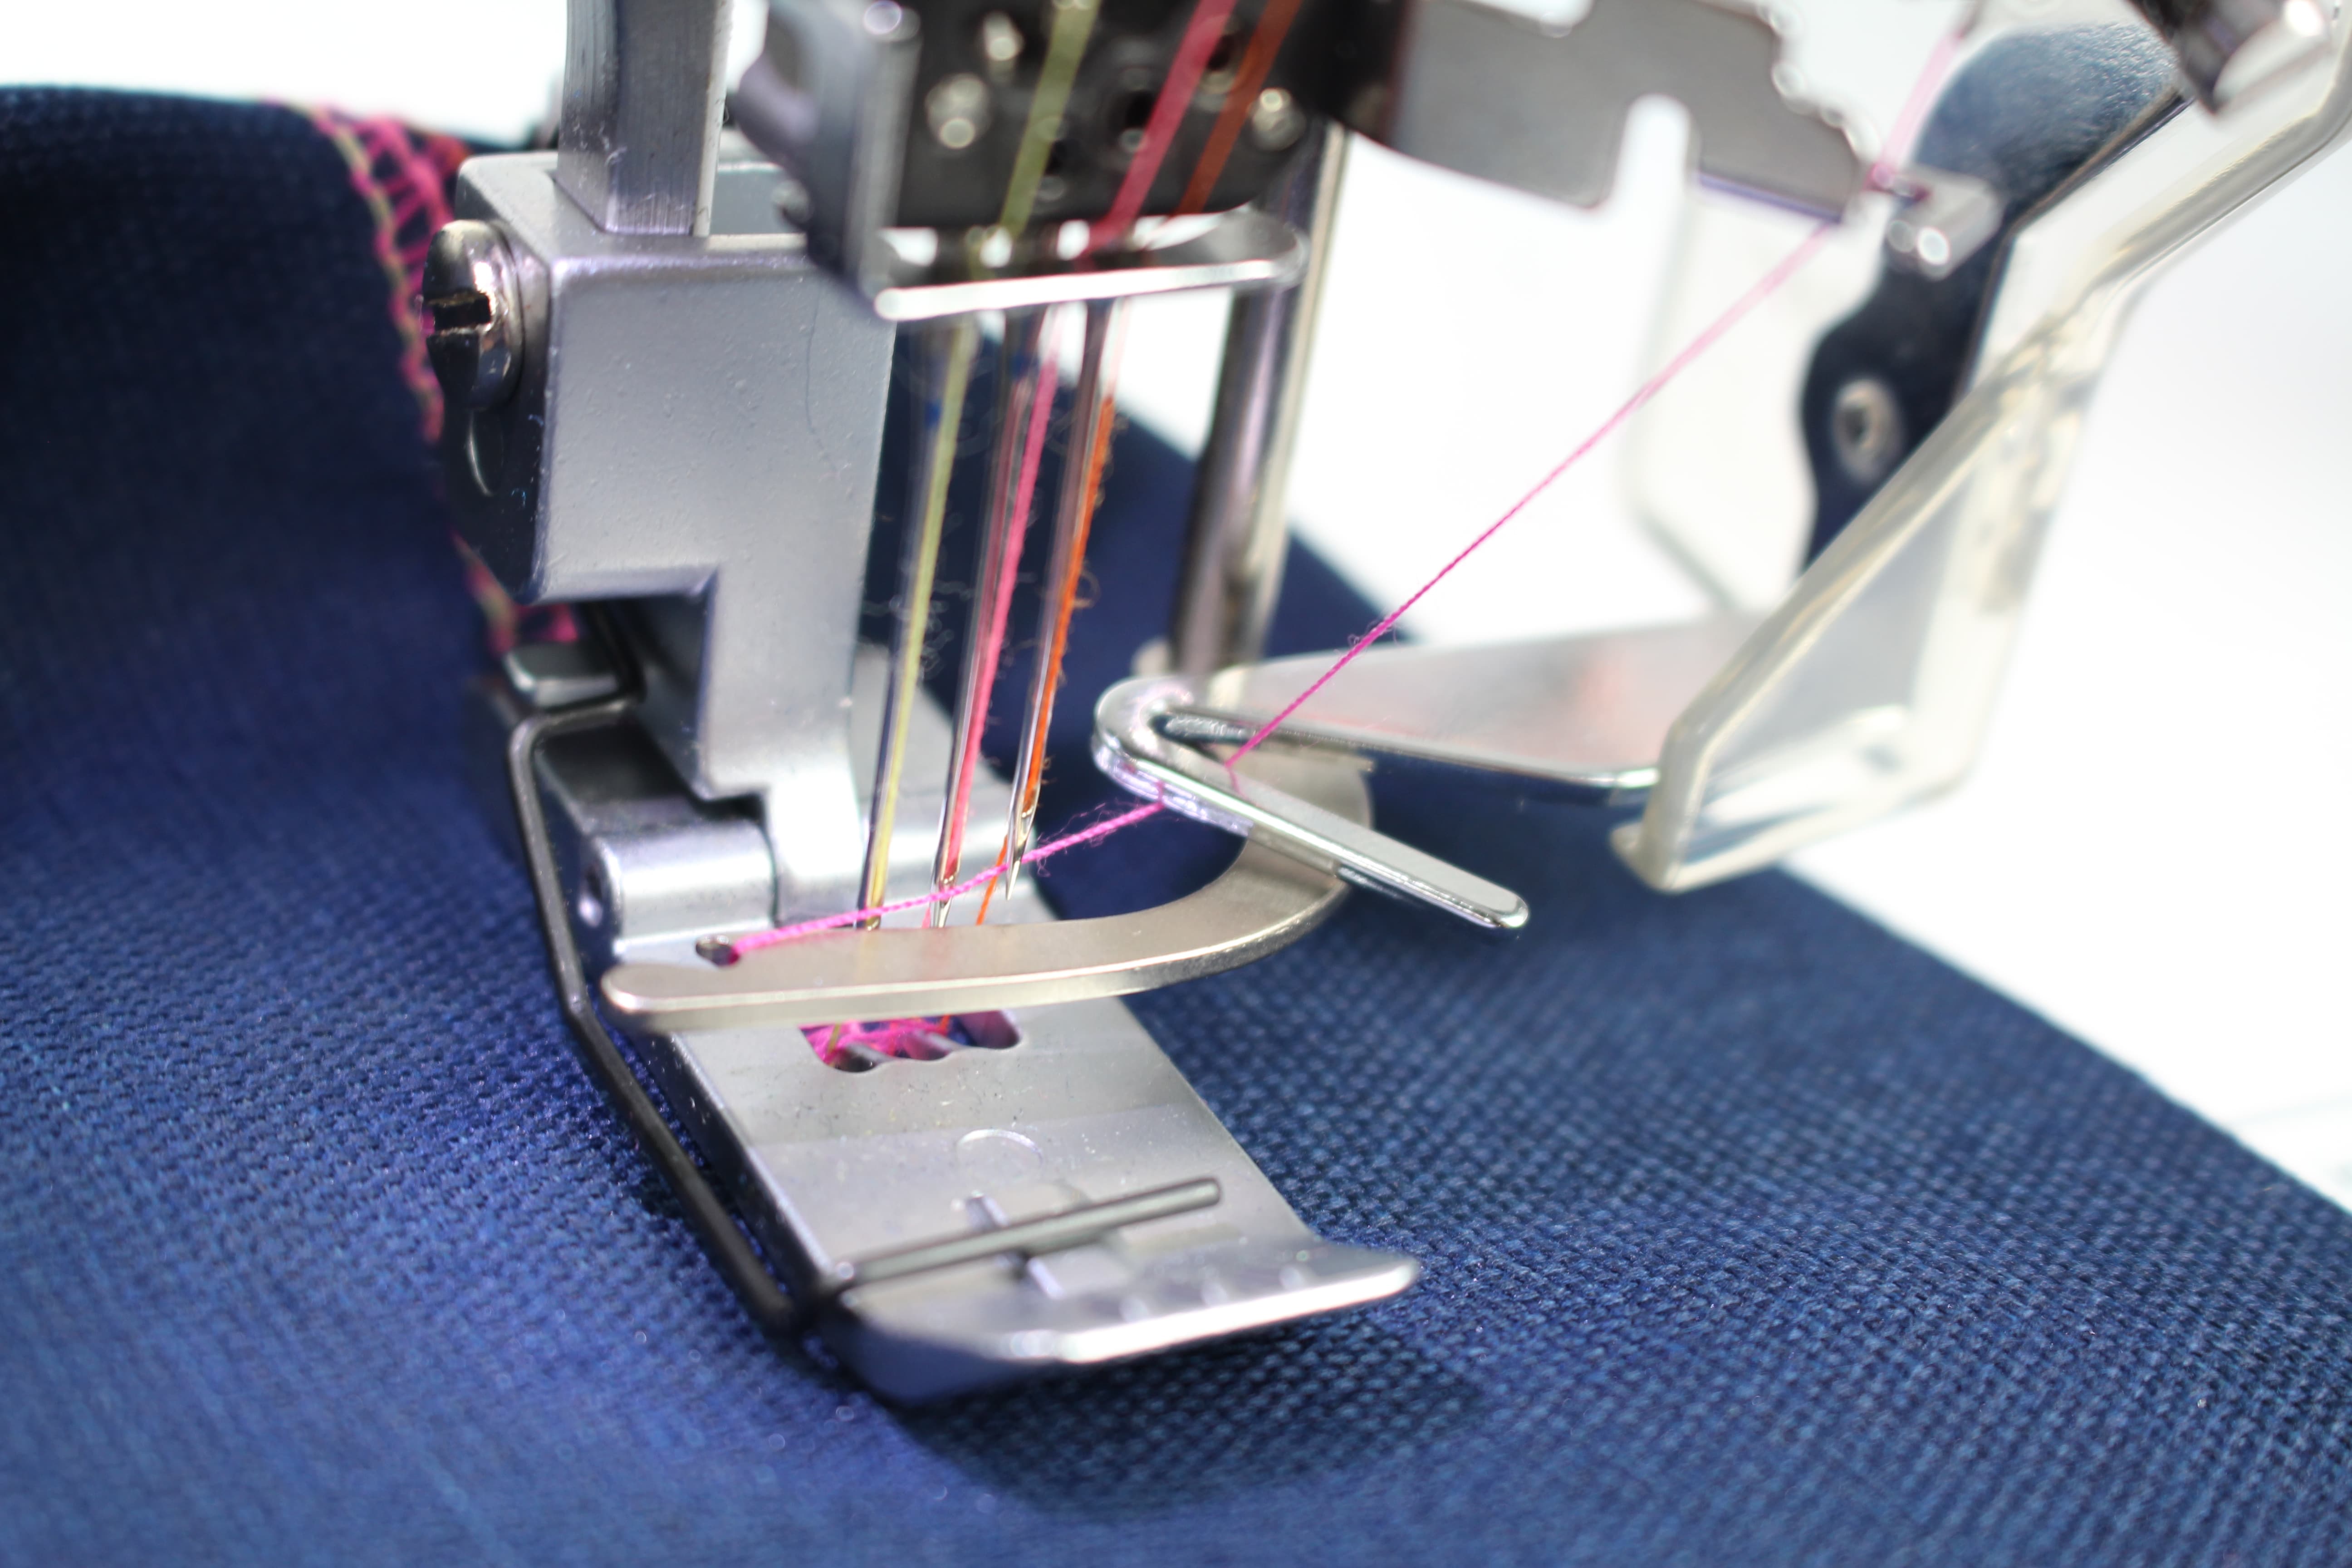
Watch the It’s Sew Easy Episode below for details on where to position the fabric to create the flatlock stitch. Be sure to test the fabric and stitch before starting a project. Depending on the thickness of the fabric, the blind hem foot will need to be adjusted to the right or left for a wider or narrower stitch.
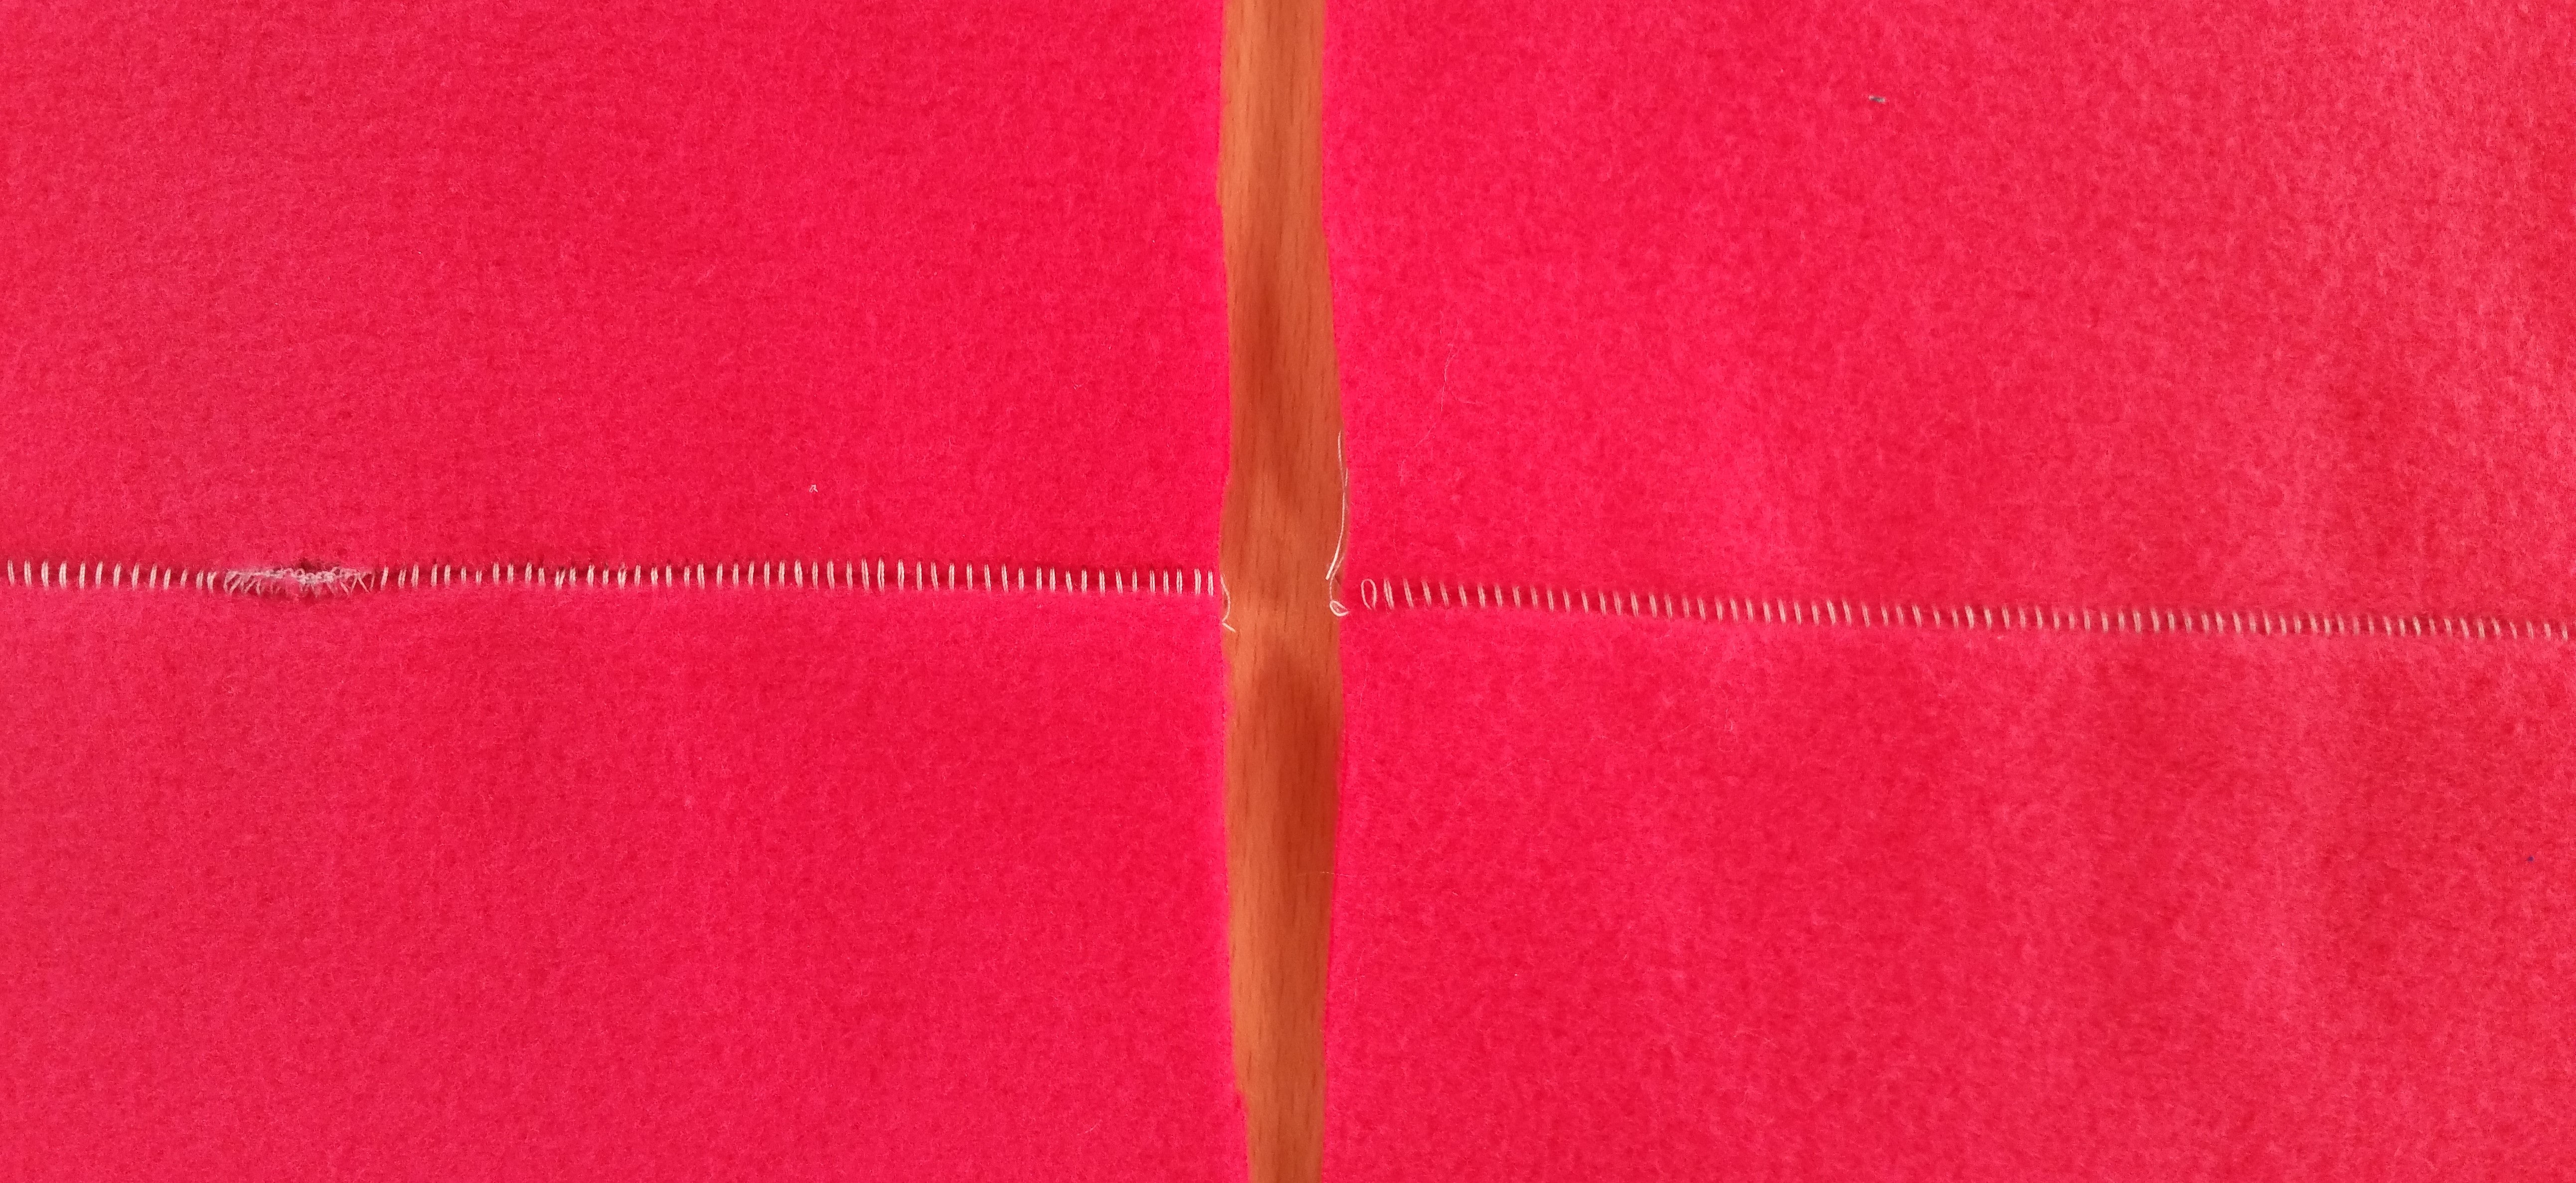
The photo to the left shows where the stitch width was too narrow and slipped off the fabric, thus creating a hole. The photo to the right looks much better.
Let me know when you try this stitch. I would love to see your creativity with this one 🙂
Cheers,


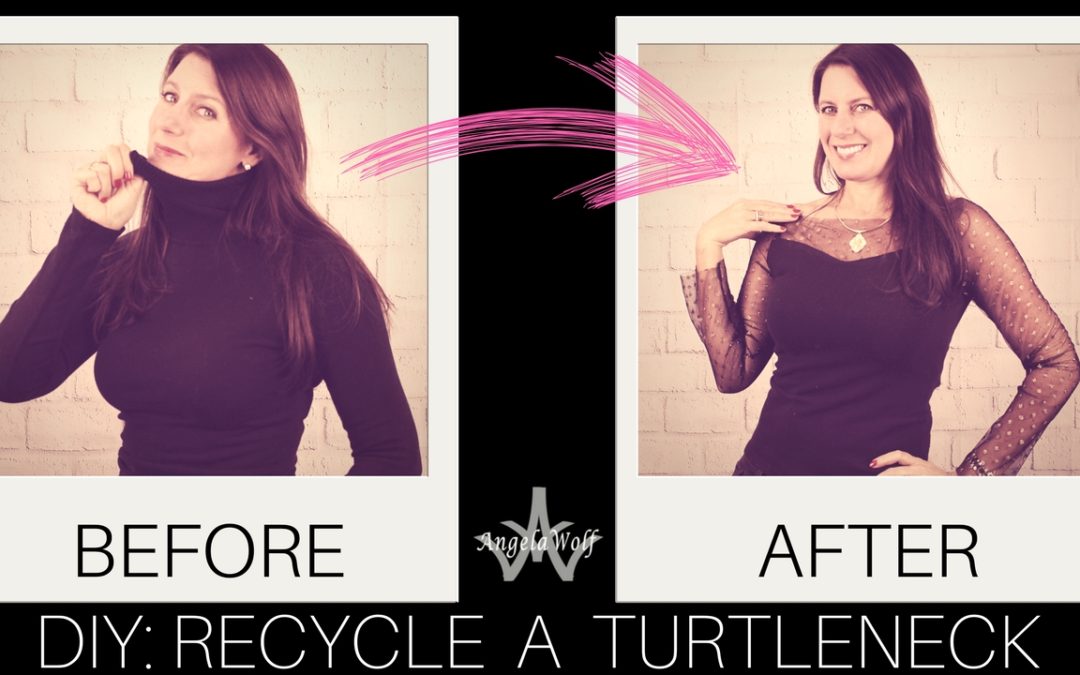
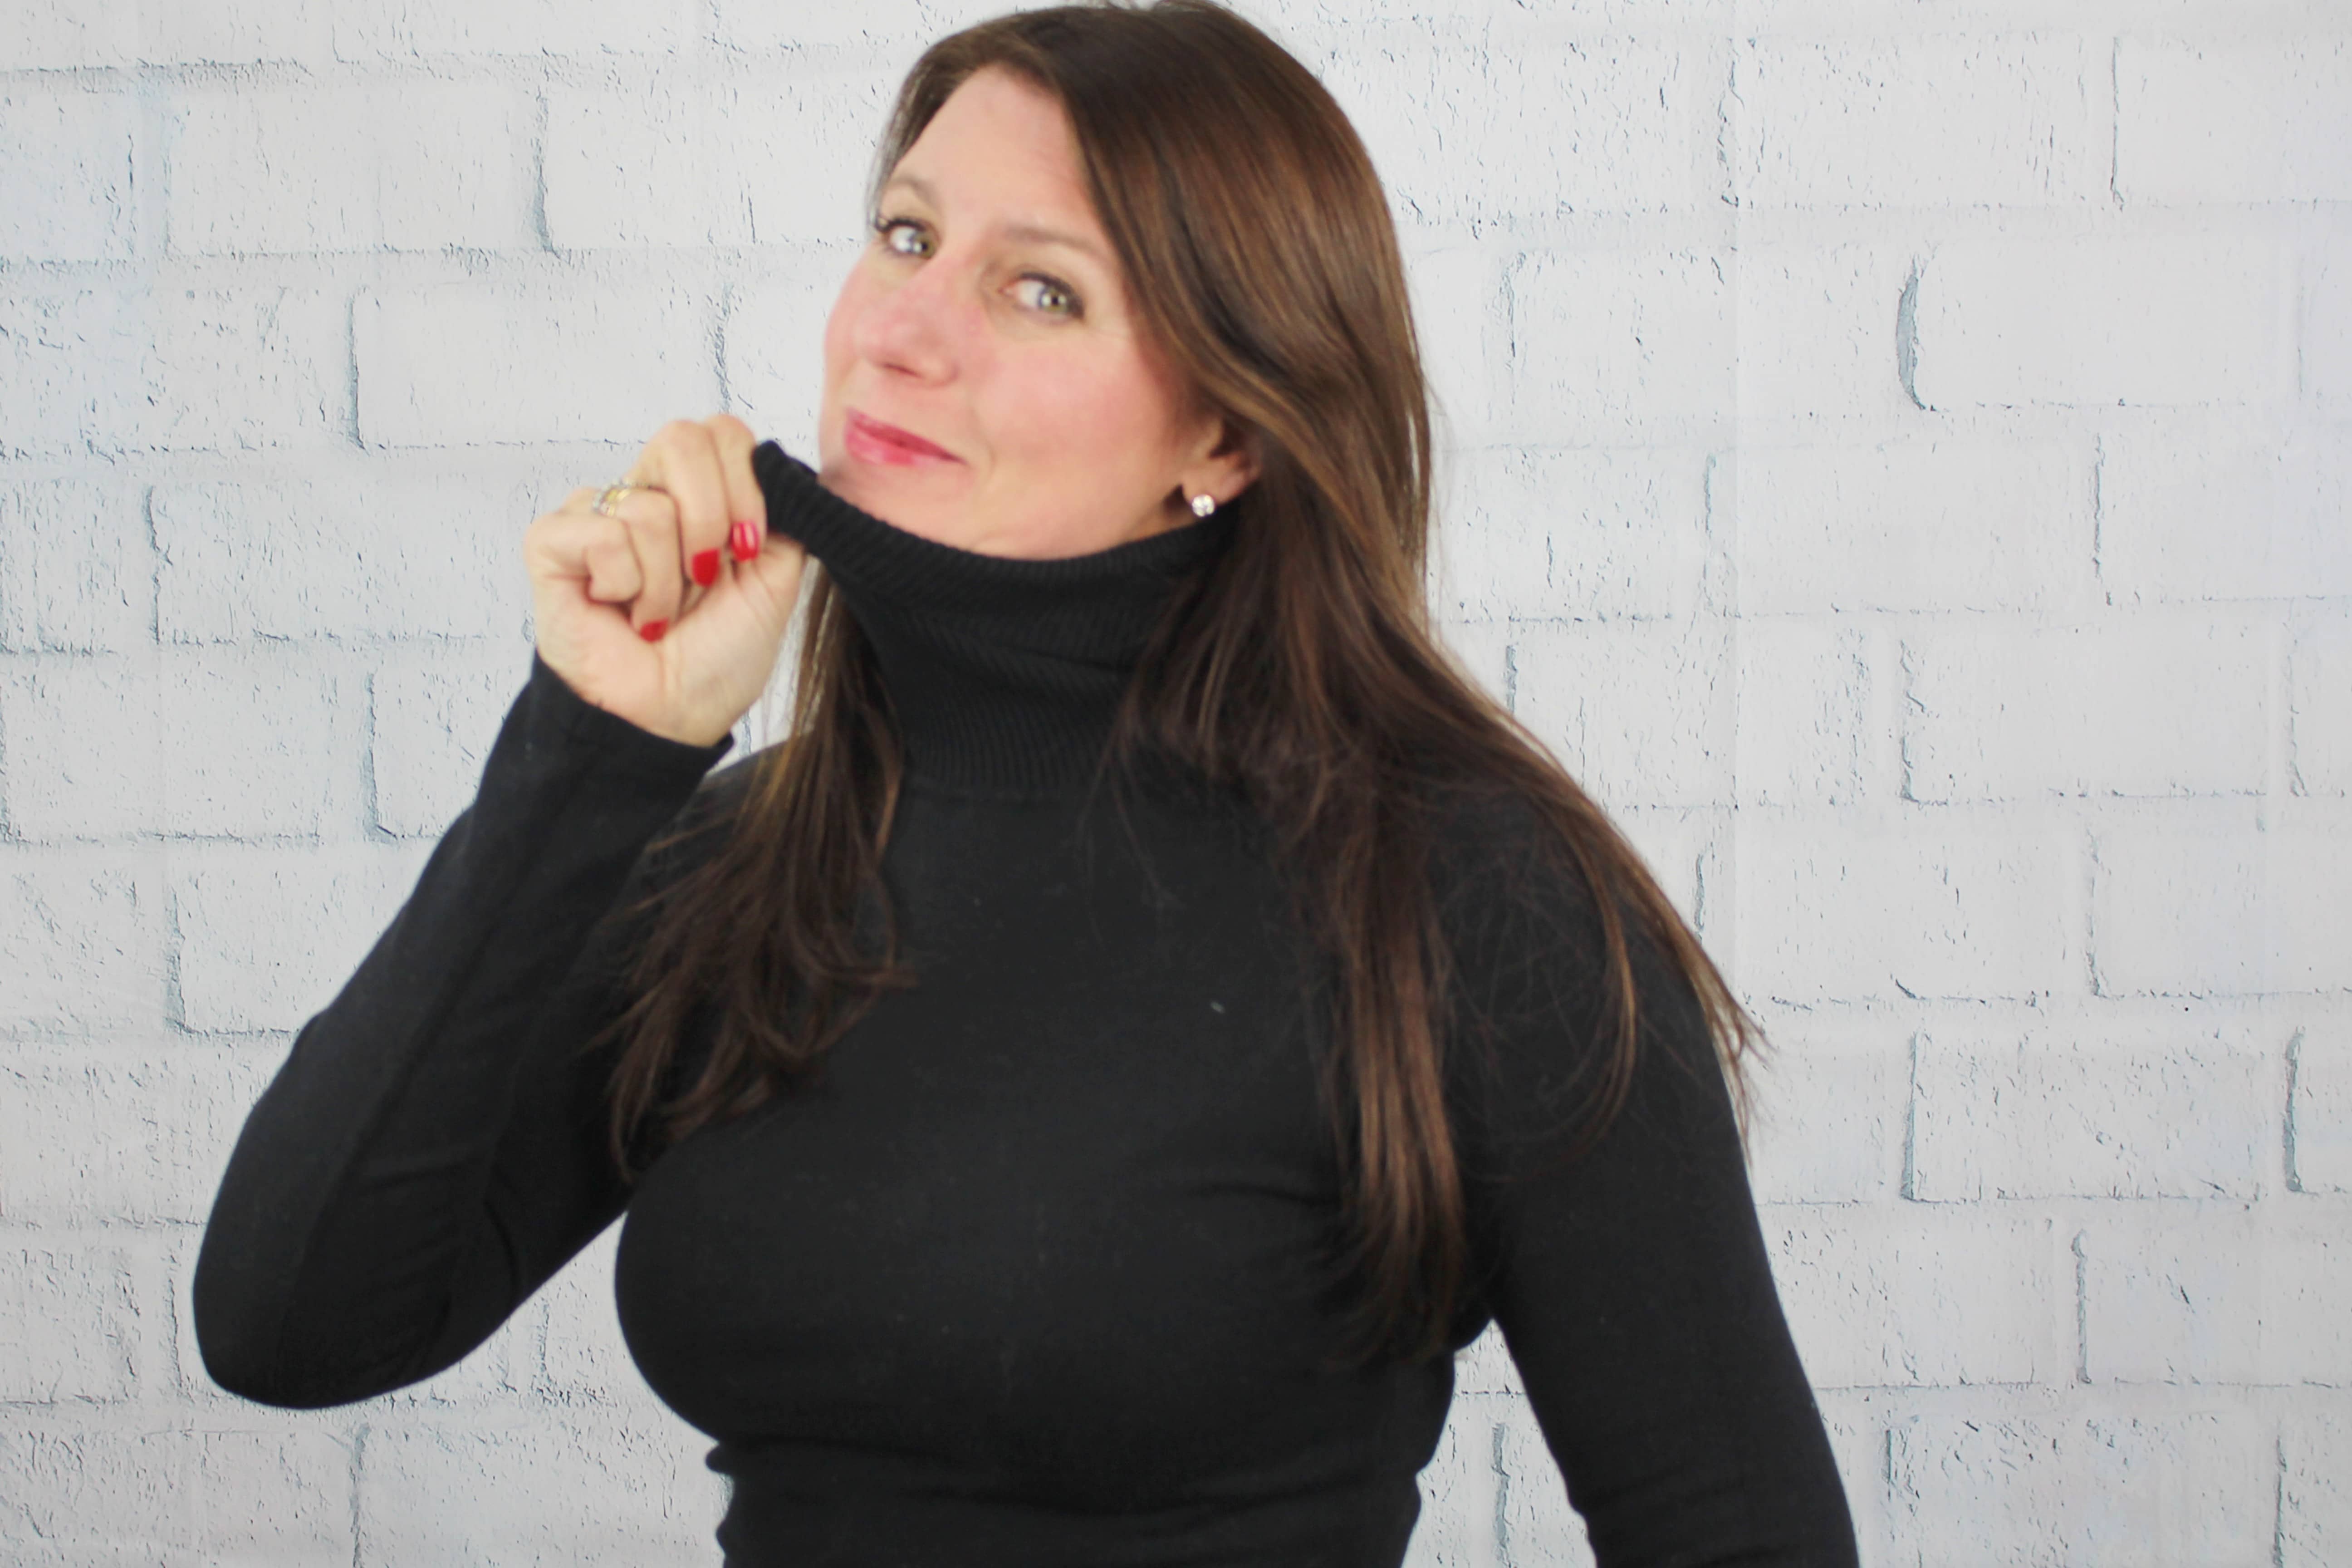
I have a few turtlenecks that are made of beautiful fabrics, but I can’t stand the high, tight neckline. Time for another DIY recycle project to makeover this sweater! The look of see through fabric, embroidered, and embellished tulle are so trendy right now – why not add a touch of glamour 🙂 I have listed all the steps here and included a video below with the full tutorial.
Supplies: Turtleneck, Tulle Fabric, Sewing Supplies including scissors, quilters ruler, tailors chalk, pins, universal or stretch thread (you can find the sewing supplies here on my amazon page)
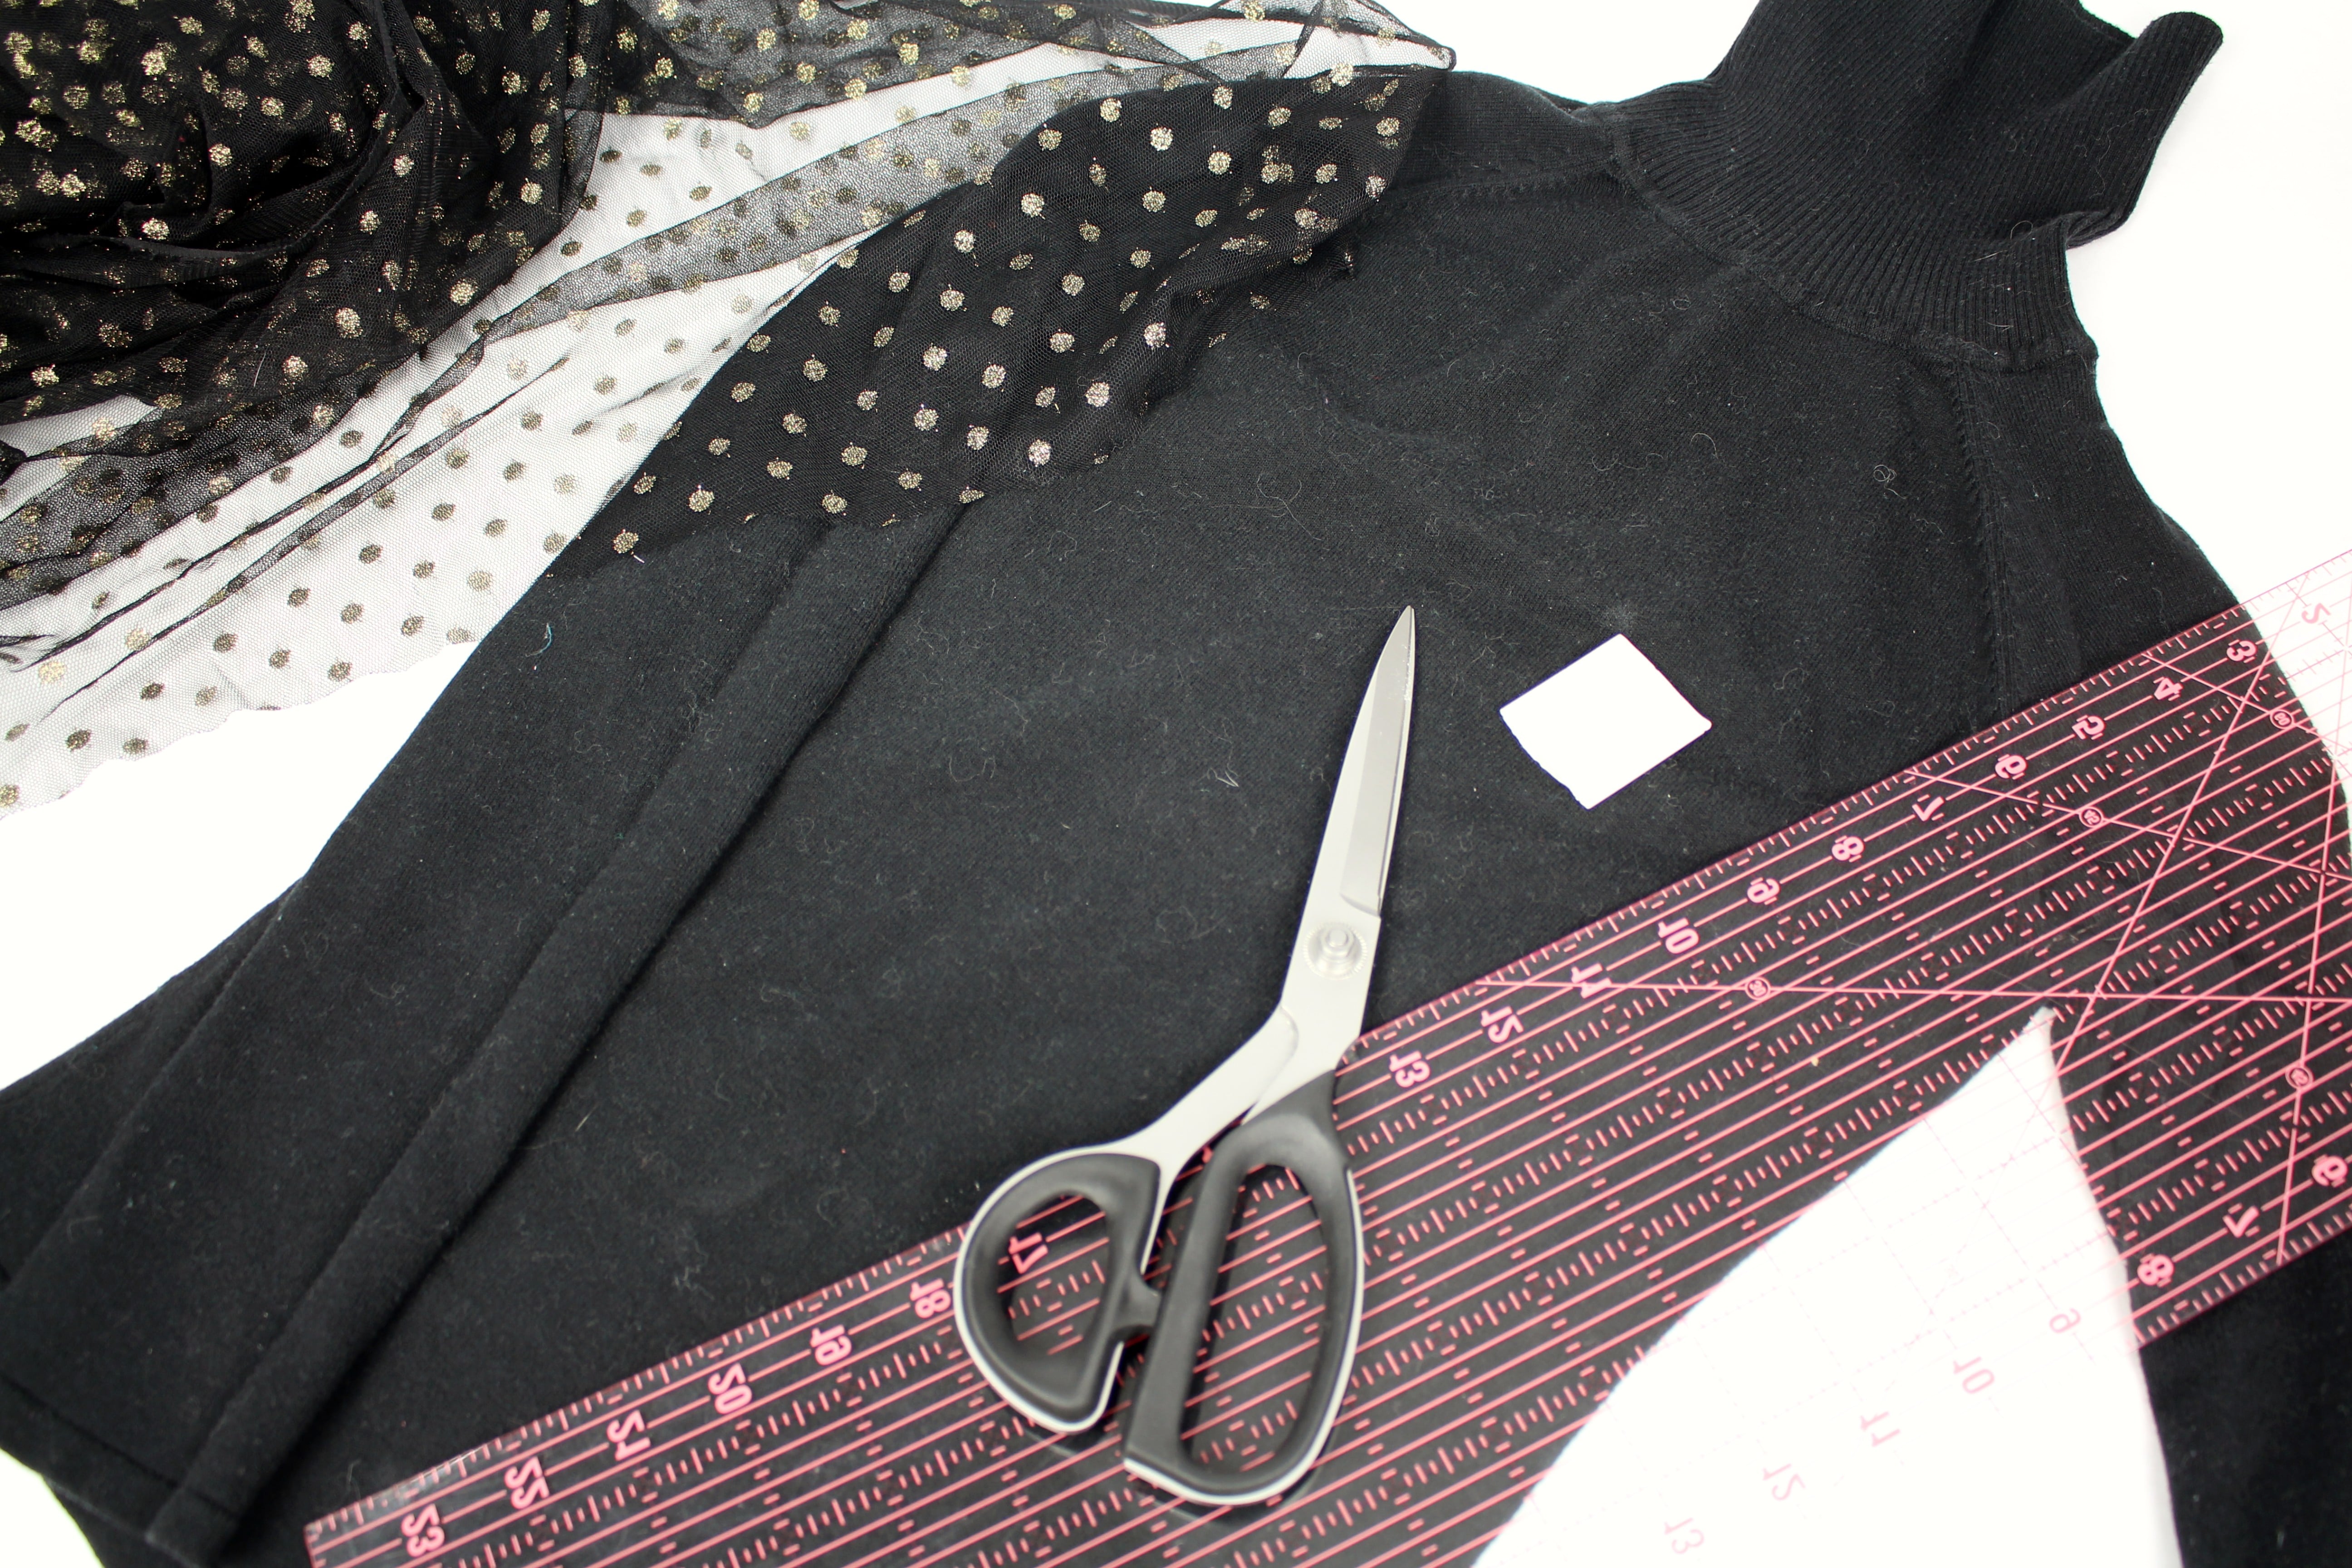
The first thing we are going to do is cut off the sleeves and collar (my turtleneck has a raglan sleeve, but any sleeve style will work). Cut inside of the sleeve seamline and underneath the collar. Save the sleeves to use as a pattern.

Mark the back of the sweater: Trace the back for the sweater outline onto the tulle fabric from the underarm up.
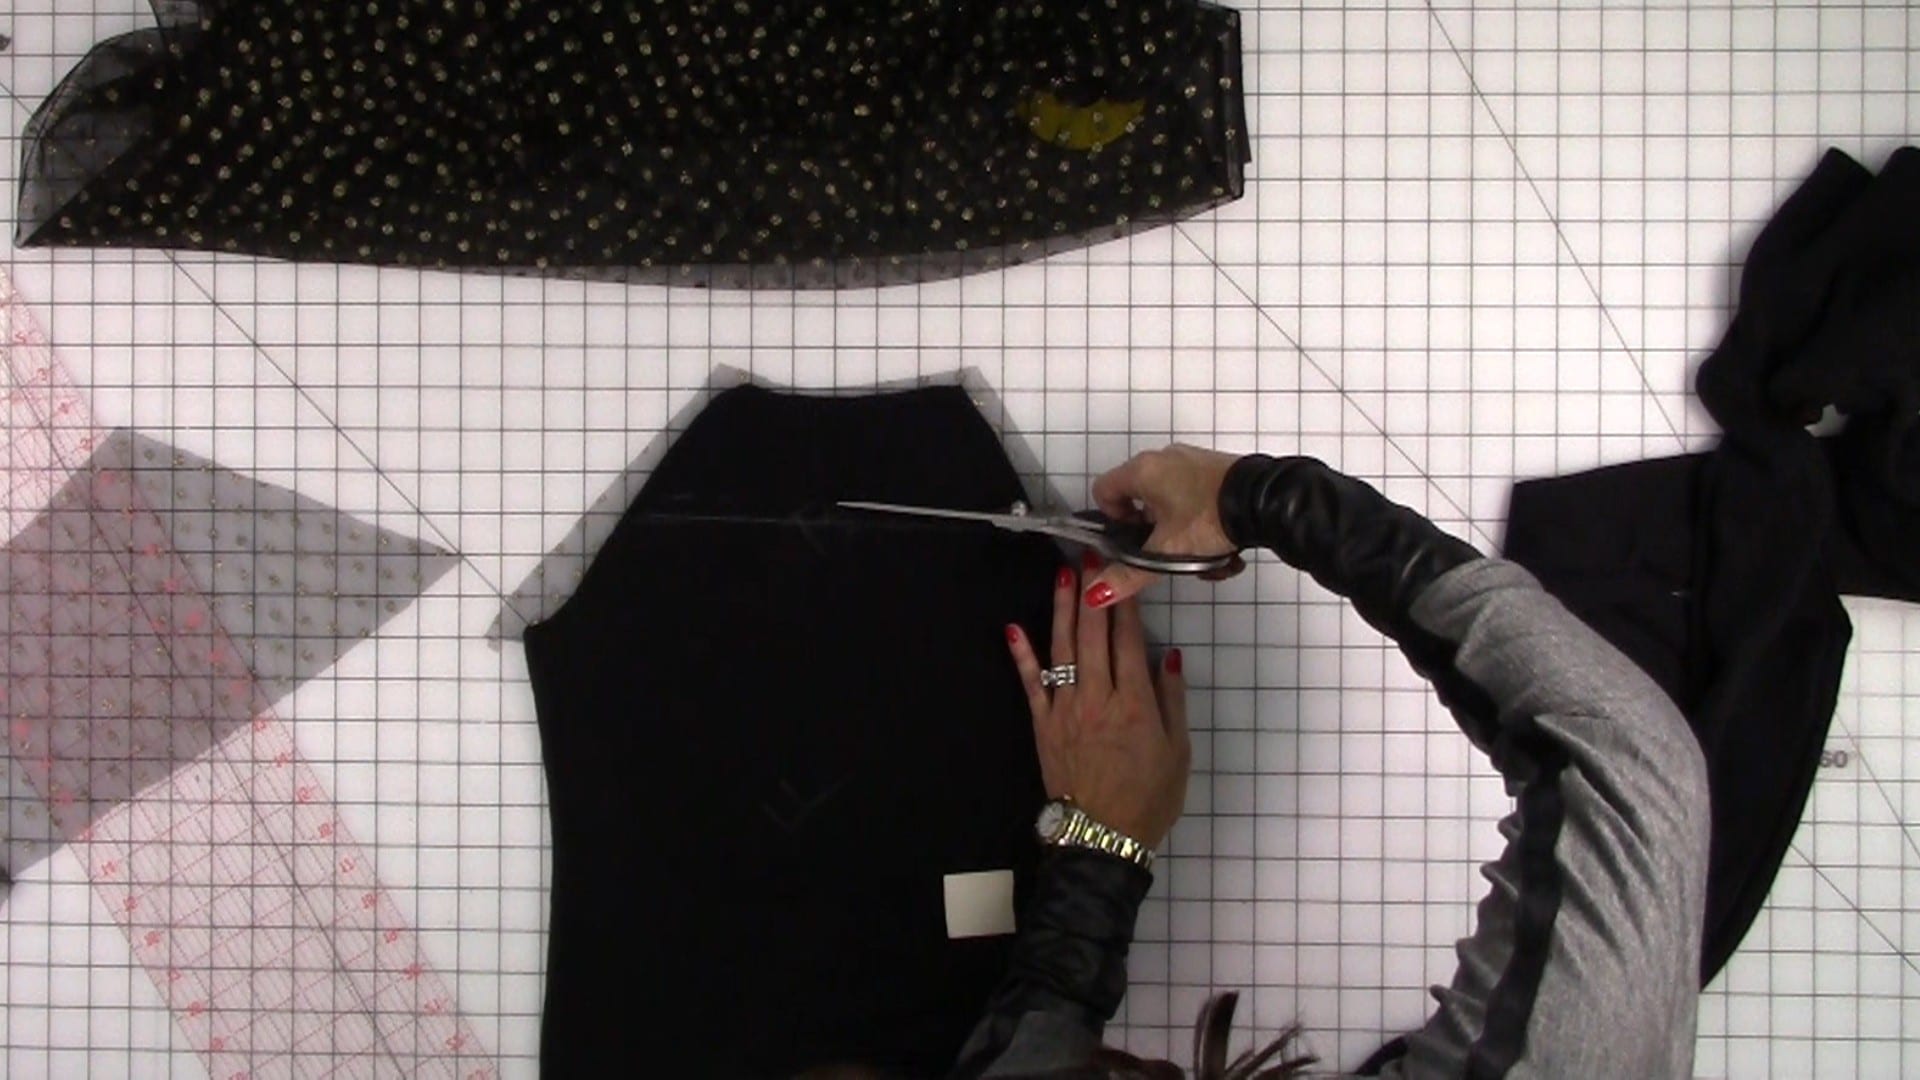
Mark a line across the sweater where you want the sweater fabric to meet the tulle fabric. Add a seam allowance and cut. Align the sweater with the tulle fabric. add a seam allowance onto the tulle fabric and cut. (the video below shows all these steps in detail).
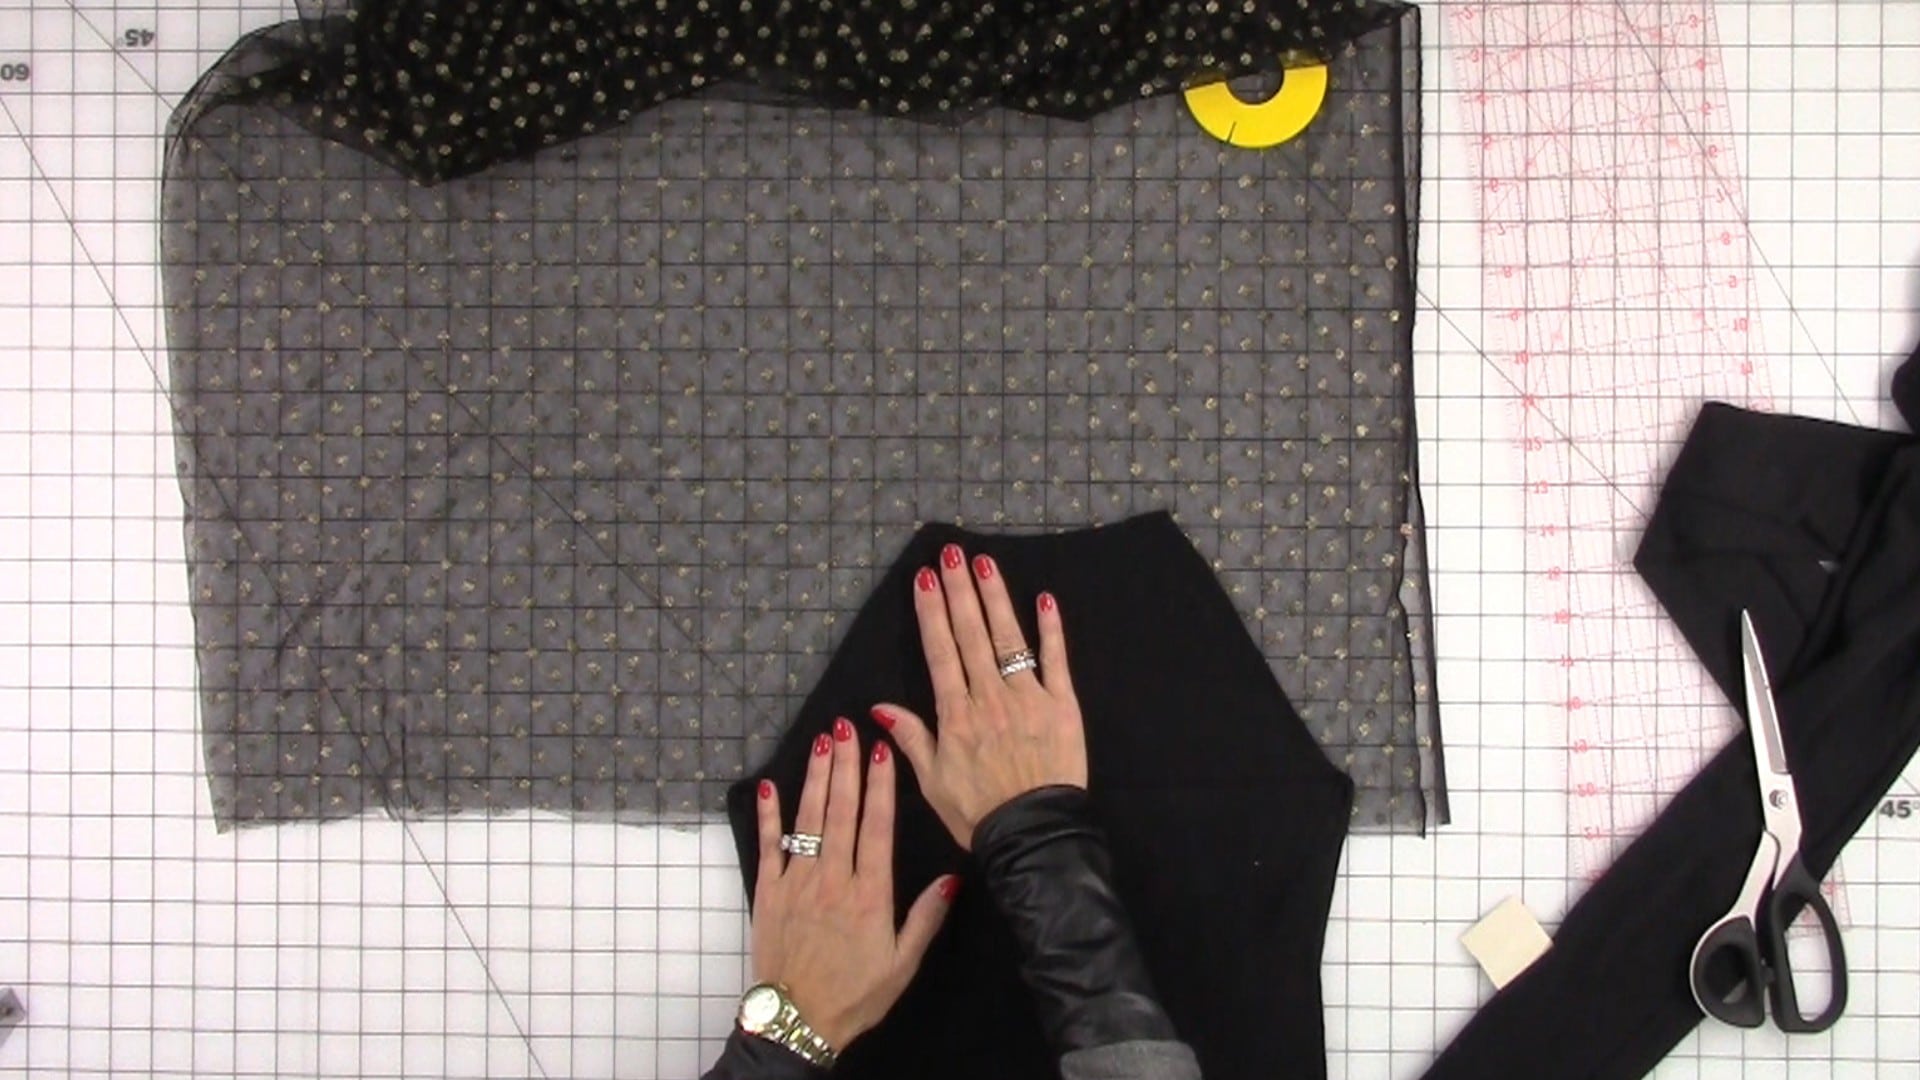
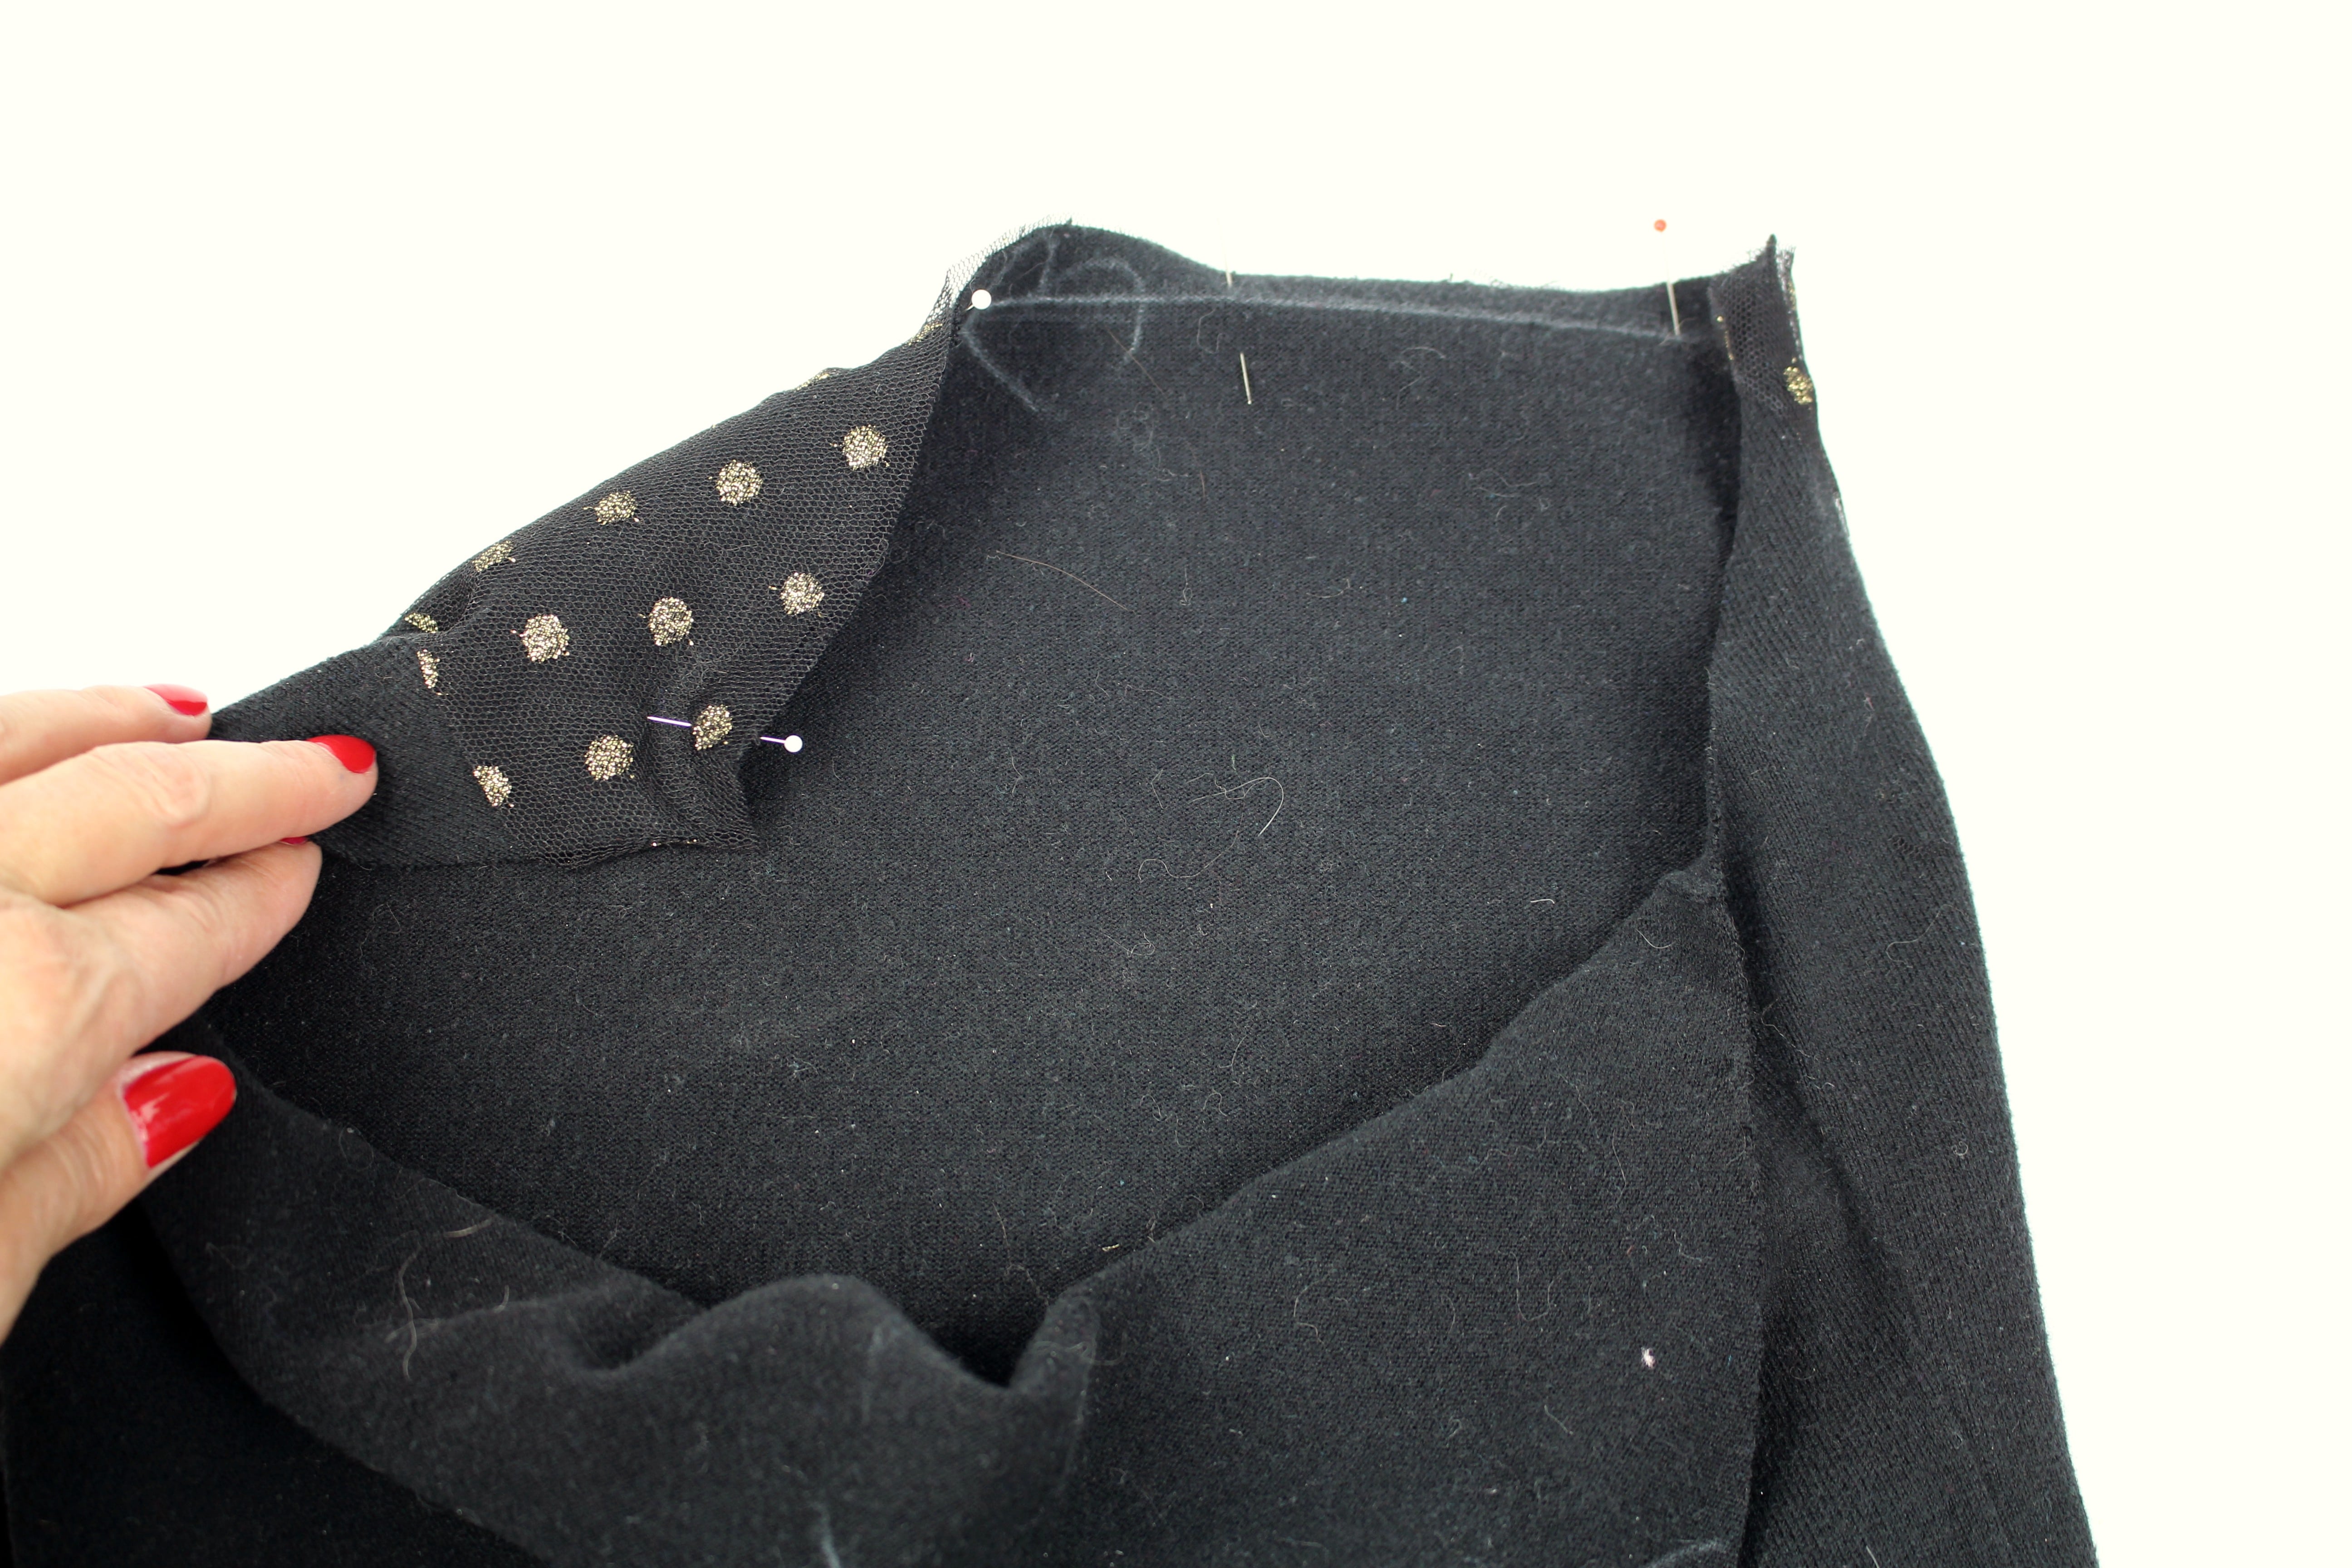
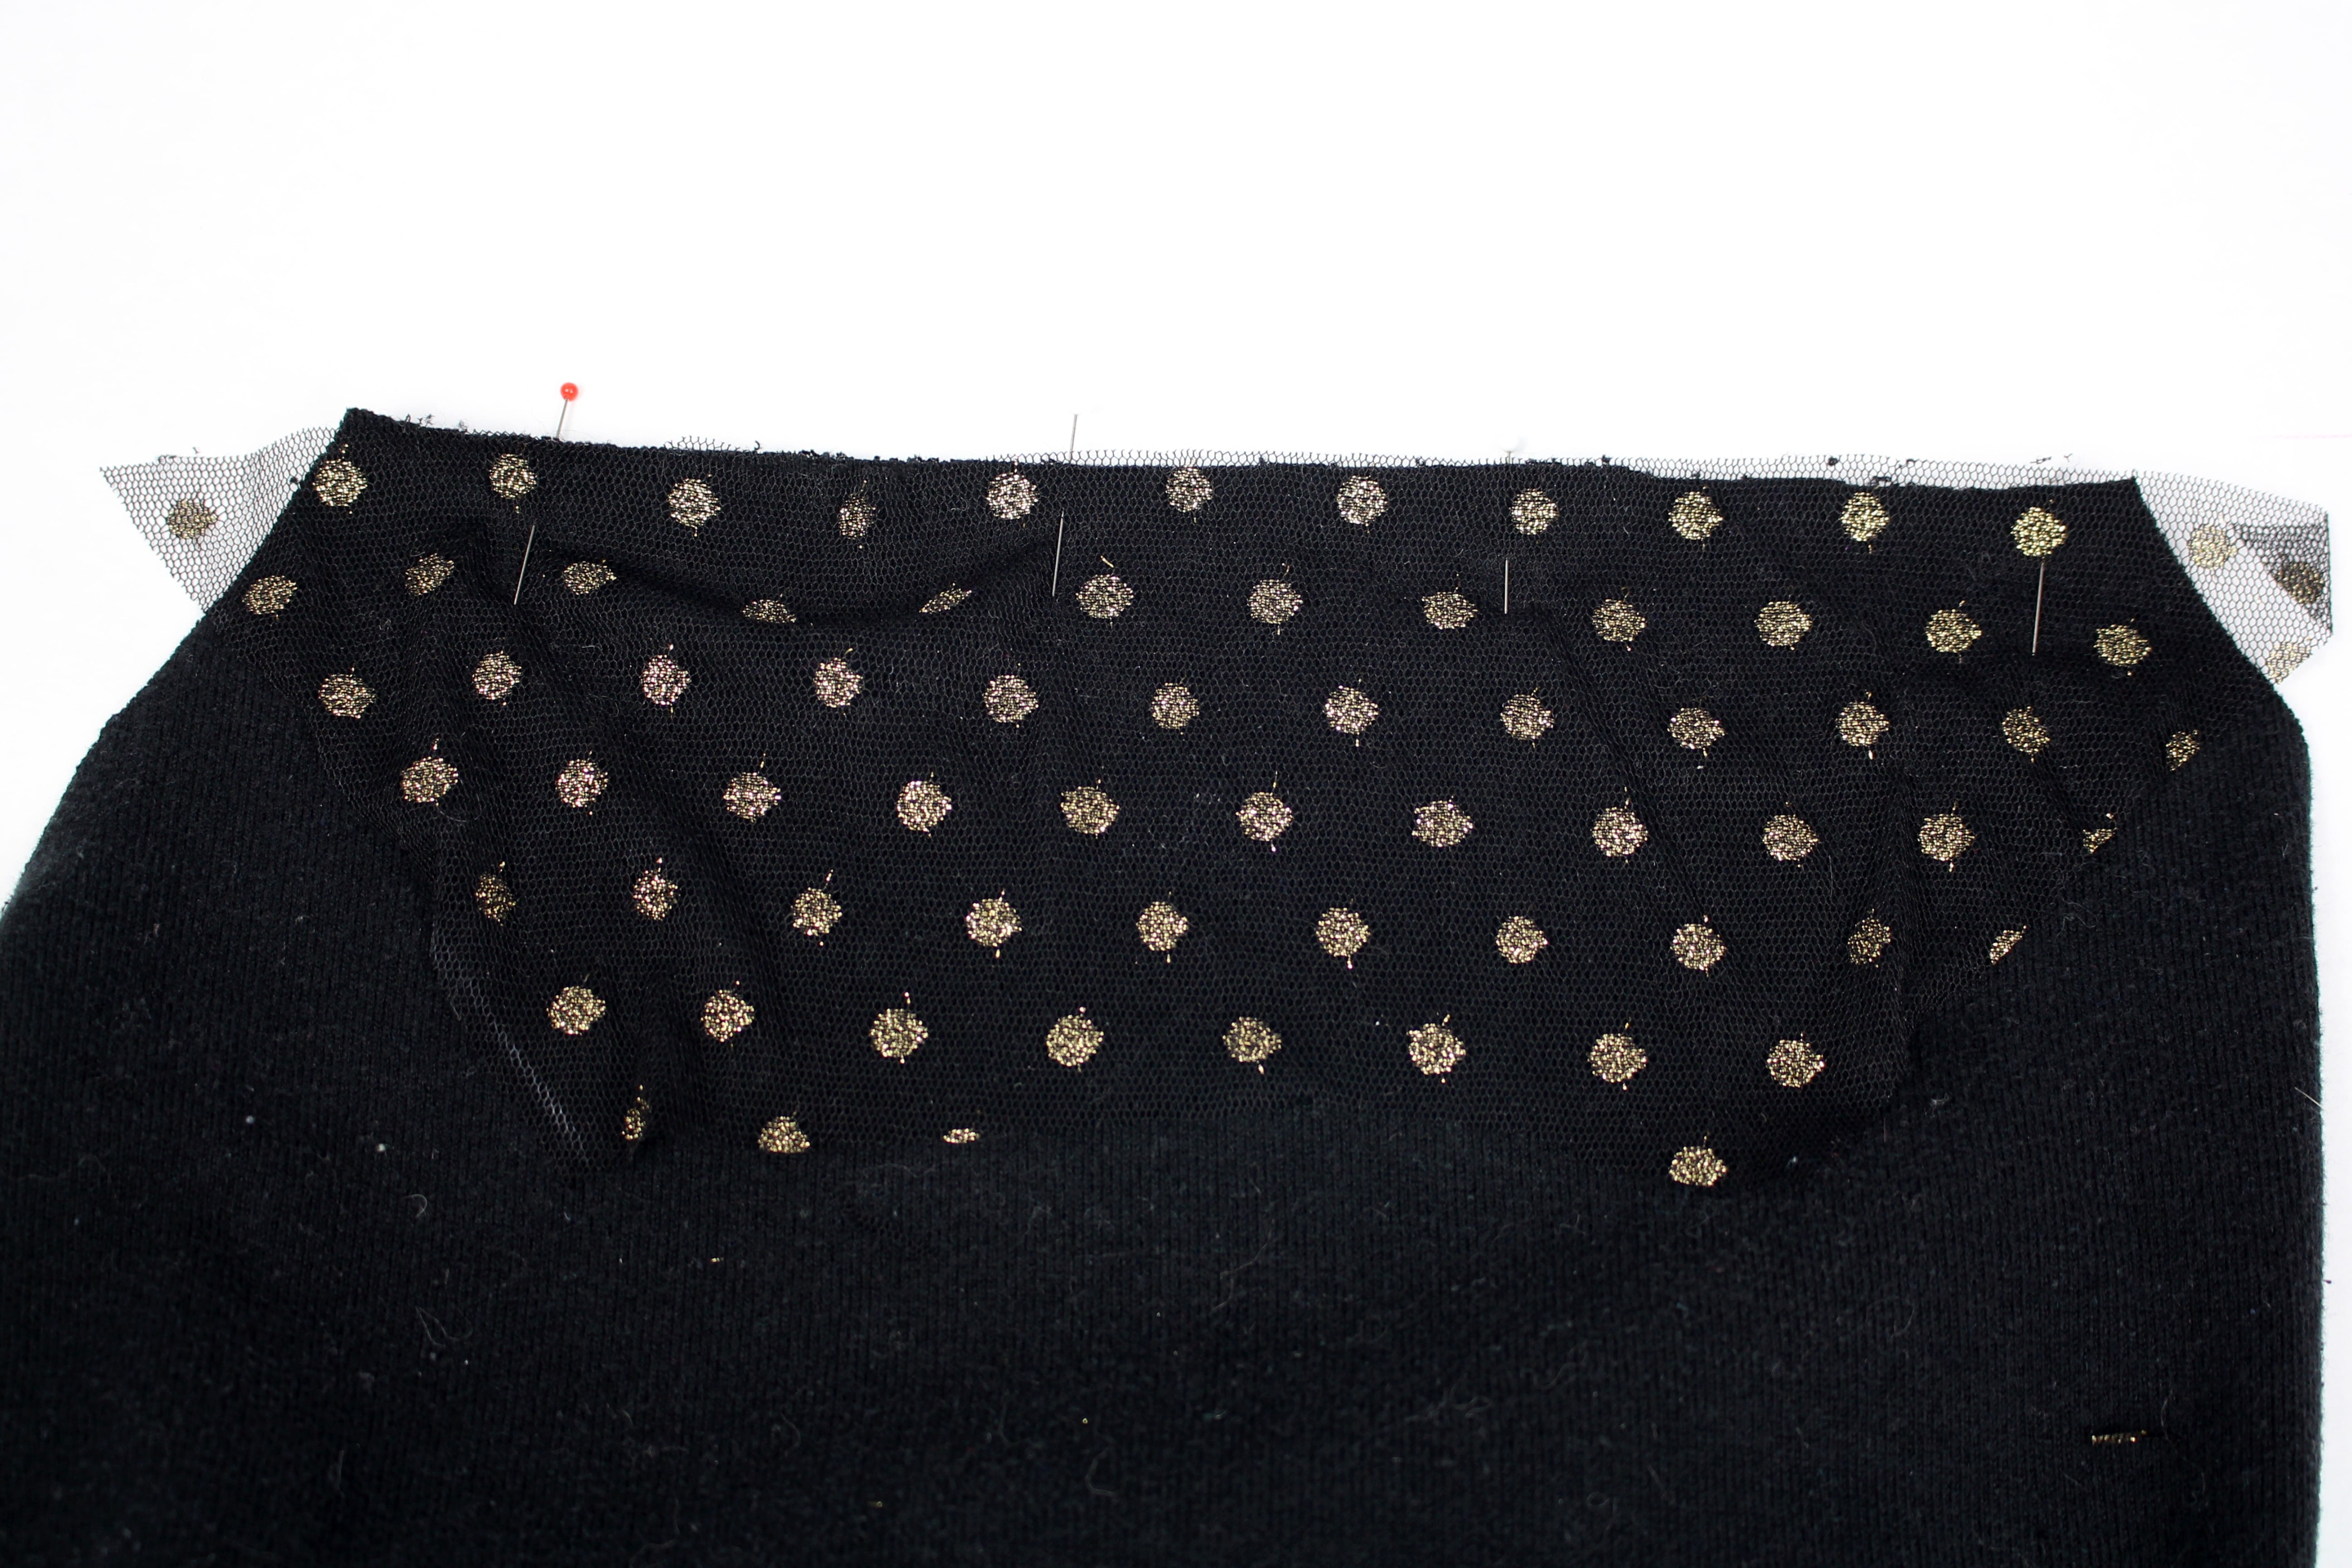
With right sides together, pin the tulle fabric to the sweater fabric.
Click on the video below to watch the full tutorial or head over to my post as a Brother Expert Consultant on the Brother Stitching Sewcial.
Are you going to try this cute restyle? Leave a comment below and tell me what you think 🙂
Cheers,

The page you requested could not be found. Try refining your search, or use the navigation above to locate the post.


I was so excited to see this new double sided top coverstitch machine by Brother! I can think of so many applications for these decorative stitches including sportswear, decorative stitching, chainstitch, hemming knits, and so much more. I am going to start a set of tutorials with the top cover stitch machine by showing you an in-depth look at threading the machine, including the top cover thread. At first it might look intimidating, but threading is quite simple.
Start by taking you machine out of the box and remove the packaging tape. You will find a dust cover, manual (always keep that handy), a plug with pedal attachment, accessory box, and DVD. If you have more than one machine in your sewing studio here is a tip: place all machine parts in a decorative box and keep each box next to the coordinating machine.
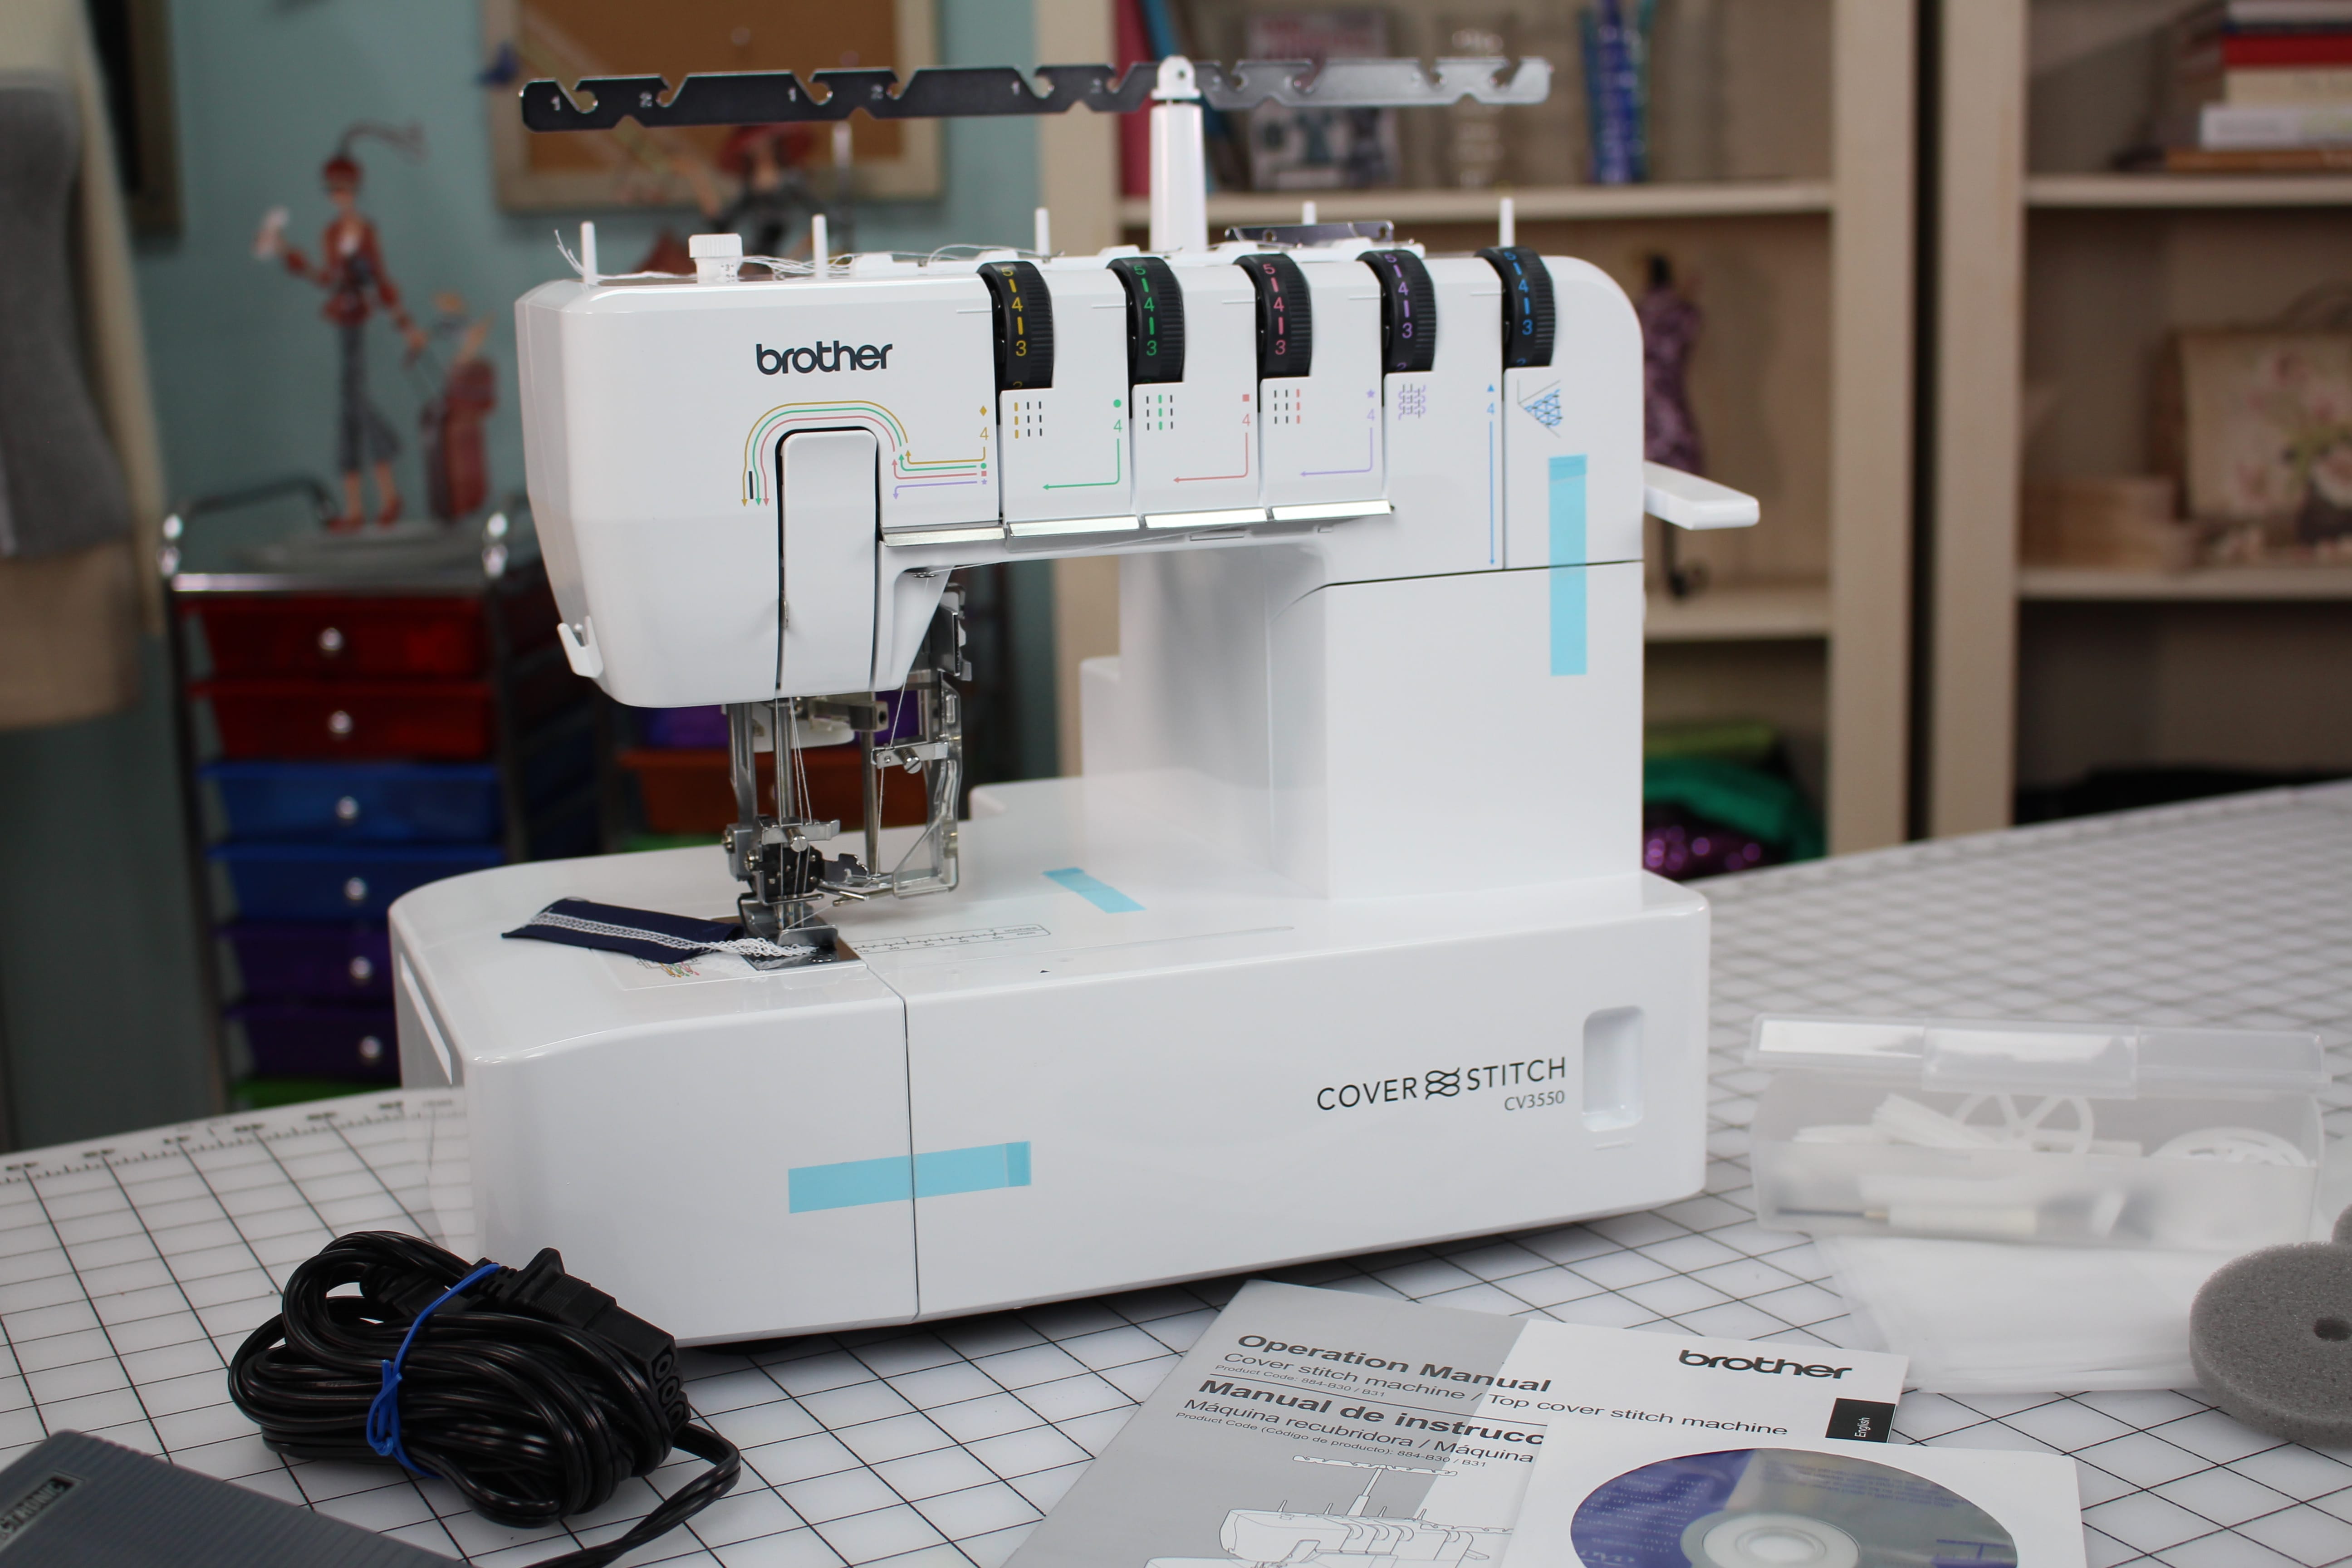
If your machine already has the top coverstitch threaders attached it will look like the photo below. If not, the video will show you how to remove and reattach these parts. You will need 5 spools of serger thread to thread the entire machine (I am going to use different colors so you can see a little better). When threading the coverstitch machine, start with the looper which is the spool on the far right side. You will then move onto threading the needles. For this demonstration I am using all three needles.
To read the full blog about threading the coverstitch machine, head over to my post as a Brother Expert Consultant on the Brother Stitching Sewcial.


The Lacy Knit Top Sewing Pattern The design for the Lacy Knit Top was a result of our everlasting Covid lockdown! Whether lounging at home, working in the studio, or working out in our home gym ~ this top hit the mark. Semi-fitted in the bust area, looser thru the...
The Shirley Faux Wrap Dress & Top I designed this pattern as one of the wrap style dresses and tops for season 19 of It's Sew Easy tv. The Shirley wrap can be sewn as a top or a dress. Because the style must pullover the head, this top must be sewn with a...

#SEWCIALHOP2020 CONGRATULATIONS TO ALL THE WINNERS! CATCH THE REPLY AND MEET OUR FABULOUS SPONSORS Day 18 #SEWCIALHOP2020 and a Special THANKYOU to ALL the SPONSORS!!! Stay up to date with new tutorials, giveaways, and more - follow...
Day 17 #SEWCIALHOP2020 Today we feature my good friends at Allbrands!!! Allbrands.com has spent four decades focused on one thing above all others, unparalleled customer service. Our owners, John and Annette Douthat, were very careful when they chose our name,...

Day 16 #SEWCIALHOP2020 Features the fabulous Holly & Steve Cobb and The Sewing Shop in Shreveport, Louisiana. I featured Steve and Holly in my live show back in May, checking in on their store during the start of the covid-lockdown. They are a Brother dealer and...
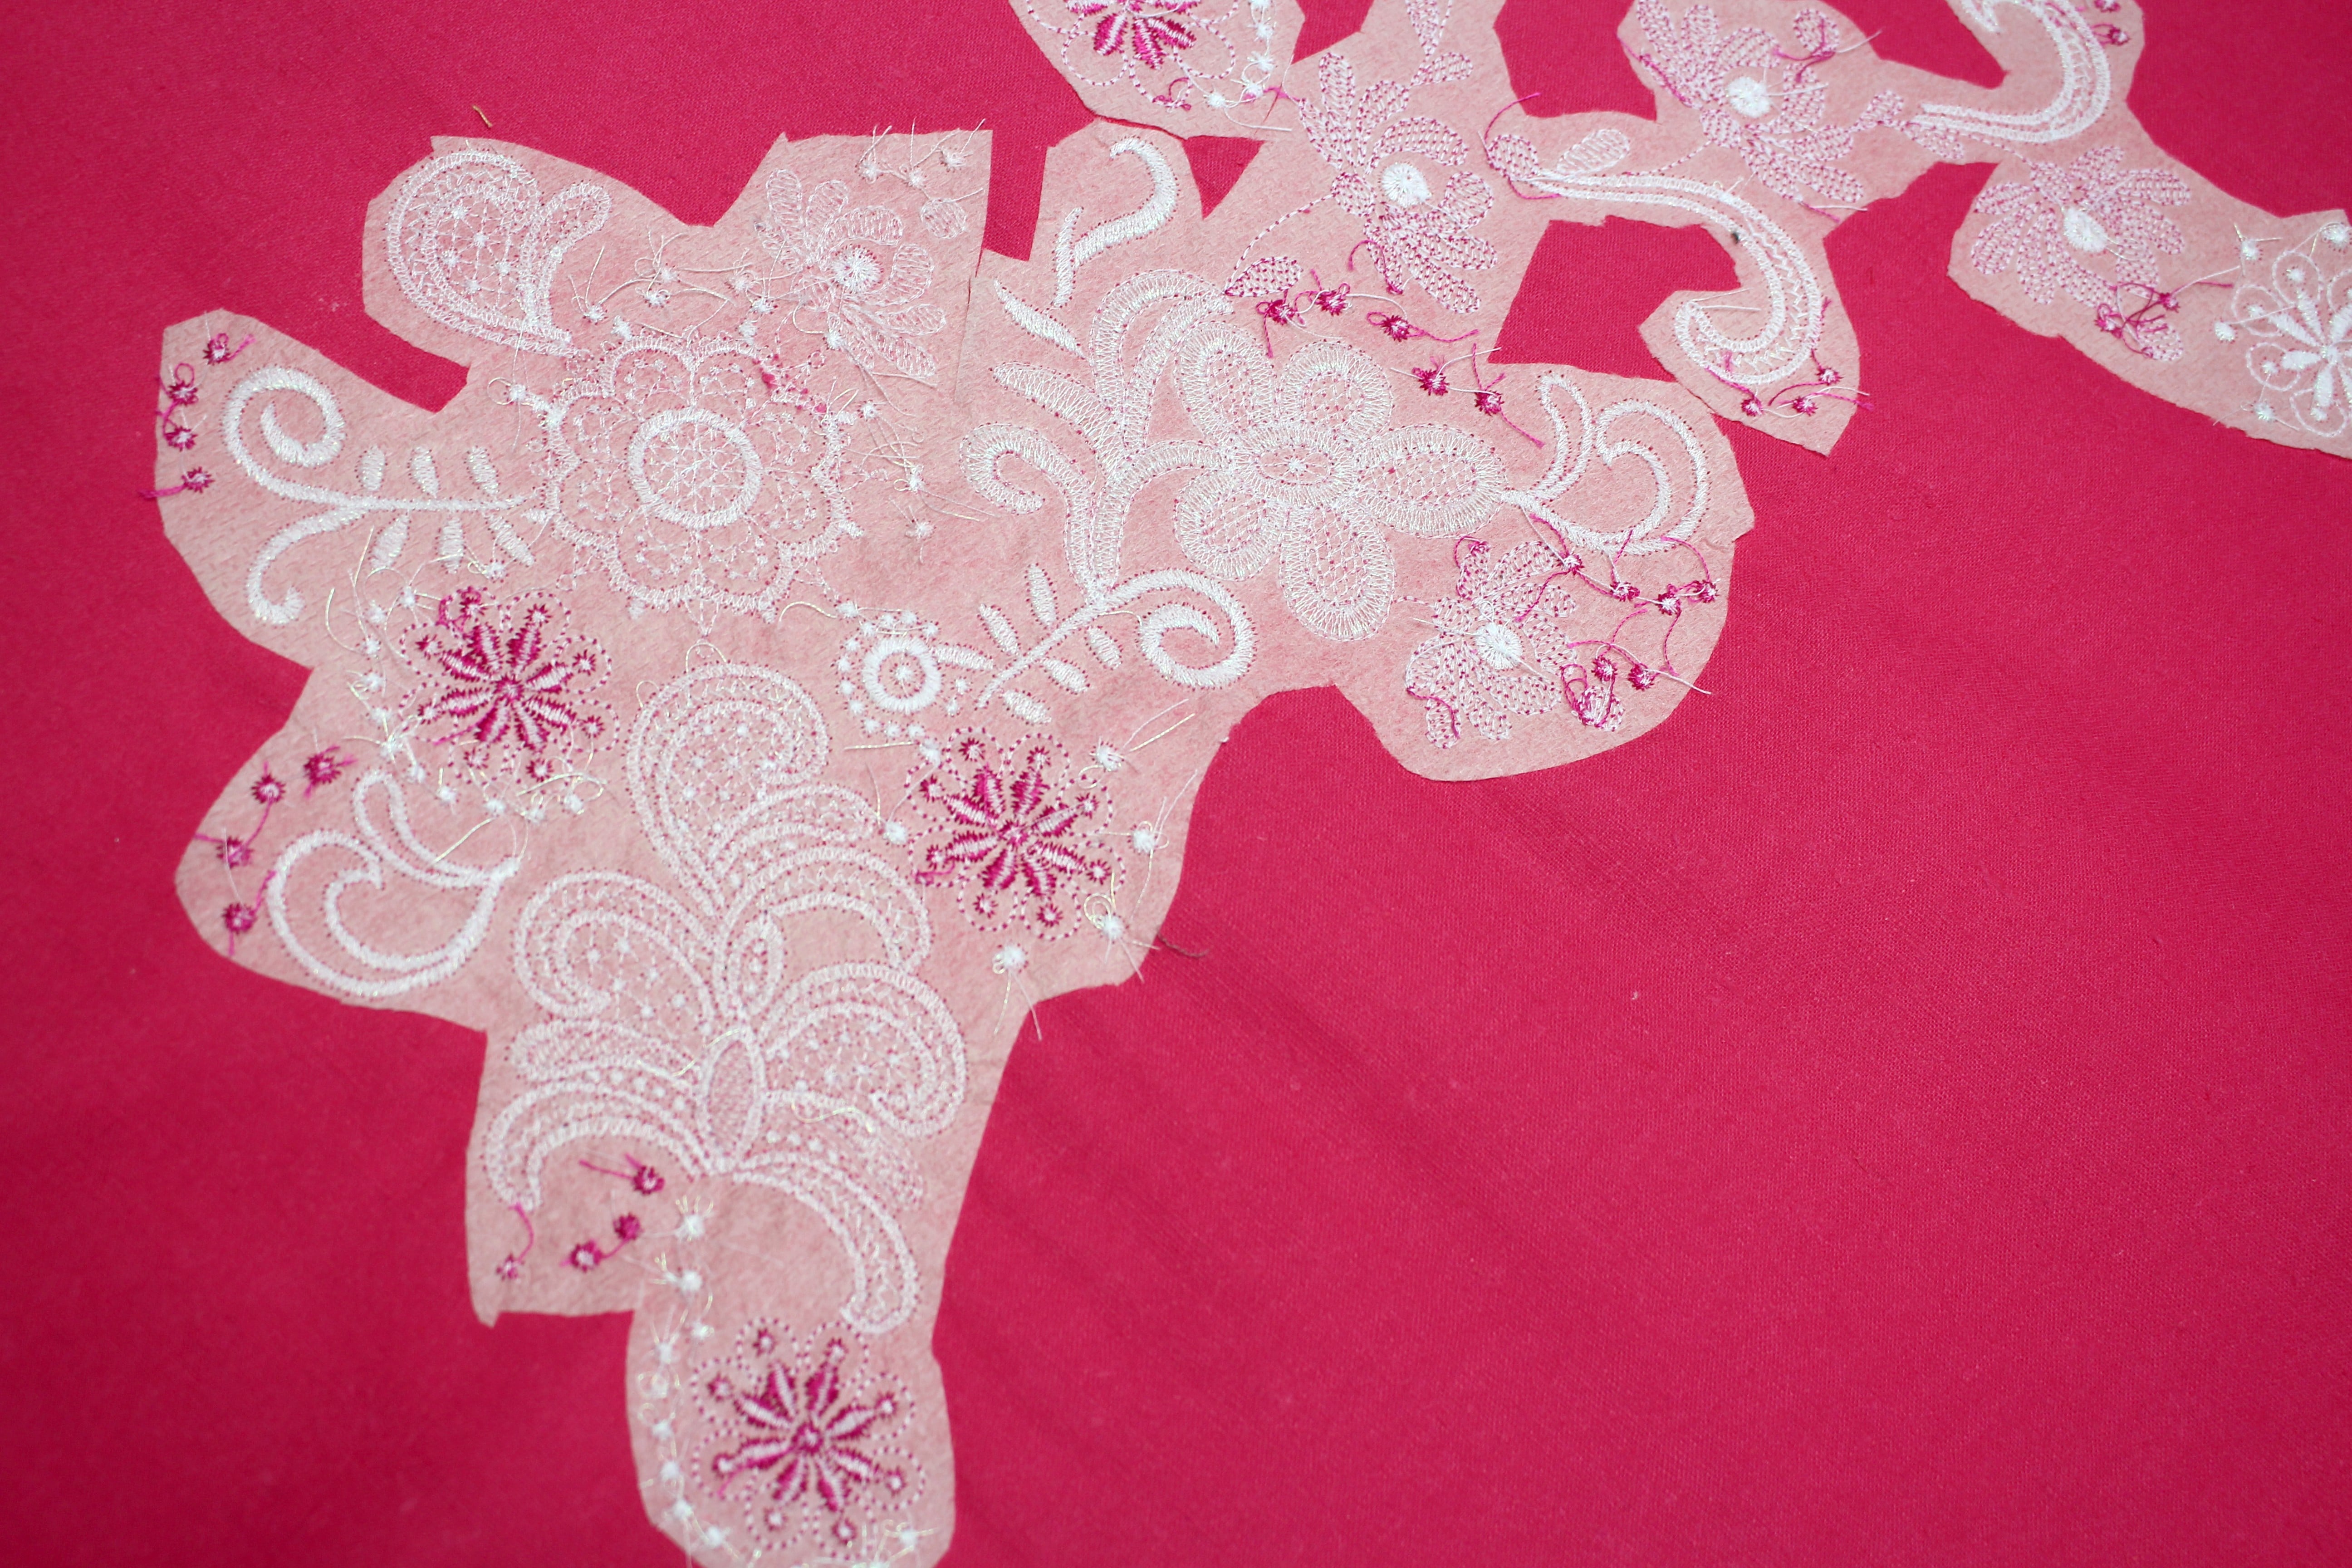
Day 15 #SEWCIALHOP2020 Our special guest is my good firend Reen Wilcoxson owner of Embroidery Garden! Embroidery Garden is filled with embroidery designs, applique files, and so many other creative projects! GIVEAWAY Reen knows how much we love embroidery and she is...
Day 14 #SEWCIALHOP2020 Today we feature my friends Kelly and Sharon at Laser Bee!!! Laser Bee Studio started from a love to create unique, handmade gifts using embroidery, vinyl and engraving. Our owners have been in the embroidery business for 20+ years. Machine...

Day 13 #SEWCIALHOP2020 We are celebrating 10 years and 20 seasons of It's Sew Easy! Let's go back and start at the beginning of how things started with on It's Sew Easy This is a story of how an opportunity change my life and business forever! In December 1994 I...
Day 12 #SEWCIALHOP2020 Today we feature making $ sewing! Have you ever wanted to turn your sewing skills into a business? Having run a custom apparel and alteration business for 20 years, being an alteration specialist is an excellent career that requires talent...
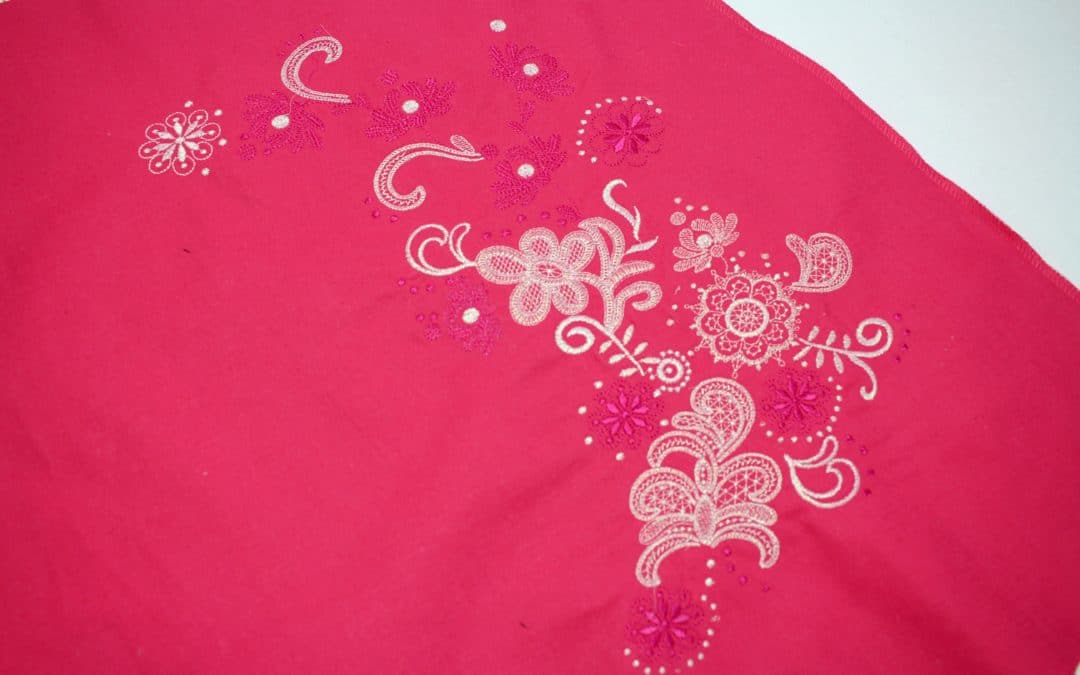
Embroidery is such a hot trend this spring! Whether you are sewing a skirt from scratch or recycling one from the back of your closet, adding a touch of embroidery can create an entirely fresh look. Keep in mind this would look great on a dress too ?
Supplies:
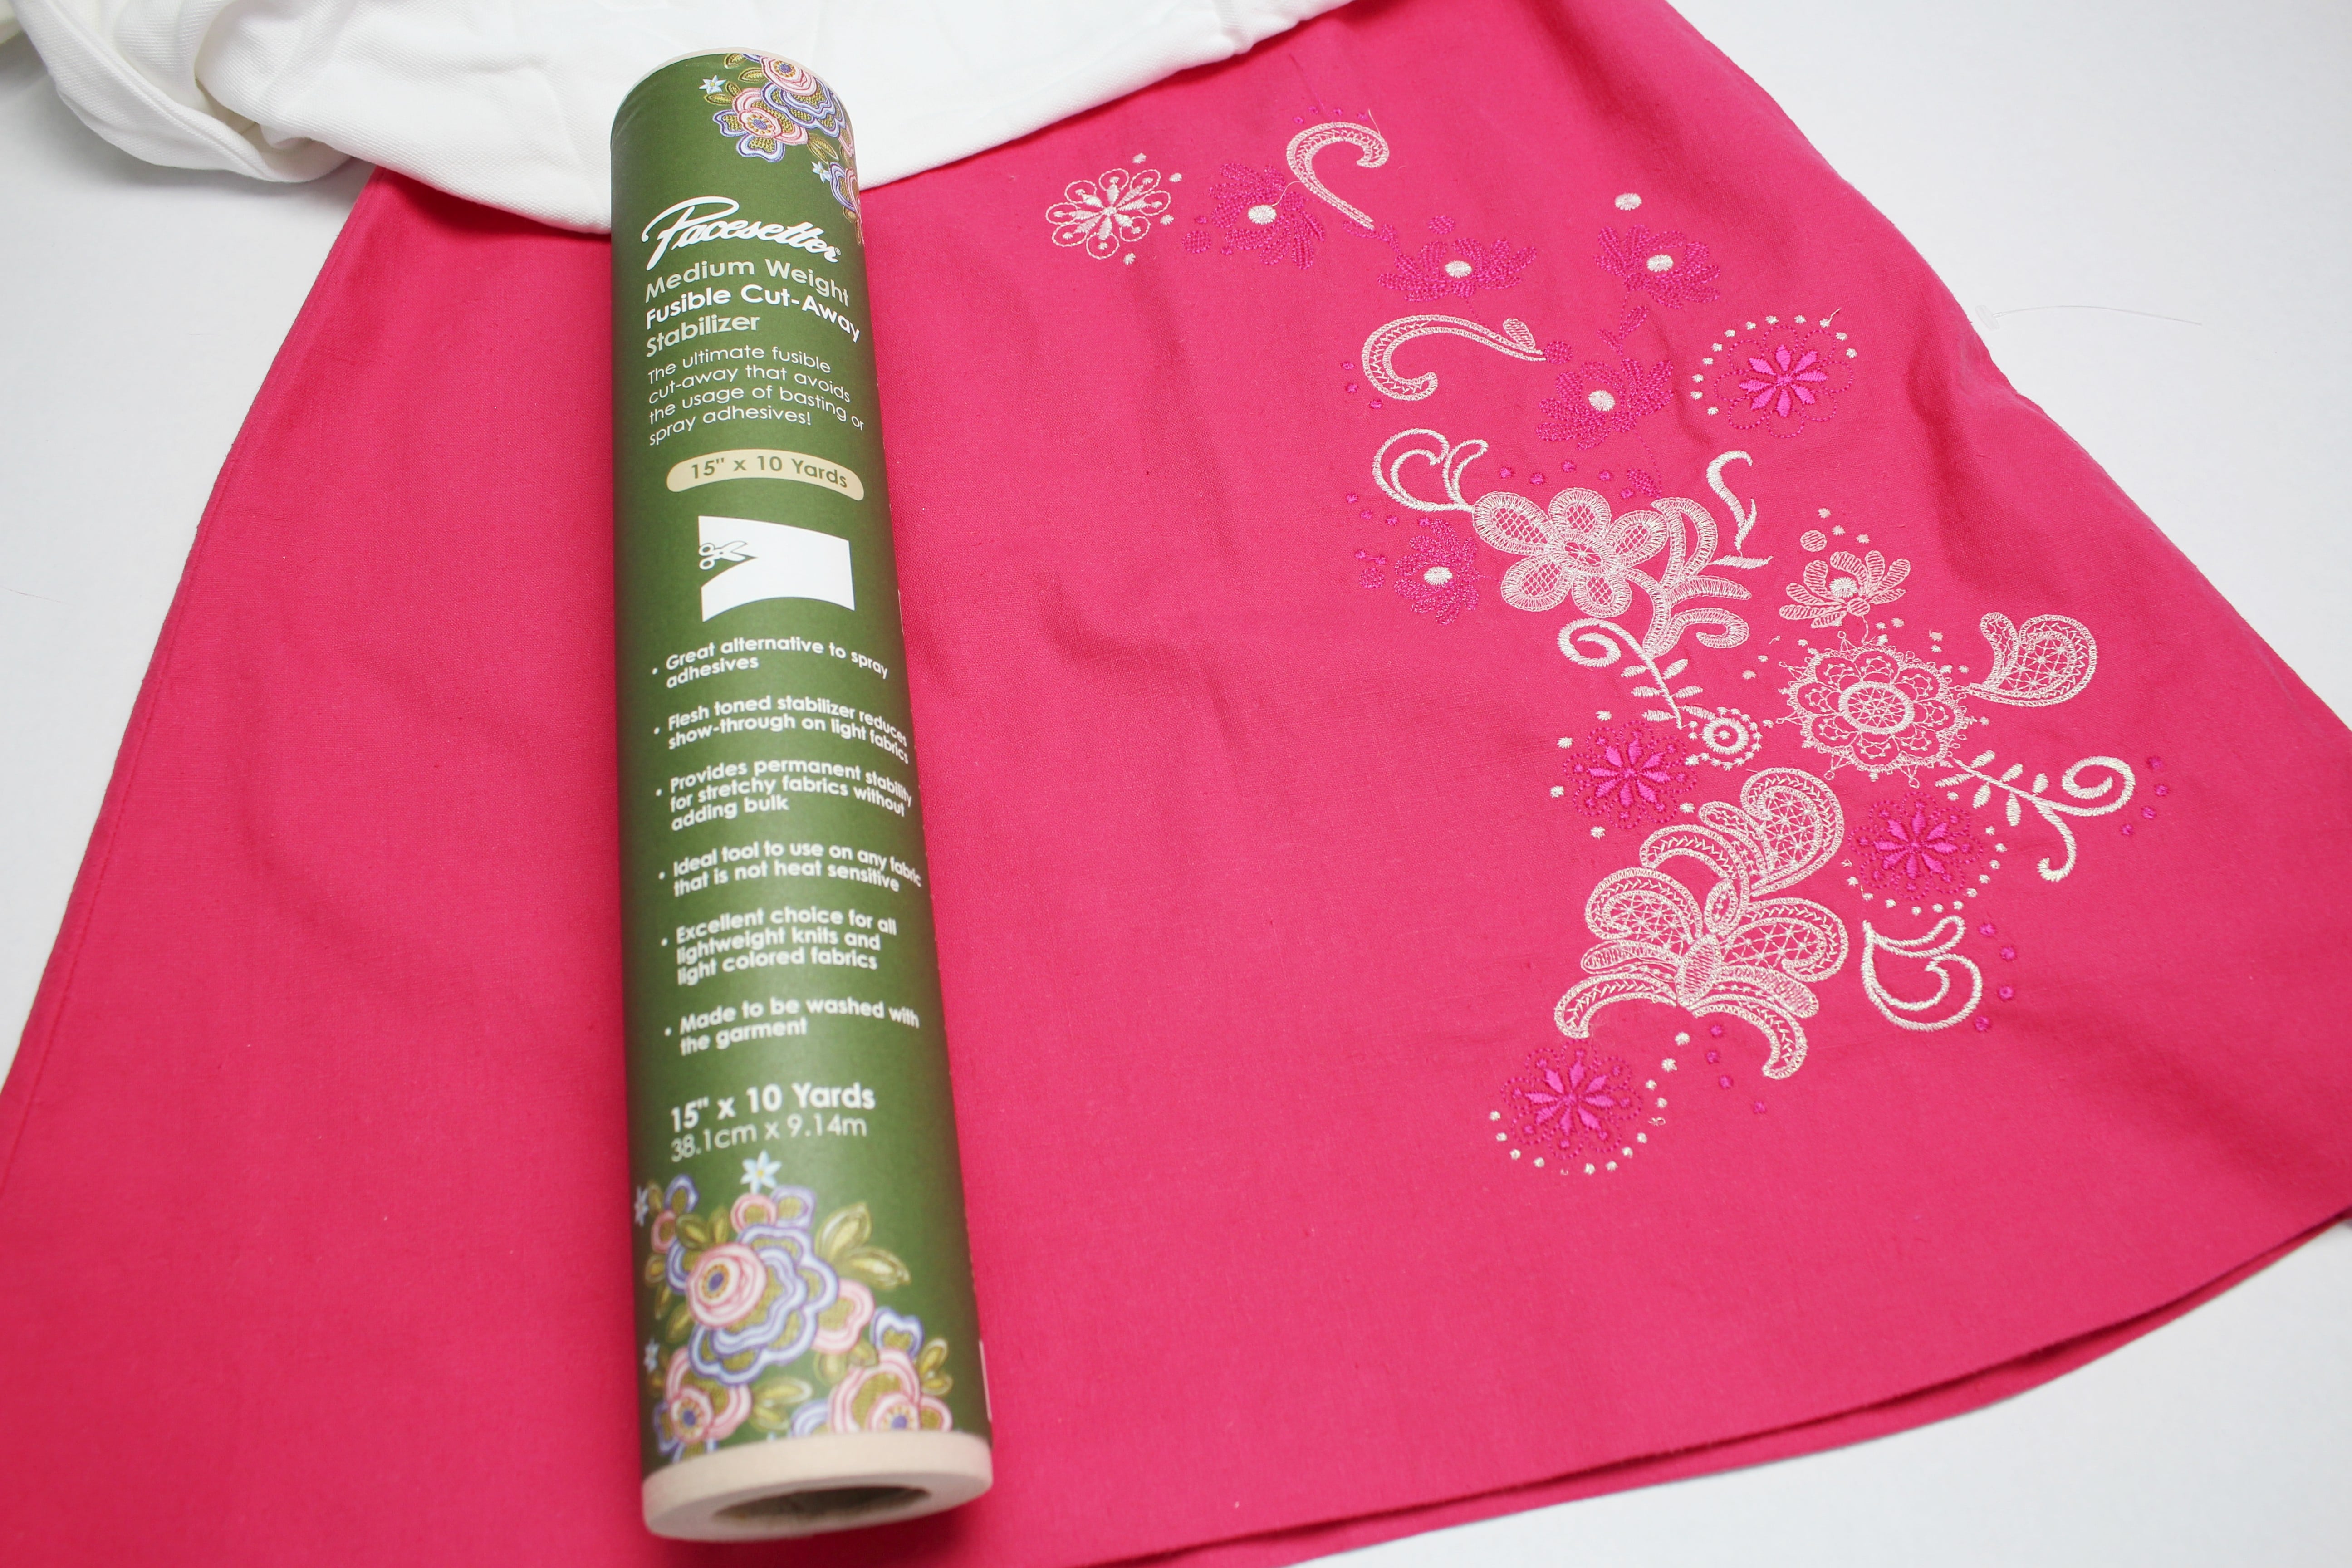
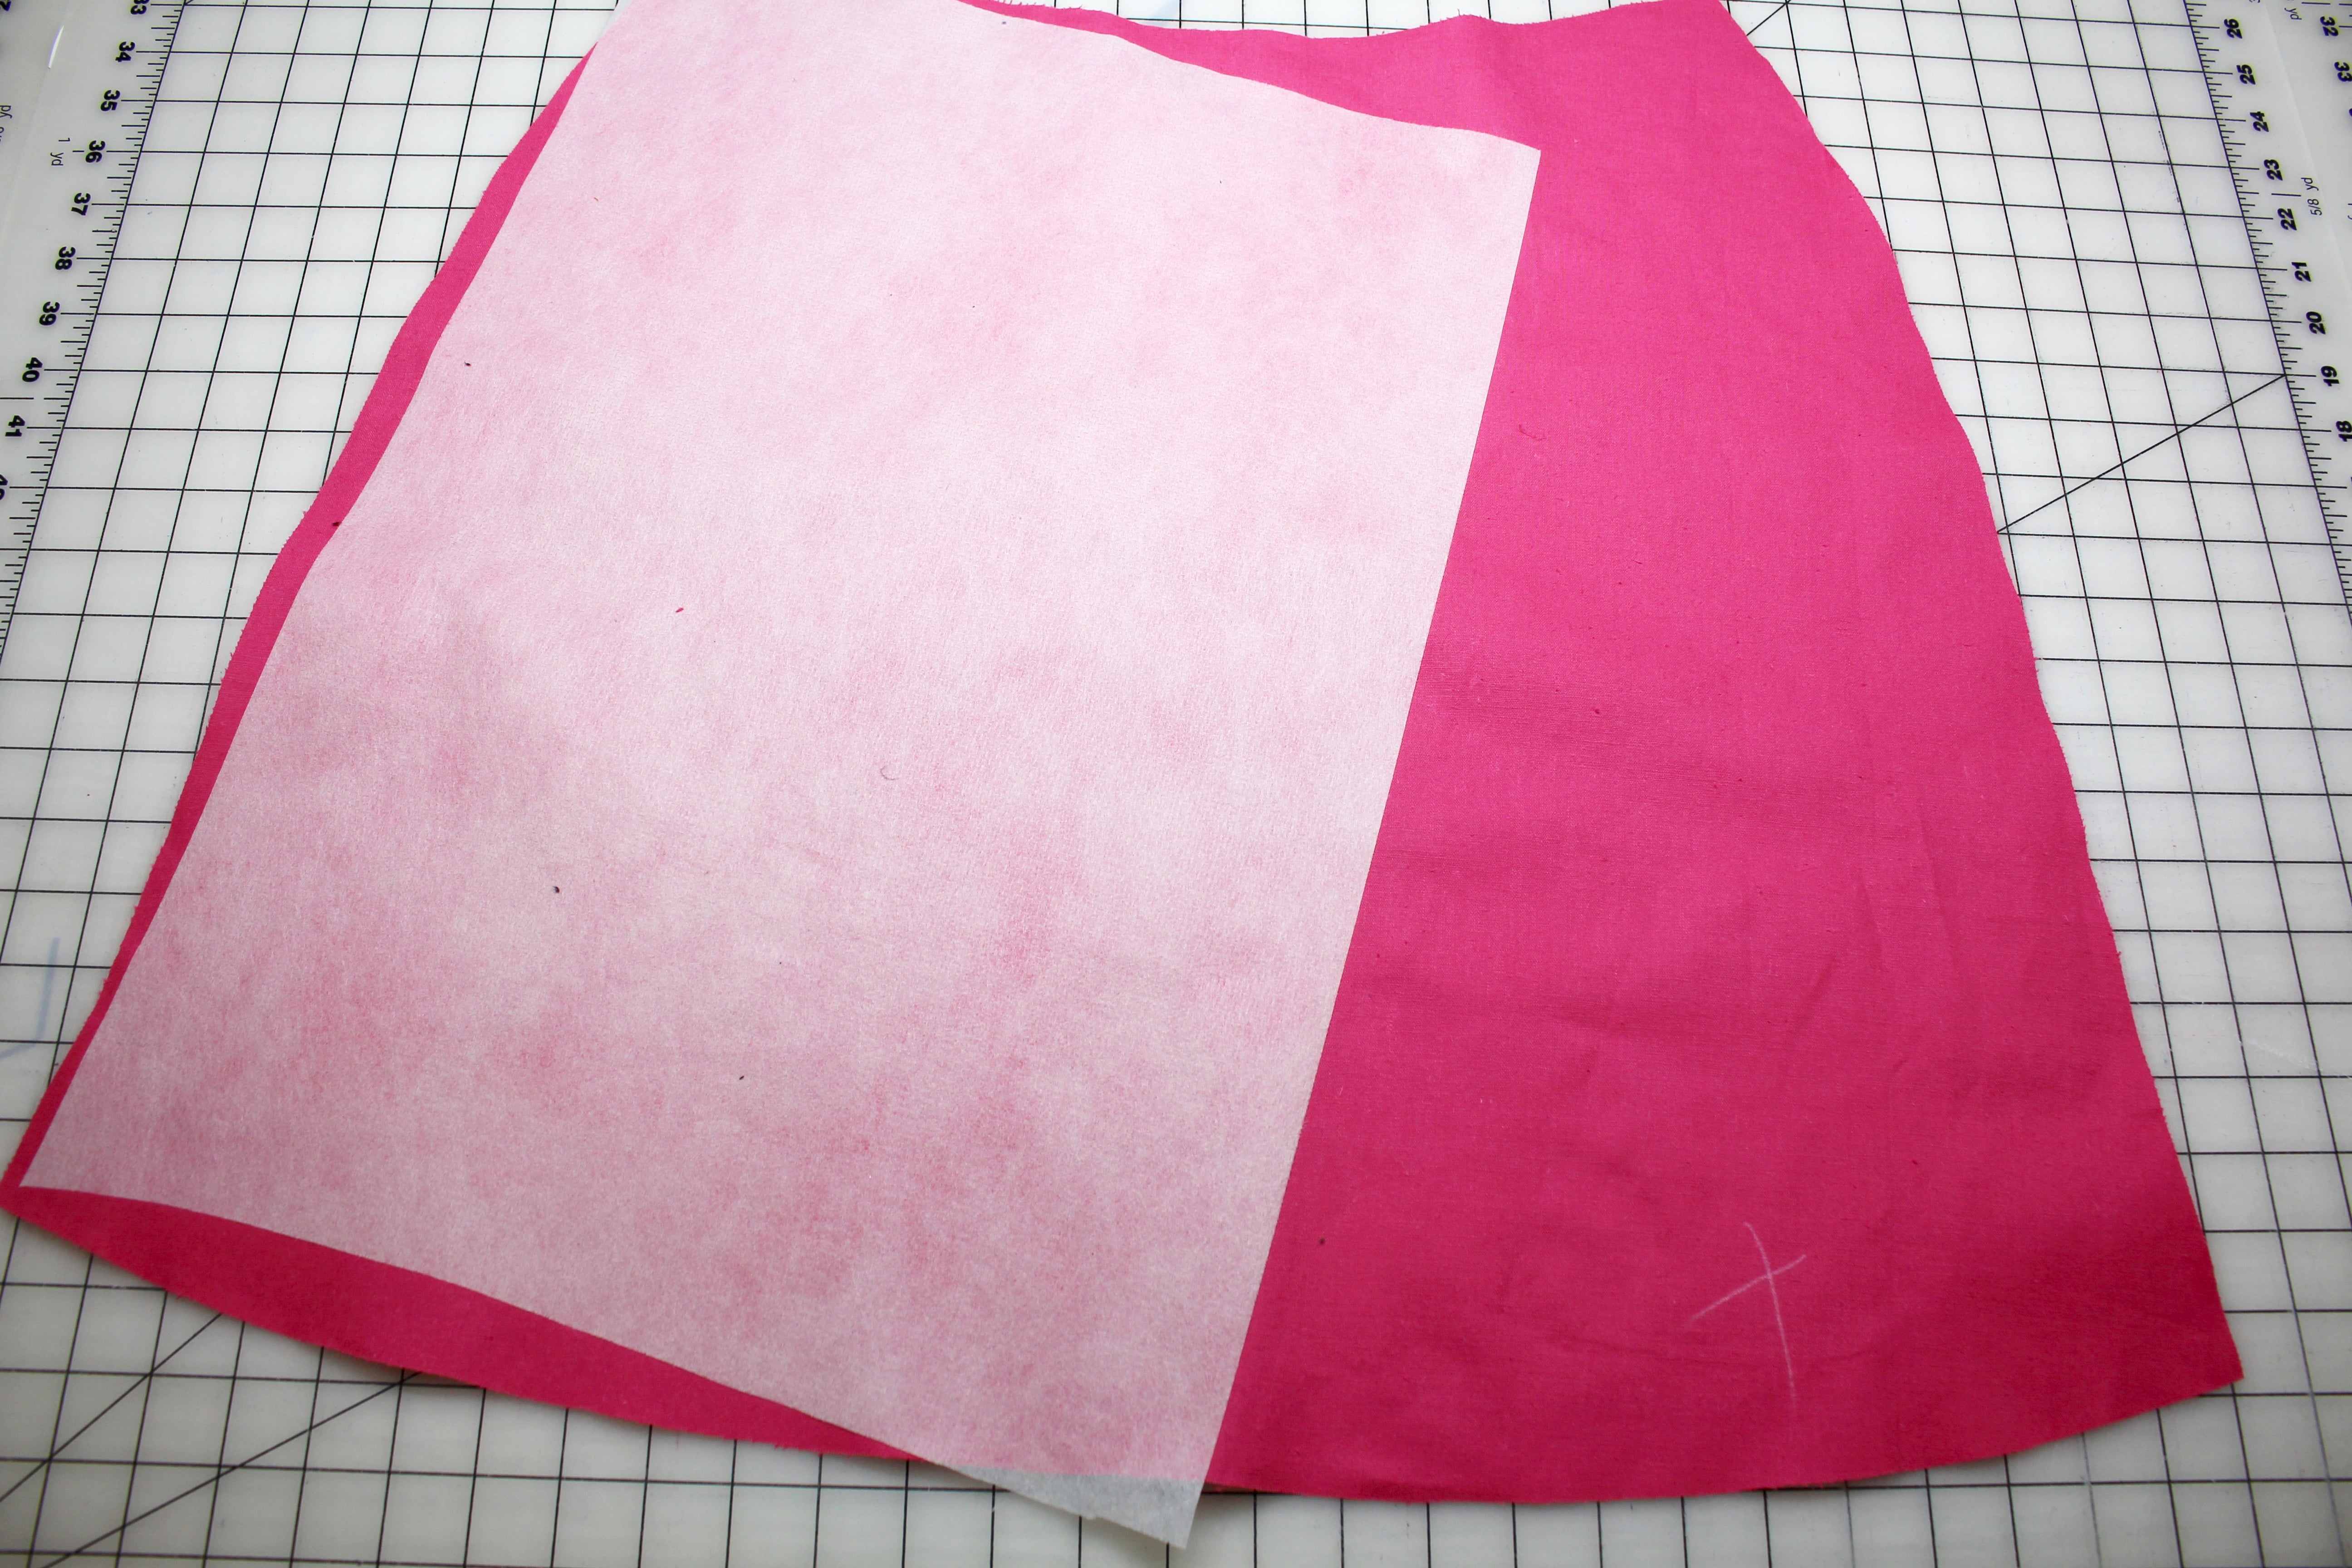
DESIGNER TIP: My skirt fabric is a linen blend, but the stabilizer I am using would work great on rayon, cotton sateen, denim, wool, and cotton blends. JUST be careful with satin, silk blends, and velvet (to name a few). You don’t want to damage the fabric from the iron when pressing on the fusible stabilizer; it’s best to test the stabilizer on a swatch of fabric first.
Determine the placement for the embroidery on the skirt. I am going to focus on one side of the front of the skirt; marking that spot with a fabric pen or tailors chalk. Press the embroidery stabilizer on the wrong side of the fabric covering the area to be embroidered.
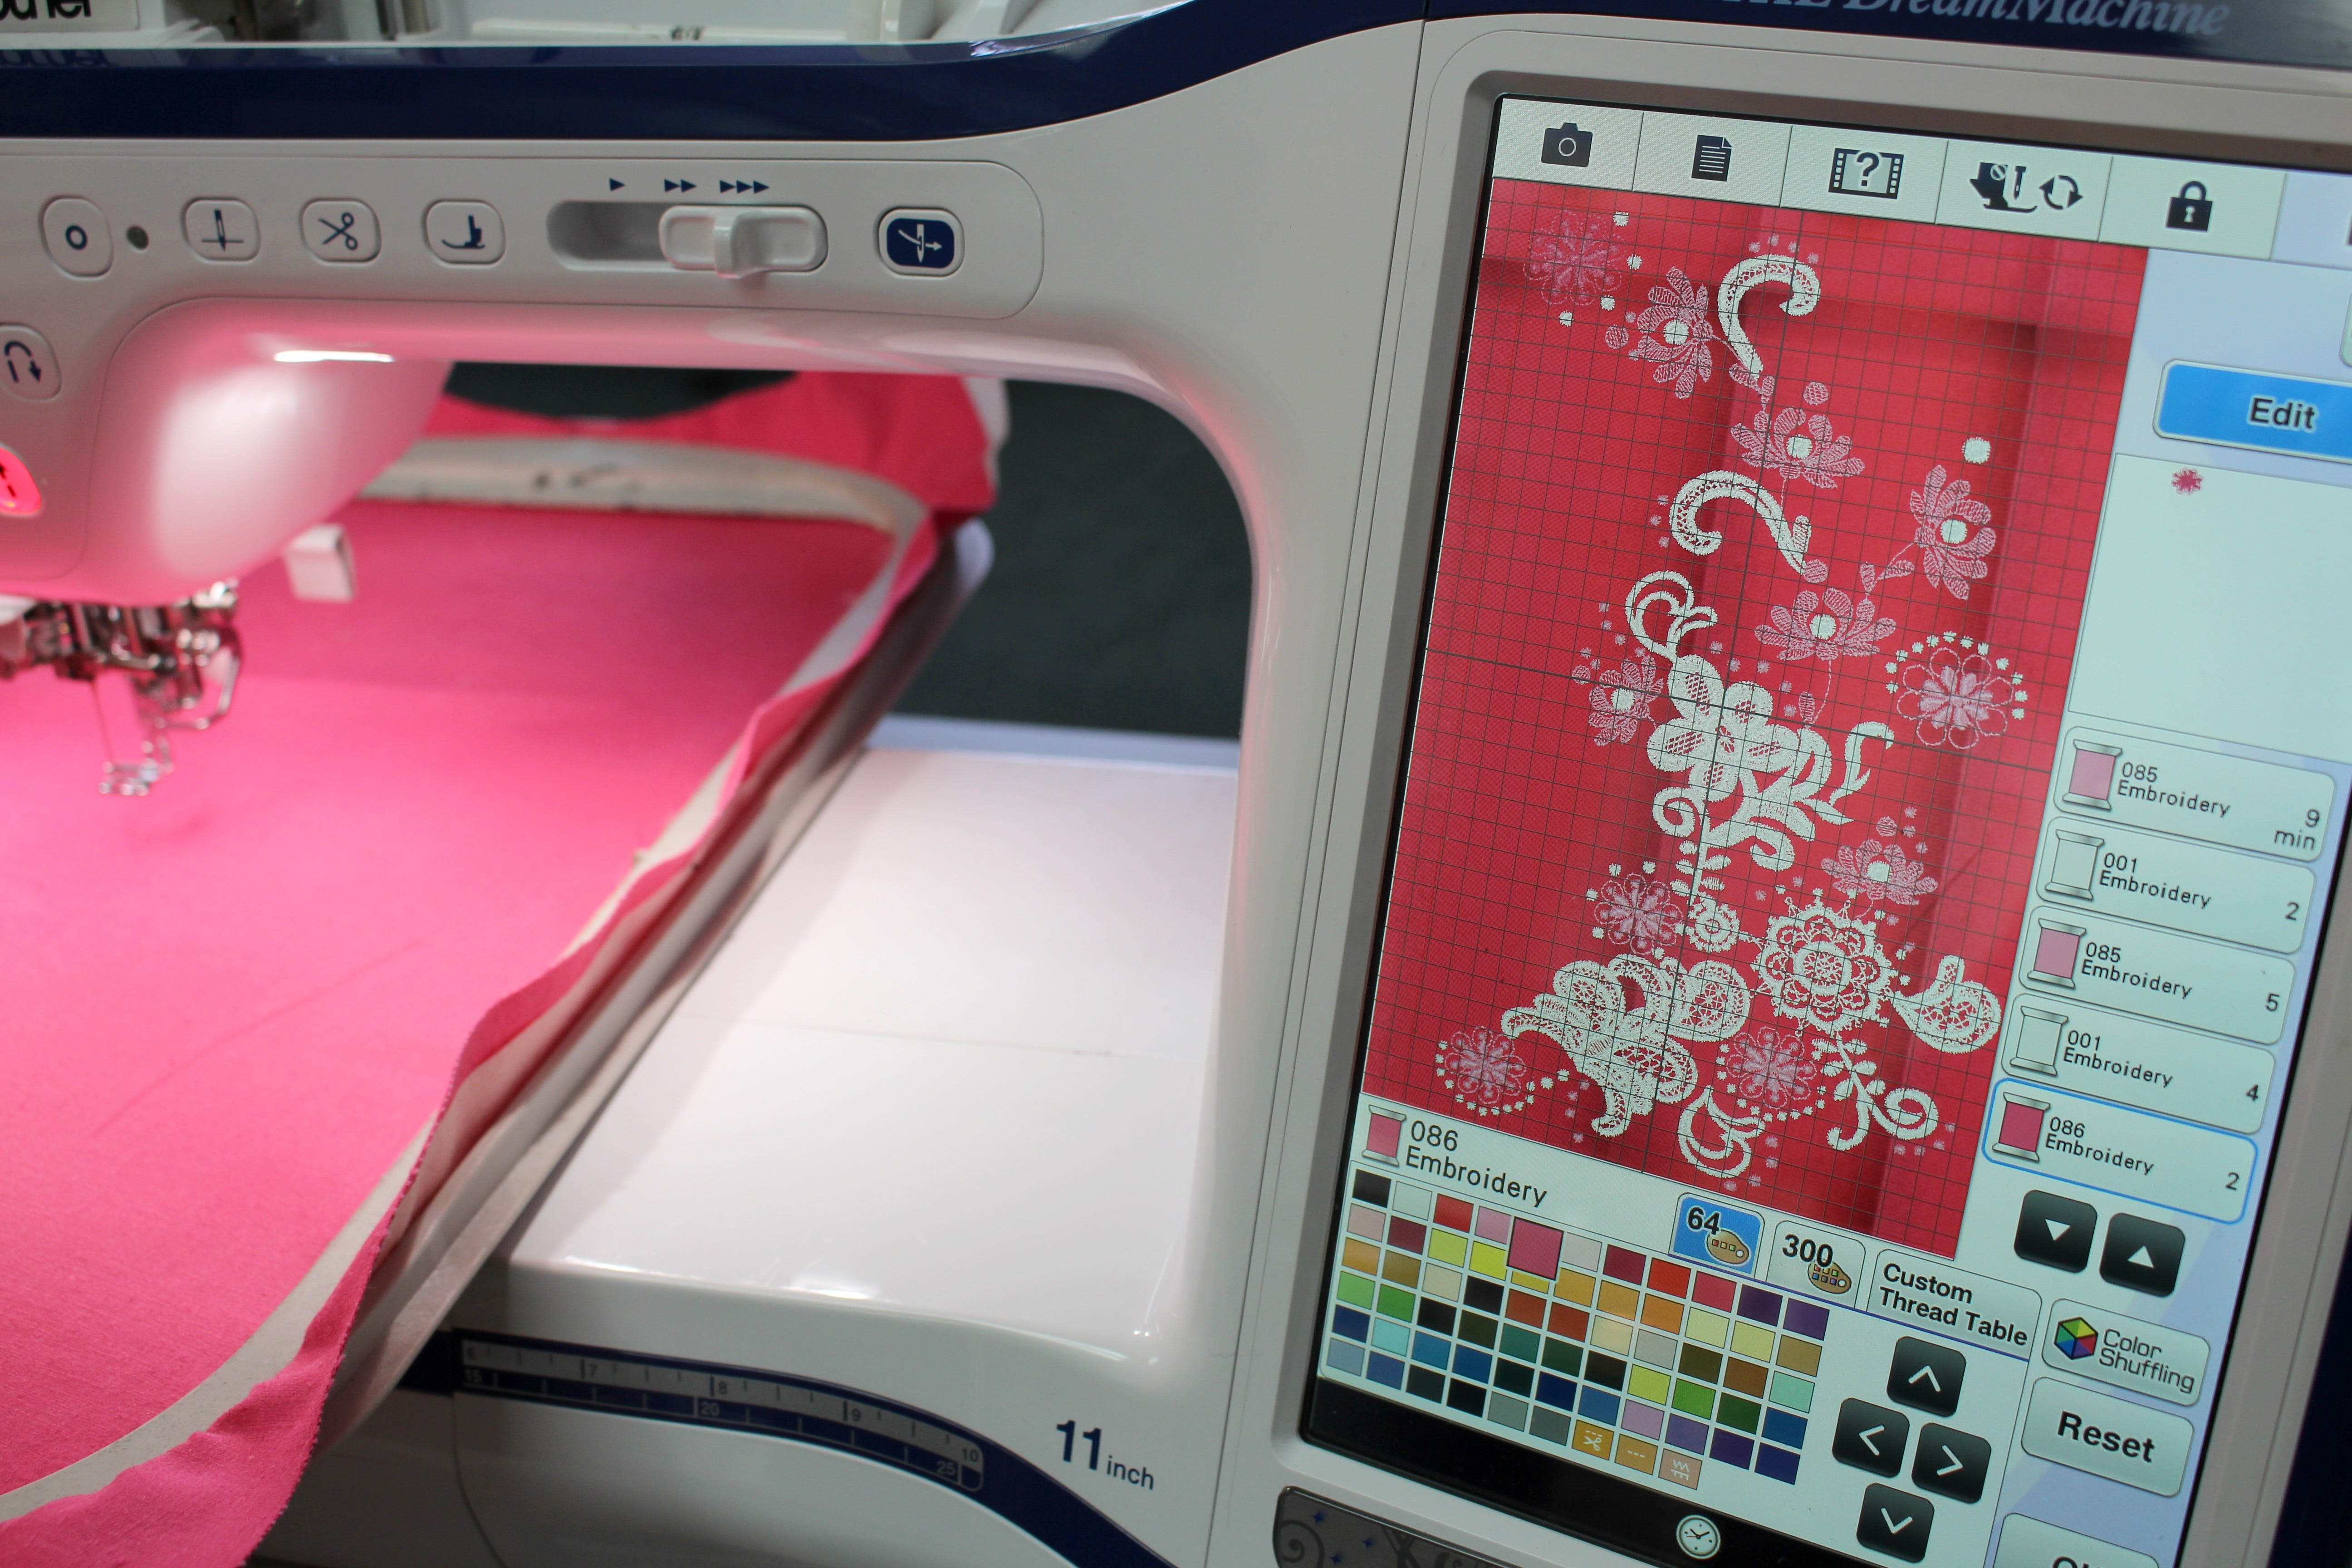
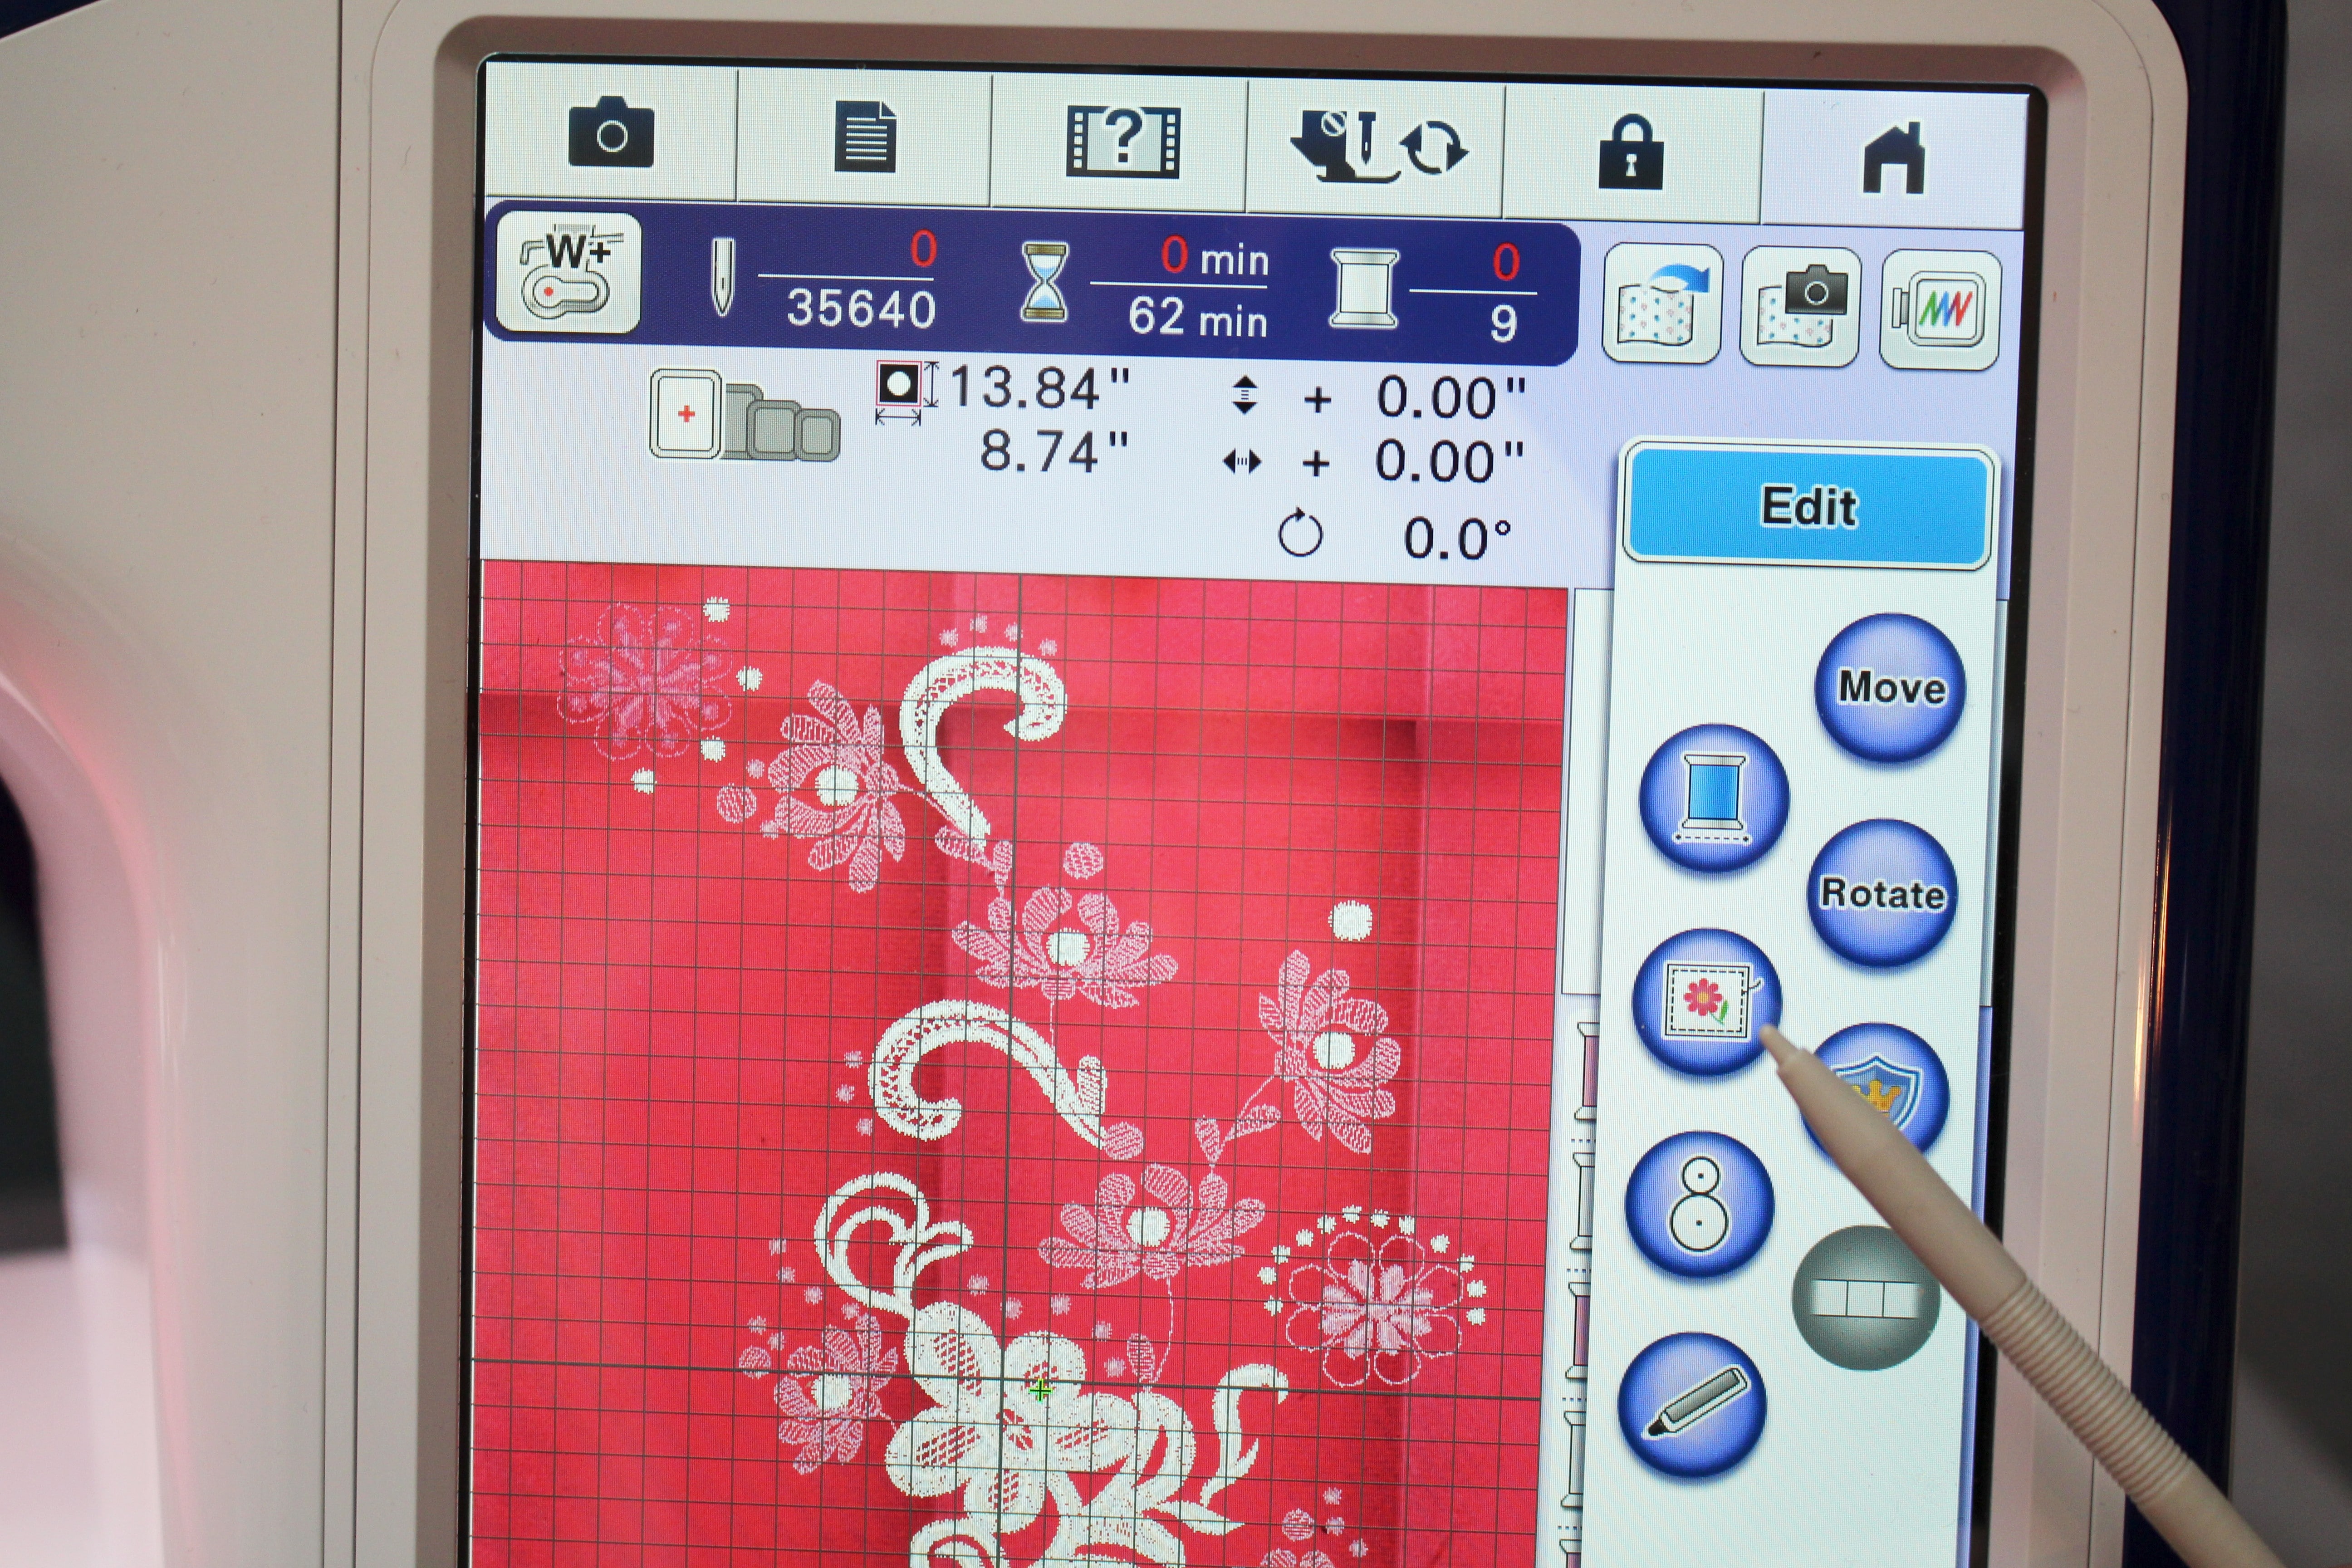
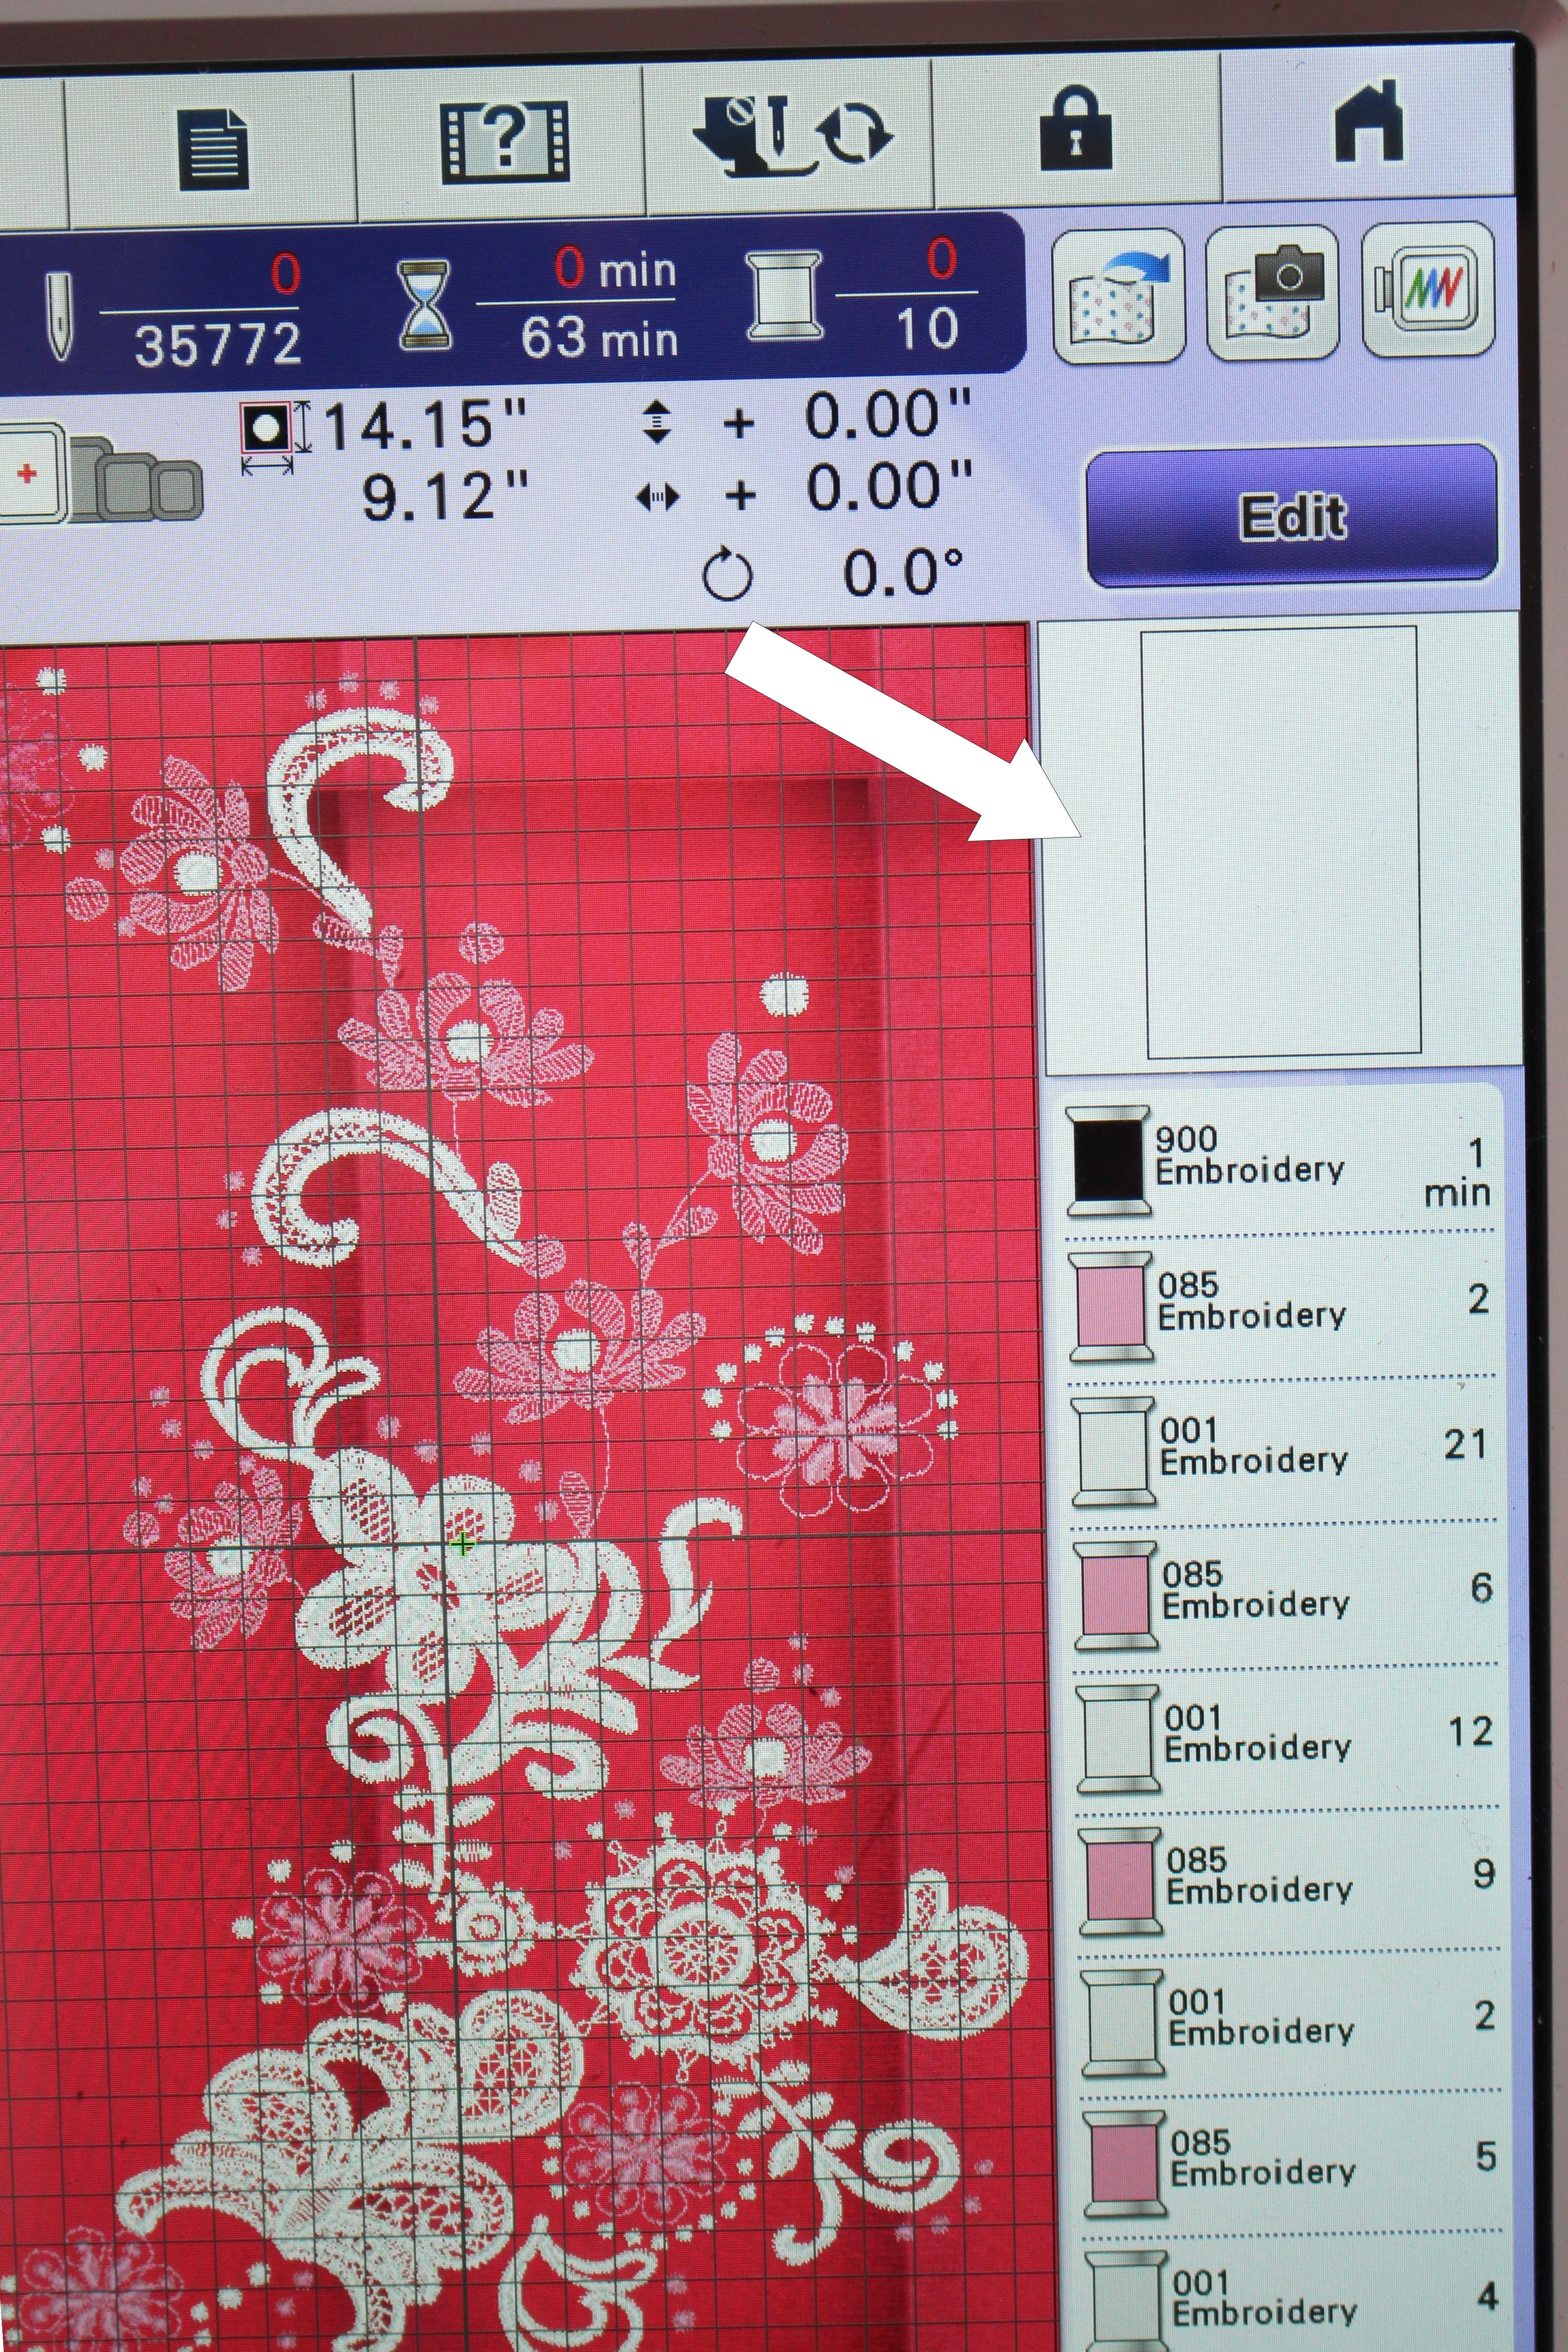
Hoop the fabric and insert the hoop into the machine. Choose an embroidery design or add a couple of designs onto the screen. Scan the fabric in and move the embroidery design as needed. If you don’t have the scanning feature on your sewing machine, use an embroidery placement marker such as the snowman or other tools.

You can read the full blog, head over to my post as a Brother Expert Consultant on the Brother Stitching Sewcial. Be sure to share photos of embellished Kate skirt #angelawolf #brothersews
Cheers,
The Lacy Knit Top Sewing Pattern The design for the Lacy Knit Top was a result of our everlasting Covid lockdown! Whether lounging at home, working in the studio, or working out in our home gym ~ this top hit the mark. Semi-fitted in the bust area, looser thru the...
The Shirley Faux Wrap Dress & Top I designed this pattern as one of the wrap style dresses and tops for season 19 of It's Sew Easy tv. The Shirley wrap can be sewn as a top or a dress. Because the style must pullover the head, this top must be sewn with a...

#SEWCIALHOP2020 CONGRATULATIONS TO ALL THE WINNERS! CATCH THE REPLY AND MEET OUR FABULOUS SPONSORS Day 18 #SEWCIALHOP2020 and a Special THANKYOU to ALL the SPONSORS!!! Stay up to date with new tutorials, giveaways, and more - follow...

Day 17 #SEWCIALHOP2020 Today we feature my good friends at Allbrands!!! Allbrands.com has spent four decades focused on one thing above all others, unparalleled customer service. Our owners, John and Annette Douthat, were very careful when they chose our name,...

Day 16 #SEWCIALHOP2020 Features the fabulous Holly & Steve Cobb and The Sewing Shop in Shreveport, Louisiana. I featured Steve and Holly in my live show back in May, checking in on their store during the start of the covid-lockdown. They are a Brother dealer and...
Day 15 #SEWCIALHOP2020 Our special guest is my good firend Reen Wilcoxson owner of Embroidery Garden! Embroidery Garden is filled with embroidery designs, applique files, and so many other creative projects! GIVEAWAY Reen knows how much we love embroidery and she is...

Day 14 #SEWCIALHOP2020 Today we feature my friends Kelly and Sharon at Laser Bee!!! Laser Bee Studio started from a love to create unique, handmade gifts using embroidery, vinyl and engraving. Our owners have been in the embroidery business for 20+ years. Machine...
Day 13 #SEWCIALHOP2020 We are celebrating 10 years and 20 seasons of It's Sew Easy! Let's go back and start at the beginning of how things started with on It's Sew Easy This is a story of how an opportunity change my life and business forever! In December 1994 I...
Day 12 #SEWCIALHOP2020 Today we feature making $ sewing! Have you ever wanted to turn your sewing skills into a business? Having run a custom apparel and alteration business for 20 years, being an alteration specialist is an excellent career that requires talent...
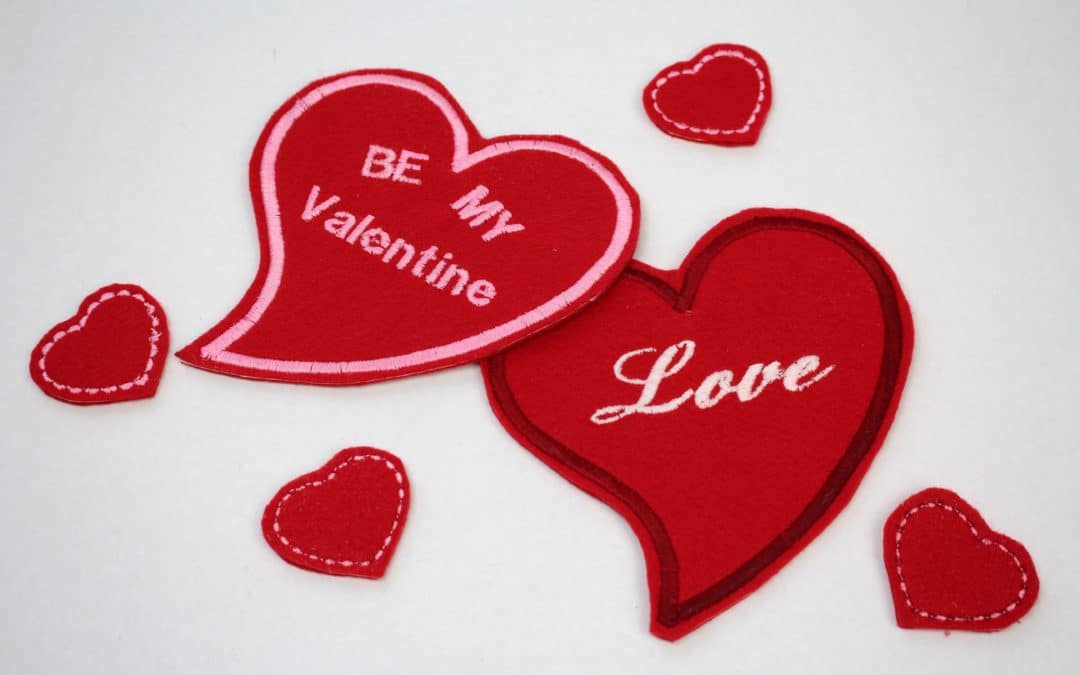
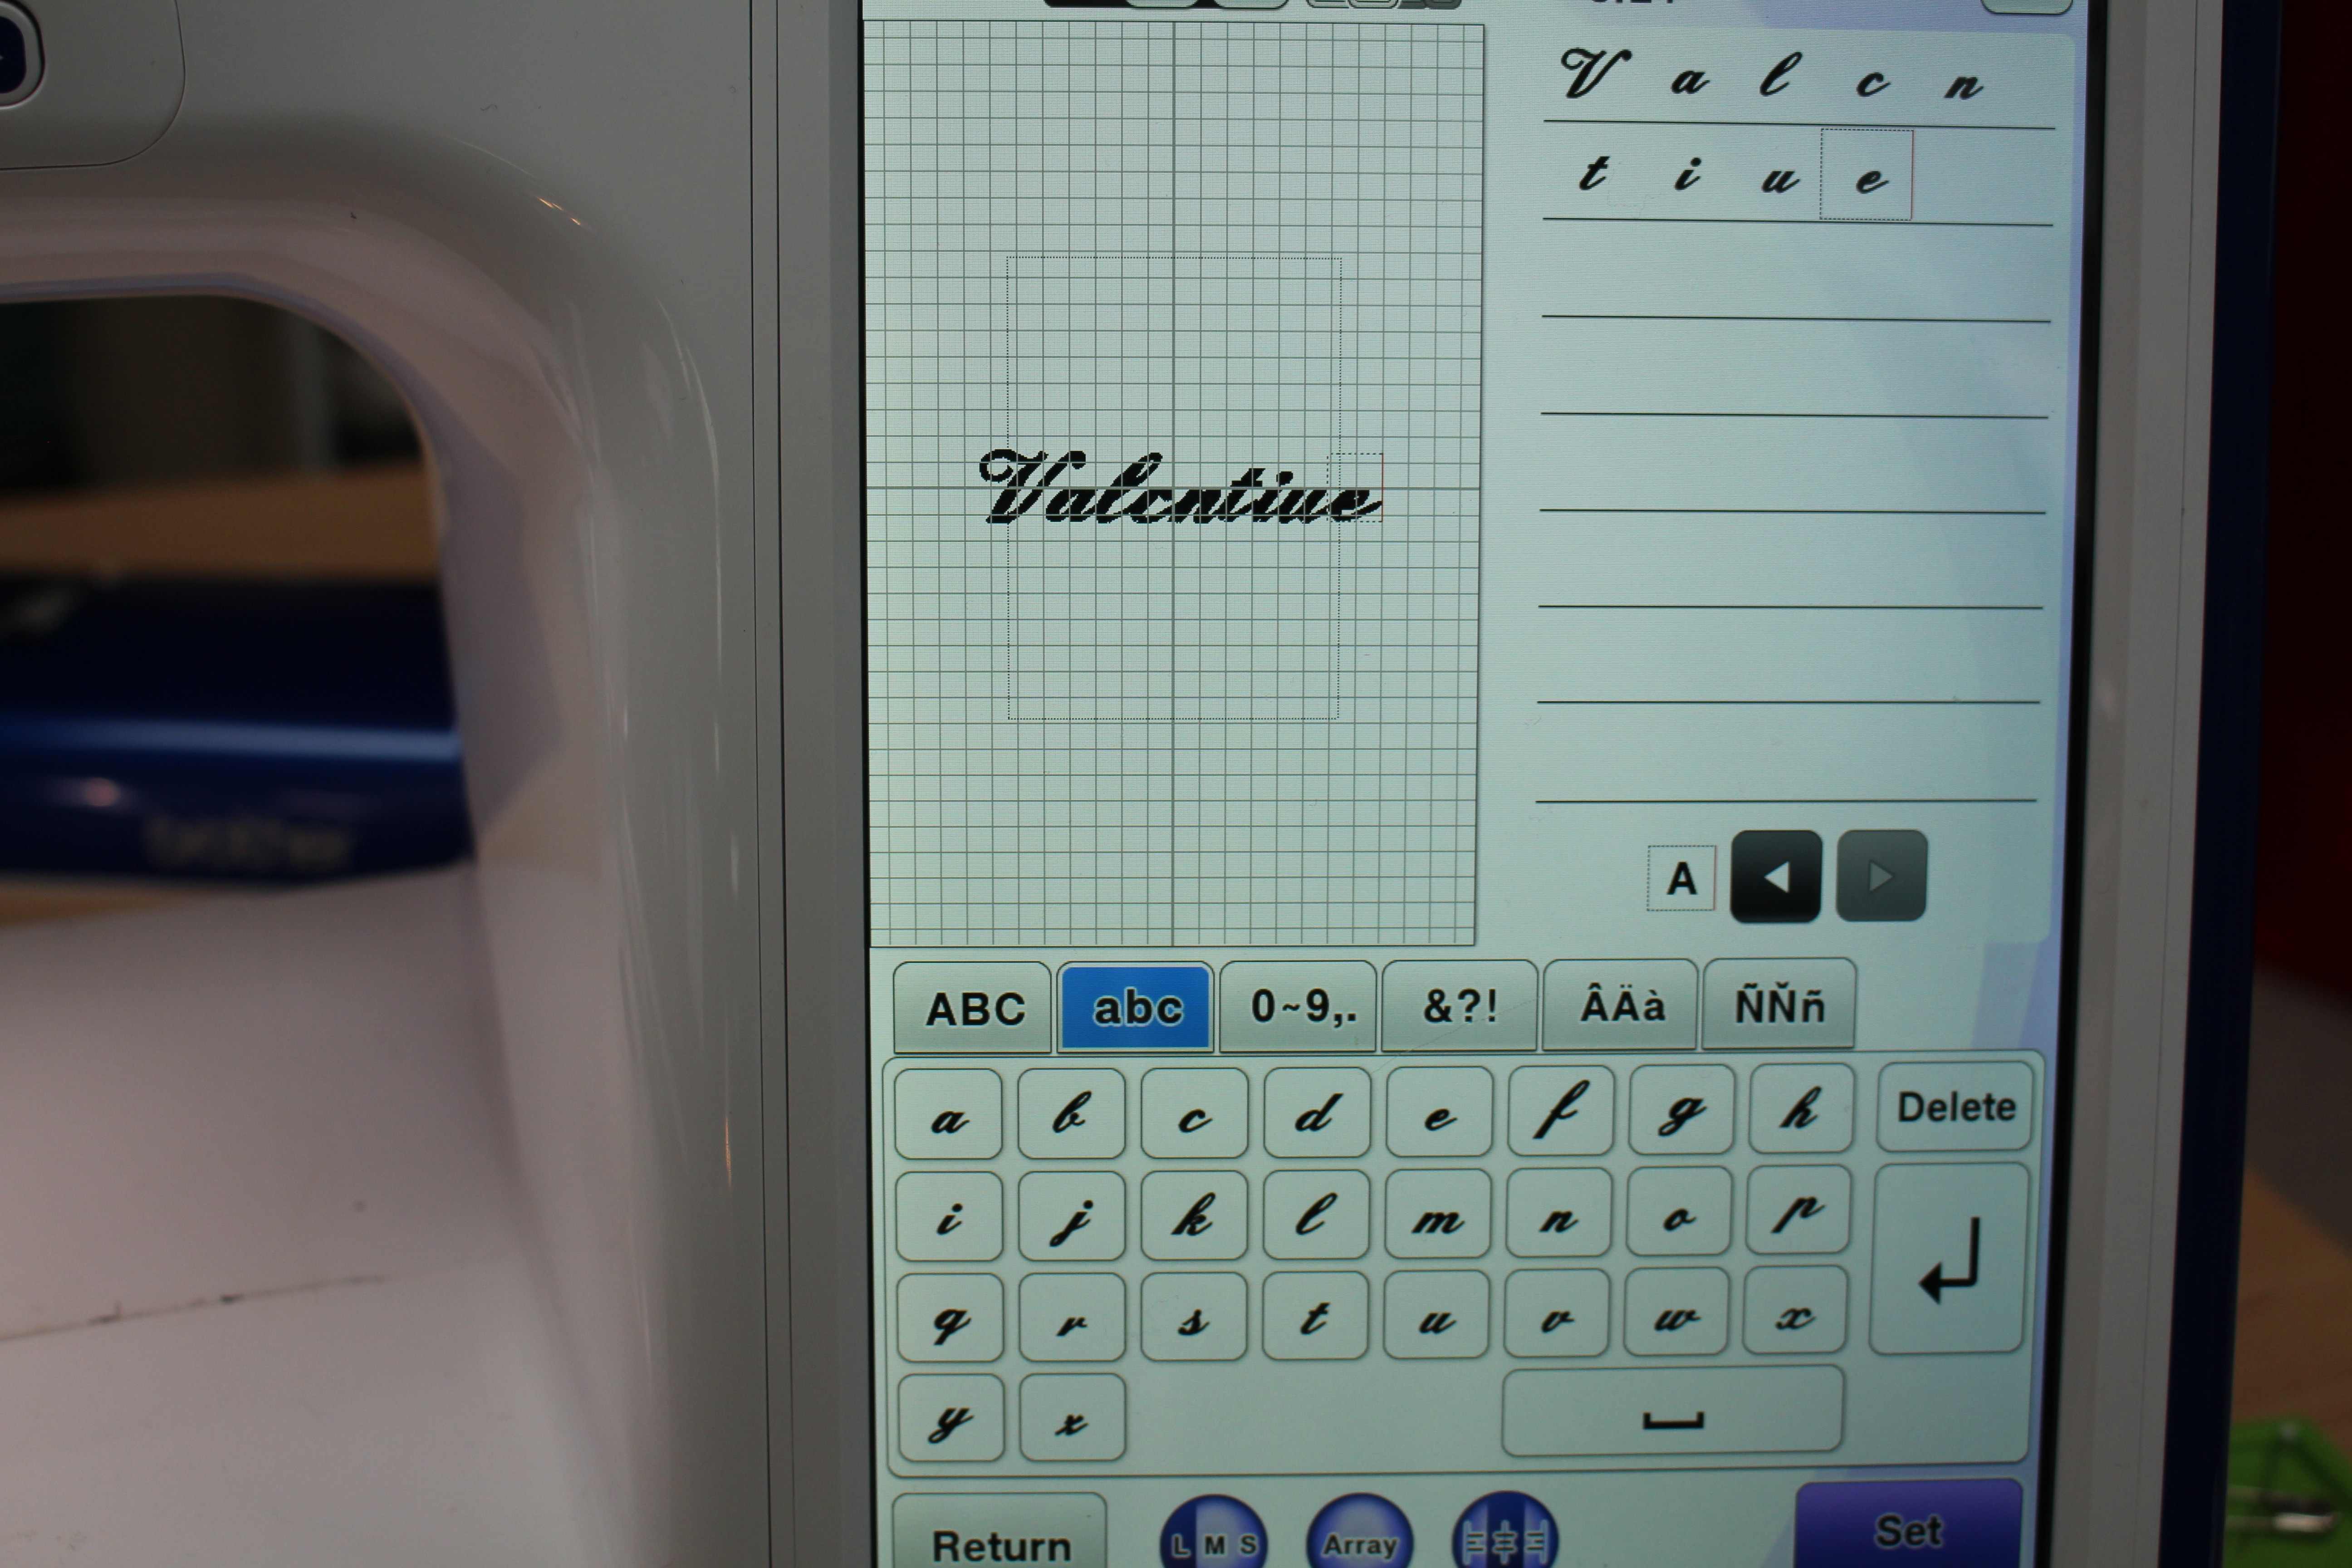
I am always looking for cute decorations for Valentine’s day, maybe it’s just that I love the color red ? Custom embroidered felt hearts is a fun way to share the love. This is a quick tutorial using My Design Center on the Brother sewing machine. Photo 1
Supplies: felt, tearaway embroidery stabilizer, water soluble topper, embroidery thread, scissors
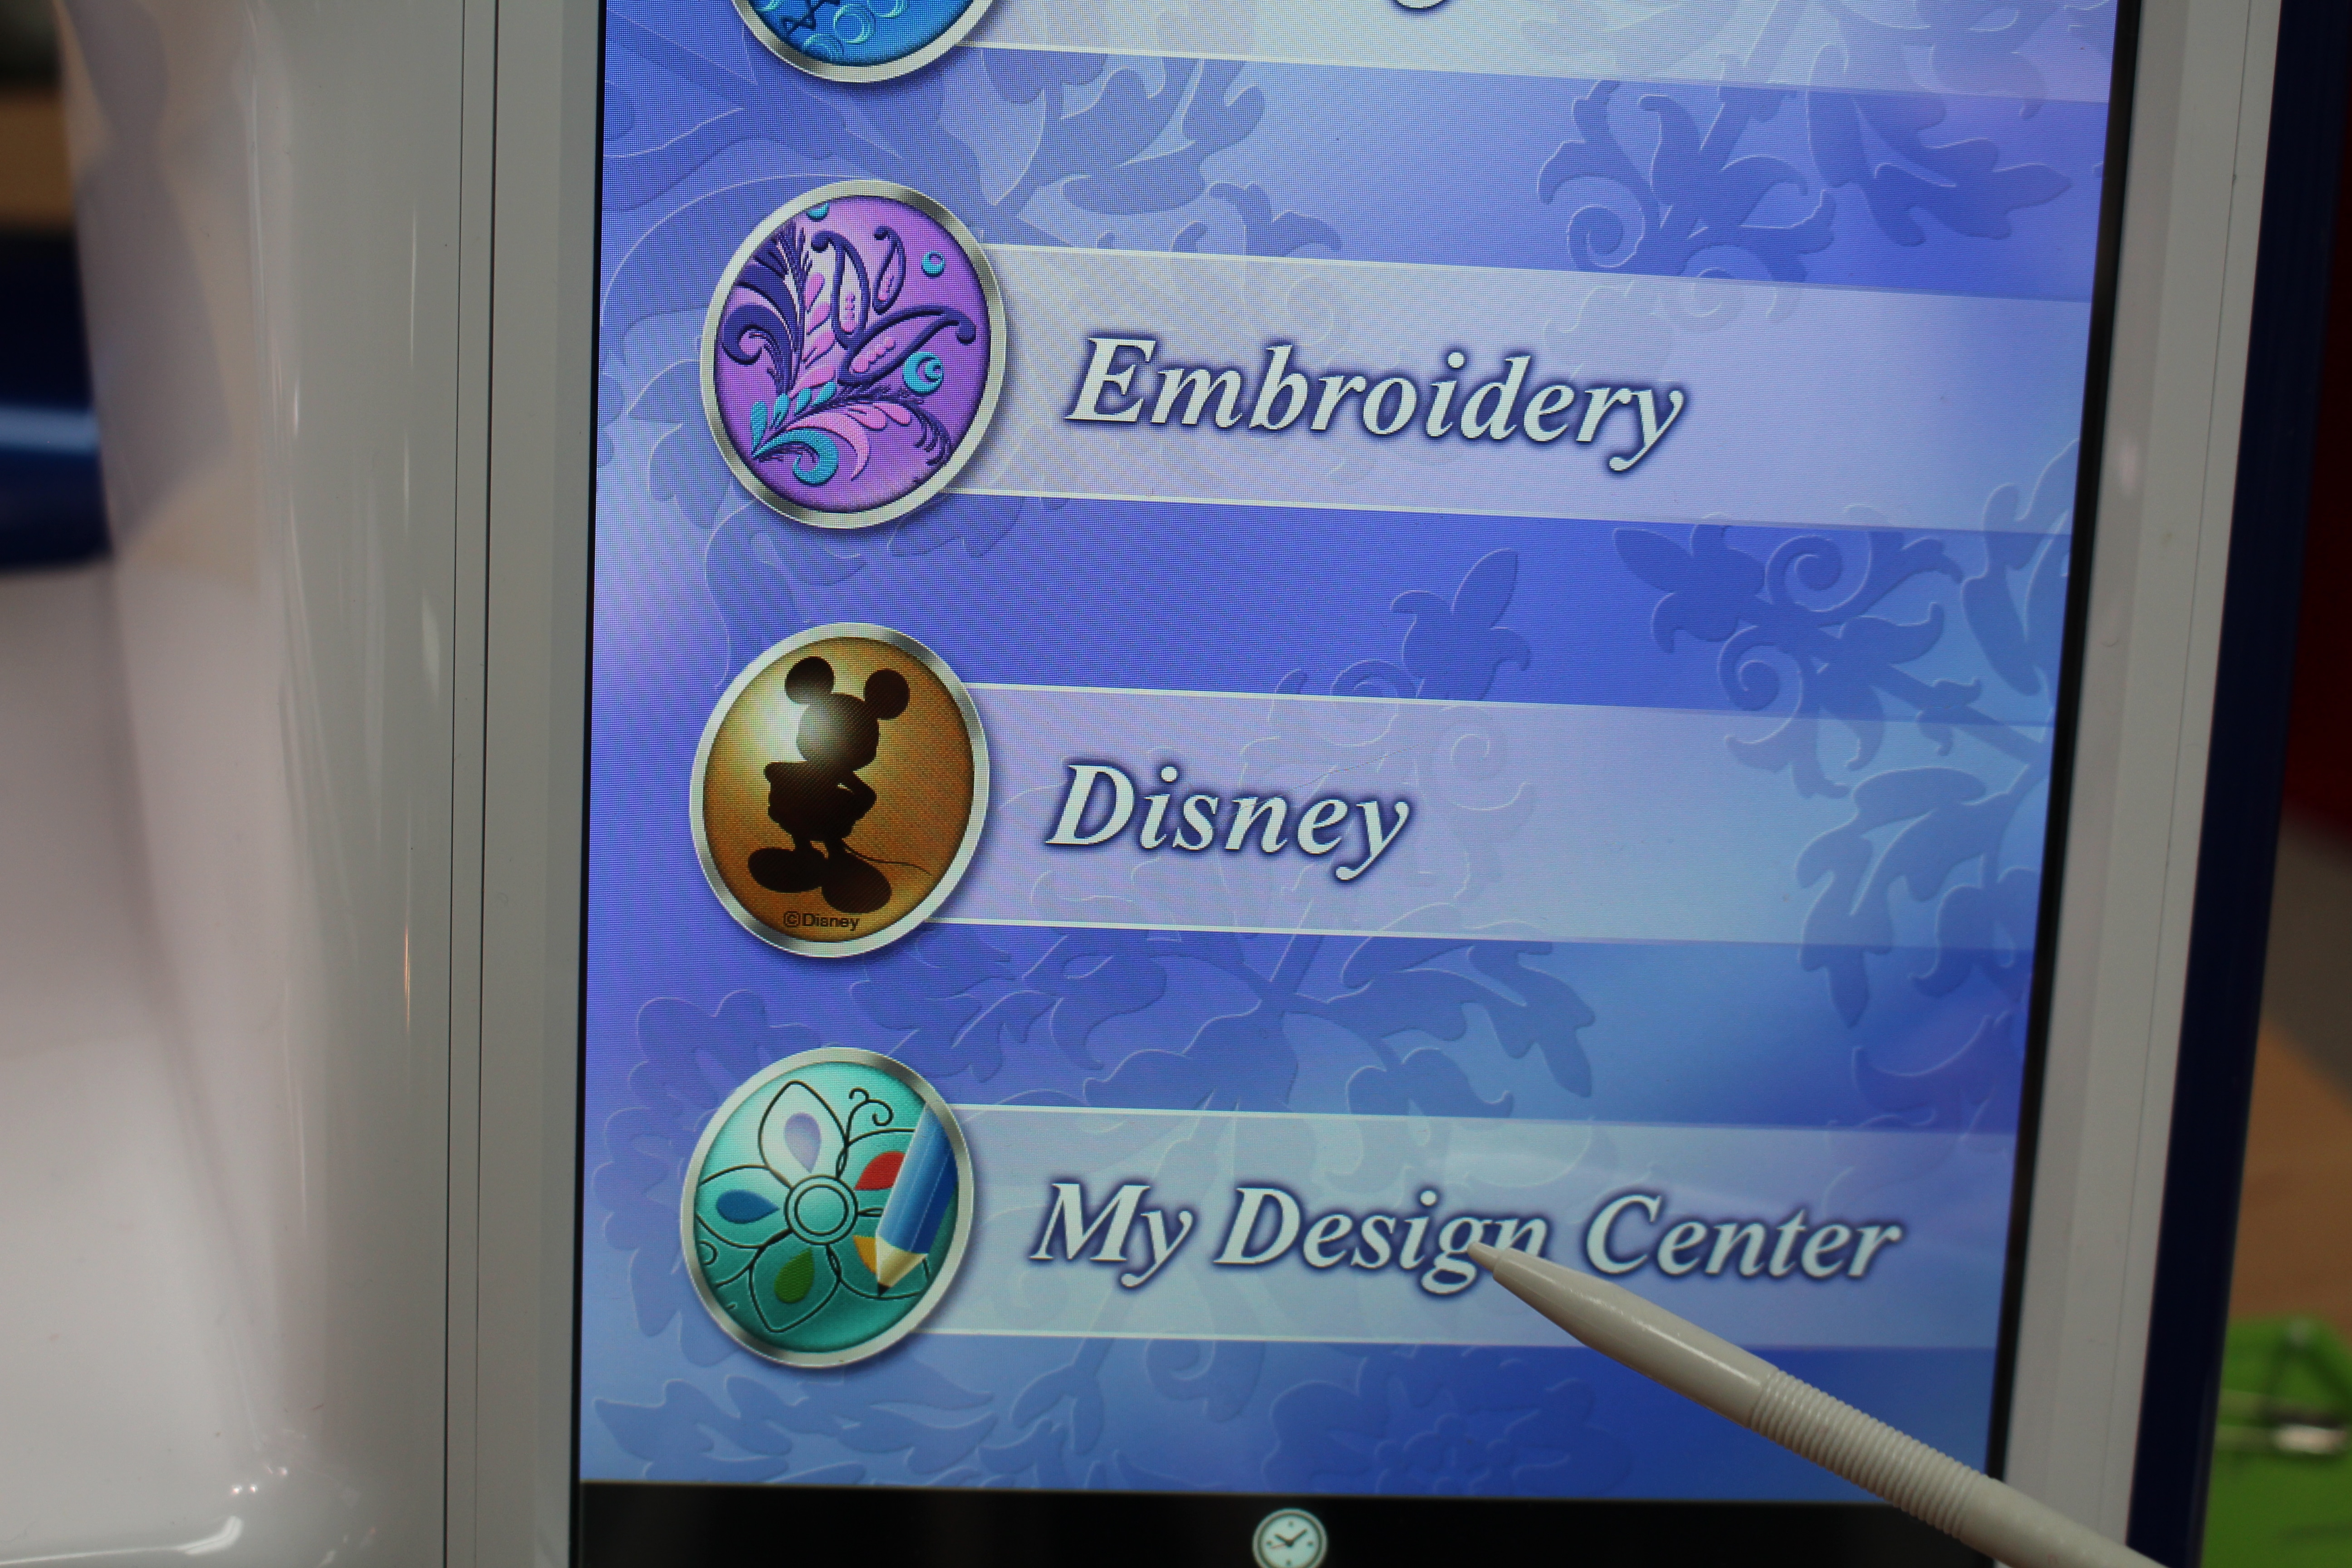

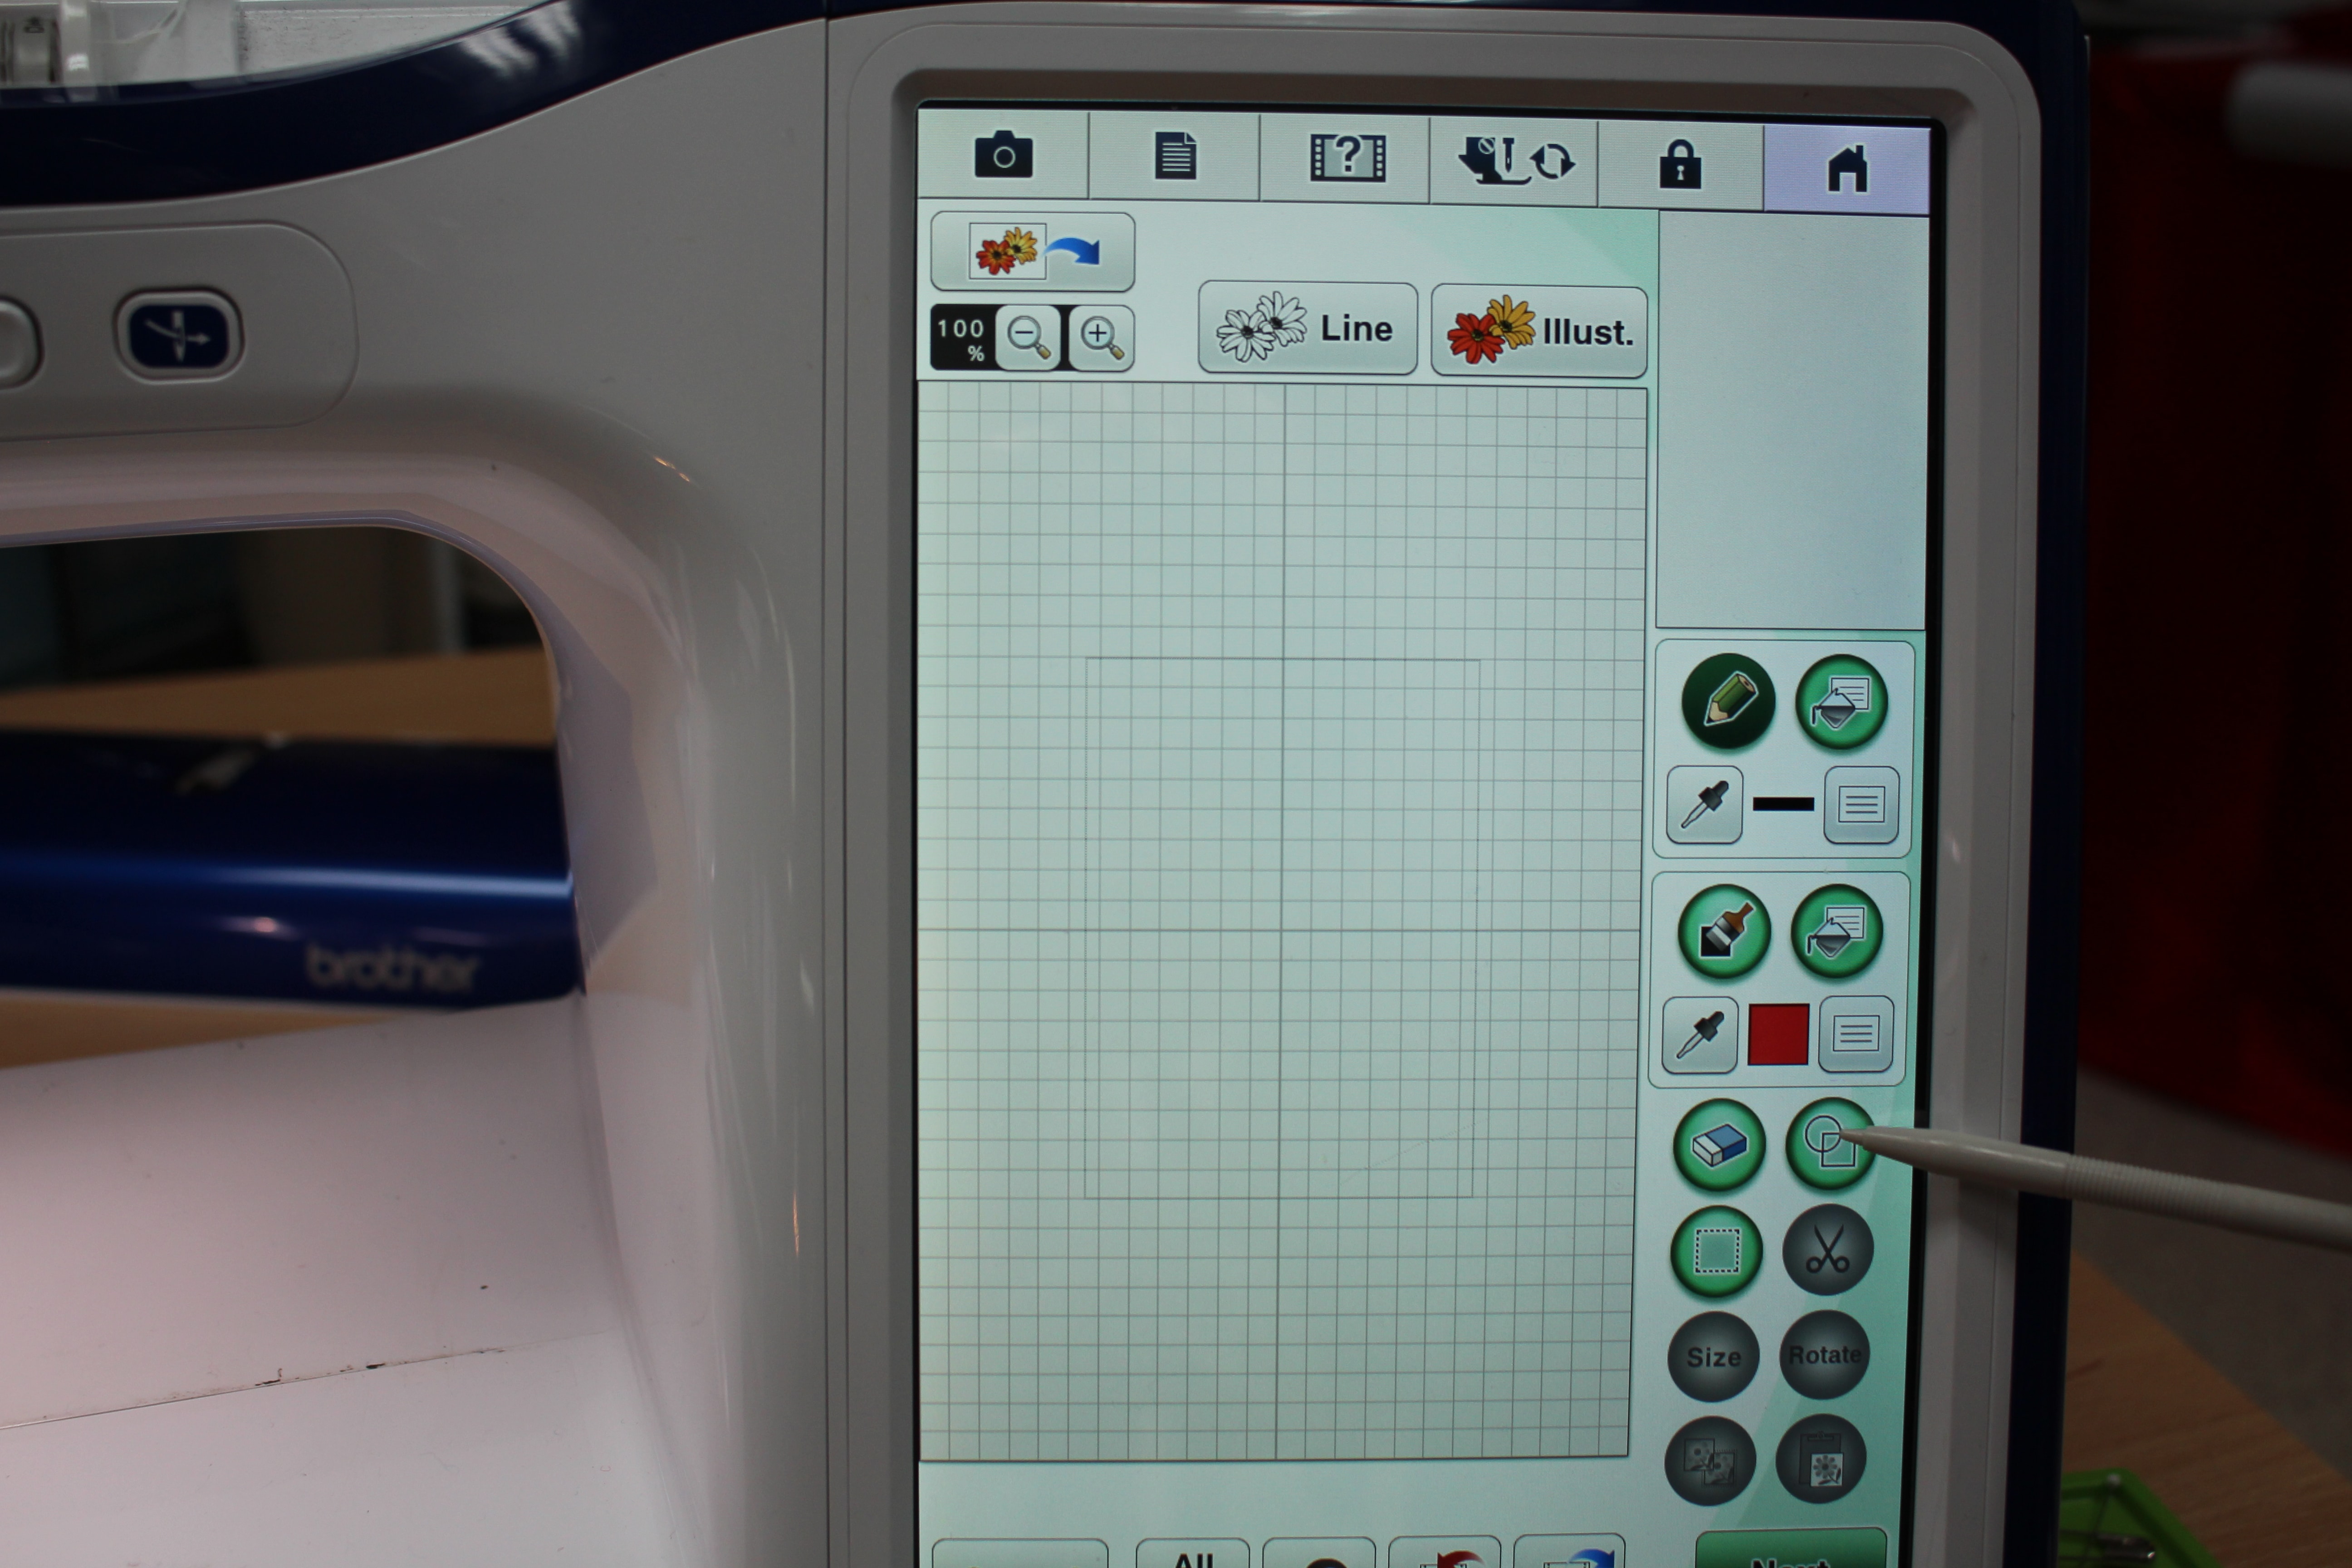
Click on the SHAPE. You will find a heart shape on the first page, but if you have the upgrades or THE Dream Machine 2 click on the icon for additional shapes.
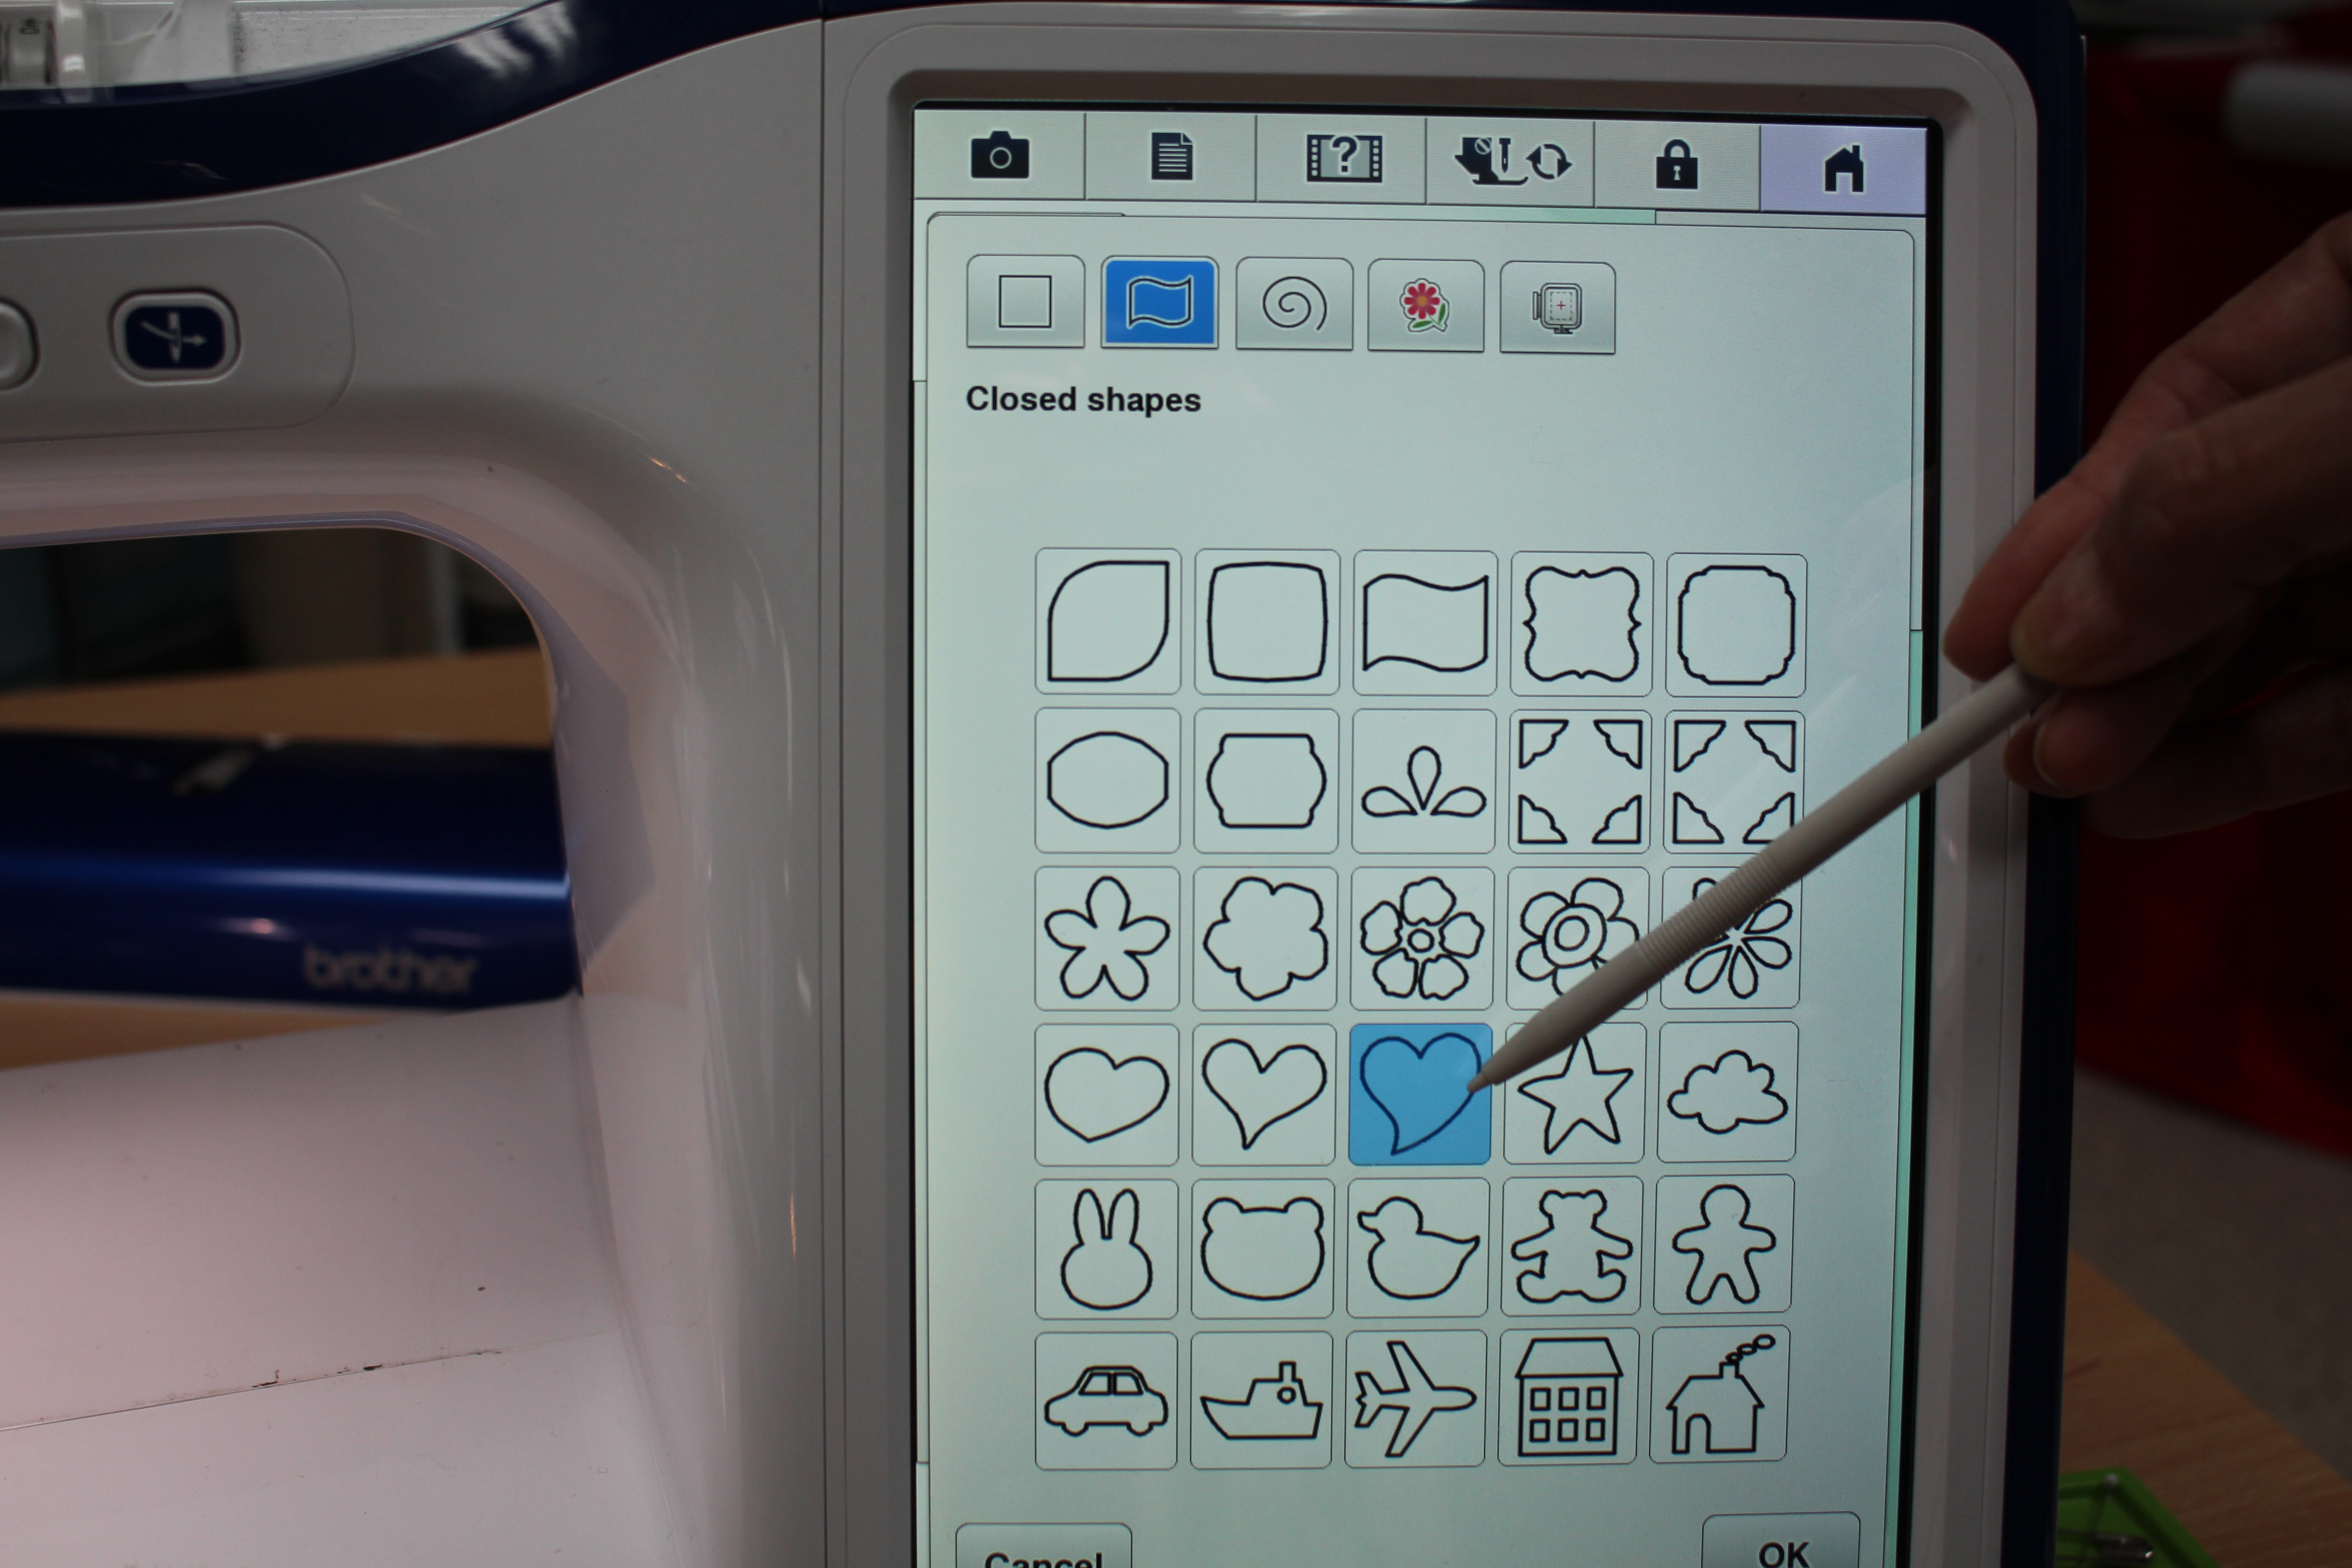
On this page you will find a few different heart shapes, choose you favorite.
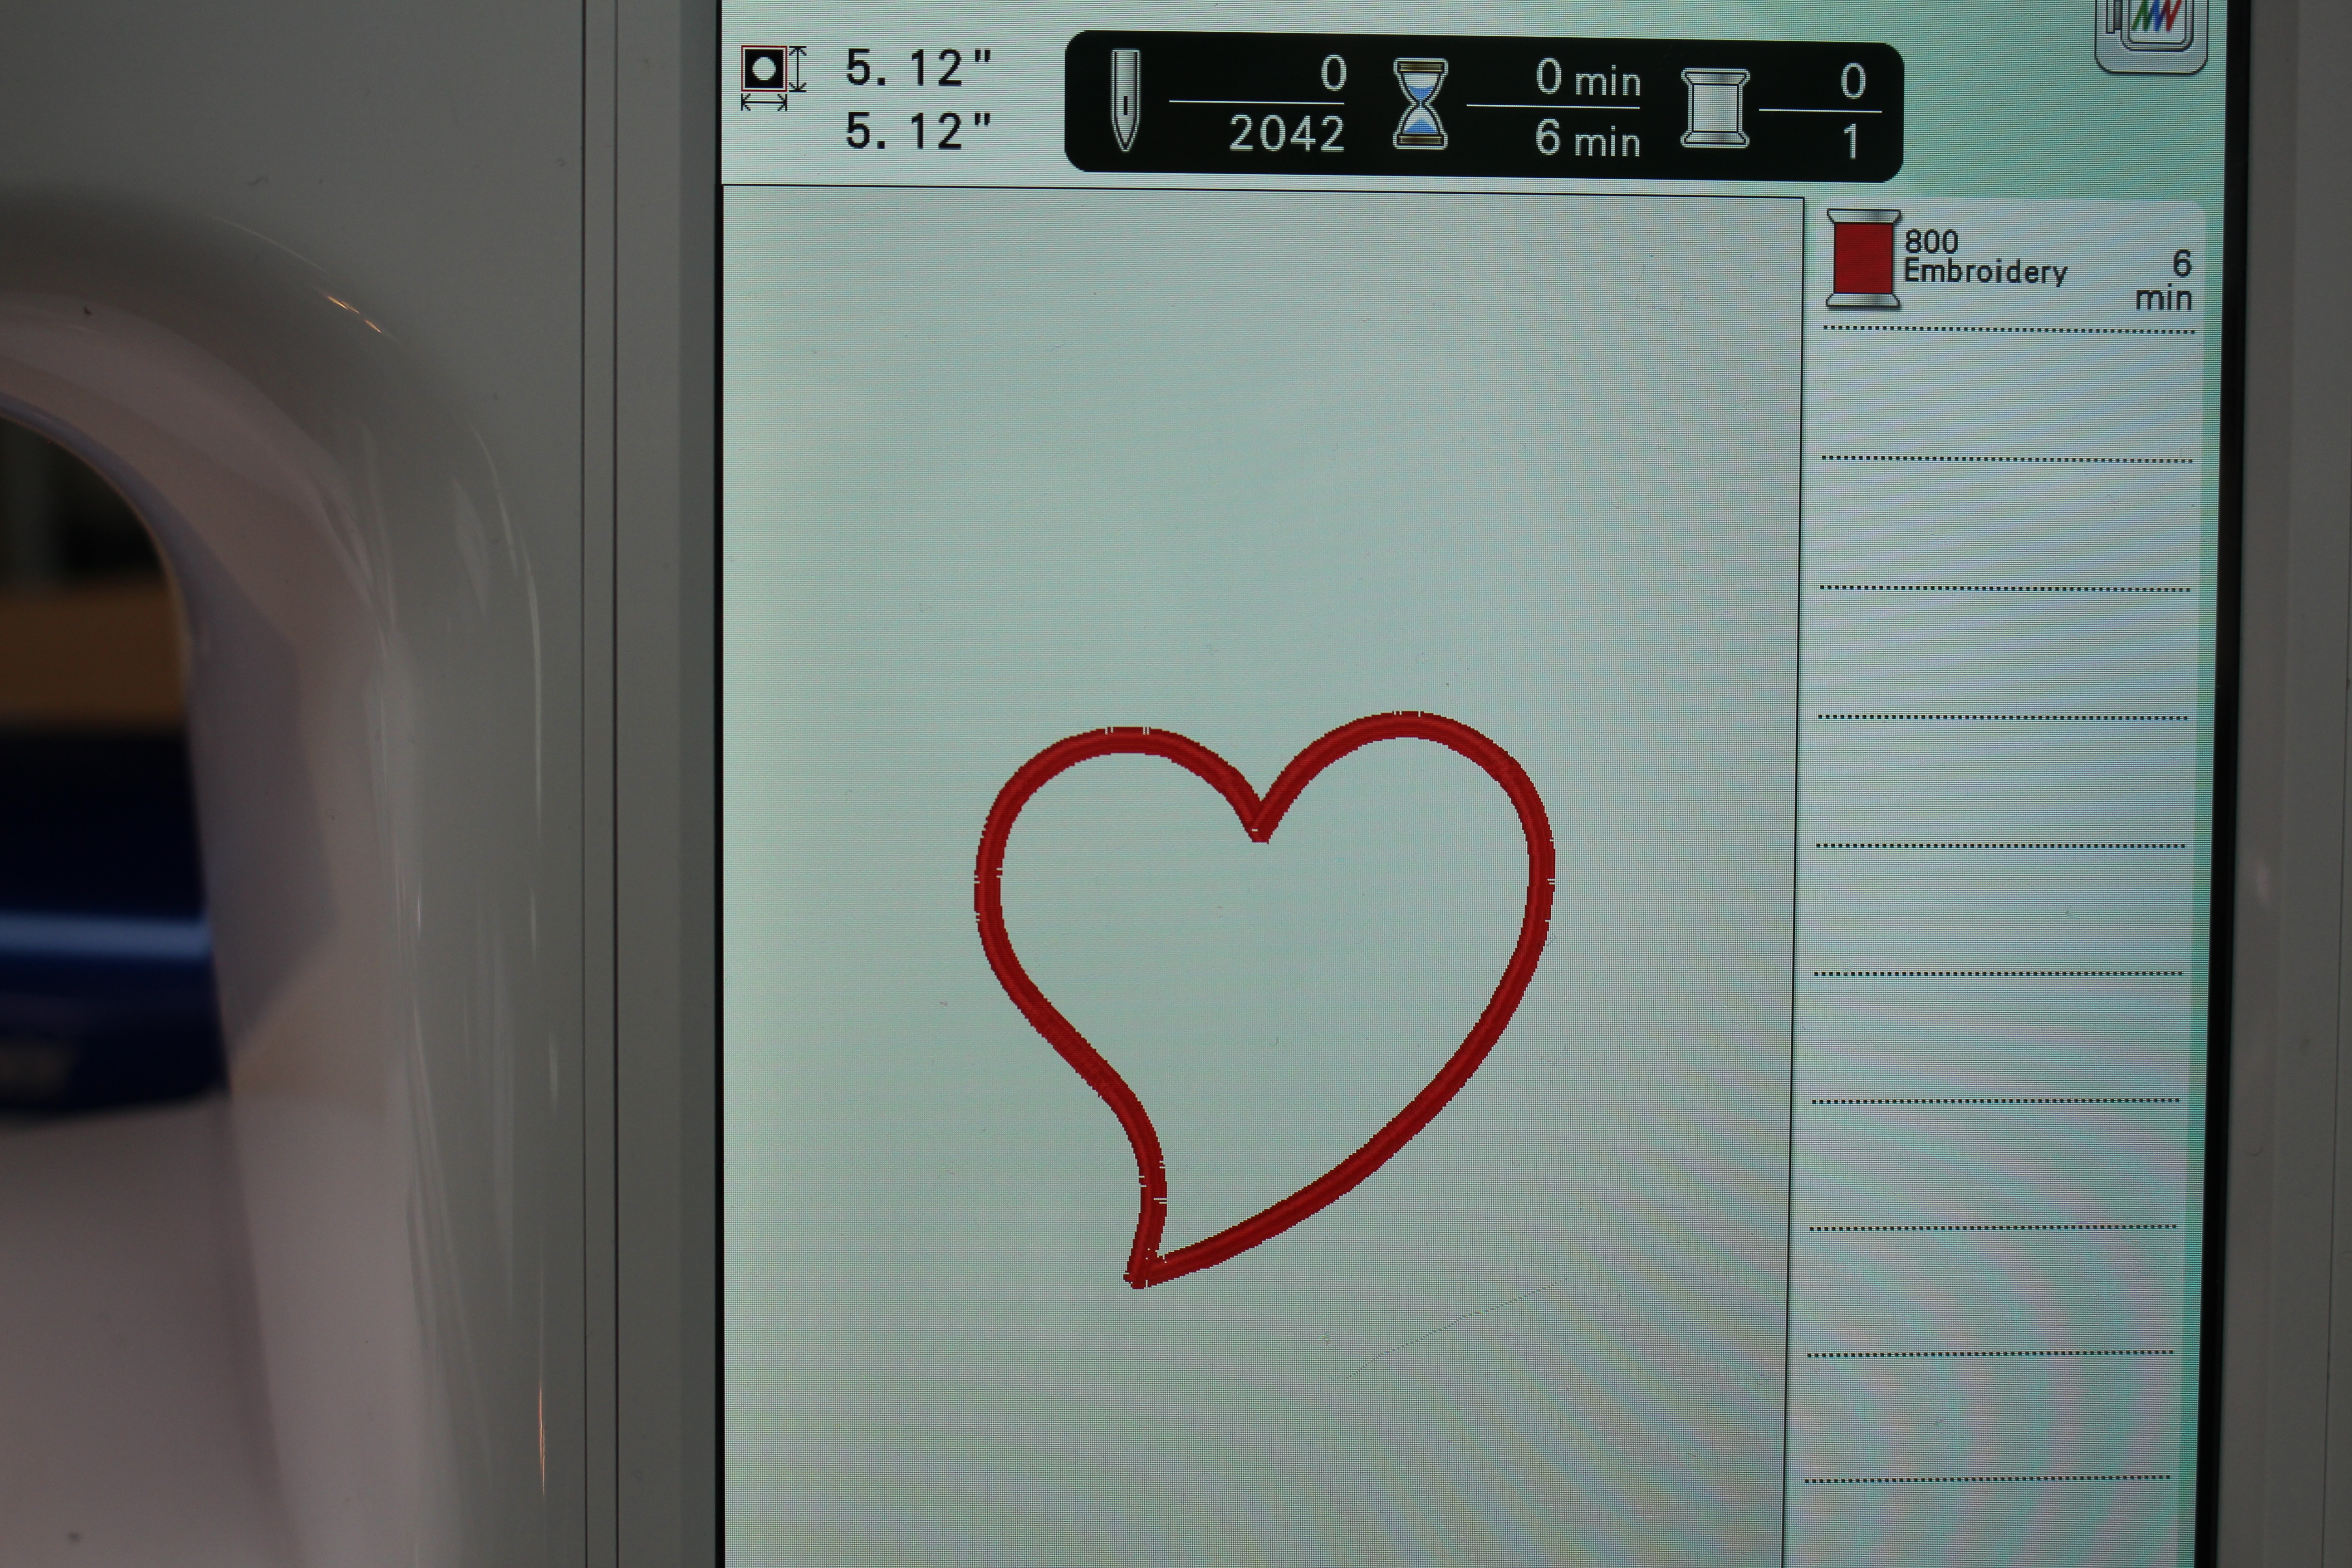
Alter the size of the heart if you want it larger or smaller. Send the design to embroidery, but before you set the design check the stitches. There are five options. I choose the satin stitch, but there are other fun one’s too.
I decided to widen the ZIGZAG WIDTH. Save the design if you want to quickly access it later and click SET.
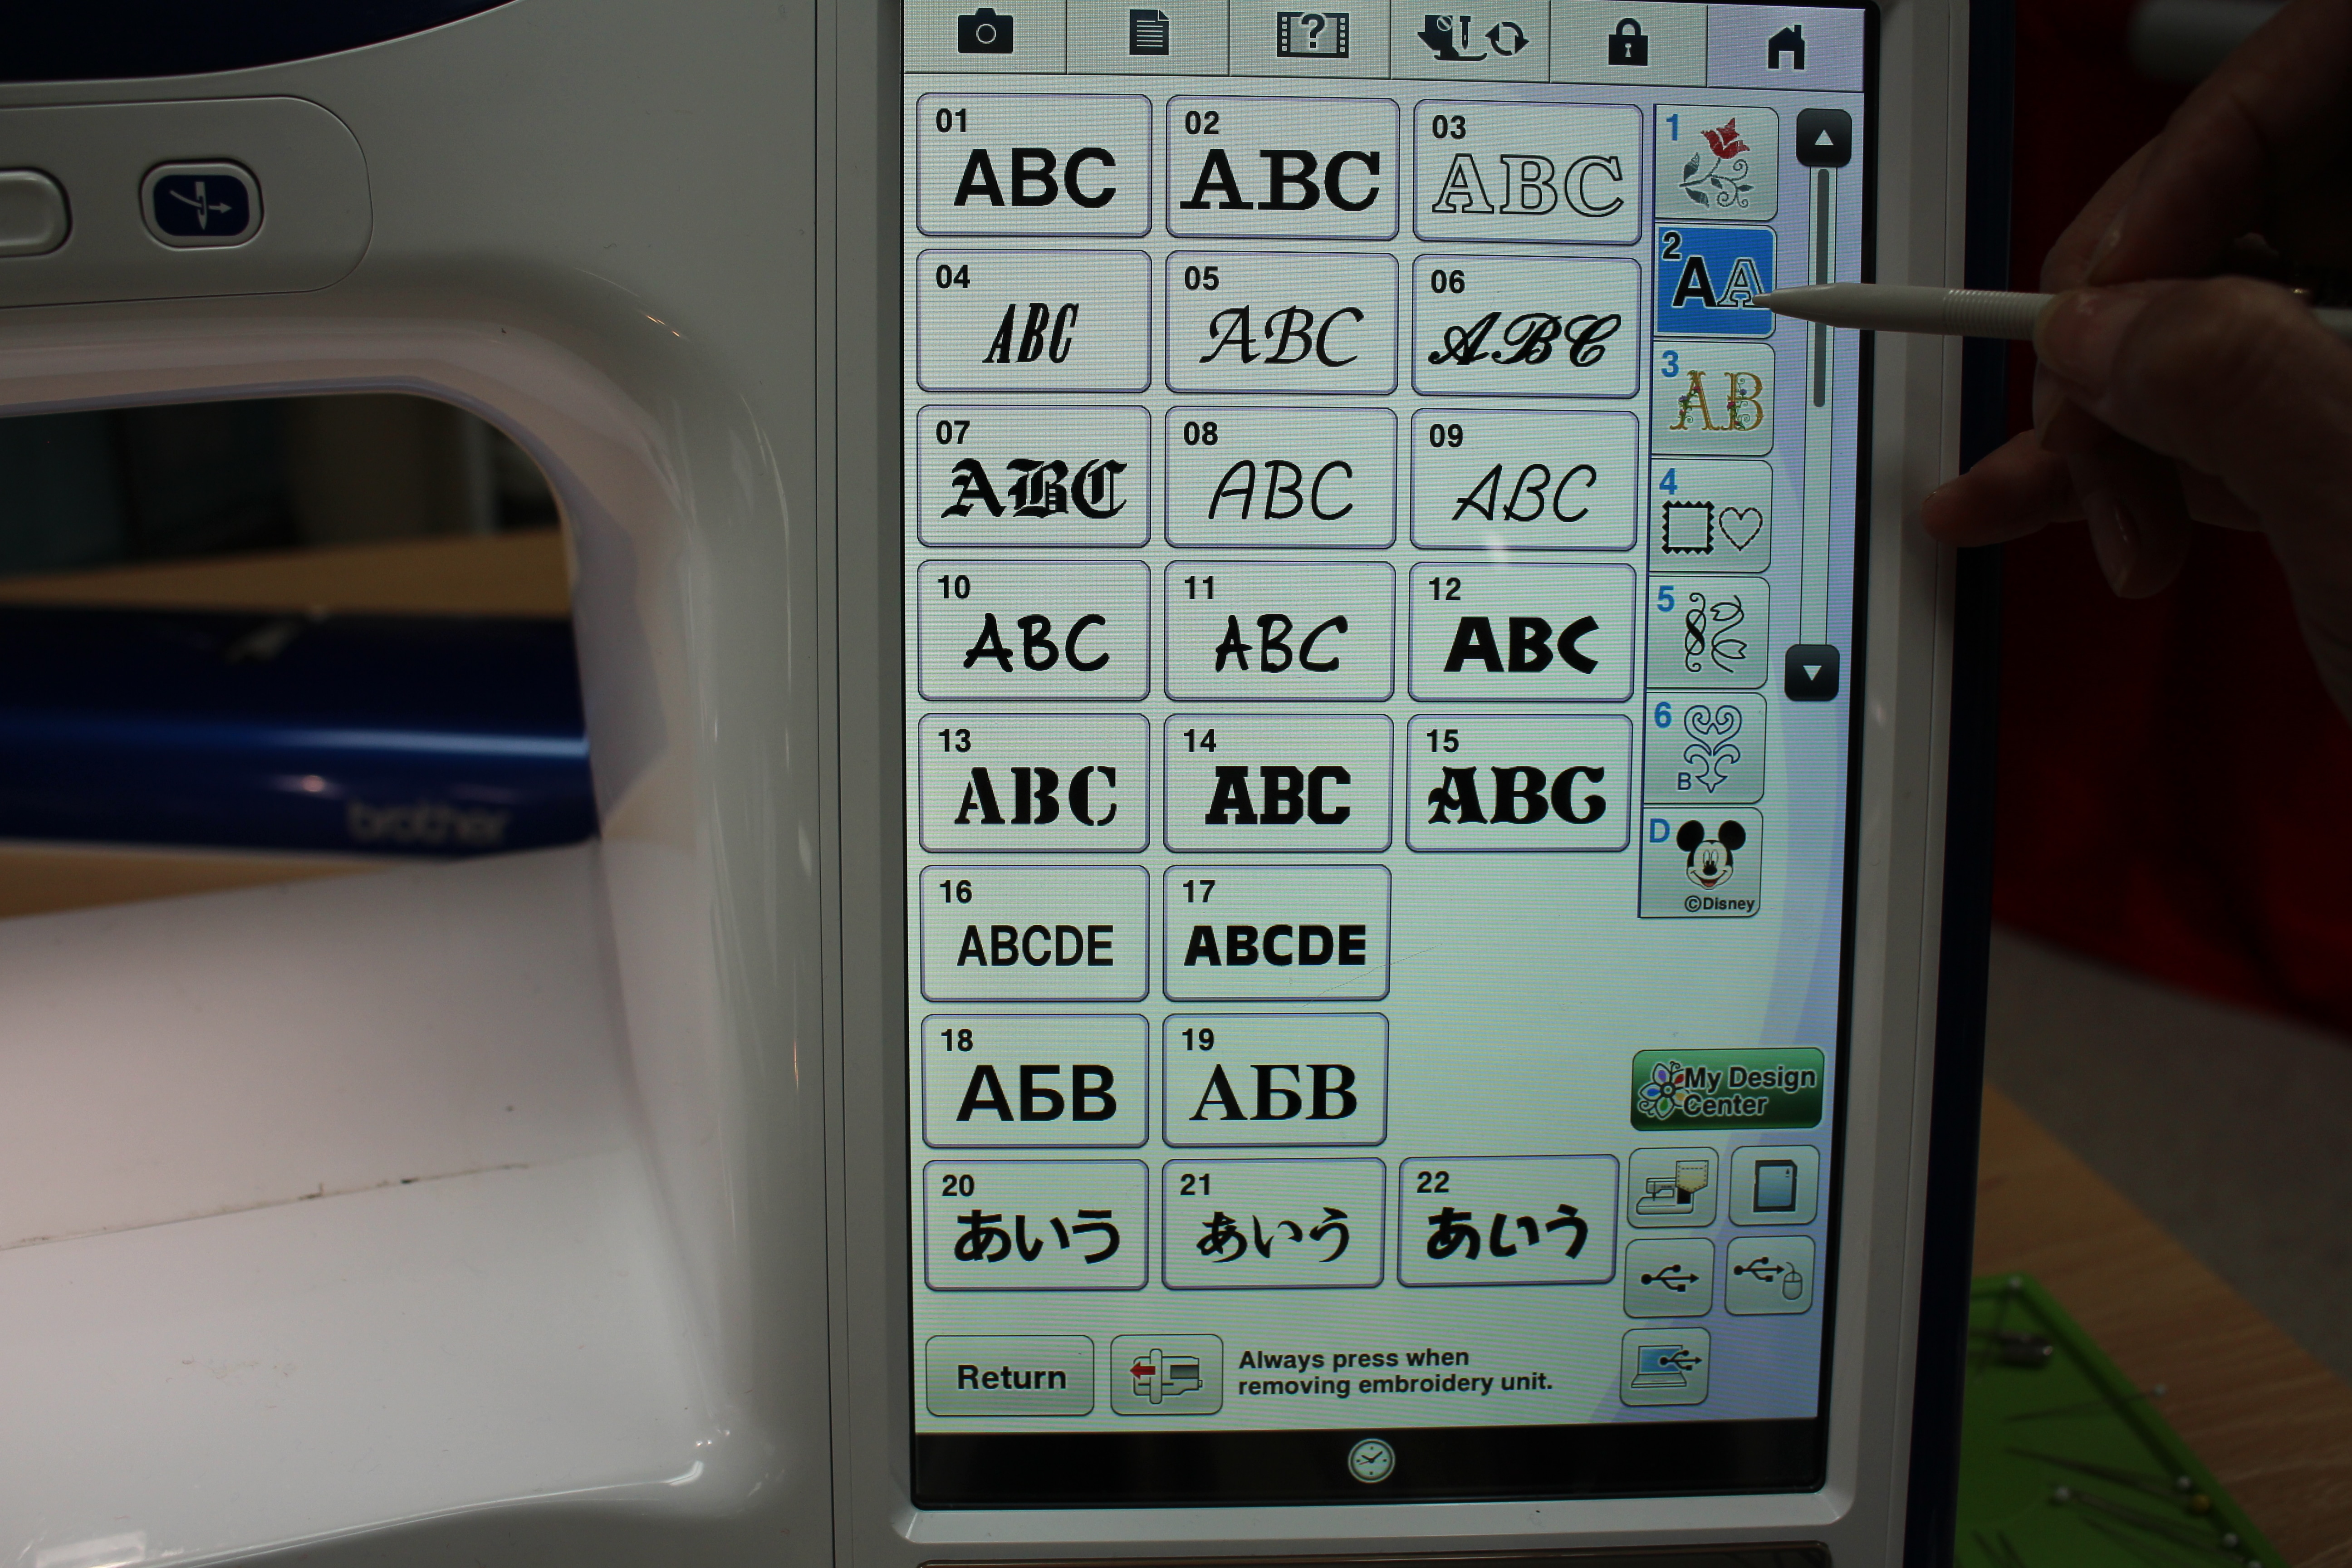
Click on ADD and choose a font.
Type in your “Valentine Message” and remember you can make the letters large, medium, or small and there are options for capital and lower case letters. Photo 26
To read the full blog, head over to my post as a Brother Expert Consultant on the Brother Stitching Sewcial. Be sure to share photos of your bags #angleawolf #brothersews
Happy Valentine’s Day ♥
Cheers,

In this tutorial you will learn how to drape a square sweater jacket with Angela Wolf. Fabrics, techniques, and measurements will be taught in this lesson.
Learn How to Use the Coverstitch Machine Do you find yourself sewing a lot of knits? If so, you will eventually want to add a coverstitch machine to your sewing room. Hemming knits has never been easier! But the Coverstitch is not just for knits, you can also do a...
Kick off of the Rachel Twin Set Sew-A-Long with Angeal Wolf. Lean about the Rachel Twin Set pattern, your measurements for this pattern, and fabrics.
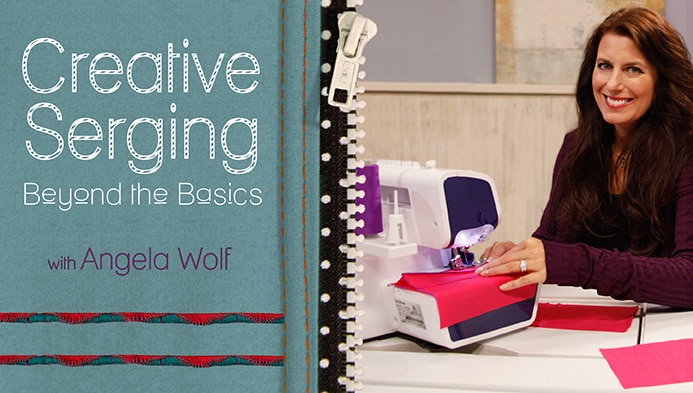
SERGER 102: Creative Serging! Now that you know the basics of using your serger, let's check out some of the decorative stitches. Join Angela Wolf for a 90 minute virtual class and learn how to use your serger for a few creative stitches and serger a...
SERGER 101: Learn the Basics! Beginners guide to using your serger! Join Angela Wolf for a 90 minute virtual class and learn how to set up and use your serger. Learn the parts on the serger, tips for rethreading, differential feed, reasons to adjust the stitch...
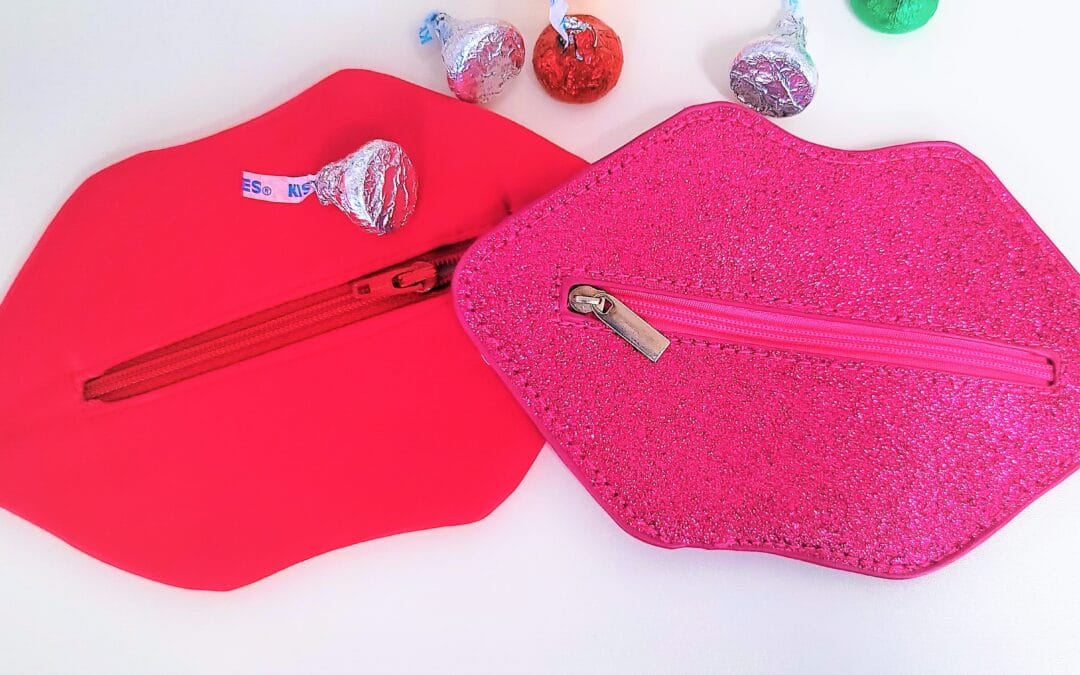
Sew the Zippered Lip Bag This is such a cute bag to sew and embroider for Valentine's Day. You can draw these lips or download my pattern ANGELA WOLF ZIPPER LIP BAG Supplies: 2 - Fabric 9" X 9" 2 - Fusible Fleece Batting cut 9"X 9" 10" (or longer) Zipper Universal...
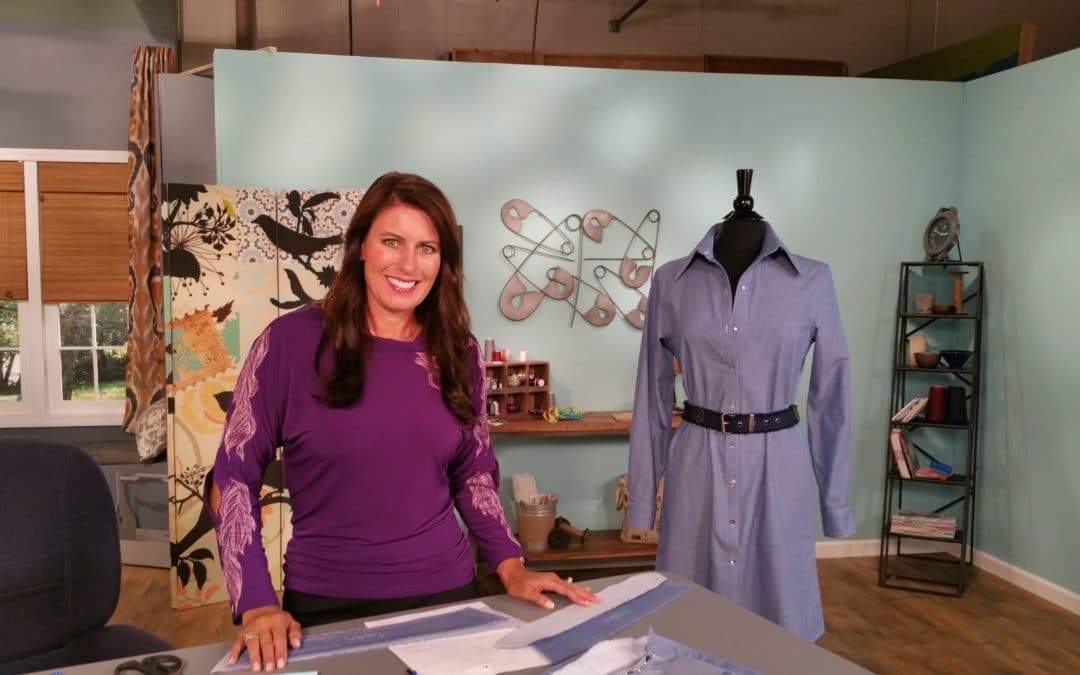
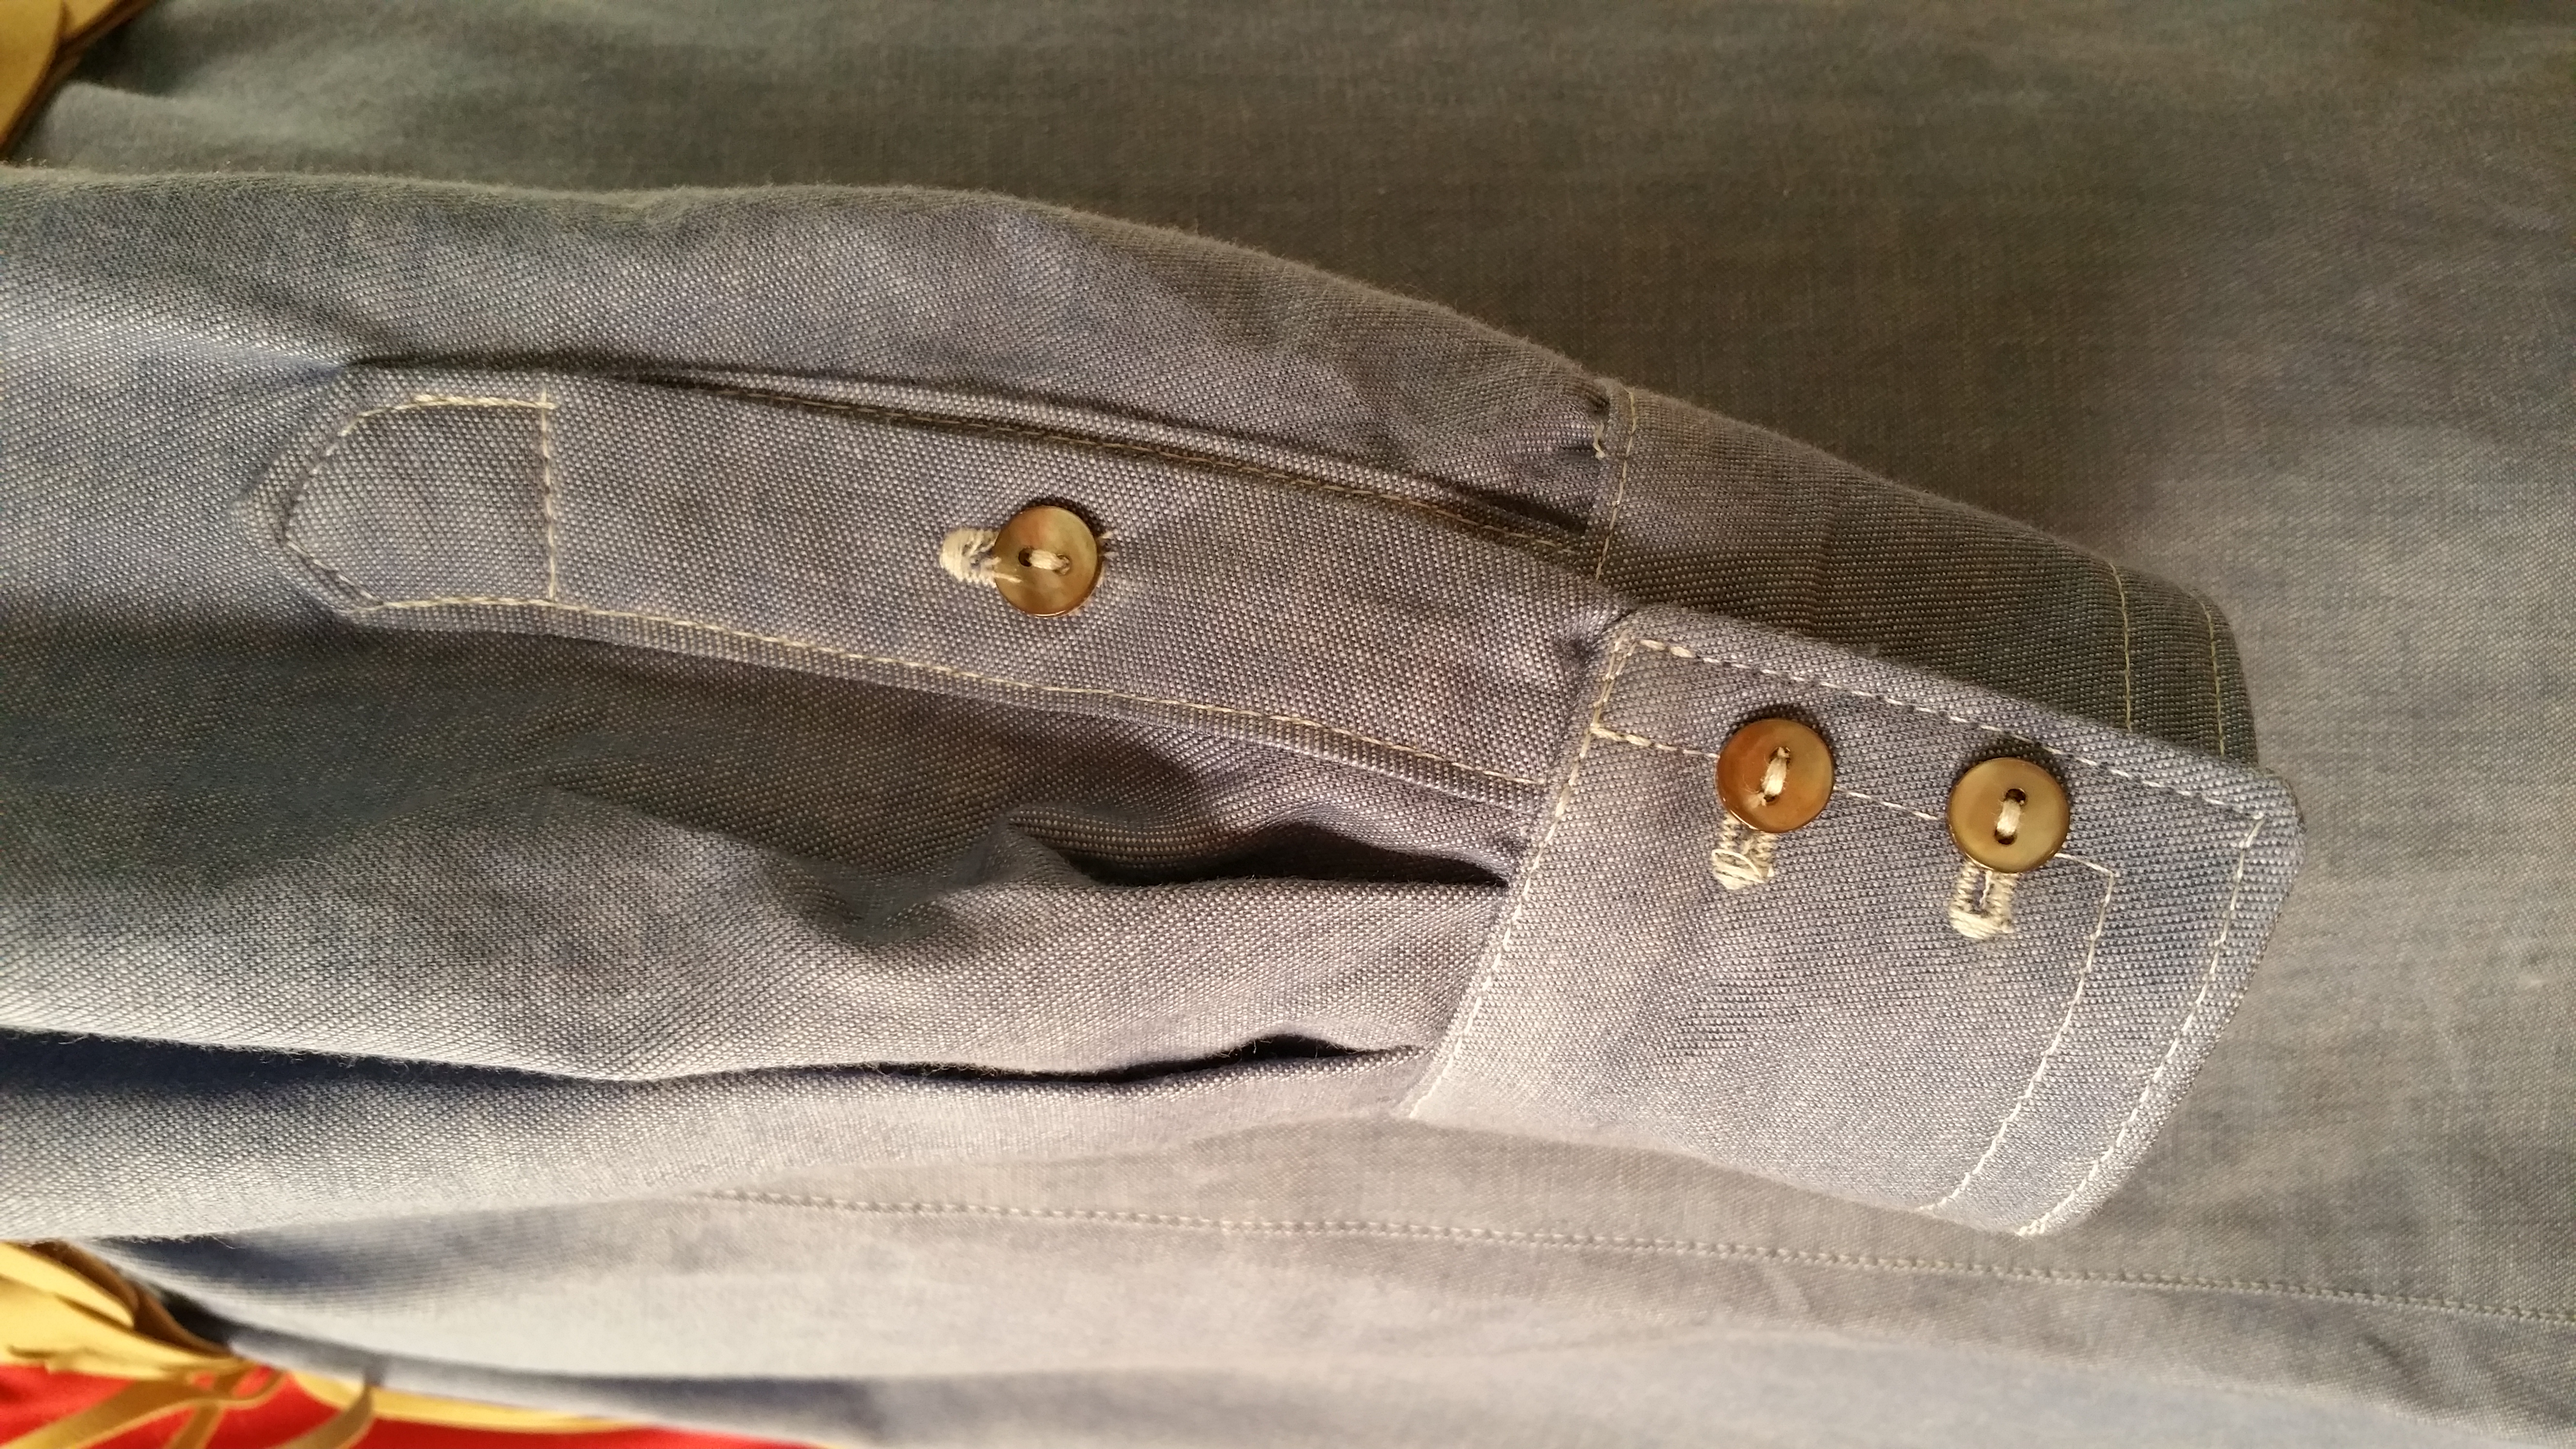
There are many ways to sew the sleeve placket and depending on your pattern you might have a one piece or two piece placket. If you have a two piece placket, you can change it to one piece and follow the steps I have shown in the tutorial. I learned this technique from altering men’s ready-to-wear and thought THIS WAS SO EASY (It’s Sew Easy LOL!)
The video from It’s Sew Easy tv is a brief tutorial on sewing the placket including pressing and topstitching. As far as interfacing, keep the interfacing out of the seam allowances or the placket will be too stiff.
I am going to work on another shirt dress out of chiffon and definitely going to add embroidery. Now is the time to embroider the sleeve, before we sew the side seams. Just an idea 🙂

Here is the blog schedule for the season long sew-along with links to the tutorials and live Q&A on my blog (each link will open on the date listed). Season 14 of It’s Sew Easy had begun airing on PBS and Create TV; you will be able to watch each episode there first (depending on when your specific station begins airing the show).
Part 1: Announcing the Shirt Dress Sewalong with Angela Wolf on It’s Sew Easy
Episode 1401: Choosing and prepping fabrics, patterns, and sizing
Part 2: Sewing the Front Placket Episode 1402: Sewing the front placket
Part 3: Attaching the Collar Episode 1404: Attaching the collar
Part 4: Sewing the Placket on the Sleeve Episode 1405: Sewing the placket on the sleeve
Part 5: Sewing the Sleeves and Side Seam Episode 1406: Sewing the sleeves and side seams (1/27/2018)
Part 6: Sewing the Cuffs Episode 1408: Sewing the cuffs (2/3/2018)
Part 7: Sewing the Buttons and Buttonholes Episode 1409: Buttons and buttonholes (2/10/2018)
Part 8: Finishing the Hem Episode 1413: Finishing the hem with a rolled hem (2/17/2018)
Join us! A new video will arrive on YouTube every Saturday. Sign up here and never miss a blog post and join the fun on facebook, instagram, twitter, and pinterest . We will share photos on the social side using hashtags #angleawolf #itseweasy
Can’t wait to see what you sew up! Leave your comments & questions below …
Cheers,

The page you requested could not be found. Try refining your search, or use the navigation above to locate the post.

Watch each episode live on facebook or catch the replay here!


