No Results Found
The page you requested could not be found. Try refining your search, or use the navigation above to locate the post.


This week’s Behind the Scenes LIVE show includes:


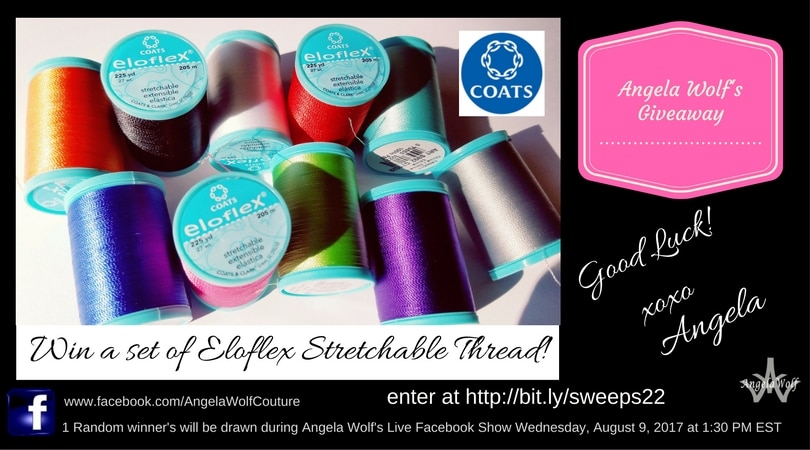
Friday 7/28 (12:01 am MT) – Sunday 7/30 (11:59 pm MT) #affiliate

Enter to win a set of ELOFLEX strechable thread in 10 colors! Sponsored by Coats & Clark! PLUS there are two ways to receive additional entries:
Join me next week live behind the scenes at the Brother convention previewing all the new products coming out! In the meantime I am working on my jeans, embroidering some knit fabrics, and dyeing the lace fabric I showed on this episode. I will keep you posted …
Don’t forget to update your email preferences for notifications you want to receive, join our private facebook group to show off your outfits, and enjoy the behind the scene photo on Instagram!
Cheers,


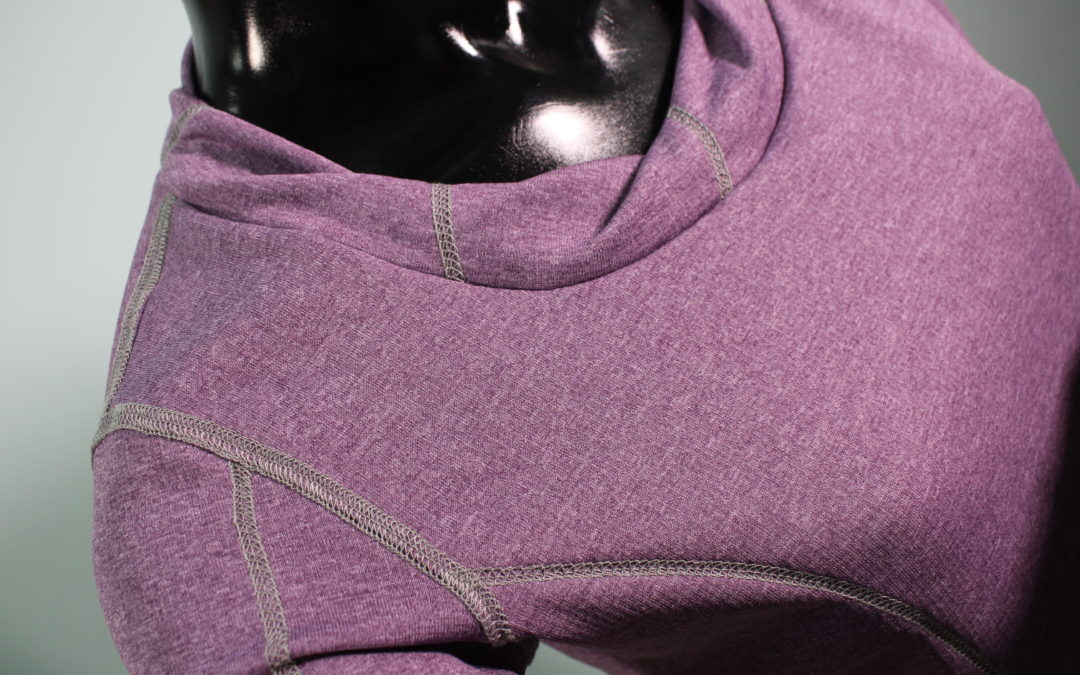
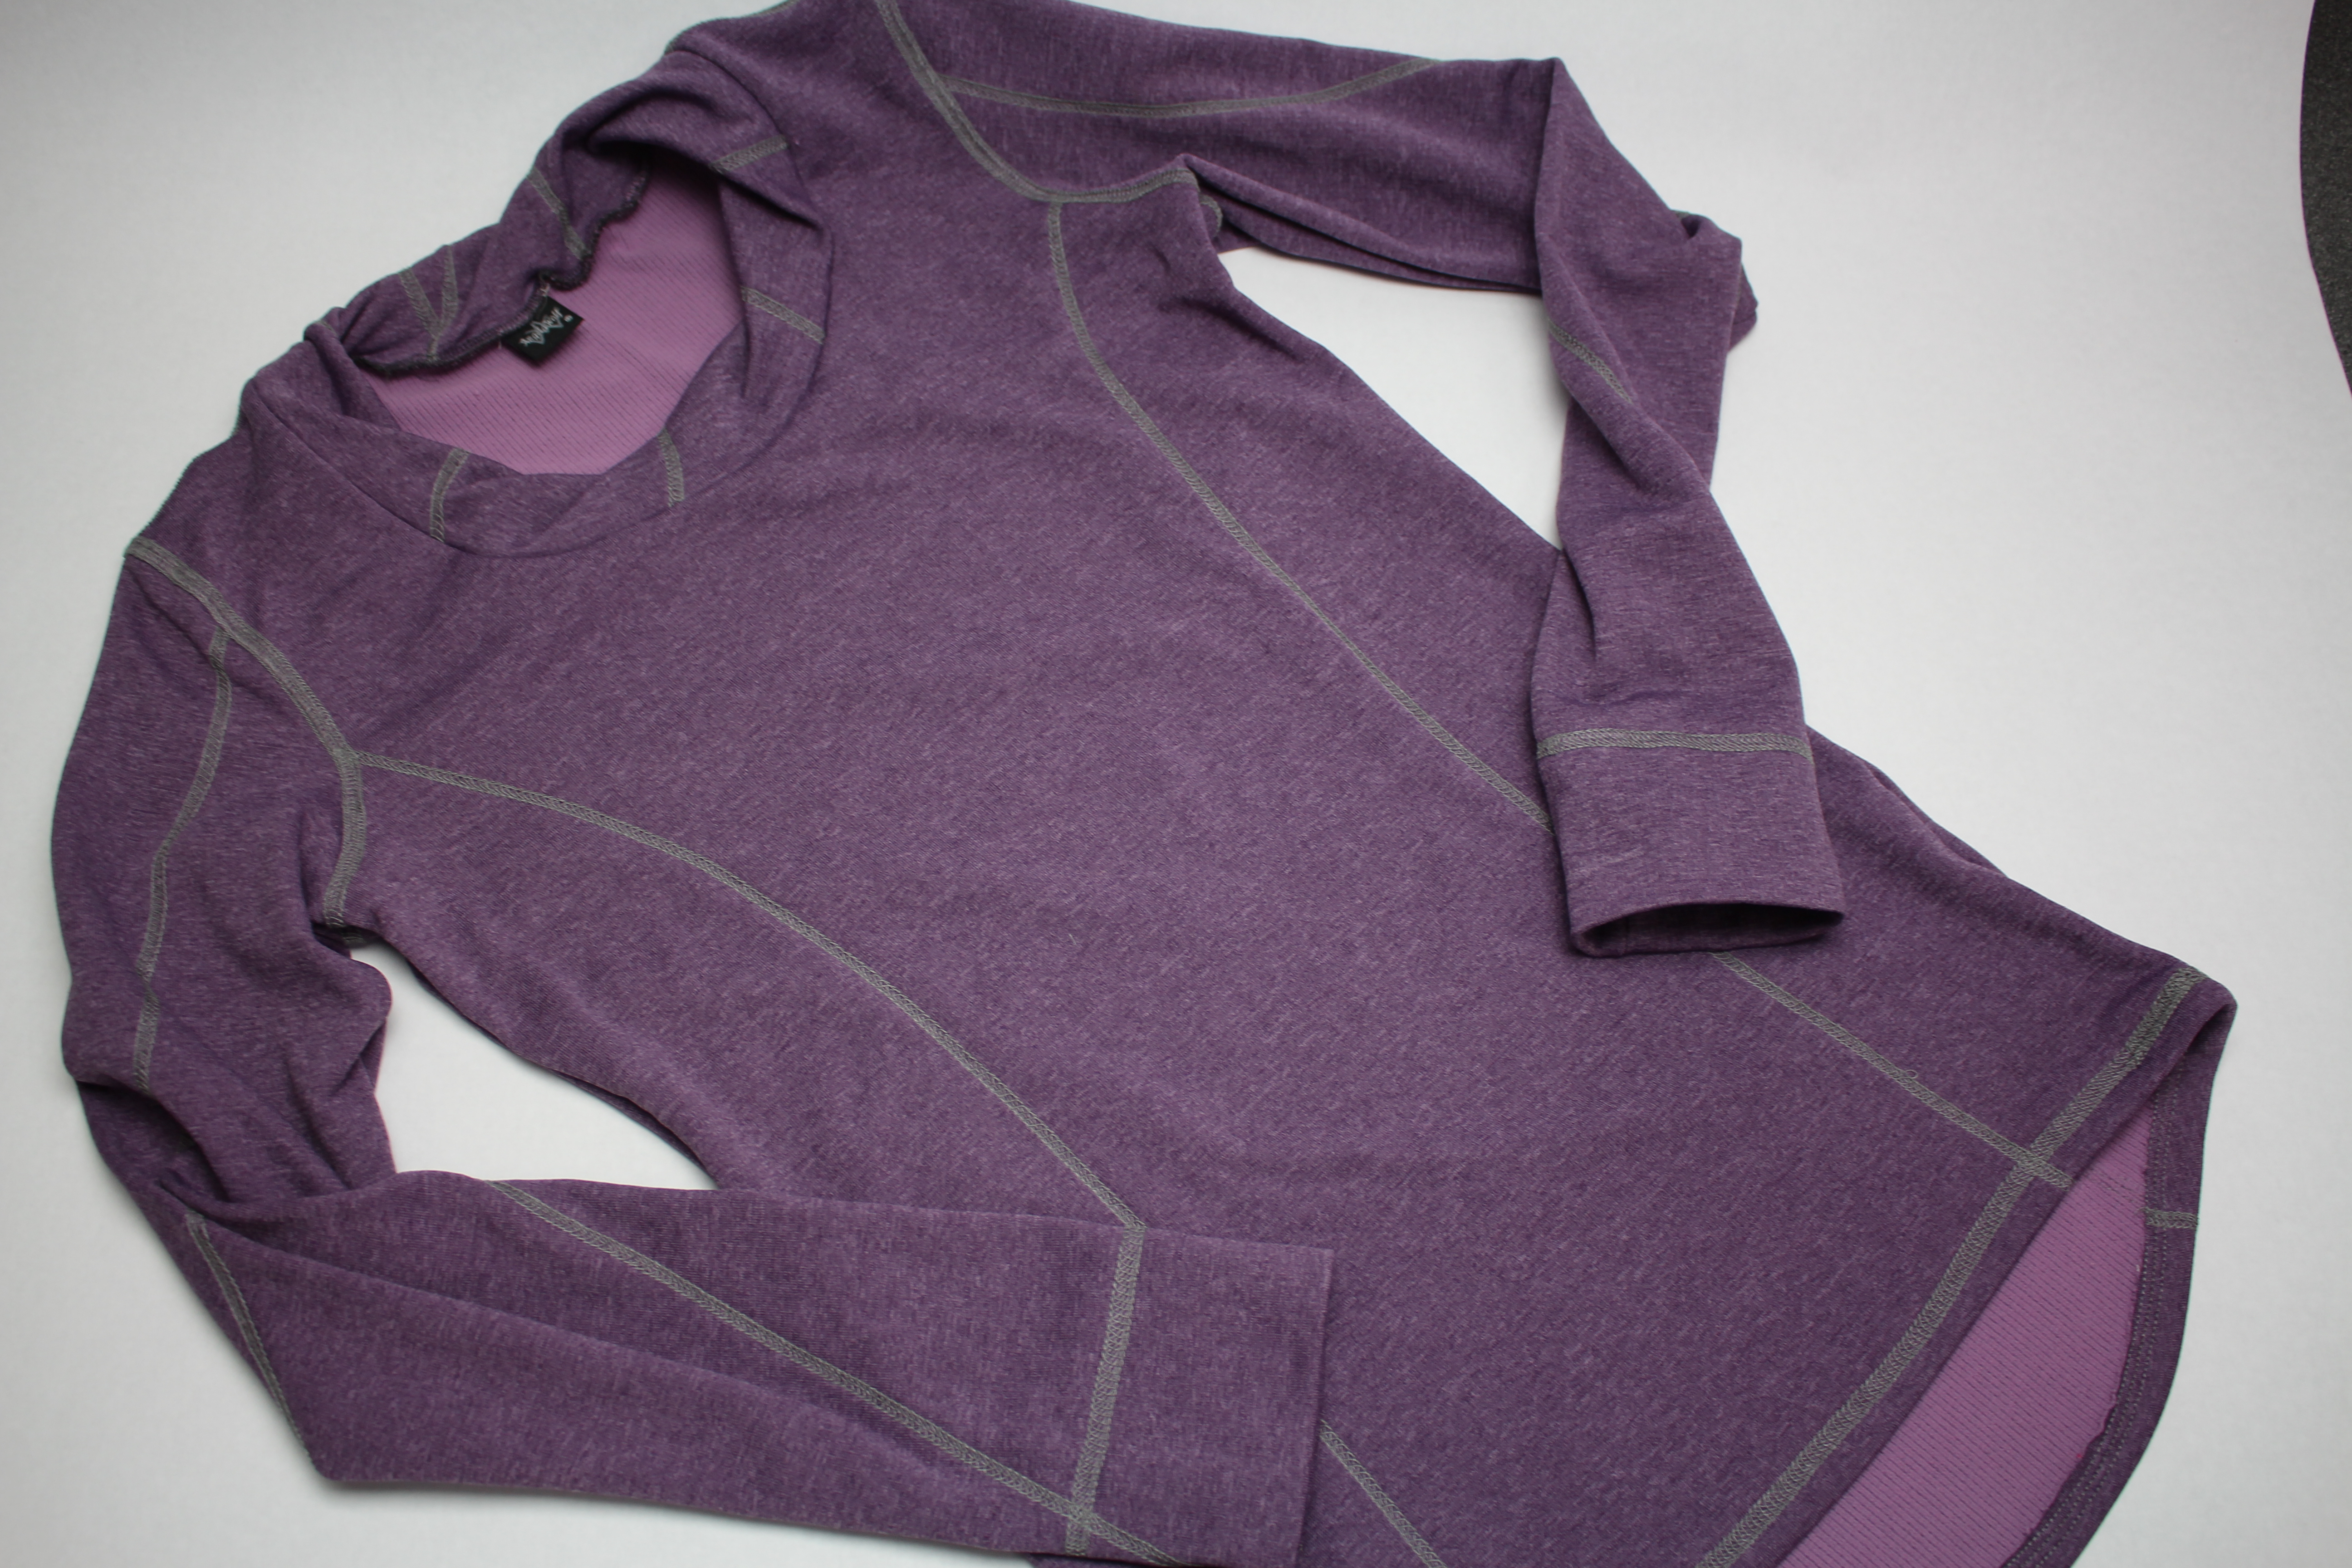
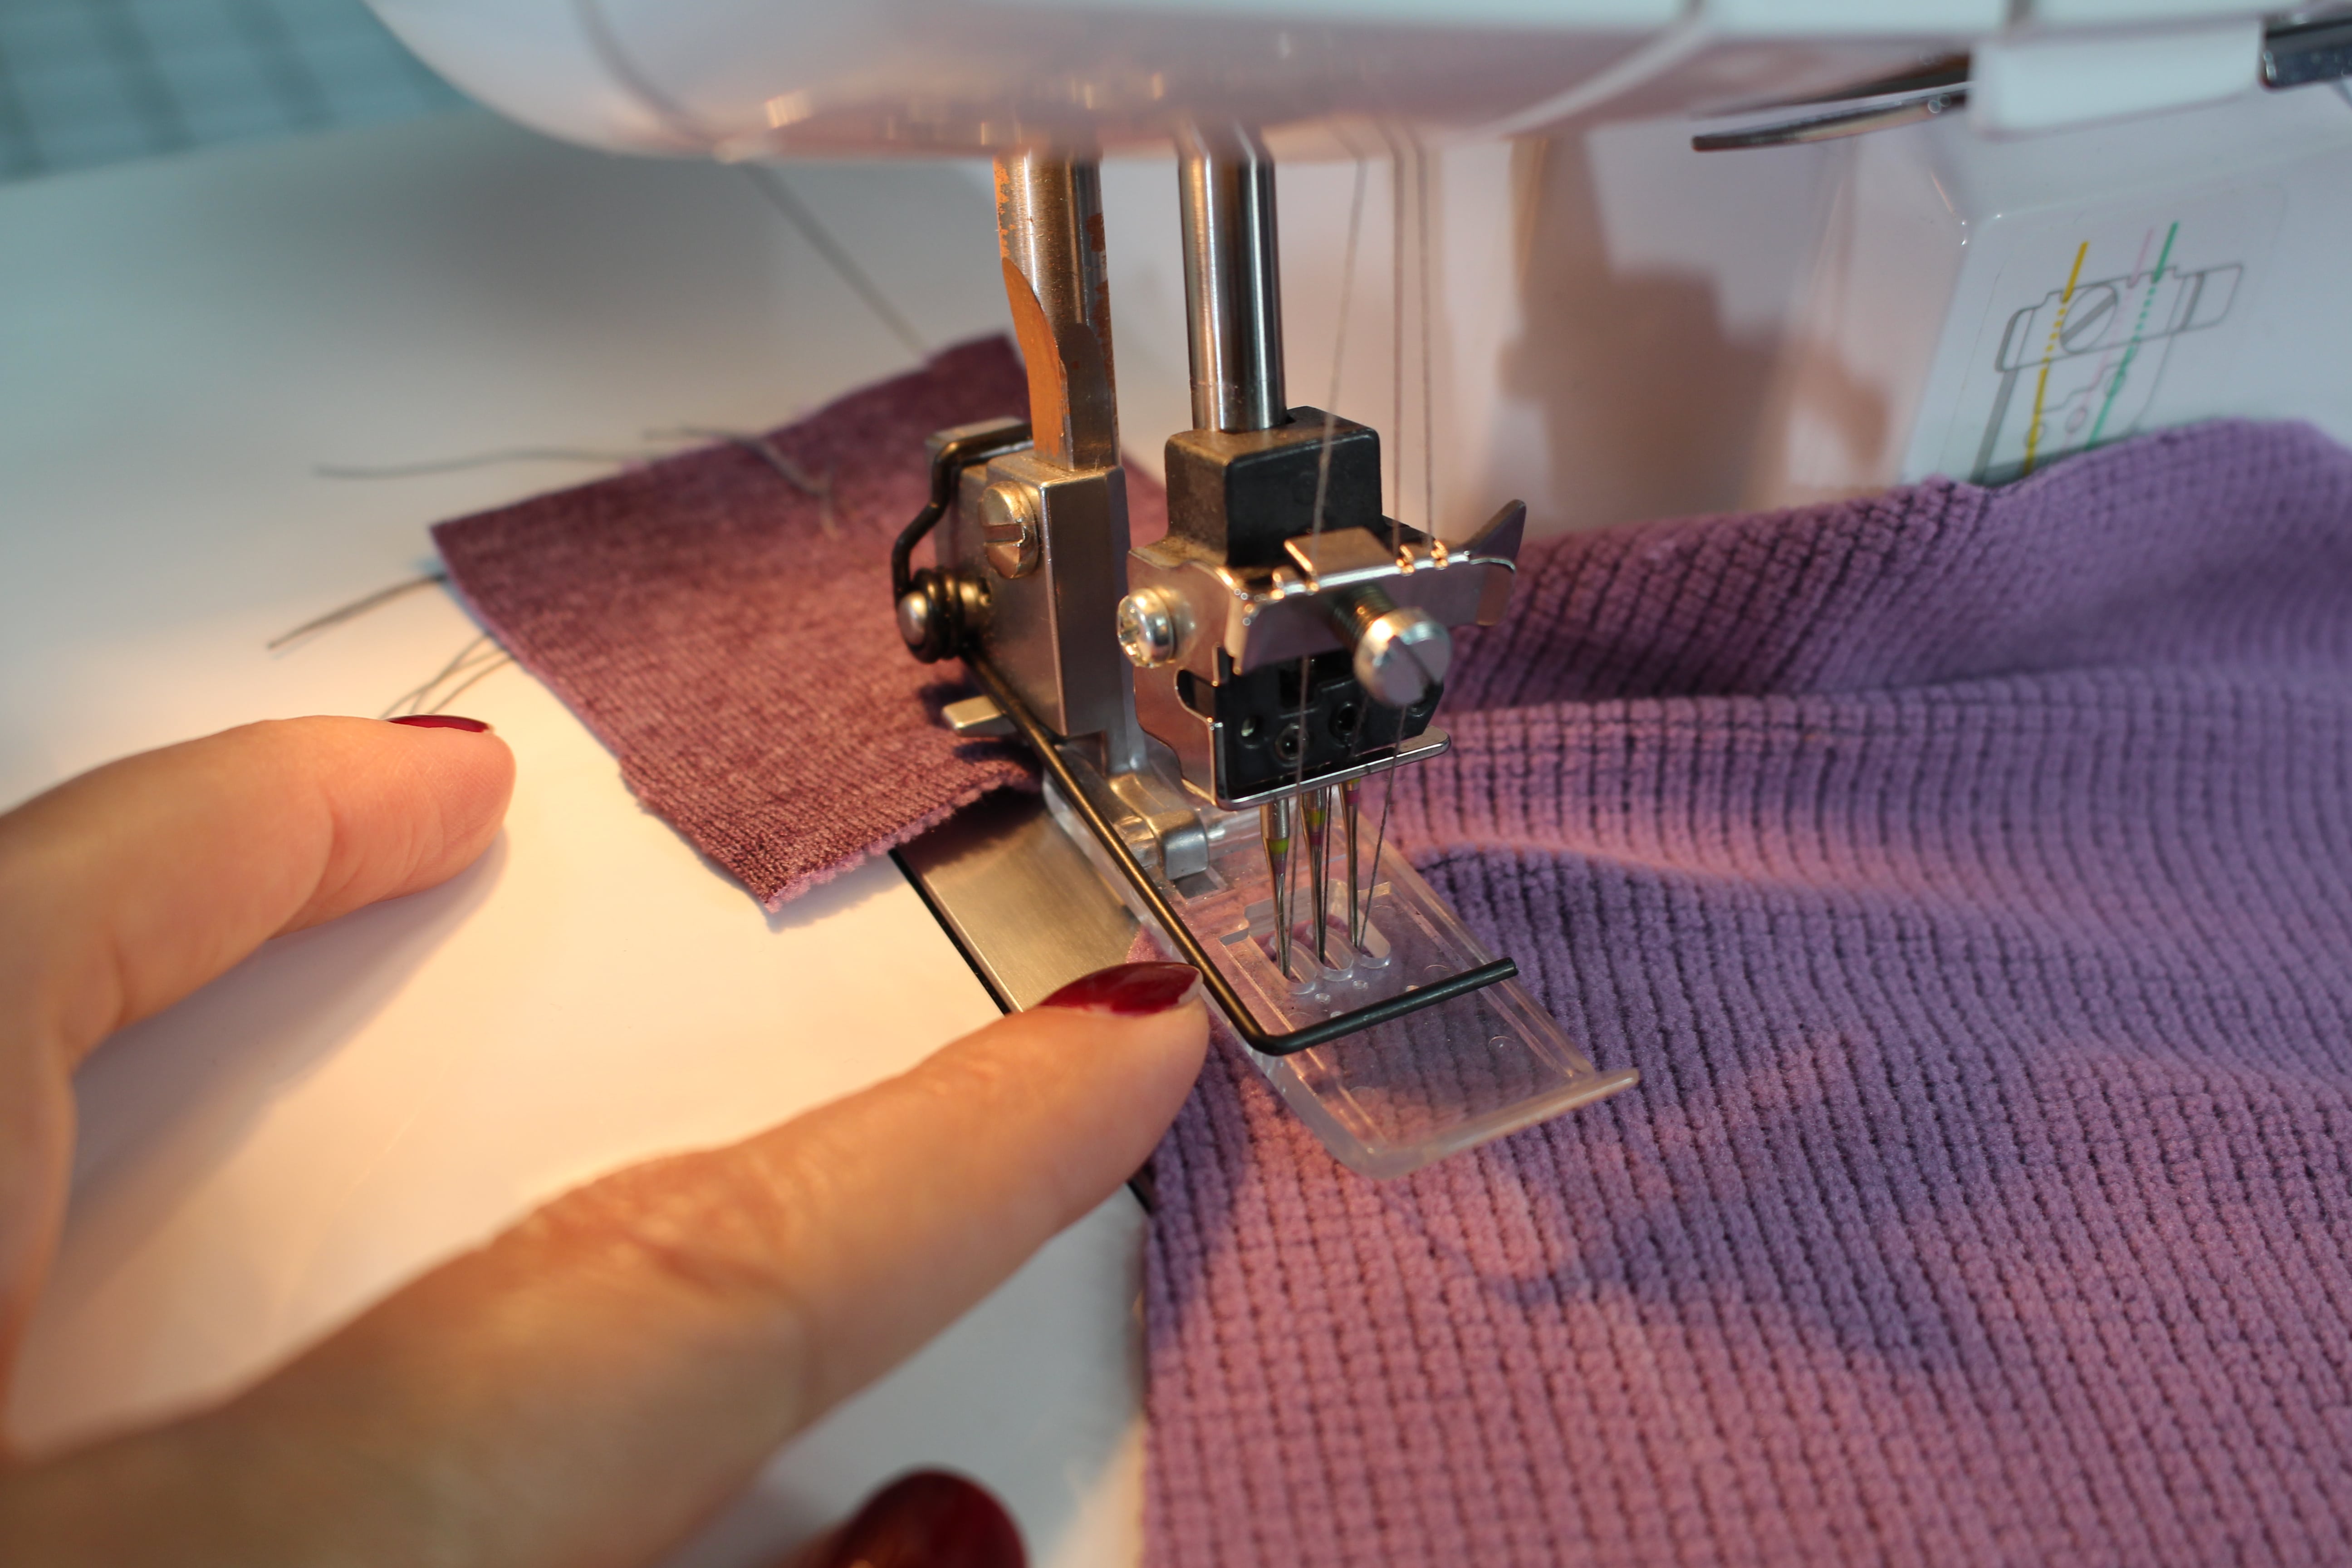
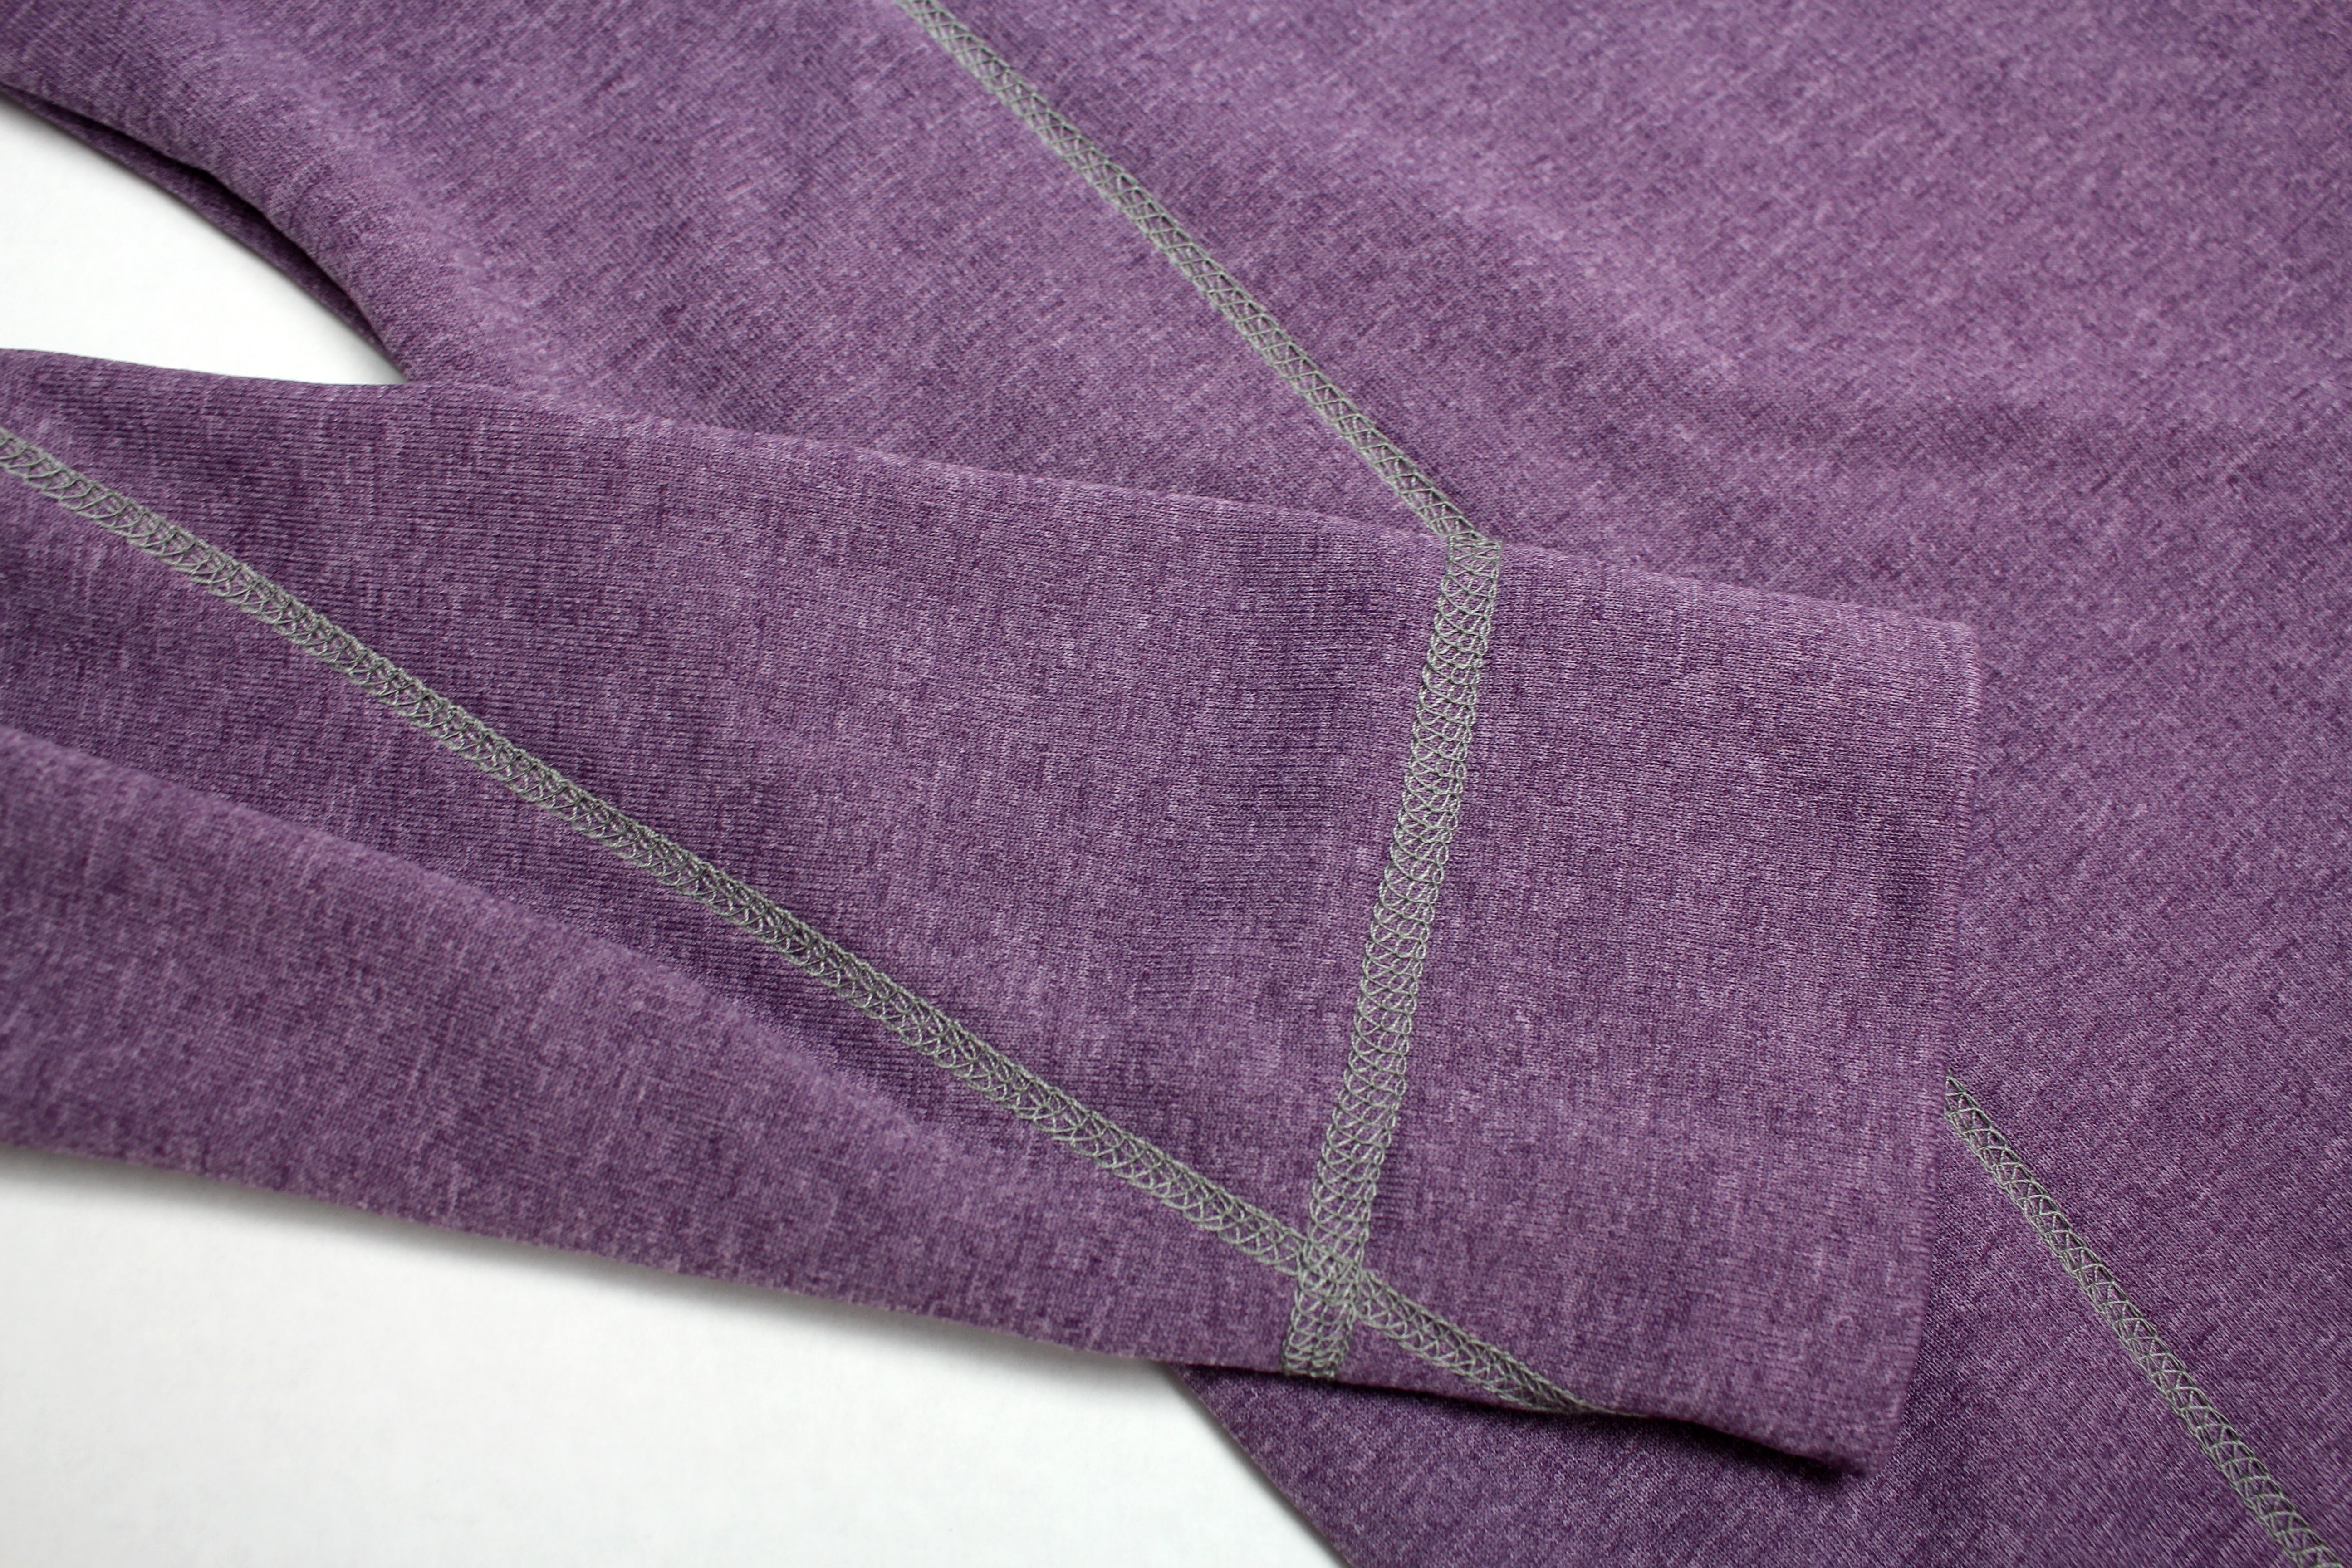
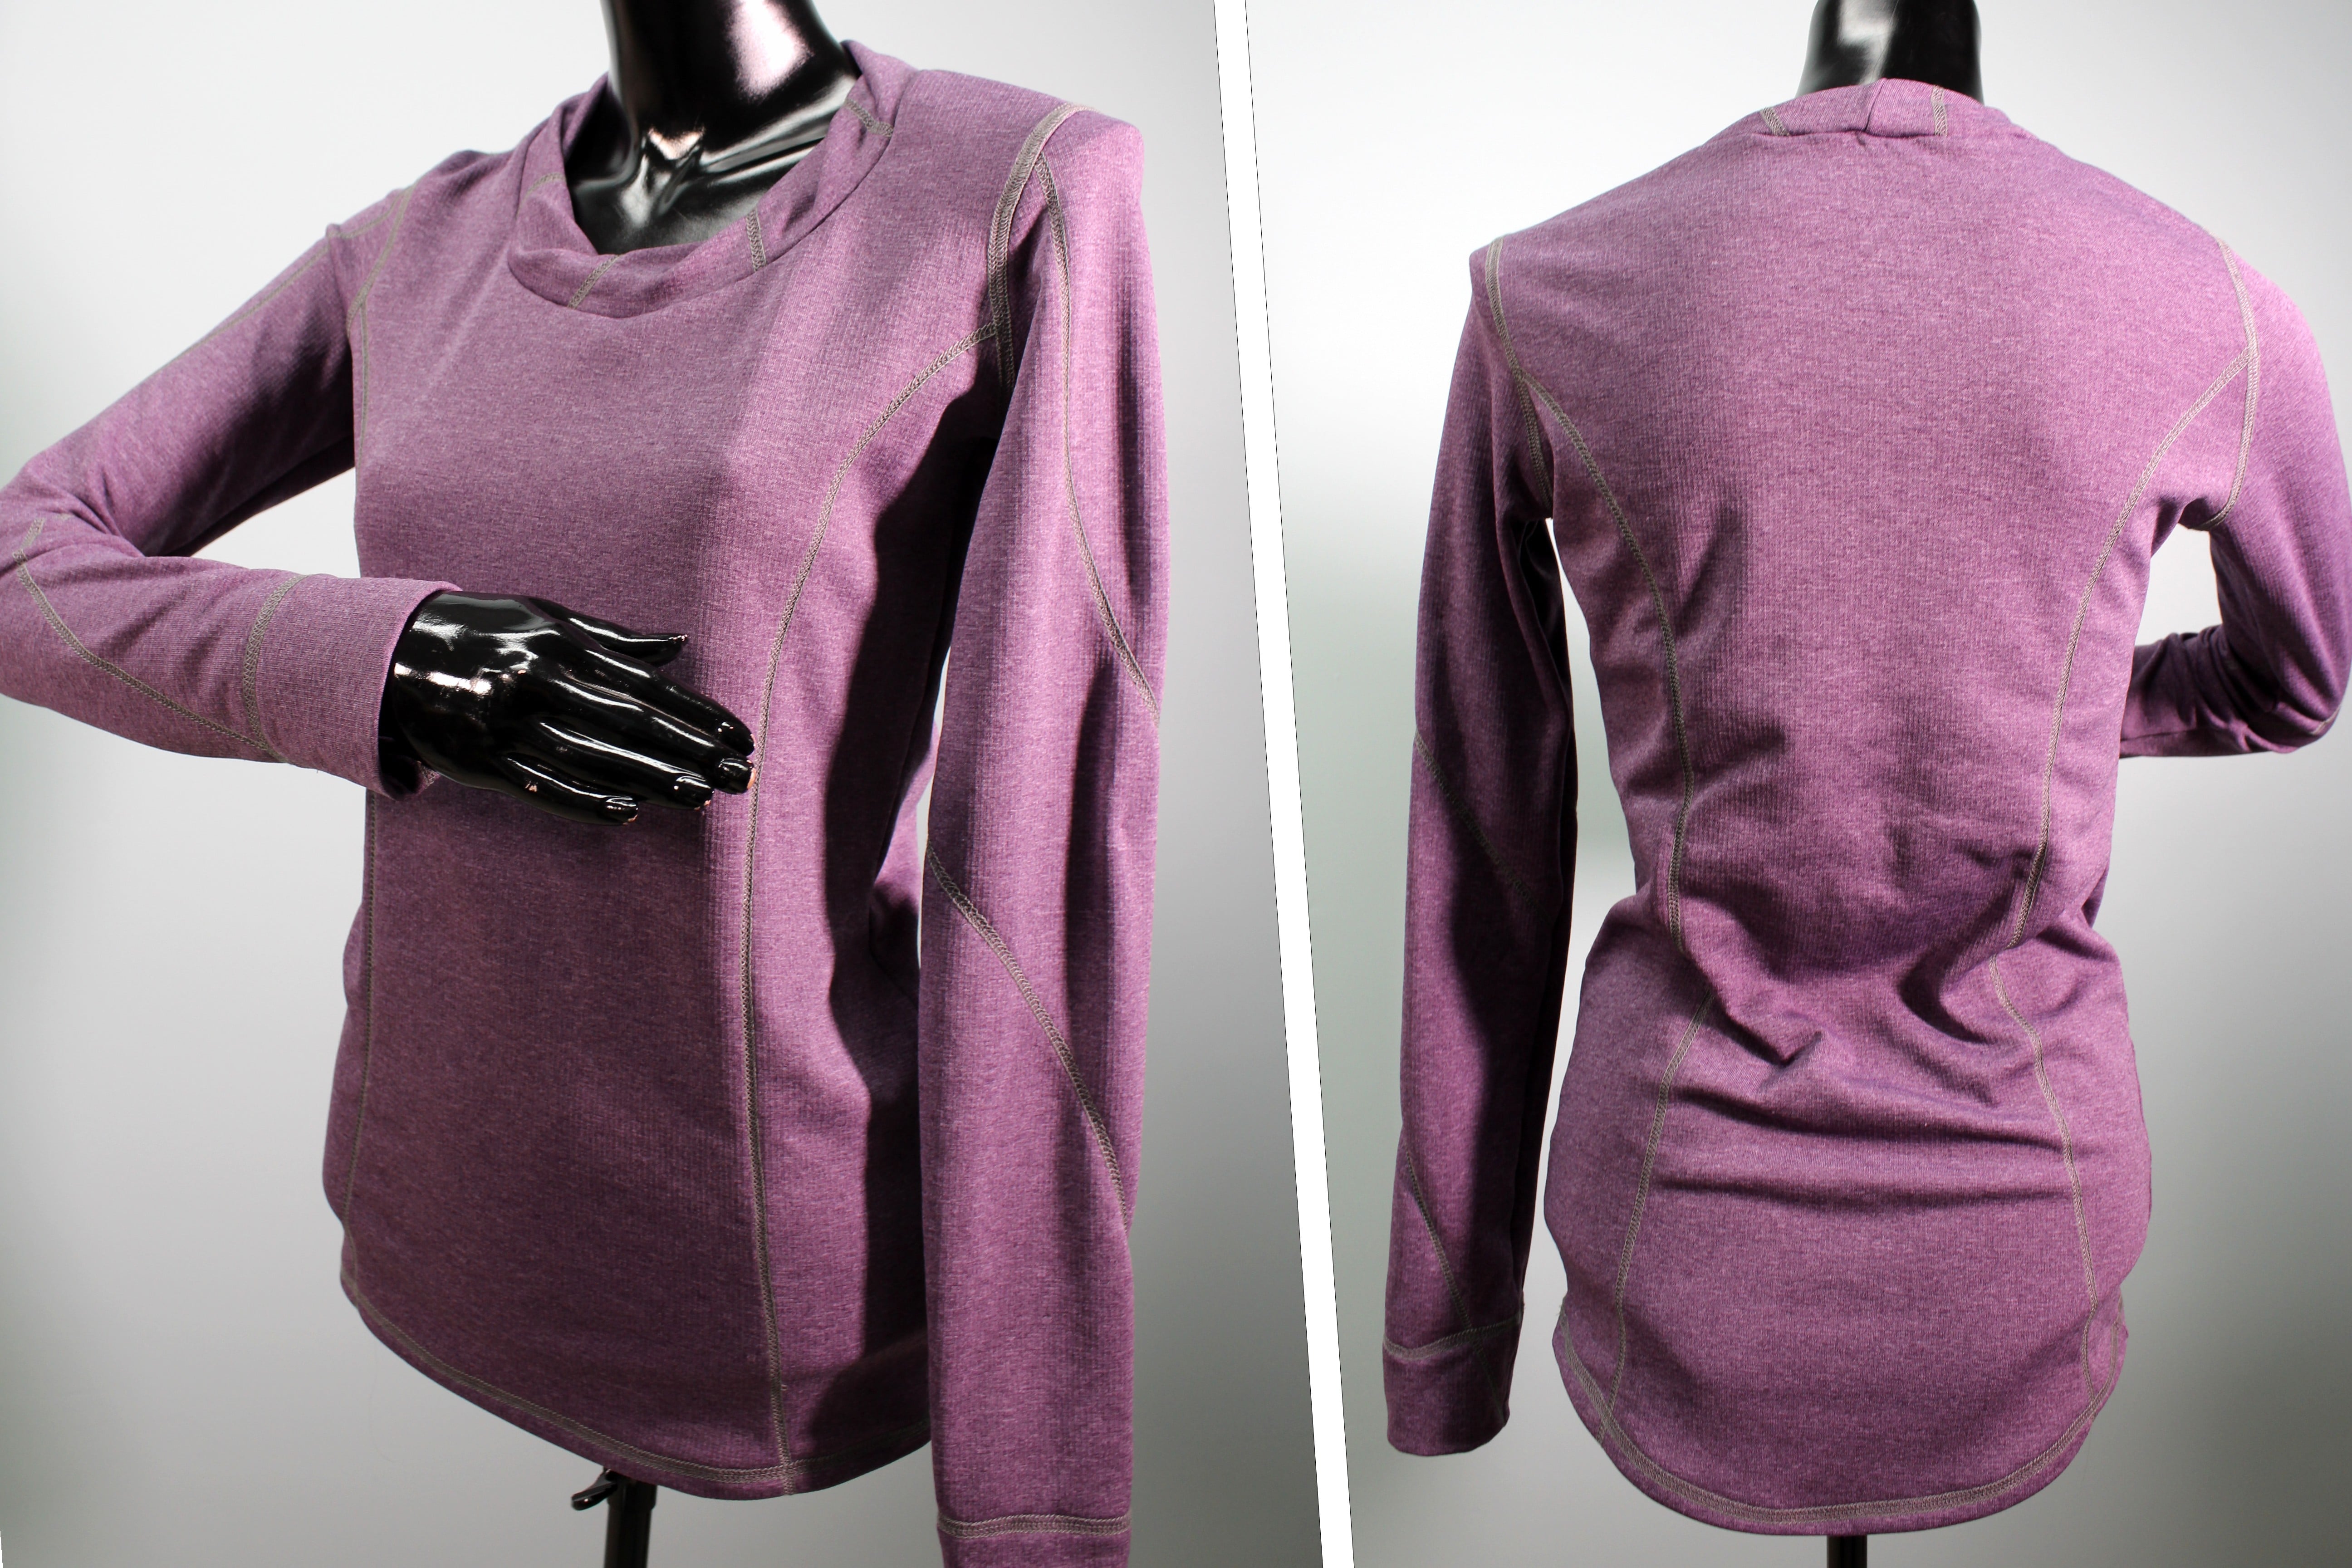
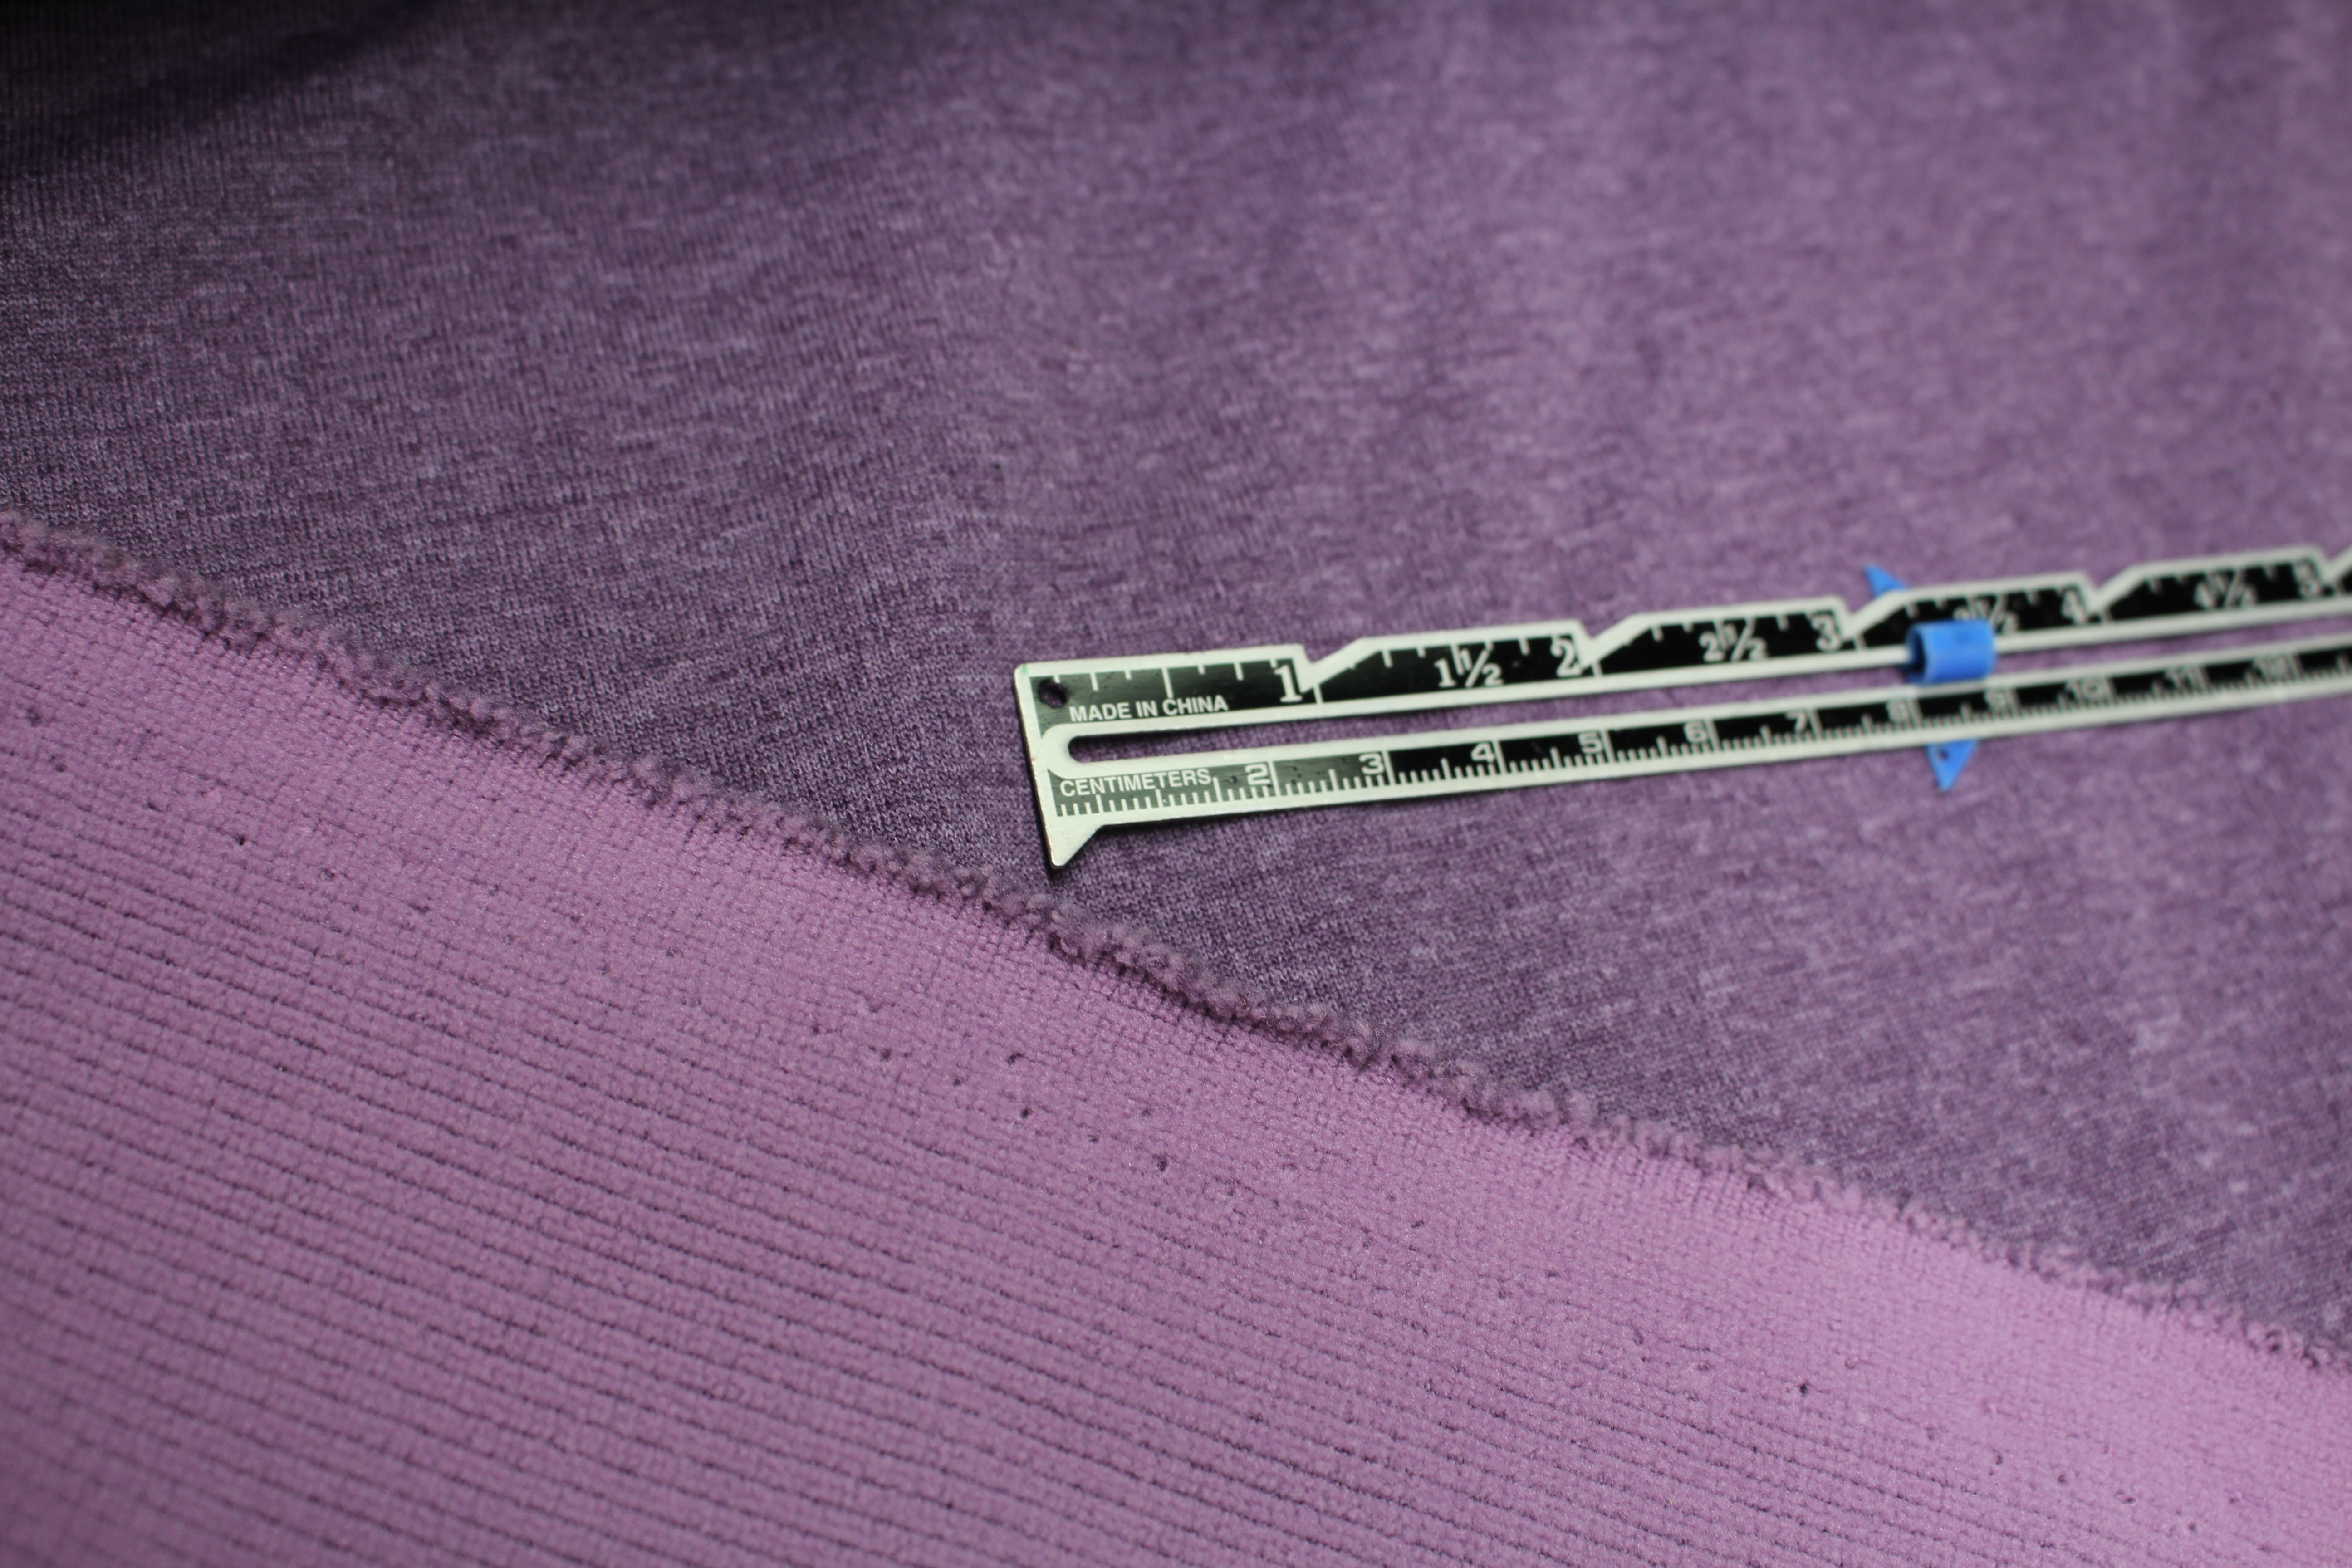
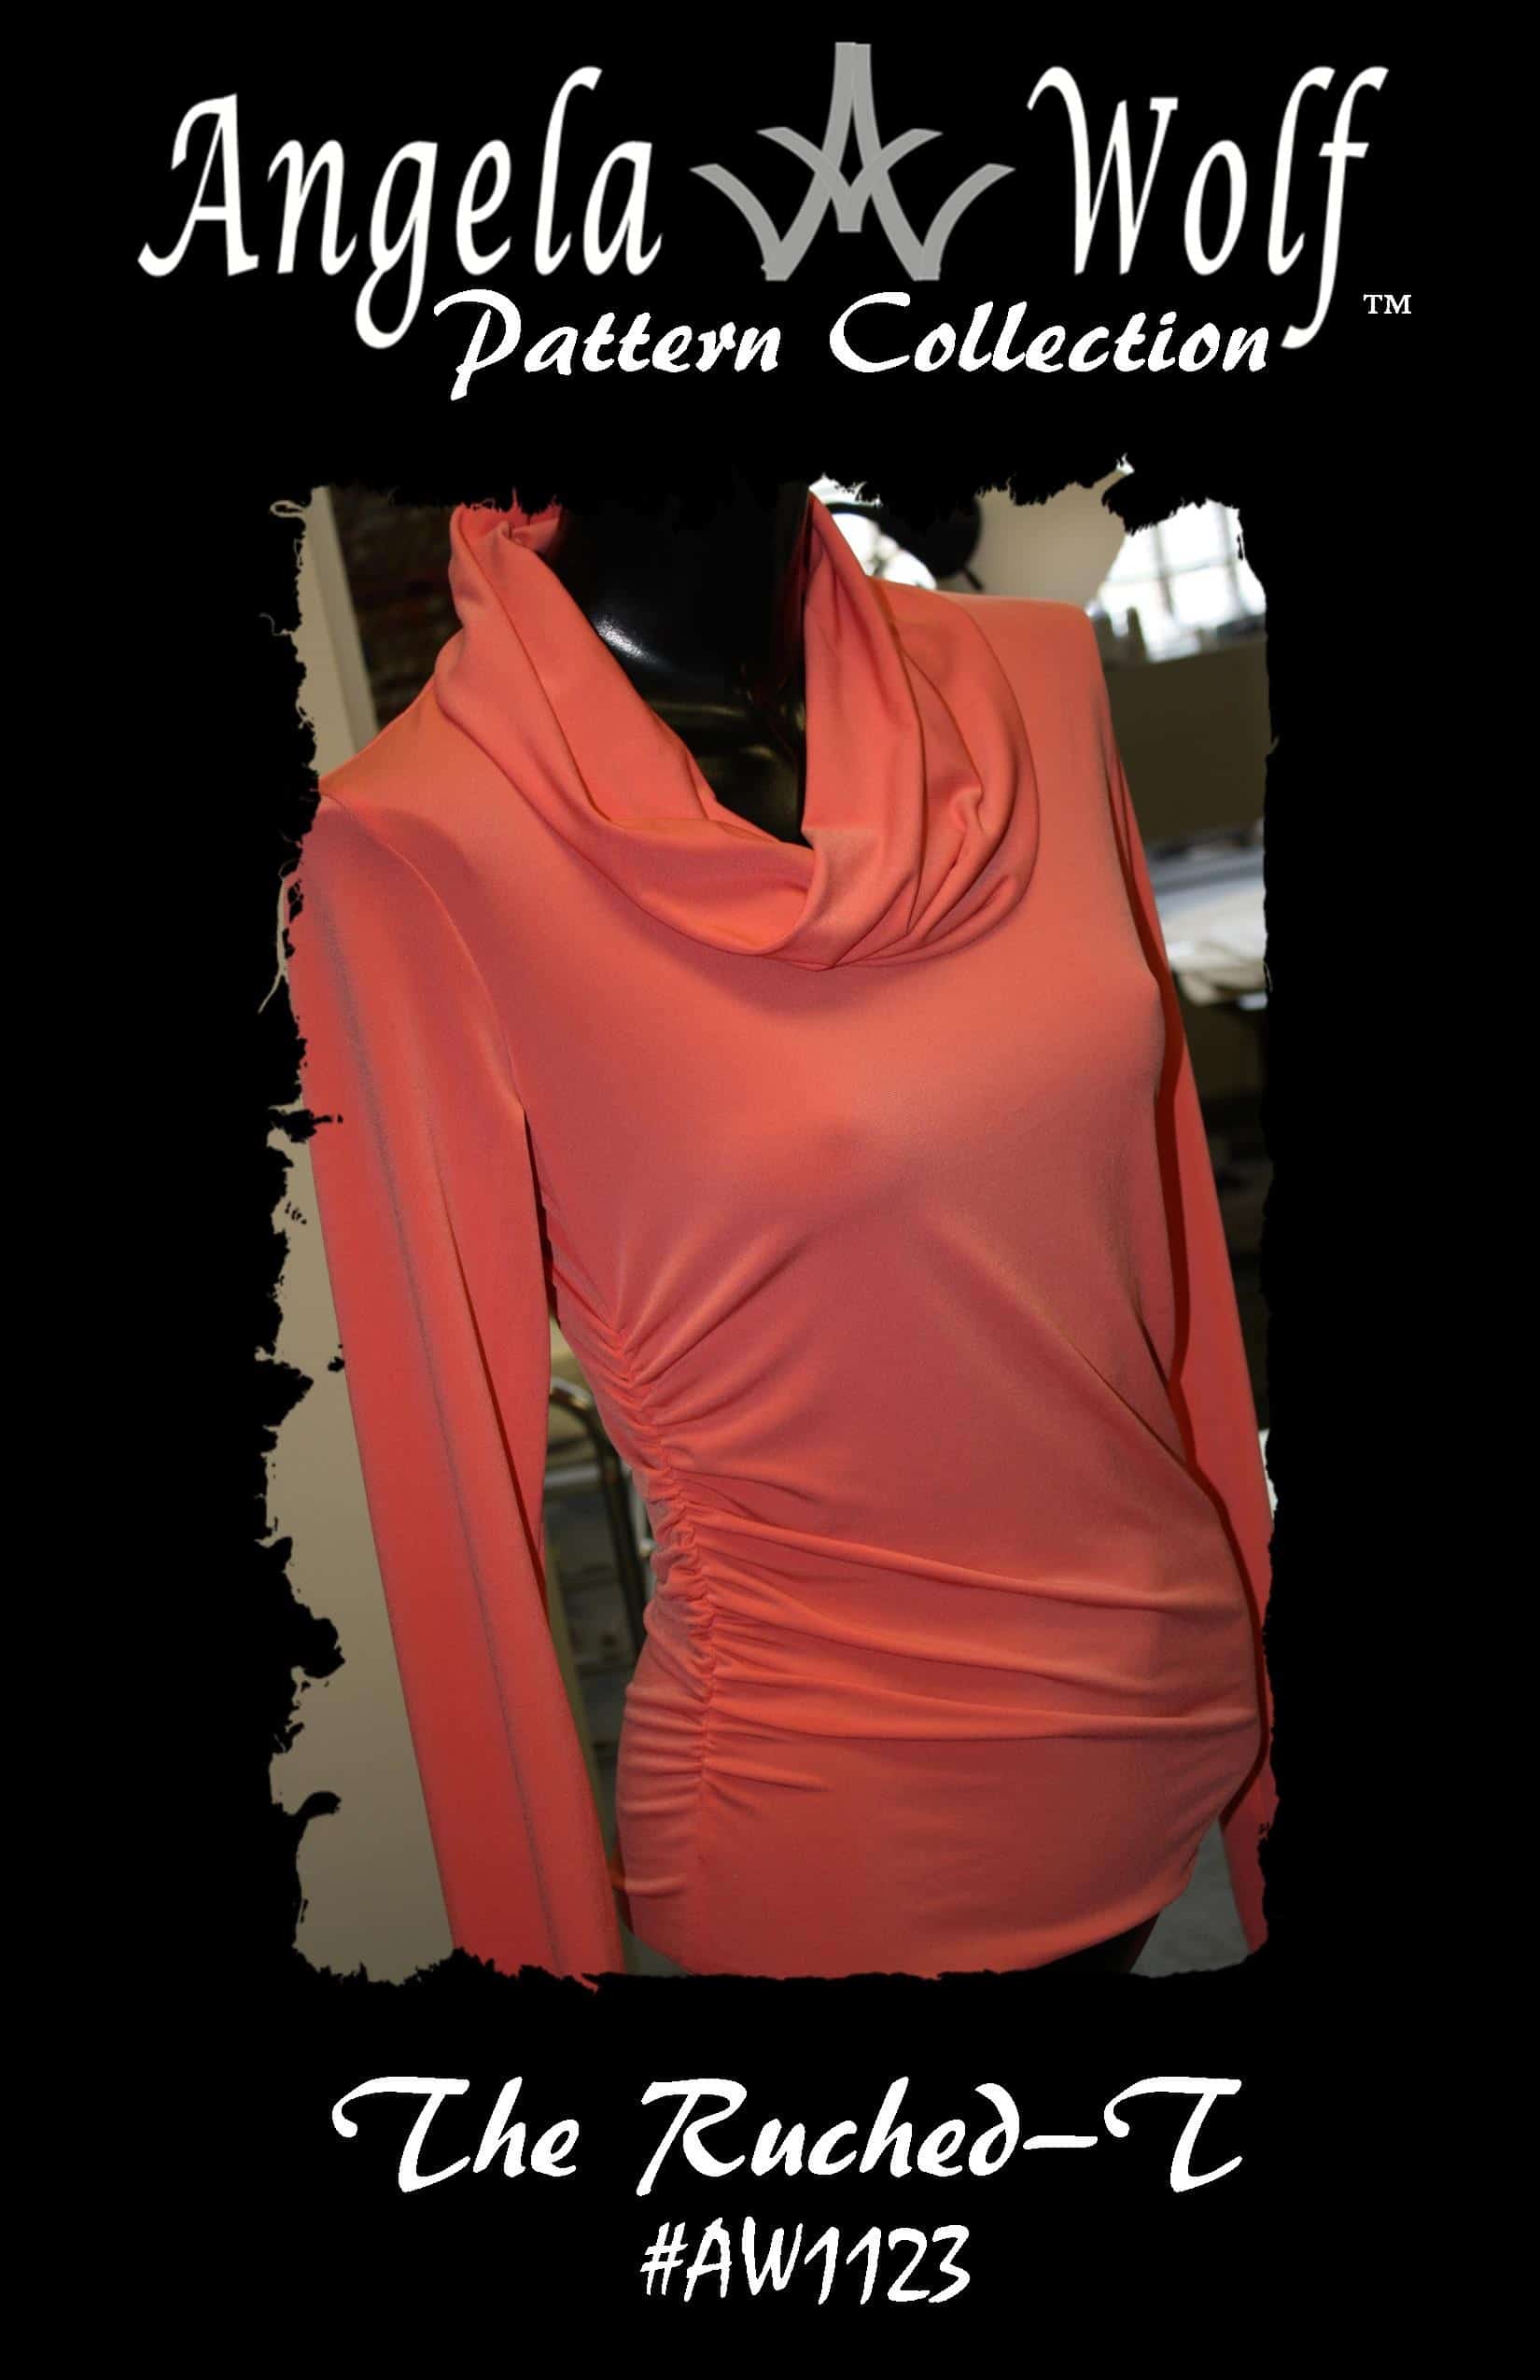
One of my favorite items to make is a simple t-shirt. It’s fast and easy when sewn with a serger. Then I use the Brother Coverstitch machine for hemming. But what about embellishing the tee with coverstitching! If you have used the Coverstitch before you will notice the back side of the coverstitch has a sporty look, similar to what we see in sportswear. For this tutorial, I am going to show you how to utilize the 3-thread Coverstitch to create this fashionable look! Let’s get started:
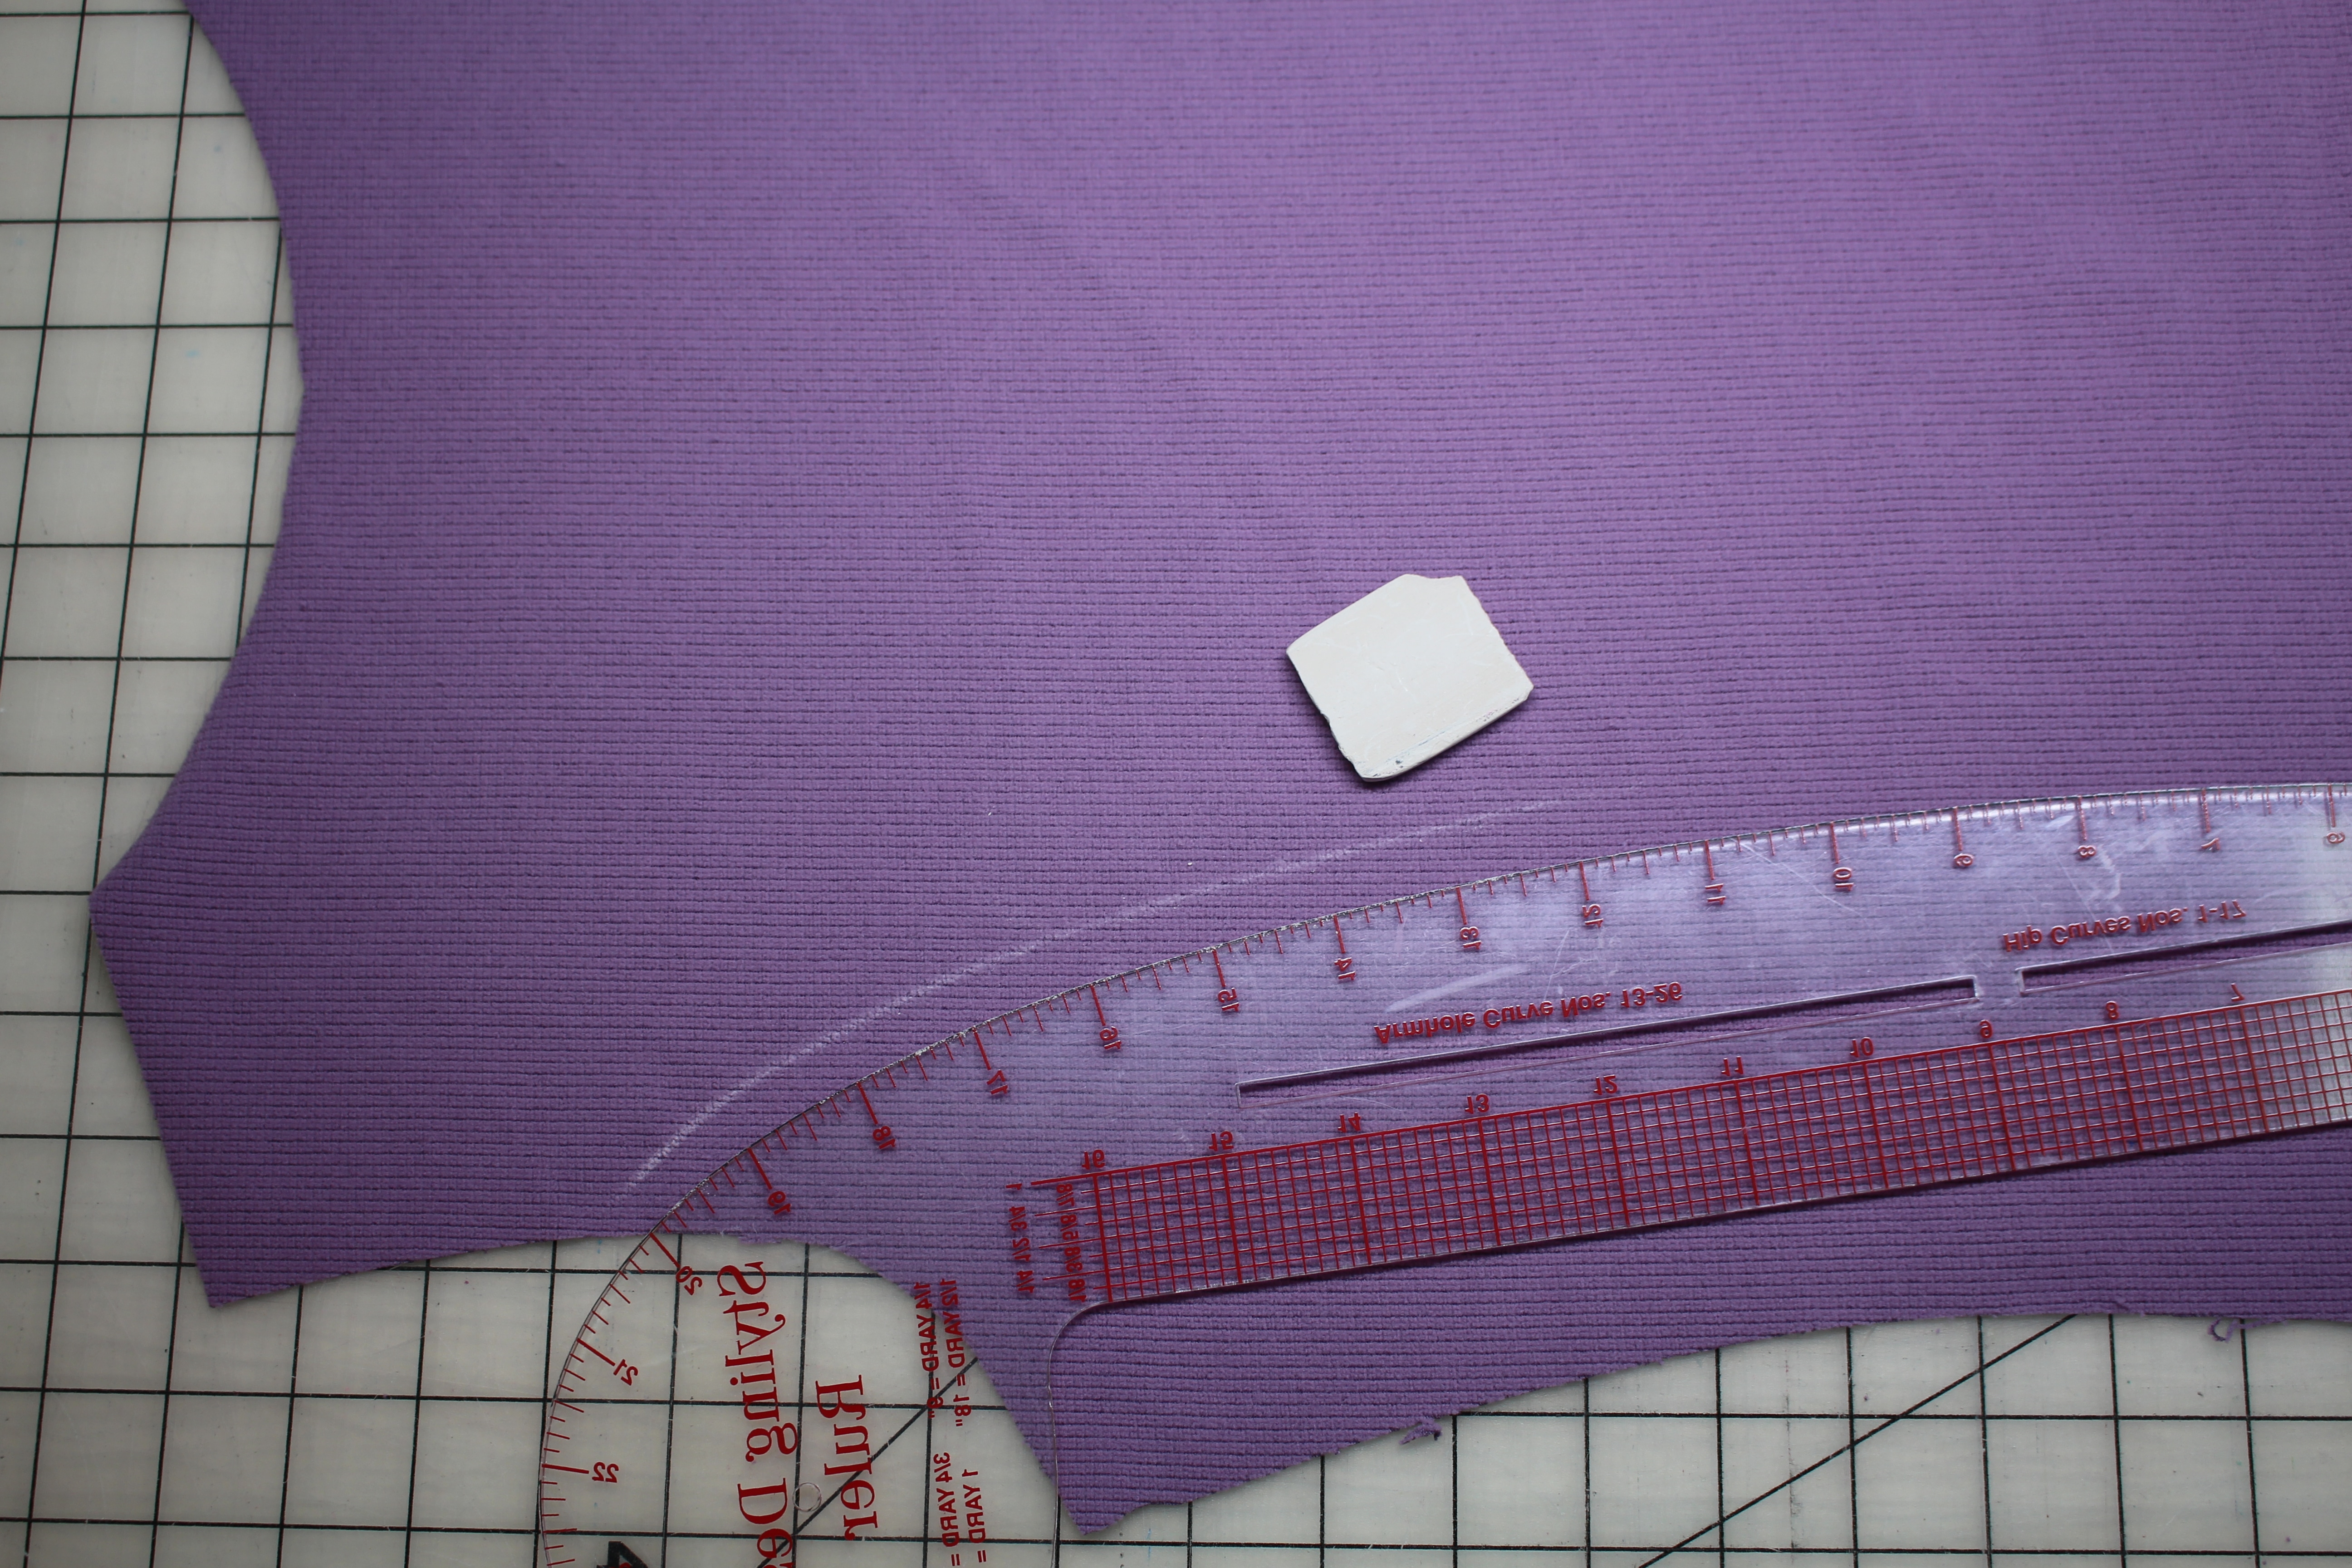
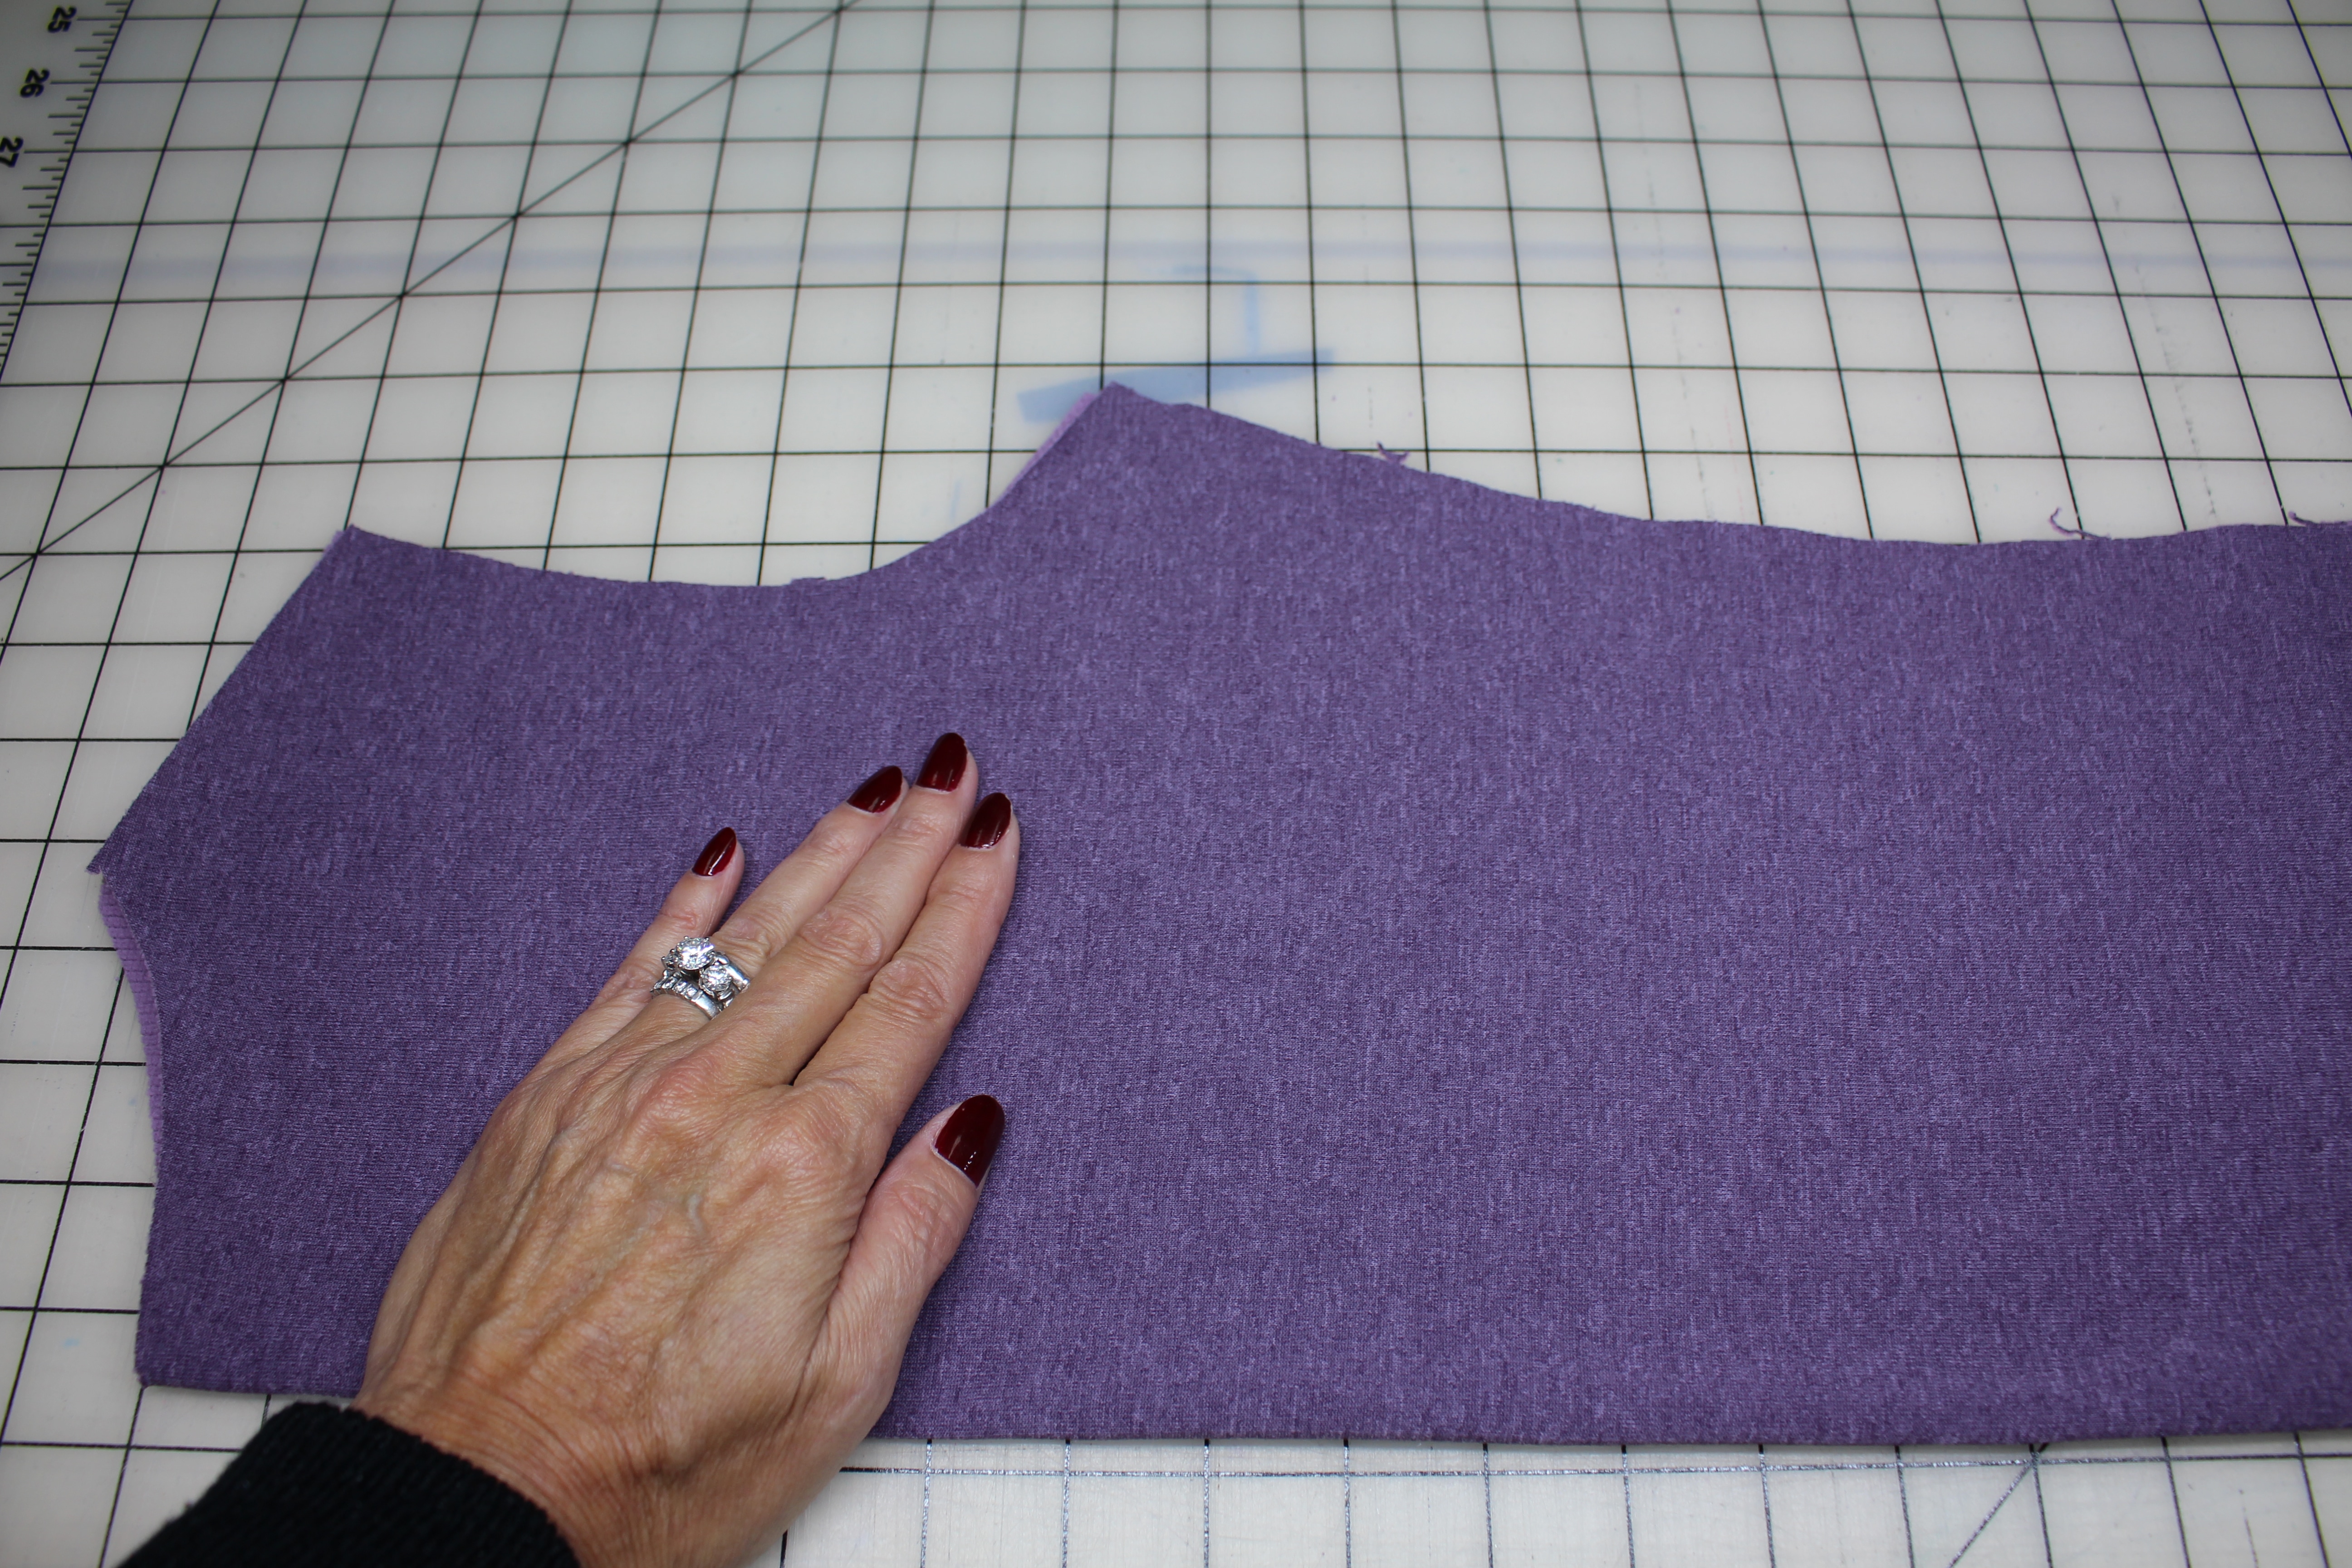
Cut out the pattern. My T-shirt pattern pieces consist of 1 Front, 1 Back, 2 Sleeves, and 1 Collar. There are not princess seams, but I want to add the illusion there are princess seams. Starting with the front pattern, on the wrong side of the fabric, draw a line from the armscye to the hem. Use a curved ruler if you need help drawing the curve .
Fold the fabric in half and use your hand to brush the fabric. This will trace the chalk mark to the other side of the fabric.
Open the fabric back up and you should see a faint line from the first chalk marking. Use the chalk to trace over this line, making it darker and easier to see. Do the same thing for the BACK pattern piece. For the collar and sleeve, draw randomly placed chalked lines.
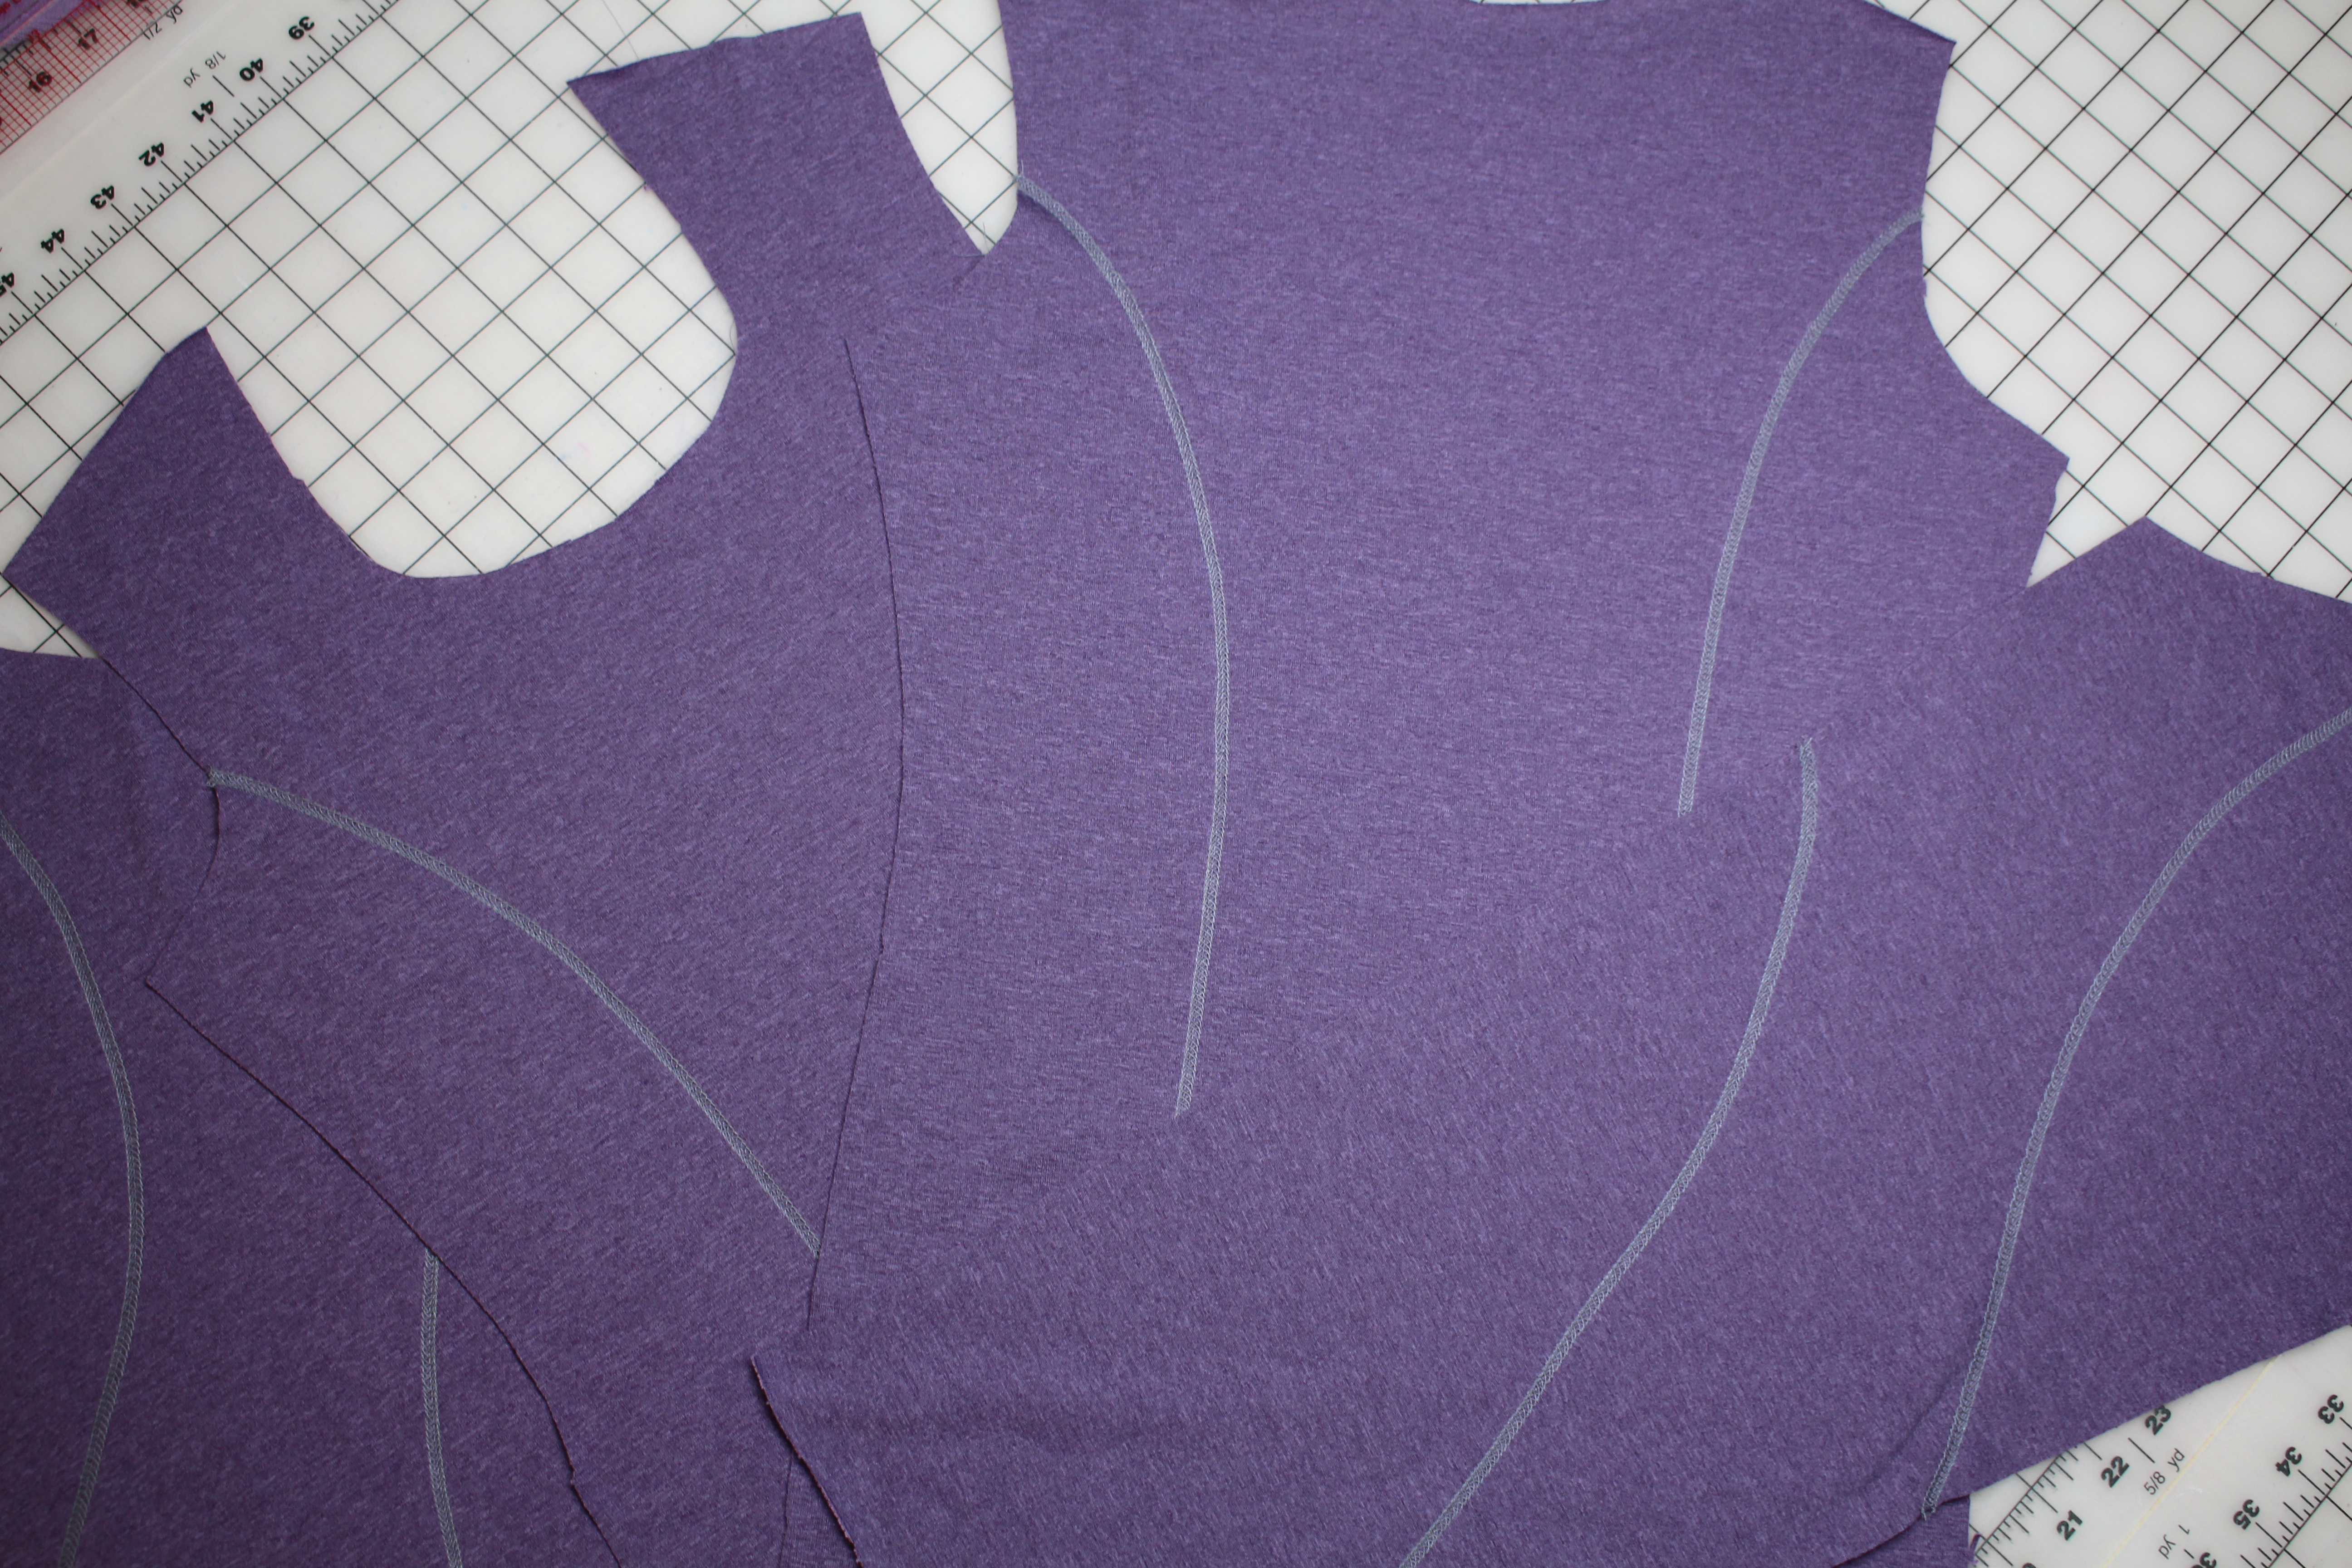
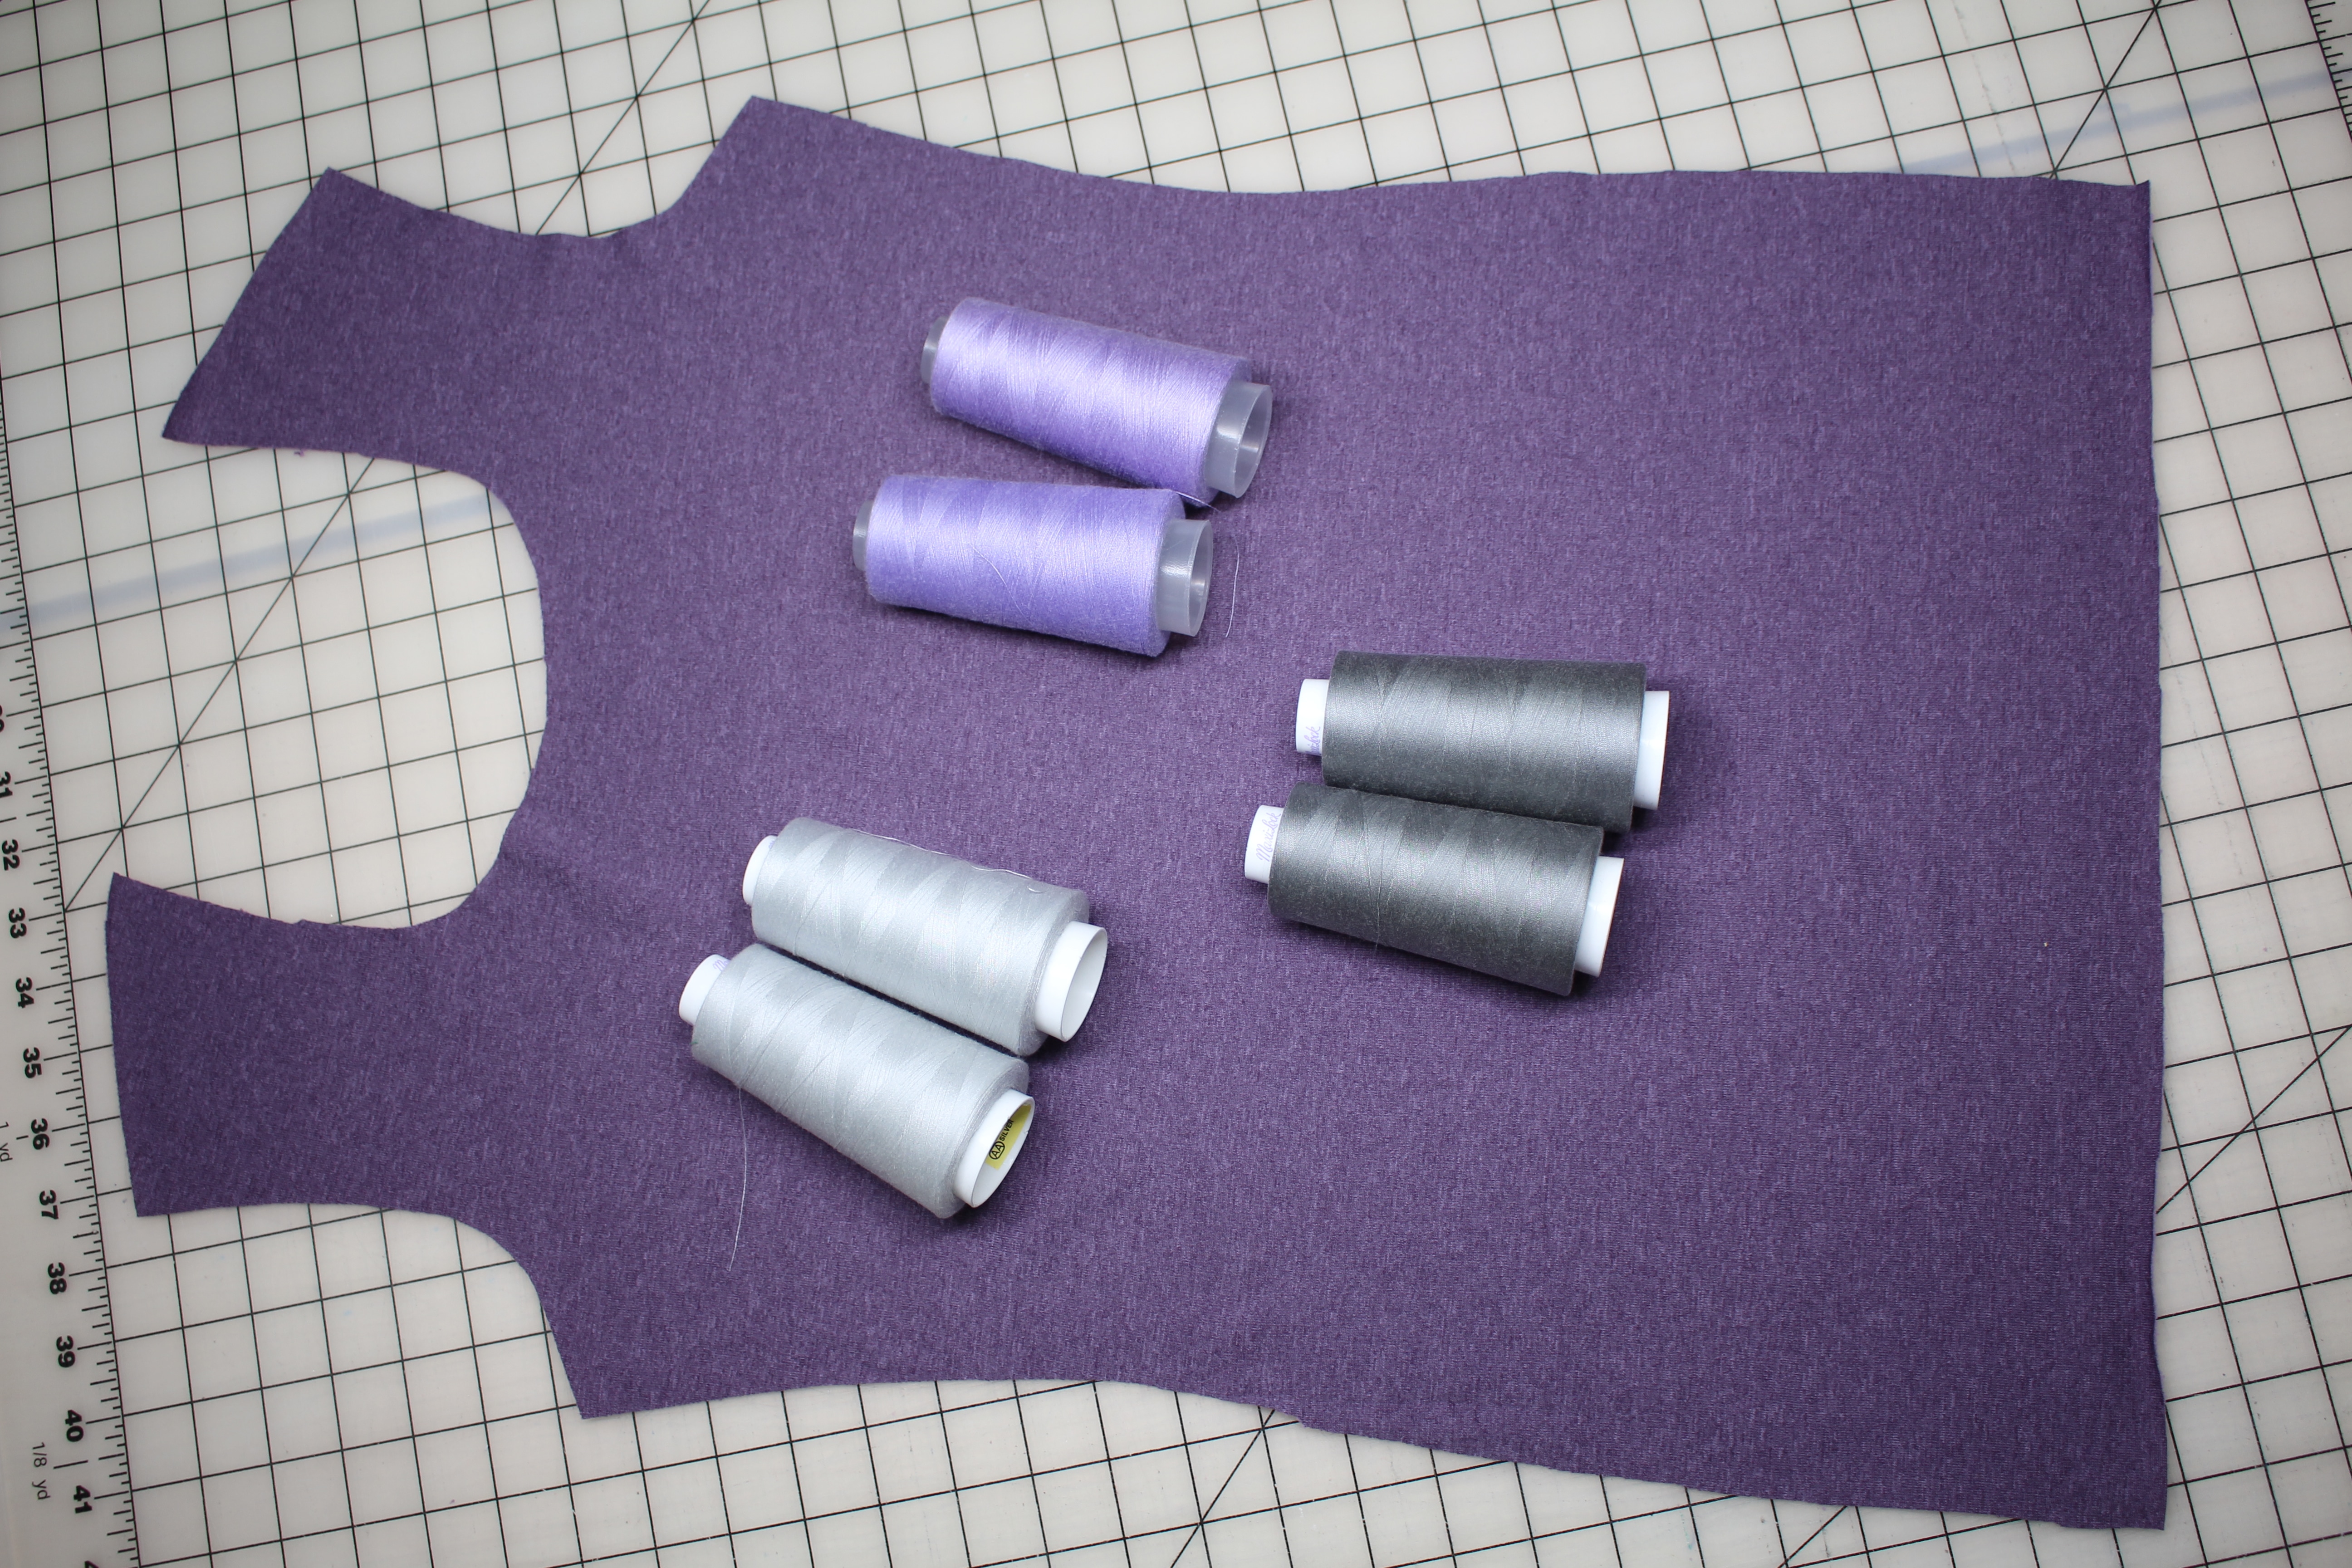
Choose the color of thread for the decorative stitch. Ideally the color should be in the same color family as the right side of the fabric, but enough of a contrast that you can see the stitches.
Decide which stitch looks the best on your fabric:
Keep in mind you will be stitching with the wrong side of the fabric facing up. Check the look of the stitch on both sides.
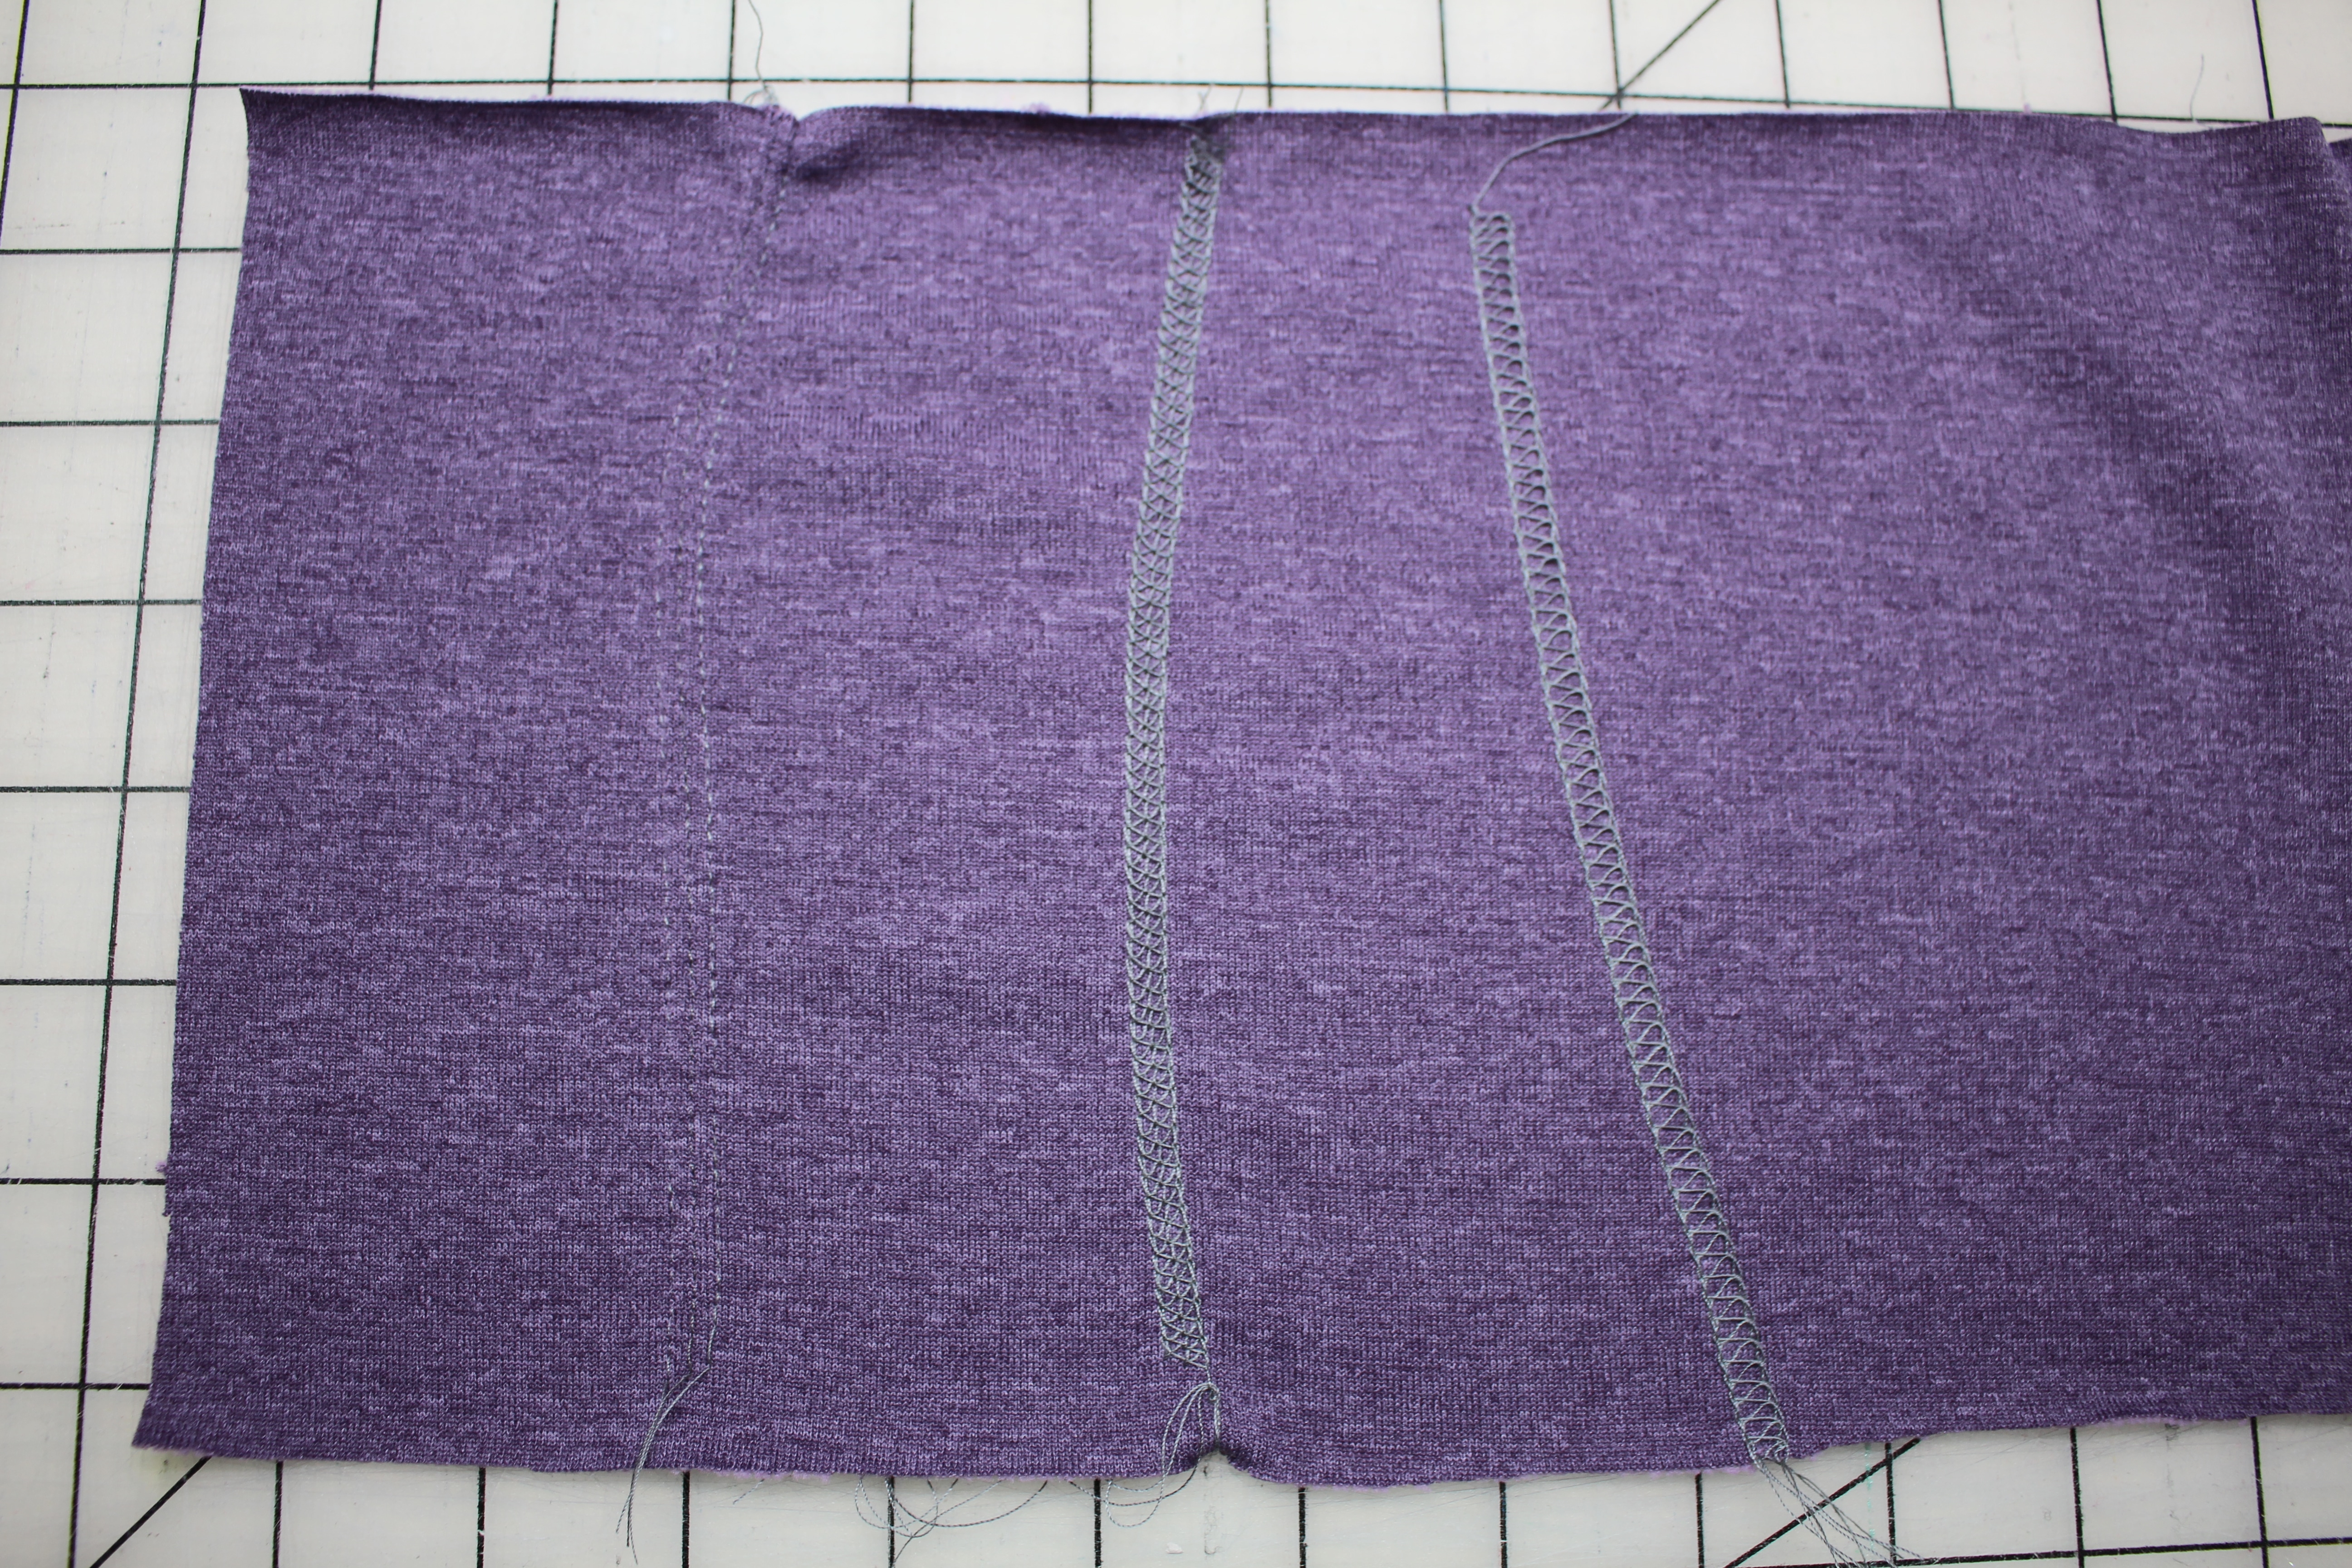
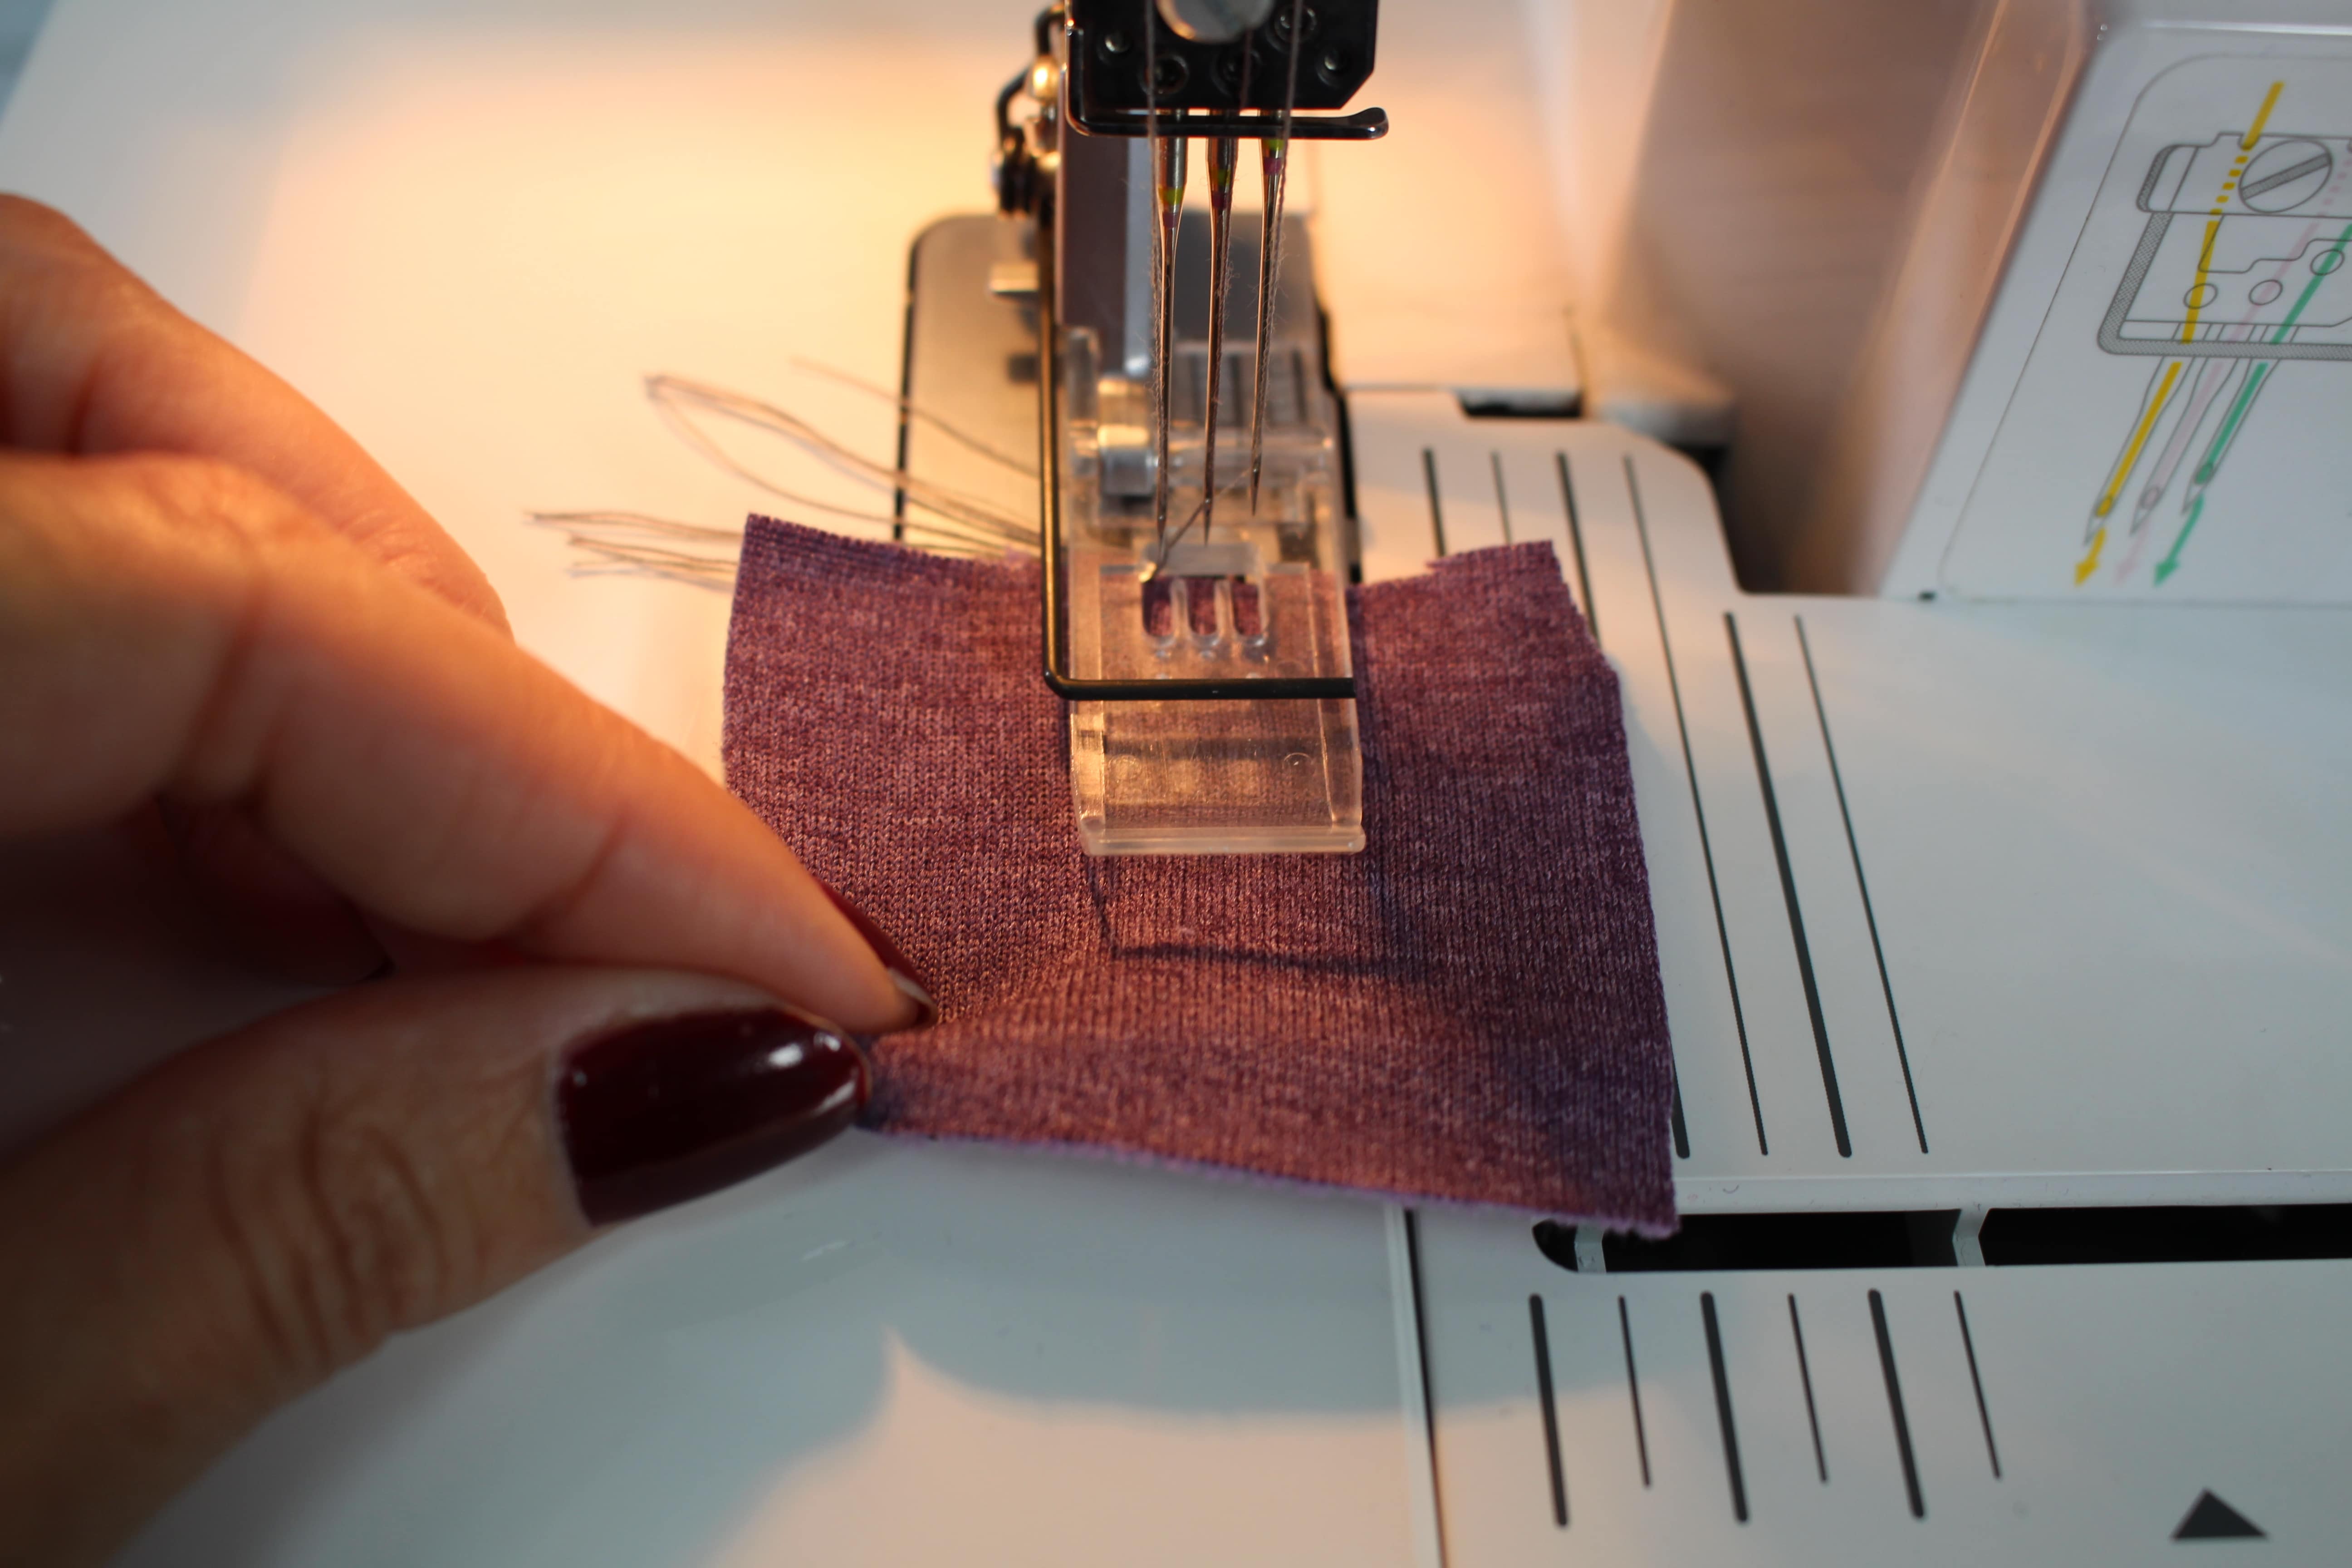
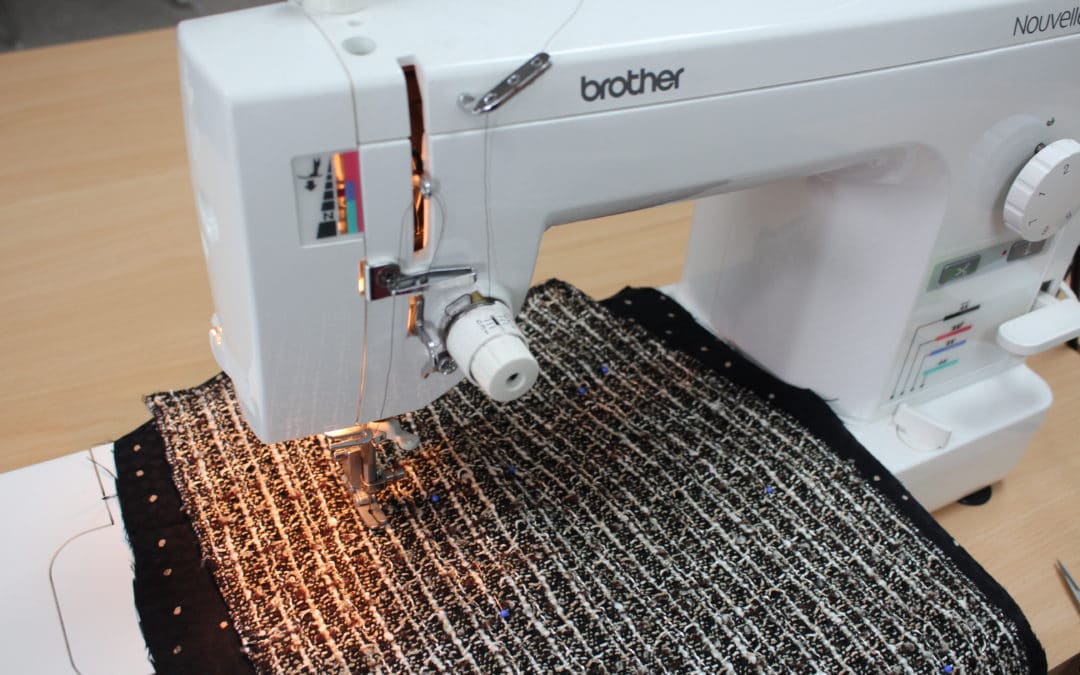
I prefer the triple coverstitch on my fabric, so I will set up the coverstitch machine with all three needles using 4 spools of thread. It’s a little faster to stitch from piece to piece, so start stitching on a scrap of fabric and then add another piece of fabric. This allows me to check my stitch quality and I won’t have to worry about threads falling off at the beginning or end of my garment pieces. (All of these stitches rows will be sealed in a seam, so no worries on threads unraveling).
For the full tutorial, check out my post on the Brother Stitching Sewcial blog. I always love to see what your are working on, be sure to share photos of your sporty tops using #angelawolf #brothersews
Cheers,

Brother Expert Sewing Consultant. This blog post may contain affiliate links.
The page you requested could not be found. Try refining your search, or use the navigation above to locate the post.
Coupon Details: Get 50% off the full retail price of select Craftsy classes taught by Angela Wolf. Cannot be combined with any other coupons. Expires August 15, 2017.
Coupon Details: Coupon Details: Get 50% off the full retail price of select Craftsy classes taught by Angela Wolf. Cannot be combined with any other coupons. Expires August 15, 2017.
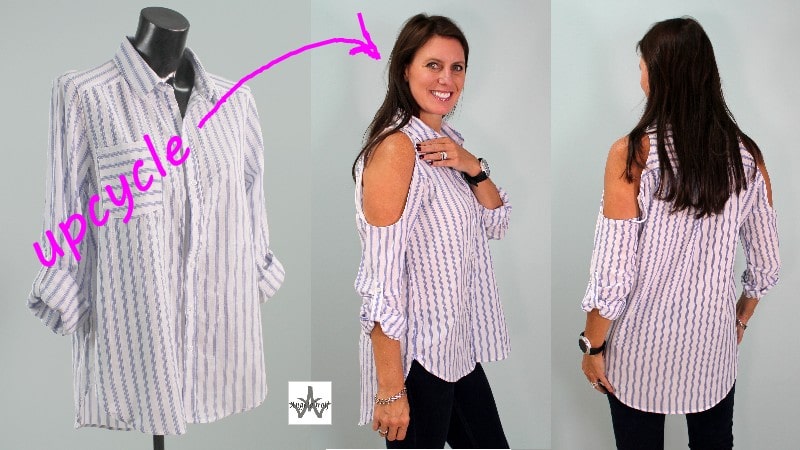

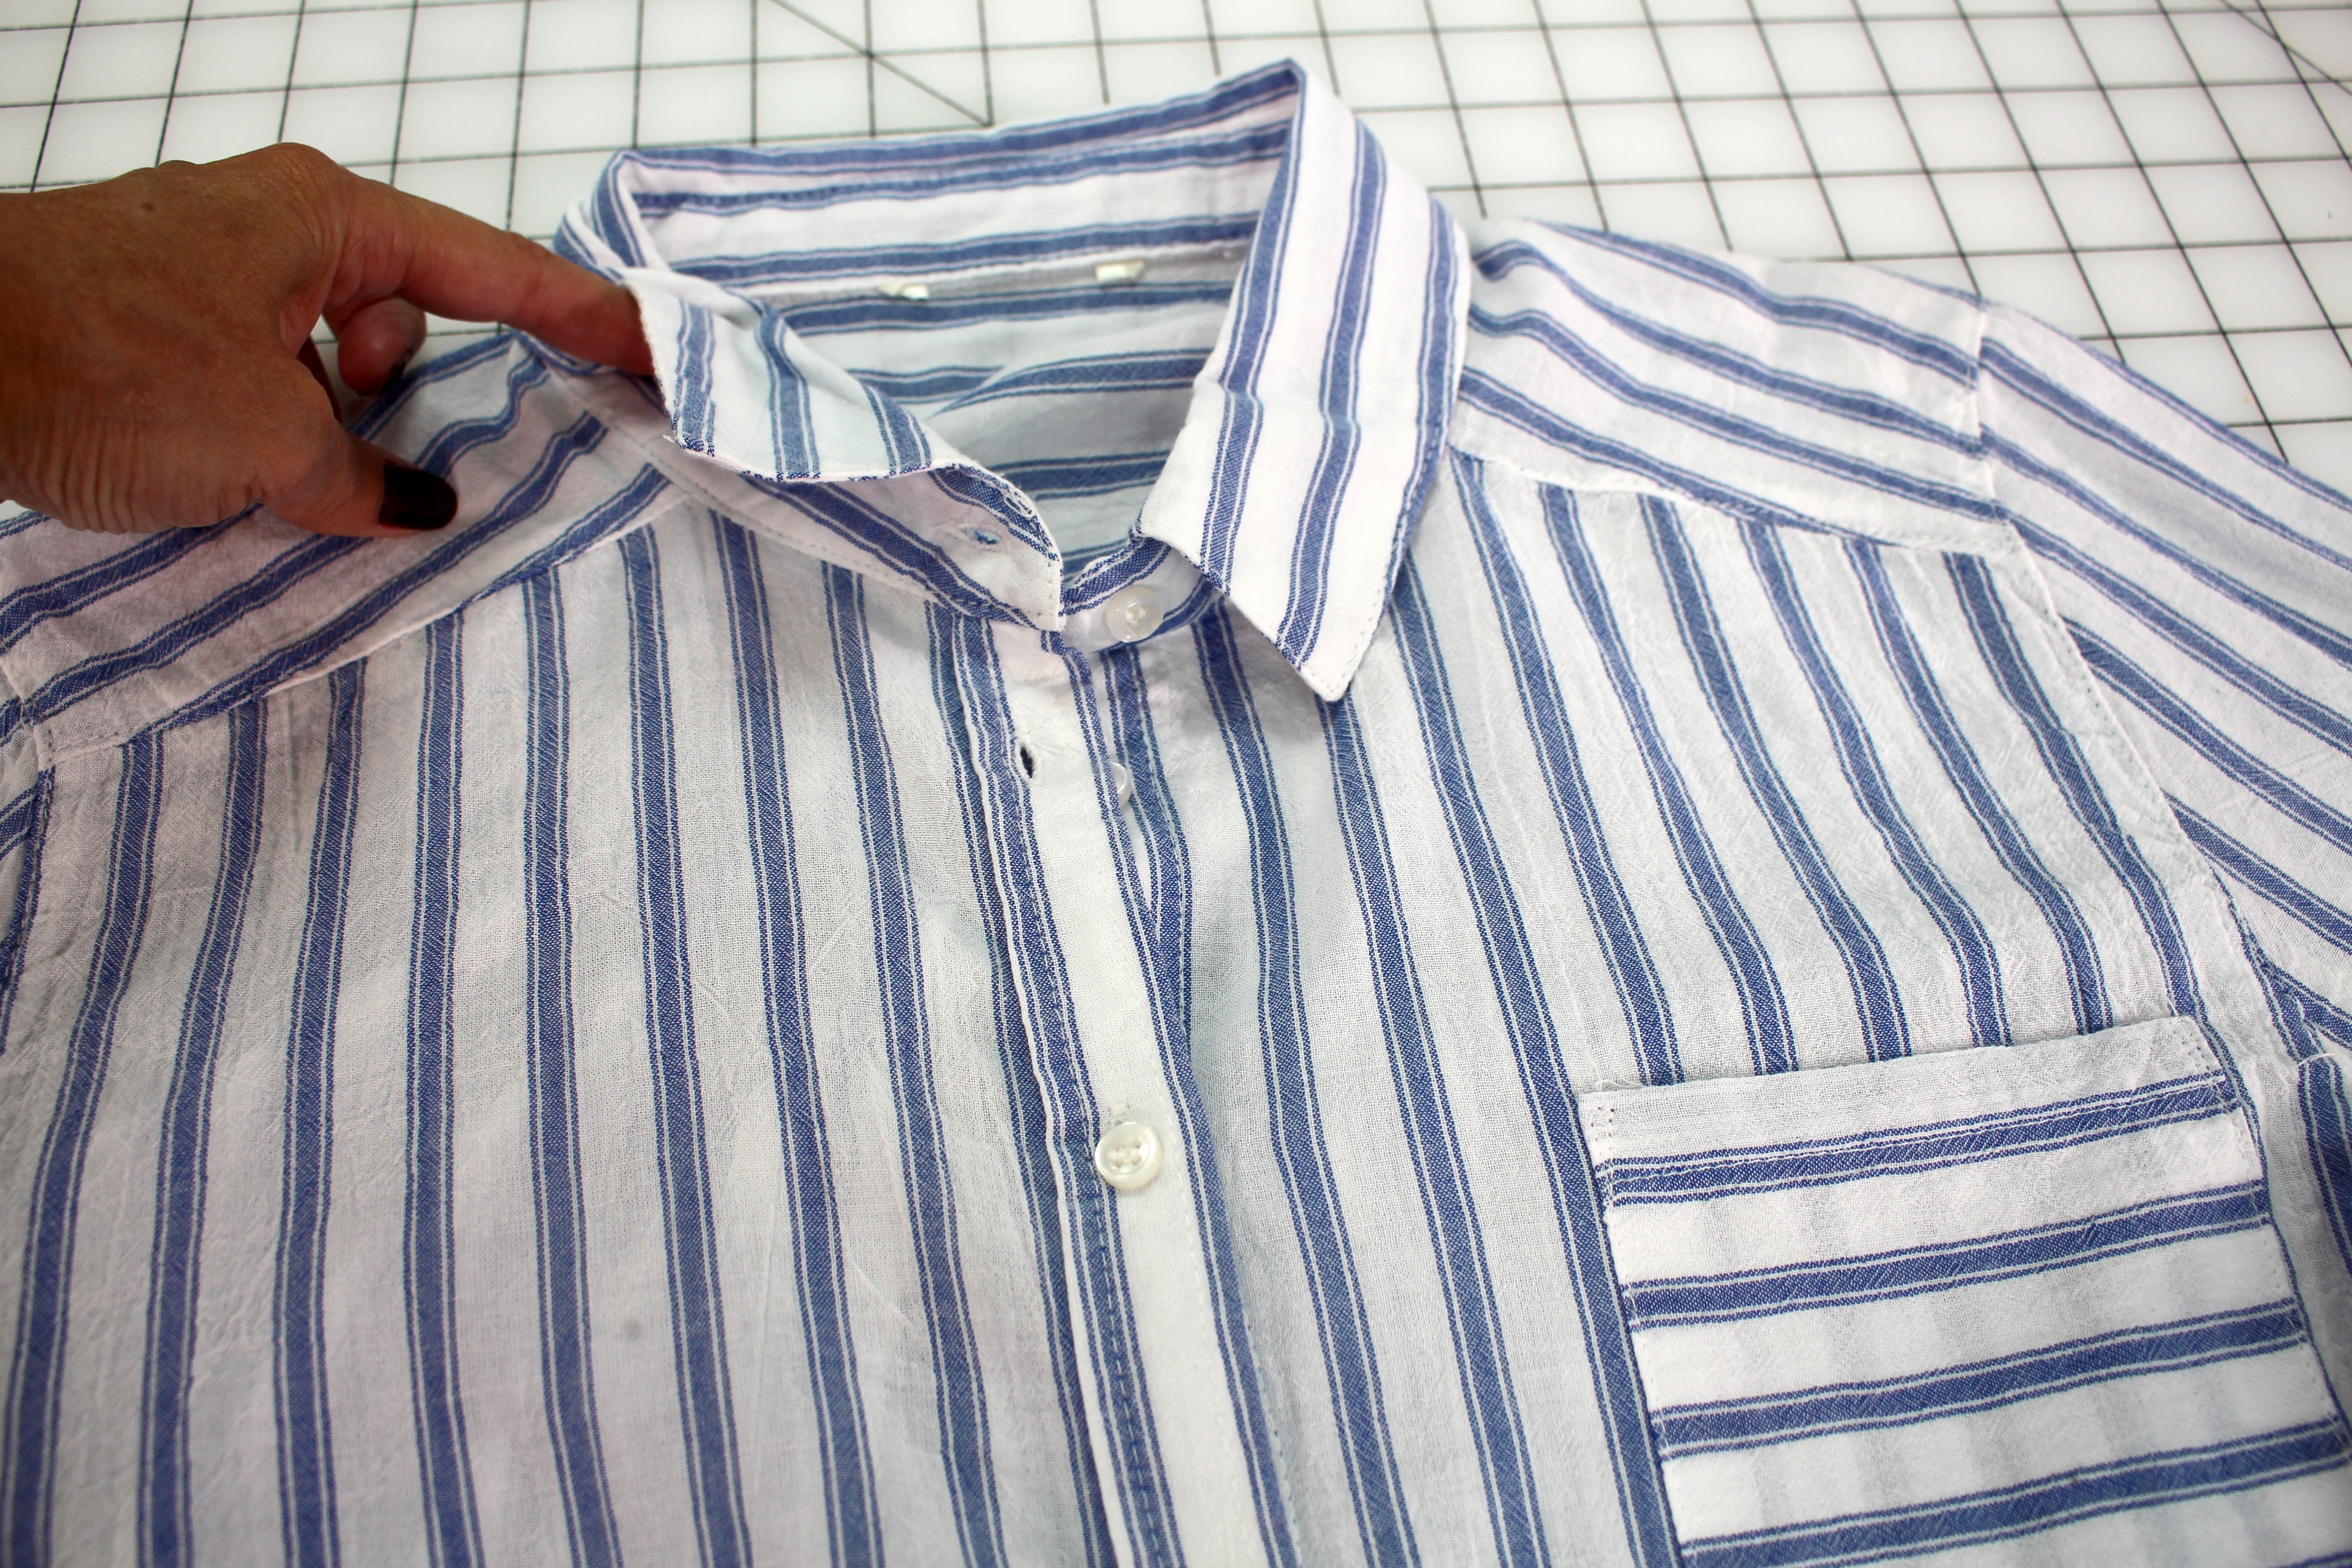
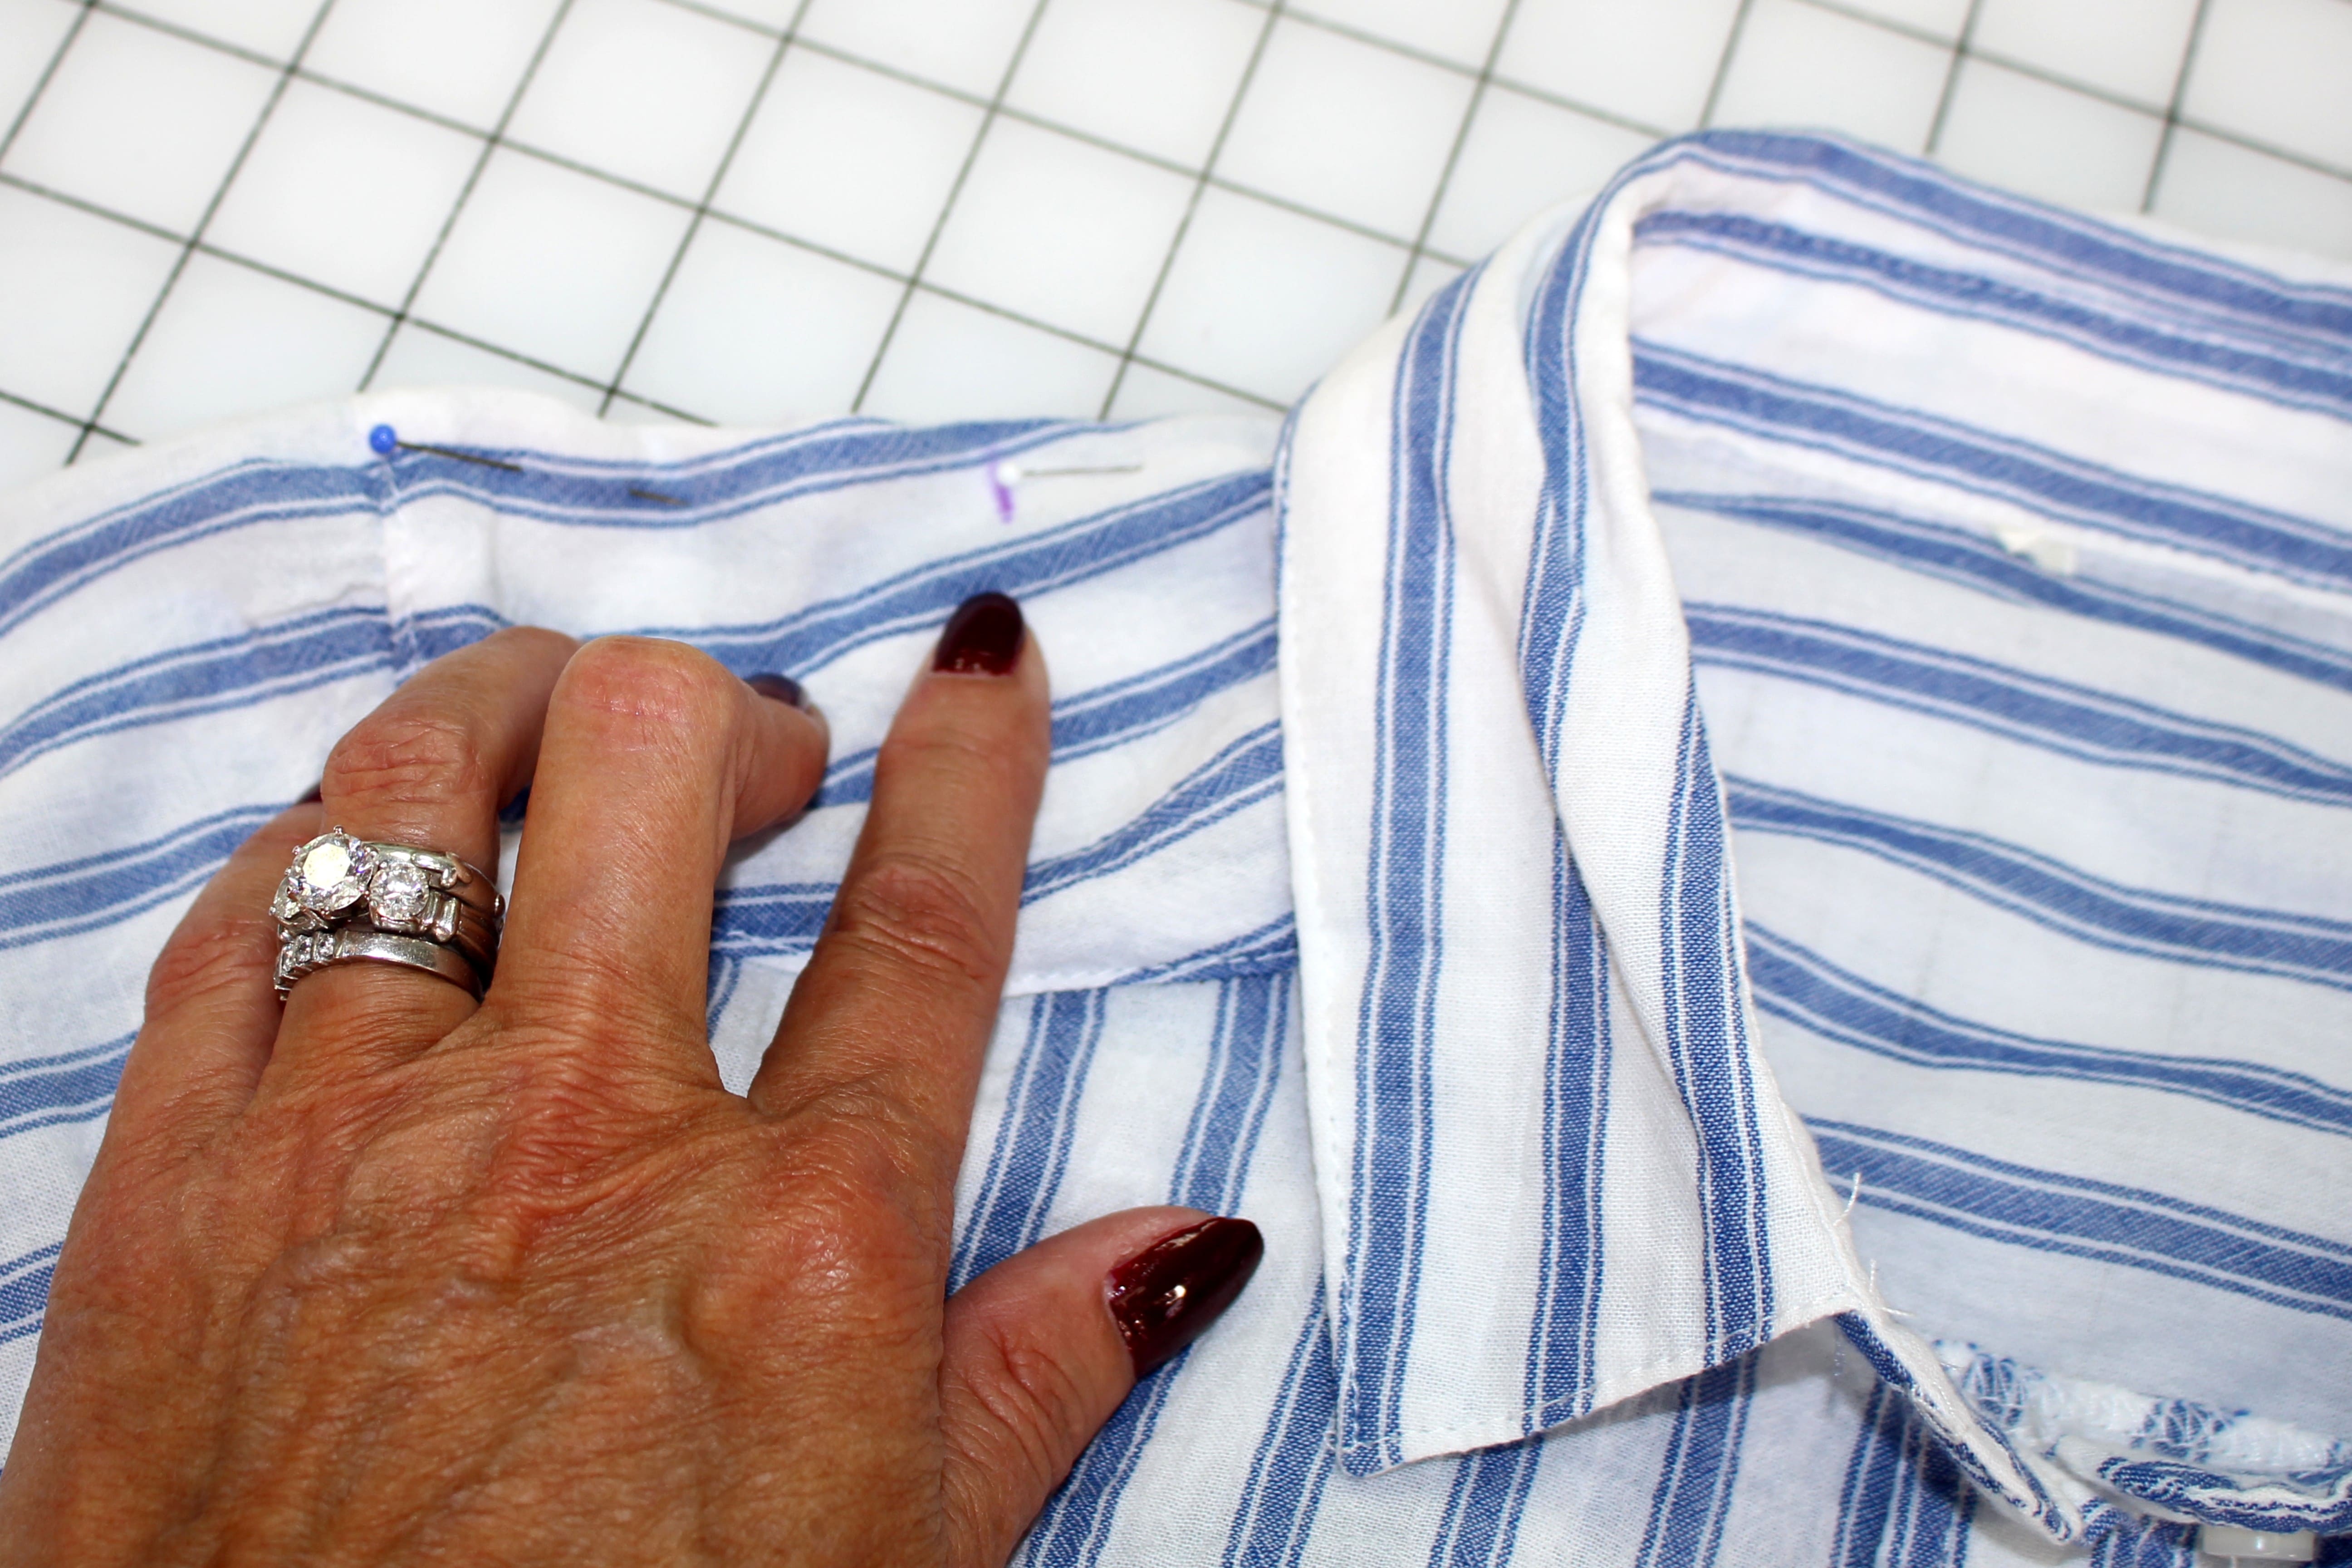
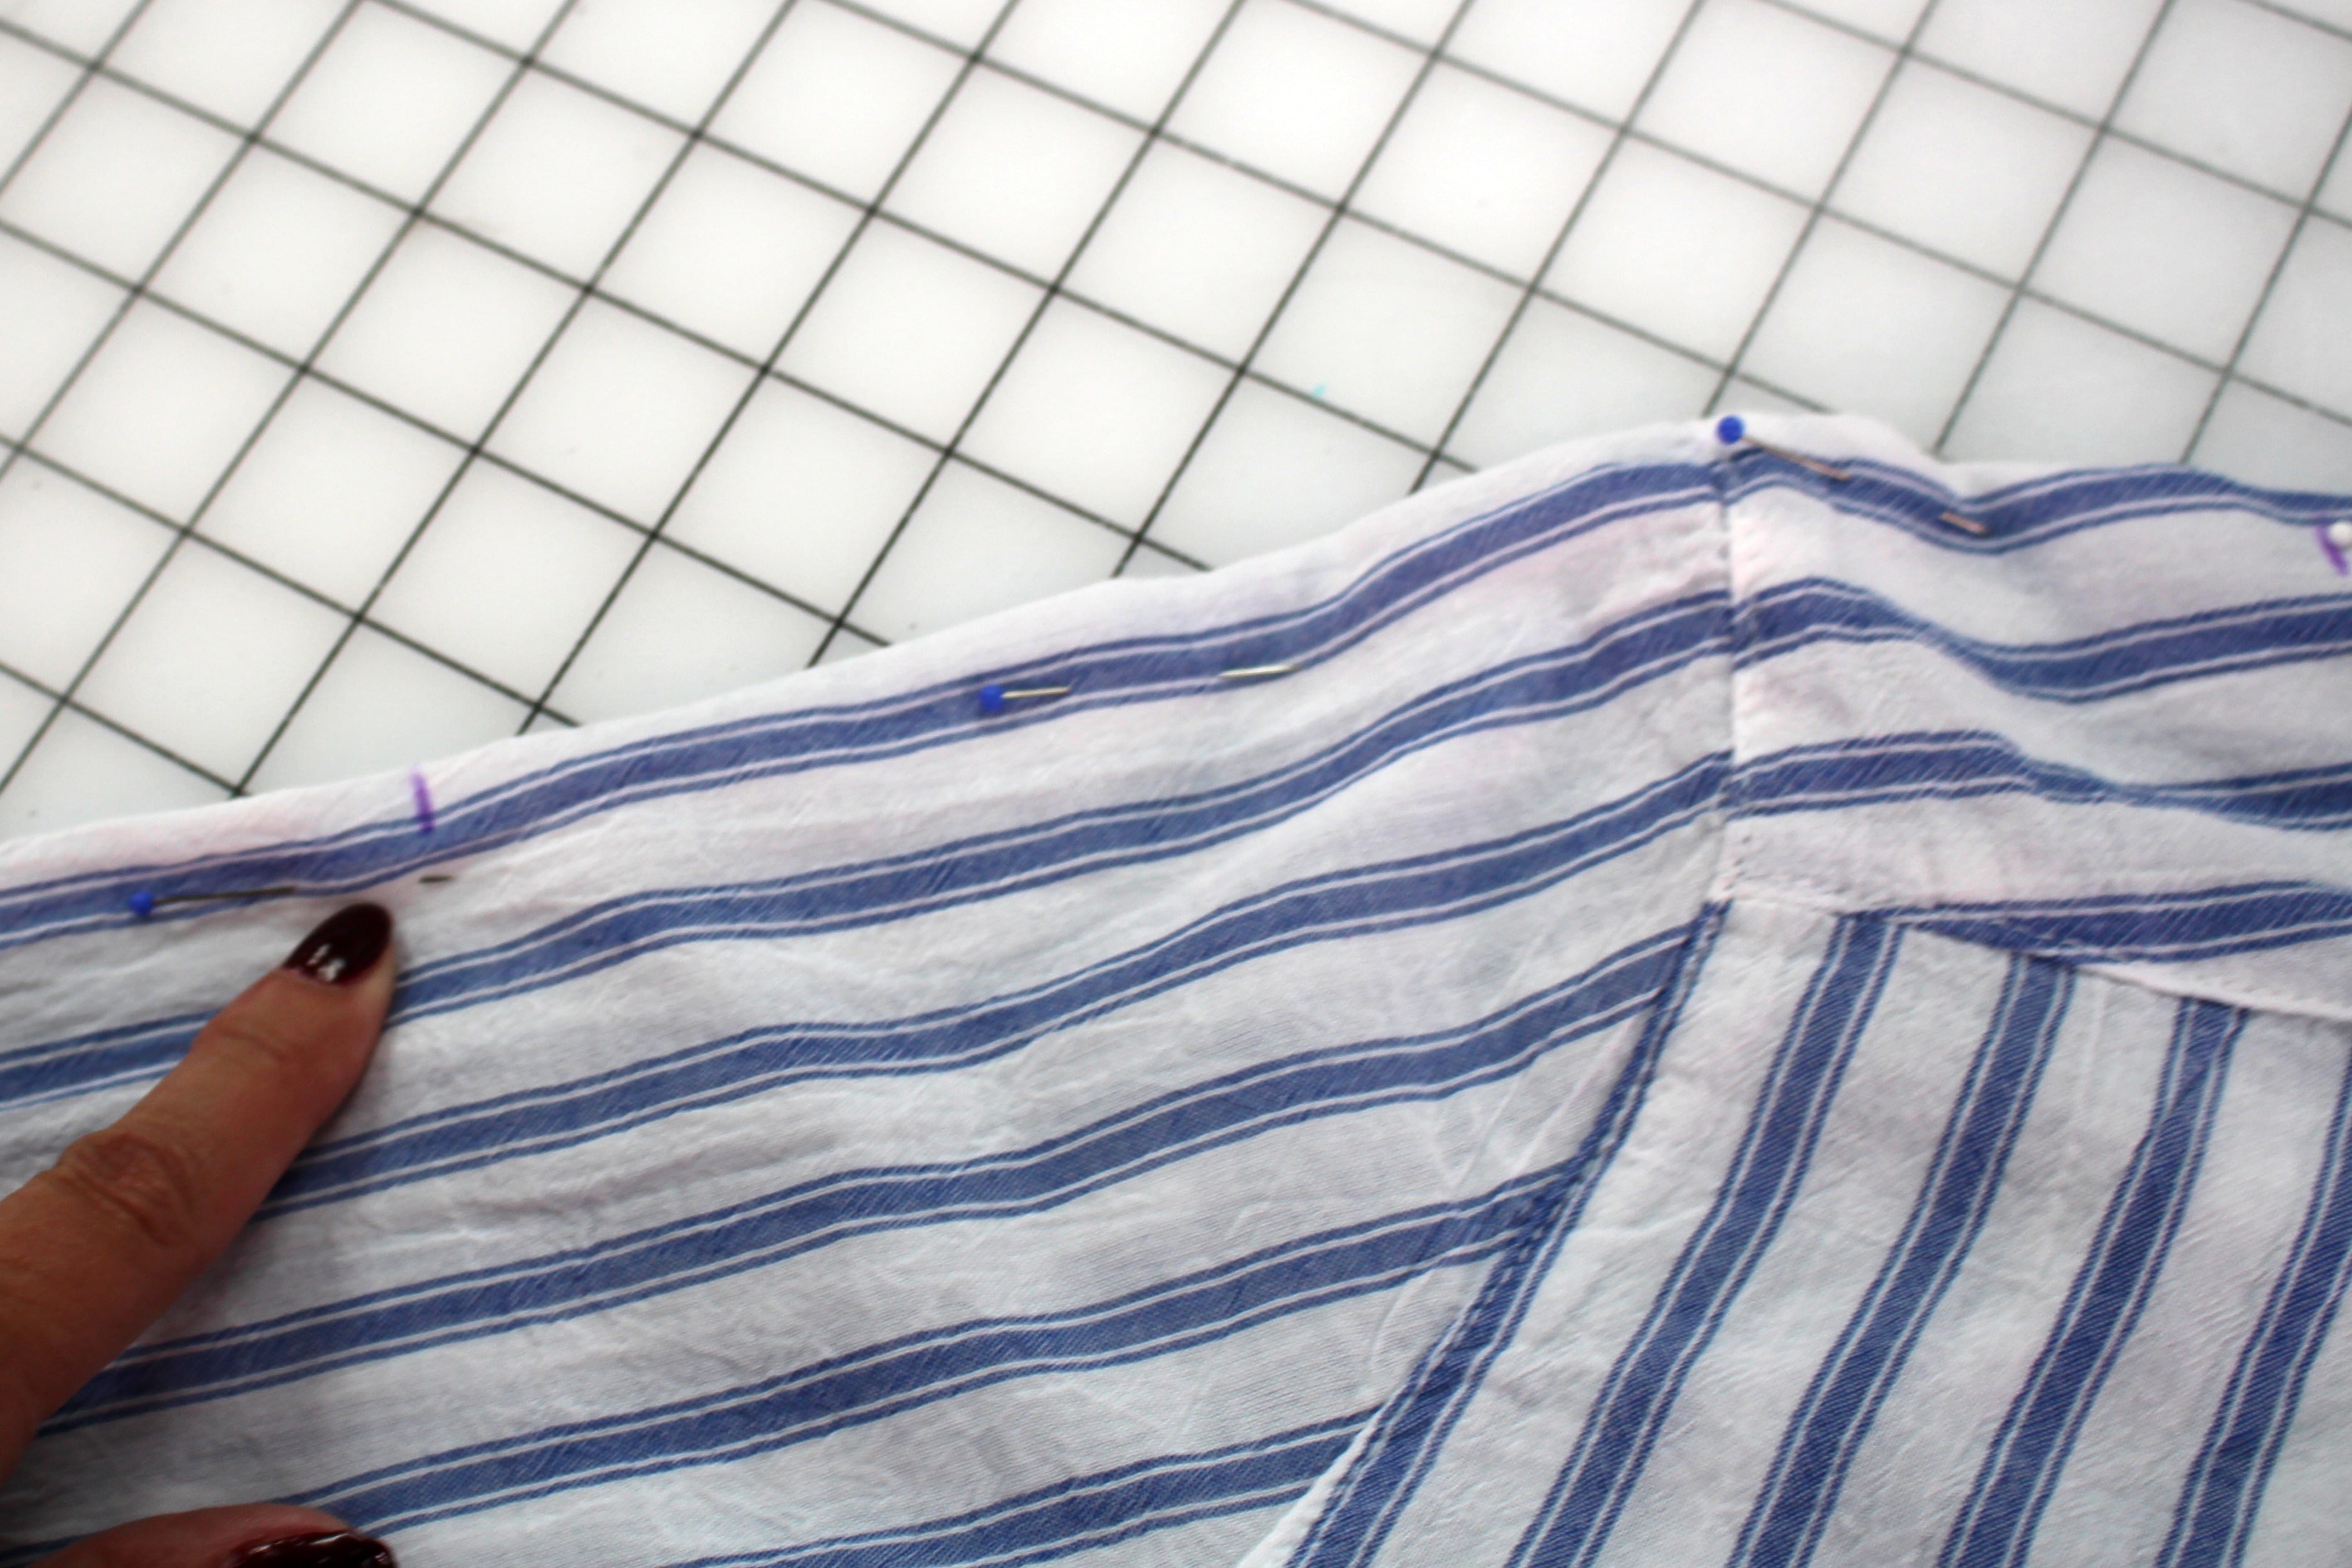
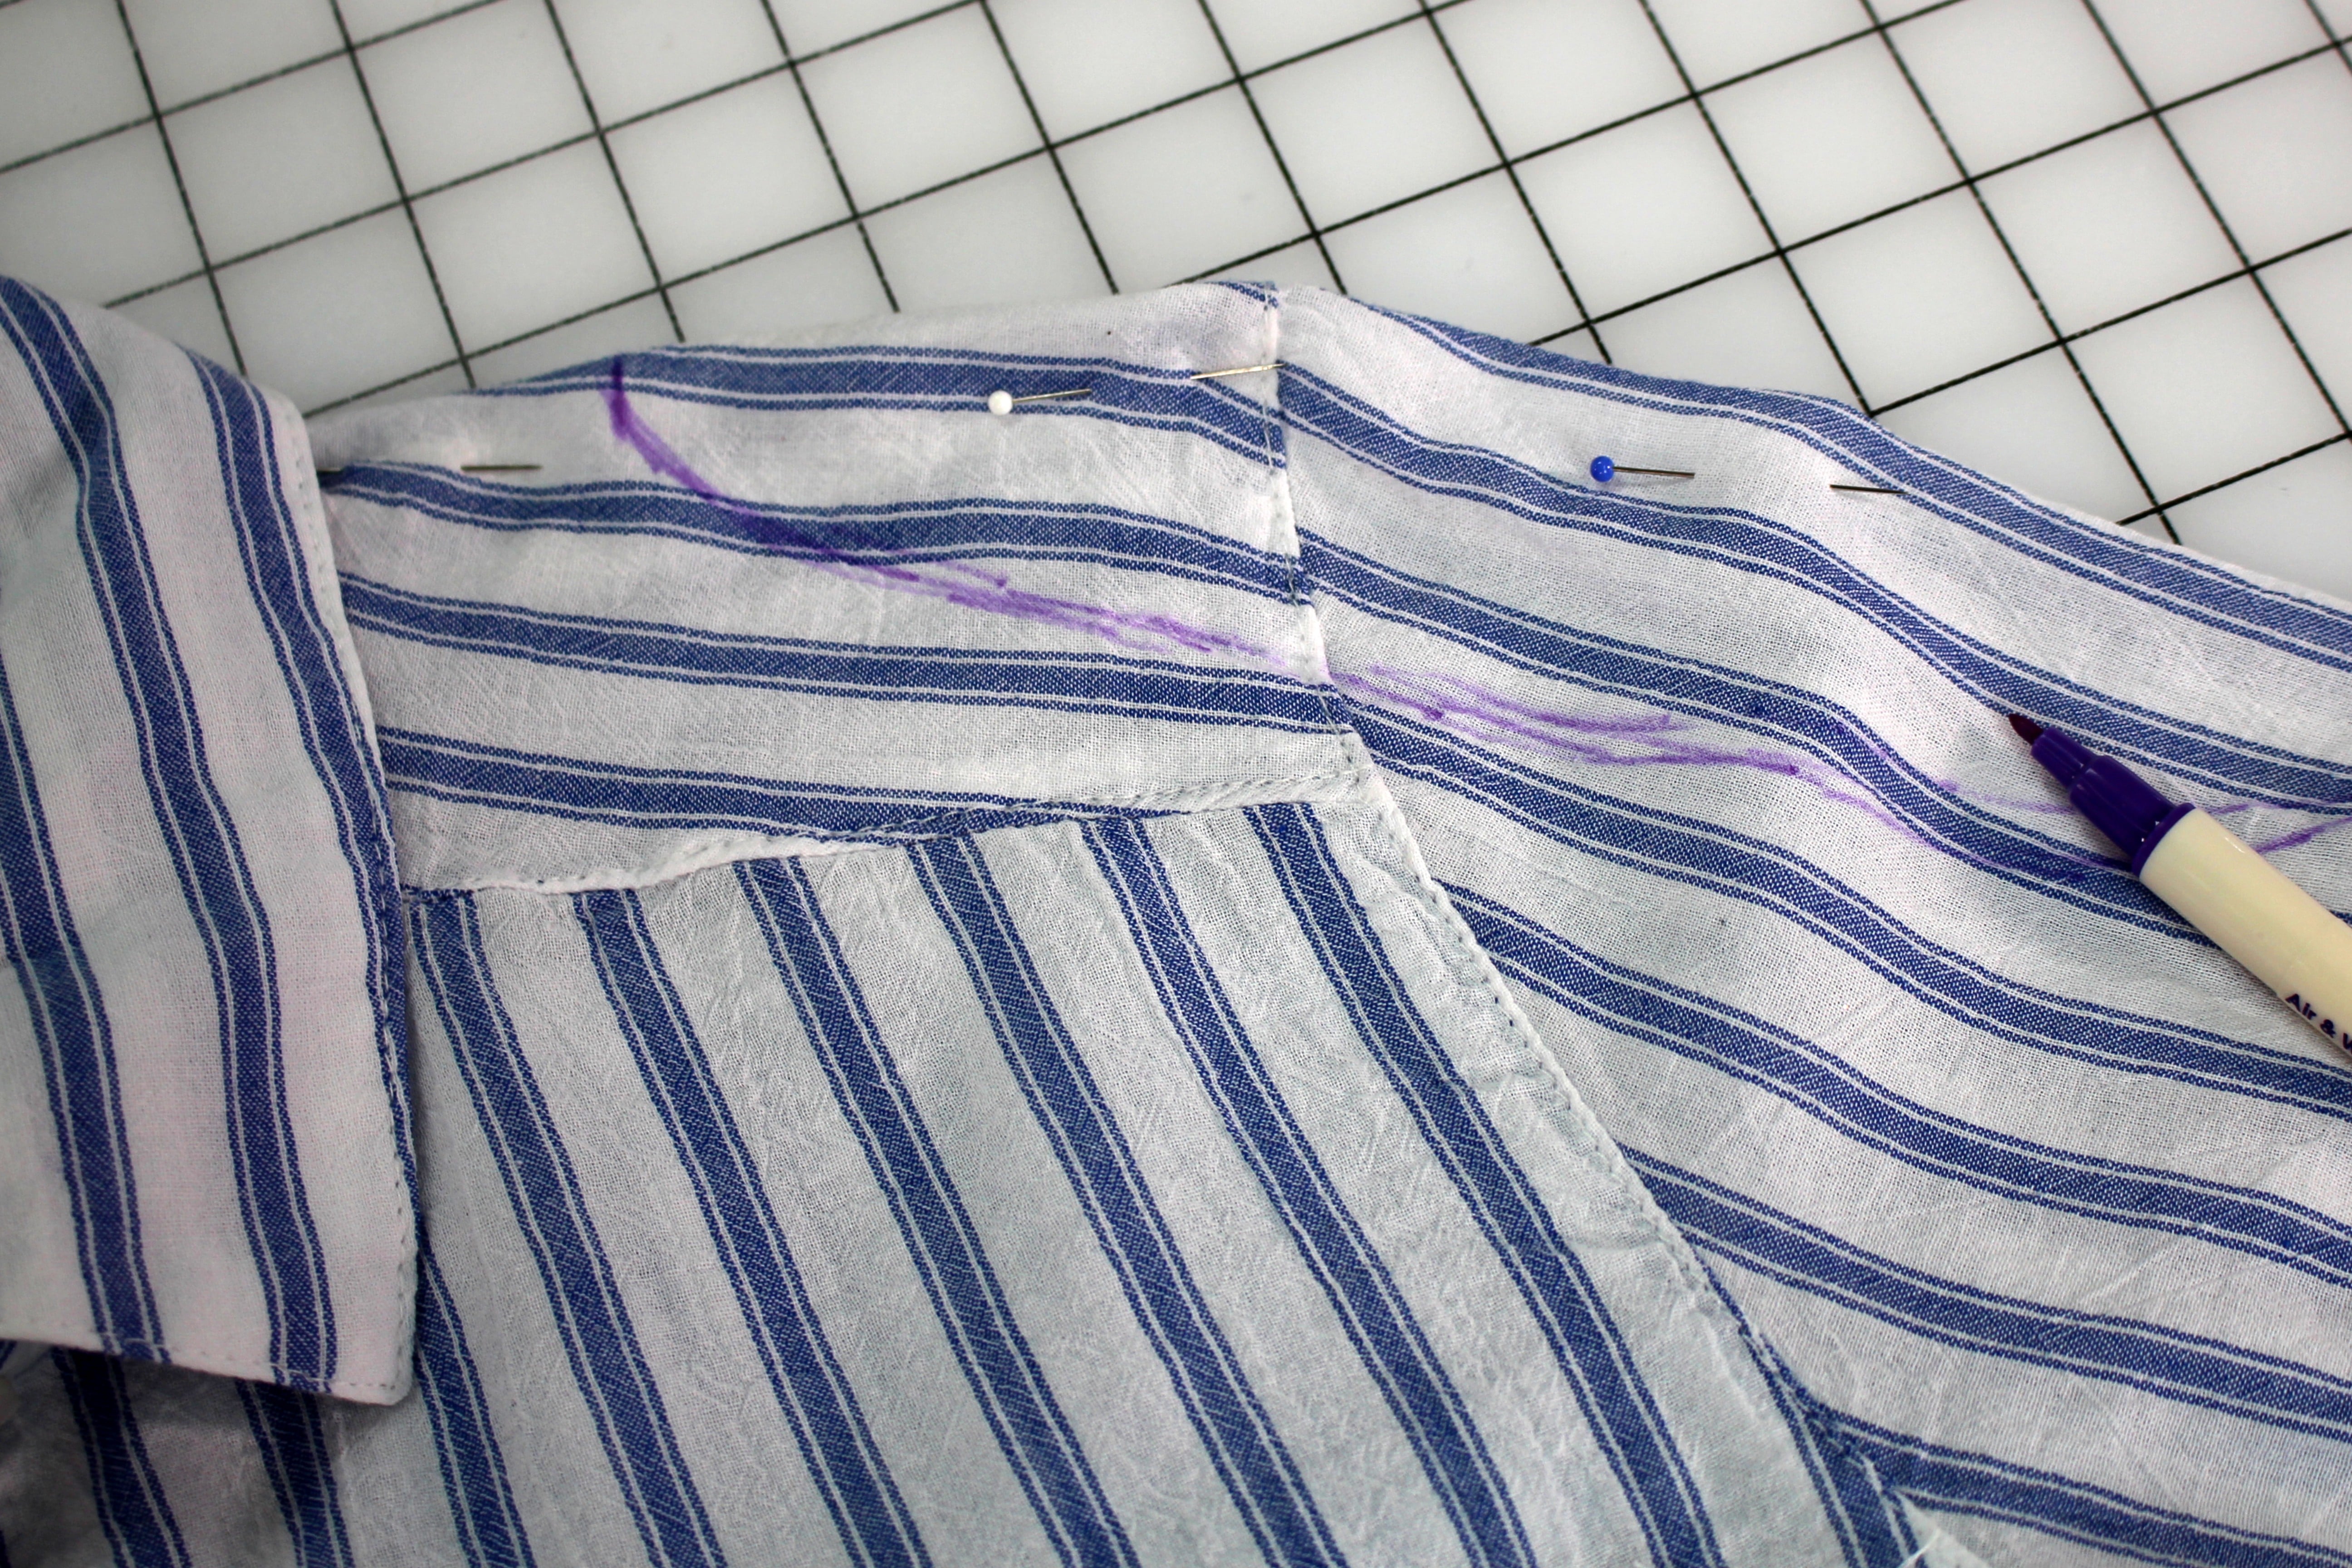
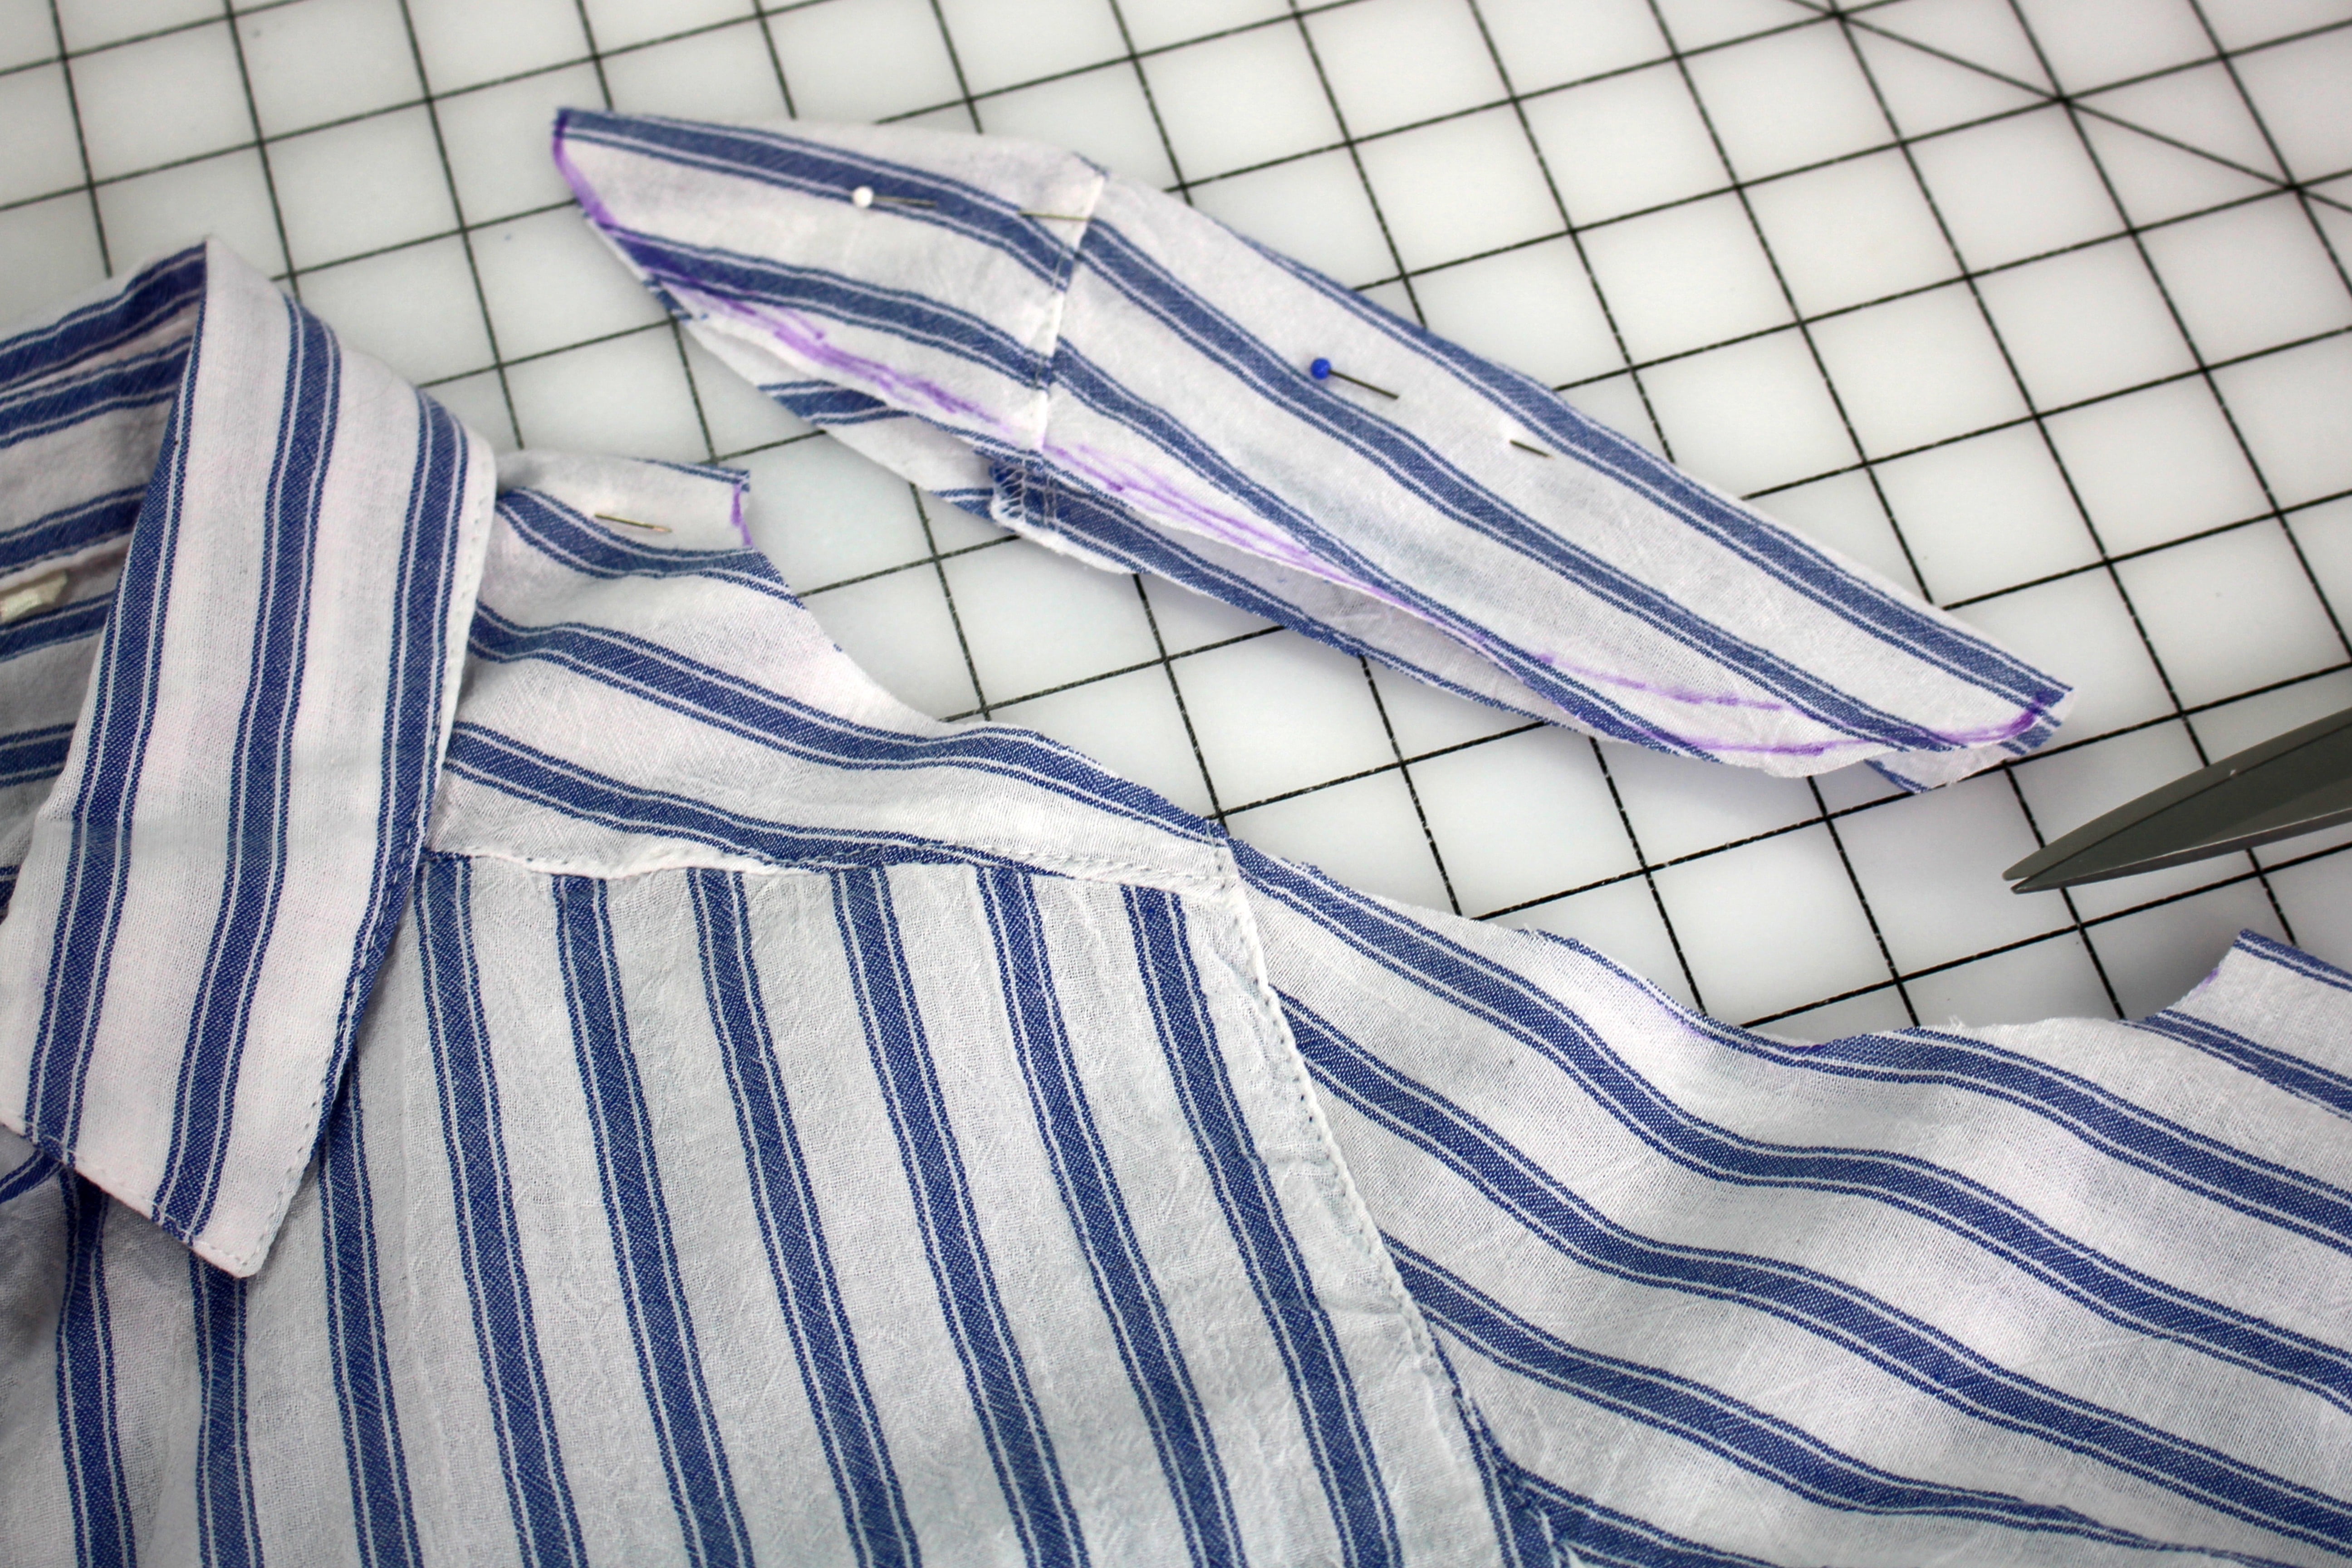
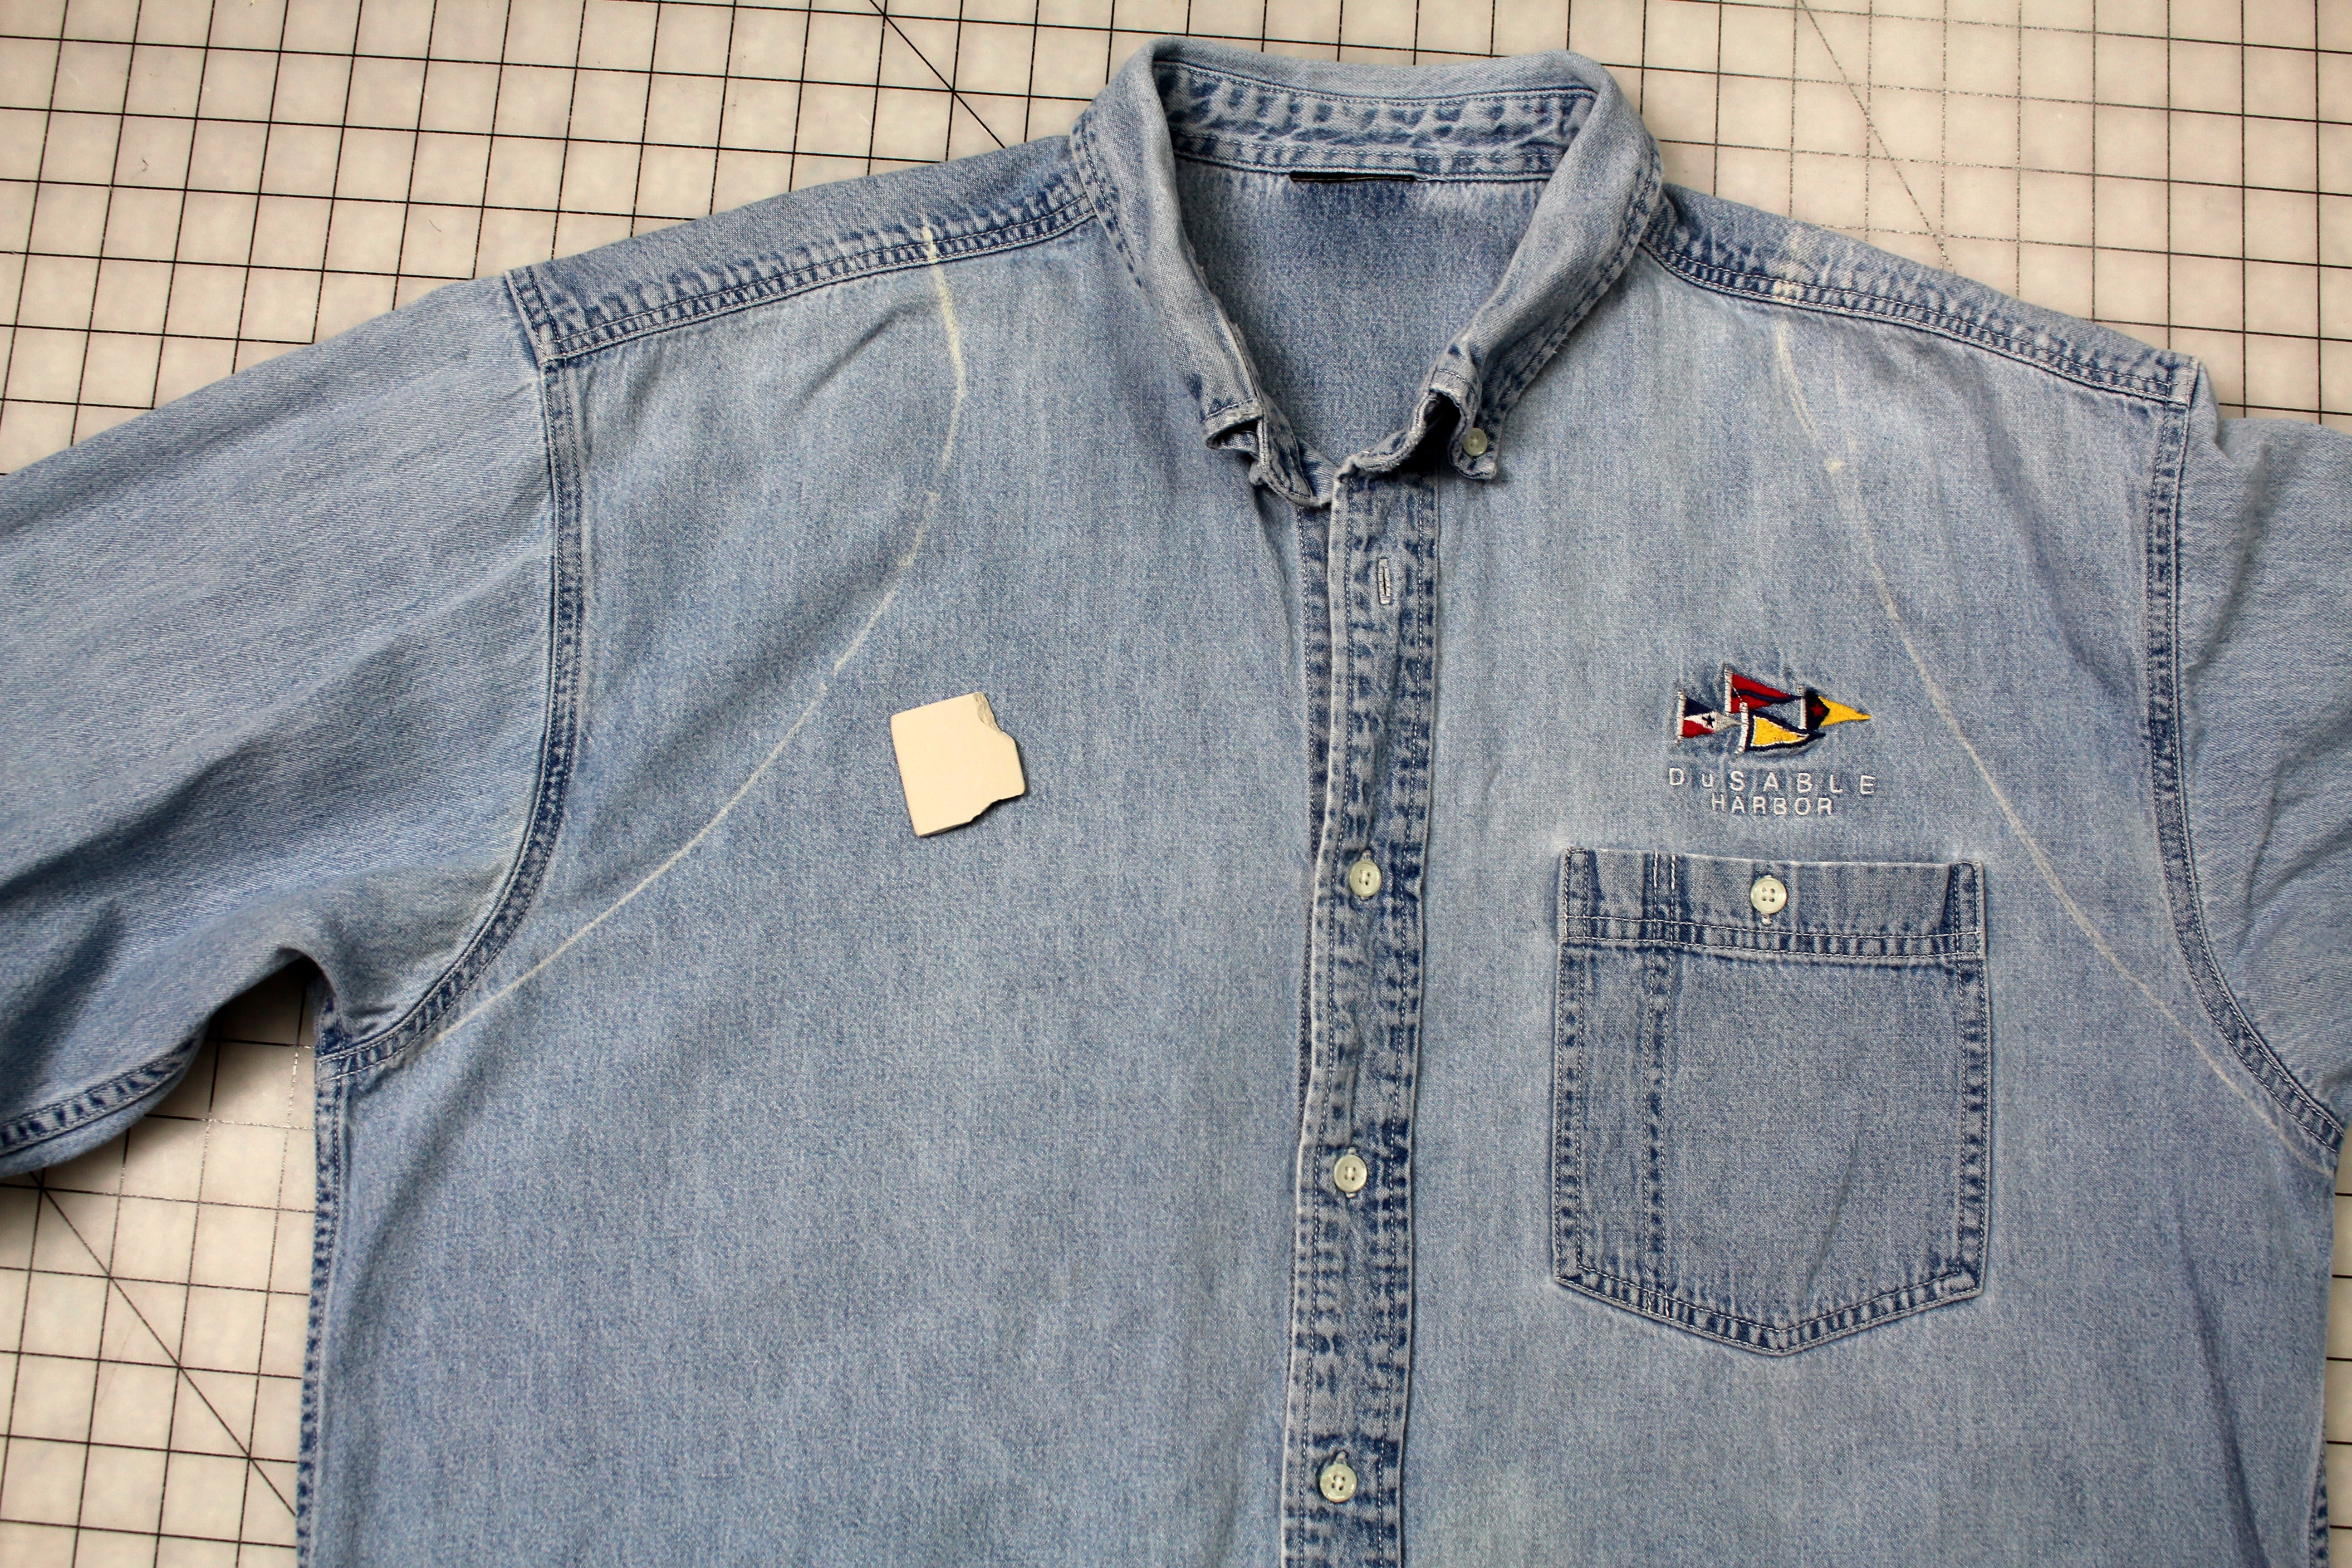
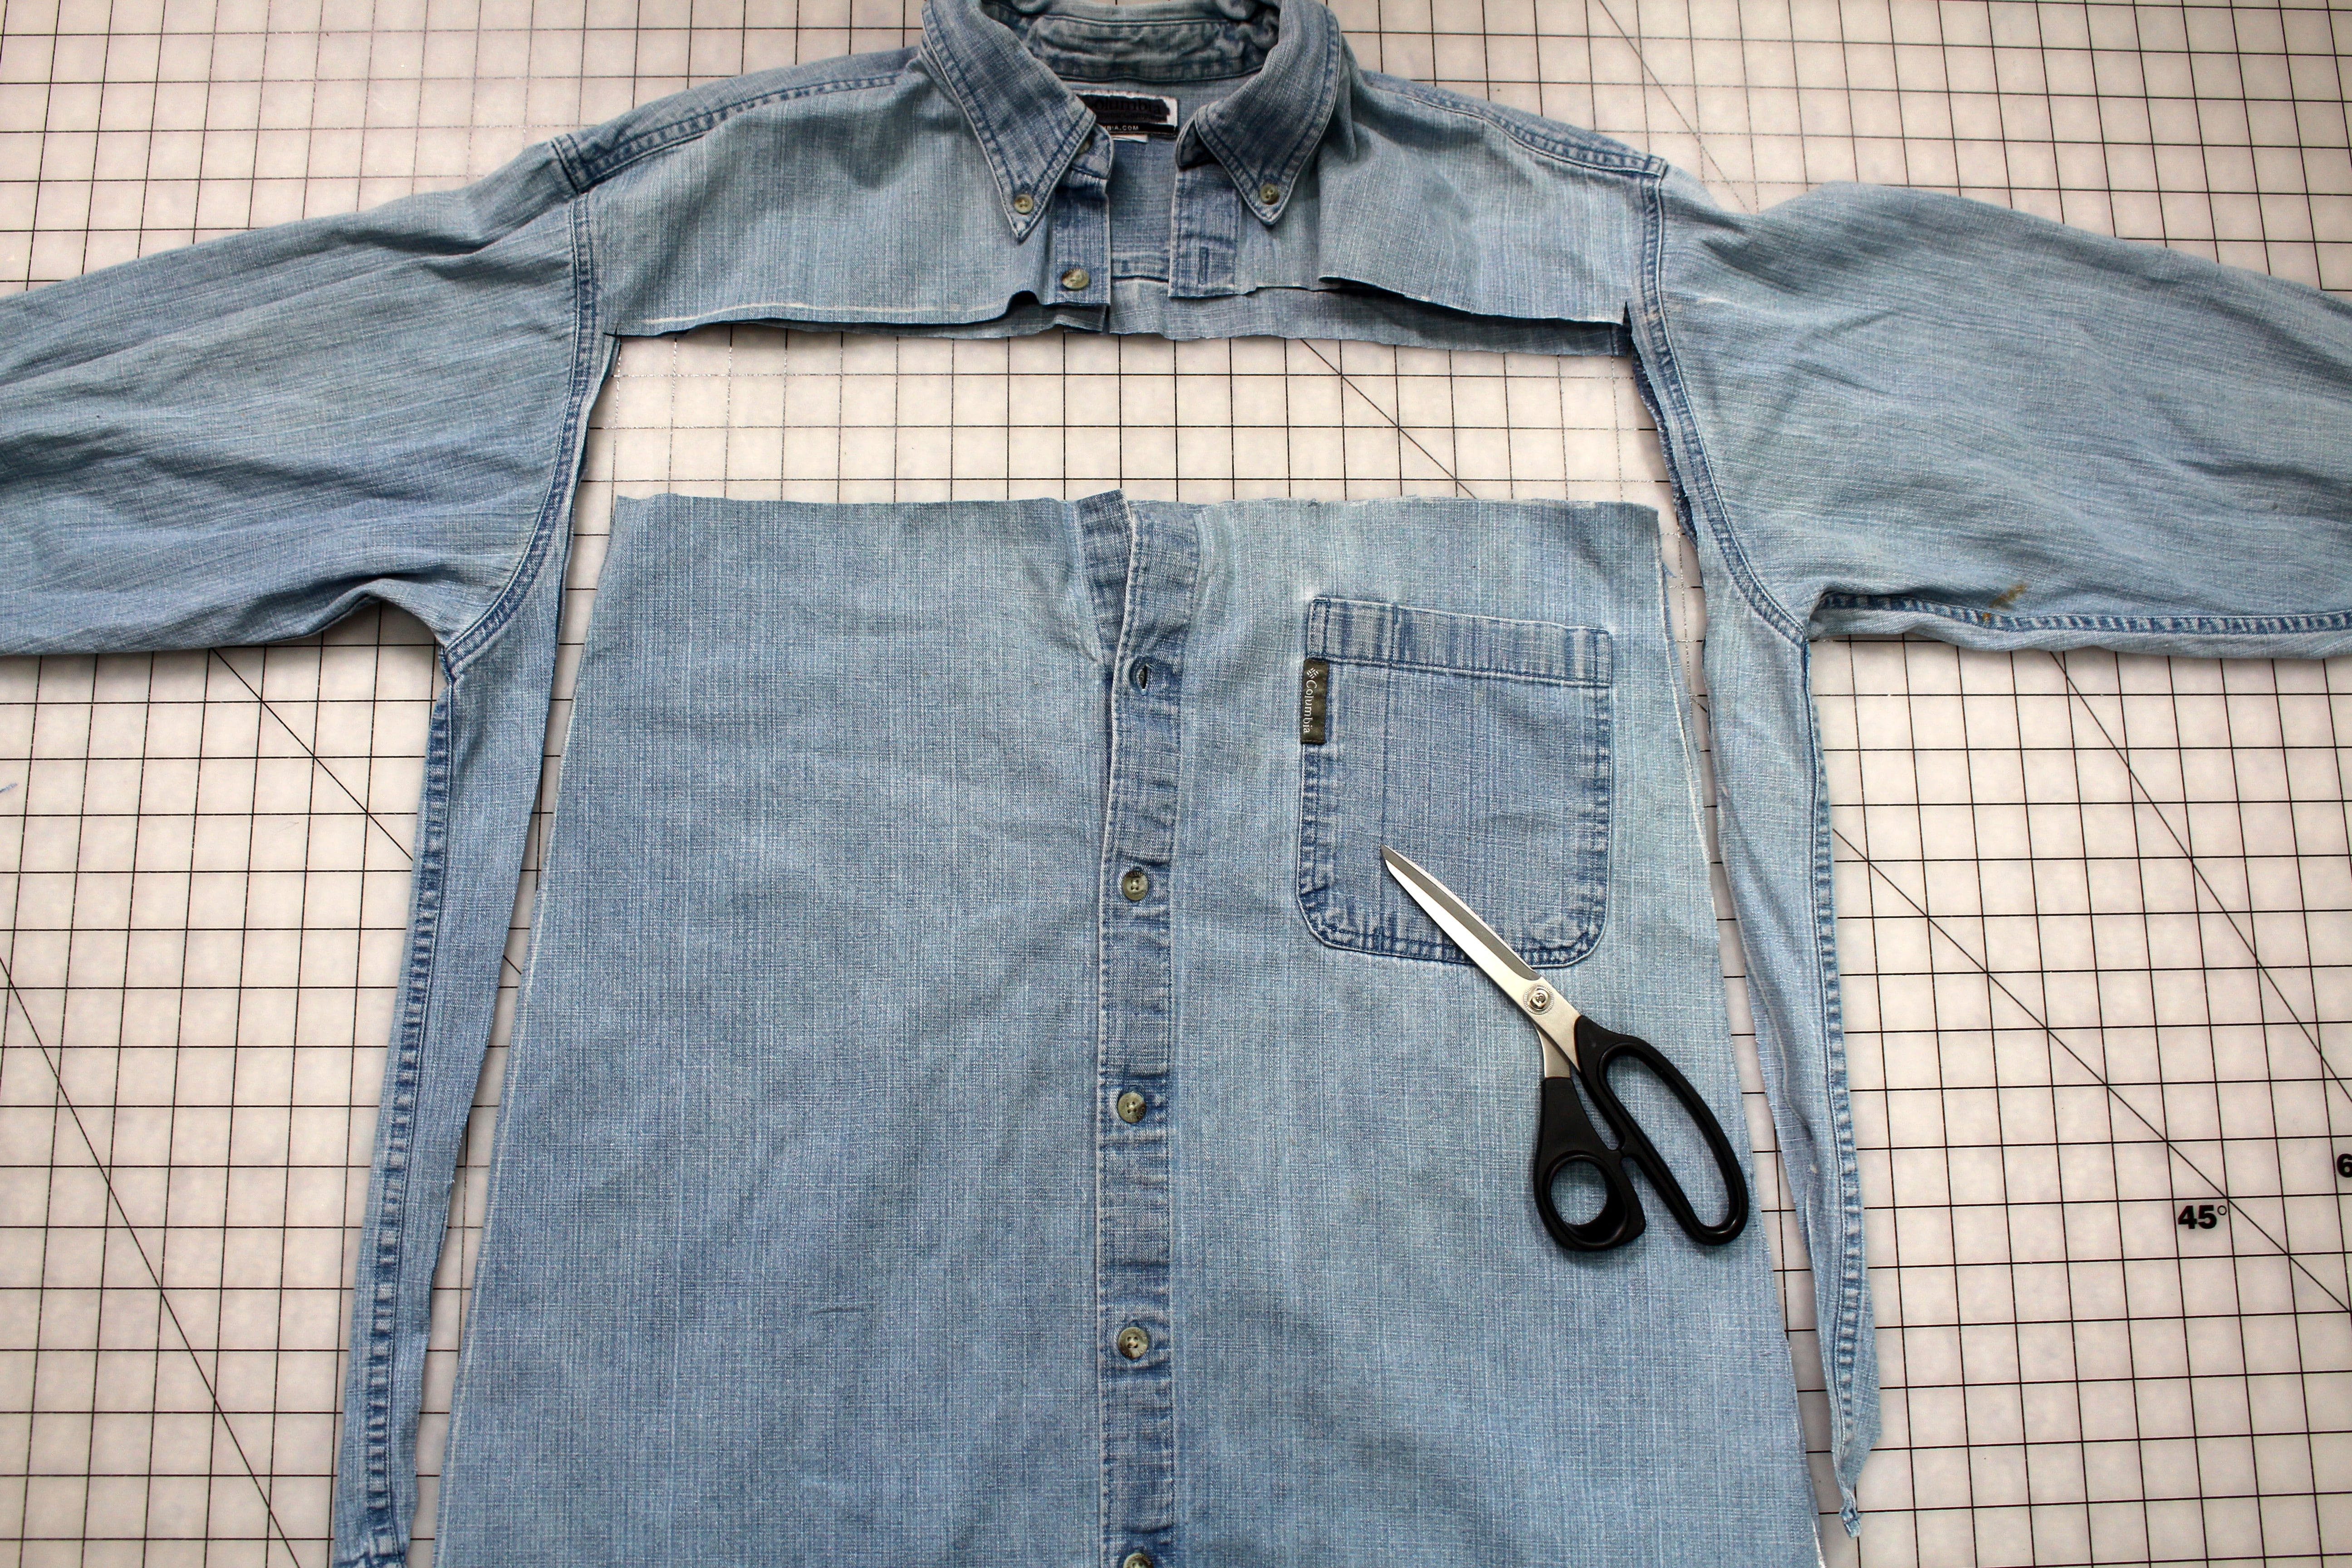
Spring cleaning time again and I have a stack of clothing items that I haven’t worn in a LONG time. You know the rule, if you haven’t worn the item in 2 years, it has to go! What happens if you love the fabric, the print, or even just the buttons? Why not recycle or upcycle the items into something I might actually wear! Here is an upcycle project for spring and summer and it’s right on trend … adding shoulder cutouts to a button down shirt.

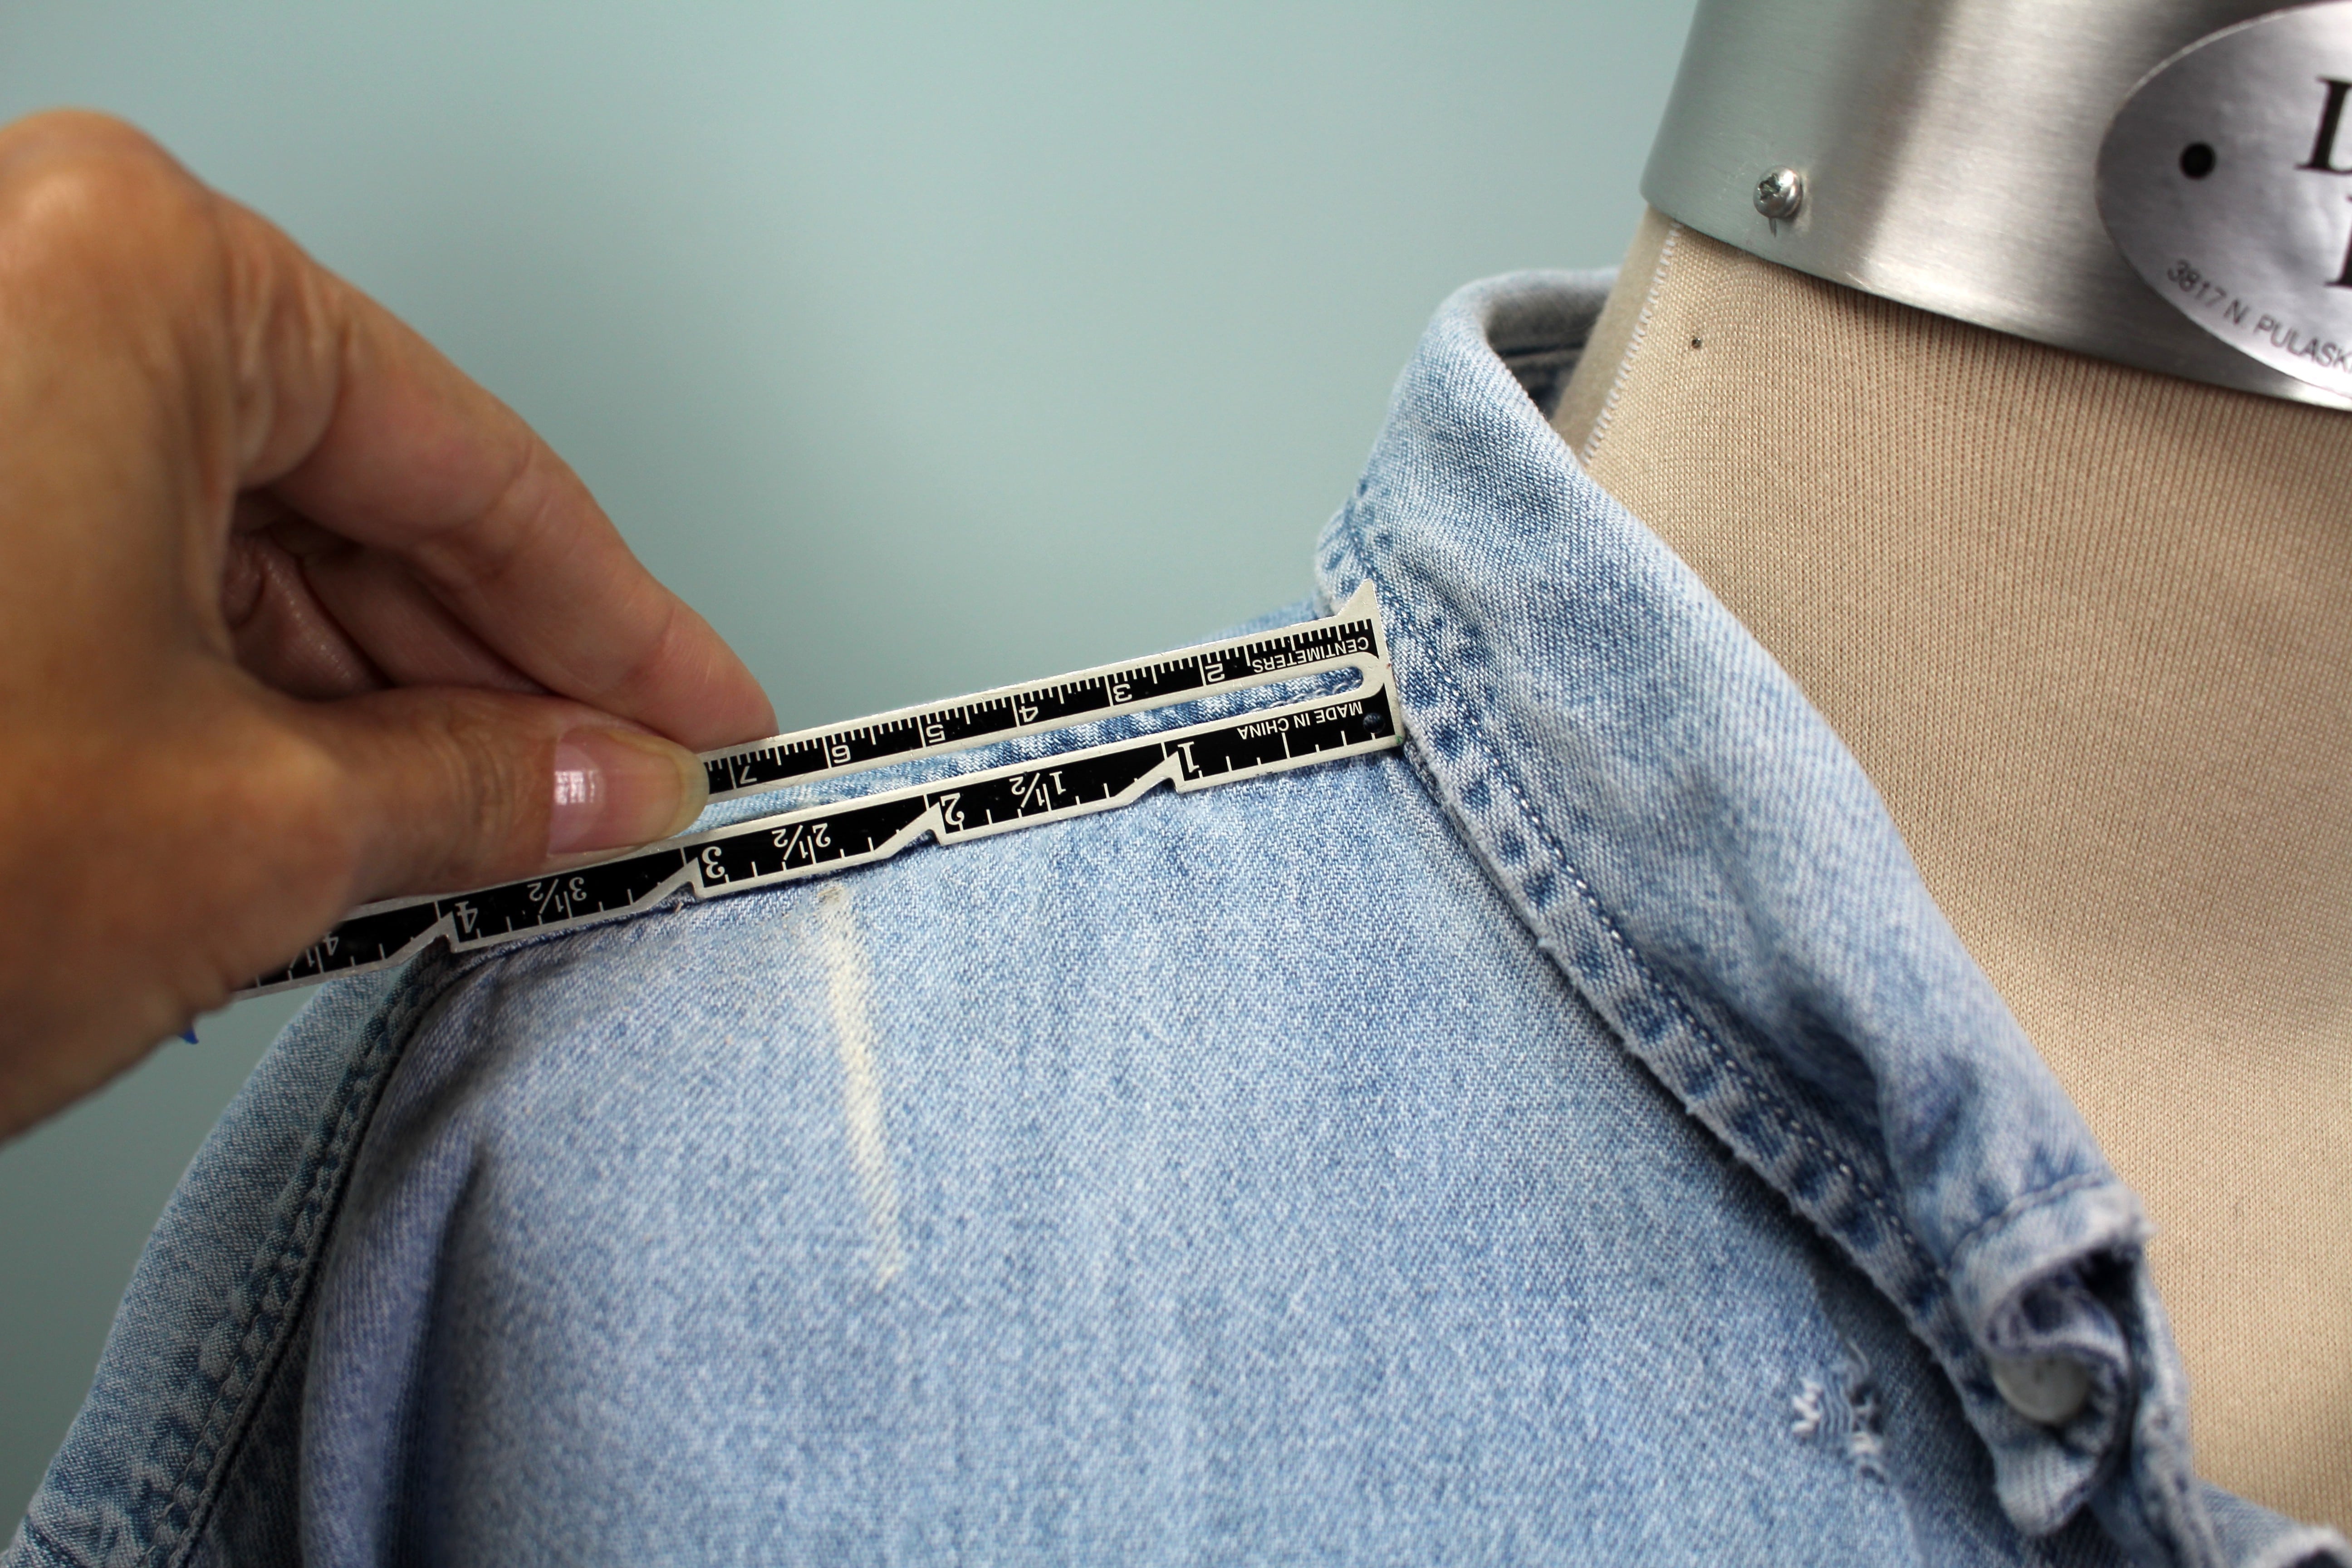
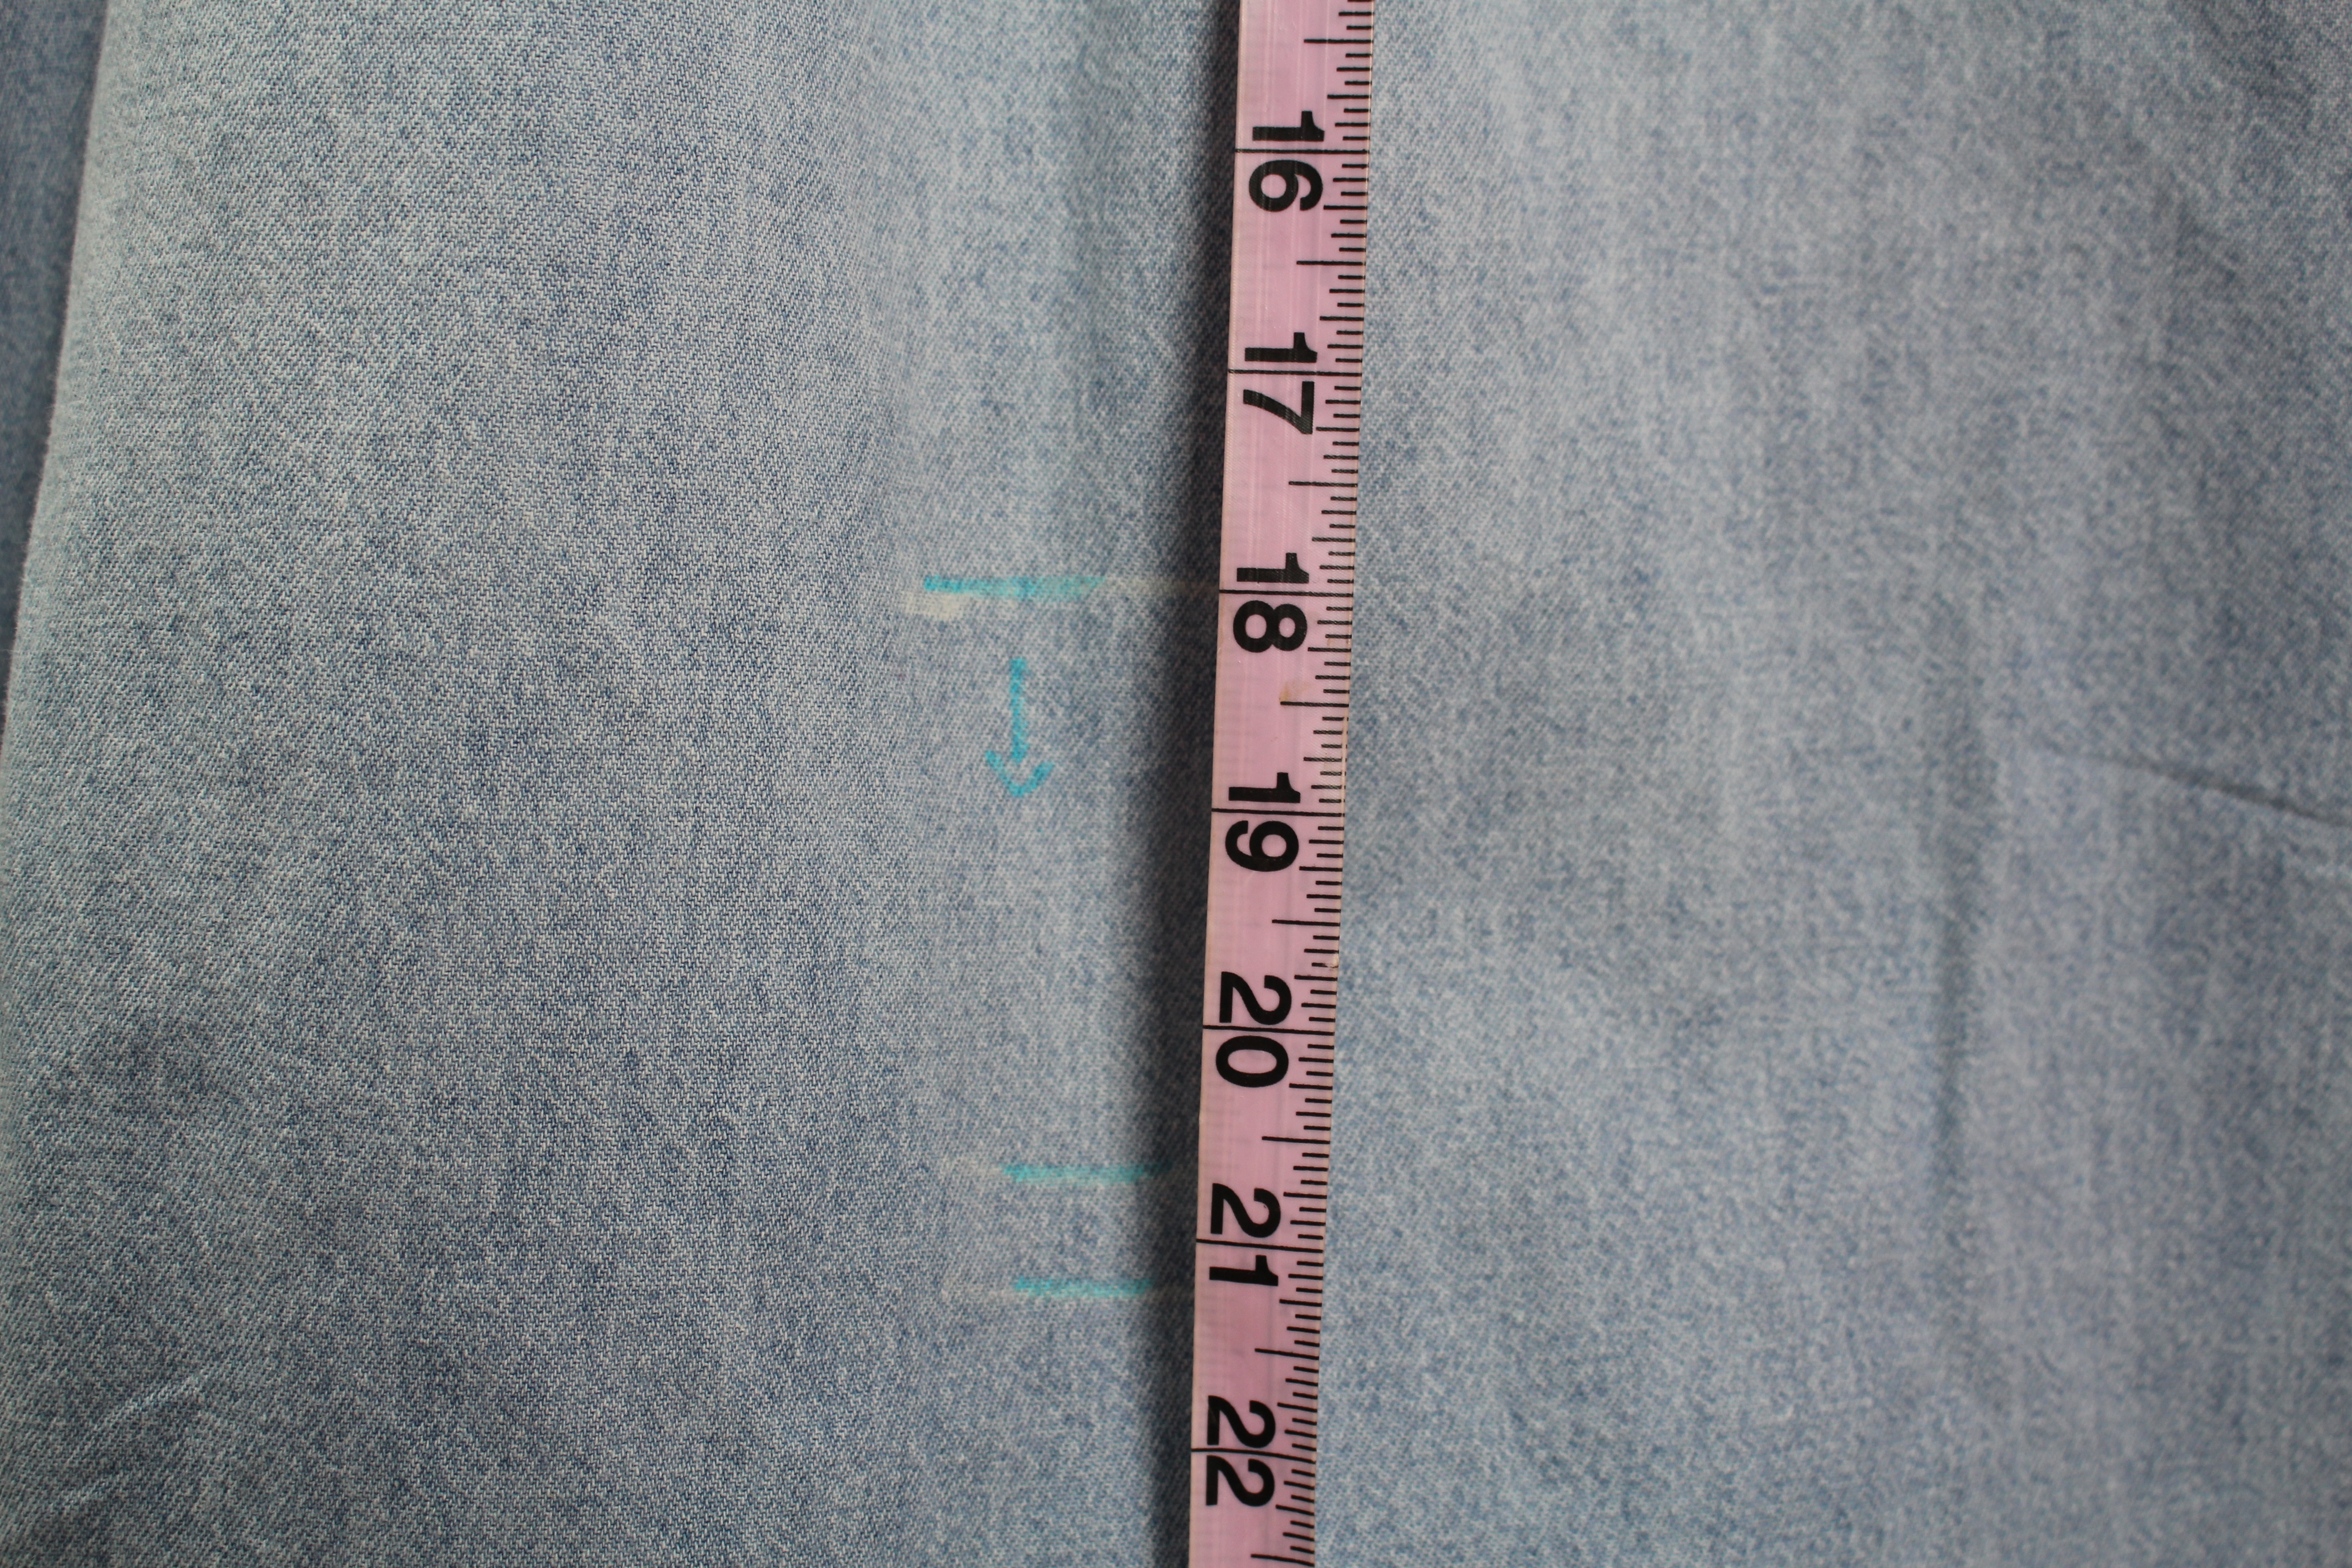
Lay the shirt flat. Locate the top of the shoulder and outside arm. Measure along the shoulder seam from the neck edge to where you want the edge of the hole to start. In my case I am going to start 2” to 3” from the neckline.
For the full tutorial, check out my post on the Brother Stitching Sewcial blog. I always love to see what your are working on, be sure to share photos of your upcycles shirt using #angelawolf #brothersews
Cheers,
Brother Expert Sewing Consultant. This blog post may contain affiliate links.
Day 2 #SEWCIALHOP2020 Our special guest is Joe Vecchiarelli! Joe has worked in the fashion industry for over 40 years from sharpening scissors to working in production. He has worked on shows like Dancing with the Stars and The X Factor. To learn more and read about...

Join Angela Wolf for the #SEWCIALHOP2020

10 Tips for Sewing Leggings, Sports & Athleisure Wear 1. FABRIC: Use a quality 4-way stretch fabric, such as...
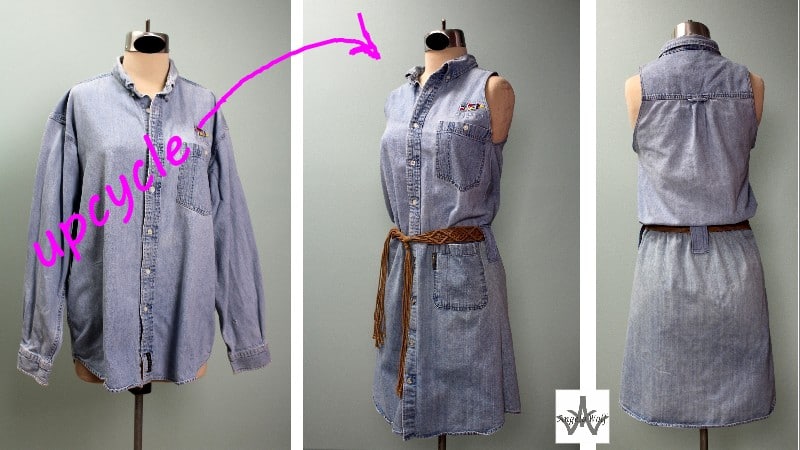
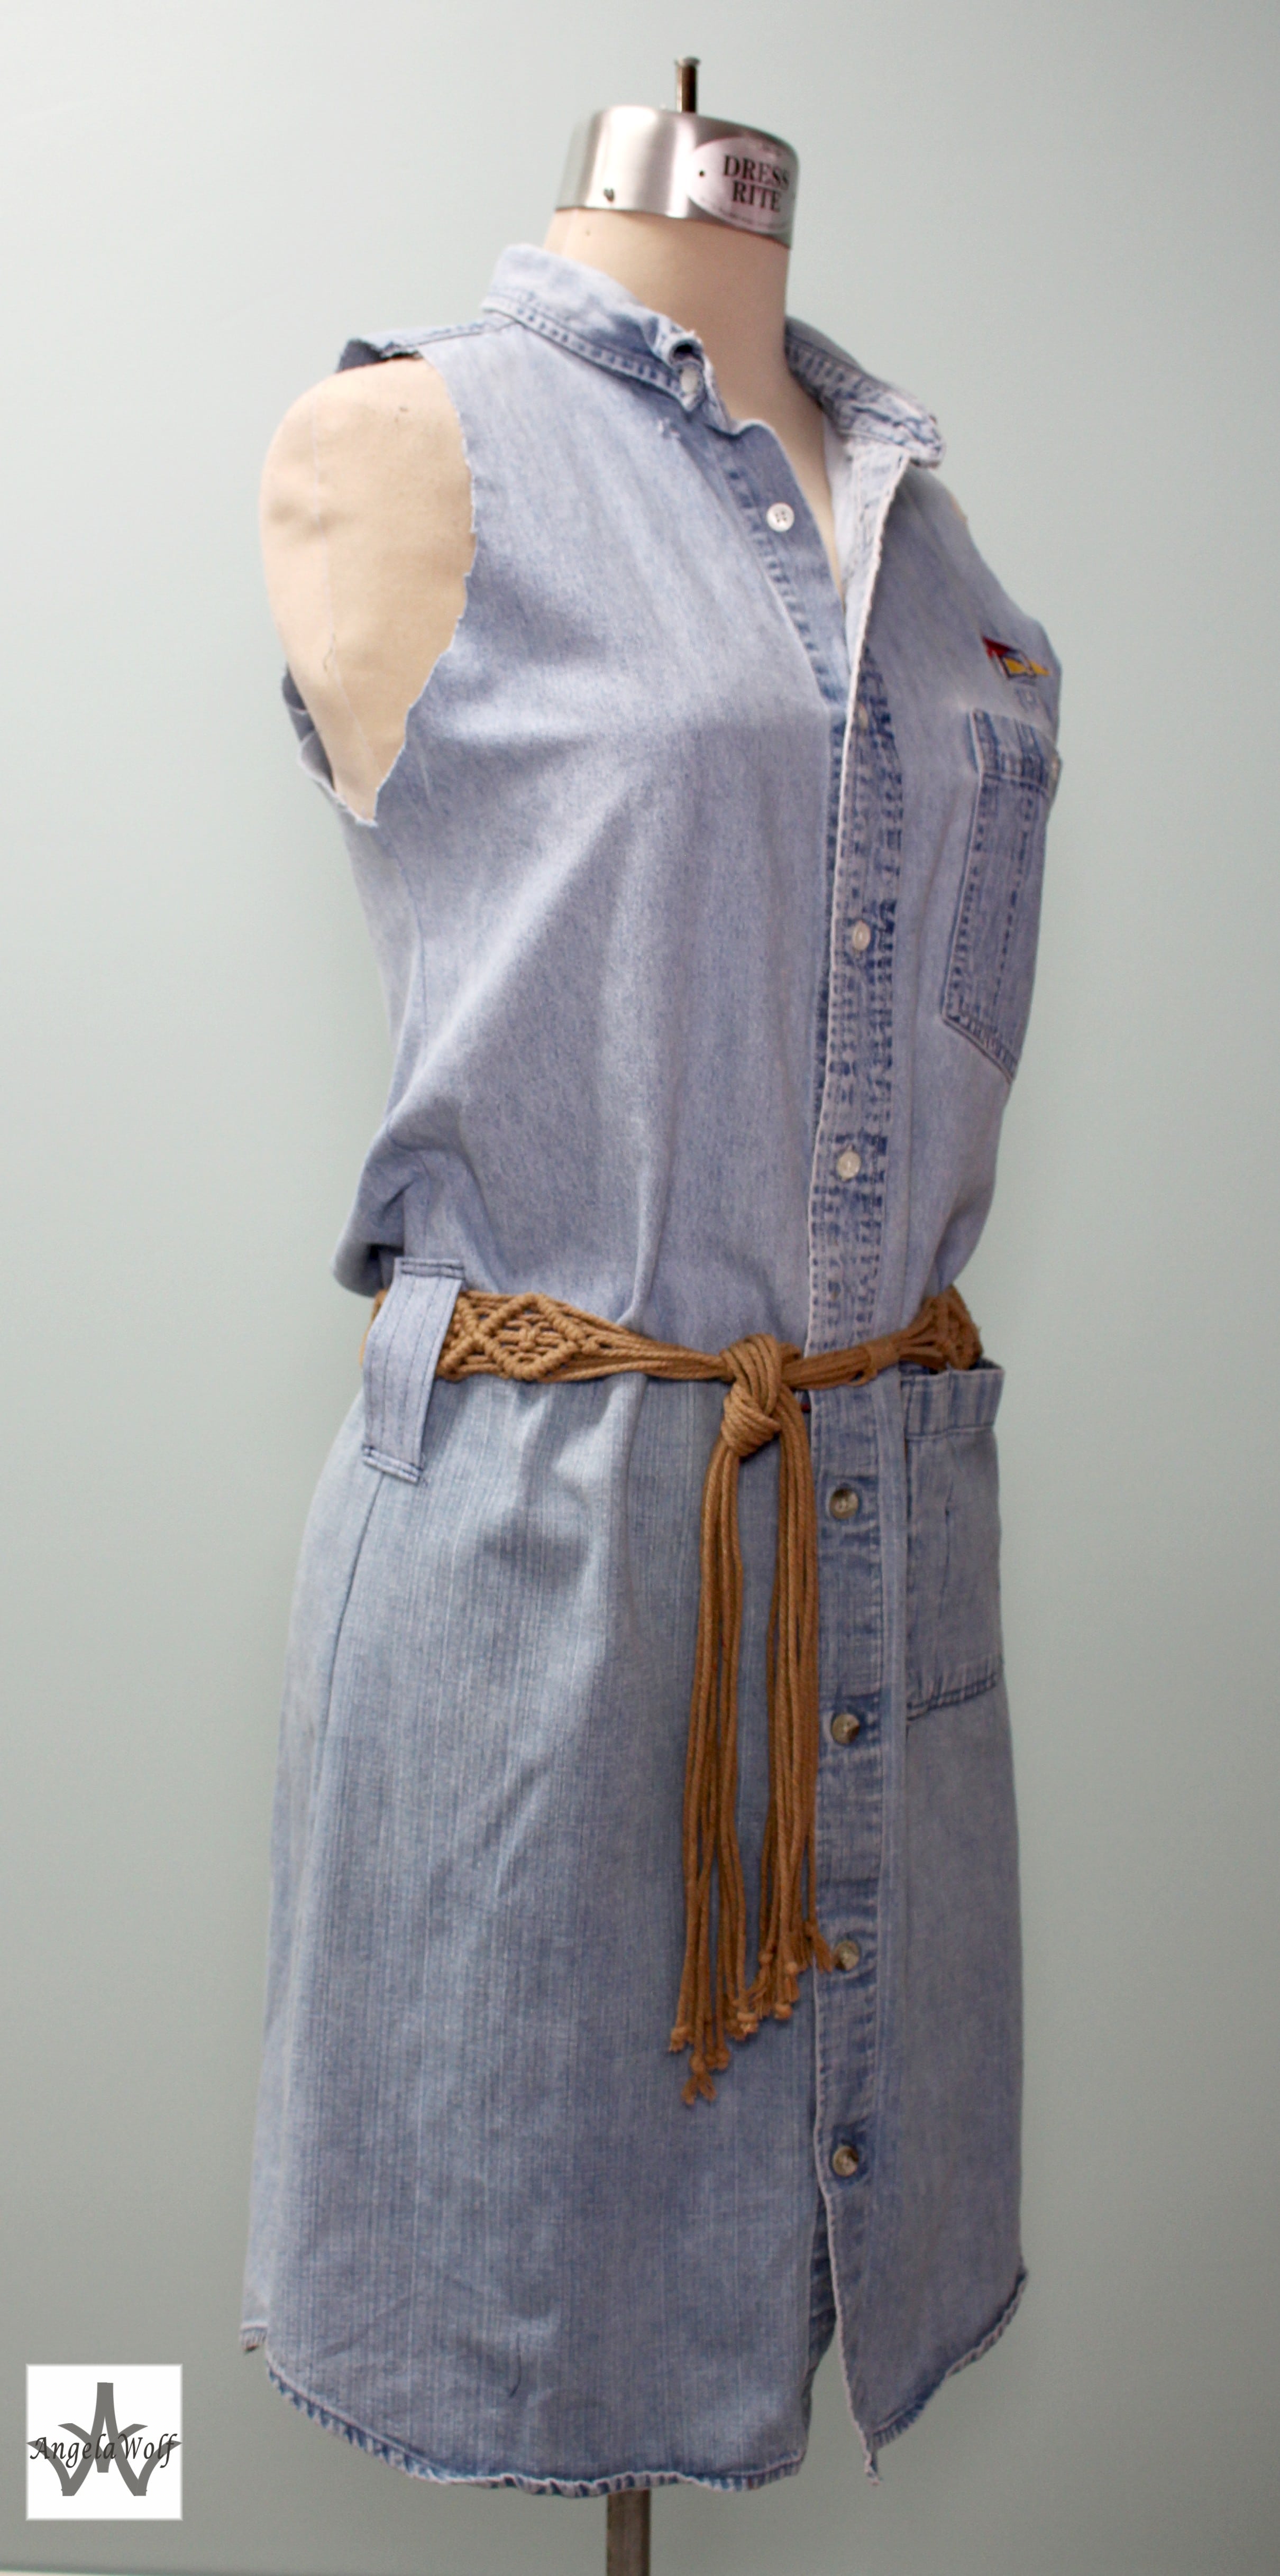
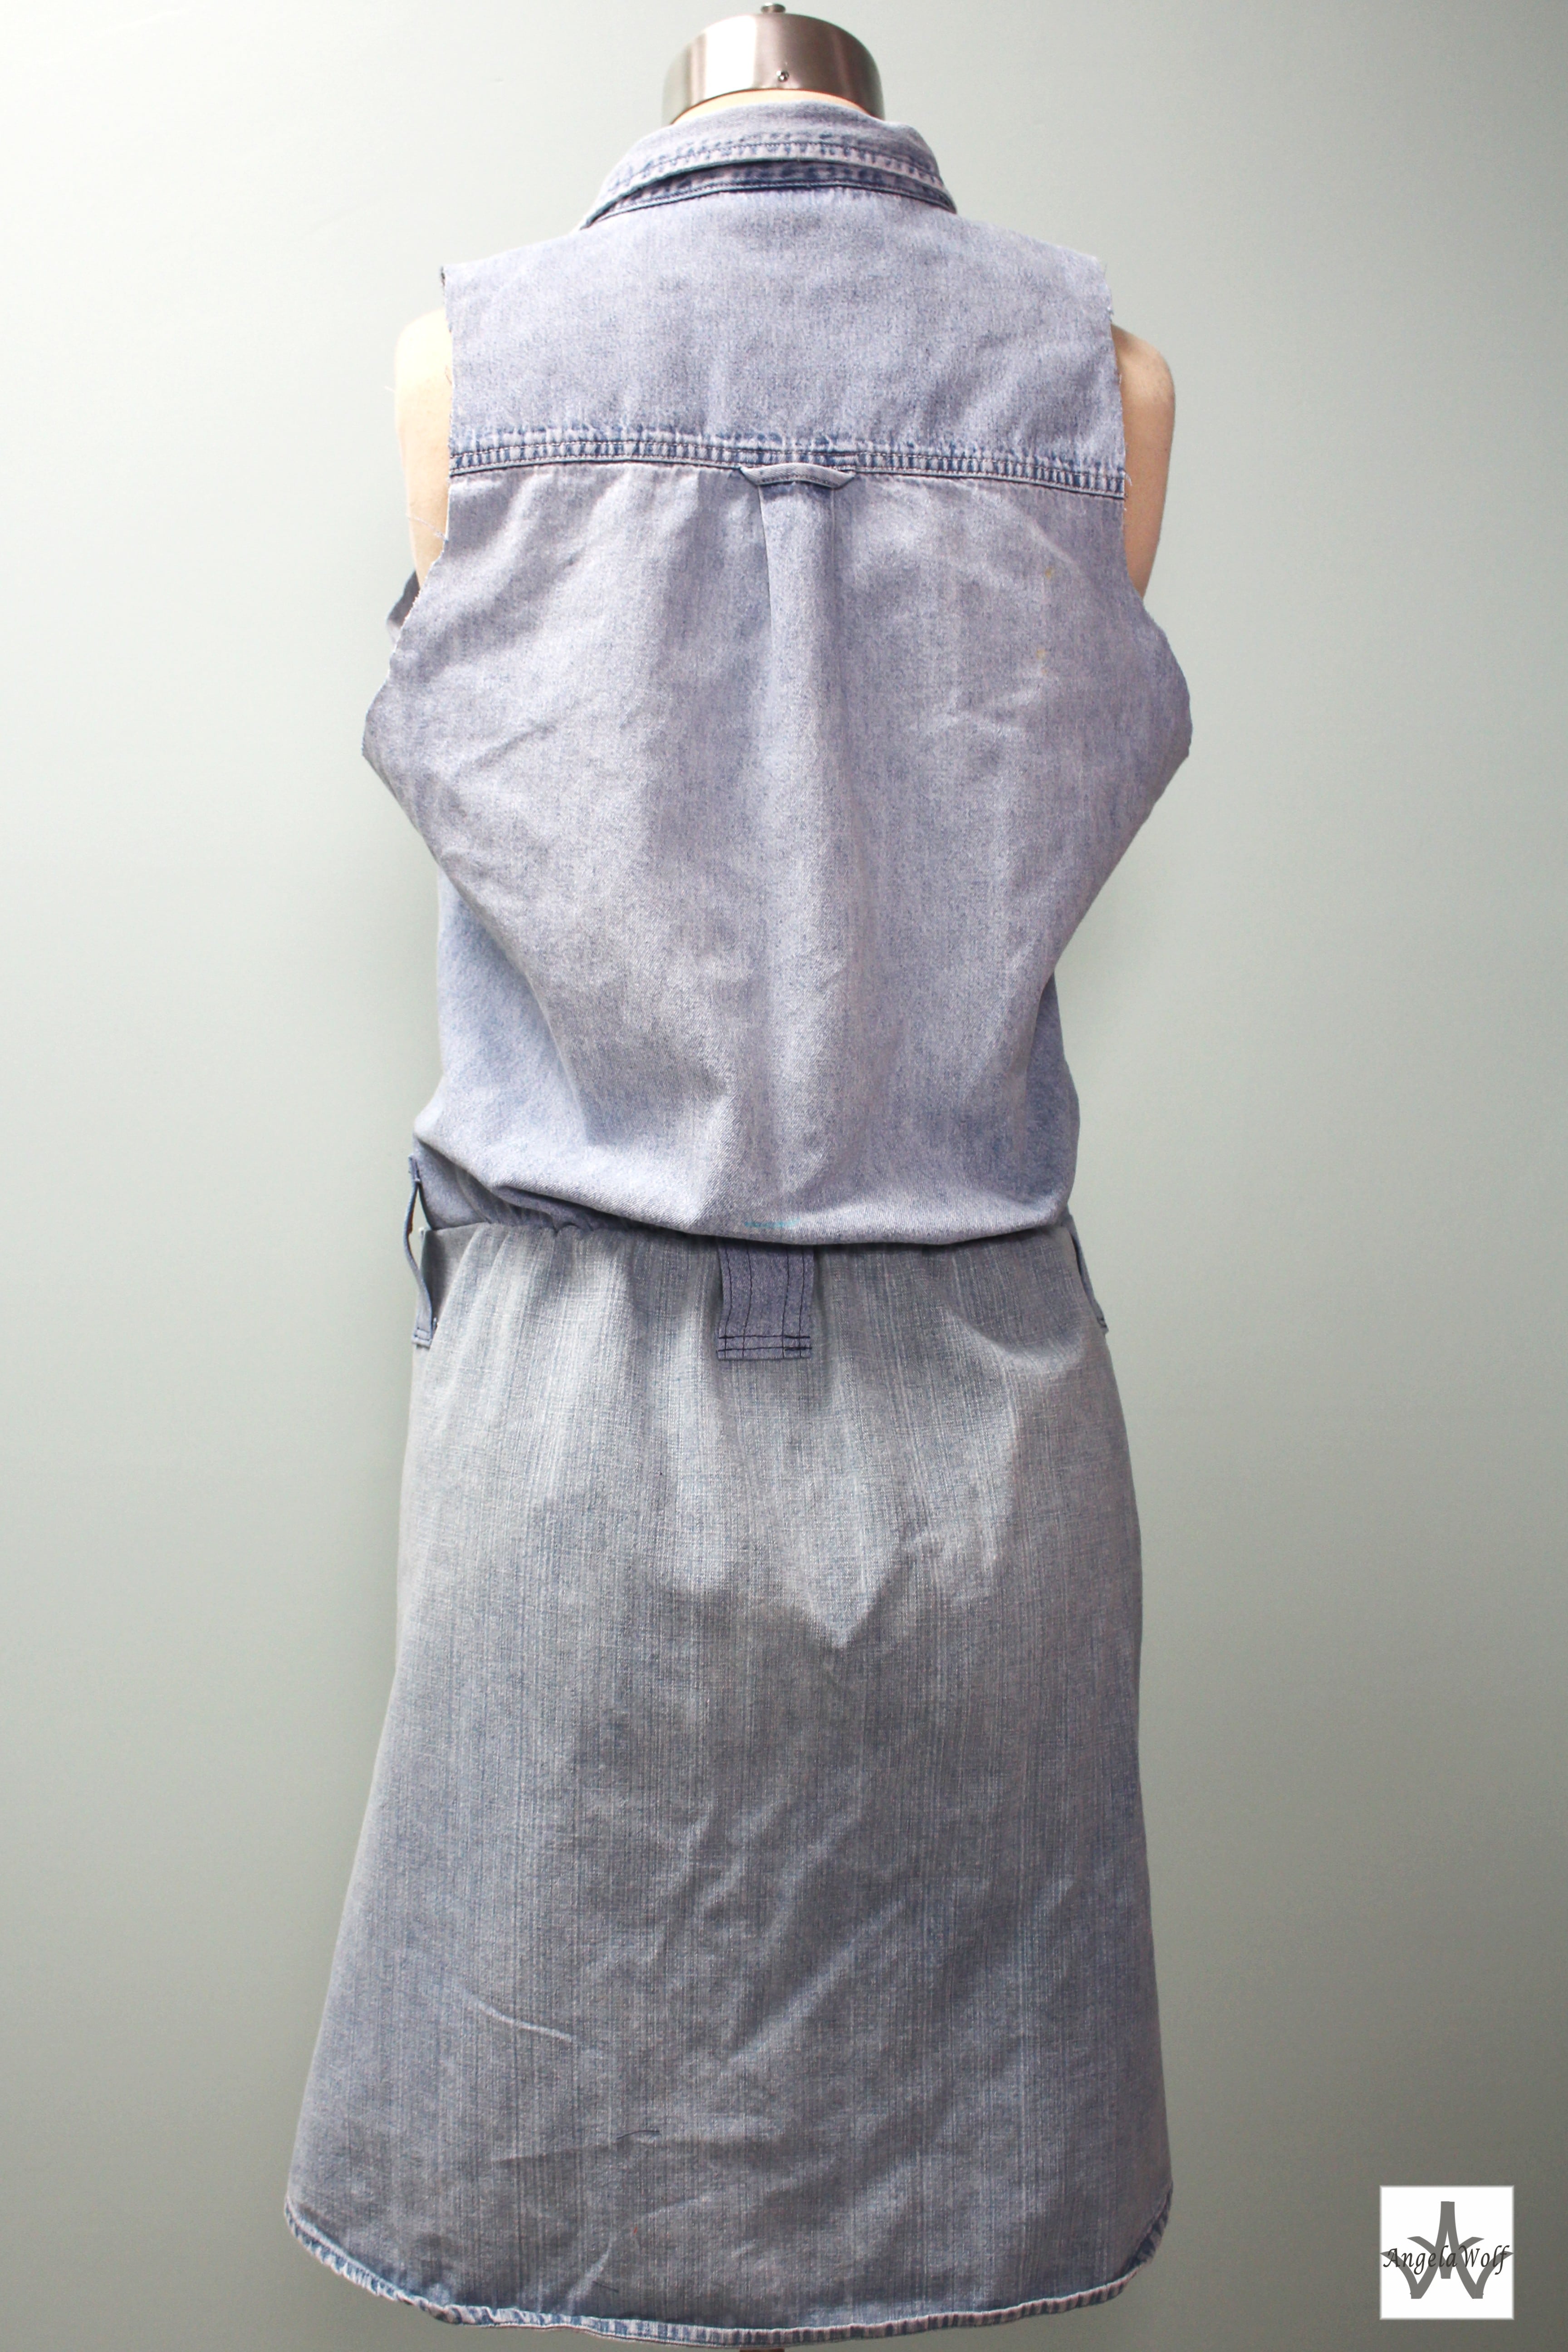
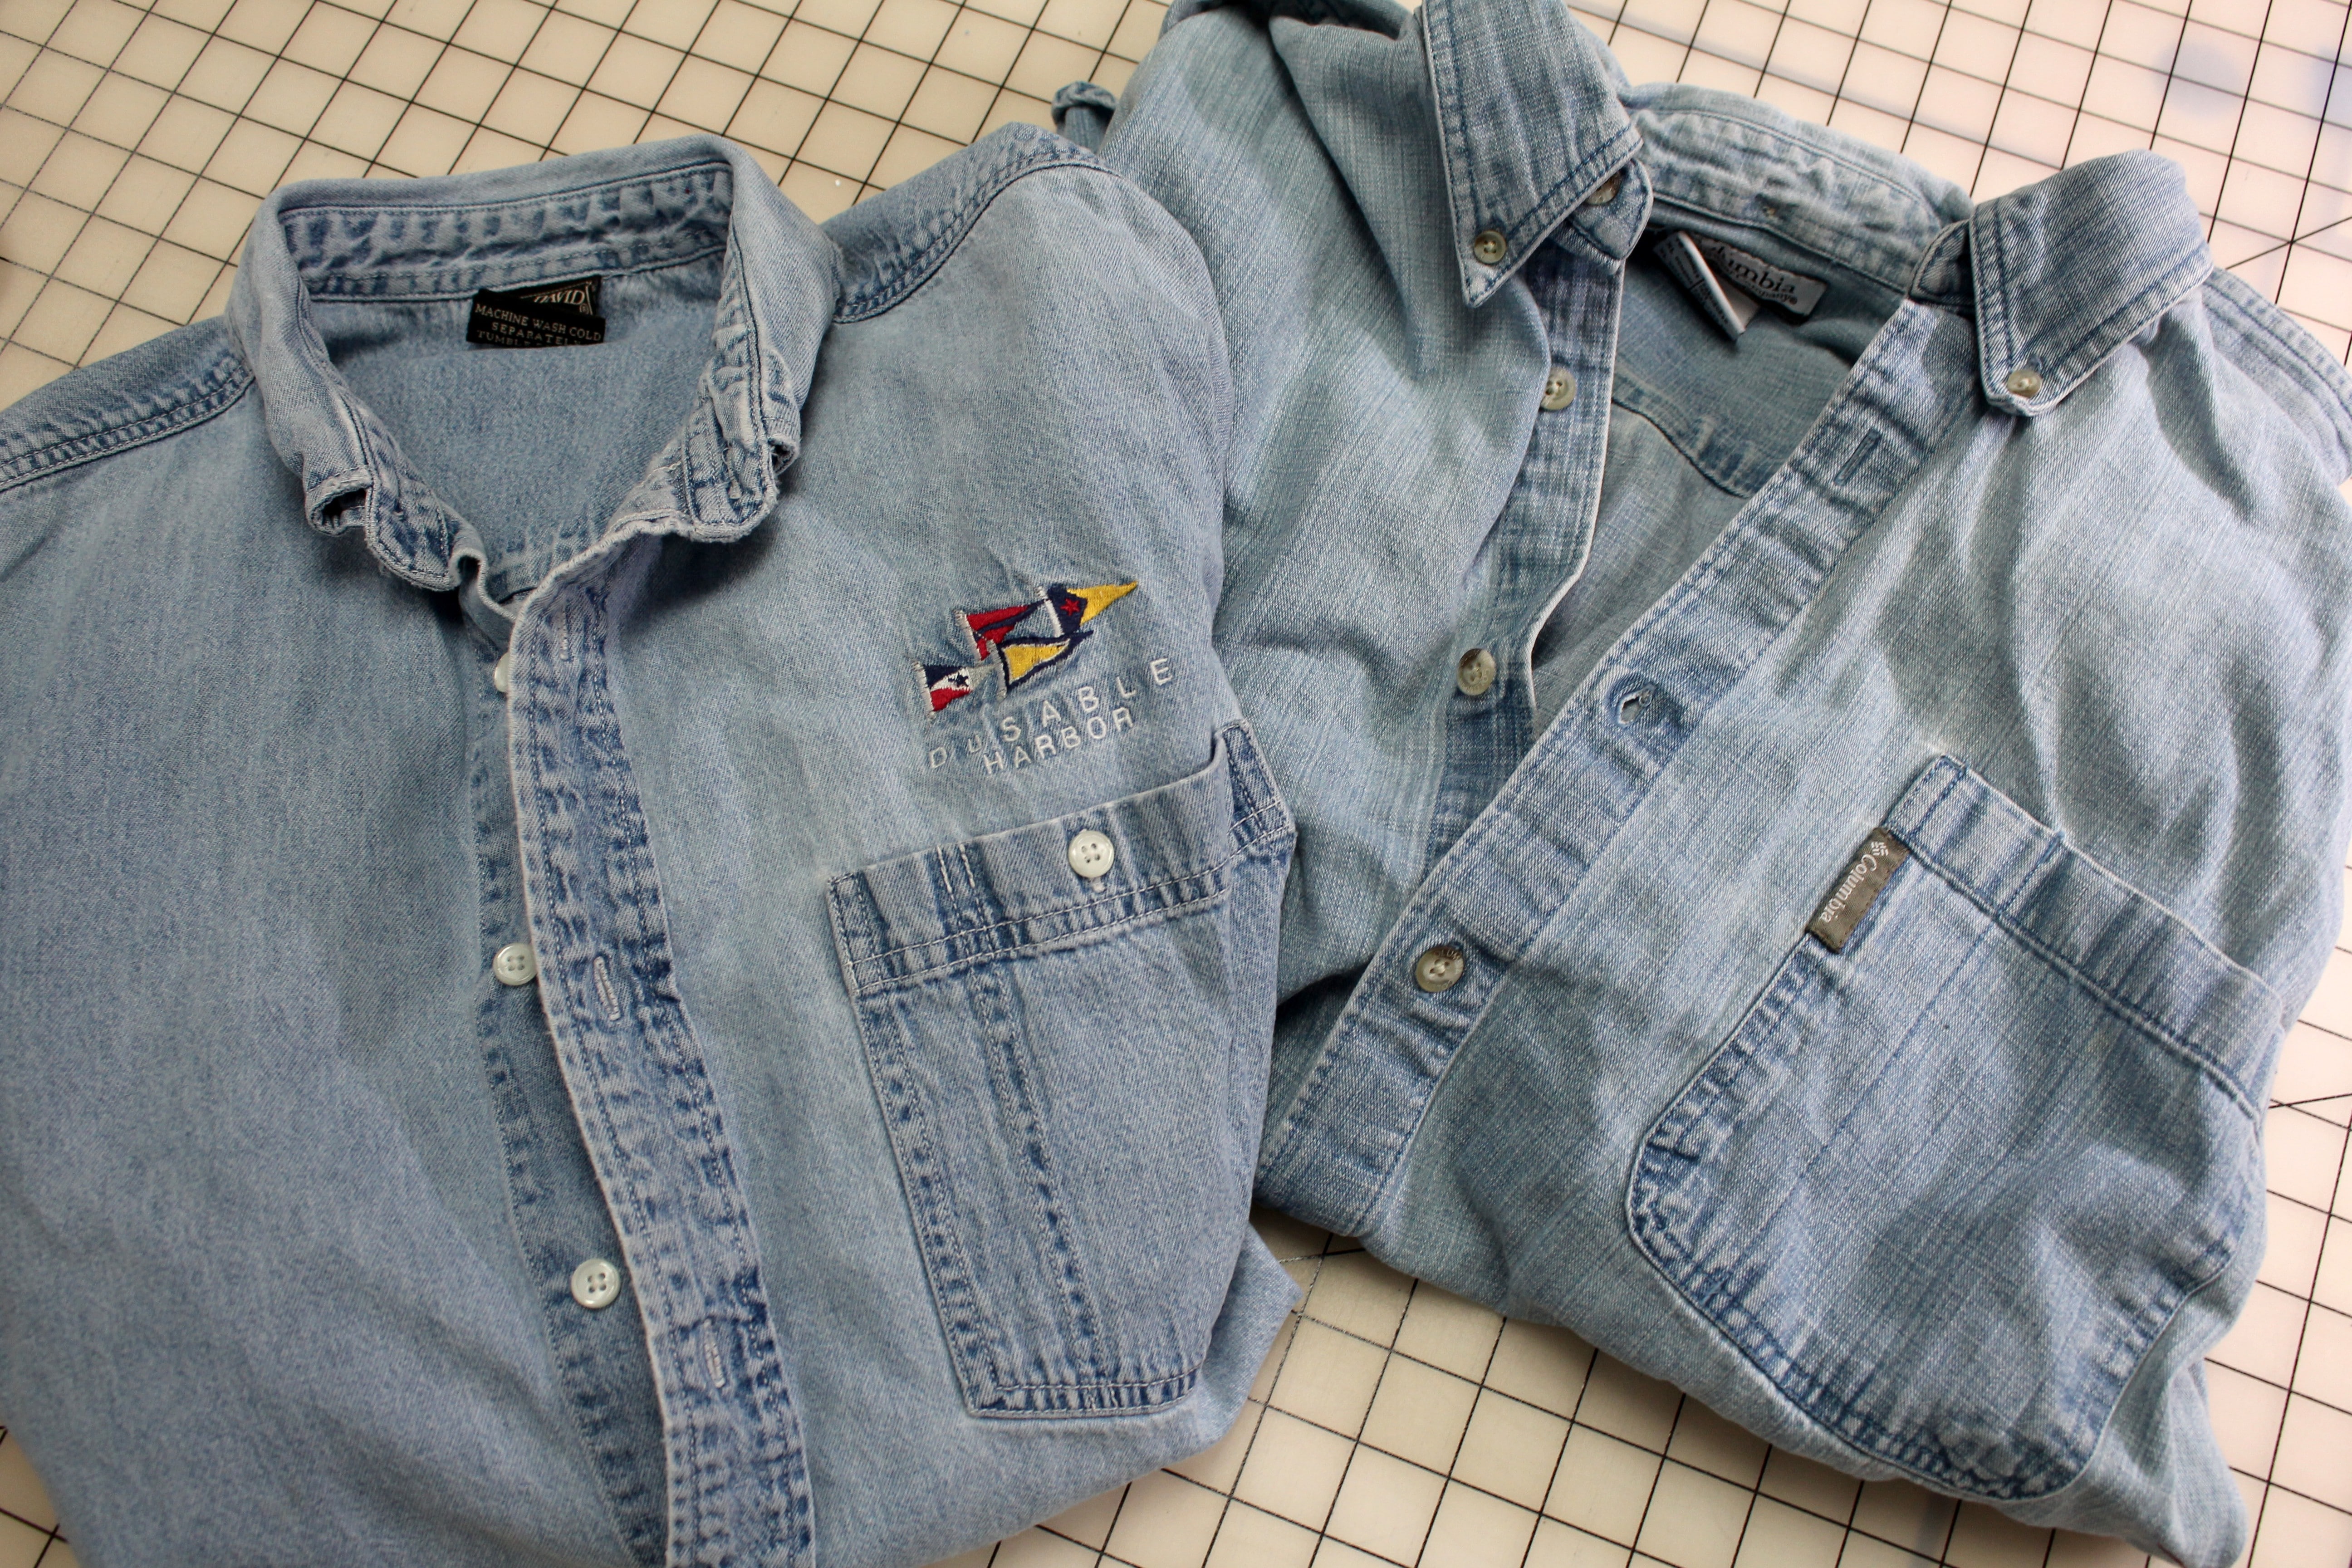
My husband was cleaning out his closet and handed me a couple of denim shirts to donate. I couldn’t help but notice the logo on one of the shirts from a marina we frequent on our summer boating trips – I couldn’t bear to allow that one to go. A friend mentioned making a quilt, but I don’t foresee that on the shortlist anytime soon. Then it occurred to me – UPCYCLE! I do need a sundress for the boating season and what better than a couple of denim shirts to play with!
Try on the shirt and check the fit. Start by marking the width of the desired tank onto the shoulder seam
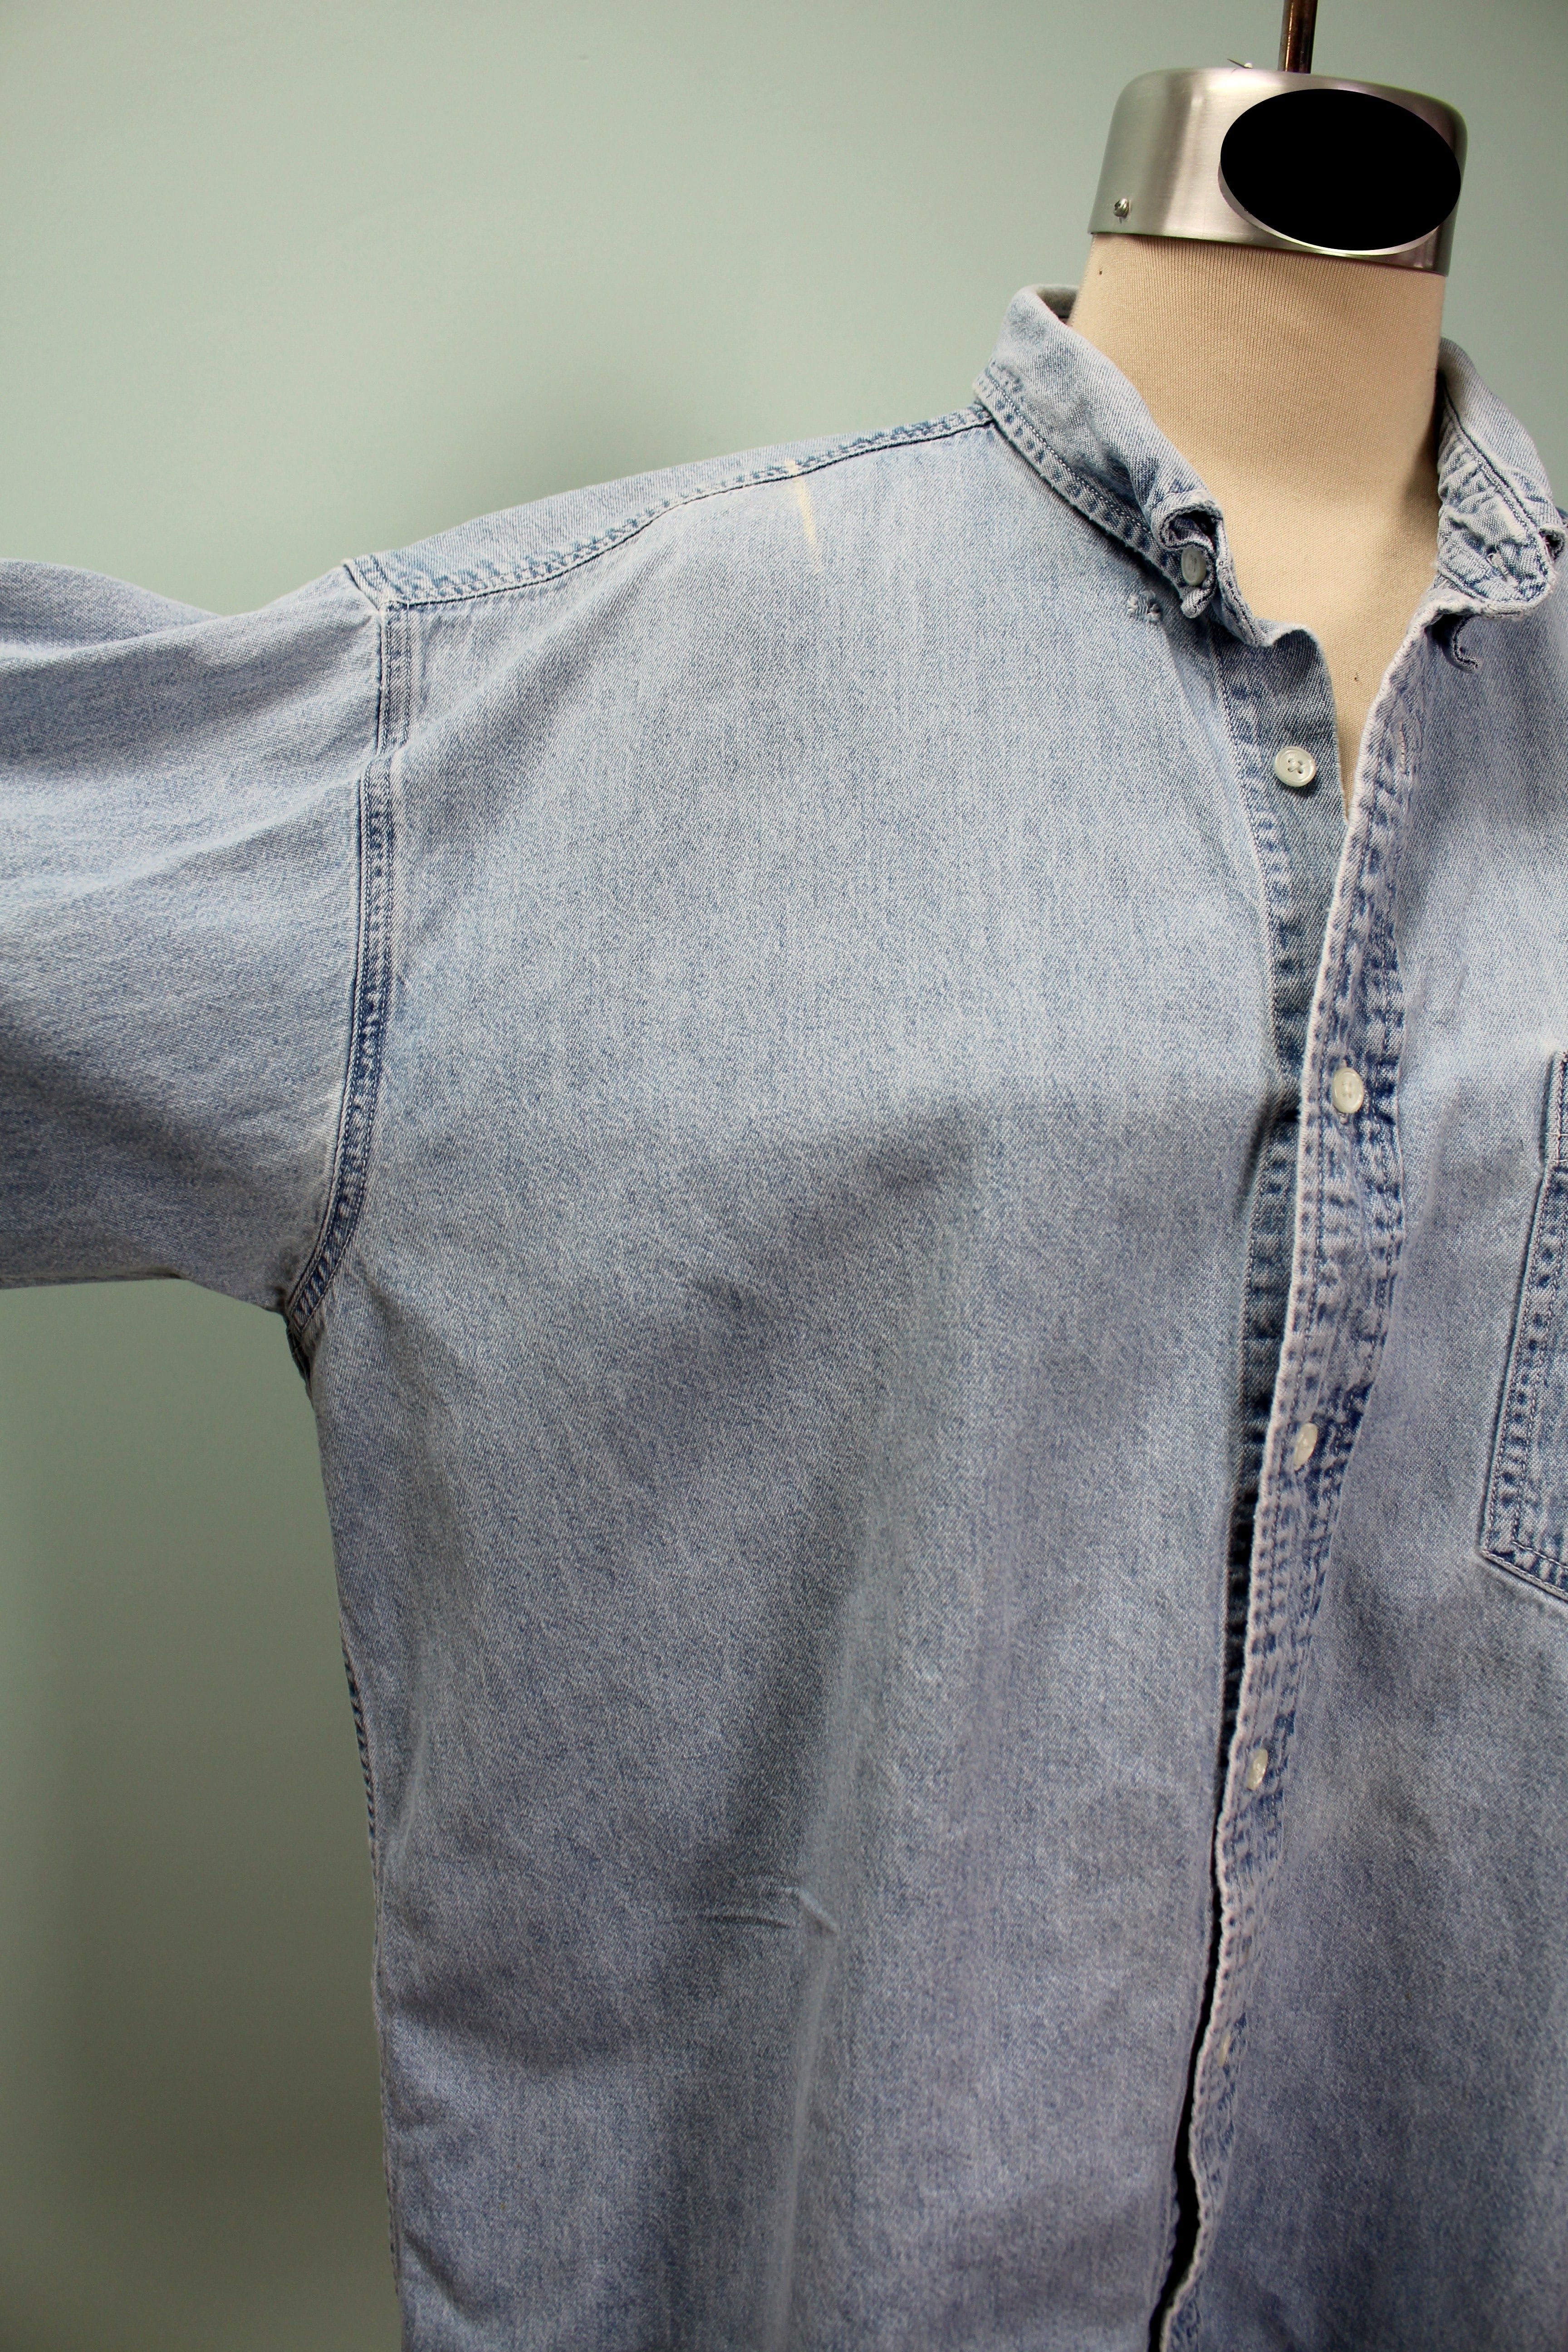
As I am holding up this sleeve, notice how wide the top is and how low the armscye falls. This will all be changed J
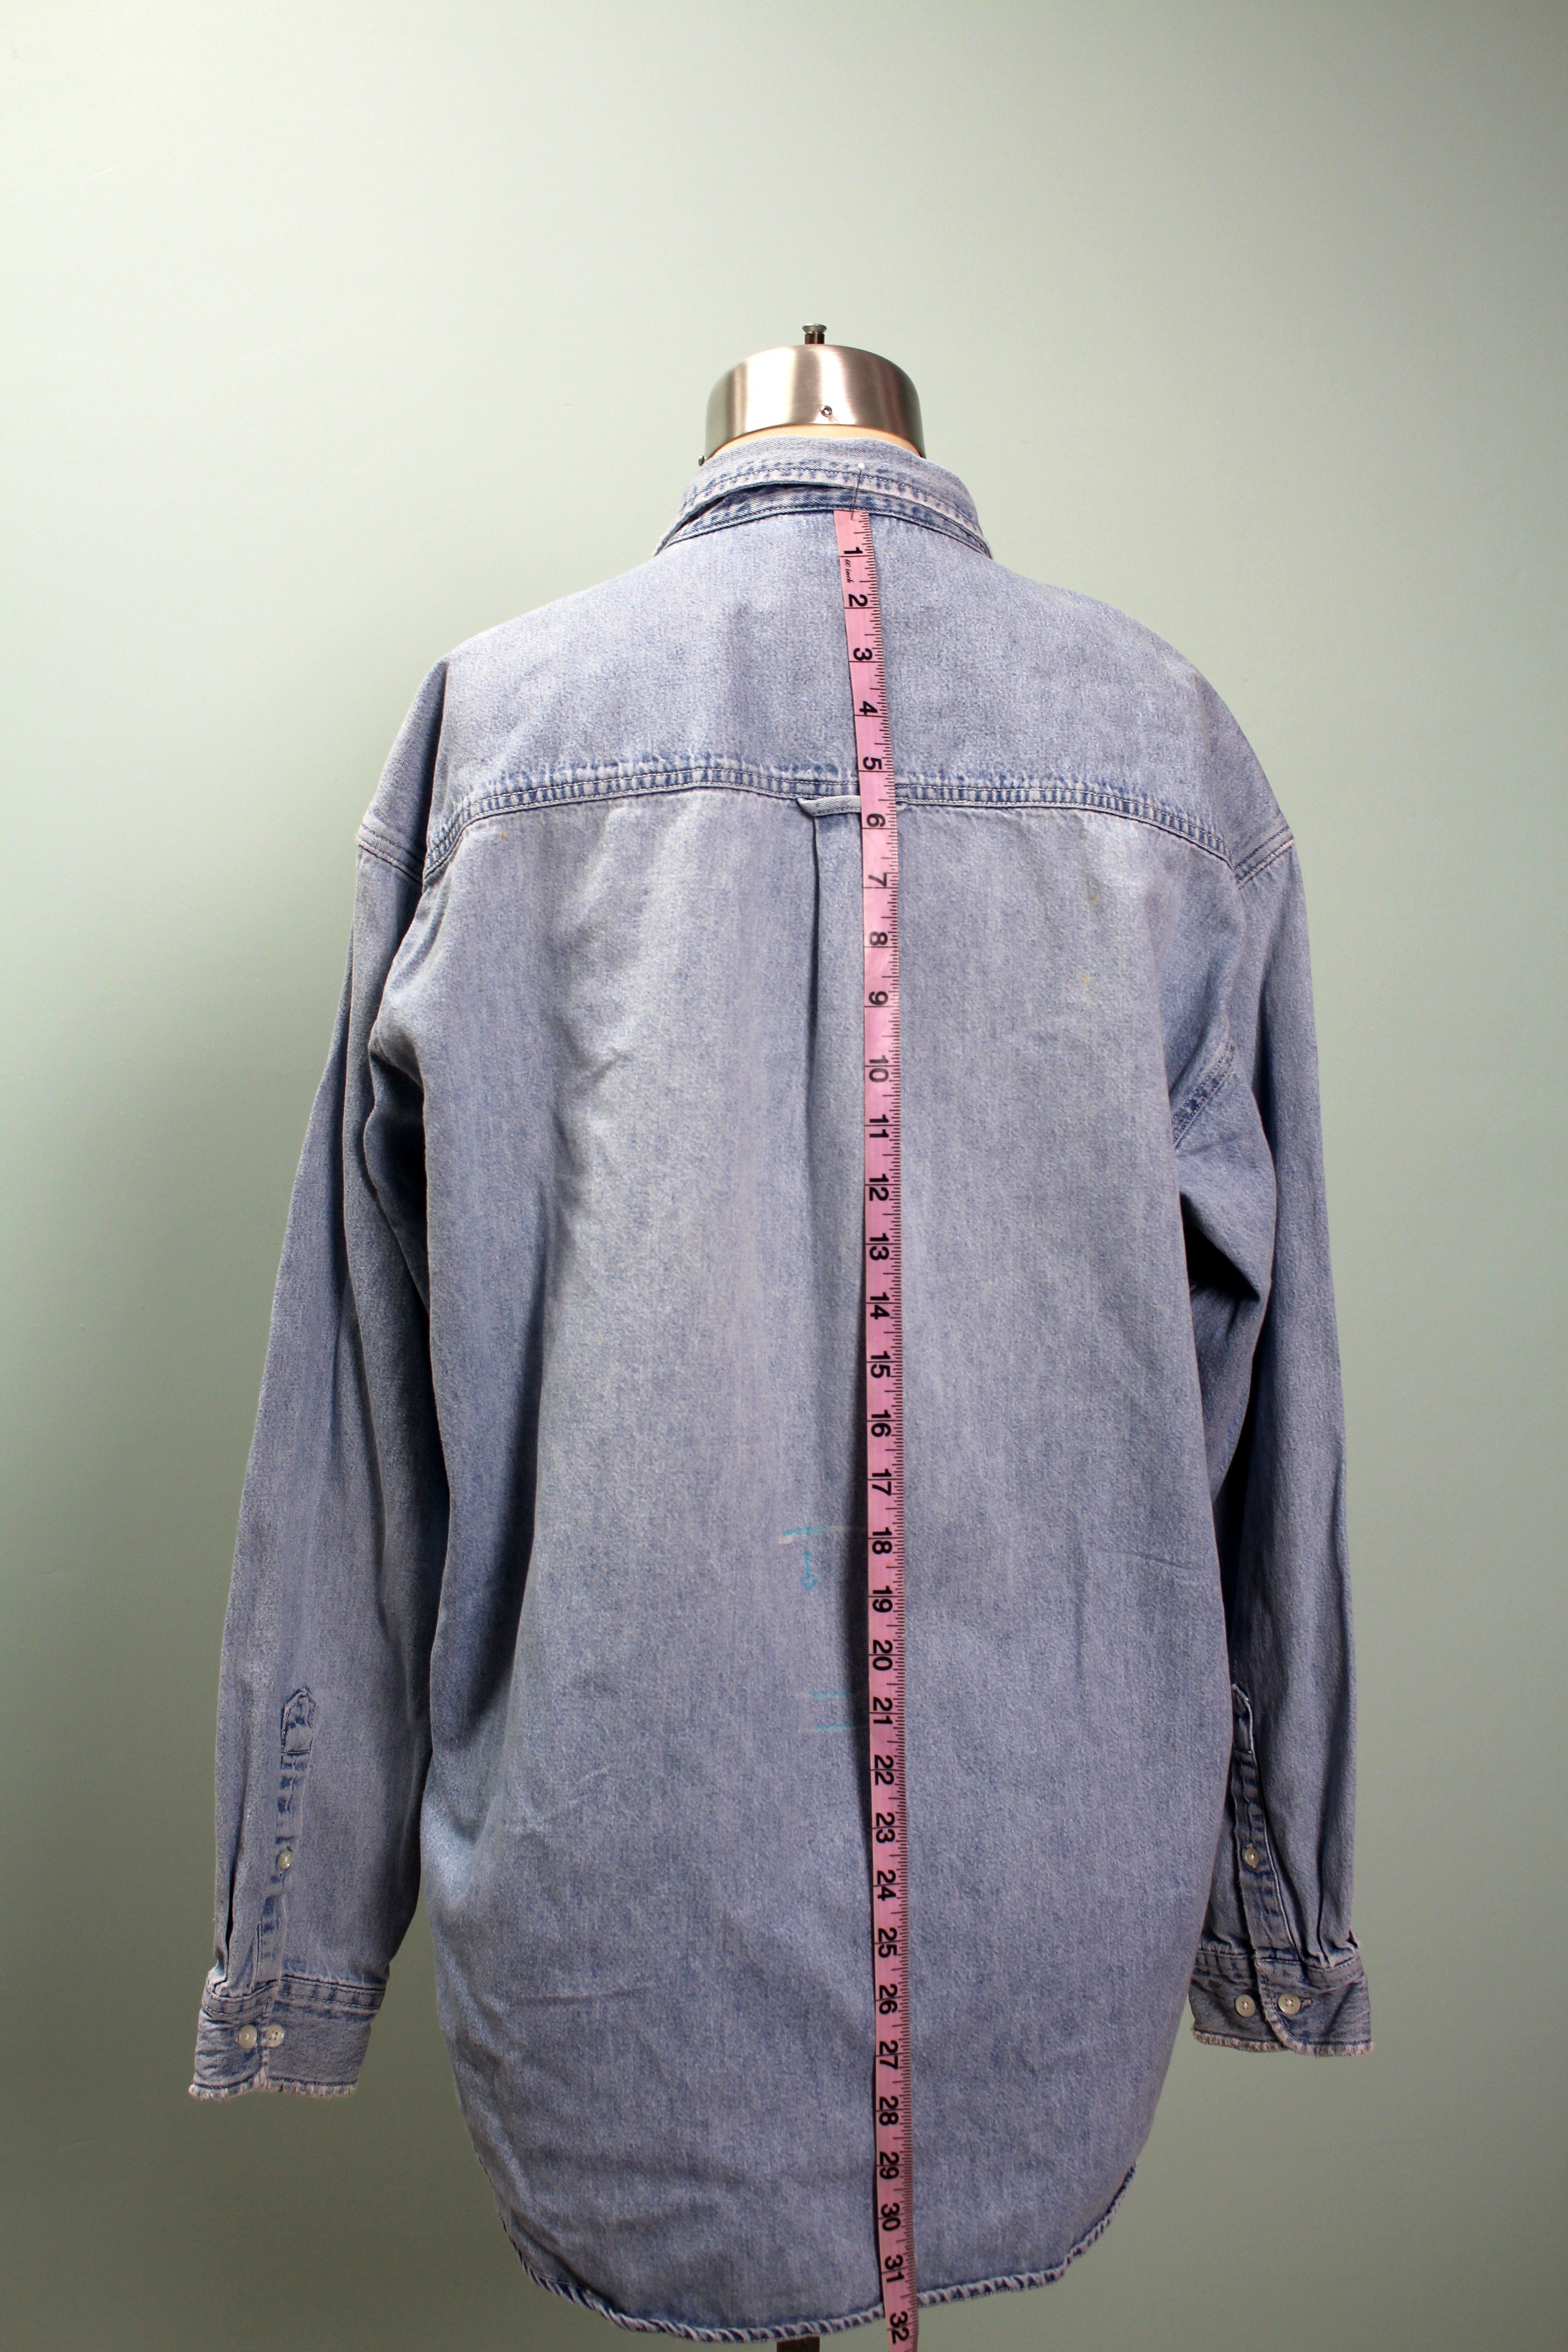
Measure from the back of the neck to your natural waistline and draw a line. Measure on the front of the top as well.
From the waist marking, measure down an additional 3” and place another mark. (I am adding the 3” to allow a little blousing when the dress is belted). Measure down another ½” to allow for a seam allowance.
Next, draw a line from the underarm seam up to the shoulder mark as shown.
For the full tutorial, check out my post on the Brother Stitching Sewcial blog. I always love to see what you are working on, be sure to share photos of your upcycled shirts using hashtags #angelawolf #brothersews
Cheers,
Brother Expert Sewing Consultant. This blog post may contain affiliate links.
The page you requested could not be found. Try refining your search, or use the navigation above to locate the post.
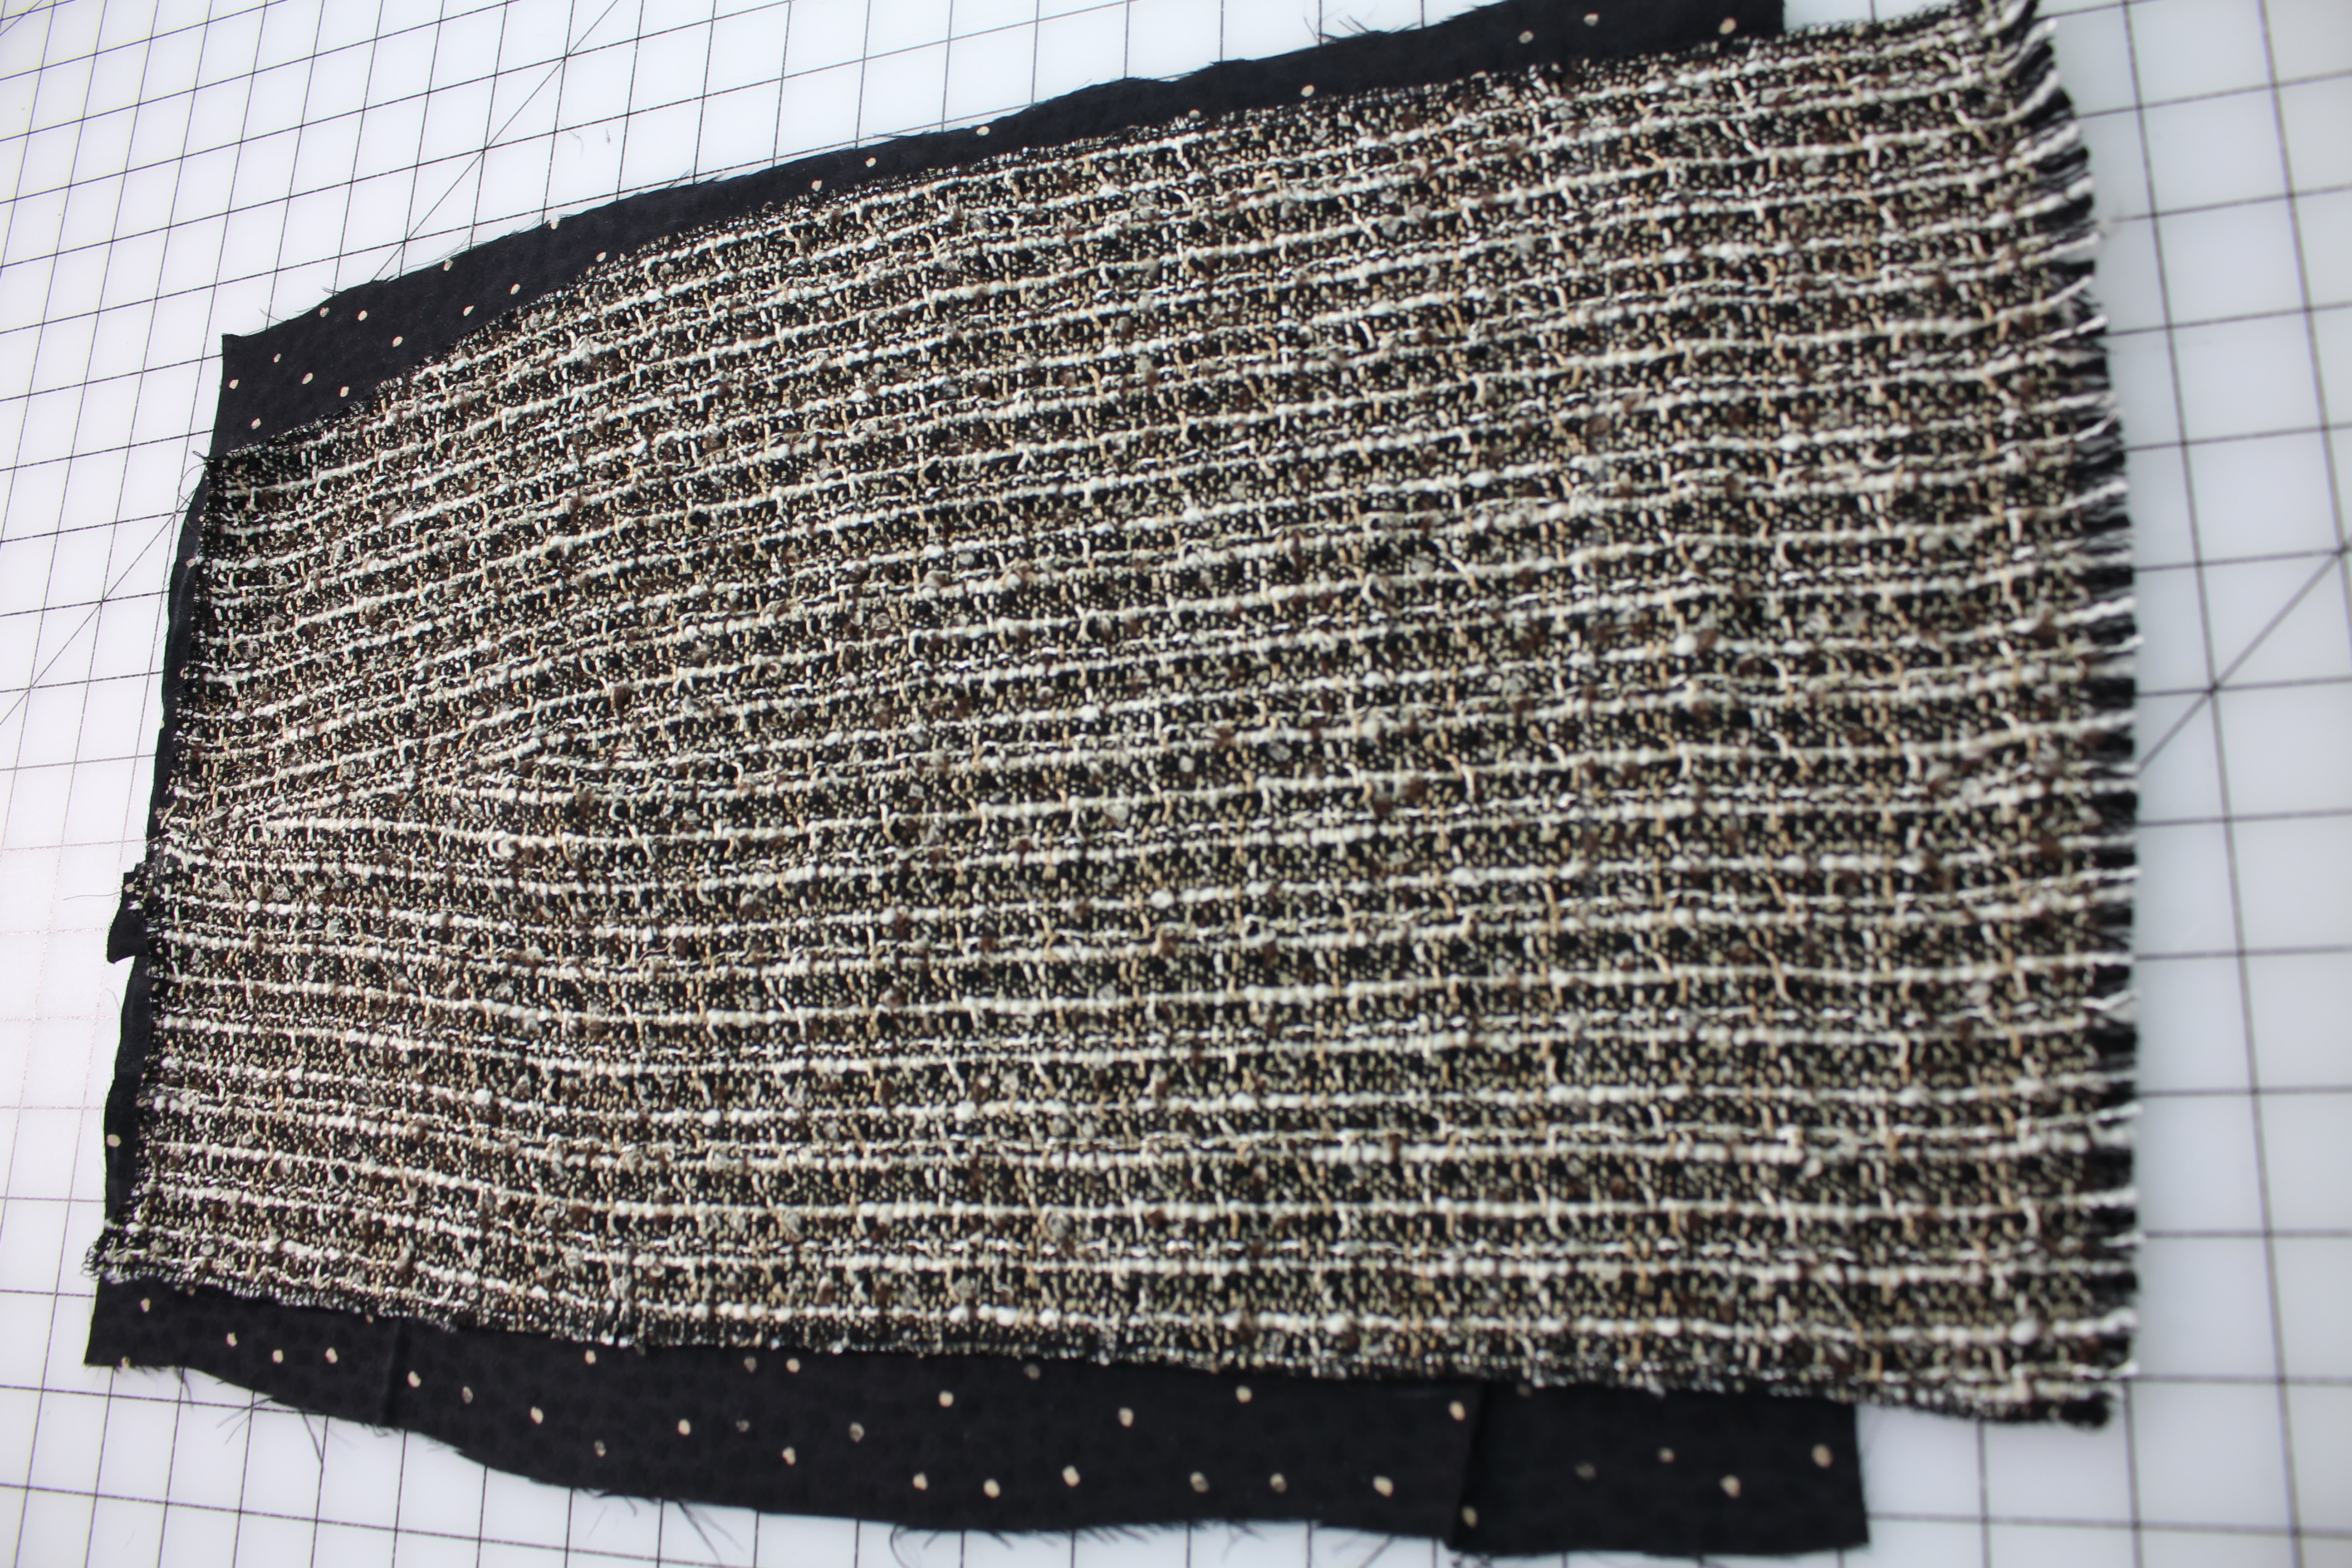
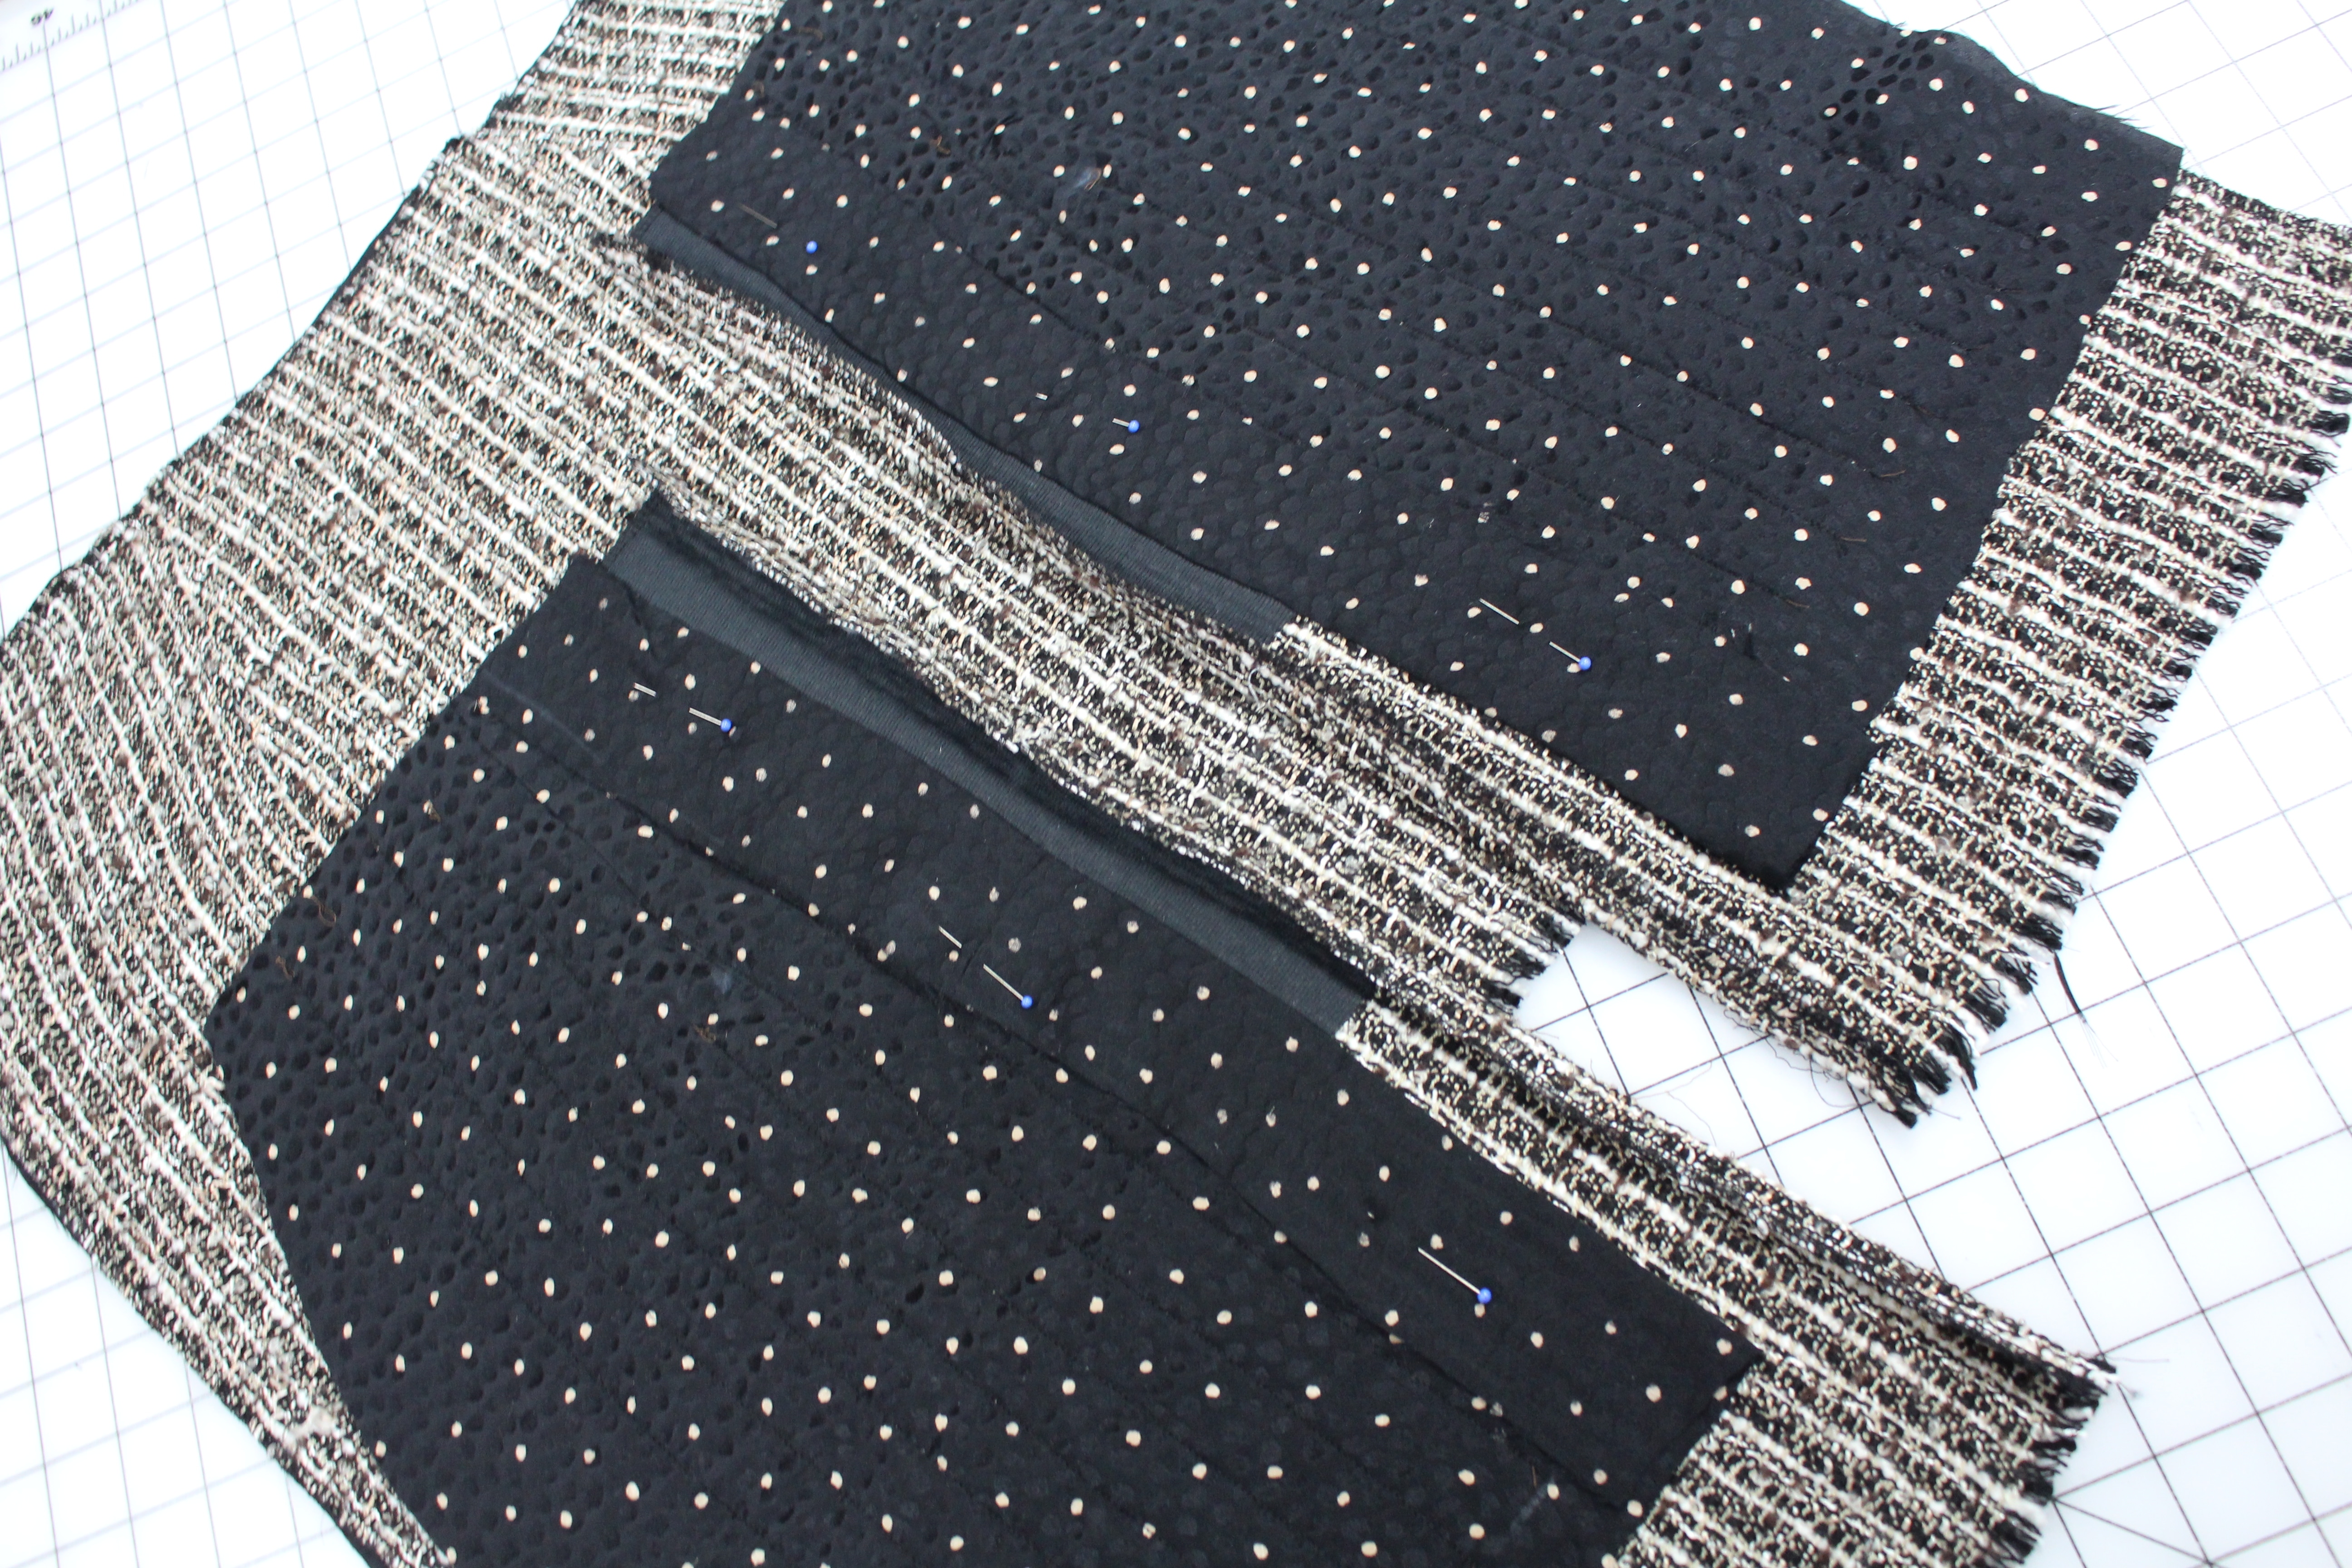
Why not add a touch of couture to your tweed fringed skirt and quilt the lining. Similar to a Chanel style jacket, the quilted lining is stylish and luxurious. There is a lot of hand-sewing involved in this process, but it’s worth every stitch ? As you know, I sew many of my skirts and jackets this way and once you wear a quilted garment you will be hooked!
I mentioned in a previous lesson in the Fringe Skirt Sewalong that is is best to use a natural fiber for the lining. Here are some of my favorite options:
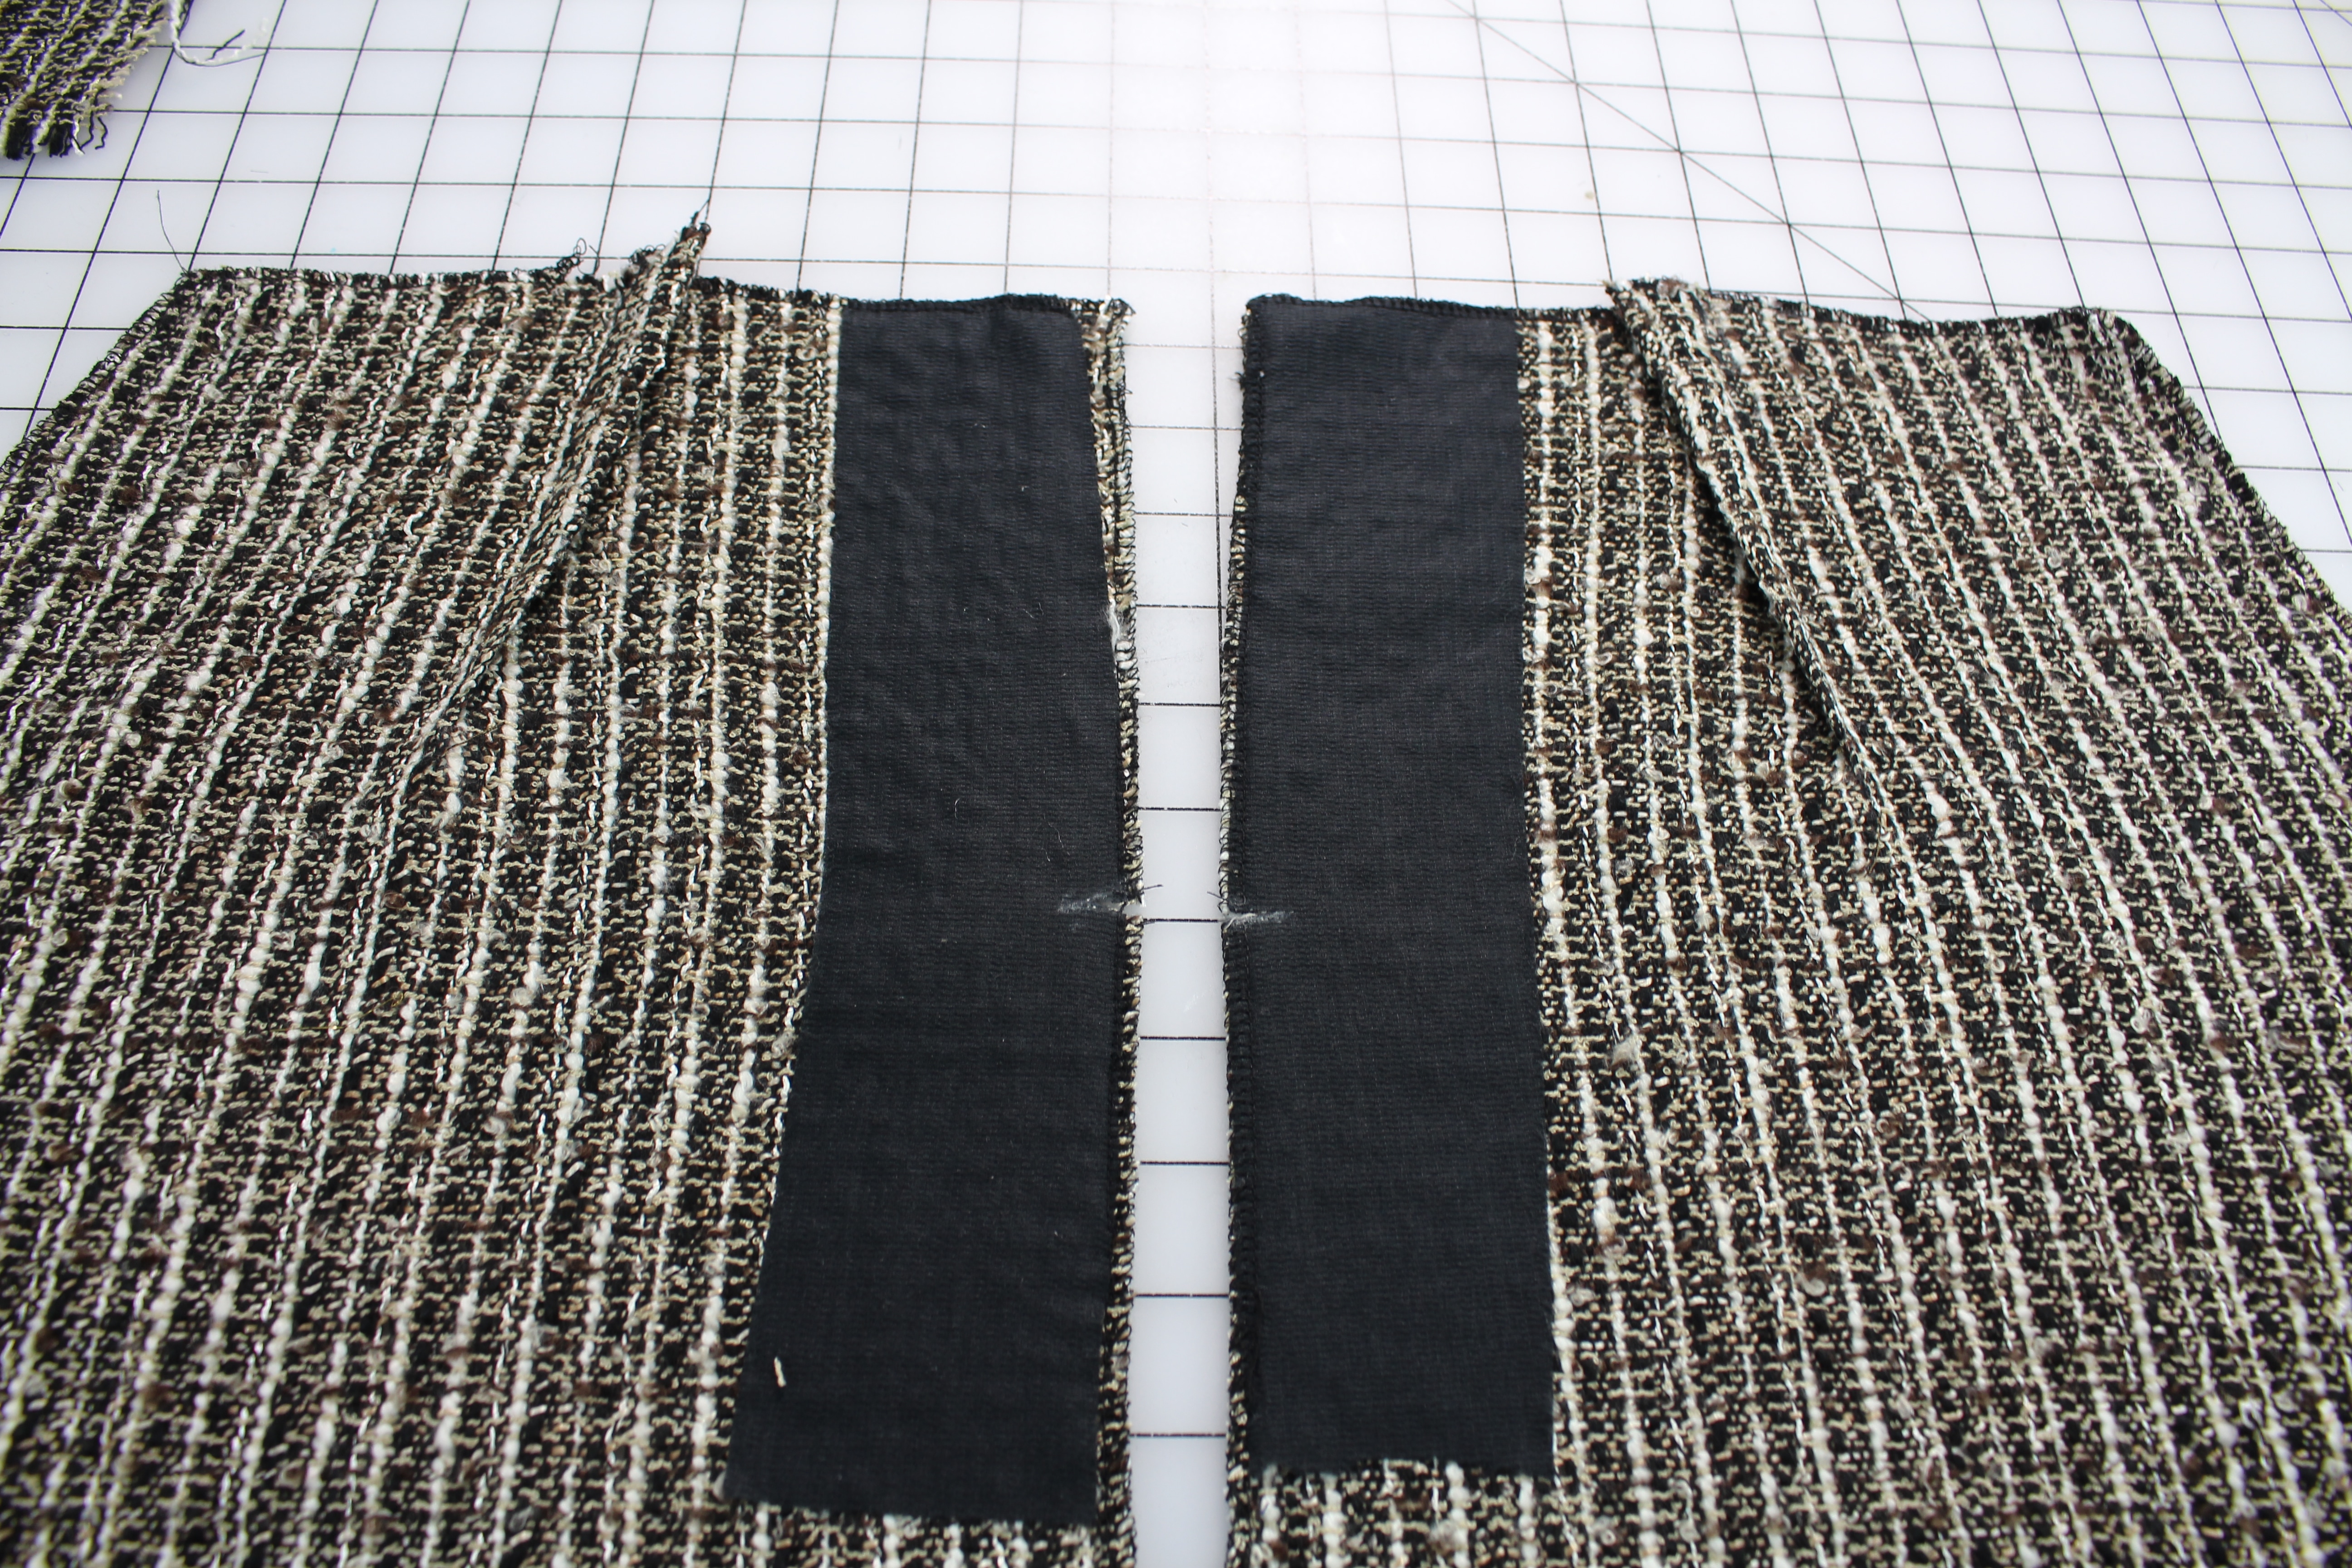
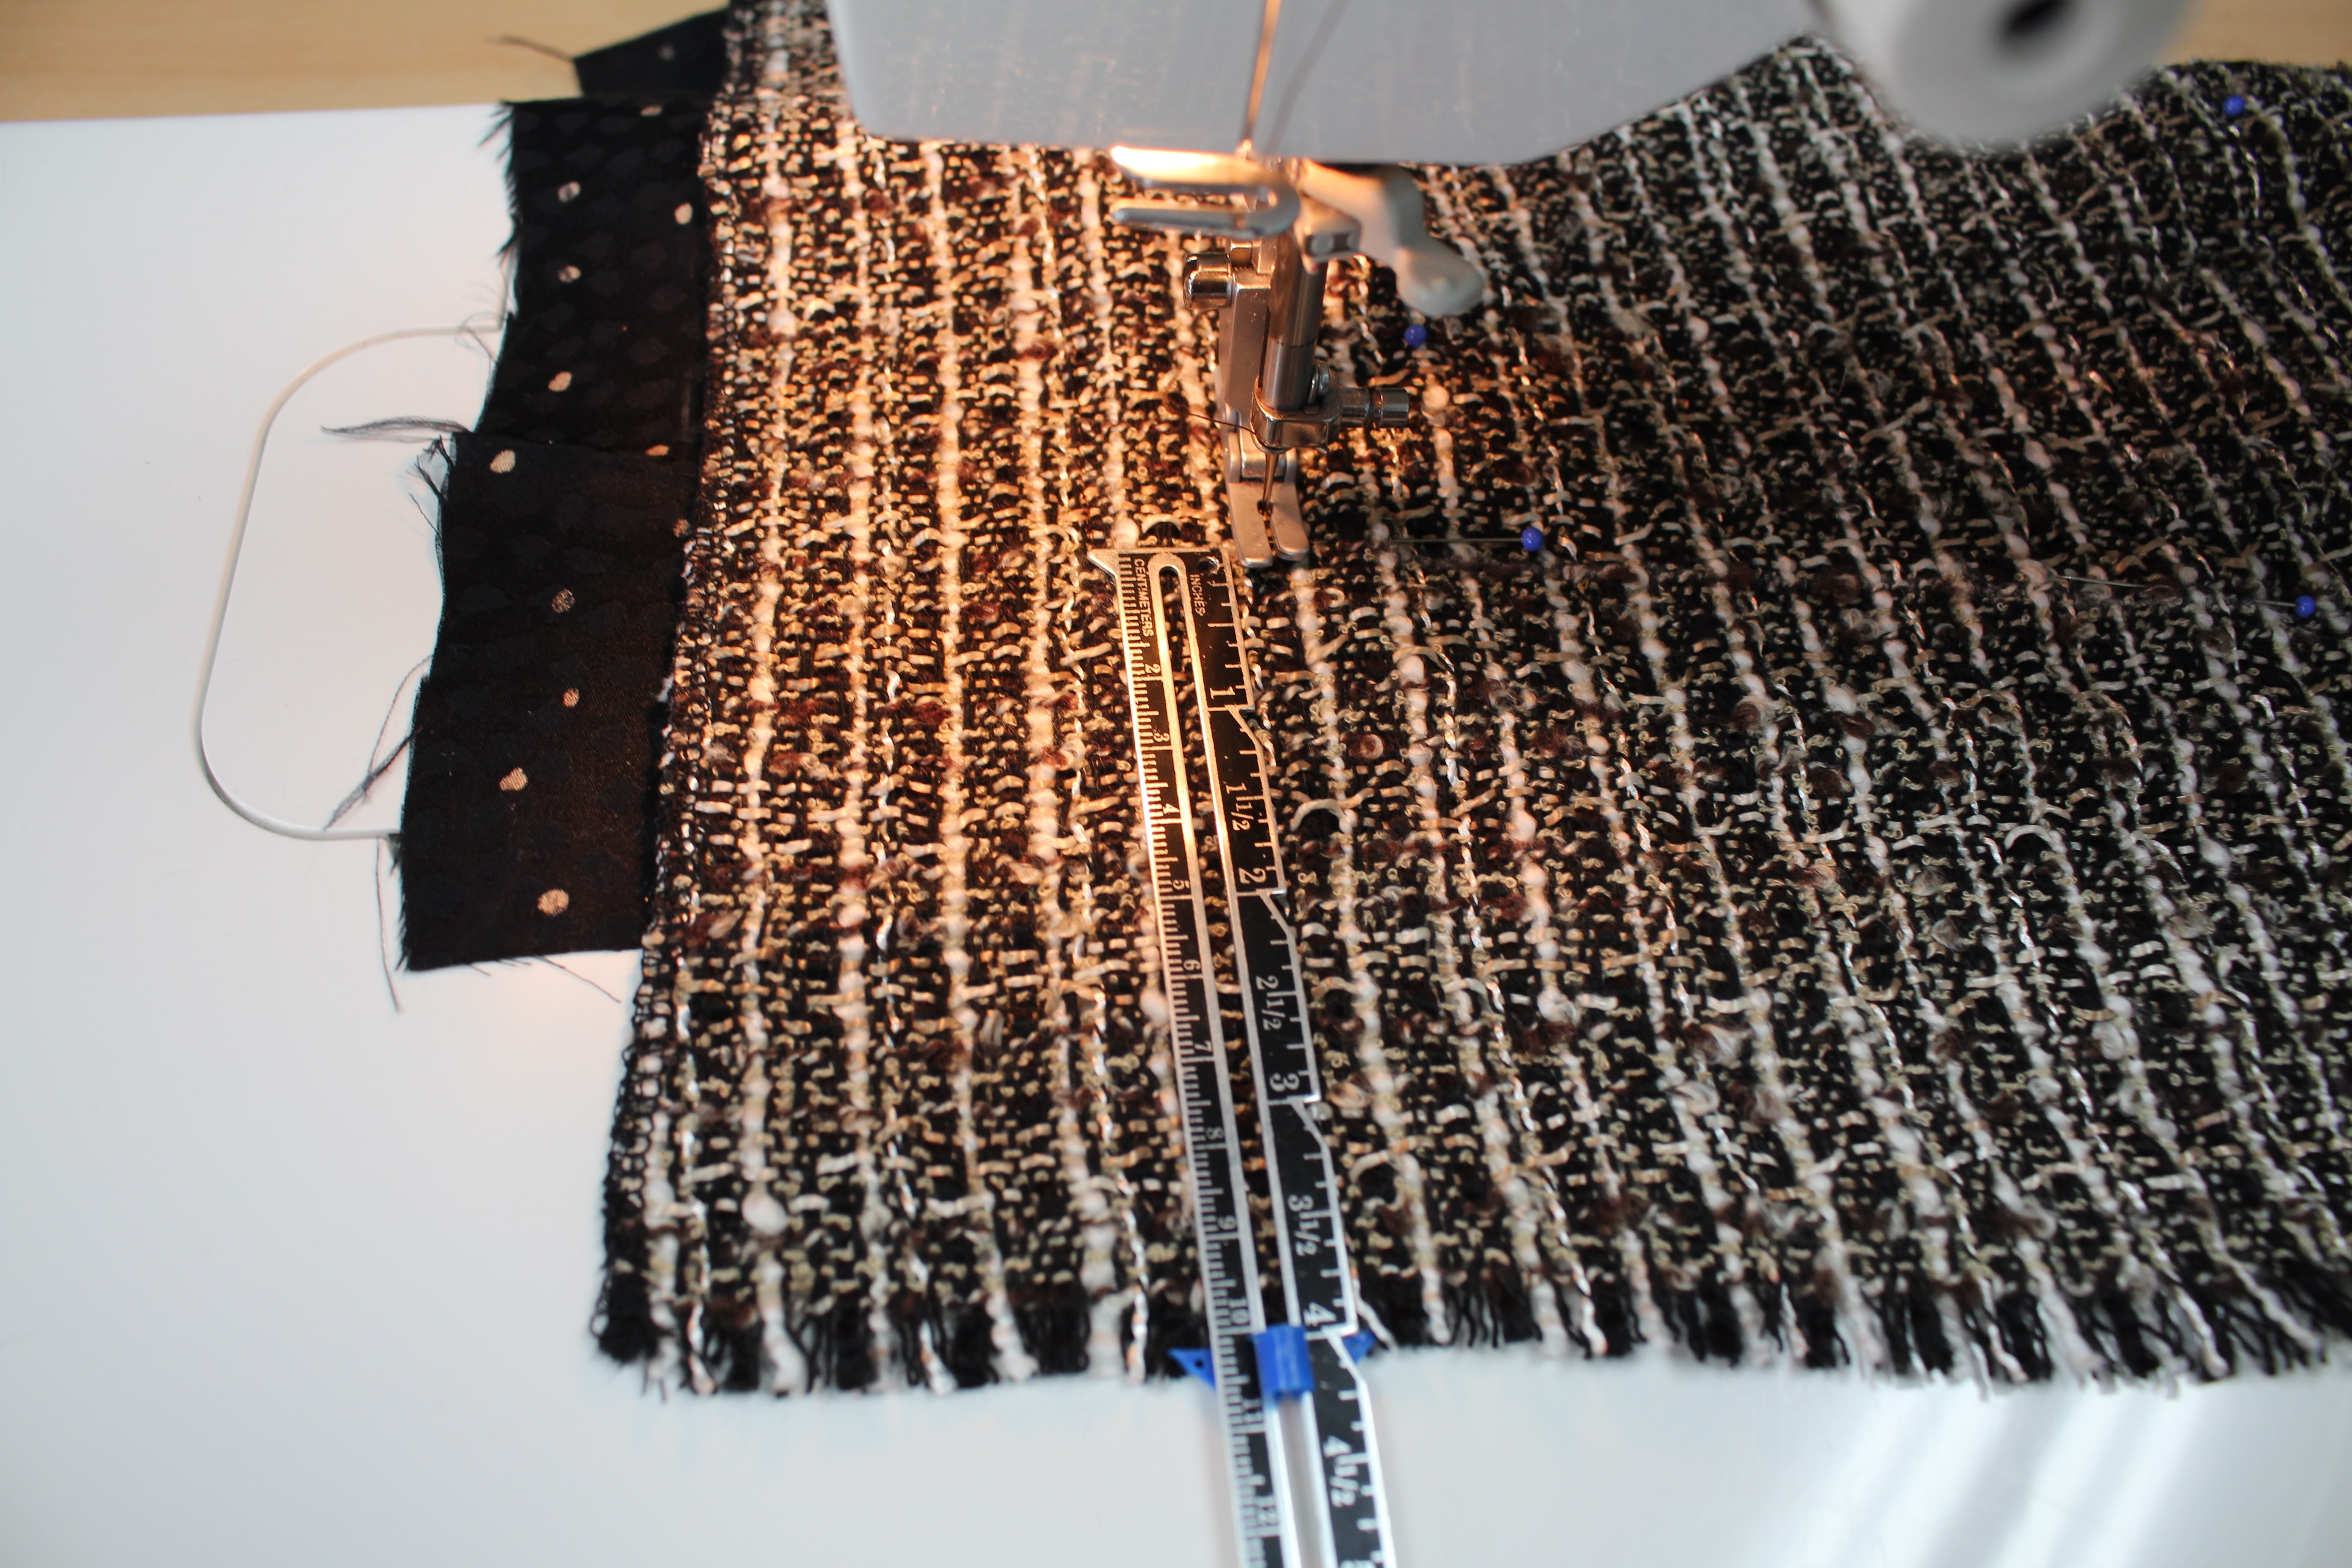
When quilting the lining you will need to cut your lining fabric a little bit wider than your fashion fabric. I usually lay my muslin or garment fabric on top of the lining as shown:
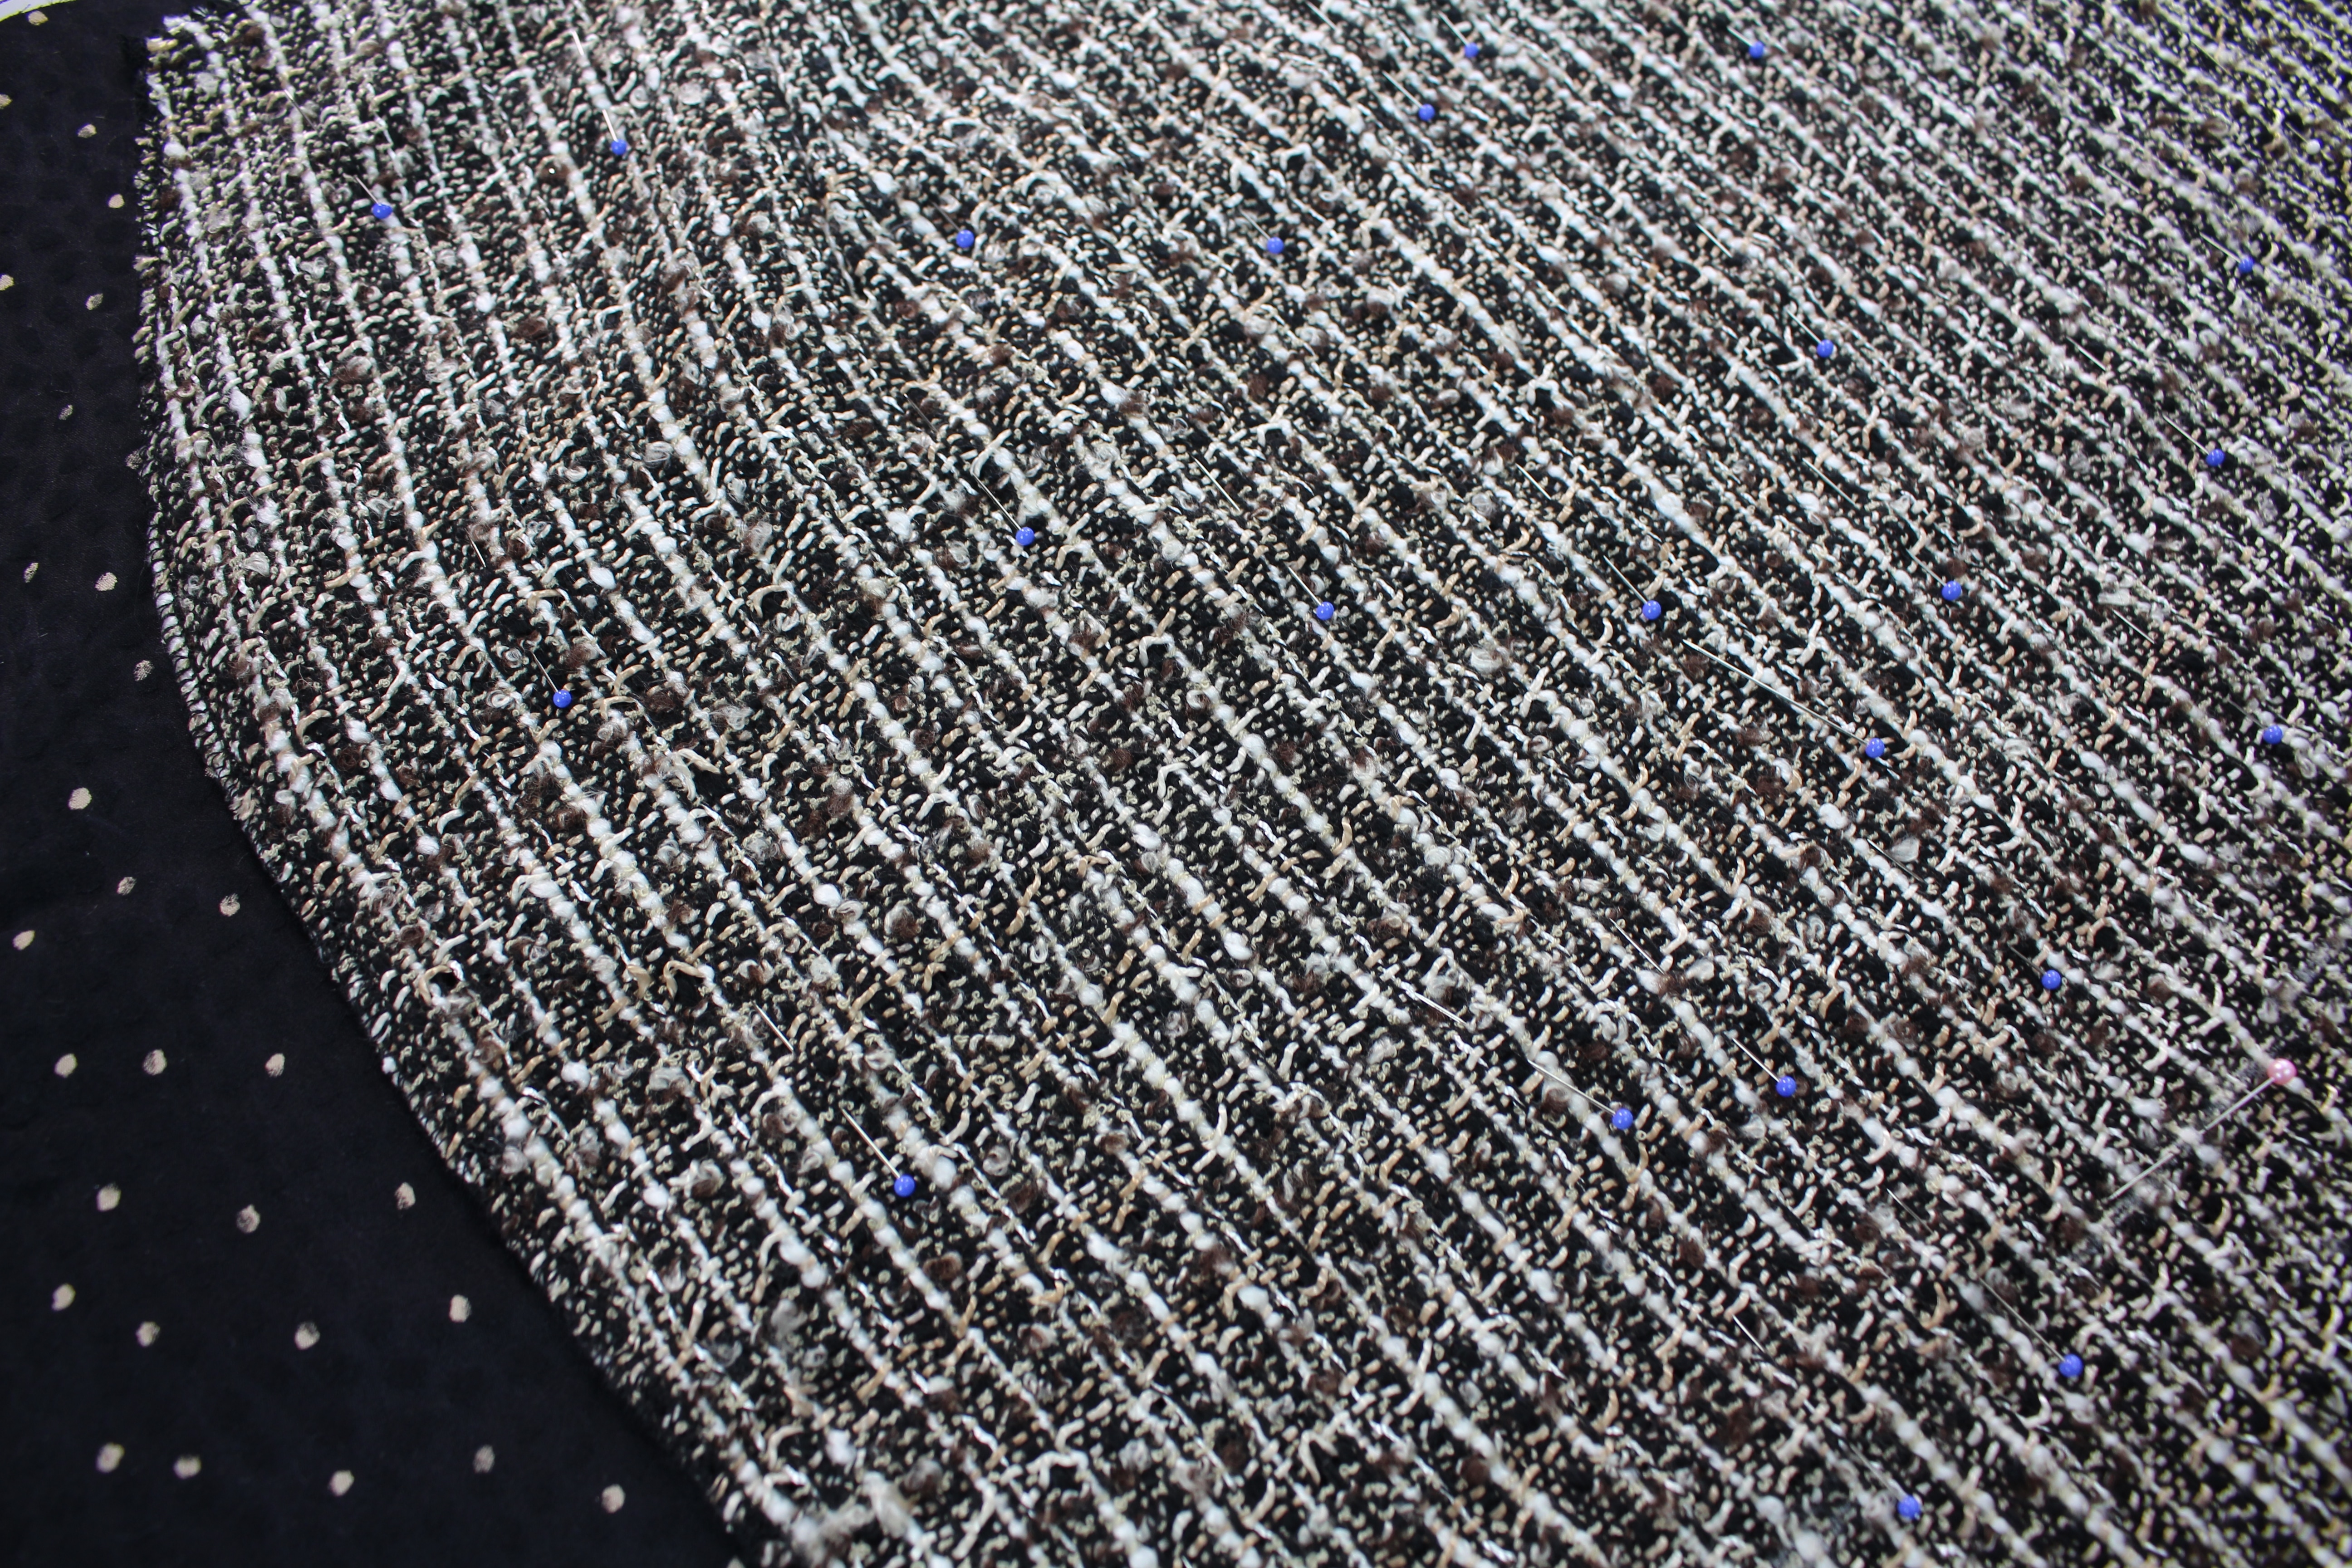
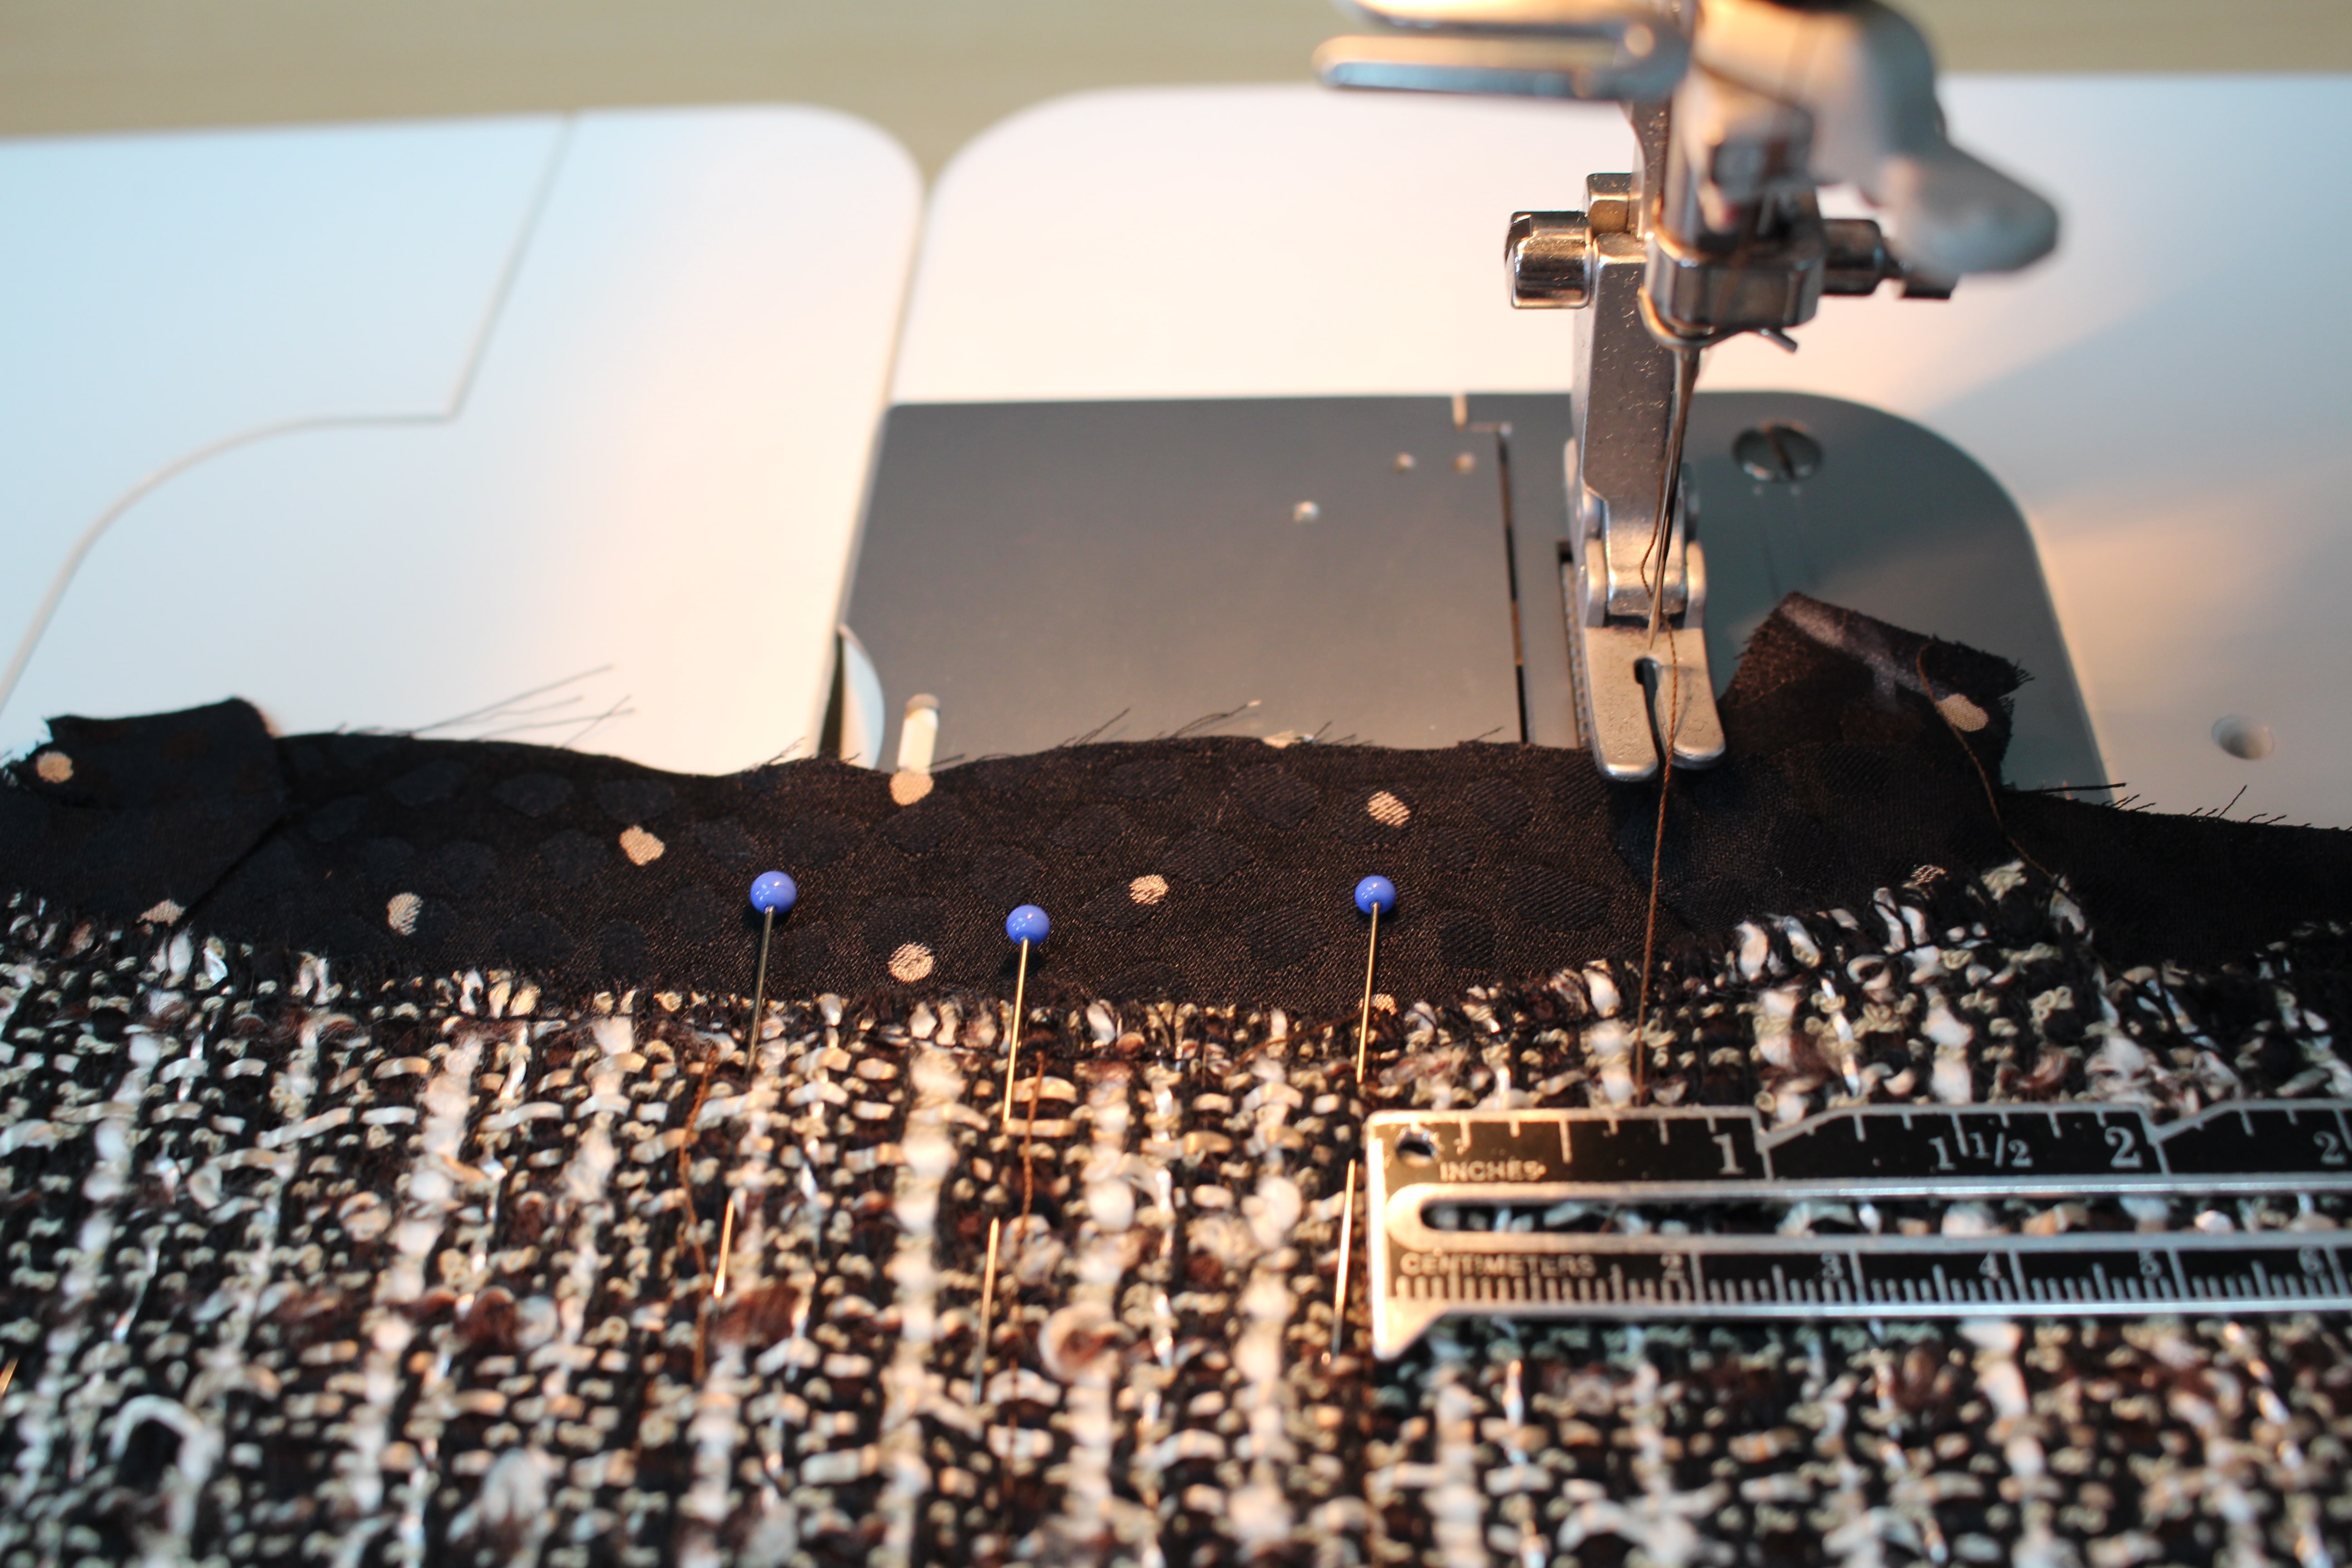
With wrong sides together, lay the tweed fabric on top of the lining. Starting at the waistline, line up the darts on both fabrics. Pin or hand-baste the fabrics together, starting at the center and moving out toward the side seams. (see my blue pins in the photo below)
Mark the area that you will not be stitching:
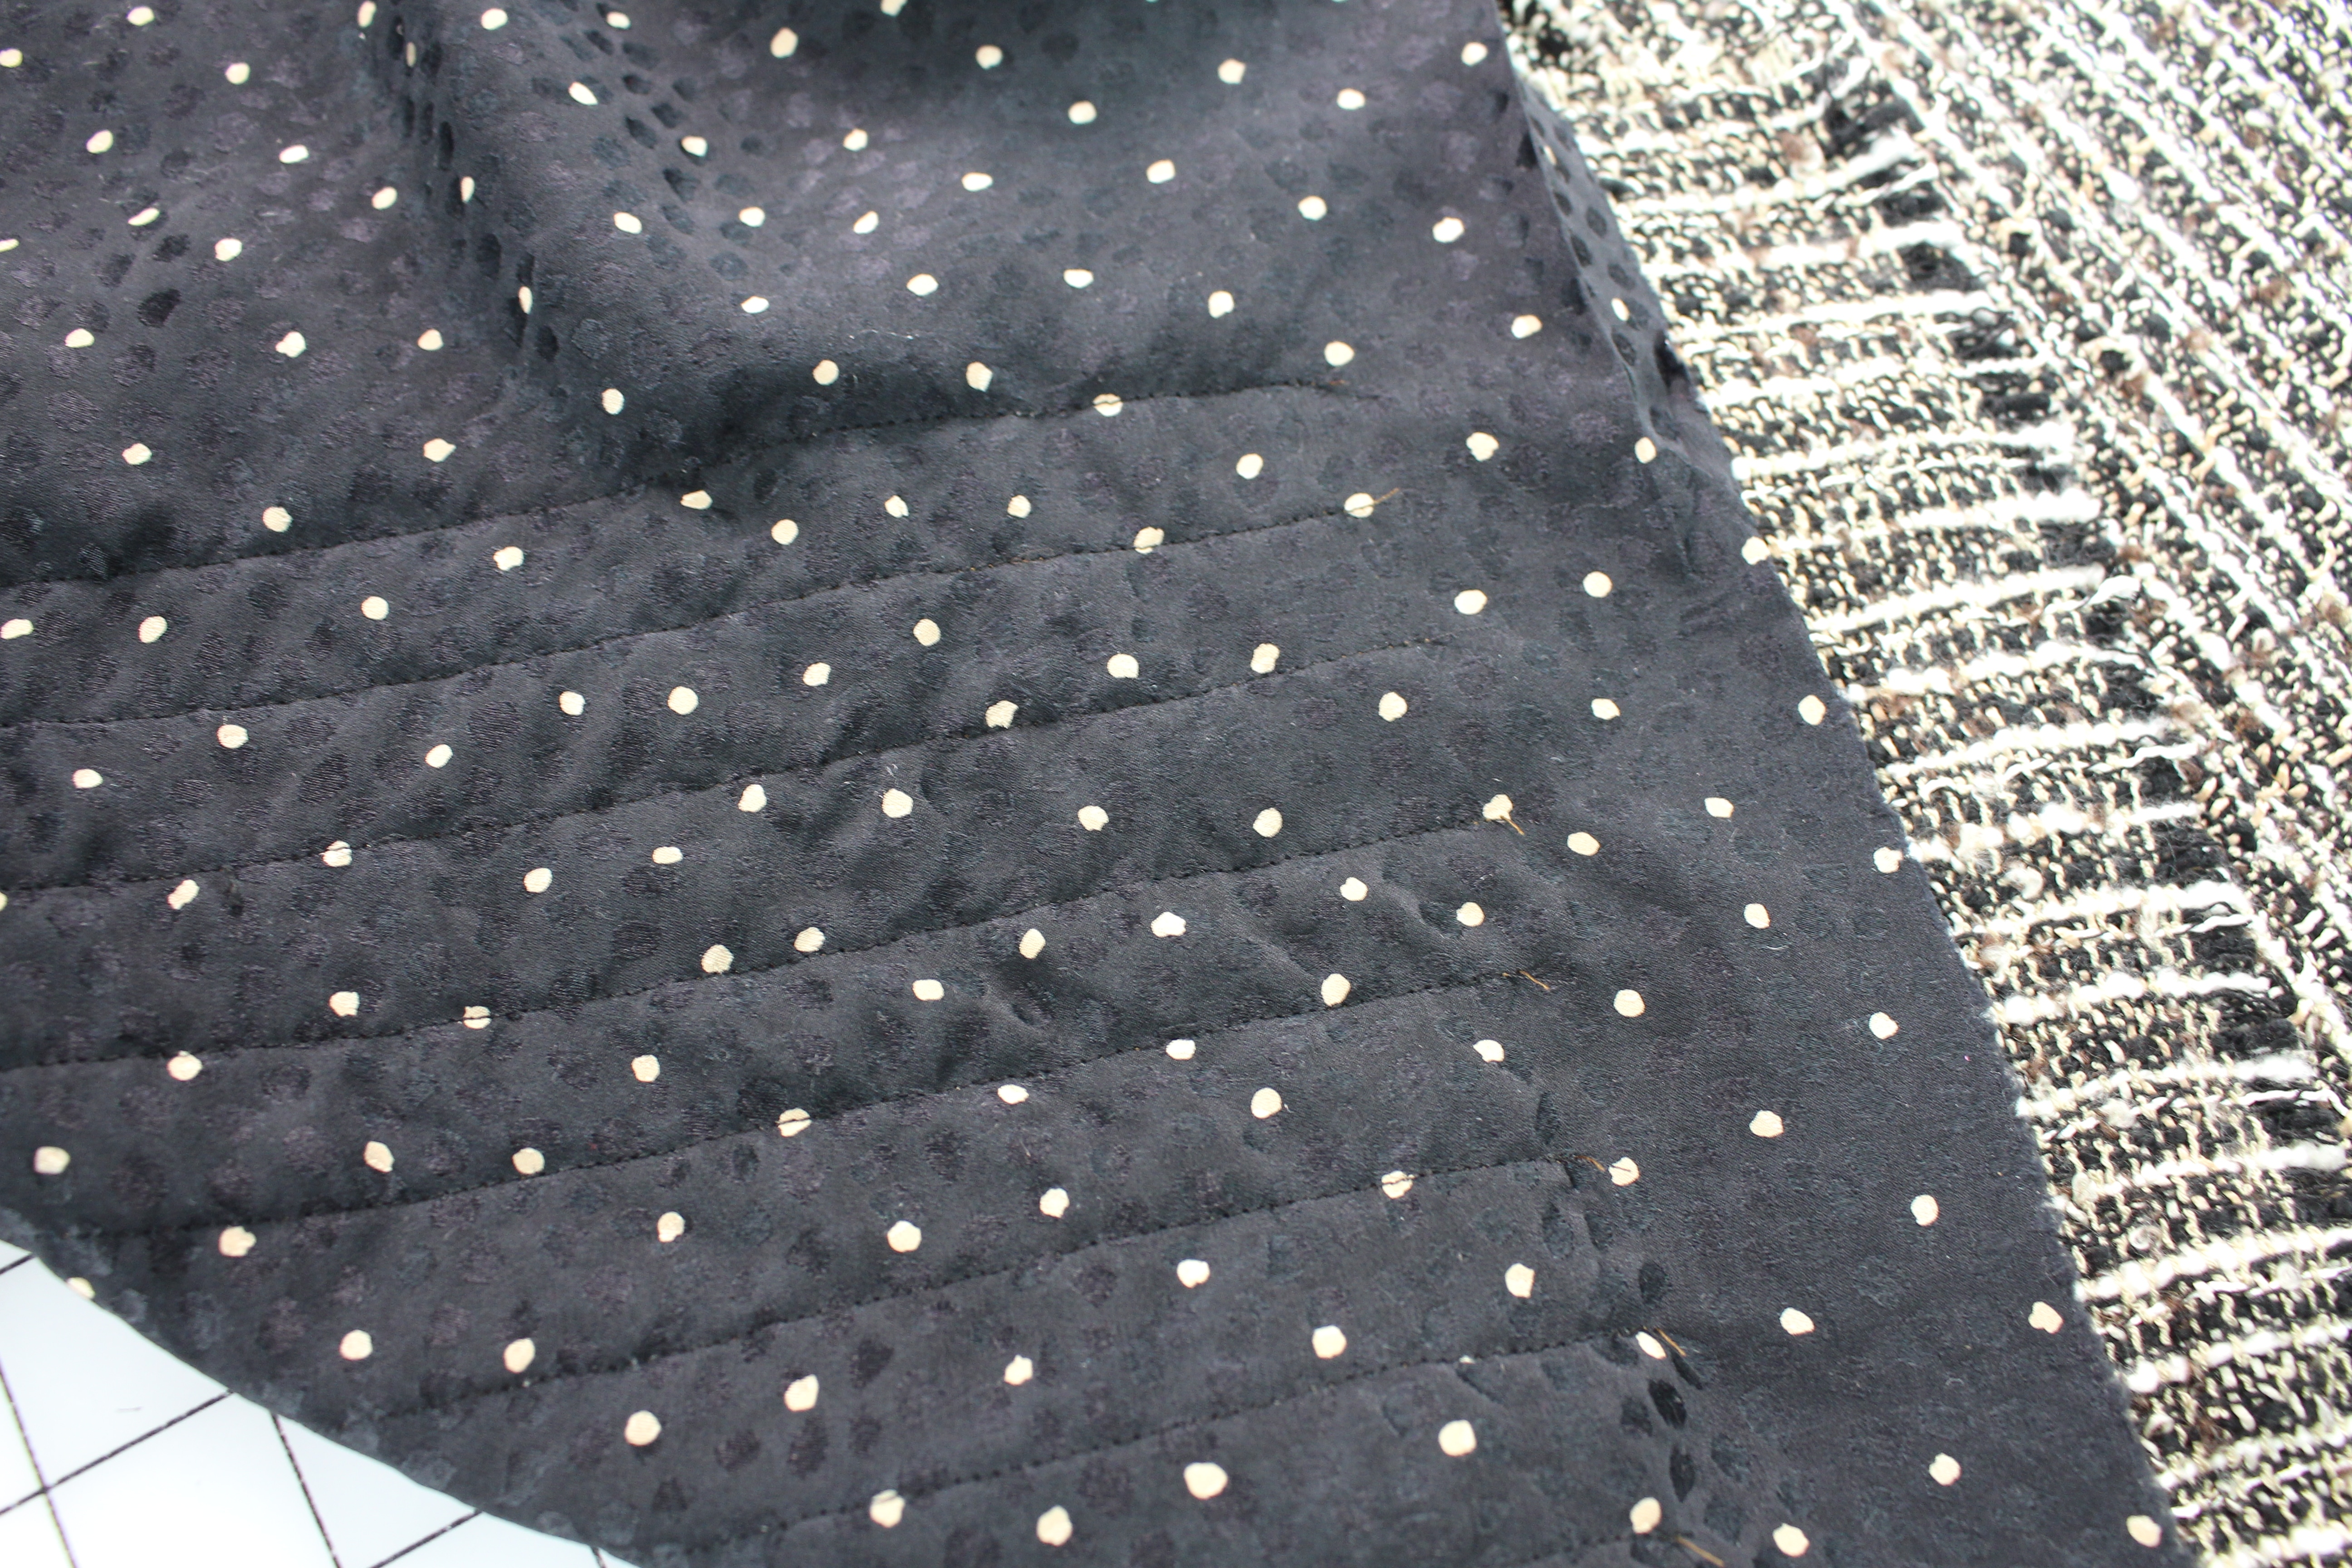
Starting at the top of the waistline in the center of the skirt, line up the needle with the grainline and stitch from the top of the skirt down. I am using a stitch length of 2.5.
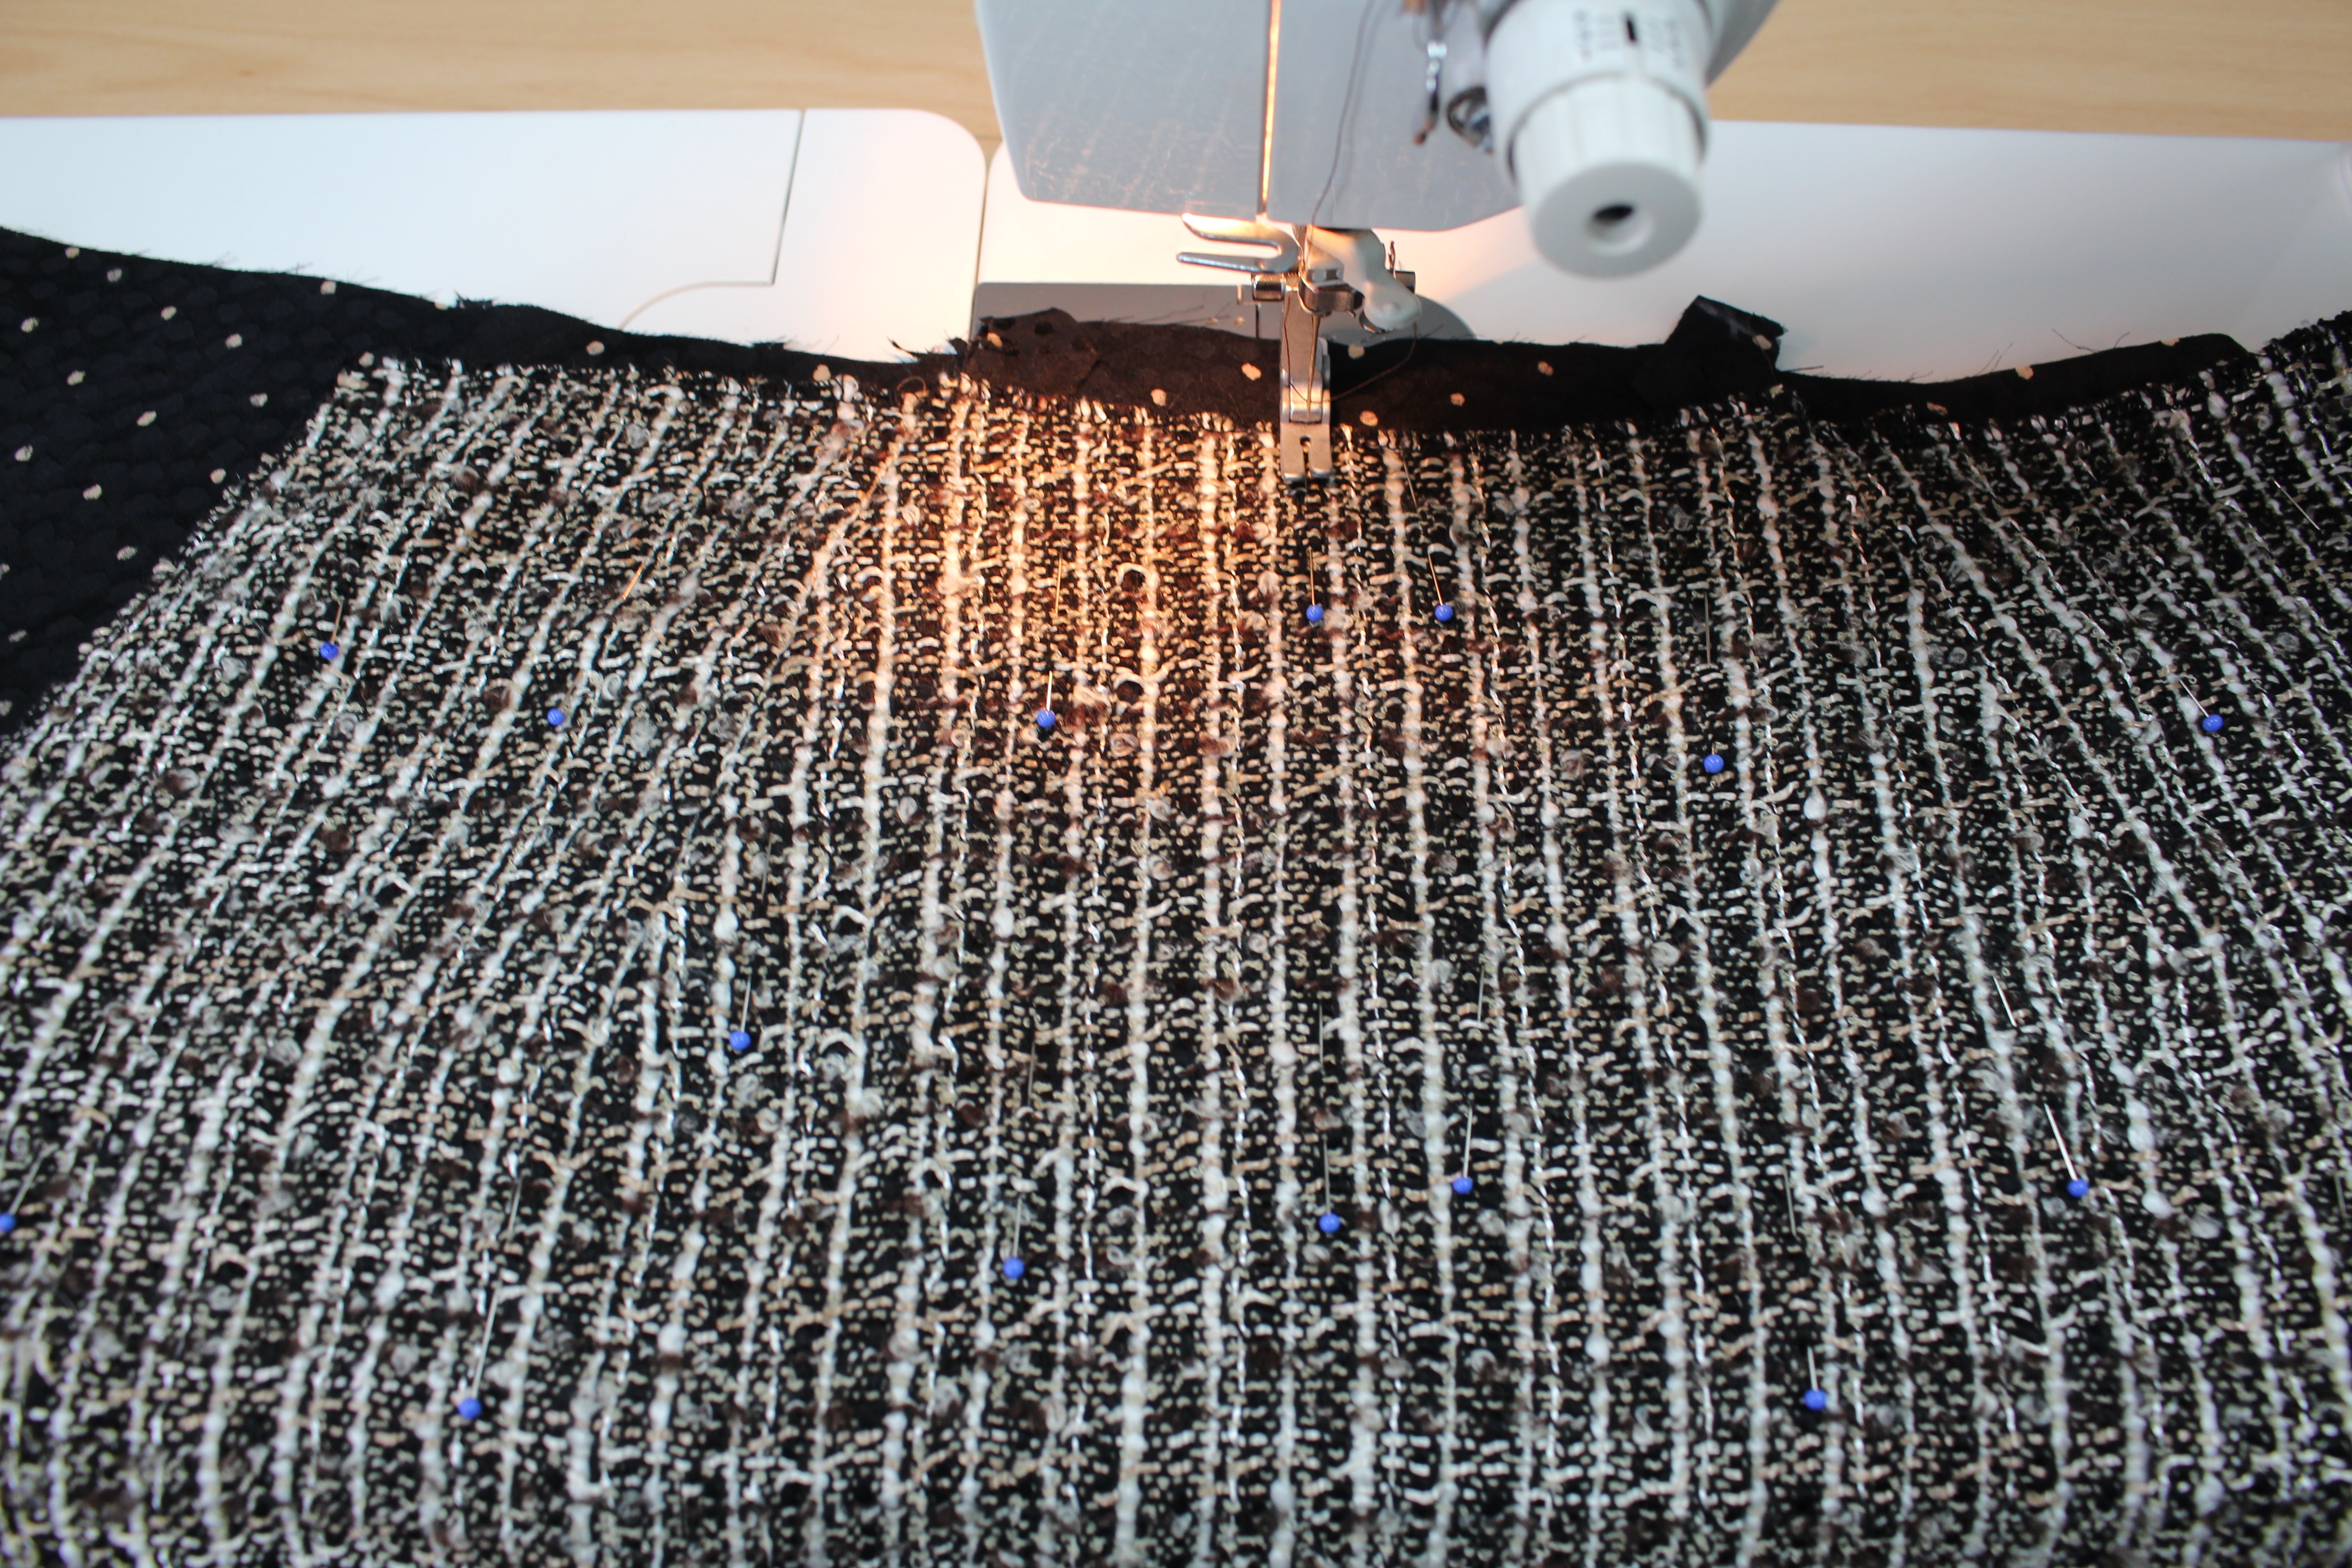
Stop the stitching 1″ to 2″ higher than the top of the fringe placement
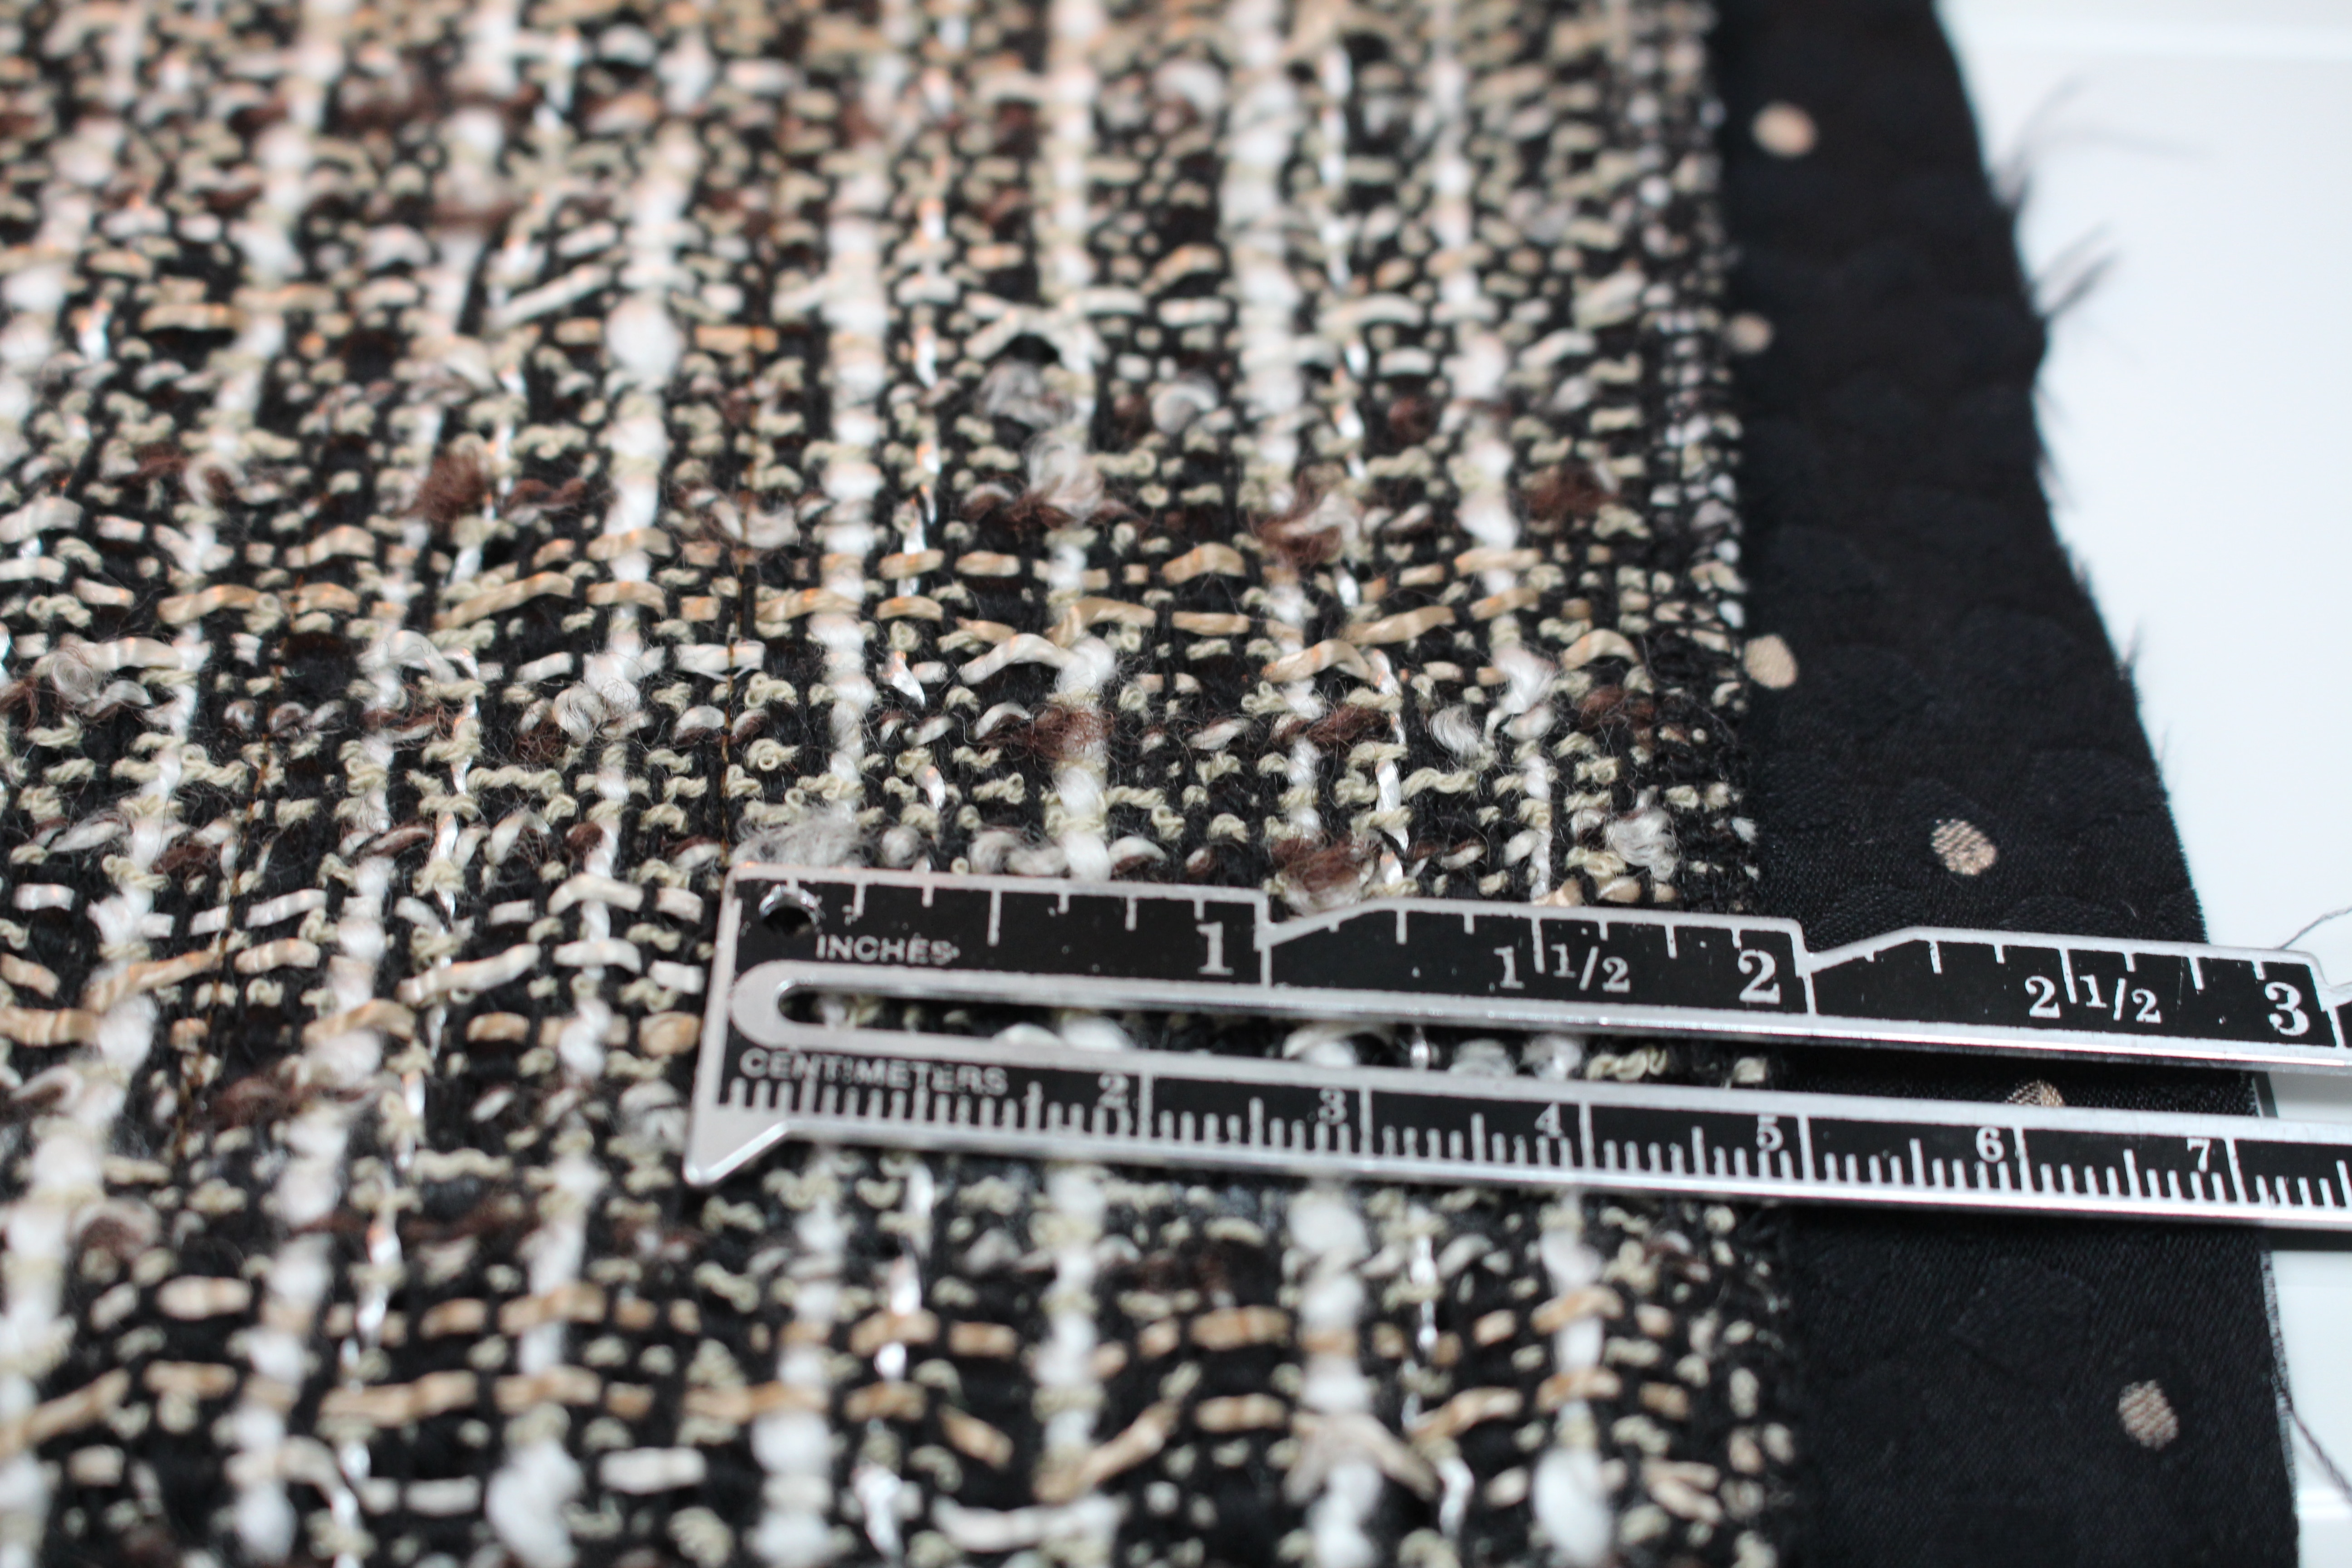
Continue to stitch parallel rows 1/2″ to 1″ apart, depending on the fabric design.
Stitch around the darts; stopping or starting the stitches around the dart, not through the dart.
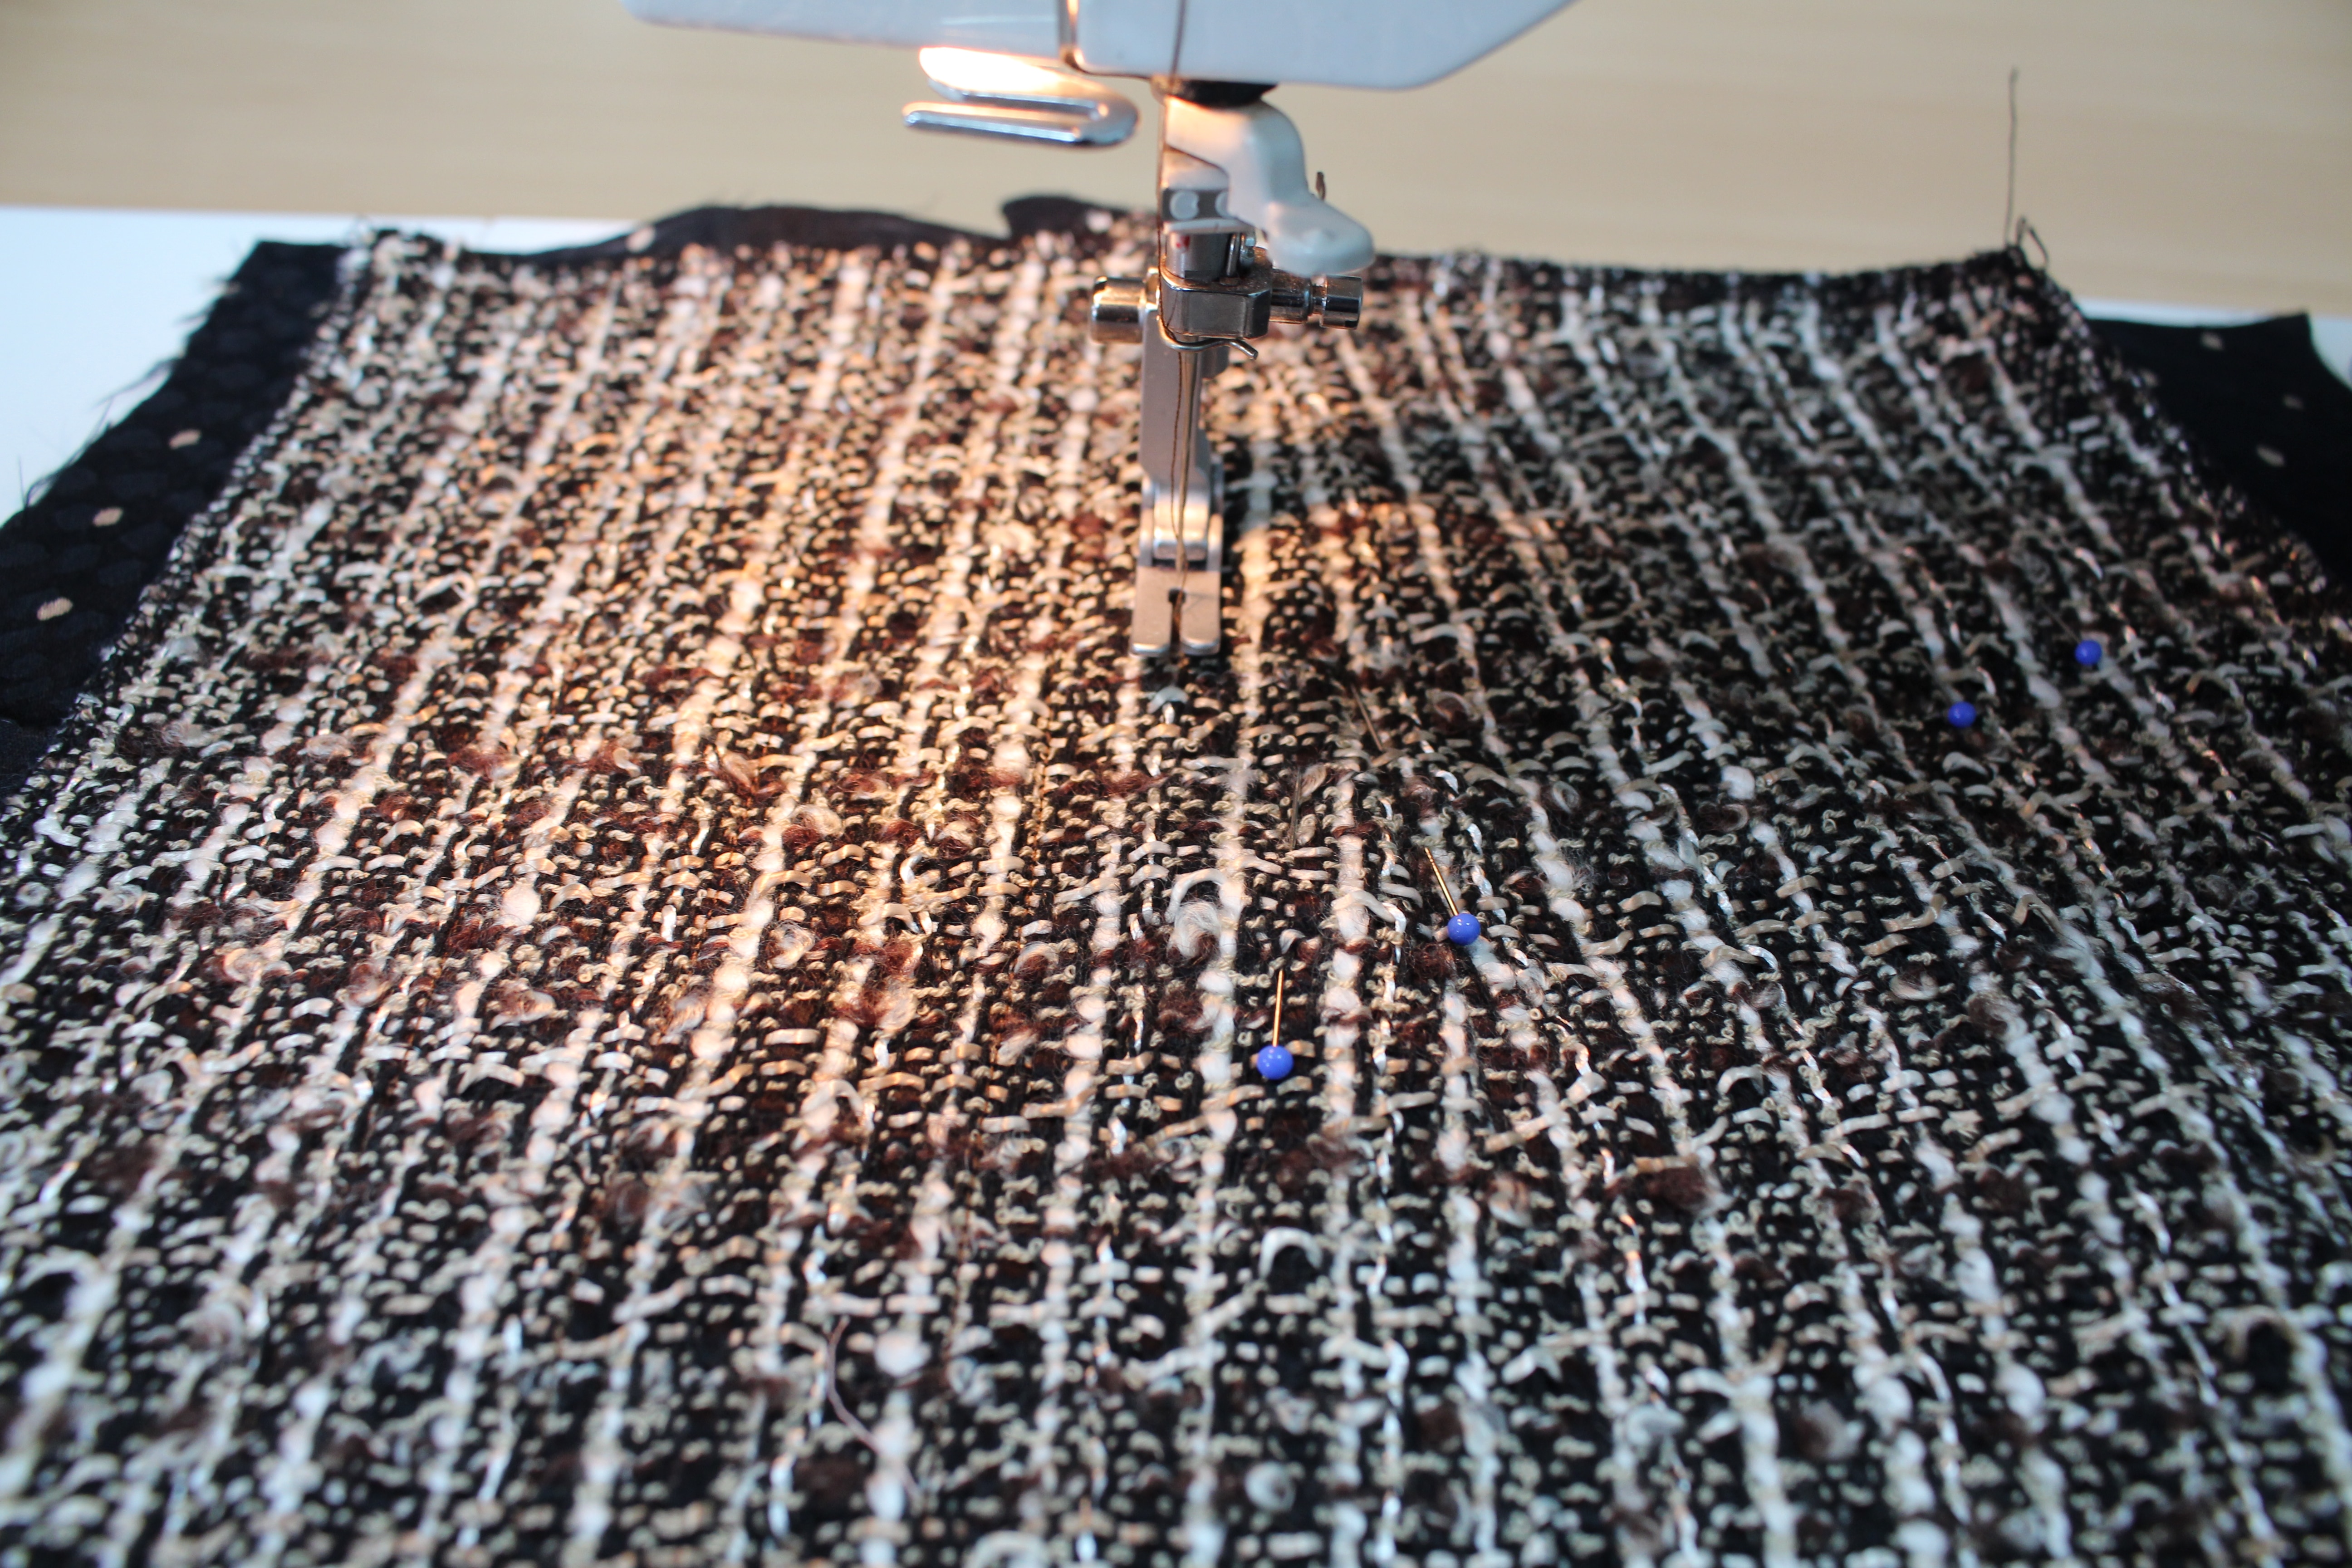
Do not quilt rows within 2″ of the side seam. This leaves room to sew the seams together and press the seam allowances open.
Quilt the front and both side back pieces
So what do you think – are you going to try this touch of couture on your next tweed skirt?
Let me know your thoughts in the comments below and don’t forget to join the Angela Wolf Patterns Private Facebook Group to share photos, ask questions, and share ideas with your fellow sewer’s!
Cheers,

Episode 87 Behind the Scenes LIVE with Angela Wolf ... What on the sewing table? Take a closer look at the maxi skirt and more ...
Embellishing Jeans with Free Motion Embroidery An easy way to restyle or upcycle jeans is to add a touch of embroidery. Free motion embroidery, also referred to as thread painting, is so easy and you don’t even need an embroidery machine for this...
Transform a Turtleneck into a Stylish Boatneck Top Here is another recycle project for the turtlenecks in our closet and its easy - perfect for beginners! For this sewing tutorial I am using a turtleneck that has a design, but any tank top will work. ...
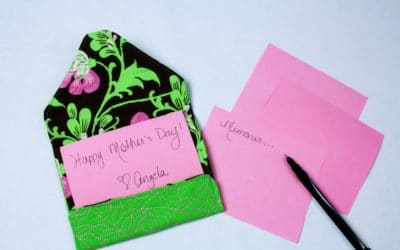
Easy Sewing Project for Mother’s Day or Any Special Day ♥ I was recently going through memory boxes and came across letters from a few people so dear to my heart that have since passed away. This made me think, I hardly write letters anymore! An email,...
Flatlock Stitching on a Serger There are so many stitches we can do with our serger / overlock machines! You might recognize the flatlock stitch as seen on sportswear or a decorative stitch used to connect two pieces of fabric. This stitch is fun and easy to do!...

I have a few turtlenecks that are made of beautiful fabrics, but I can’t stand the high, tight neckline. Time for another DIY recycle project to makeover this sweater! The look of see through fabric, embroidered, and embellished tulle are so trendy right now...


