Join me next week live behind the scenes at the Brother convention previewing all the new products coming out! In the meantime I am working on my jeans, embroidering some knit fabrics, and dyeing the lace fabric I showed on this episode. I will keep you posted …
Don’t forget to update your email preferences for notifications you want to receive, join our private facebook group to show off your outfits, and enjoy the behind the scene photo on Instagram!
Cheers,
Upcoming Events!
Behind the Scenes LIVE at Brother Back to Business Convention Wednesday, August 2nd @ 1:30PM EST
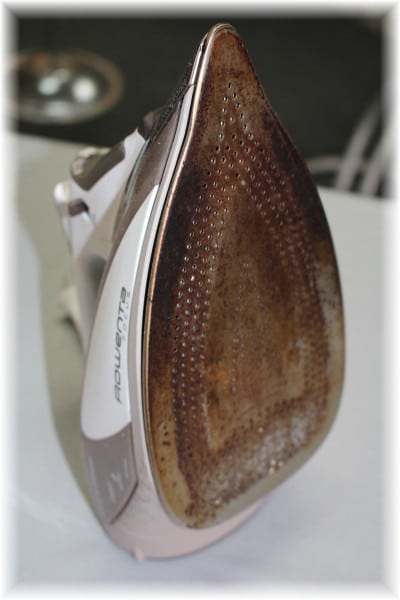
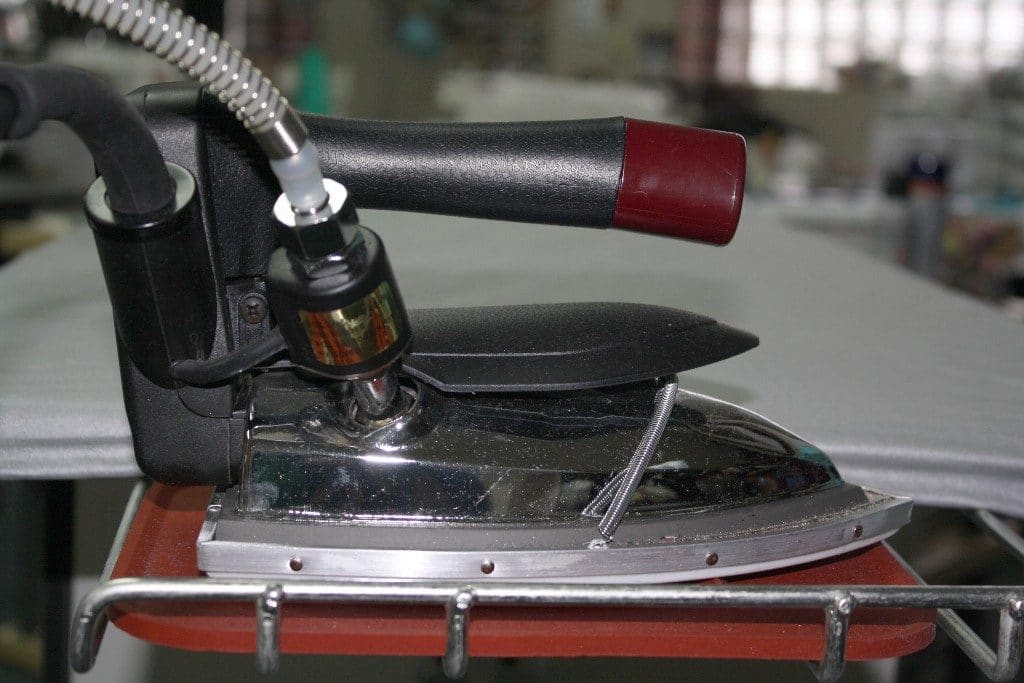
Welcome to Ask Angela where your questions get answered in detail! This weeks question is from Glenda and you can watch the video above (click here if you don’t see the video). You will find a tutorial on how to clean a dirty iron face and even a preview of my favorite steam iron.
Leave me a comment below with your experience cleaning irons and if you have a favorite iron you must share with the rest of us! Feel free to submit a question for an upcoming episode.
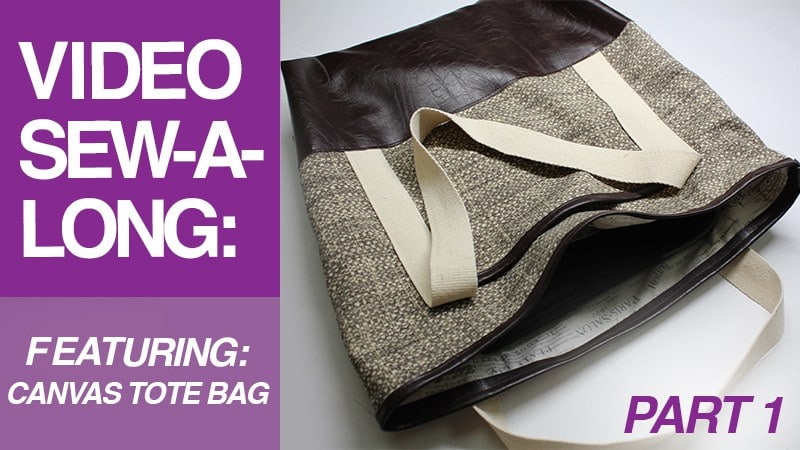
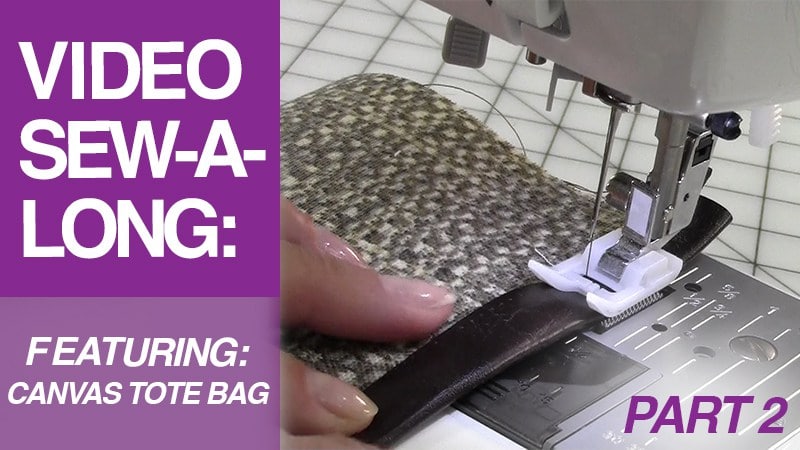
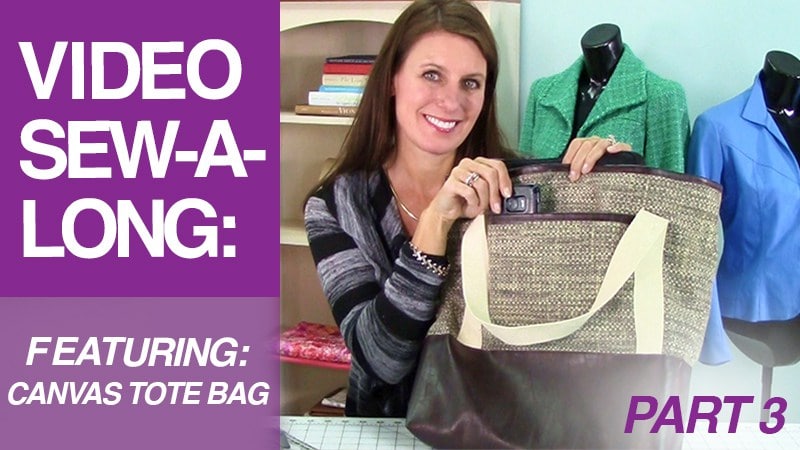
Envelope Pattern There are three download versions for the envelope pattern: Full Layout - Use this for projector printing or printing on a plotter. ENVELOPE PURSE Letter Size Printing - Use this when printing letter size paper (8.5" x 11"). Print pages 1-8, the...
Episode 303 🧵 Behind the Scenes with Angela Wolf The last part of our Delila Slit Sleeve Sewalong! Have you checked out all the Delila tops posted in our private Angela Wolf Patterns Group? So cute!!! Angie Hotchkiss ~ Angela Wolf Facebook GroupDarlene Deck ~...
Episode 302 🧵 Behind the Scenes with Angela Wolf We are onto part 2 in the Delila sew along! We have cut our fabric and ready to sew. Did you have any questions about fitting? If so, be sure to take your photos with questions to the Angela Wolf Patterns Facebook...
Episode 301 🧵 Behind the Scenes with Angela Wolf Getting into summer and looking for stylish tops to wear with jeans, shorts, or skirts and one of my fist patterns always shows up ... The DelilaDelila Pattern has 9 Options I designed this pattern to be able to sew...
Episode 260 🧵 Behind the Scenes with Angela Wolf ~ Sew the Shirley Wrap with a Sweater Knit The Shirley Wrap pattern is so versatile and this time we will use a thicker, sweater knit fabric. You can find the Shirley pattern in PDF and paper patterns in size XXS -...
Have you see the WOW package from CraftOptics? I met Jeff Caplan from CraftOptics a few years ago in Puyallup, his booth was around the corner from Kai Scissors. I was intrigued by the glasses and loved hearing the comments that people would say after trying them...
Episode 250 ~ At your side 🧵 Virtually! Unboxing Craft Optics & Sleeve Hack Behind the Scenes Episode 250 Included an interview with Jeff from CraftOptics and an unboxing of my new WOW glasses. Then I kick off Birthday sewing month with a sleeve hack for another...
Quick & Easy Christmas & Holiday Decor Quick Table Runner Instructions Fabric Requirements: a. Center fabric: Sew together seven of the quilted blocksmade in the 7 7/8 x 14 in hoop. Five of the blocks will havethe applique design and the two ends will be...
Episode 199 ~ At your side 🧵 Virtually! Create a mug run and decorate your coffee mug with vinyl Join Brother Brand Ambassador Angela Wolf and Brother Educator's Kathy Stipe and Barb Mikolajczyk Designing Mug Rugs in My Design Center-Quick and Easy Supplies needed:...
Pant Sloper Fitting Online Course Learn to fit your own pant sloper! Then take that sloper and turn it into a pattern. This class will be taught in a virtual & online setting; offering 5 live lessons with additional videos for specific fitting issues. You will...
VLOG 238 Behind the Scenes ✂️ with Angela Wolf ! Last week we cut out the Lacy top pattern, this week we will serge it together. And I will be drawing 3 lucky winners for the beautiful Shannon Fabric!!! Also, check out the new renovations coming to Angela Wolf's...
Episode 198 ~ At your side 🧵 Virtually! Create a Thread Catcher & Pin Cushion with Jerry GranataSupply List & Instructions for Thread Catcher • Brother Stellaire XP2 or comparable machine to embroider and sew, or both• Feet you will need: - Embroidery foot, J...
NEVER use a dull seam ripper!!!!! I buy my seam rippers in bulk from WAWAK Sewing and you should too 🙂 Then you can throw them away at the first sign of dullness and grab a new one.
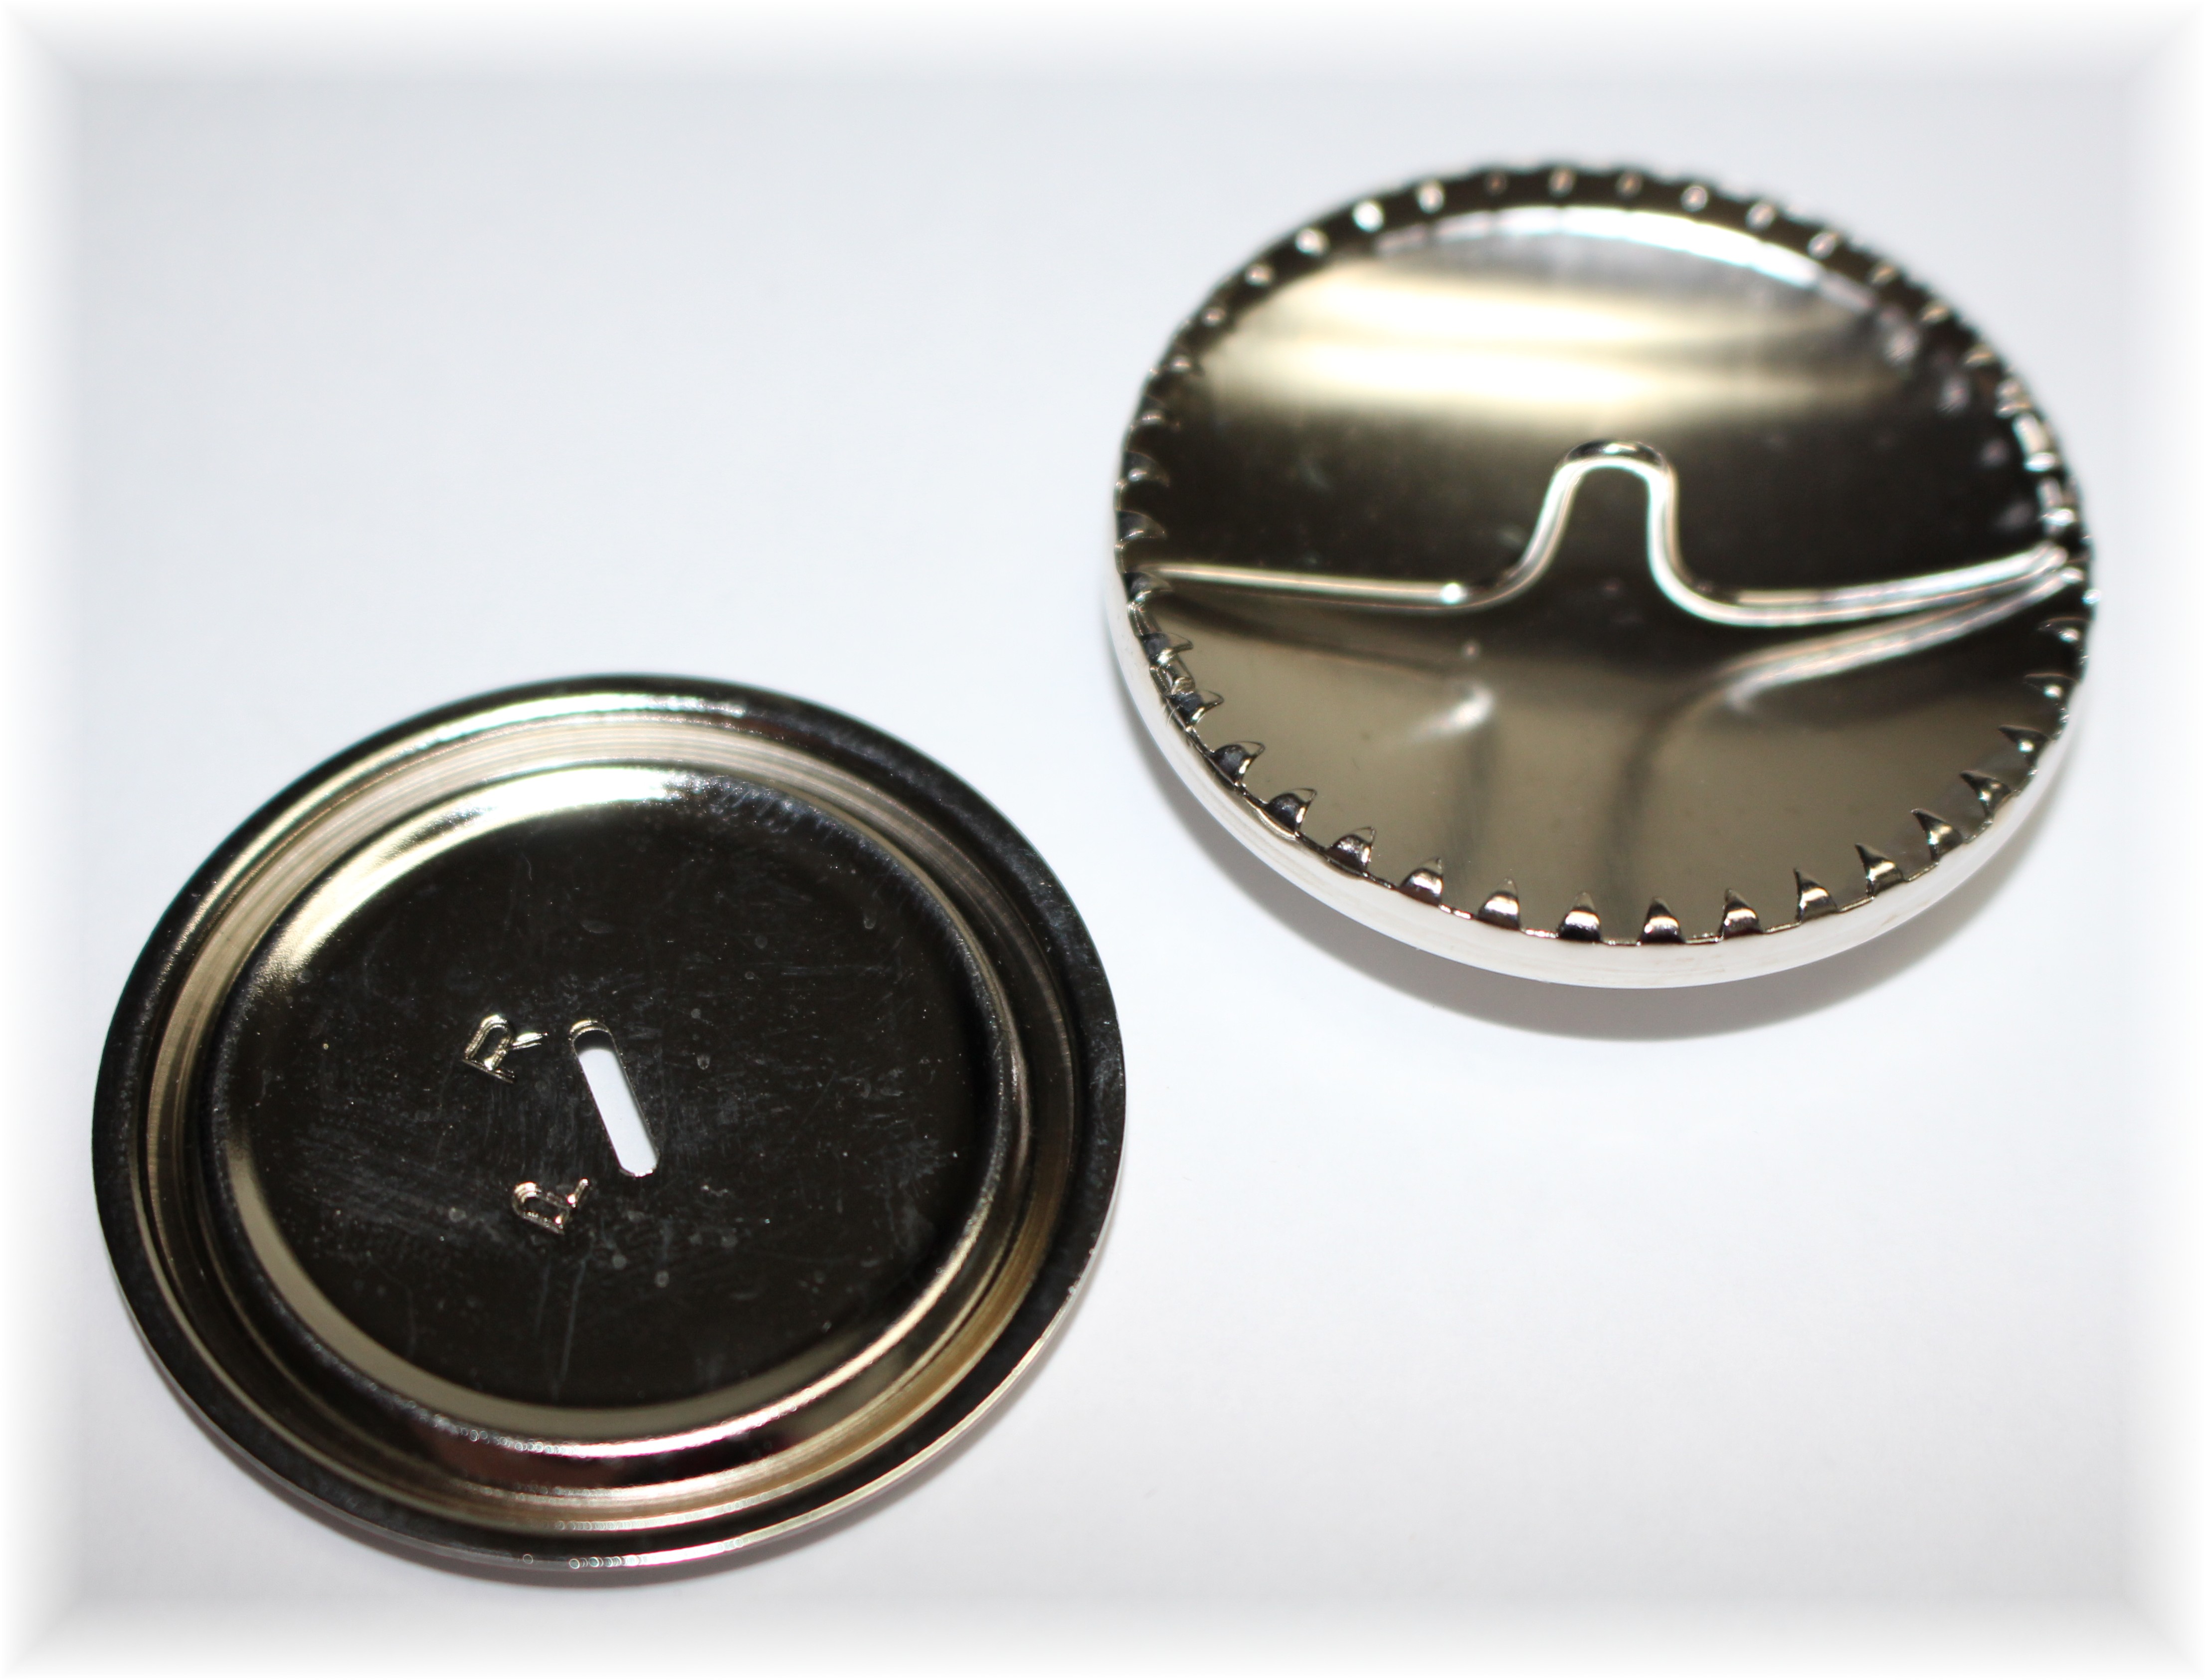
Embellishing is one of my favorite things to do, in fact sometimes I even add touches to ready-to-wear garments. One of the easiest ways to restyle is to change the buttons. Even better, your own custom covered buttons! From simple to couture, this is what I will cover in the next series of blogs.
First, lets start with the basics on how to cover a button. The base of the button looks just like the ones above and they come in many sizes. There at two kinds available, I prefer the ones with what I call “teeth”, like this one from WAWAK.
Each button has 2 parts: a top that you will wrap your fabric around and a base that snaps onto the back, securing the fabric.
Let’s get started!
Cut out a circle from your fashion fabric, just little bit bigger than the button.
Note: the circle above is too large for that button, it should look more like the photo below
2. Wrap the fabric around the curve of the button top, securing edges of fabric in the teeth. If the fabric is plaid or striped, take care in placing the button and check the alignment of the shank to make sure its the same on every button.
3. Continue all the way around until the fabric is tight and secure.
See why I prefer the teeth, so much easier to tighten the fabric!
4. Place the backing on and snap into place with needle nose pliers. Snap all the way around the button to make sure the back is tightly closed.
Trouble Shooting: If you can’t snap the back of the button in place, you might have too much fabric inside. This means the circle of fabric was too large, but you can still trim out the excess fabric to make it work.
That’s it! Super easy and trend with a touch of couture 🙂
I have quite a few more buttons to go, but this jacket has been cut and sitting in my “to do” bin for over a year! Hand-dyed silk charmeuse lining and all, I must finish this before spring!
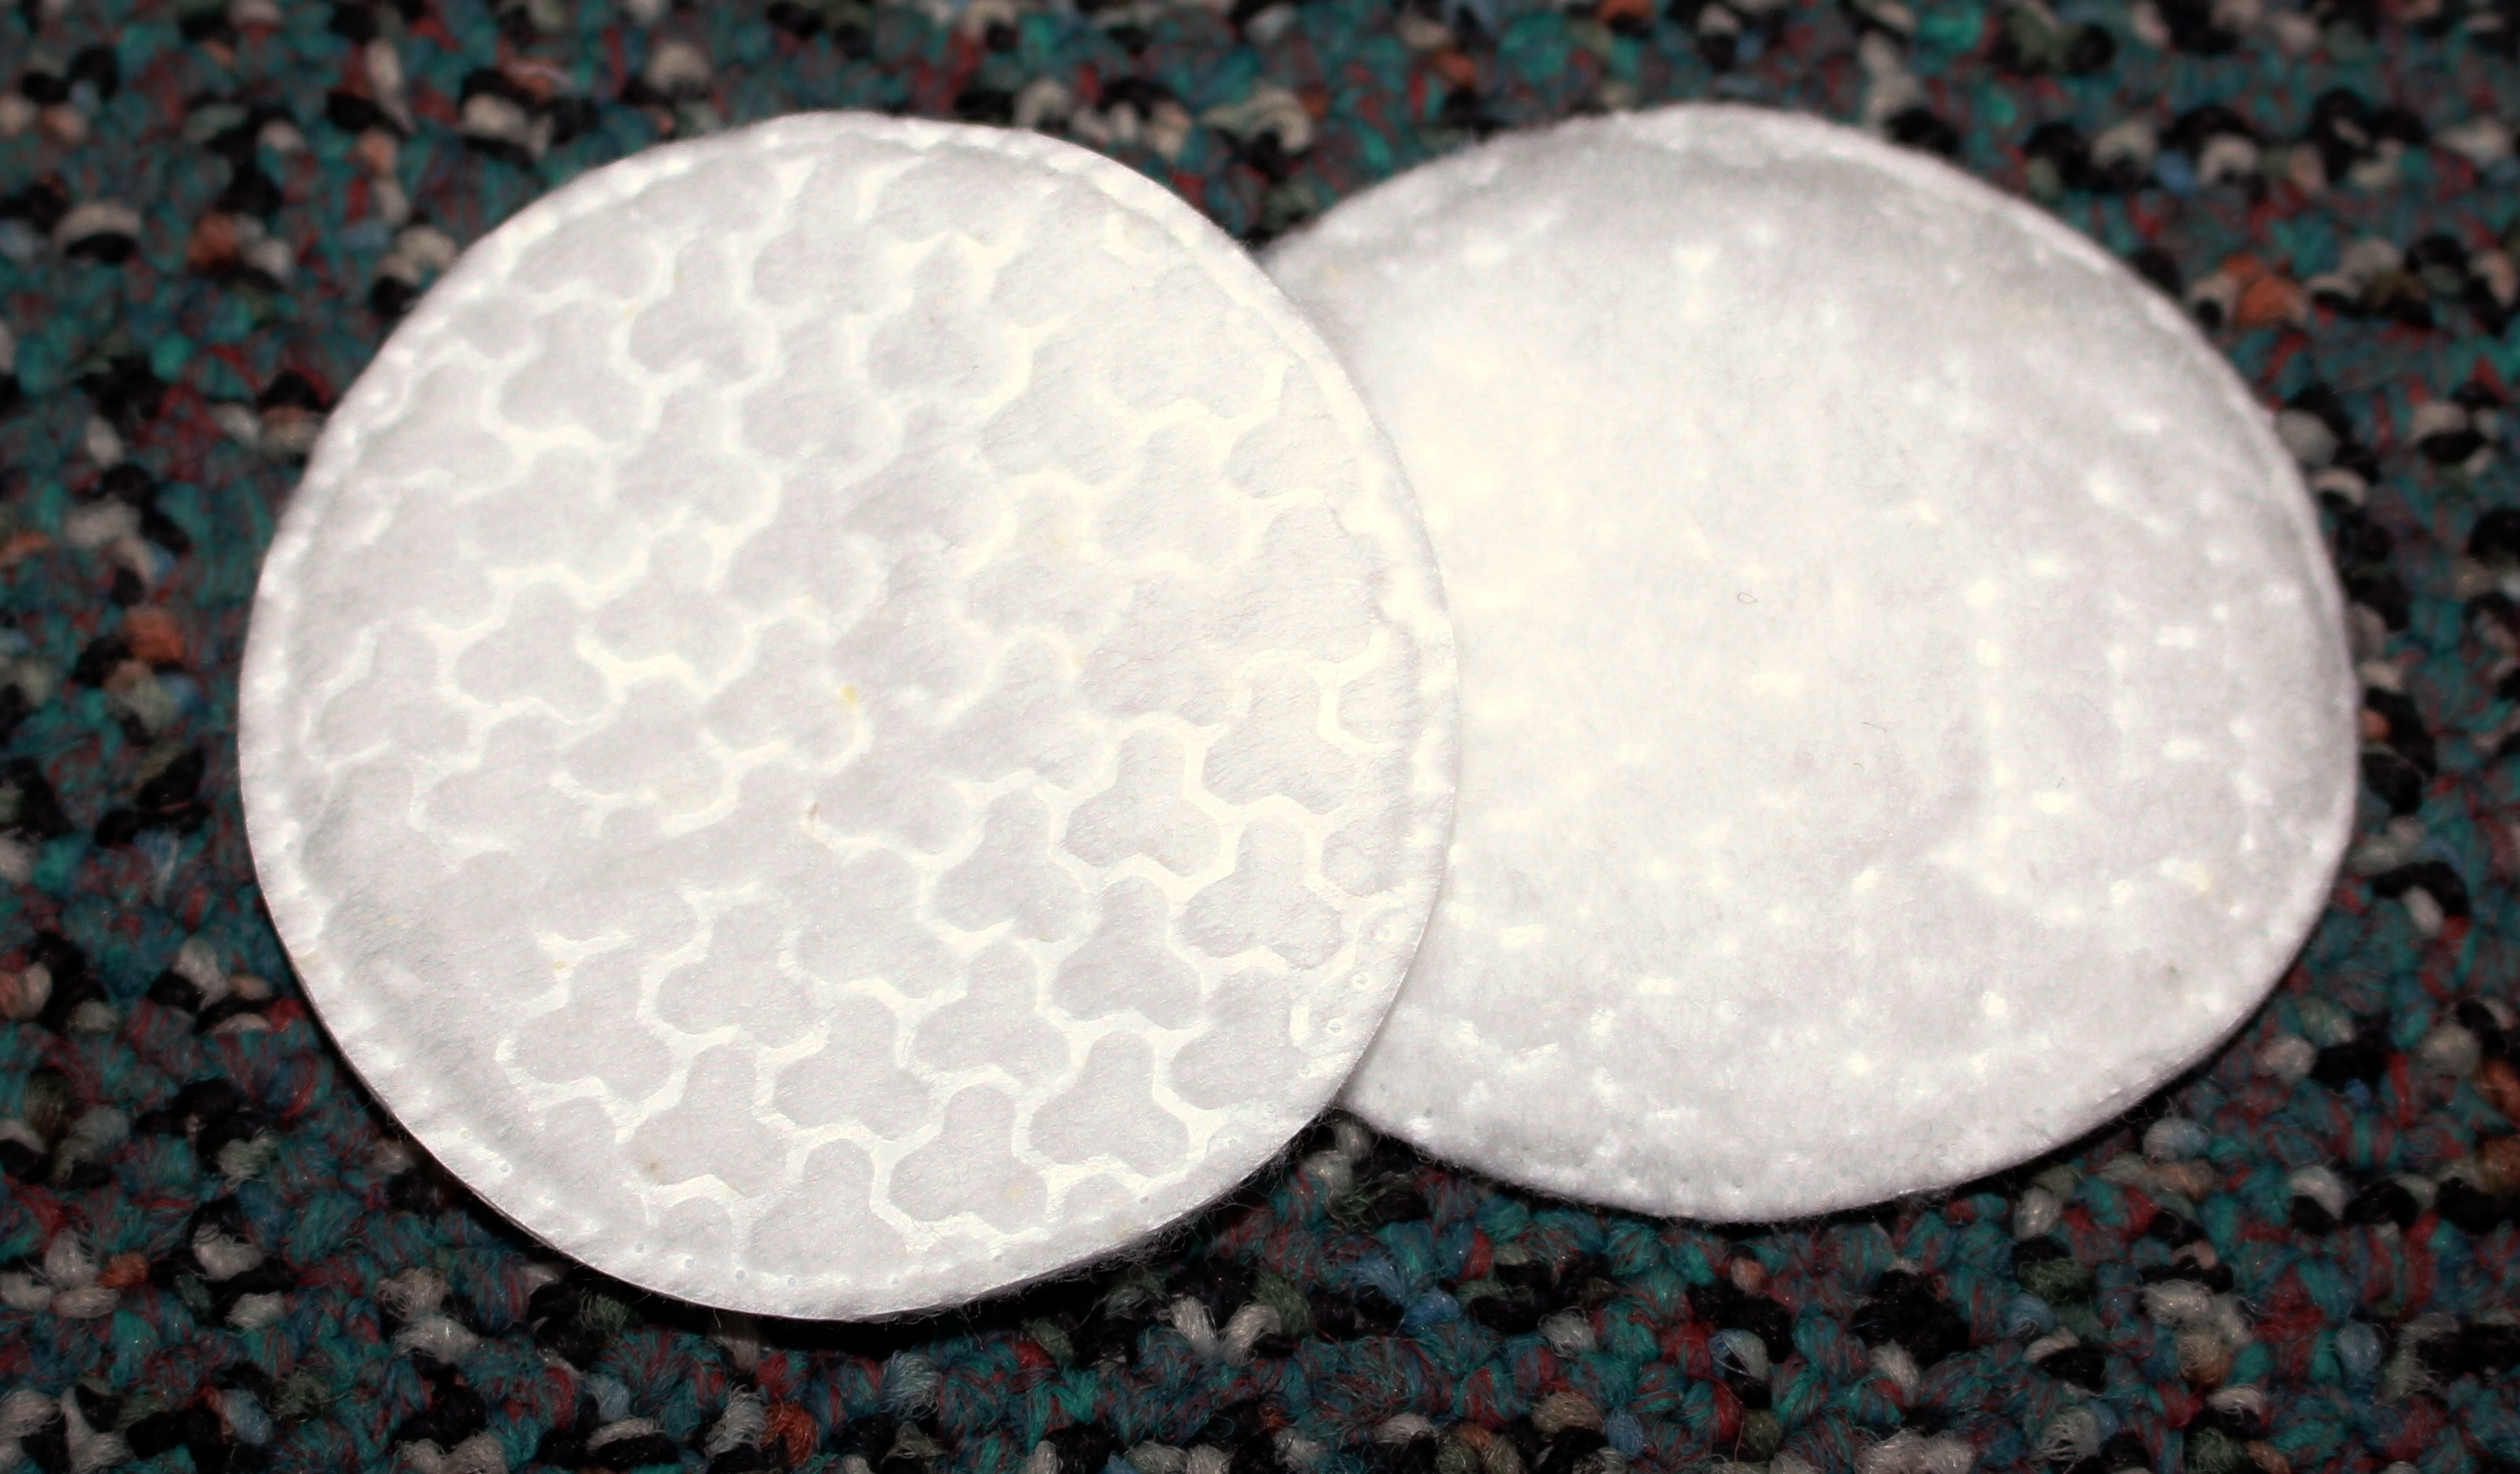
One more thing about covering buttons: A little trick that I do to make my buttons look more professional is to add a touch of cotton. You can use cotton balls, make-up remover cotton, batting, even a thin piece of polar fleece.
Center the cotton on the button, then wrap the fabric over the cotton. Now when you secure the fabric tightly you won’t see any metal through the fabric and it softens the look. Now when I want to add beading to the button I can actually get my needle through the fabric. If you have a hard time keeping the cotton in place, use a tab of super glue, just let the glue dry before covering with fabric.
Buying Covered Buttons:
There are so many covered buttons to choose from it can get a little overwhelming, so I have included links to the ones that I use from WAWAK Sewing:
I just got back from a 6 day Sit & Sew tour visiting all the Allbrands stores which started in Louisiana and ended in Texas. Fabulous trip, but definitely dragging a little today. I will be sharing details of the week as soon as I organize all the photos. In short, I met so many wonderful people, ate some amazing food, got over my fear of bridges, I now have official Mardi Gras beads …
In the meantime, I posted this message to facebook and realized not all of you are on facebook, so I thought I would THANK YOU again.
Saturday was the last day of teaching and I was flying out the next morning. Super tired, but before crashing I decided to scan my emails and came across one from Craftsy with the title “Are you a blogger award finalist?”. I clicked on the link and couldn’t believe it! You nominated my blog to the top 4 Best Sewing Instructor Blog again. You all are AWESOME! This means so much to me, thank you, thank you. I also know it is a little work to nominate a blog at the first stage, you have to fill out a lot of things. Thanks so much for going through the effort, you inspire me to keep at it 🙂
One More Round of Voting
Now, there is a last round of voting that ends Wednesday at midnight. This vote is quick and easy:
Click here to vote: Scroll down the page to Vote Now! Best Craftsy Sewing Instructor’s Blog and you will see my name. Vote and then watch the tally live.
Just being in the top 4 is such an honor and knowing it’s because of your effort to nominate me really makes my day and a huge THANK YOU is all I can say! By the way, while you are scanning the page you might want to check out a few of my friends blogs that also made the top 4 in their category: Leah Day has a great one for quilting and Lisa Shaw in Embroidery.
WARDROBE CHALLENGE
The 2014 Wardrobe Challenge was so much fun! Seeing your outfits on flickr and following your Pinterest boards has been a treat and a quick way to get in the sewing mood, I hope you have enjoyed it as much as I have. There have been a few hiccups on my end, so thanks for your patience. (Note to self: Never plan anything while I am traveling to teach, tape It’s Sew Easy, or shoot online classes – just not enough time and brain space ) In fact, I still need to post the list of winners, but I wanted to give you the last challenge.
LAST CHALLENGE
I told you the last challenge would be an easy one. Take a picture of the clothes in your closet that you have sewn this past year and post it on Flickr before February 15th (the same way you posted the other photos – click here if you need help uploading to flickr). Even if you only have 1 garment, your photo qualifies you for this last challenge. Winners will be all random drawings from the entrants, so even if you haven’t participated yet or you feel intimidated by the rock stars who have really used the challenge to fill their closet, let us see what you have made. Again this is just 1 photo, just like mine. Good luck and thanks again to all that have participated.
I don’t know if you read my last post about the cooking adventure, but many of you gave the best tips for cleaning the pan! the baking soda worked like a charm and I wrote all the cleaning tips down so I am ready for the next burn. Well, I am off to edit pictures and explain to Winn how I got my mardi gras beads 🙂