Episode 199 ~ At your side 🧵 Virtually! Create a mug run and decorate your coffee mug with vinyl

Join Brother Brand Ambassador Angela Wolf and Brother Educator’s Kathy Stipe and Barb Mikolajczyk 

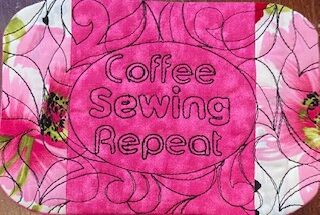
Designing Mug Rugs in My Design Center-Quick and Easy

Supplies needed:

      • Threads of your choice
      • 5×7” Frame (or whatever you want)
      • Tear away stabilizer
      • Top fabric (size needed to have enough to cut a little excess around the outer edges)
      • Batting (again to fit)
      • 2 Back pieces (enough to fold each piece in half – wrong sides together- and have 1” overlap in the middle of the back at the folds).

To create your design Using My Design Center:

      1. Pick shape wanted (or draw it or Scan it in)
      2. Size to slightly bigger (.5) then you want the finished Mug Rug (assign single run stitch to it for placement)
      3. Save to memory in MCD
      4. All clear
      5. If piecing, draw lines for “seams” * Make sure no lines intersect!
      6. Save to memory as the 2nd step
      7. All clear
      8. Bring in Scanned saying (or add it in embroidery)
      9. Add shape around wording or design if desired
      10. Save to memory
      11. Add quilting where desired (using established shapes)
      12. Save to memory as a separate step
      13. Make another identical shape (as the original) only assign triple stitch to it and make it slightly smaller than the placement stitch
      14. Save in memory as a separate step

Bring each step over to Embroidery and save in Memory

Build your Final Design for the Mug Rug in the Embroidery side.

Bring in:

  1. Placement Stitch
  2. ADD
  3. Piecing seams (if there are any) From Pocket
  4. ADD
  5. Wording and or Quilting from the pocket (if there is either)
  6. Final stitch is the outside shape in triple stitch and slightly smaller than the placement stitch.

You have created your complete design!!!

Instructions to stitch out: 

  1. Hoop Tearaway stabilizer
  2. Stitch the placement stitch
  3. Lay the batting down (cover the placement line)
  4. Lay center piece right side up over the batting
  5. If Piecing: Lay the different sections of piecing right side down. Make sure the edge to be the seam will be under the stitch and that you have enough fabric to fold over after the seam is stitched to cover the area needed.
  6. Do all the piecing one piece at a time
  7. Stitch the saying or embroidery and the quilting
  8. Back: Fold both pieces in half with wrong sides together and finger press or press

Lay the 2 back pieces on top of the hoop with the folds overlapping in the middle about an inch

  1. Stitch the final stitch (triple stitch of the total outside shape.
  2. Trim around all edges to ¼” and pay special attention to trimming the corners.
  3. Turn right side out through the folds in the back.
  4. Poke edges and corners
  5. Press

Catch the Next Show …

Be sure to catch At Your Side Virtually! every Tuesday and Thursday at NOON Eastern / 9:00am Pacific and Behind the Scenes live on Facebook and YouTube every Wednesday at 1:30pm / 10:30am Pacific.  I will post the replays here on the blog too 🙂 

cheers,


Learn to Sew Knits Online Class: Angela Wolf Academy

Quilted Grocery Bag Sewalong

Quilted Grocery Bag Sewalong  I am so excited to share this new grocery bag sewalong with you!  This is an easy project with opportunities to make is more advanced with embroidery and embellishing. Sewalong Schedule #372 - 9/7 - Sewalong Part 1 Supplies and Pattern...

309: Boucle Skirt + Quilted Lining = Touch of Couture Part 1

Tweed Skirt Sewalong Part 1 In part 1 of this sewalong I will share options for choosing the best fabrics and pattern.  Join me in choosing the best lining to coordiante with my fabric!Skirt Patterns to choose from: ~ The Kate Skirt ~ The Fringe Skirt Pattern ~...

Ep. 305: Learn What is Planned for the Sew Fun Cruise in February 2024

Episode 305 🧵 Behind the Scenes with Angela Wolf  I know you have heard me say many time ... I am never going on a cruise!  Winn and I are on the water all the time, why would I want to go on a cruise?!?  Kelli Presley and Phyllis Batz will be joining me live to talk...

Ep. 304 Meet Jeff – Founder of CraftOptics

Episode 305 🧵 Behind the Scenes with Angela Wolf Featuring CraftOptics I am not sure about your, but if I am working in a low lit area or sewing beads onto a garment, I tend to lean forward and squint, this ending up with a terrible back ache!  CraftOptics has changed...

Ep. 303 Delila Knit Top Part 3

Episode 303 🧵 Behind the Scenes with Angela Wolf The last part of our Delila Slit Sleeve Sewalong!  Have you checked out all the Delila tops posted in our private Angela Wolf Patterns Group?   So cute!!! Angie Hotchkiss ~  Angela Wolf Facebook GroupDarlene Deck ~...

Ep. 302 Delila Knit Top Sewalong Part 2

Episode 302 🧵 Behind the Scenes with Angela Wolf We are onto part 2 in the Delila sew along!  We have cut our fabric and ready to sew.  Did you have any questions about fitting?  If so, be sure to take your photos with questions to the Angela Wolf Patterns Facebook...

Ep. 301 Delila Knit Top Sewalong Part 1

Episode 301 🧵 Behind the Scenes with Angela Wolf Getting into summer and looking for stylish tops to wear with jeans, shorts, or skirts and one of my fist patterns always shows up ... The DelilaDelila Pattern has 9 Options  I designed this pattern to be able to sew...

Ep. 260 Sewing the Shirley Wrap Top with a Sweater Knit

Episode 260 🧵 Behind the Scenes with Angela Wolf ~ Sew the Shirley Wrap with a Sweater Knit The Shirley Wrap pattern is so versatile and this time we will use a thicker, sweater knit fabric.    You can find the Shirley pattern in PDF and paper patterns in size XXS -...

VLOG 259 Behind the Scenes ✂️ Pressing with a Tailors Clapper

Episode 259 ~ At your side 🧵 Virtually!  Organizing and Sewing Clear Vinyl Join Angela Wolf with the next steps in sewing the Shirley Wrap with a sweater knit. Pressing hems with a tailors clapper, prepping neckline, and marking gathering.Catch the Next Show ... Be...

Sewing with CraftOptics is a Great Solution for the Eyes!

Have you see the WOW package from CraftOptics? I met Jeff Caplan from CraftOptics a few years ago in Puyallup, his booth was around the corner from Kai Scissors.   I was intrigued by the glasses and loved hearing the comments that people would say after trying them...

Pin It on Pinterest

Share This

Share this post with your friends!