Learn to fit your own pant sloper! Then take that sloper and turn it into a pattern.
This class will be taught in a virtual & online setting; offering 5 live lessons with additional videos for specific fitting issues. You will have an opportunity to watch the class live and/or the replay and the online class will remain open as long as Angela Wolf Academy is open. At the end of class there will be an opportunity for private zoom fitting sessions for an additional charge.
ANGELA WOLF PDF SLOPER PATTERN INCLUDED IN SIZE 0 – 36W
Lesson 1: Fitting Instructions
Learn how to take your own accurate measurements
Compare your measurements to the Angela Wolf Pants Sloper Pattern
Raising the waistline
Changing the leg shape
Lesson 2: Flat Pattern Alterations
Full tummy
Full Hip
High Hip
Front Crotch Curve
Back Crotch Curve
Full thigh
Hyperextended Calf
Lesson 3: Check the Fit
Read the wrinkles
Crotch curve chaos
Lower the Crotch curve vs. taking in the inseam
Lesson 4: Waistband
Design your own curved waistband
Design a straight waistband on the bias
Design an elastic waistband
Lesson 5: Muslin to Paper Pattern
Transfer your muslin to paper
Darts or Yoke
Pockets
Front Fly
Live Sessions: You do not need to watch the class live
Monday, September 20th at 4:00pm Eastern / 1:00pm Pacific
Tuesday, September 21st at 3:30pm Eastern / 12:30pm Pacific
Wednesday, September 22nd at 4:30pm Eastern / 1:30pm Pacific
Thursday, September 23rd at 3:00pm Eastern / 12:00pm Pacific
Friday, September 24th at Noon Eastern / 9:00am Pacific
Enter to Win a Spot in the Pant Sloper Fitting Course
Click Here to Enter (I included the form below too) to win a spot in the Pant Sloper Fitting Course AND leave a comment below and let me know your biggest pant fitting issues. You can also leave a comment on Facebook and Instagram for extra chances to win. I will draw 1 random winner Monday, September 20th at NOON Eastern. Good luck!
cheers,
Discount on Supplies Needed for the Pant Sloper Class
Get 10% OFF muslin fabric, tailors clapper, and sewing supplies at www.AngelaWolfPatterns.com with coupon code AWPATTERNS
Envelope Pattern There are three download versions for the envelope pattern: Full Layout - Use this for projector printing or printing on a plotter. ENVELOPE PURSE Letter Size Printing - Use this when printing letter size paper (8.5" x 11"). Print pages 1-8, the...
Quilted Grocery Bag Sewalong I am so excited to share this new grocery bag sewalong with you! This is an easy project with opportunities to make is more advanced with embroidery and embellishing. Sewalong Schedule #372 - 9/7 - Sewalong Part 1 Supplies and Pattern...
Tweed Skirt Sewalong Part 1 In part 1 of this sewalong I will share options for choosing the best fabrics and pattern. Join me in choosing the best lining to coordiante with my fabric!Skirt Patterns to choose from: ~ The Kate Skirt ~ The Fringe Skirt Pattern ~...
Episode 305 🧵 Behind the Scenes with Angela Wolf I know you have heard me say many time ... I am never going on a cruise! Winn and I are on the water all the time, why would I want to go on a cruise?!? Kelli Presley and Phyllis Batz will be joining me live to talk...
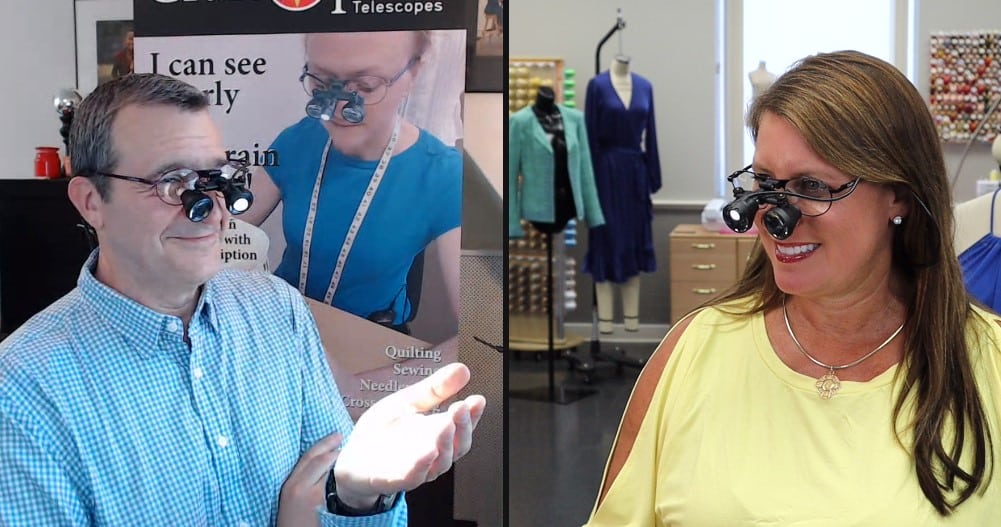
Episode 305 🧵 Behind the Scenes with Angela Wolf Featuring CraftOptics I am not sure about your, but if I am working in a low lit area or sewing beads onto a garment, I tend to lean forward and squint, this ending up with a terrible back ache! CraftOptics has changed...
Episode 303 🧵 Behind the Scenes with Angela Wolf The last part of our Delila Slit Sleeve Sewalong! Have you checked out all the Delila tops posted in our private Angela Wolf Patterns Group? So cute!!! Angie Hotchkiss ~ Angela Wolf Facebook GroupDarlene Deck ~...
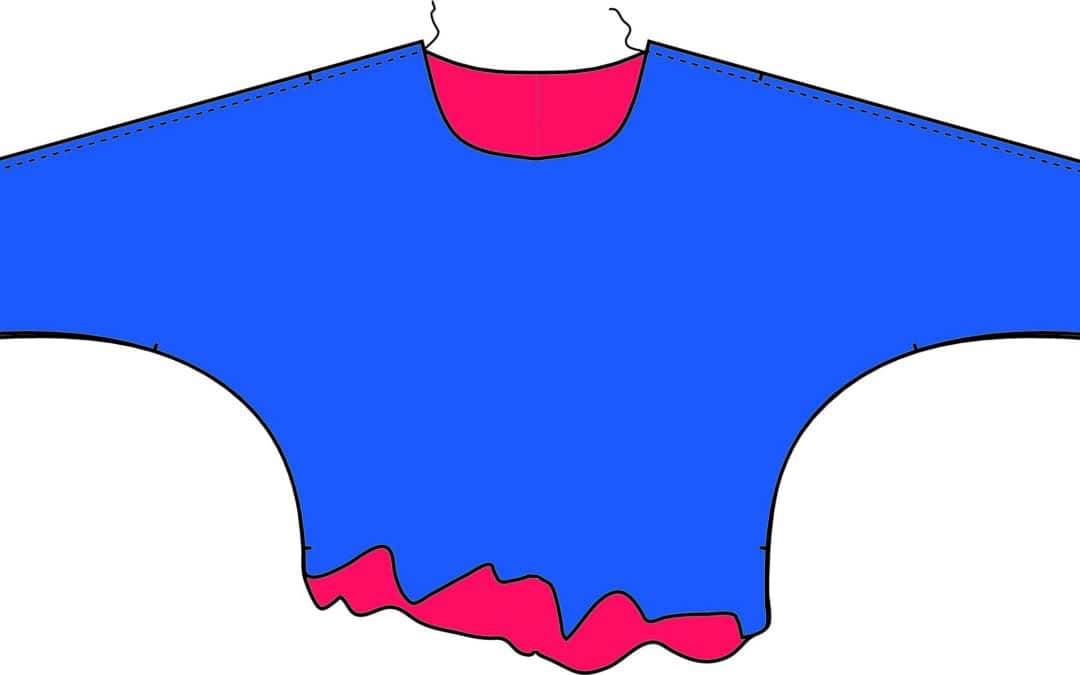
Episode 302 🧵 Behind the Scenes with Angela Wolf We are onto part 2 in the Delila sew along! We have cut our fabric and ready to sew. Did you have any questions about fitting? If so, be sure to take your photos with questions to the Angela Wolf Patterns Facebook...
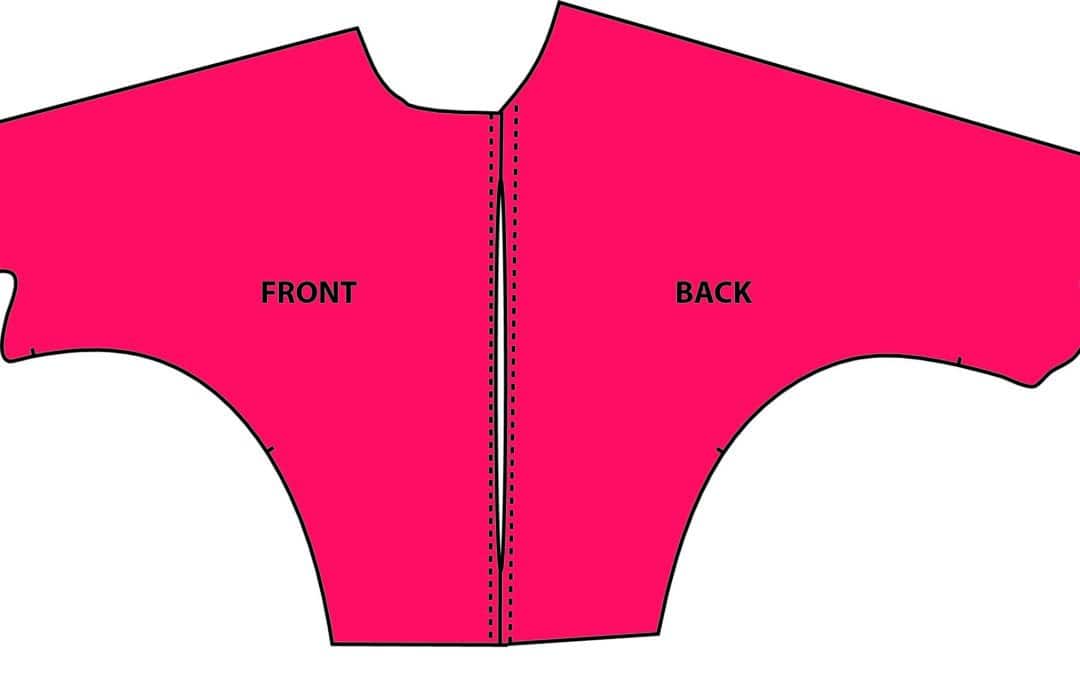
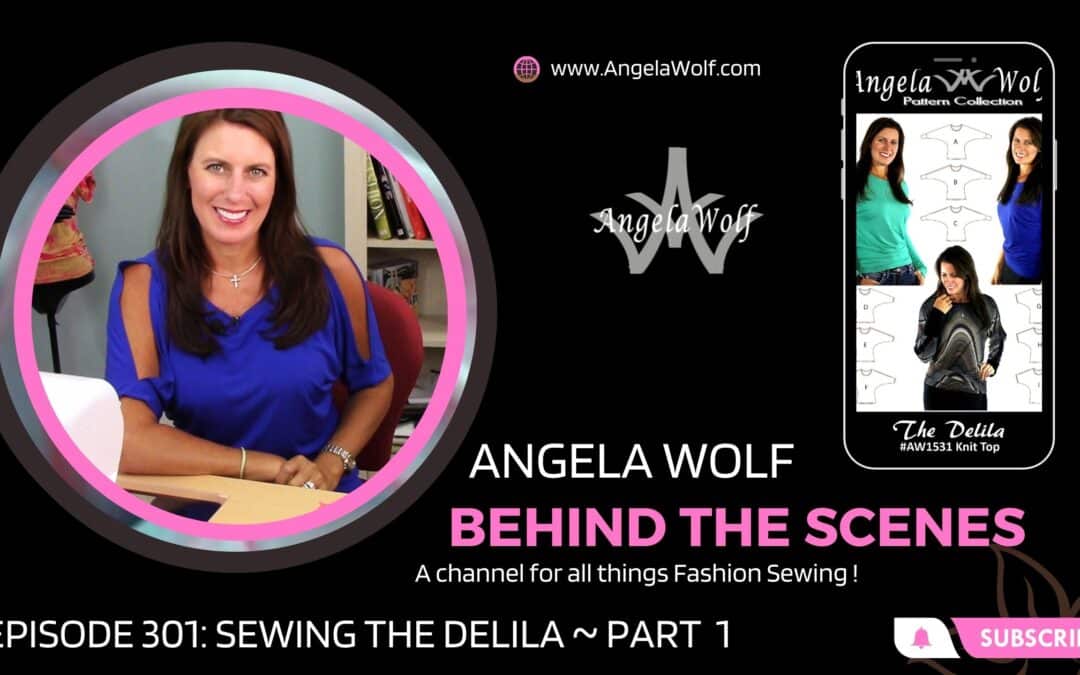
Episode 301 🧵 Behind the Scenes with Angela Wolf Getting into summer and looking for stylish tops to wear with jeans, shorts, or skirts and one of my fist patterns always shows up ... The DelilaDelila Pattern has 9 Options I designed this pattern to be able to sew...
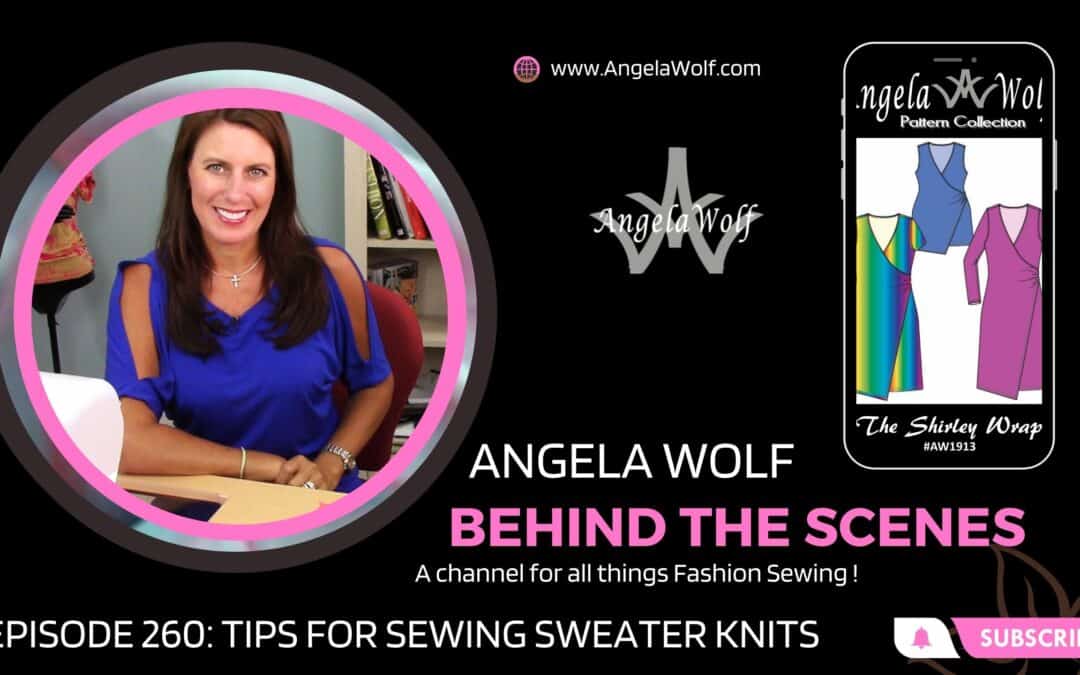
Episode 260 🧵 Behind the Scenes with Angela Wolf ~ Sew the Shirley Wrap with a Sweater Knit The Shirley Wrap pattern is so versatile and this time we will use a thicker, sweater knit fabric. You can find the Shirley pattern in PDF and paper patterns in size XXS -...
Episode 259 ~ At your side 🧵 Virtually! Organizing and Sewing Clear Vinyl Join Angela Wolf with the next steps in sewing the Shirley Wrap with a sweater knit. Pressing hems with a tailors clapper, prepping neckline, and marking gathering.Catch the Next Show ... Be...
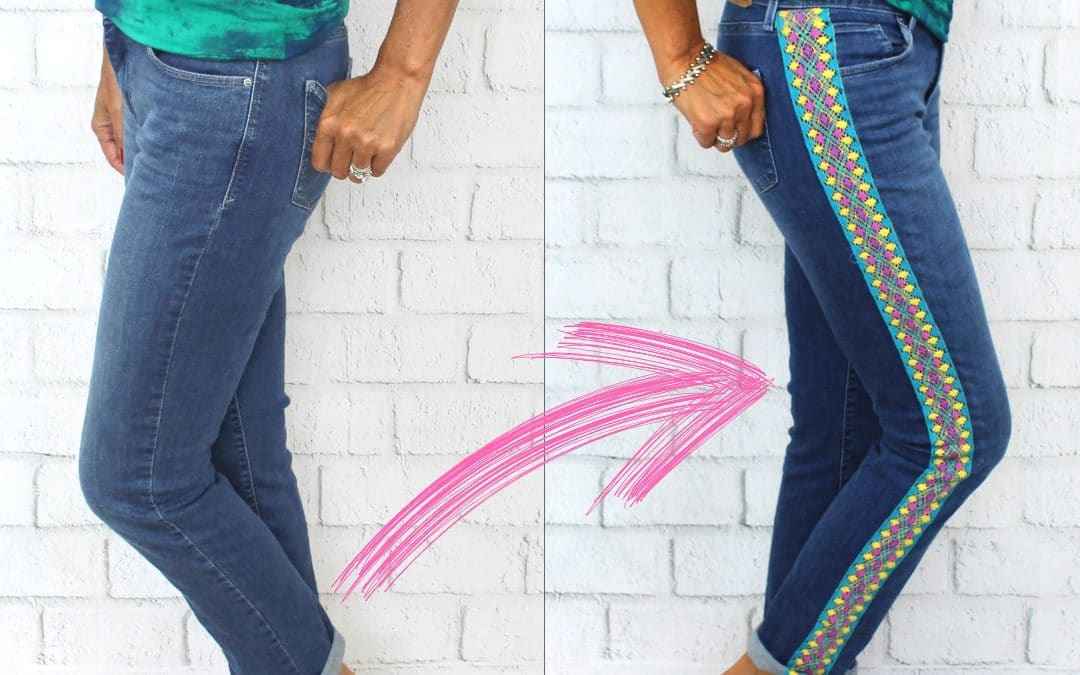
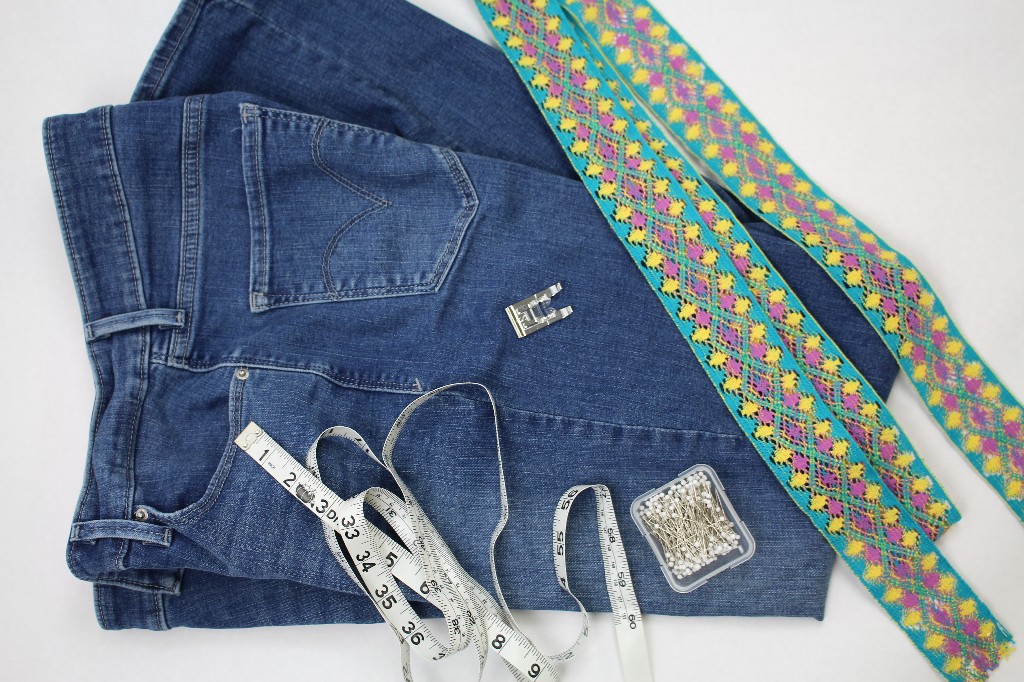
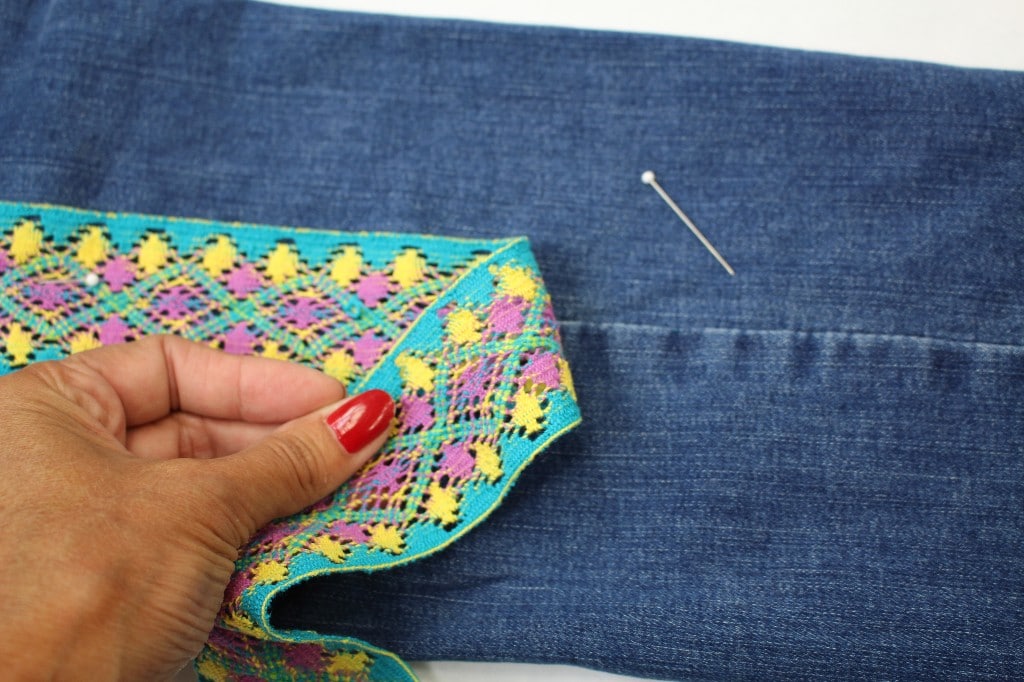
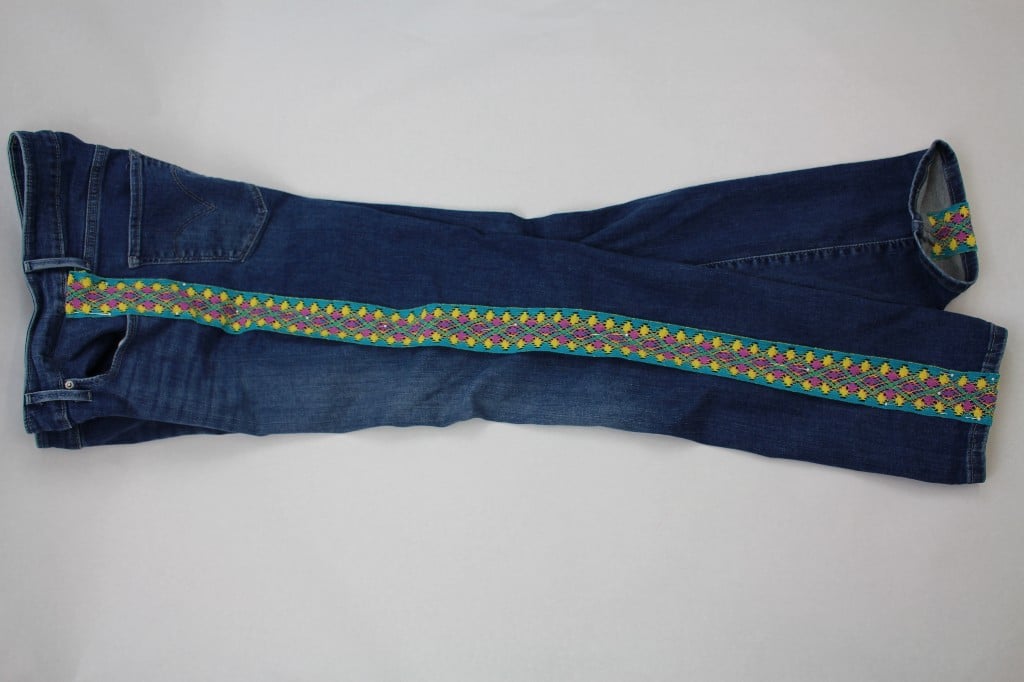
You might have noticed some of the fashions of the late 60’s and 70’s making a comeback on the store shelves, from floral fabrics to embellished jeans. How about adding crocheted ribbon trim along the outside leg! This is so easy!!!
Supplies:
Jeans
Measuring tape
Pins
Ribbon or trim (check that the trim is washable)
PREPPING
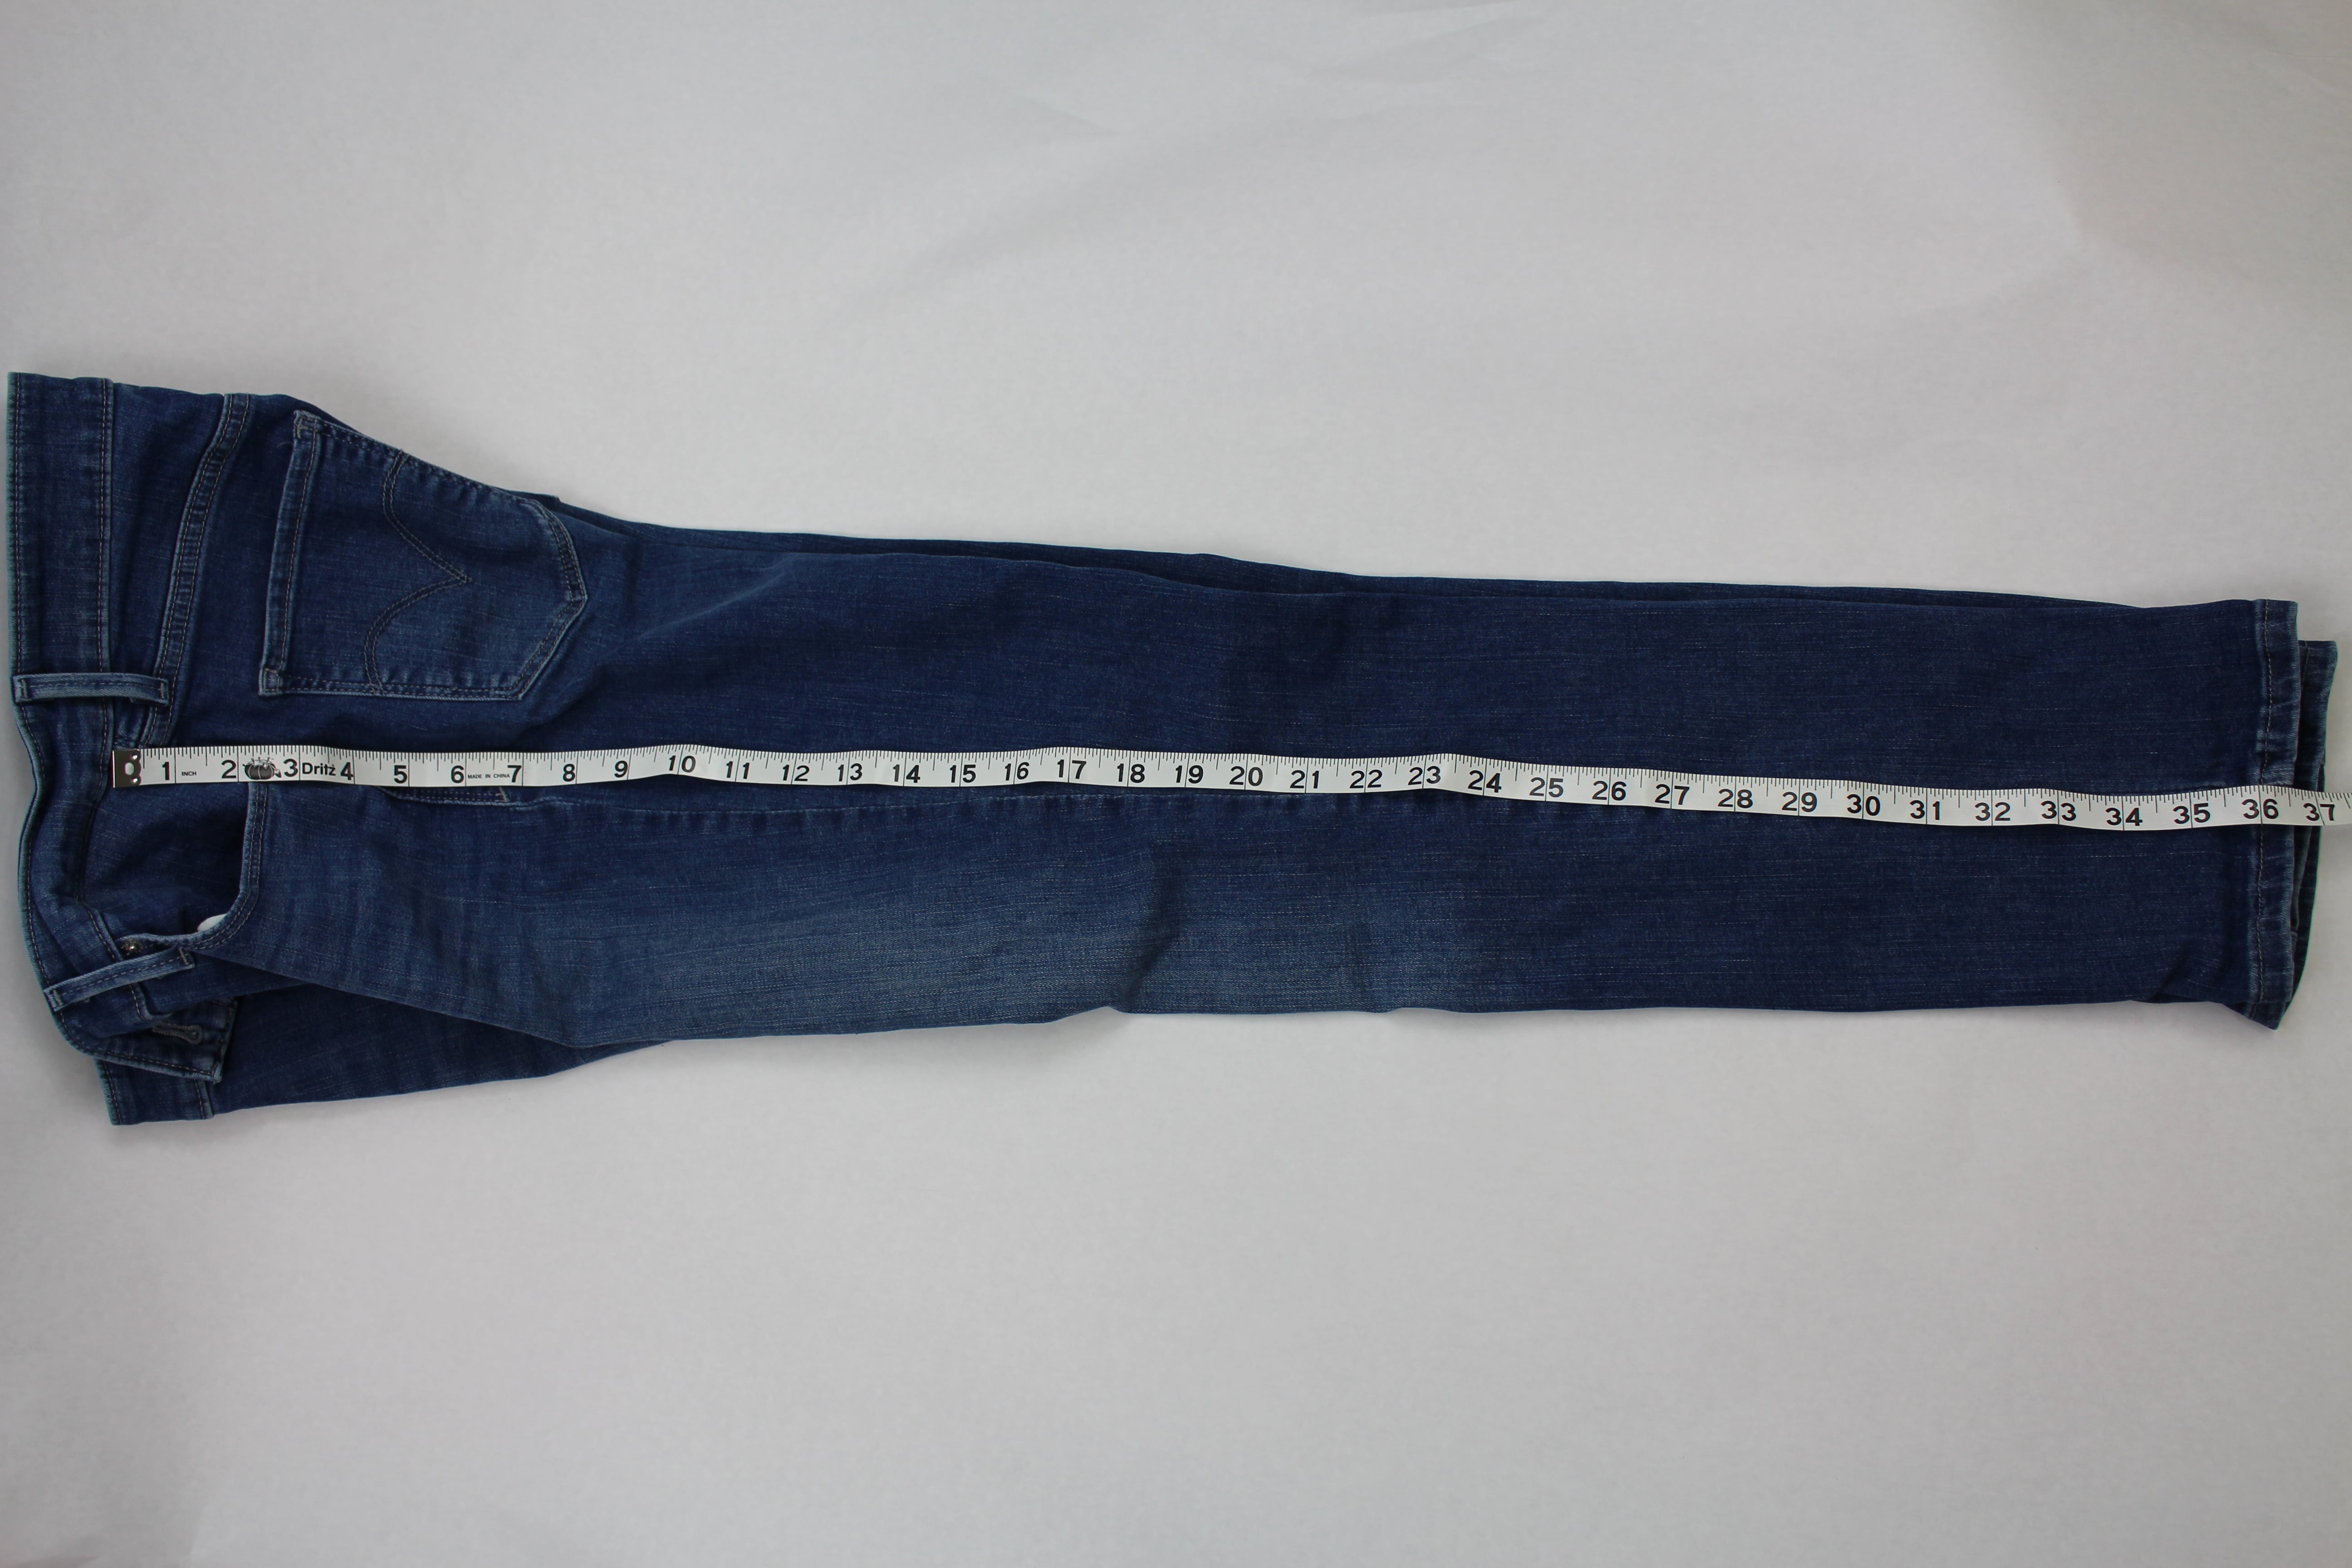
Measure the outside of the jean leg from the bottom edge of the waistband to the hem.
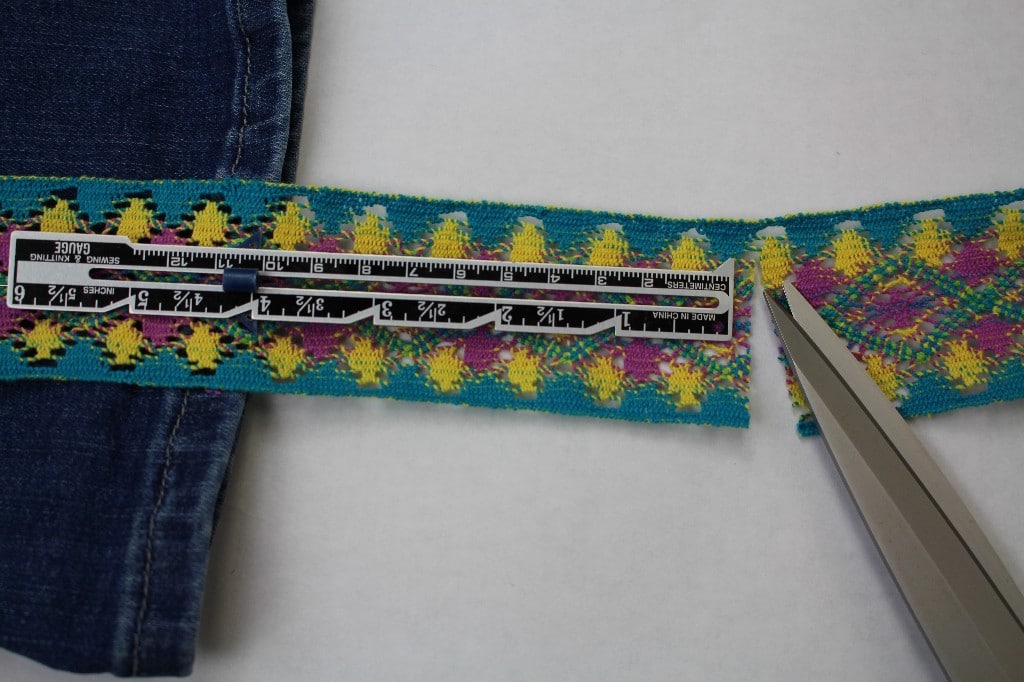
2. Add 6 inches to the outside leg measurement and cut 2 pieces of trim that exact length.
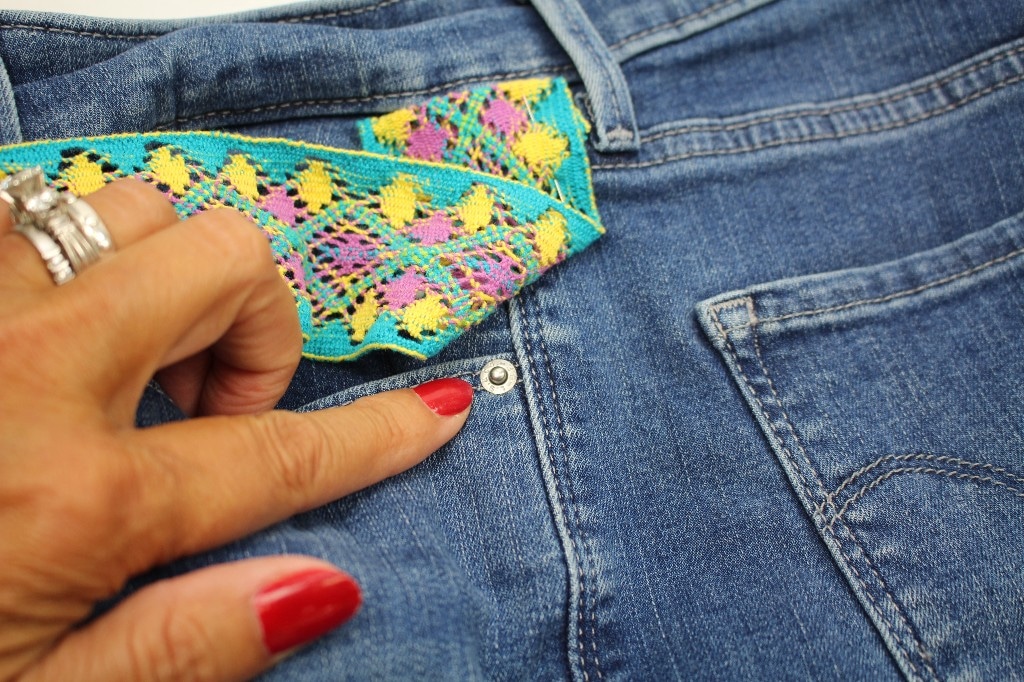
3. Starting at the edge of the waistband, center the trim with the outside leg seam. Fold under the raw edge of the trim about ½” and pin.
4. Continue to pin the trim along the outside leg seam. Be sure to look for metal rivets or other hardware! Here I have a rive and I will make sure to mark this spot as to not break the sewing machine needle.
5. Pin the ribbon/ trim all the way to the hemline. If you plan on folding up the jeans, measure 4 inches below the hemline and cut the trim. If you are not going to fold up the jean hem, measure 2 inches and cut off any excess ribbon.
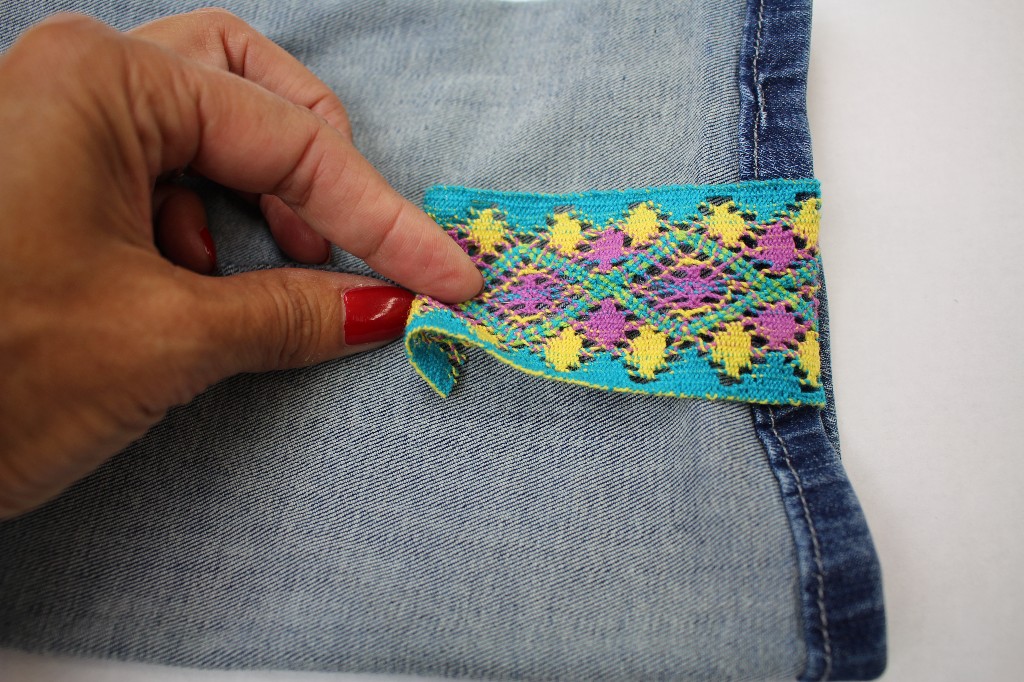
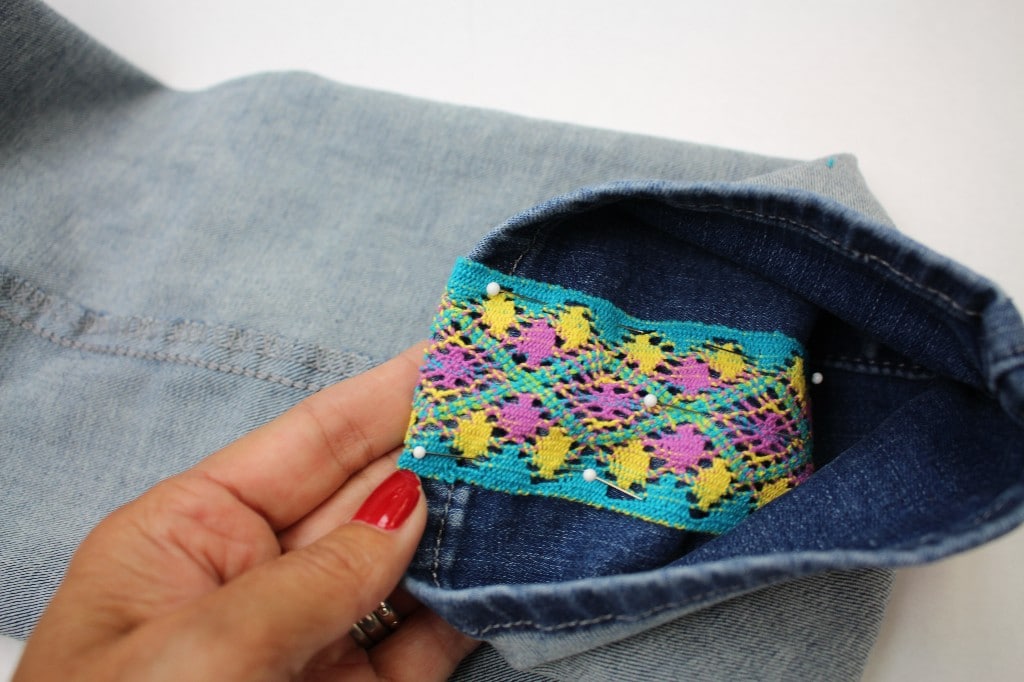
6. Turn the jeans inside out. Center the ribbon on the seam allowance, fold under the raw edge ½” and pin in place.
7. Follow these steps on both outside leg seams.
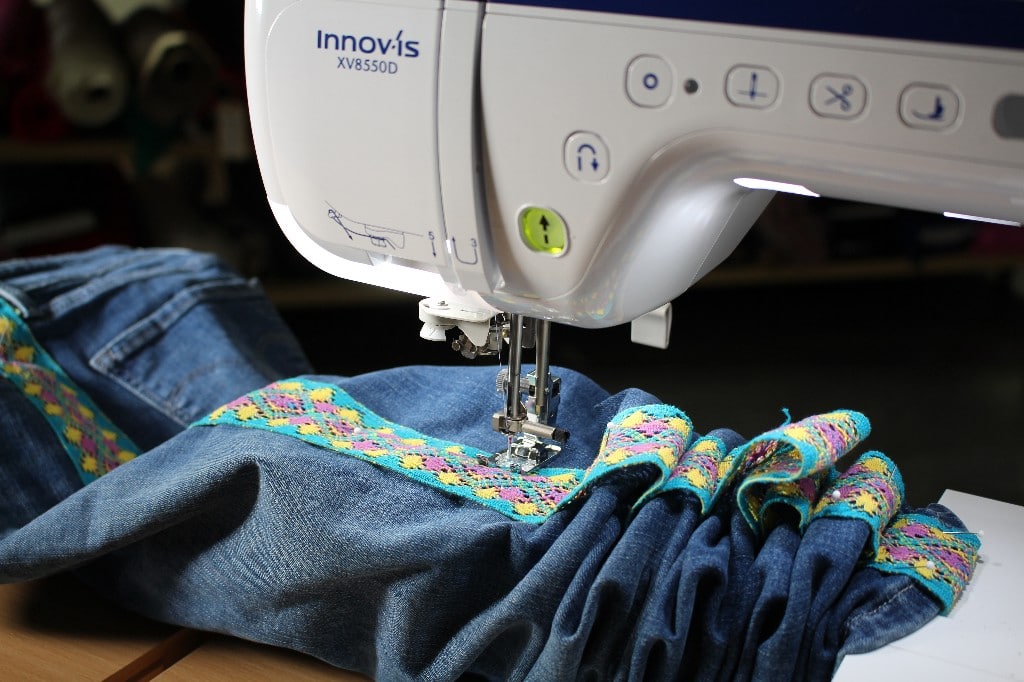
SEWING
Depending on the style and size of the jeans, it can be challenging sewing all the way down to the narrow hemline. To make is easier we are going to utilize the sewing sideways feature!
8. Set up the machine for sewing a straight stitch and move the needle all the way to the far-right position. Slide the jeans under the foot starting at the waistline. To read the full blog post, head over to my post as a Brother Expert Consultant on the Brother Stitching Social.
Looking for more ideas on refashioning jeans, check out my blog post on embellishing jeans with embroidery.Be sure to share photos on the social side #angelawolf – I always love to see what you are working on!
Tweed Skirt Sewalong Part 1 In part 1 of this sewalong I will share options for choosing the best fabrics and pattern. Join me in choosing the best lining to coordiante with my fabric!Skirt Patterns to choose from: ~ The Kate Skirt ~ The Fringe Skirt Pattern ~...
Episode 305 🧵 Behind the Scenes with Angela Wolf I know you have heard me say many time ... I am never going on a cruise! Winn and I are on the water all the time, why would I want to go on a cruise?!? Kelli Presley and Phyllis Batz will be joining me live to talk...
Episode 305 🧵 Behind the Scenes with Angela Wolf Featuring CraftOptics I am not sure about your, but if I am working in a low lit area or sewing beads onto a garment, I tend to lean forward and squint, this ending up with a terrible back ache! CraftOptics has changed...
Episode 303 🧵 Behind the Scenes with Angela Wolf The last part of our Delila Slit Sleeve Sewalong! Have you checked out all the Delila tops posted in our private Angela Wolf Patterns Group? So cute!!! Angie Hotchkiss ~ Angela Wolf Facebook GroupDarlene Deck ~...
Episode 302 🧵 Behind the Scenes with Angela Wolf We are onto part 2 in the Delila sew along! We have cut our fabric and ready to sew. Did you have any questions about fitting? If so, be sure to take your photos with questions to the Angela Wolf Patterns Facebook...
Episode 301 🧵 Behind the Scenes with Angela Wolf Getting into summer and looking for stylish tops to wear with jeans, shorts, or skirts and one of my fist patterns always shows up ... The DelilaDelila Pattern has 9 Options I designed this pattern to be able to sew...
Episode 260 🧵 Behind the Scenes with Angela Wolf ~ Sew the Shirley Wrap with a Sweater Knit The Shirley Wrap pattern is so versatile and this time we will use a thicker, sweater knit fabric. You can find the Shirley pattern in PDF and paper patterns in size XXS -...
Episode 259 ~ At your side 🧵 Virtually! Organizing and Sewing Clear Vinyl Join Angela Wolf with the next steps in sewing the Shirley Wrap with a sweater knit. Pressing hems with a tailors clapper, prepping neckline, and marking gathering.Catch the Next Show ... Be...
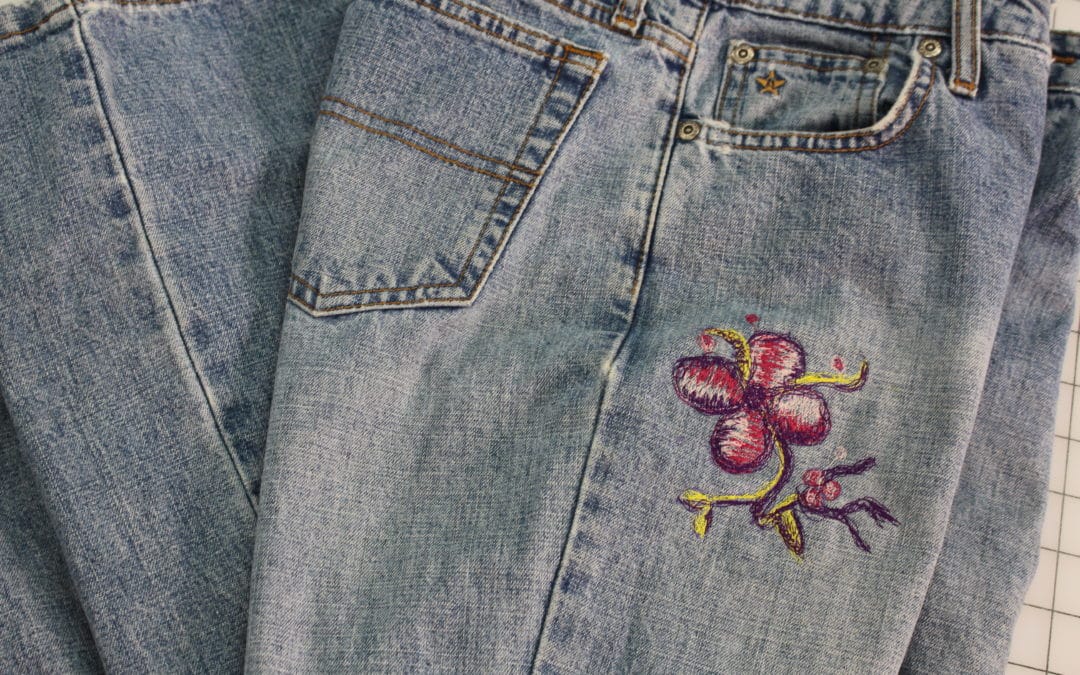
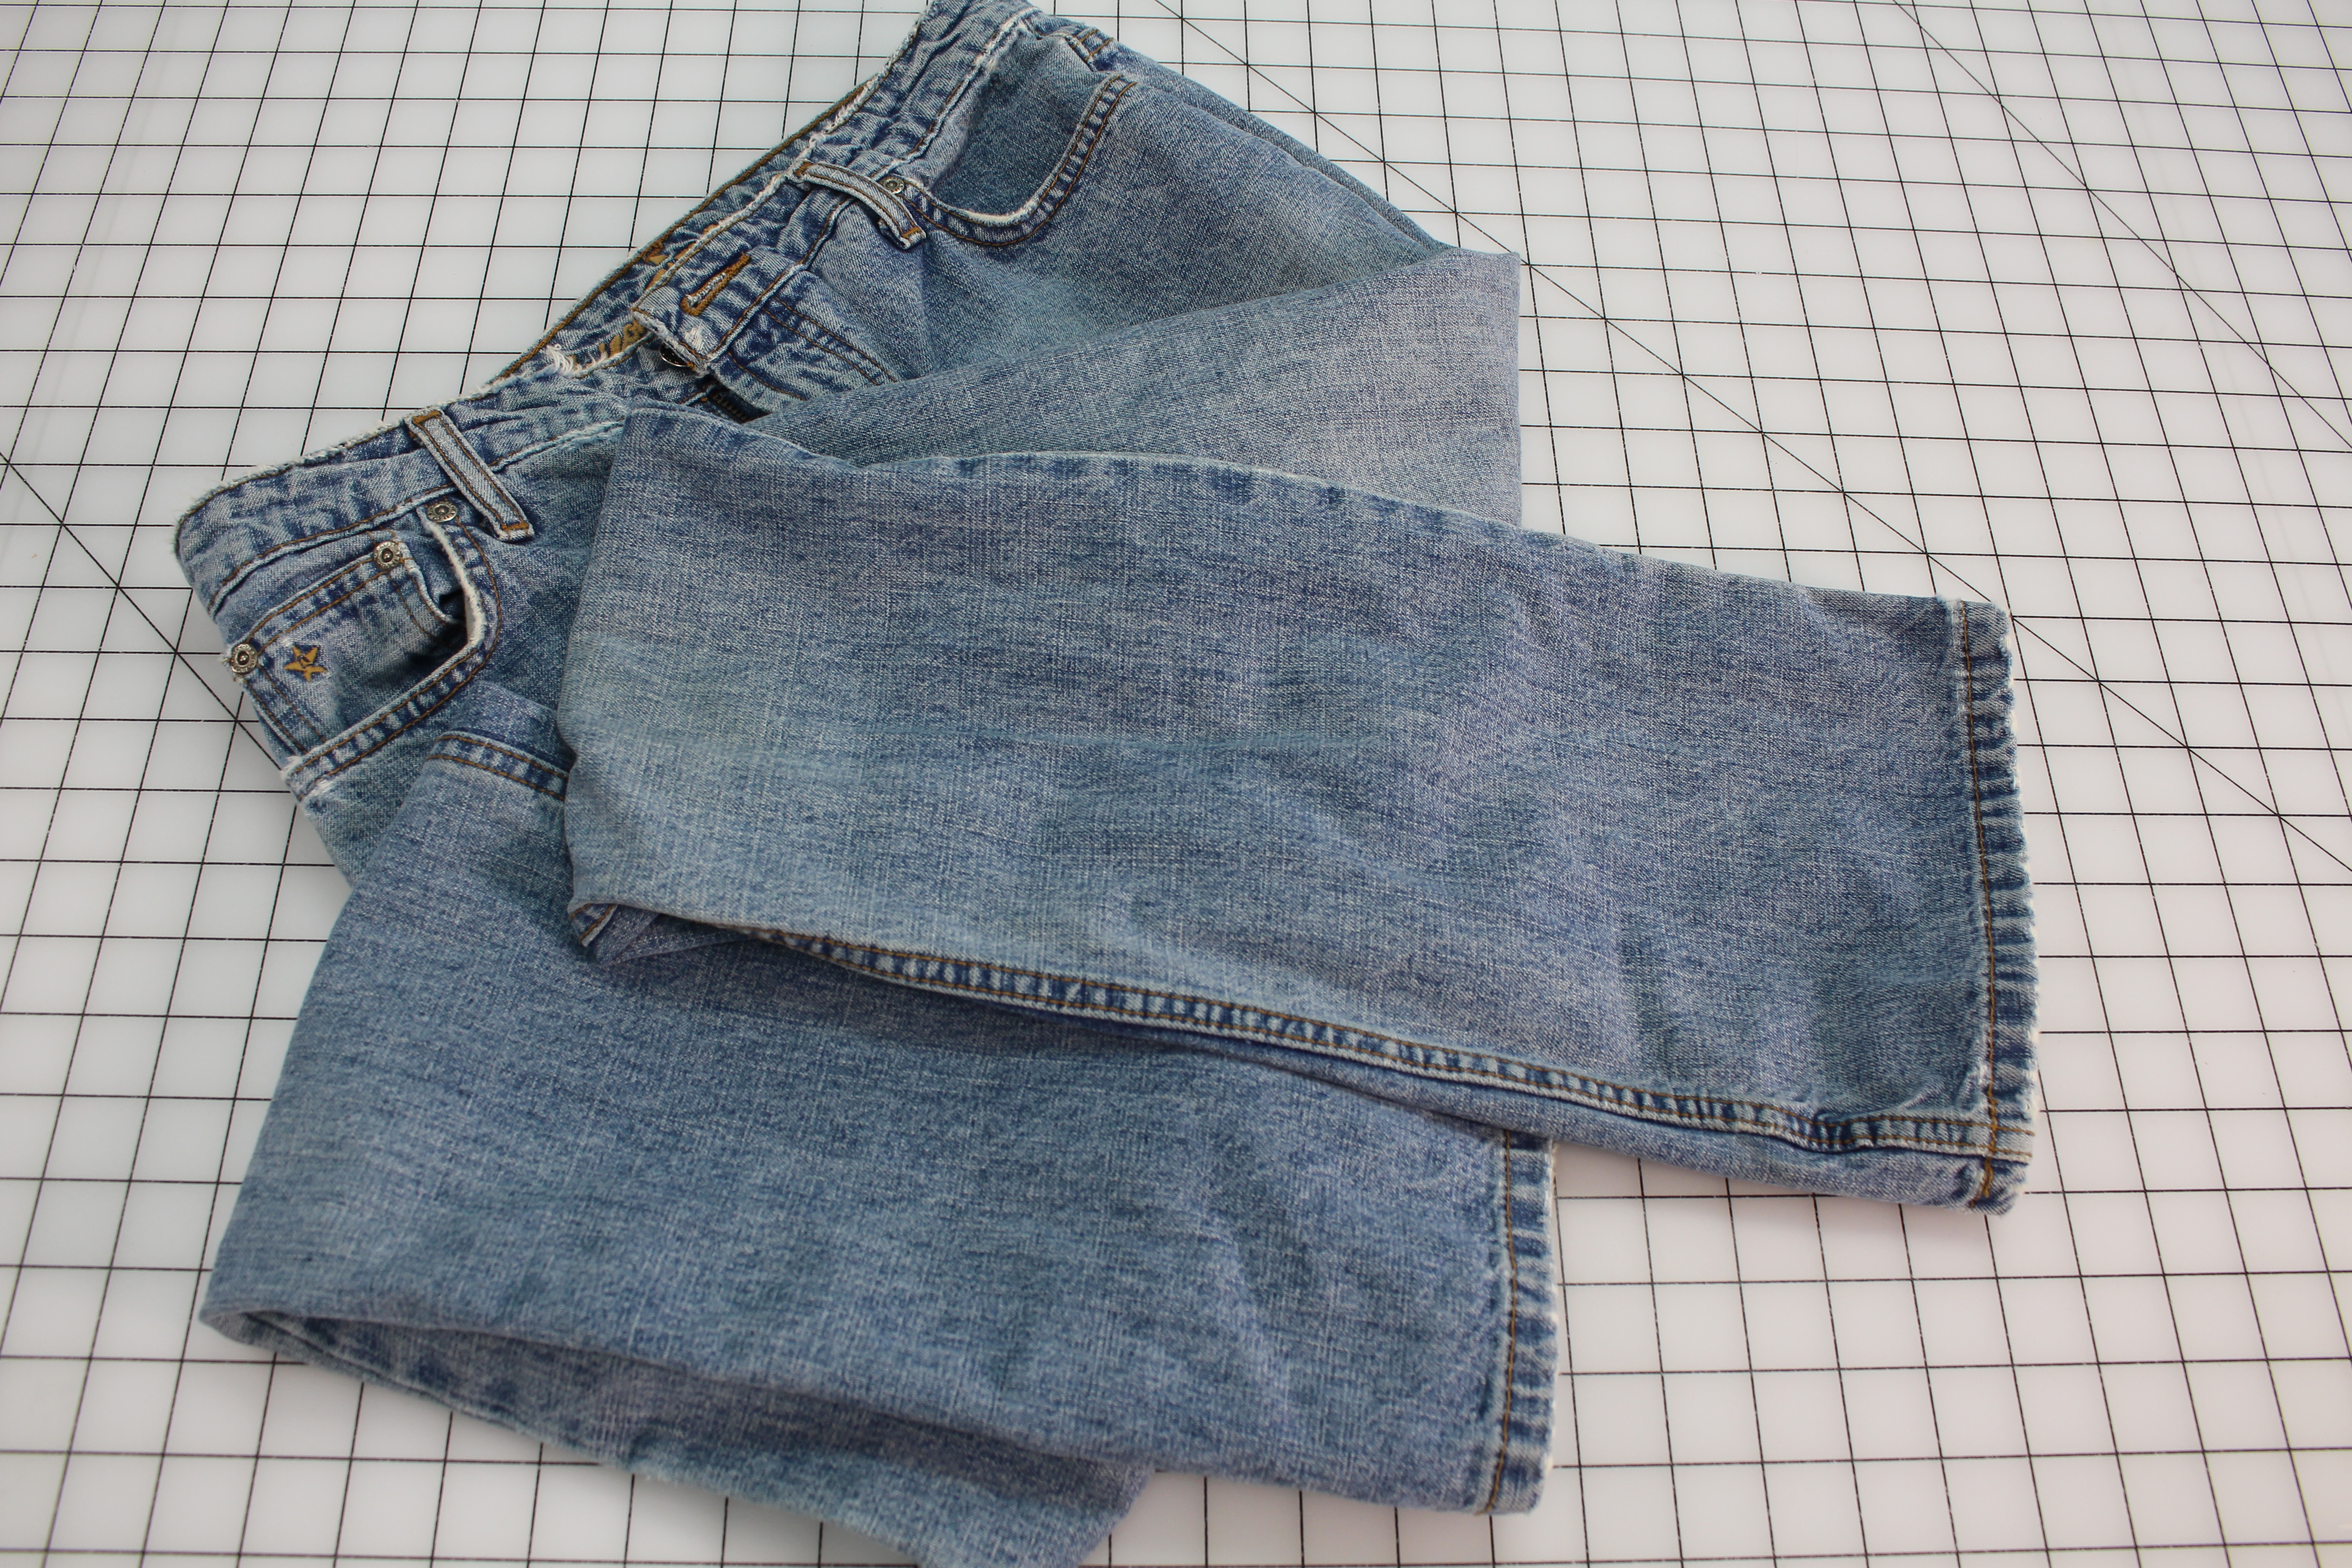
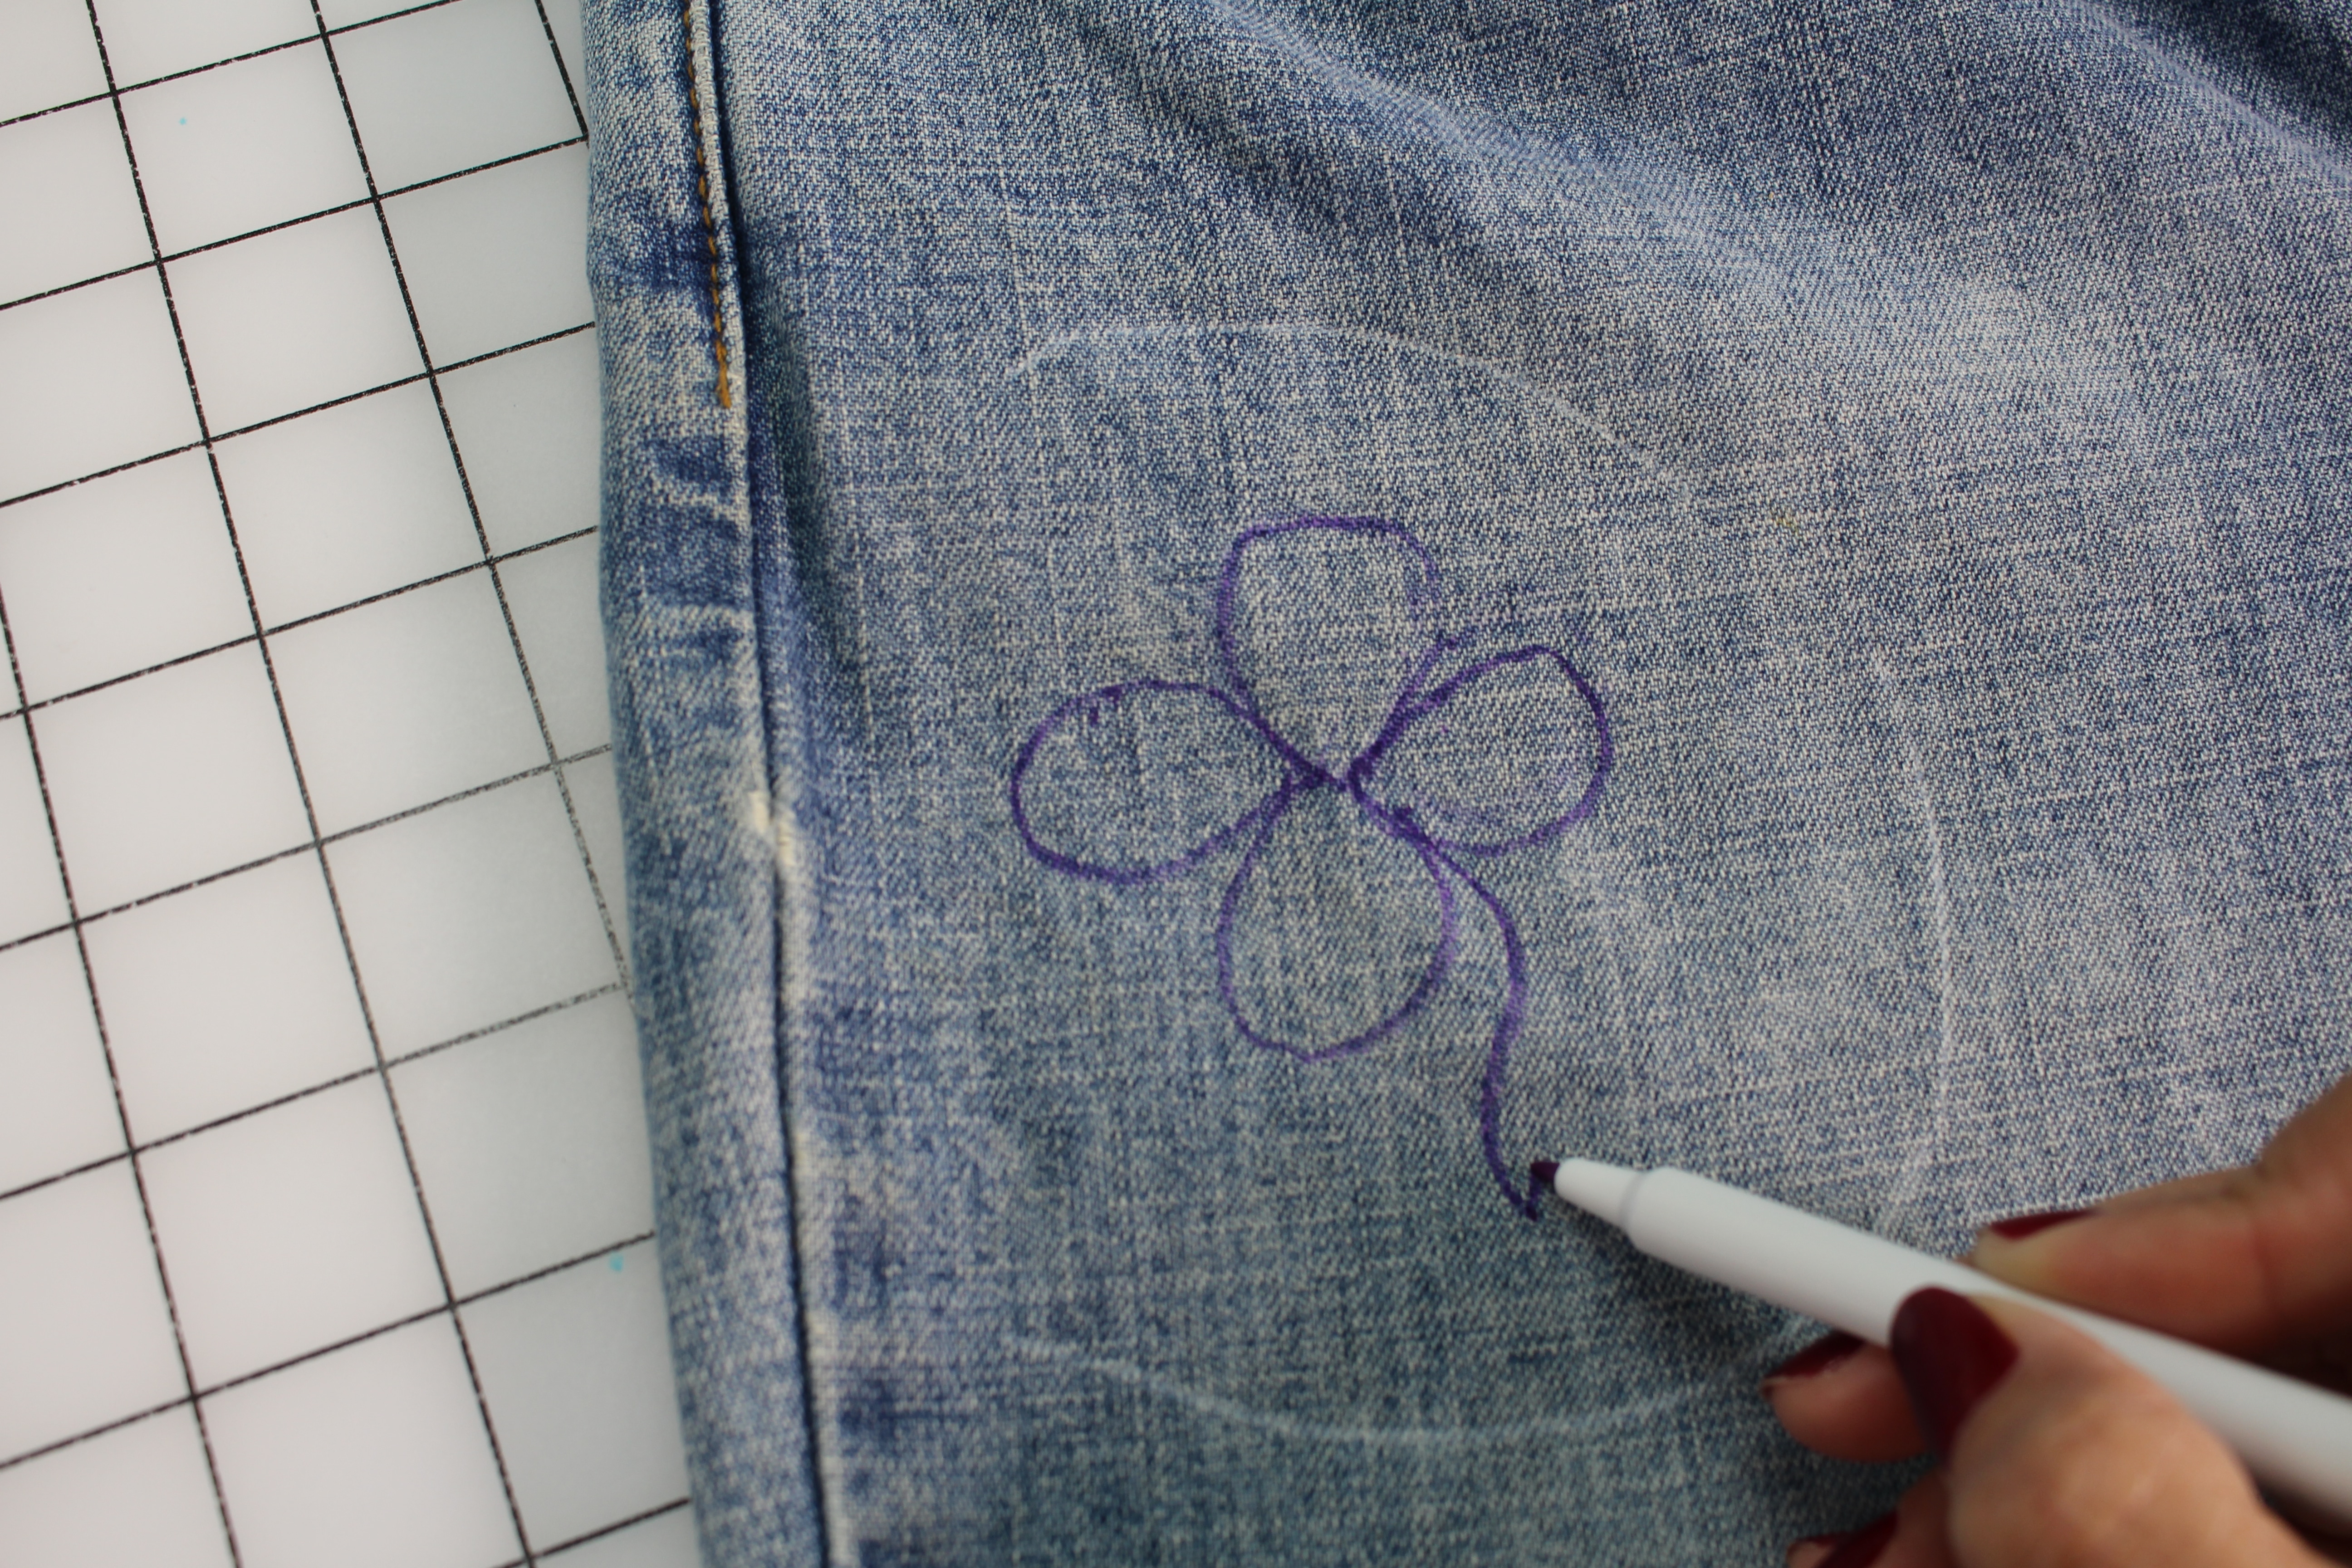
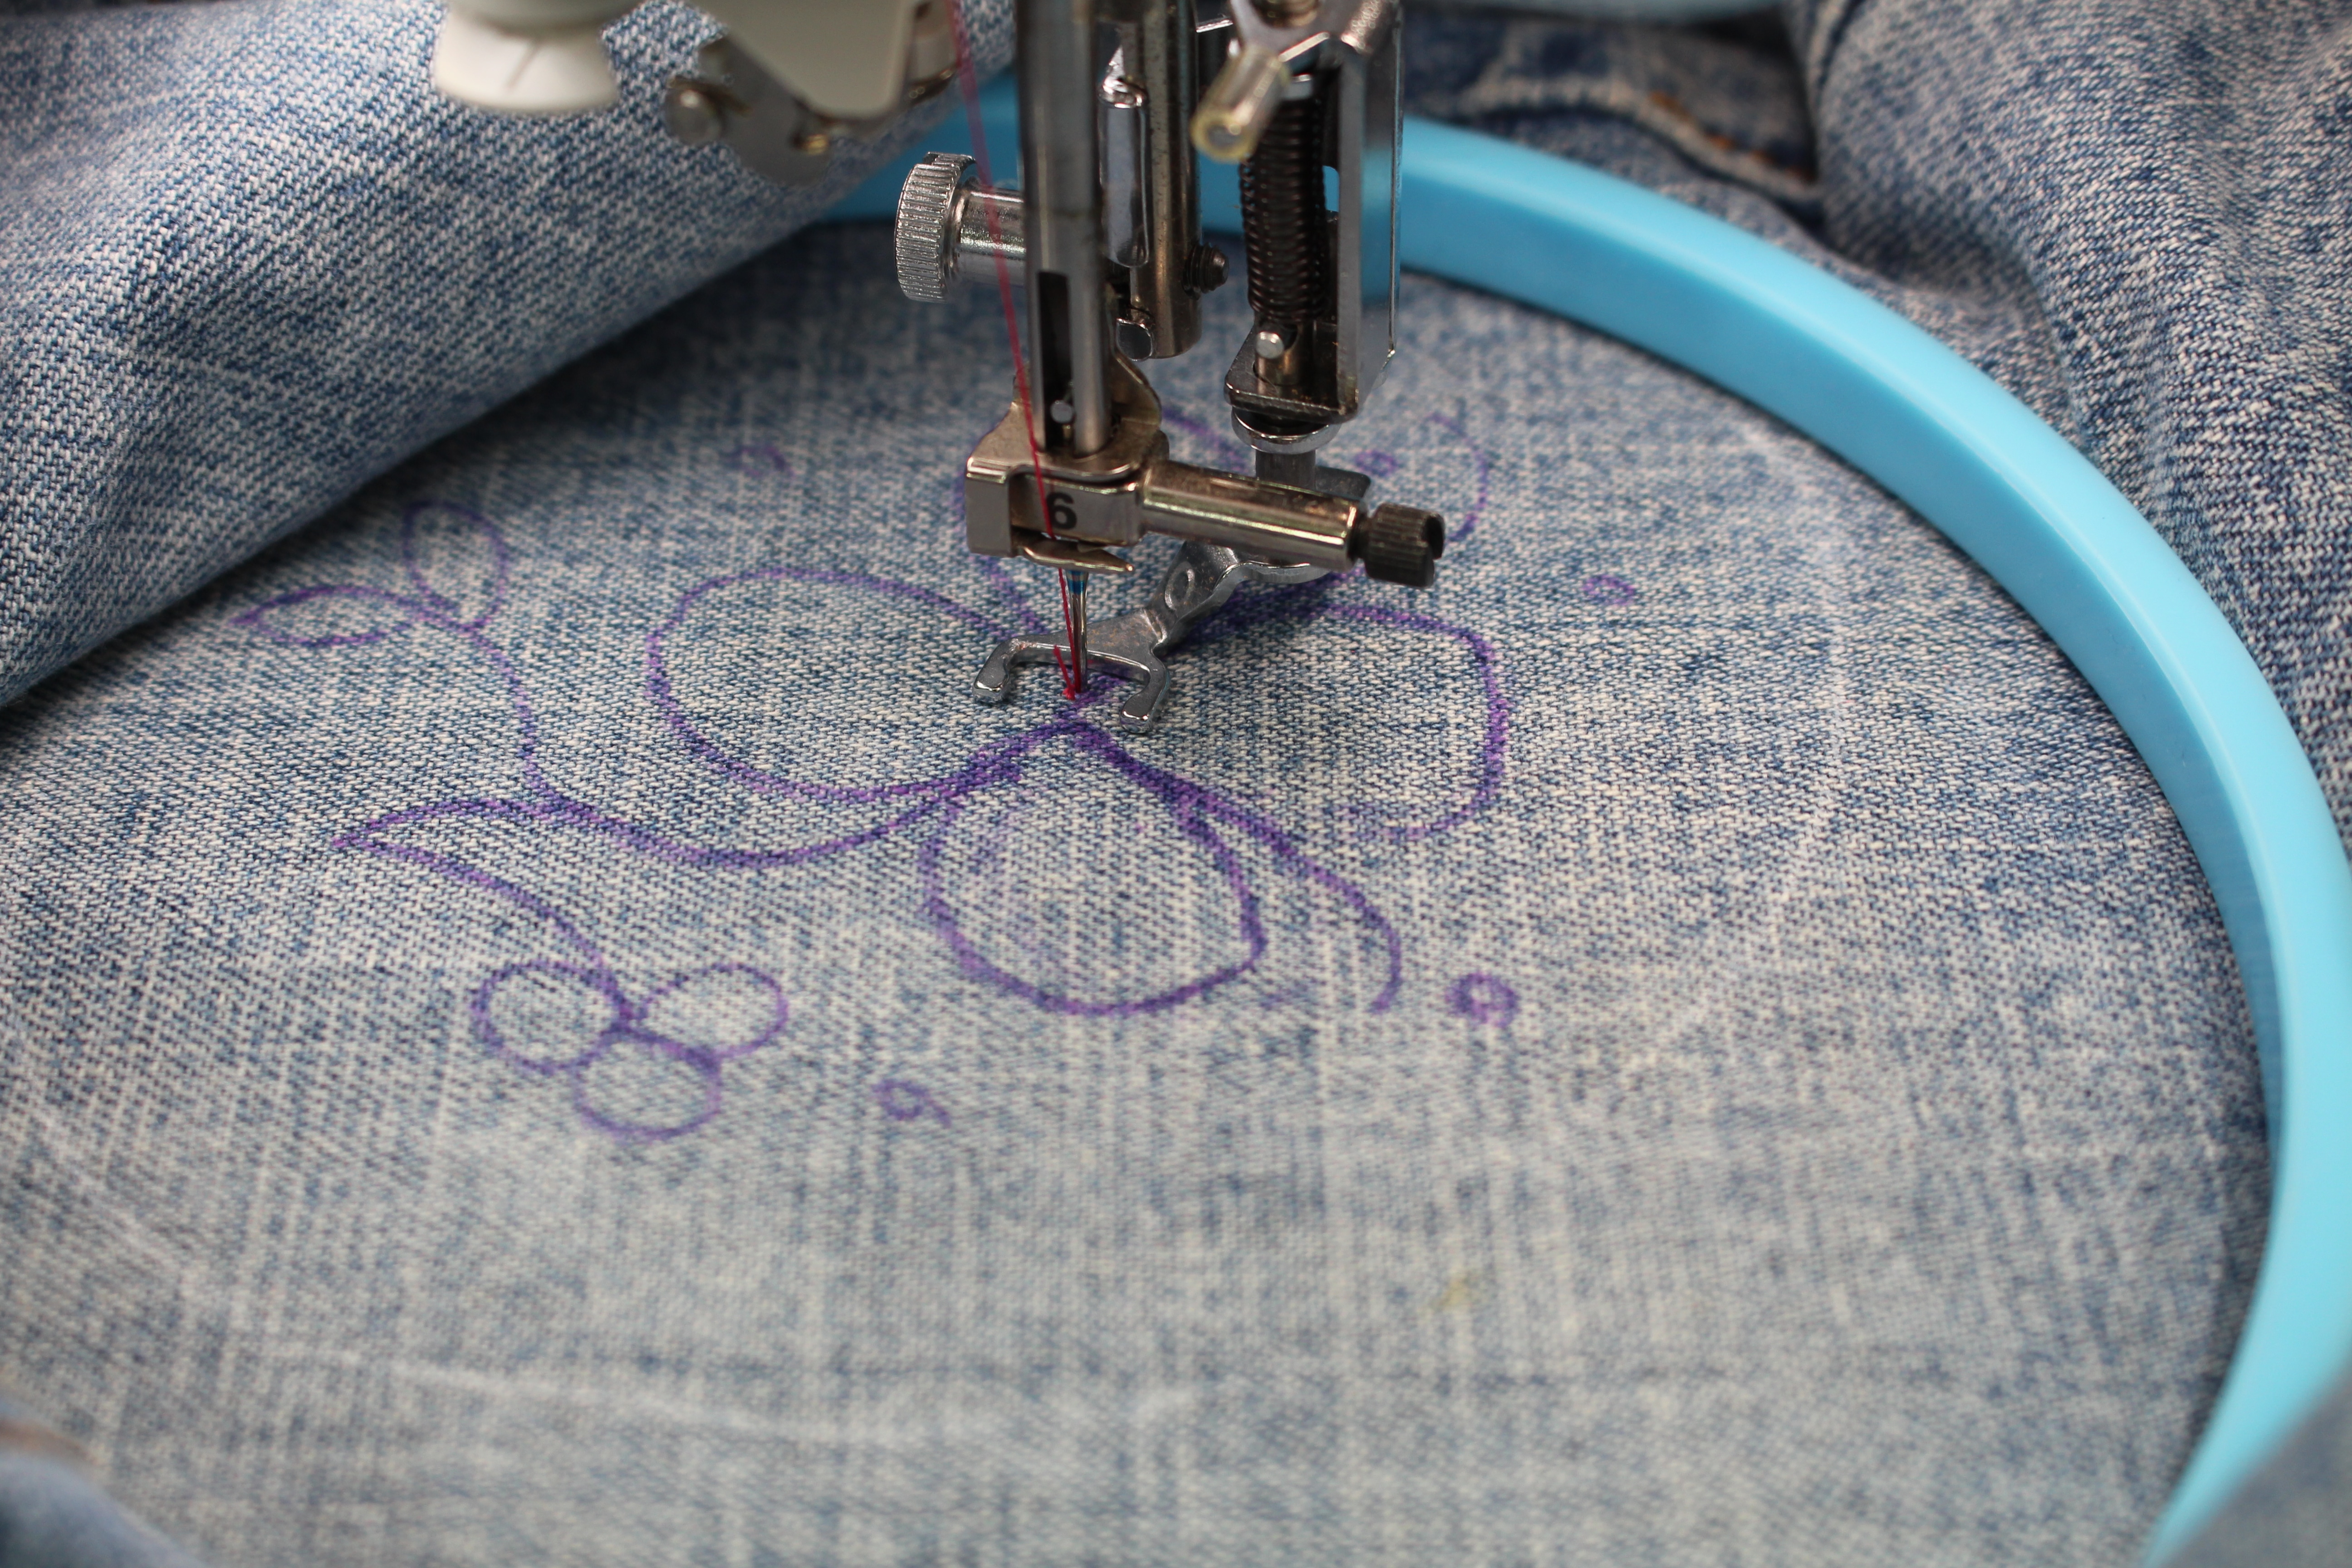
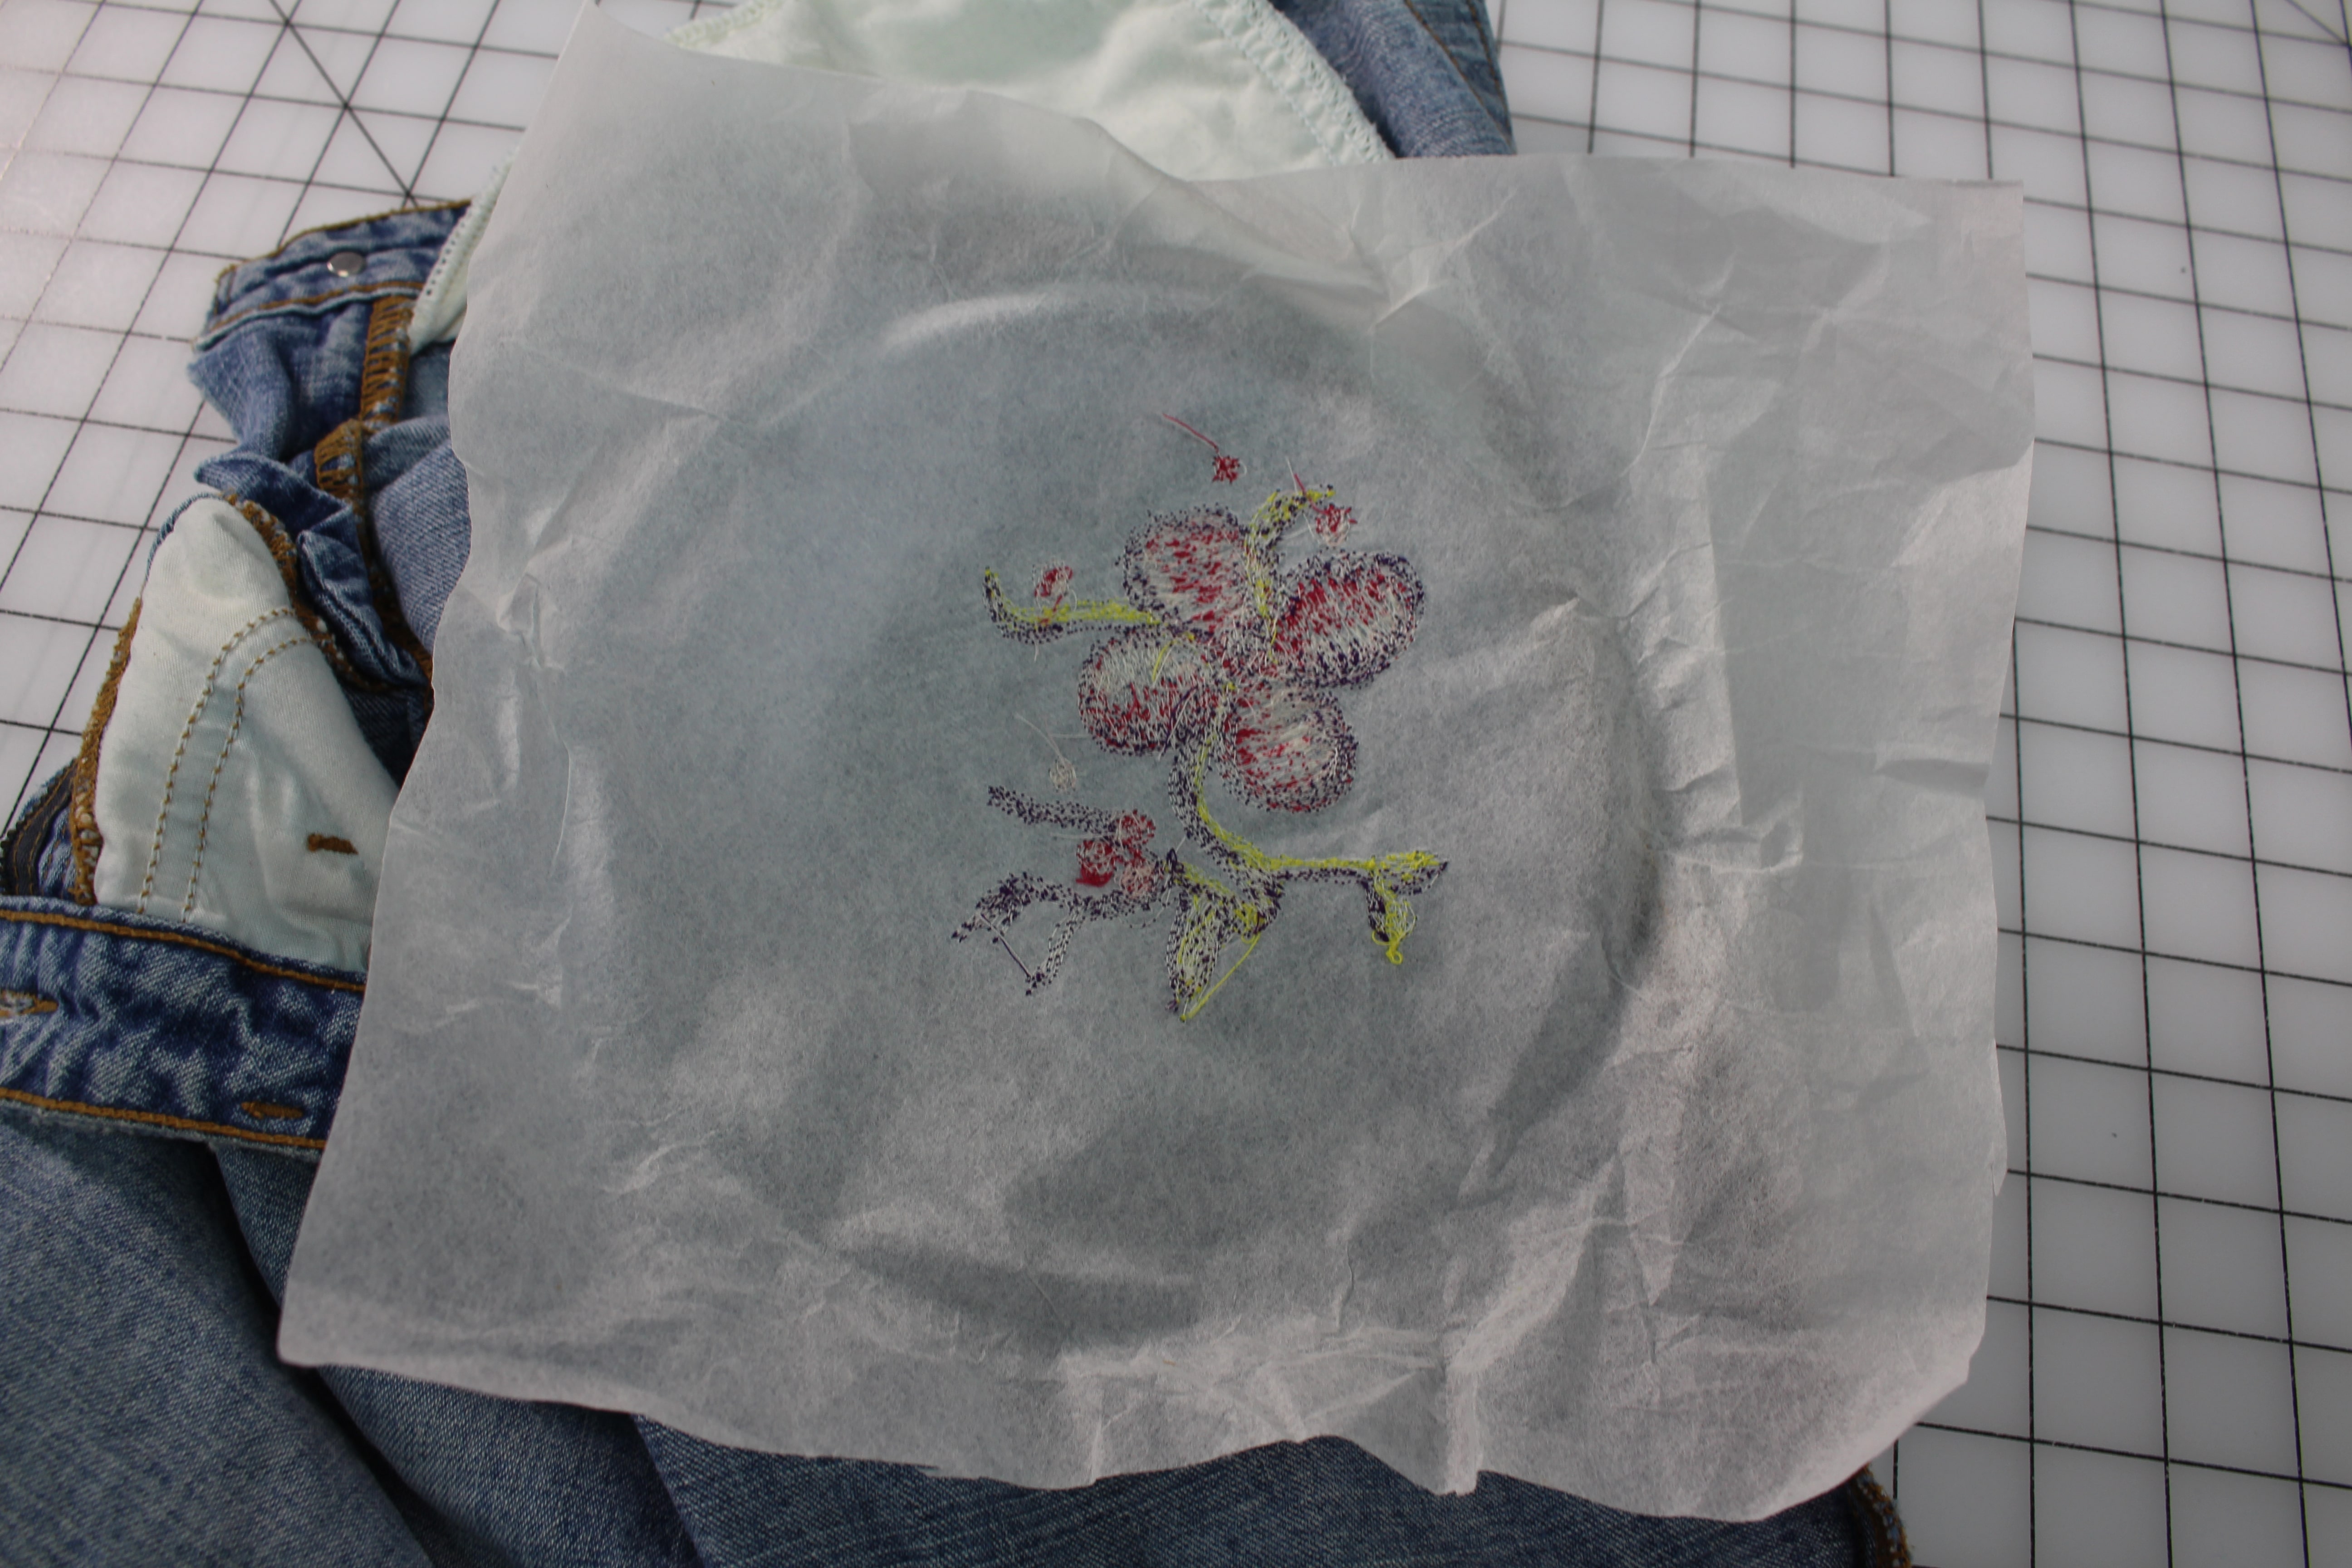
An easy way to restyle or upcycle jeans is to add a touch of embroidery. Free motion embroidery, also referred to as thread painting, is so easy and you don’t even need an embroidery machine for this technique. Instead we are going to use free motion quilting / embroidery techniques.
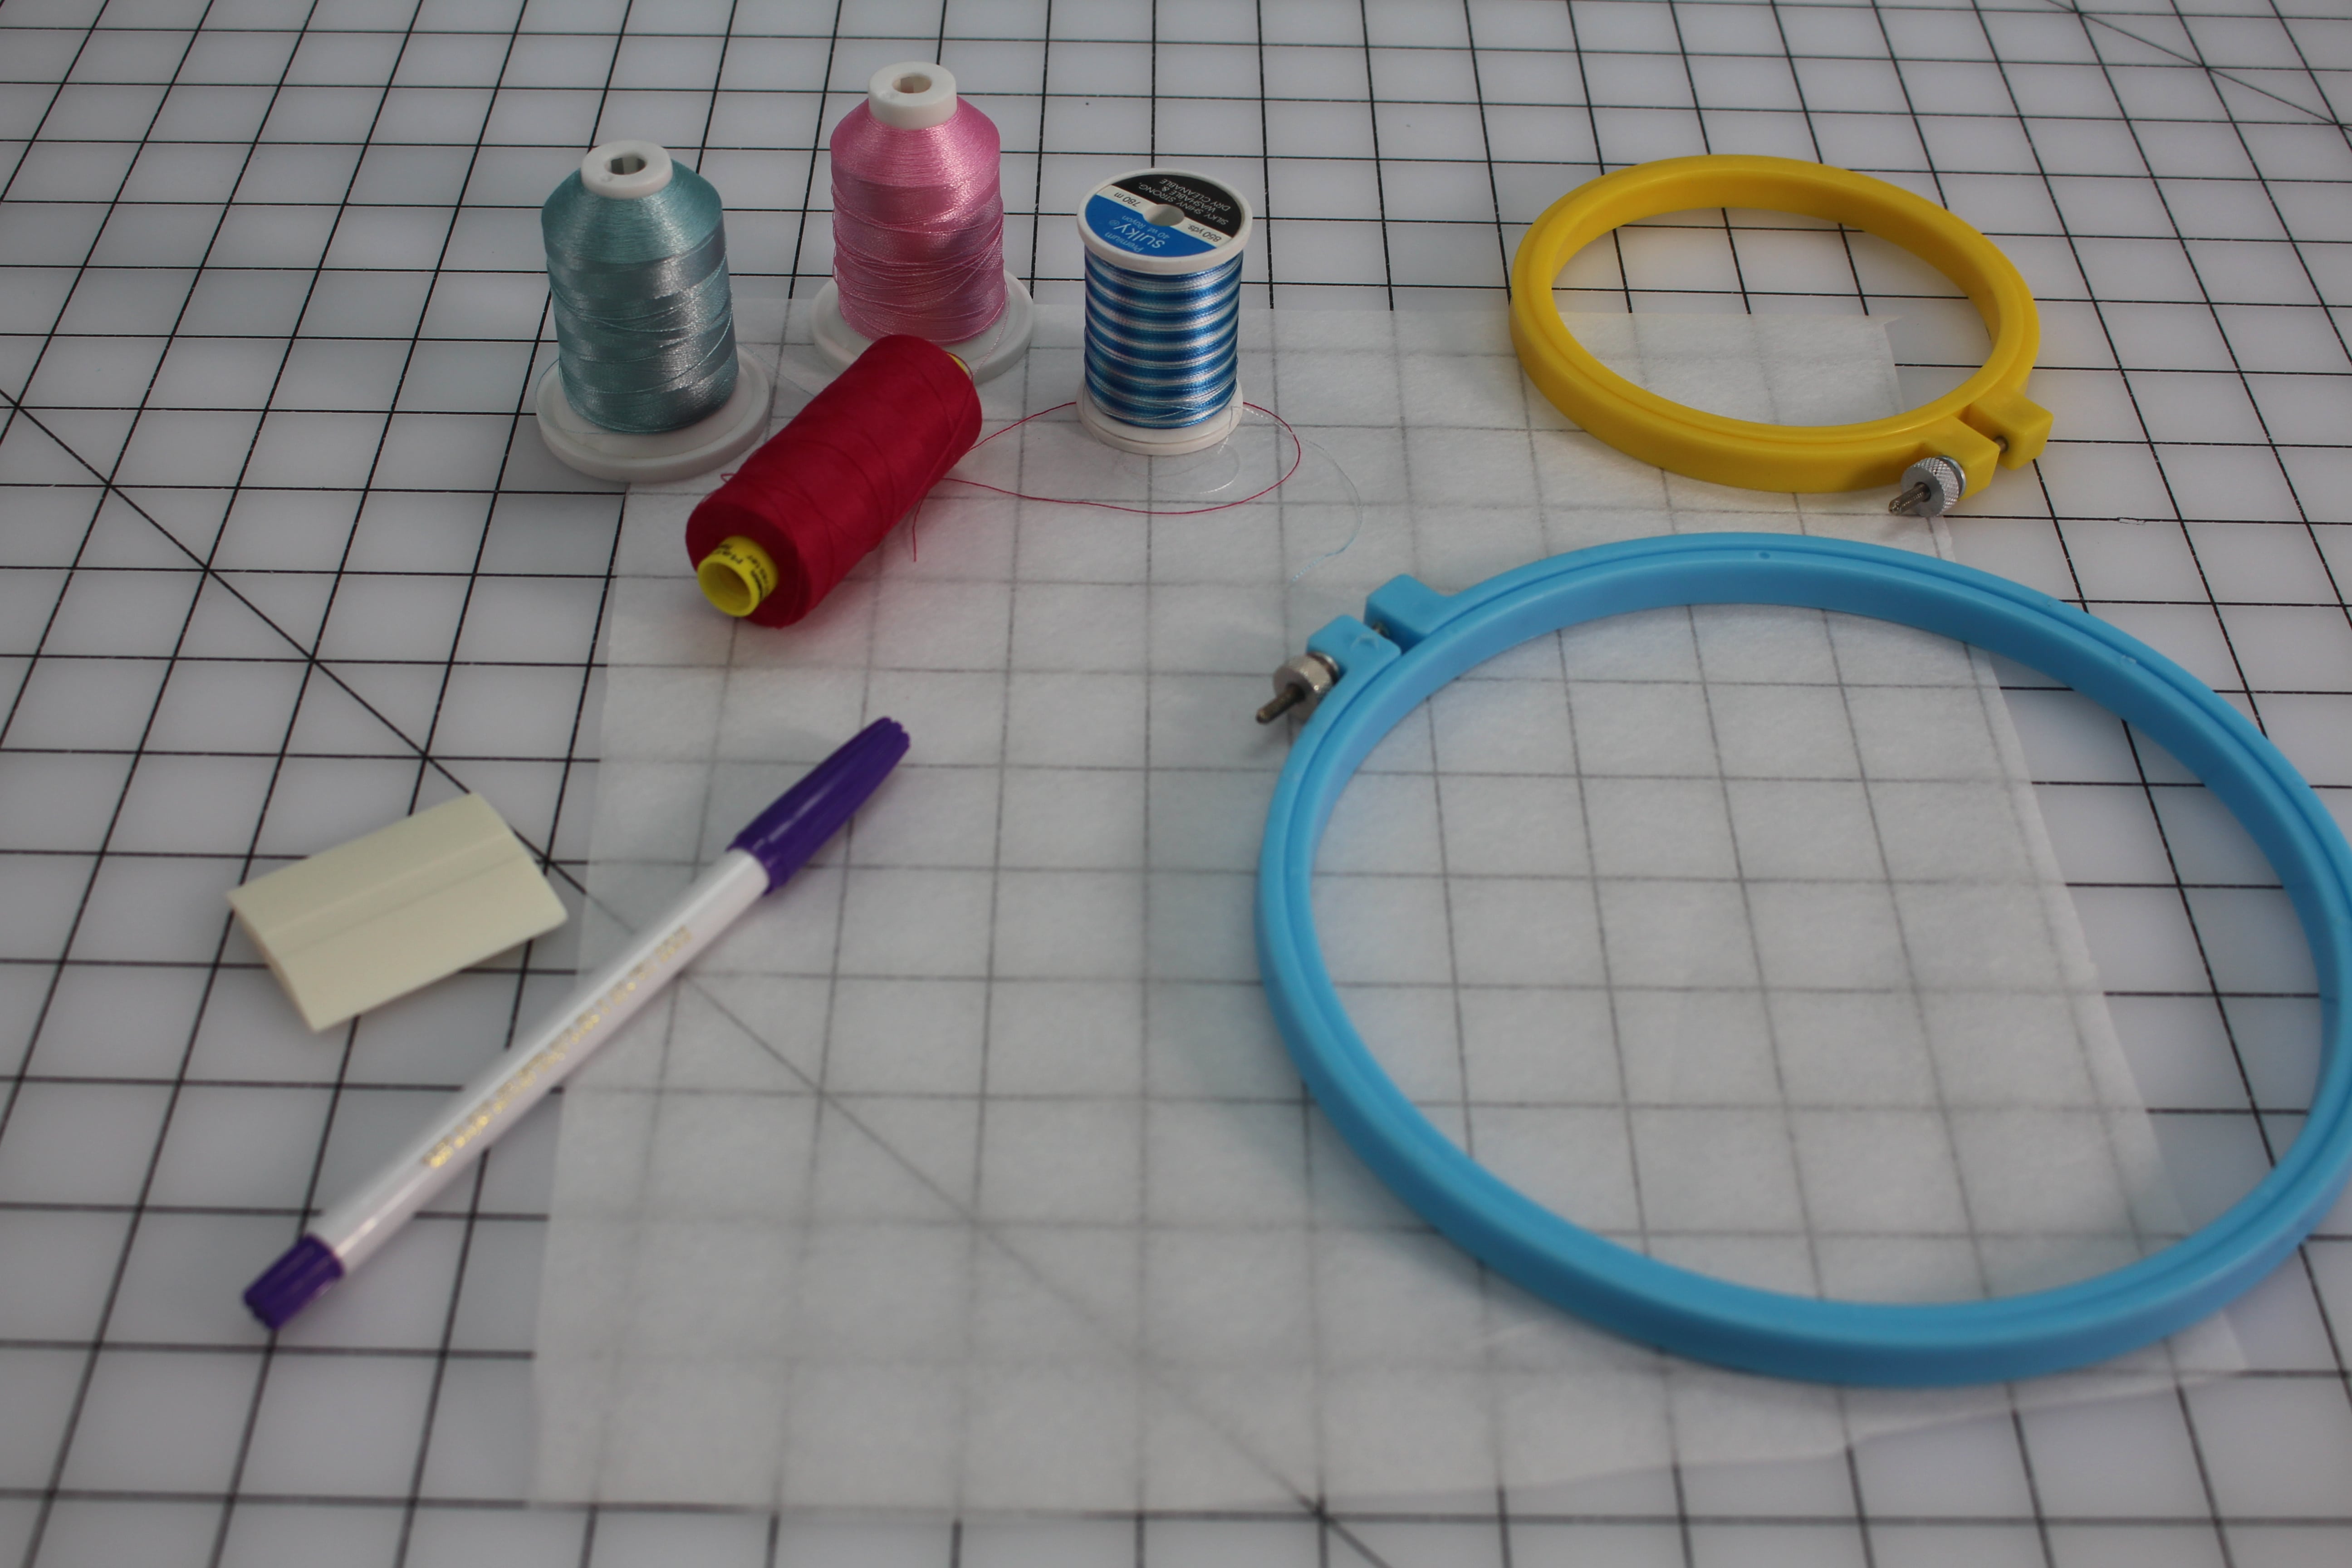
Supplies Needed:
Jeans
Medium Weight Tear-away Stabilizer
Any type of thread (all-purpose, rayon, embroidery, silk, cotton)
Embroidery Hoop
Fabric marking pen or chalk
Open toe quilting foot
Layout the Design
Try on the jeans and determine where you want the embellishment to go. A few things to keep in mind:
Don’t place the embroidery:
too close to the zipper
on top of thick seams
over thick pockets
on top of metal rivets
Too far down the leg (remember you need to get to the area to stitch J)
Good places for the embroidery:
Above the hemline
Along the back yoke (avoiding the center back seam)
Front hip
Waistband
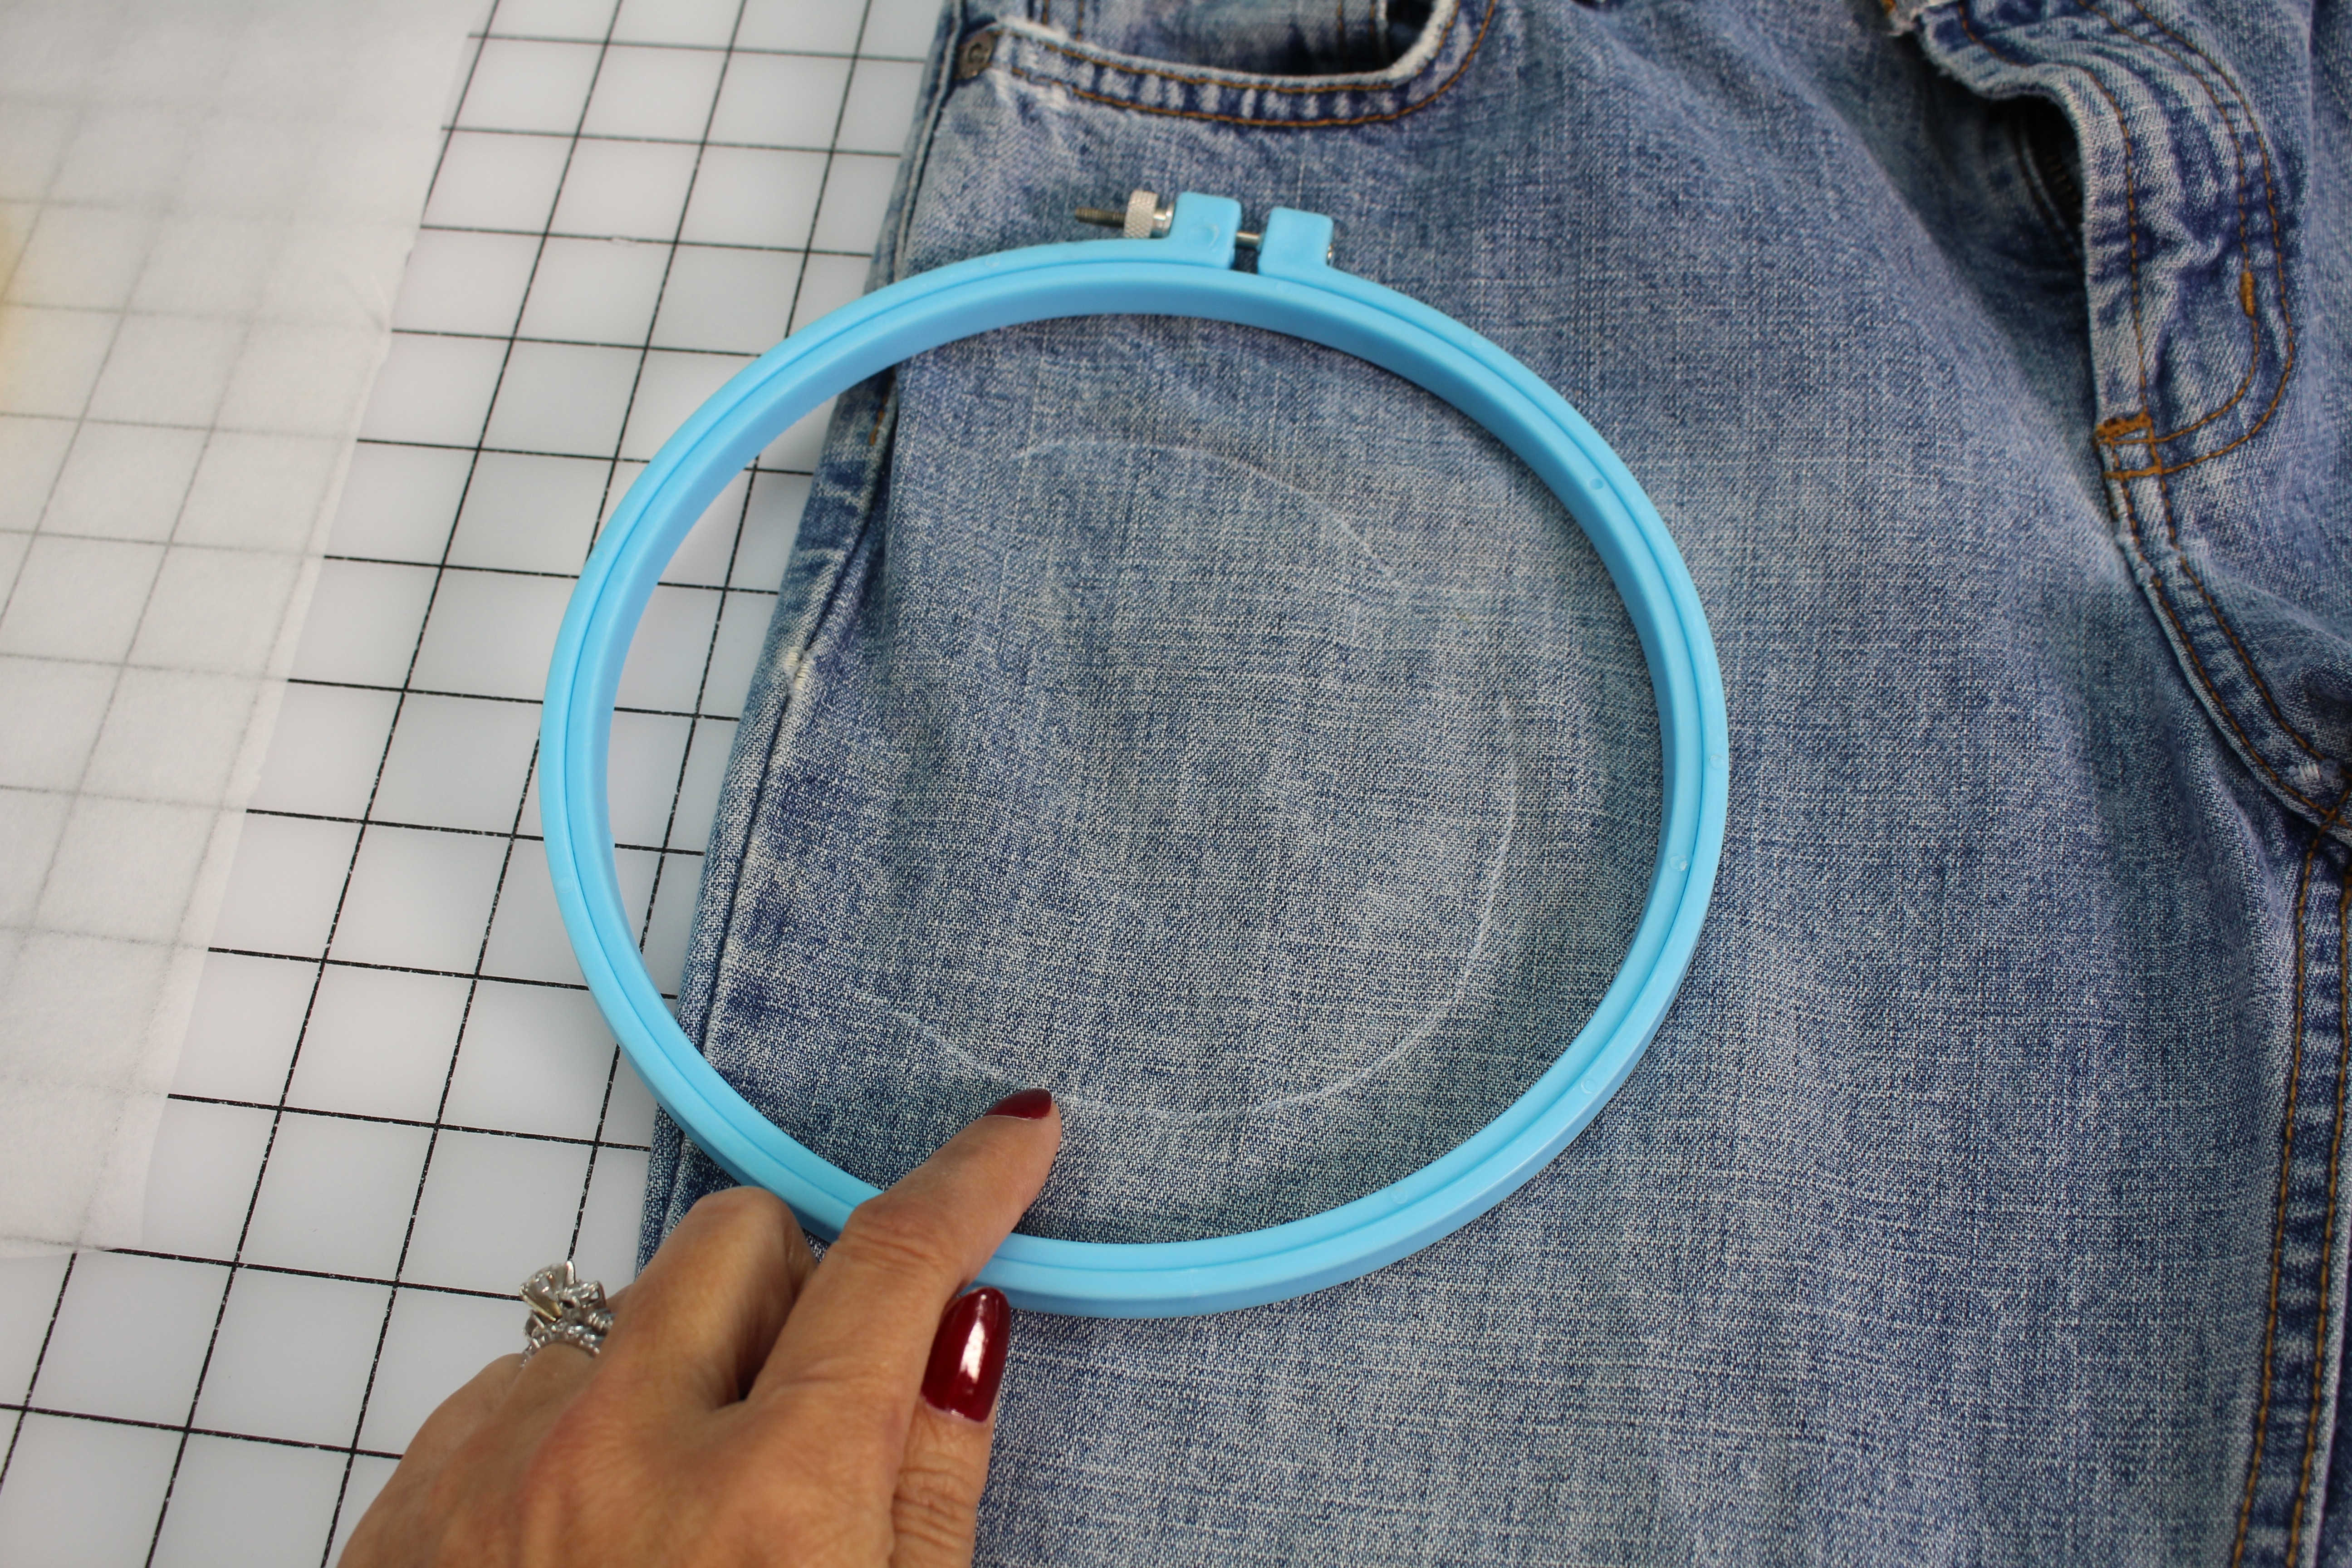
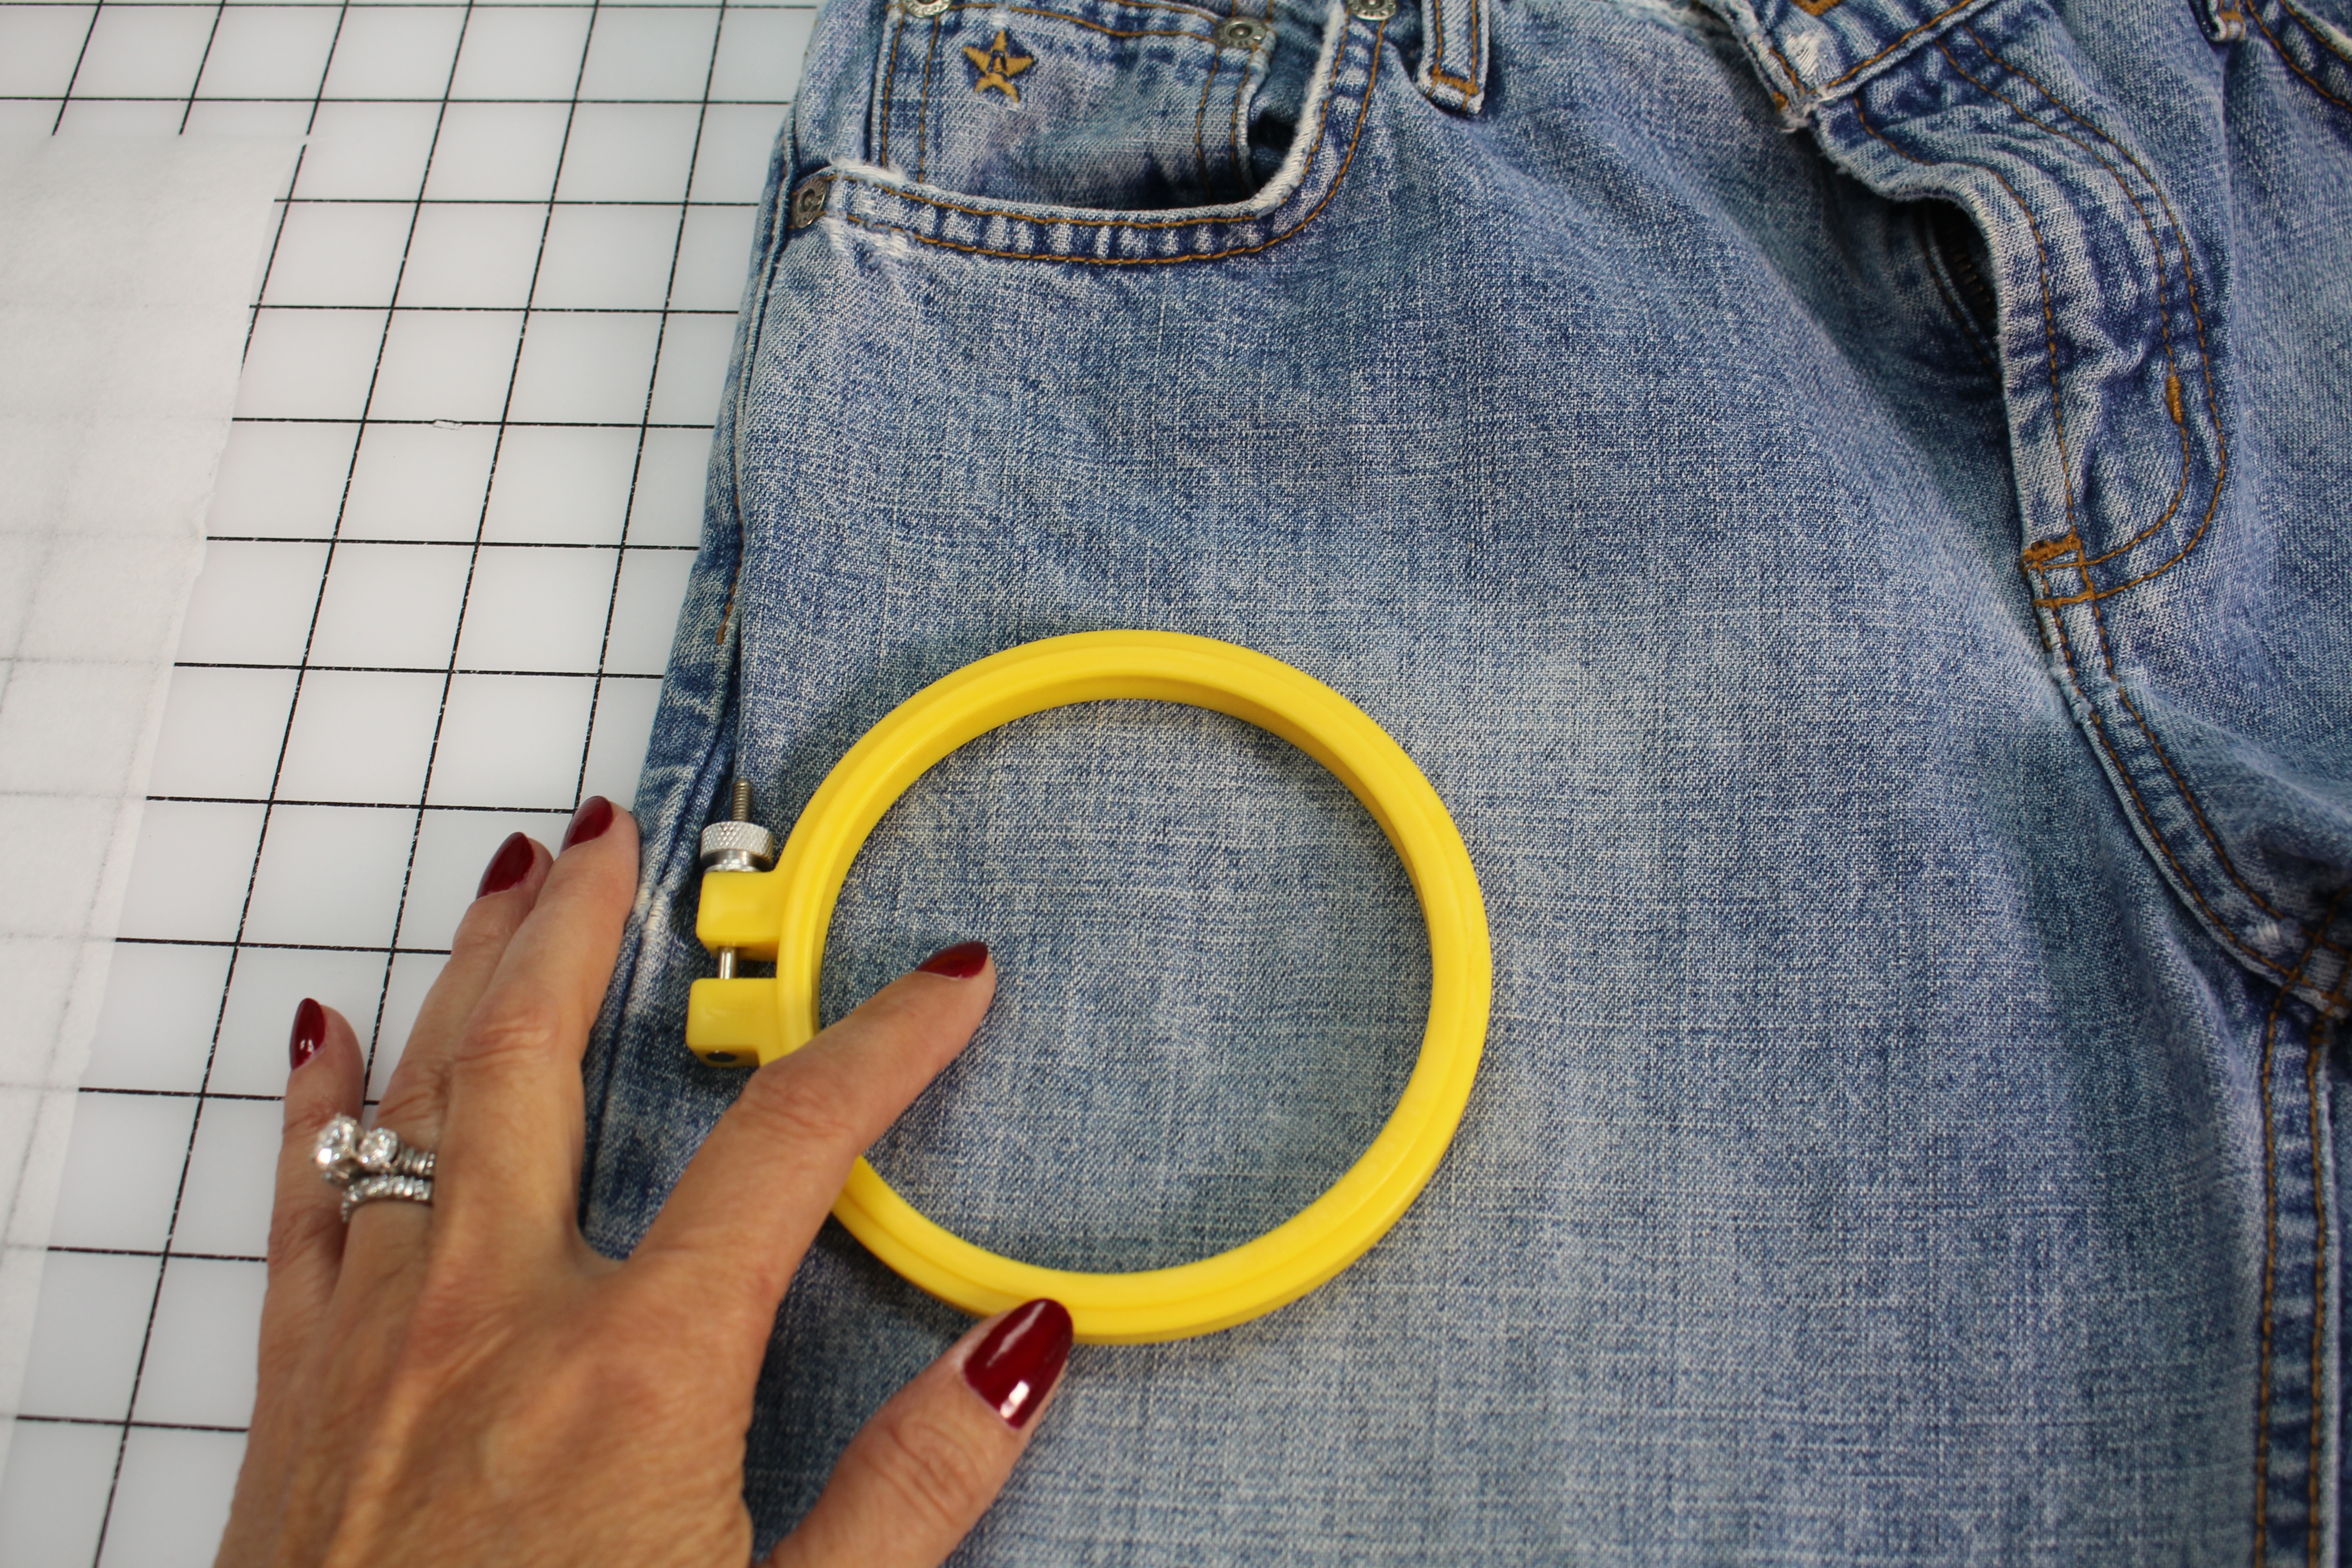
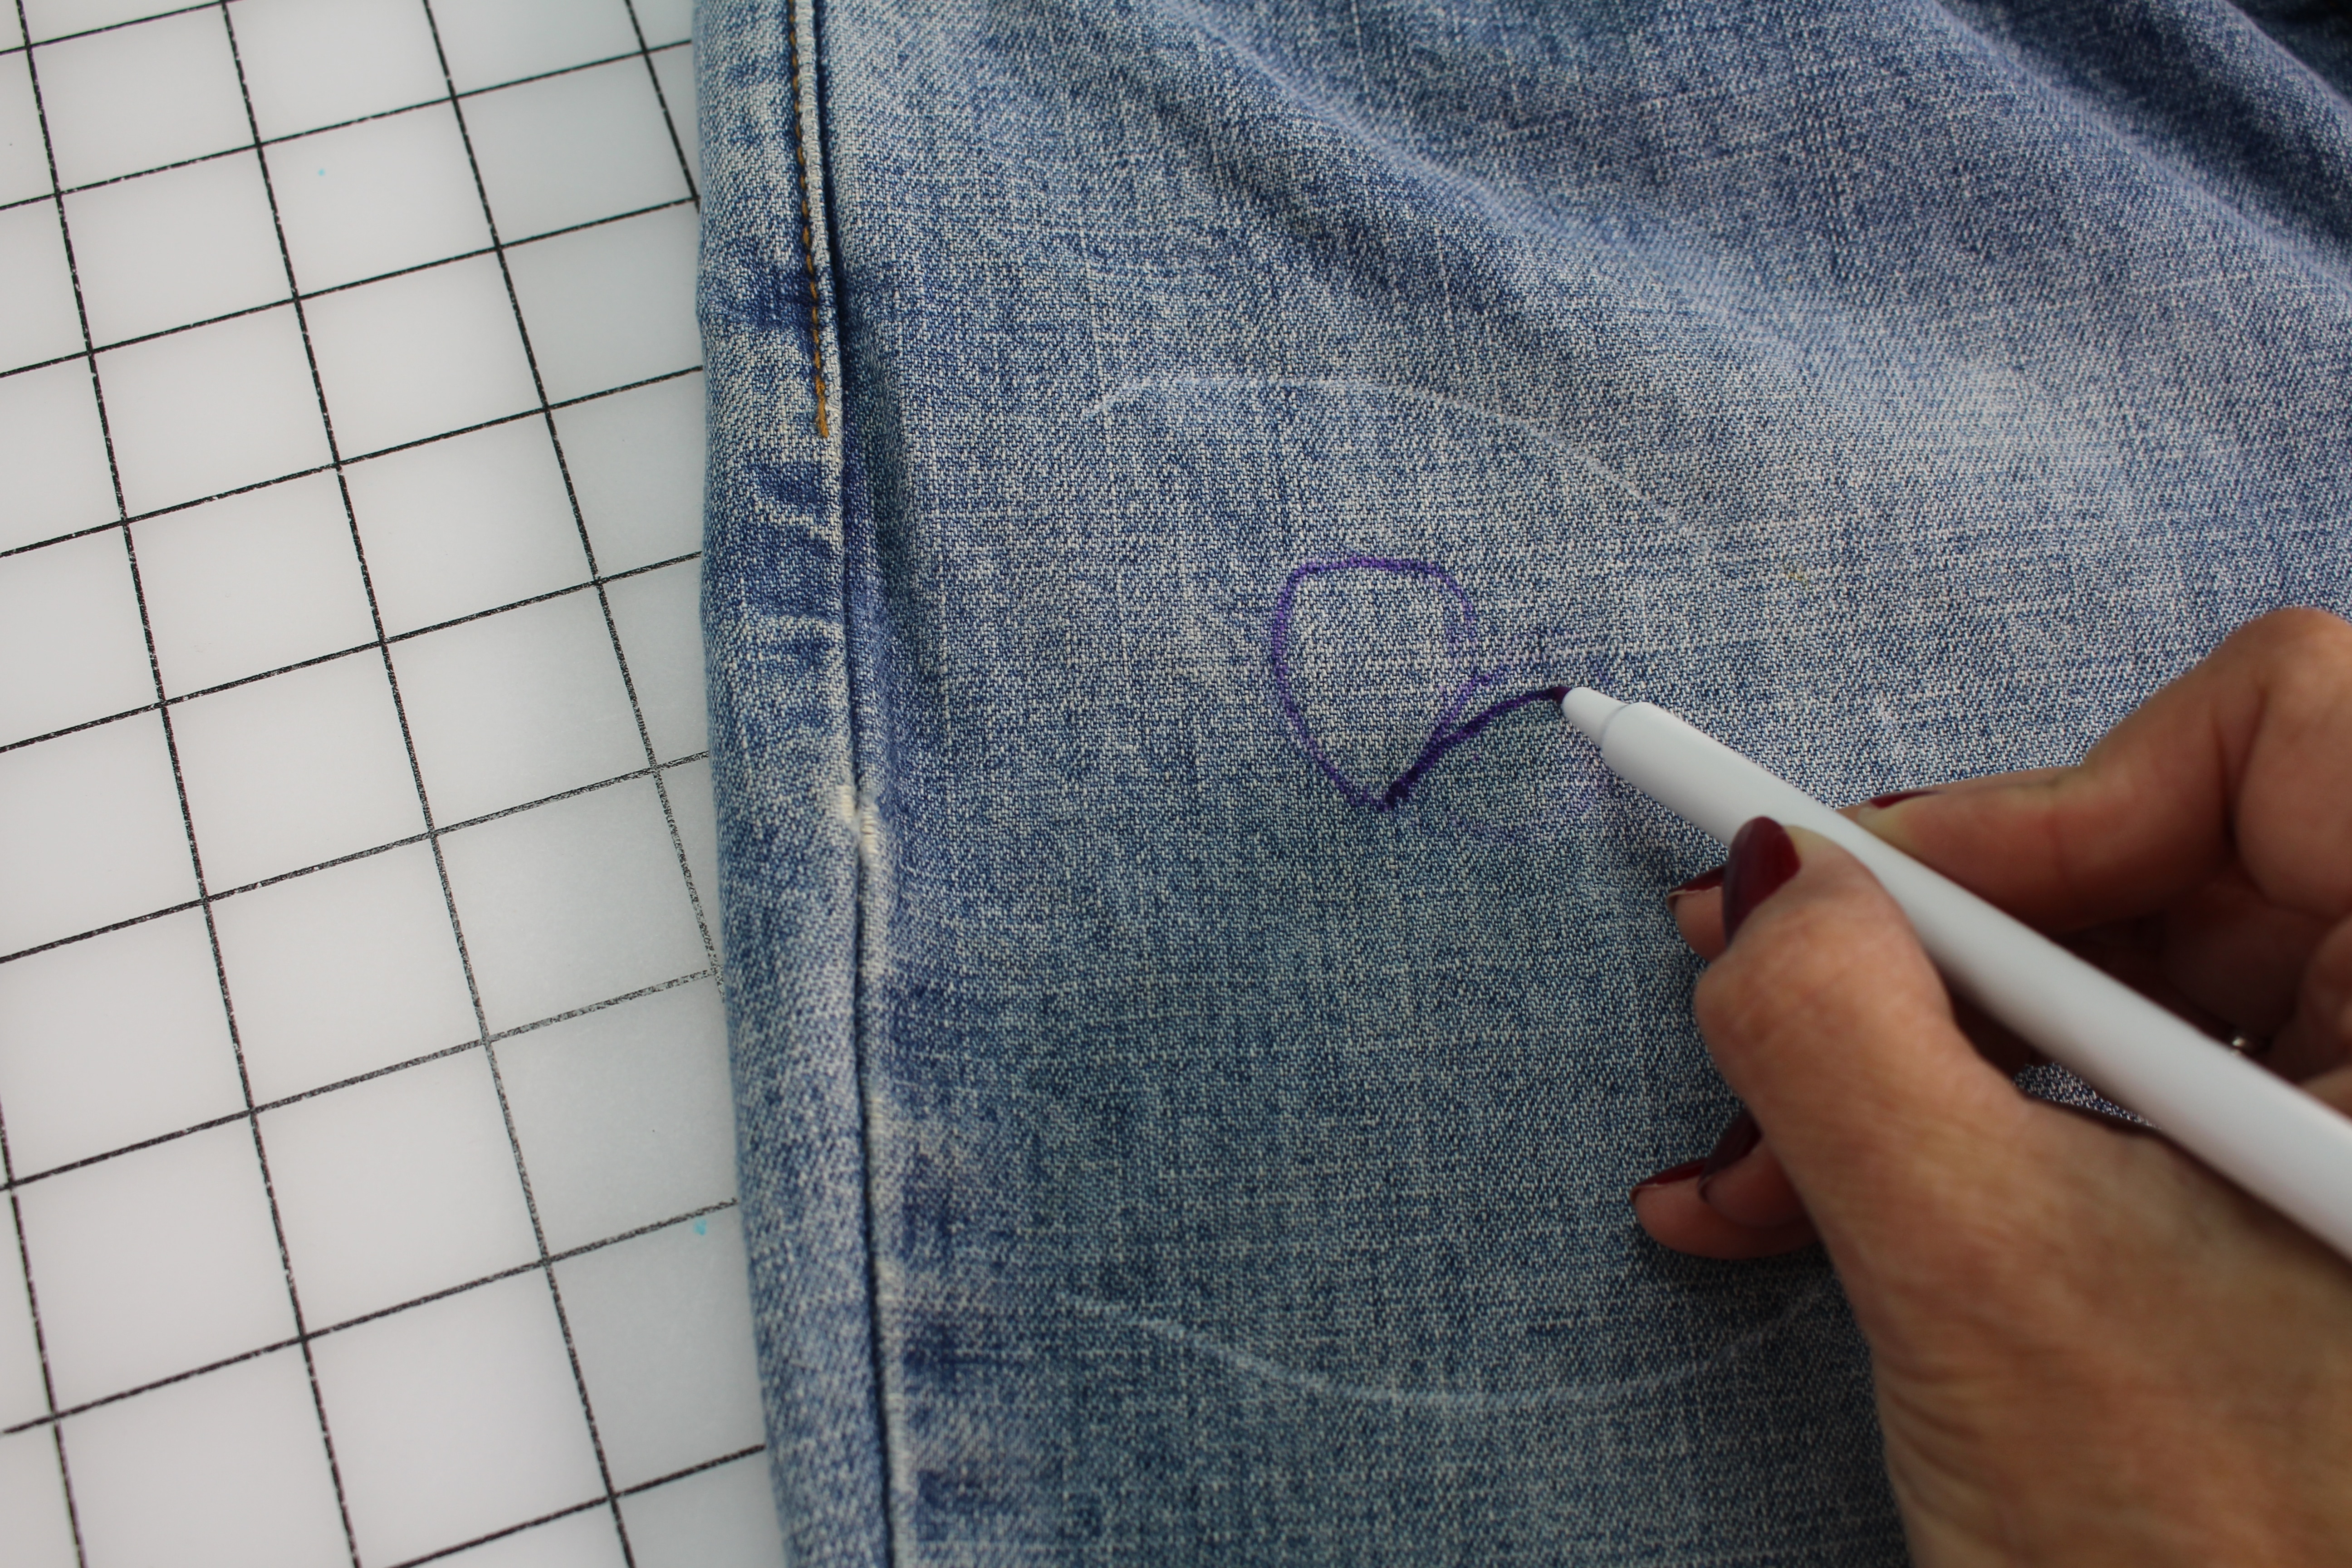
Choose a hoop size that can easily fit into the jean pant leg and large enough for the design you have in mind. Using tailors chalk, mark the placement for the design.
Draw a design with a fabric pen.
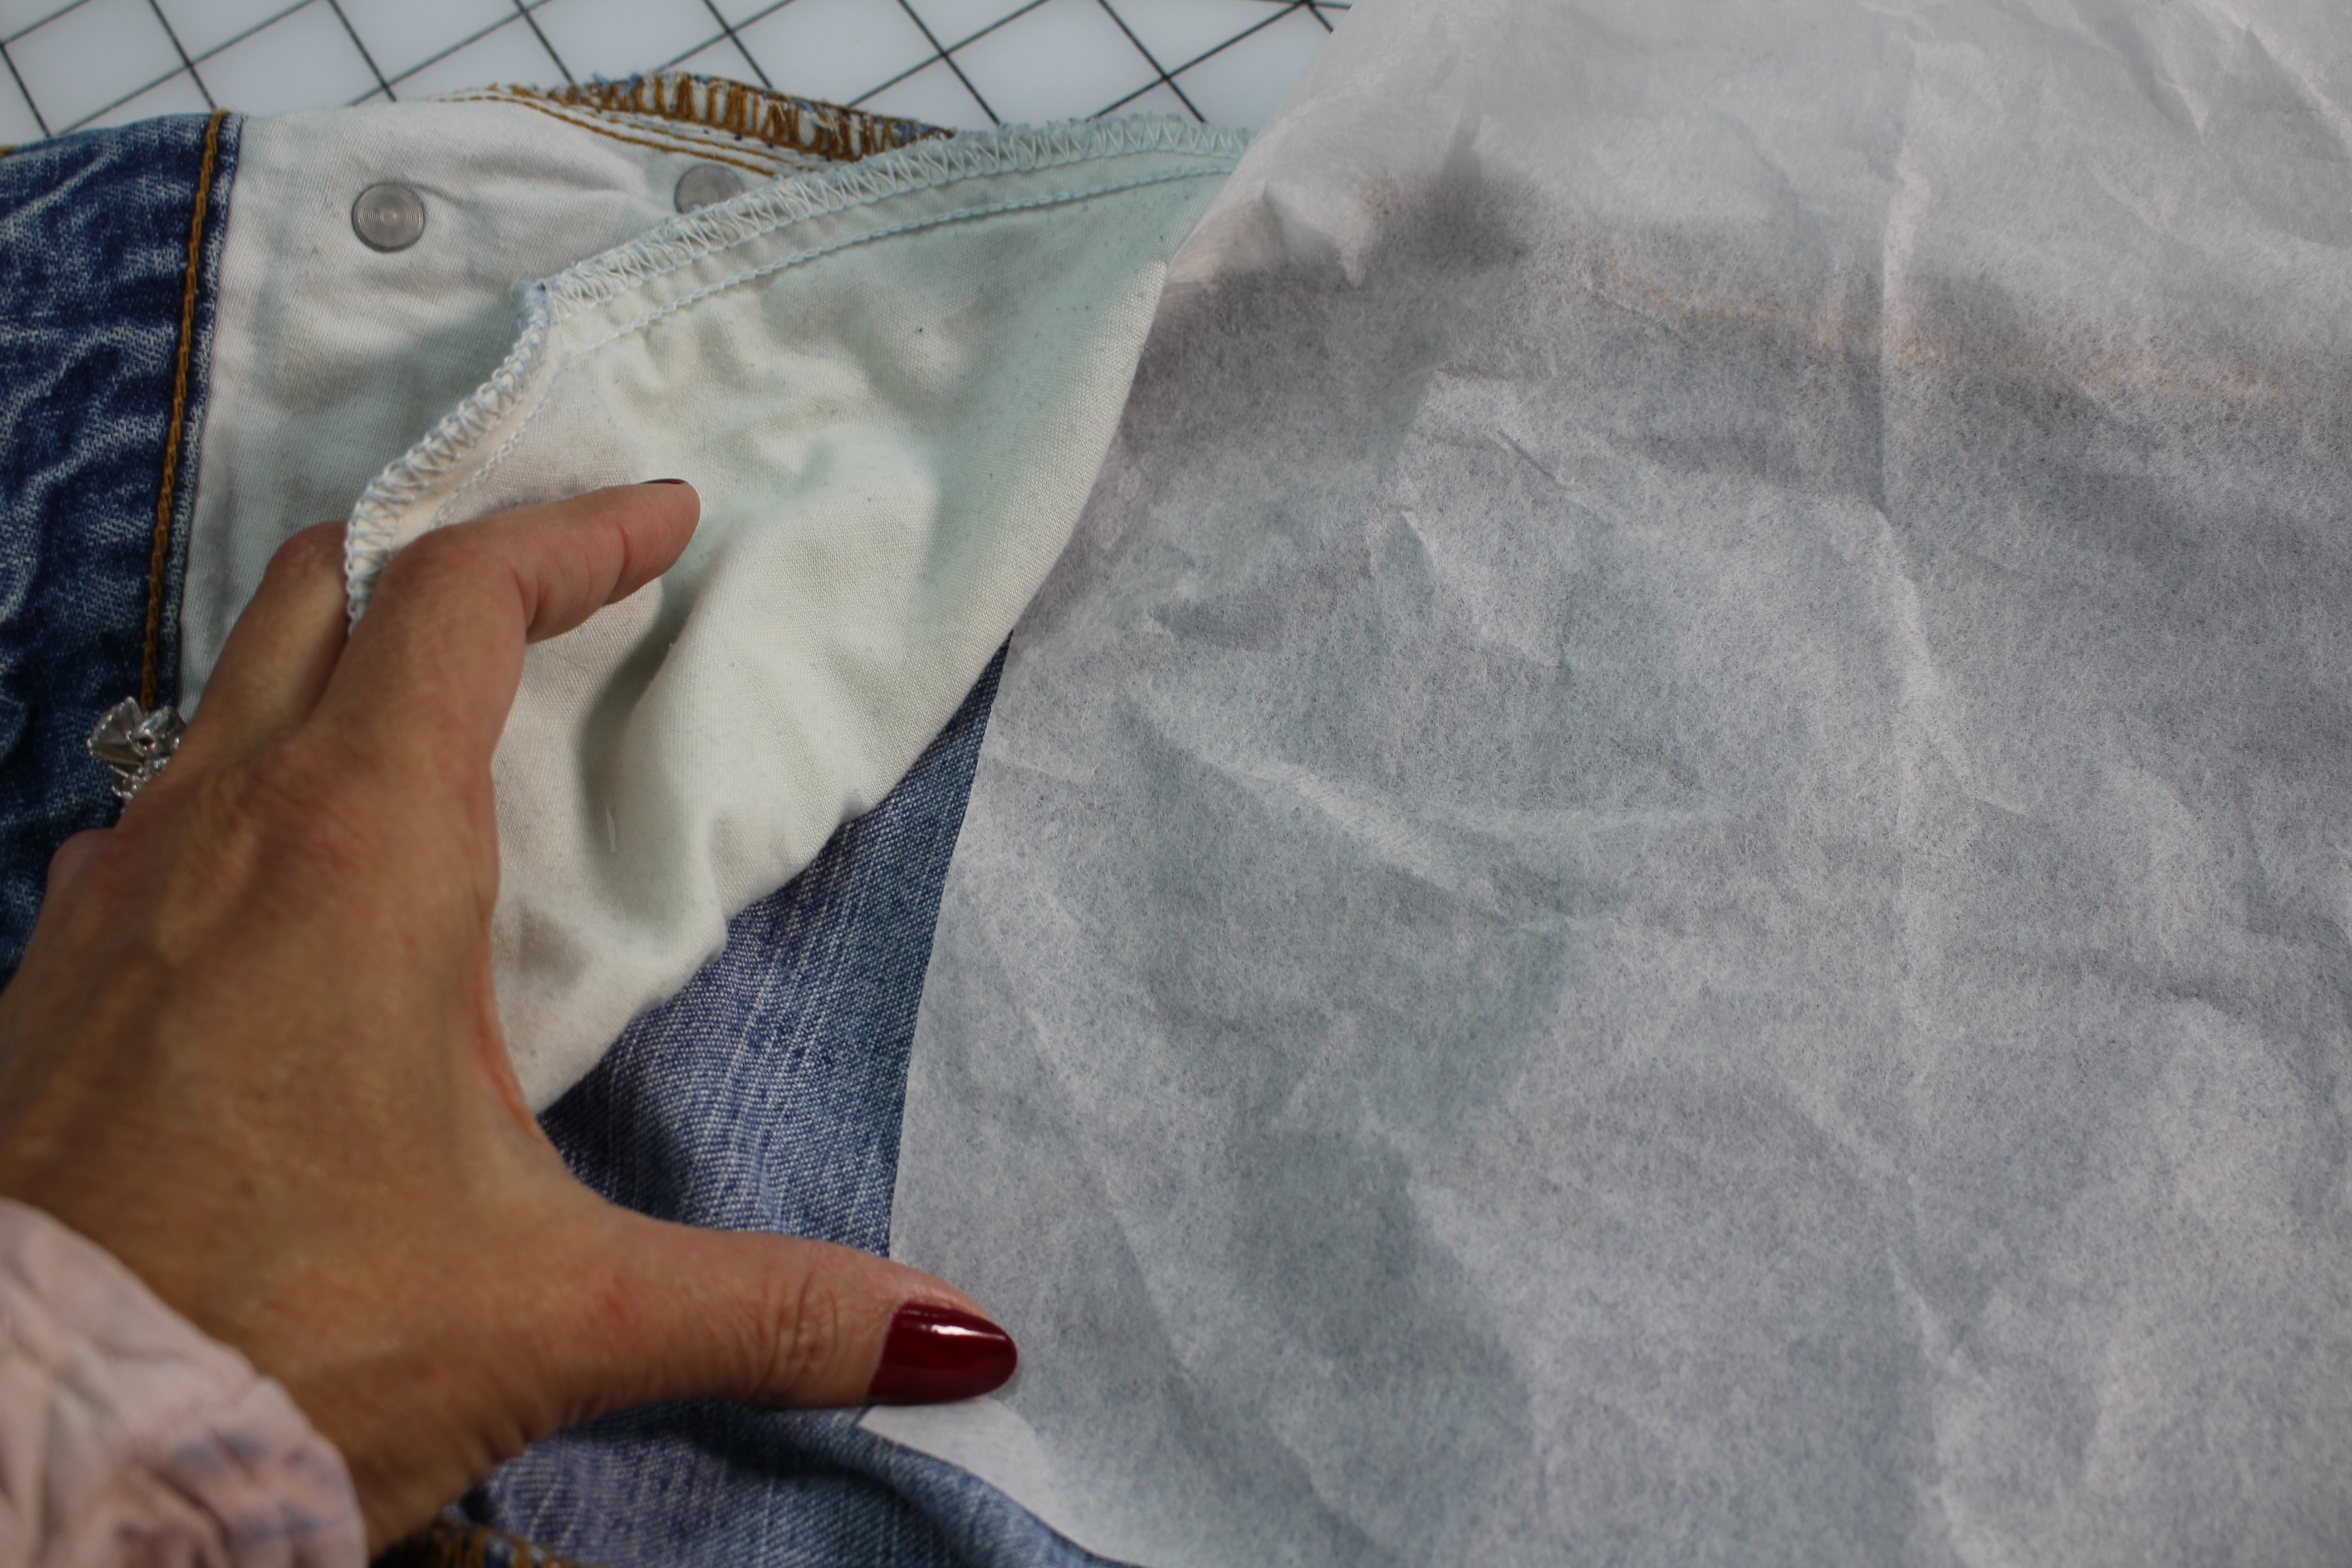
Hooping the Jeans
Slide the stabilizer into the jeans leg behind the design area. My design is close to the front pocket, so I will pull the pocket lining out of the hooping area.
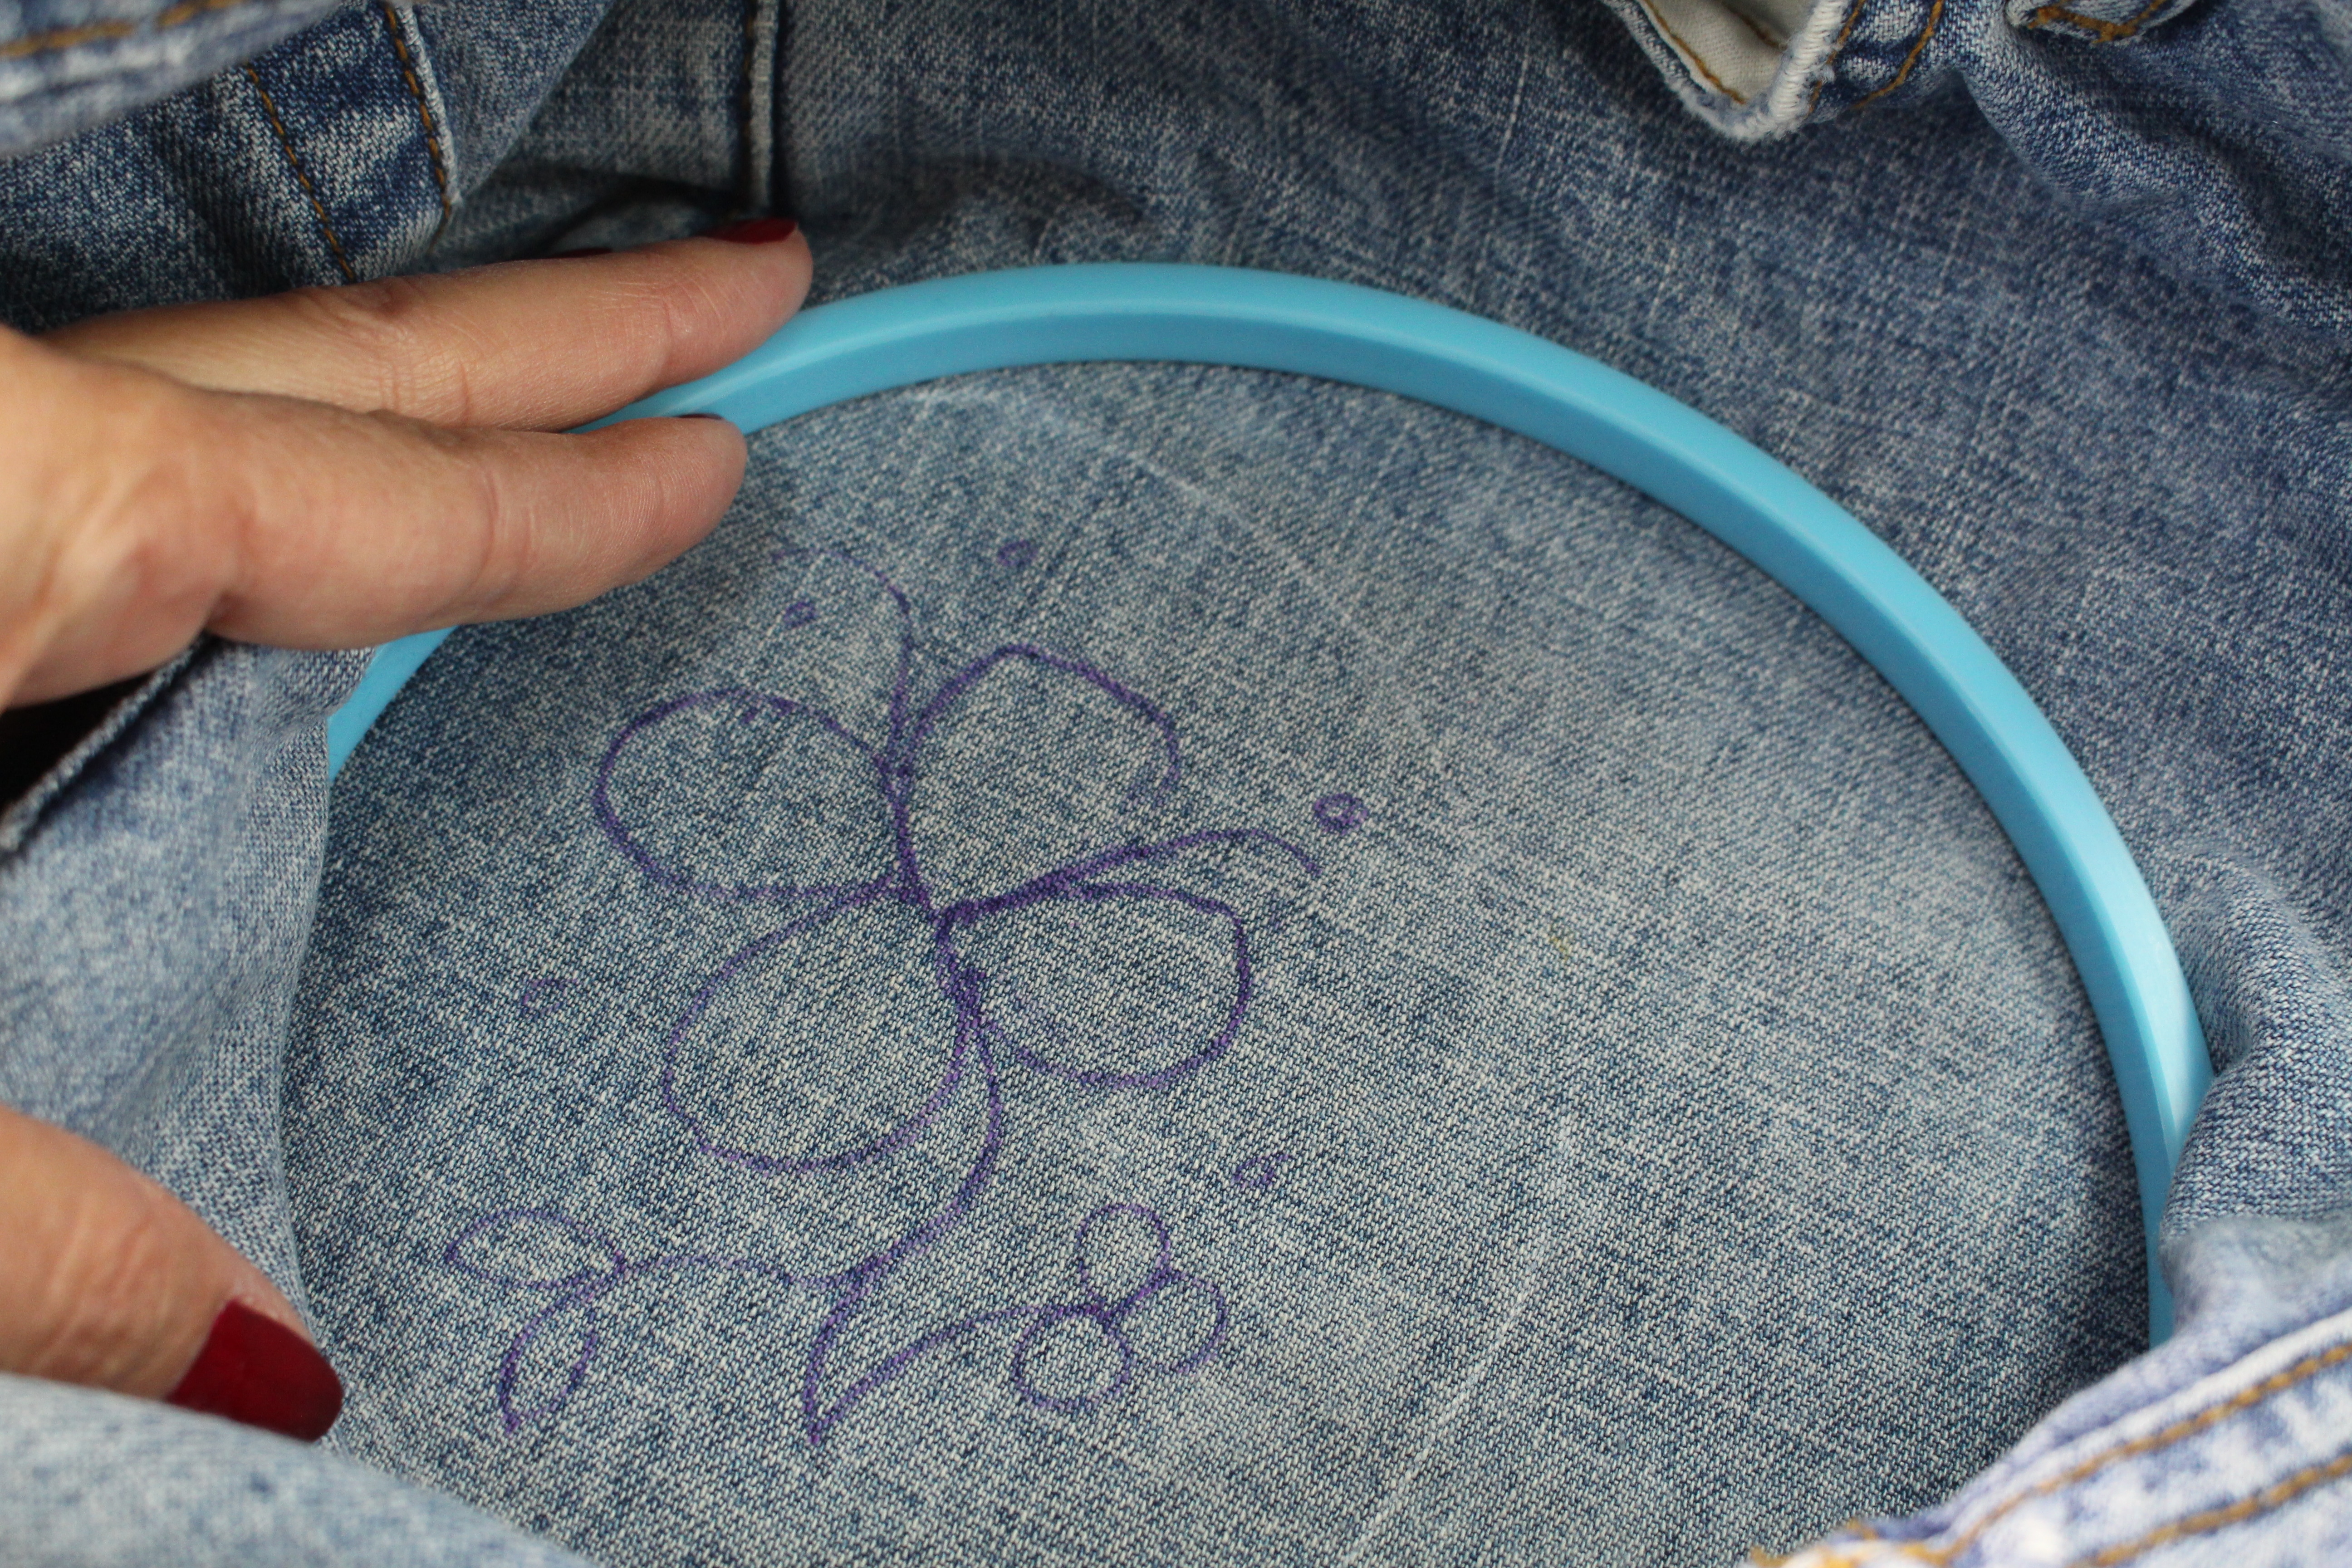
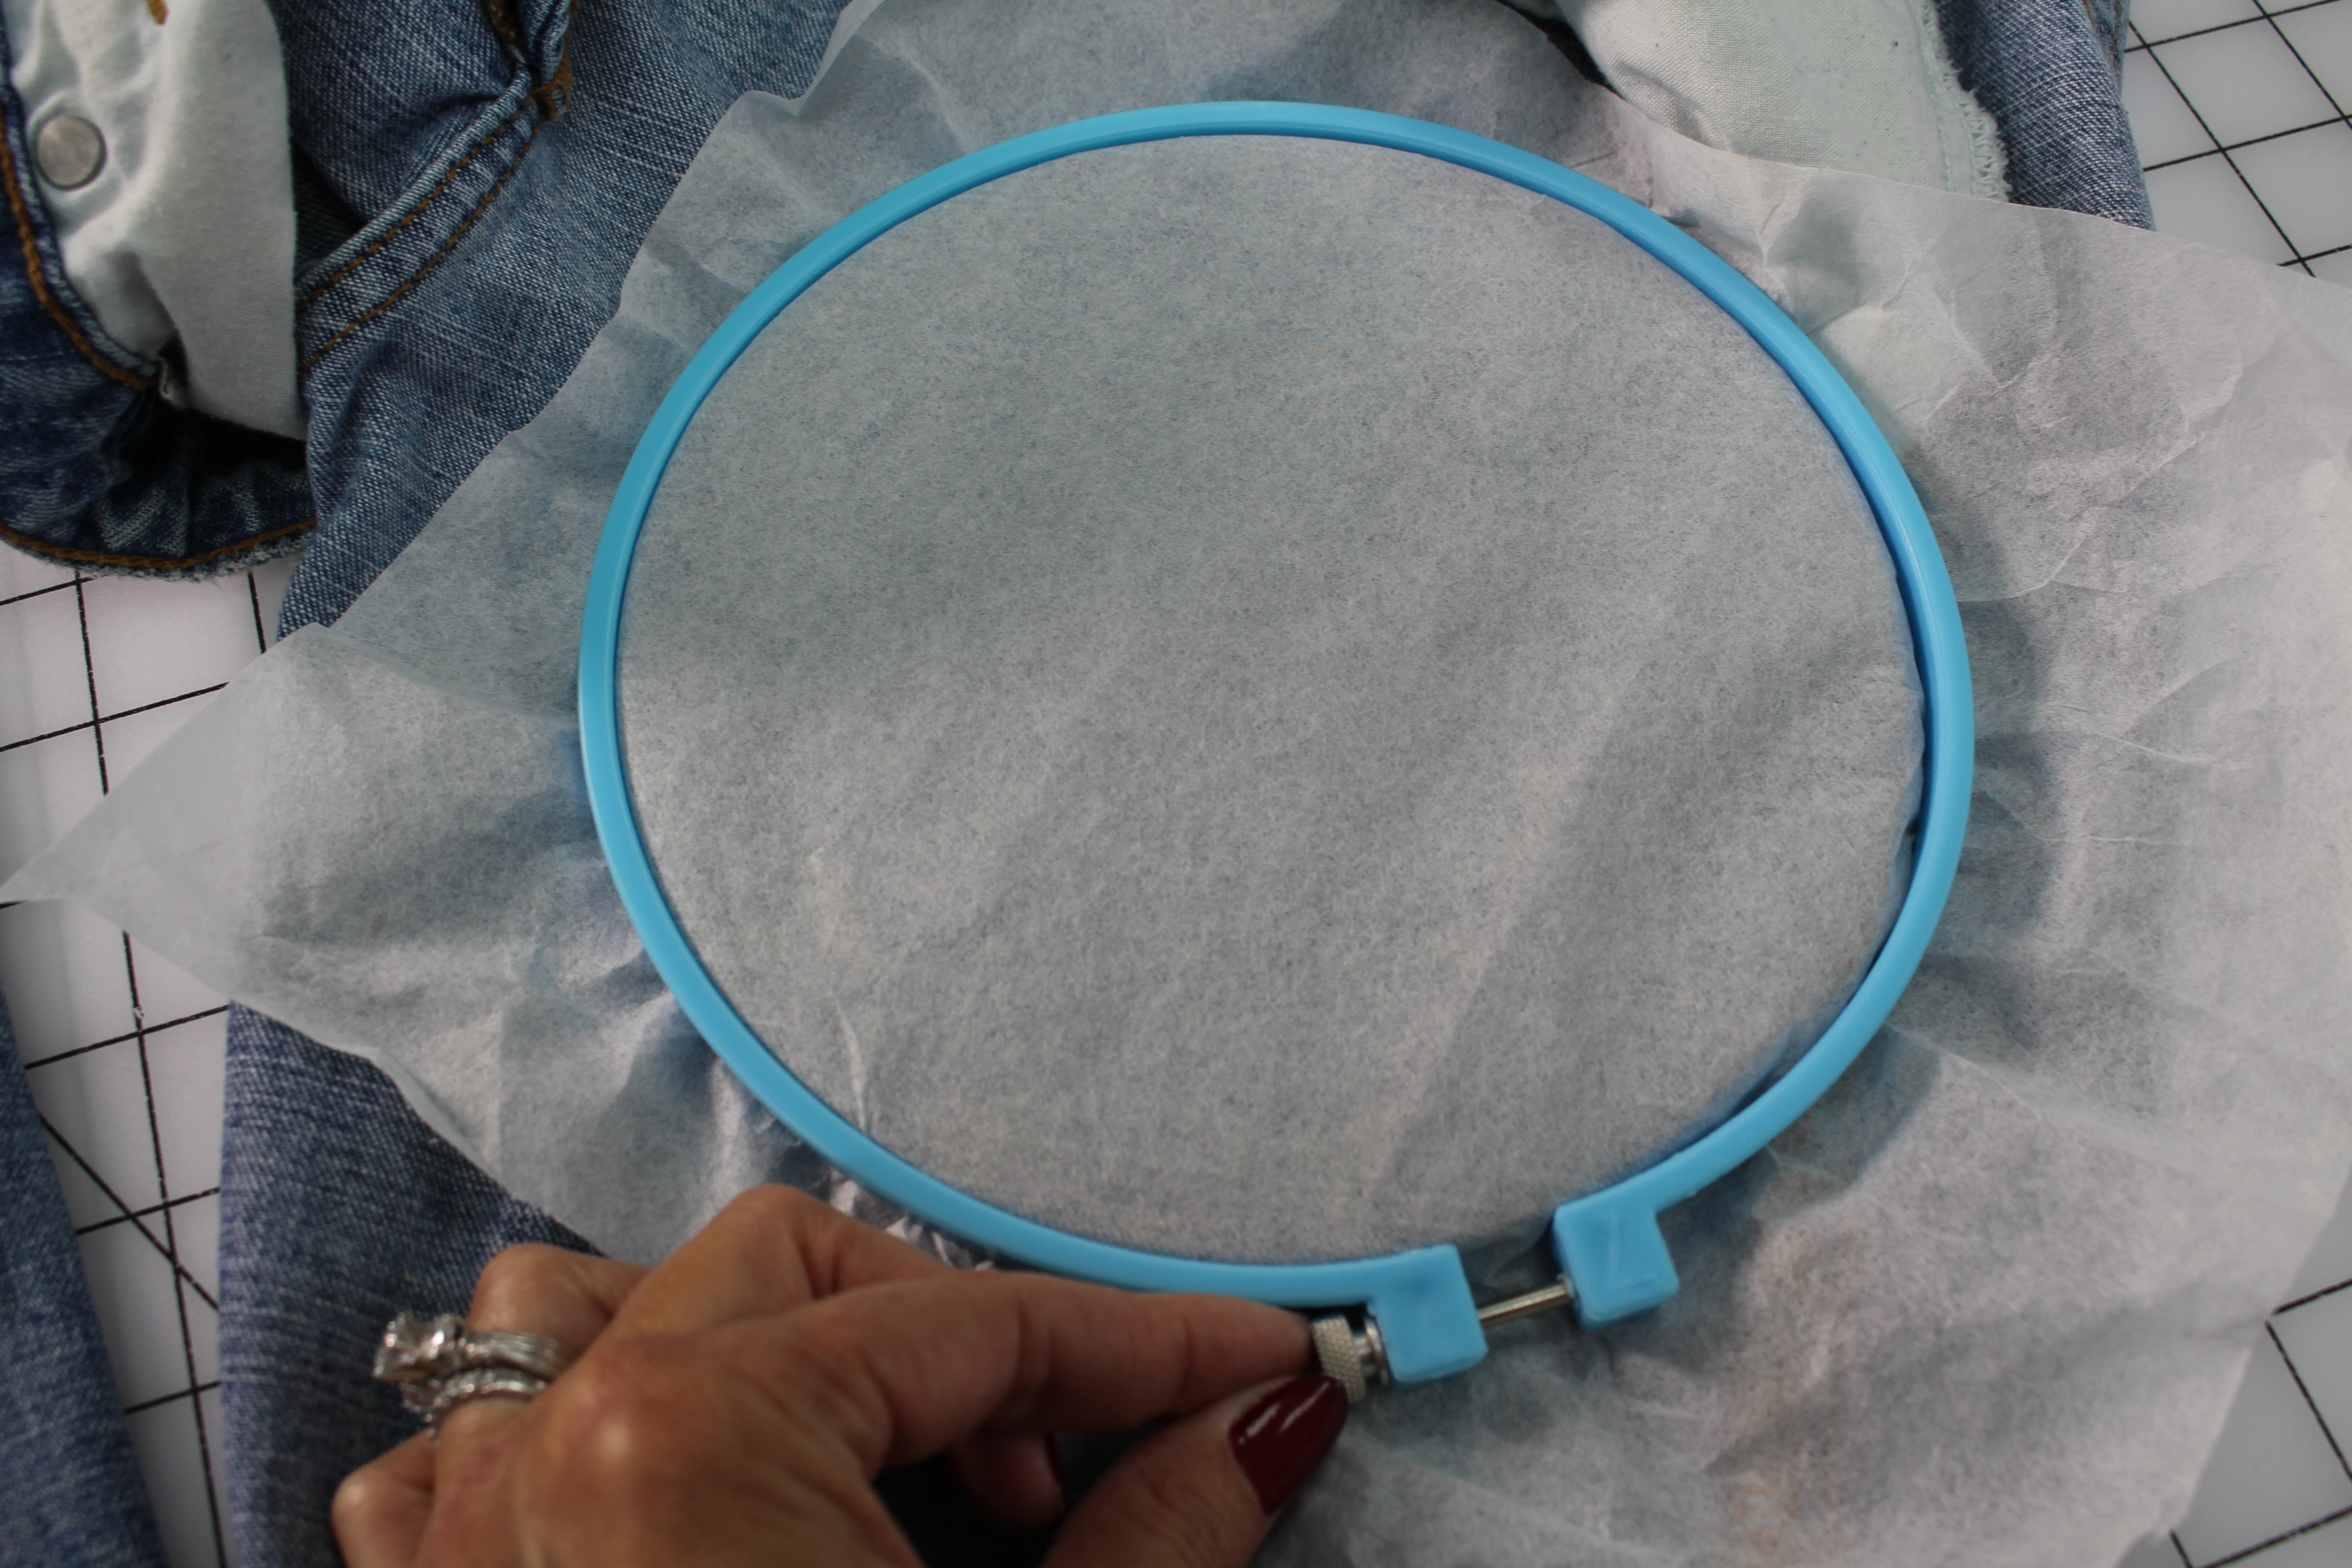
Align the smaller inside hoop on the outside of the jean leg with the larger hoop and stabilizer inside the jeans leg.
Push the hoop closed, encasing the jean fabric and stabilizer, and tighten the screw on the hoop.
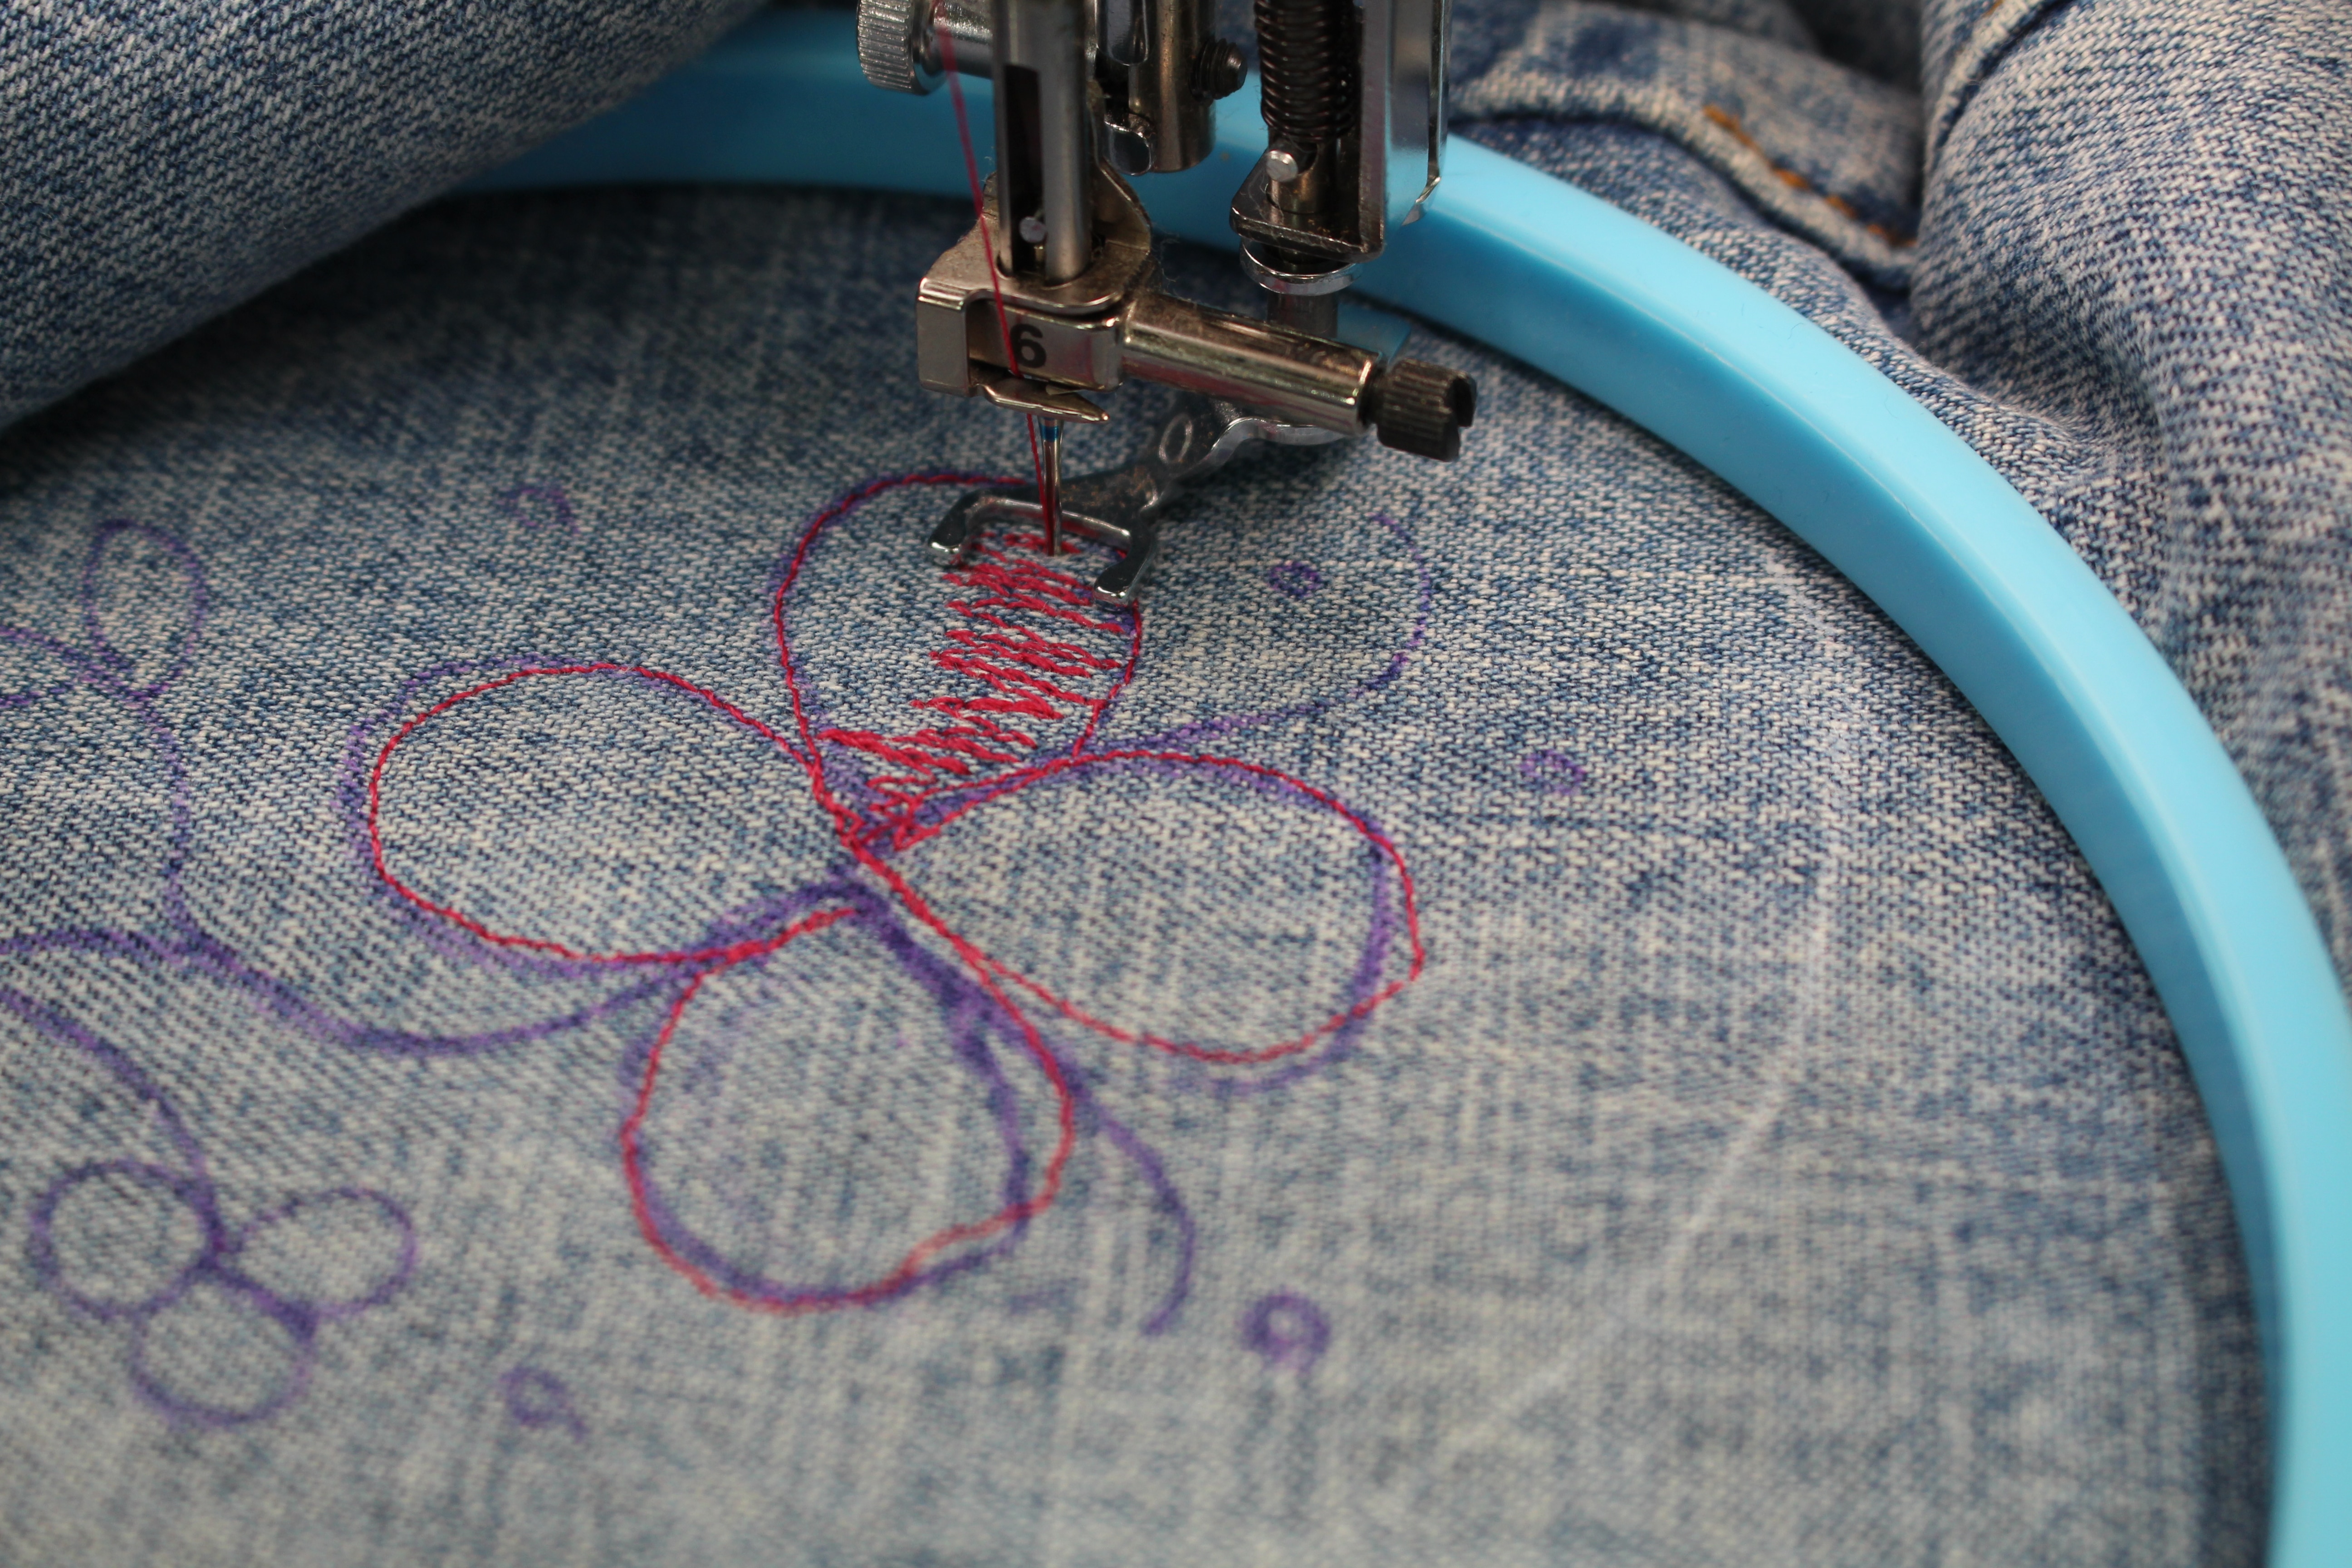
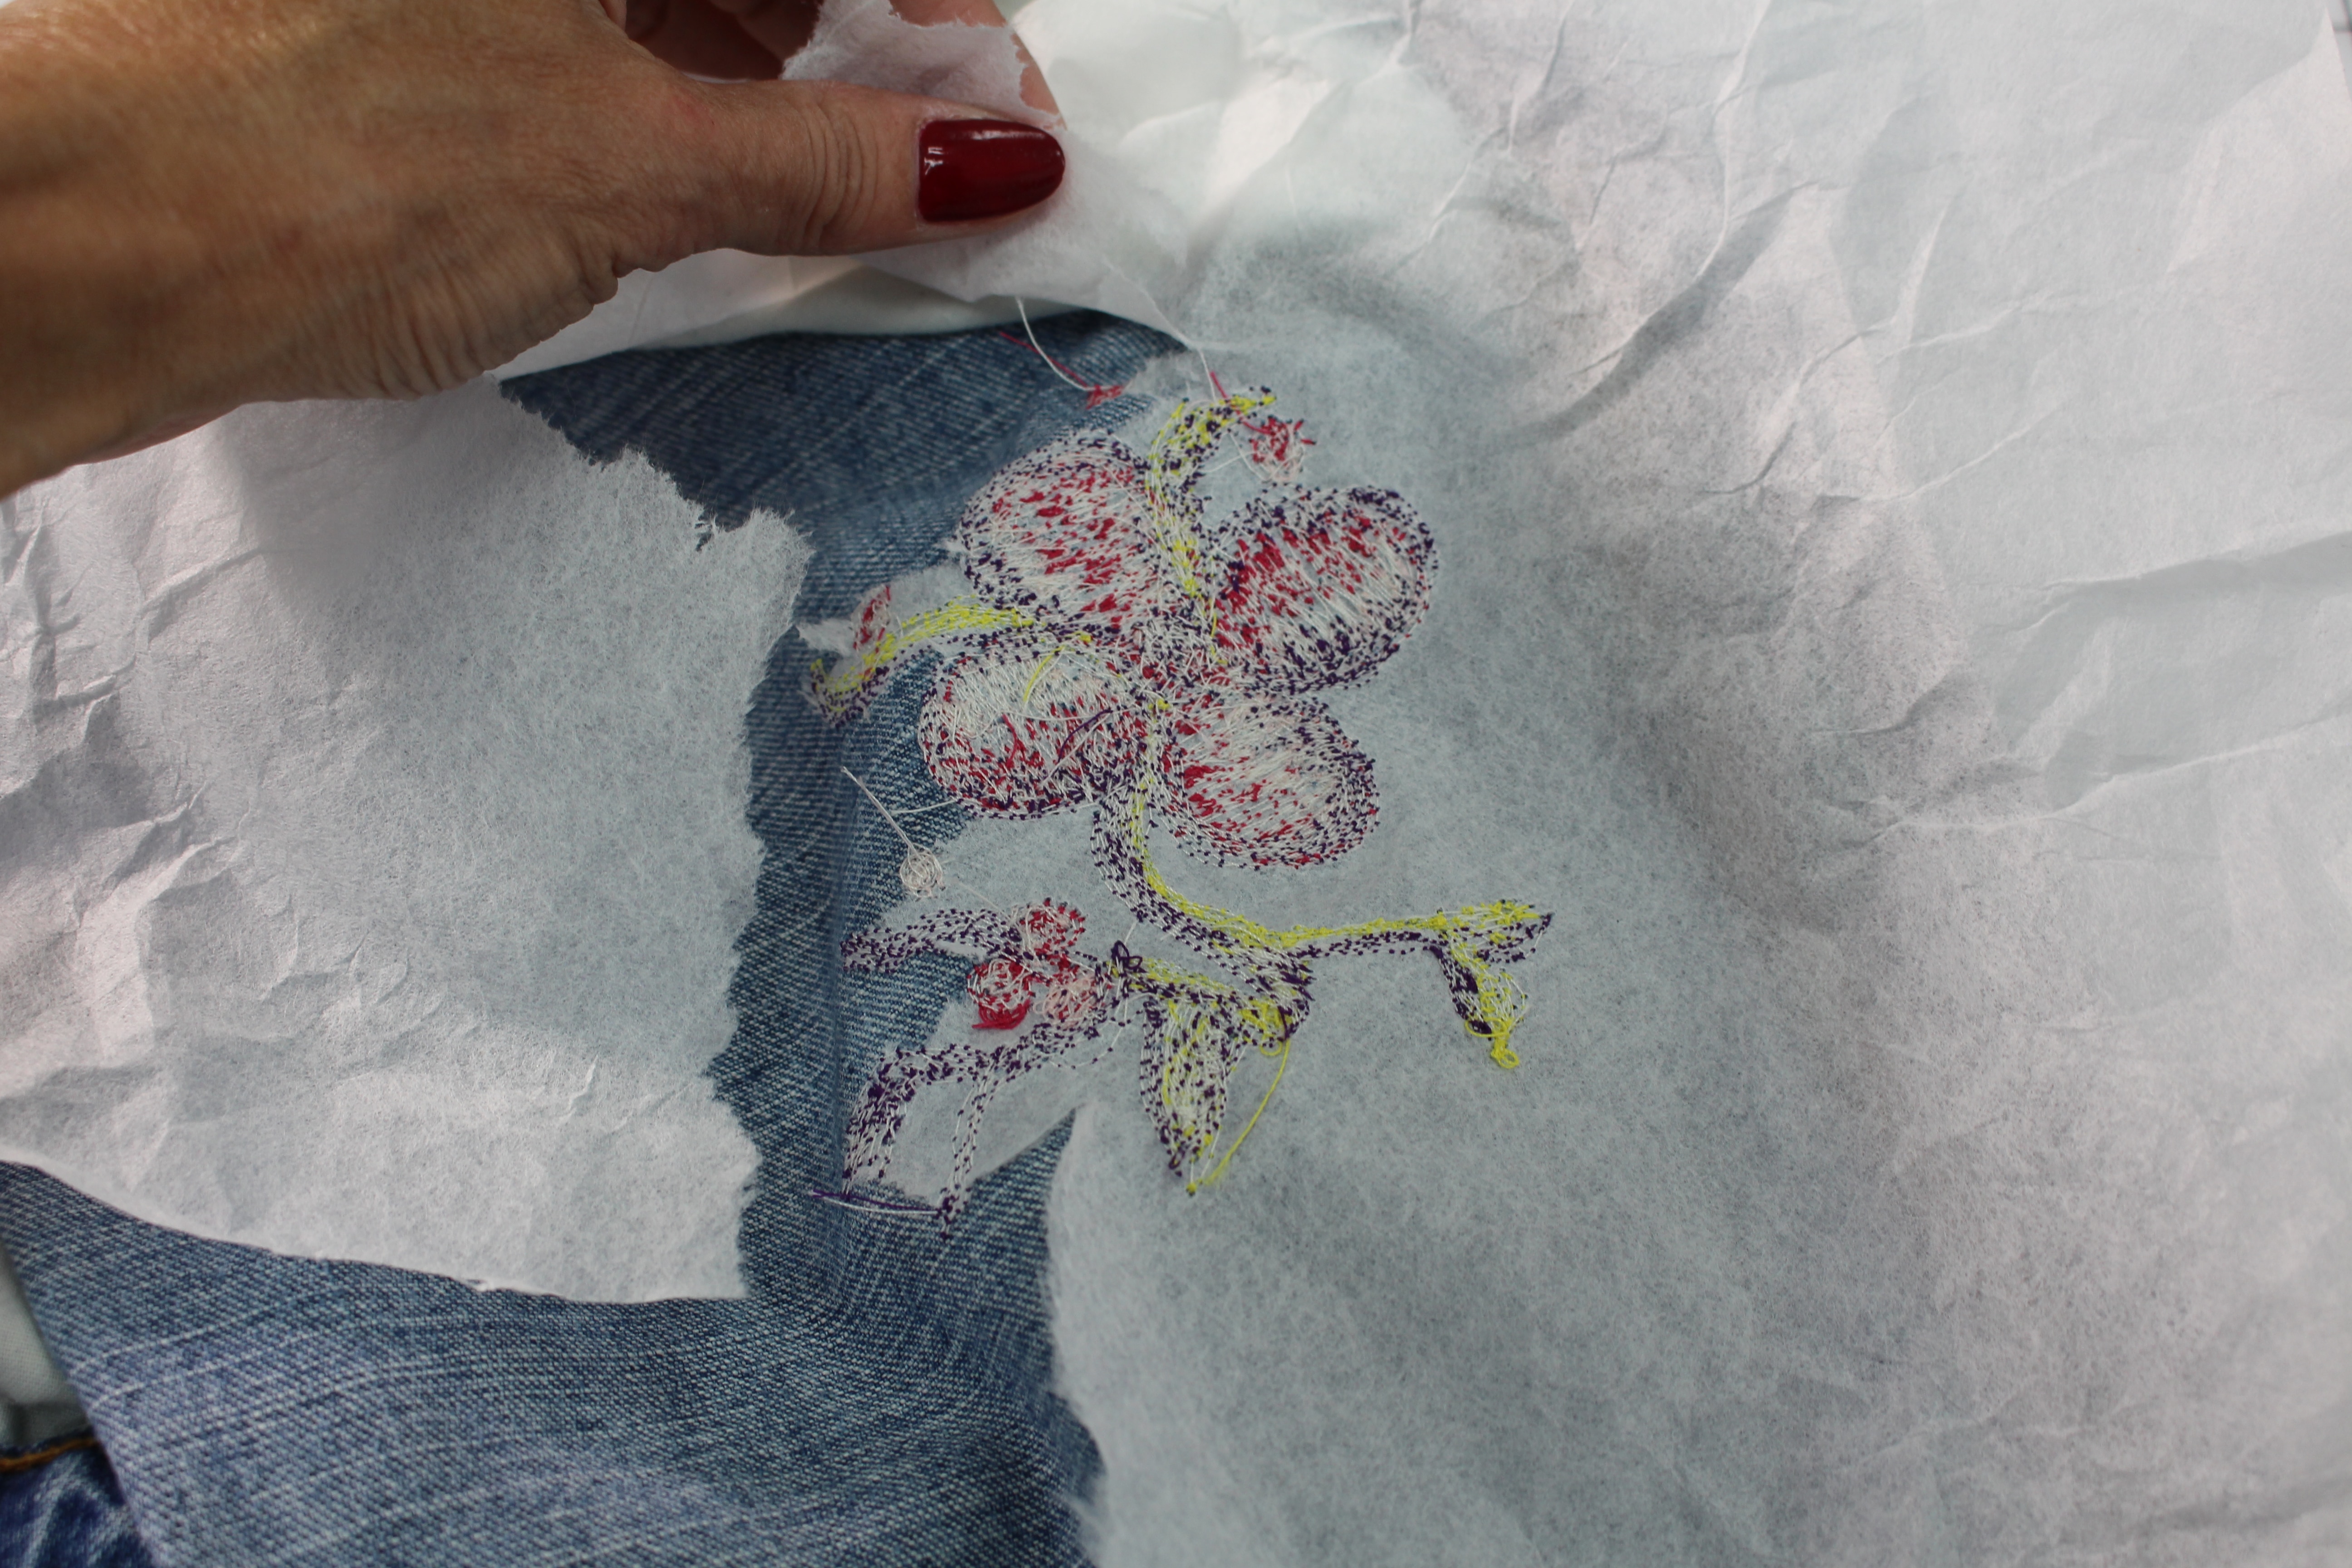
Free Motion Embroidery
Set the sewing machine up for free motion quilting and slide the hoop under the presser foot, making sure to keep the back of the jean leg out of the way. We only want the fabric in the hoop under the needle on the machine.
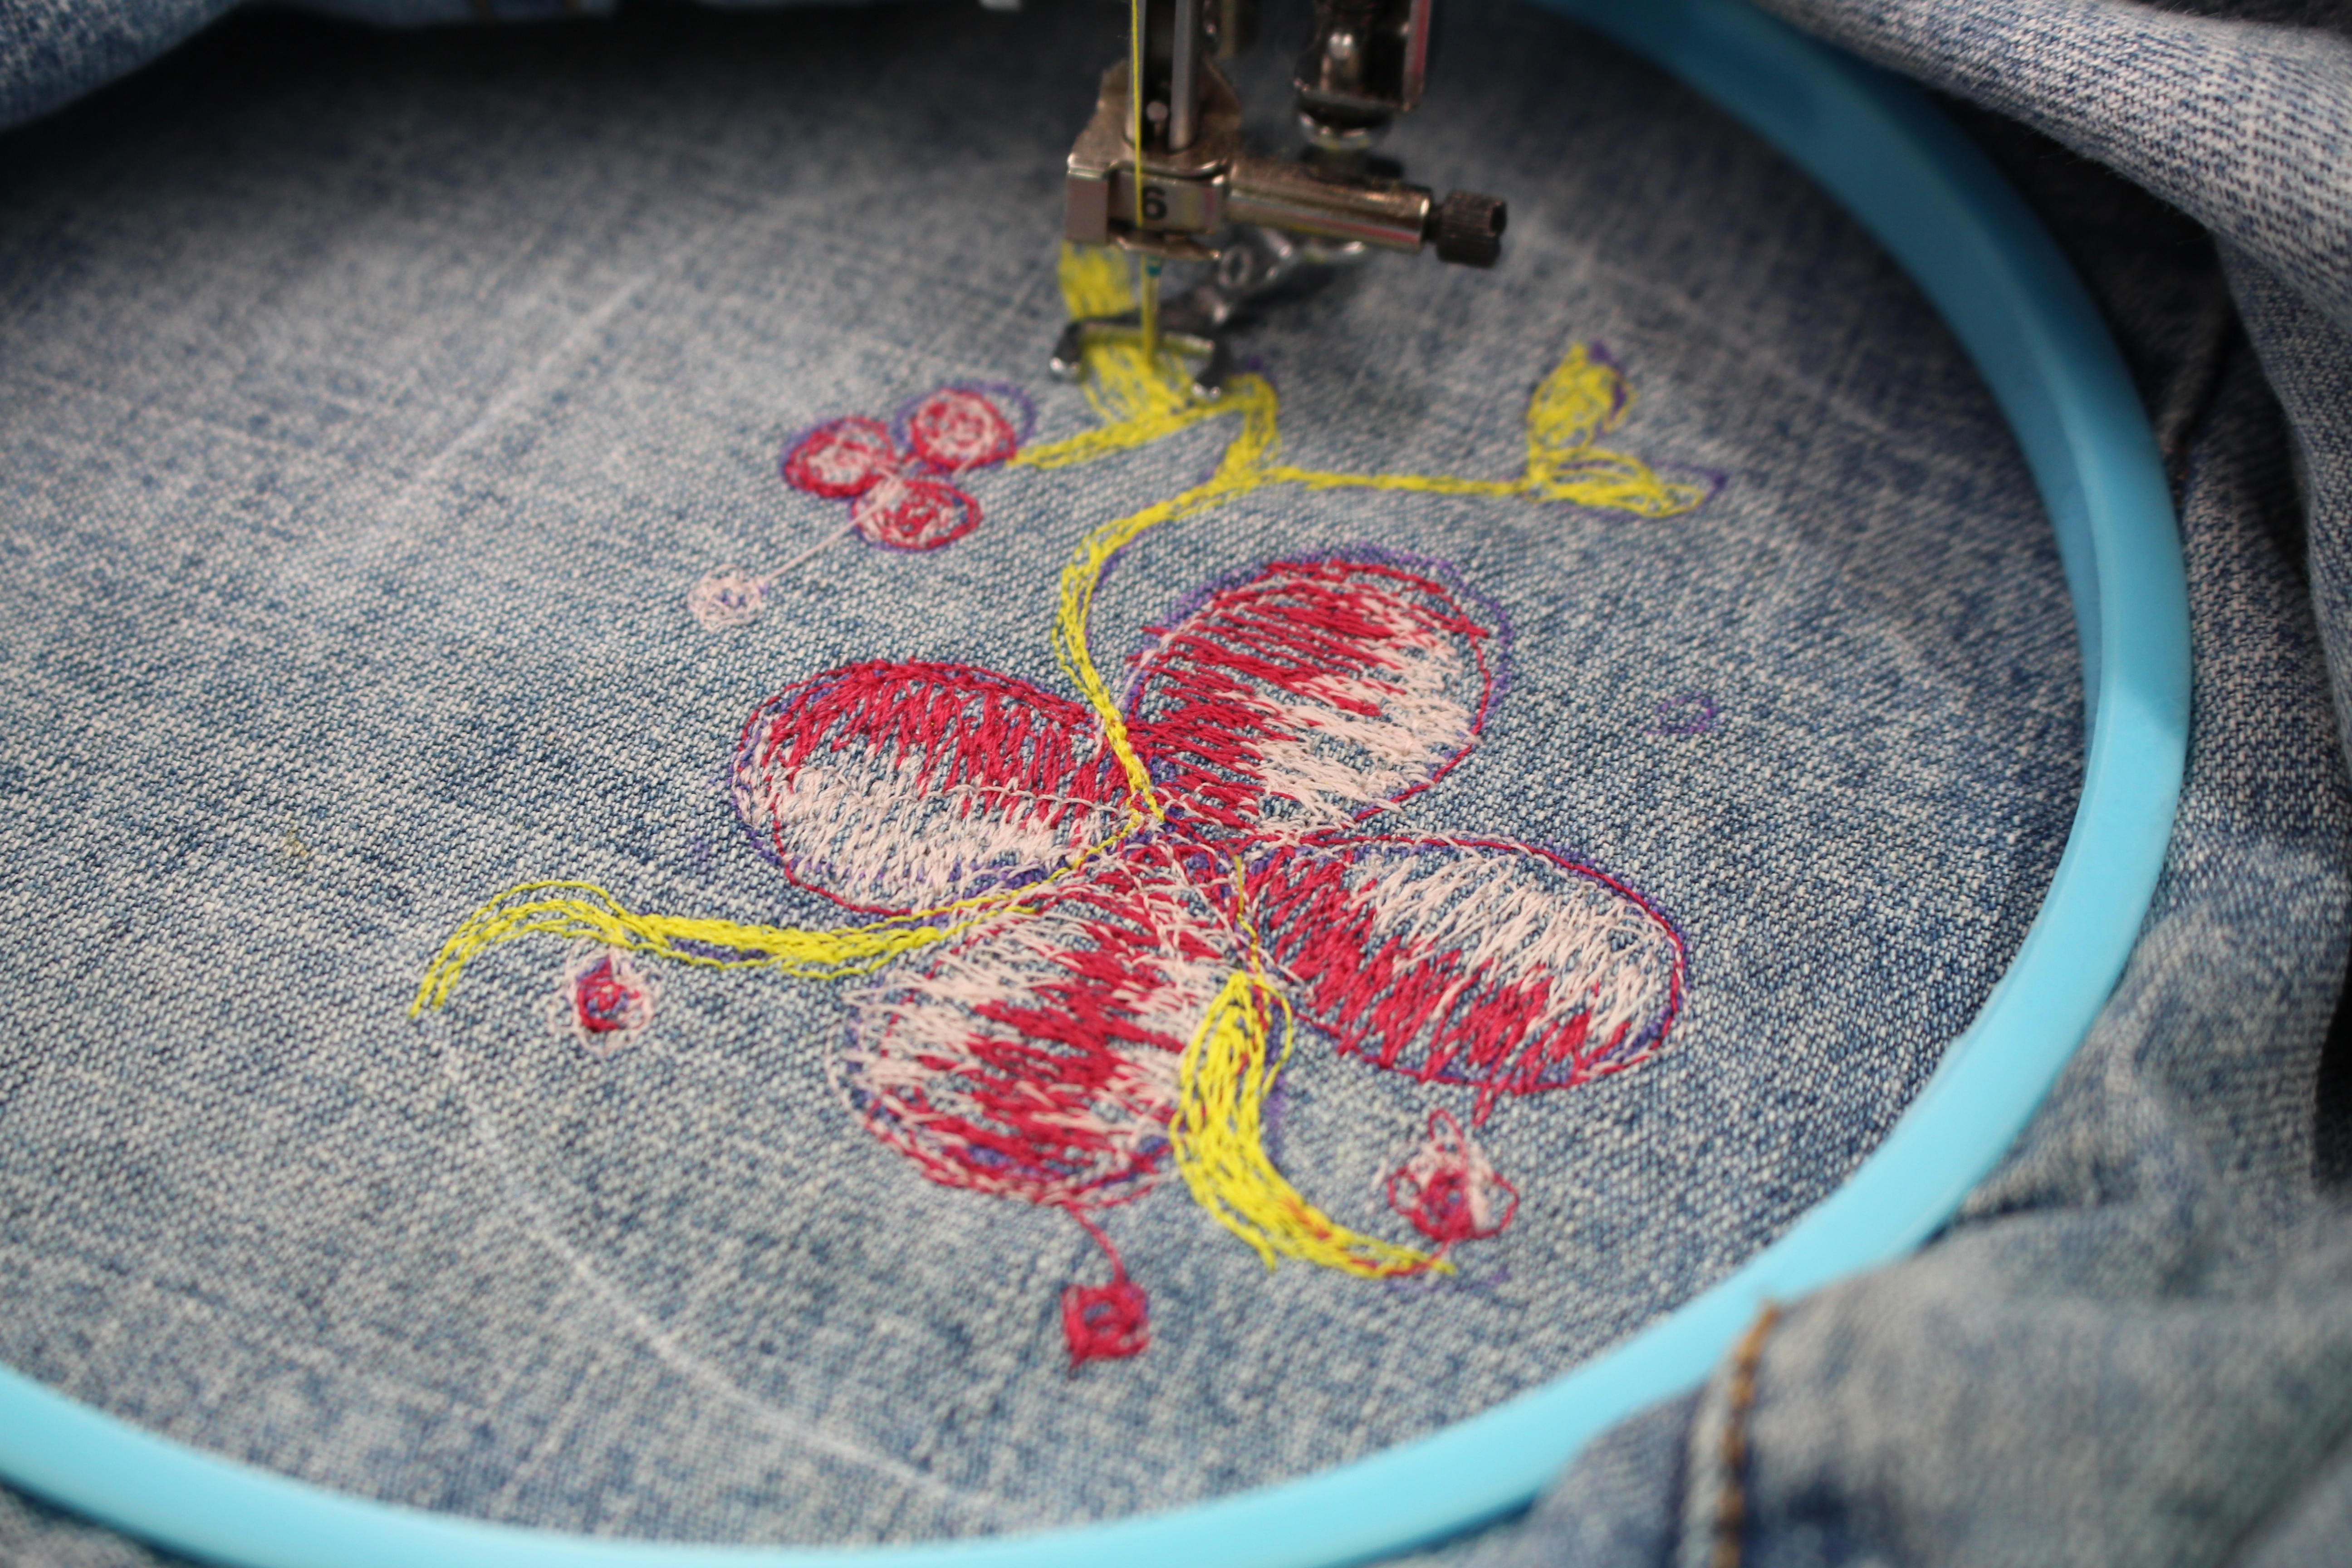
Start in the middle of the design and fill in the design with thread.
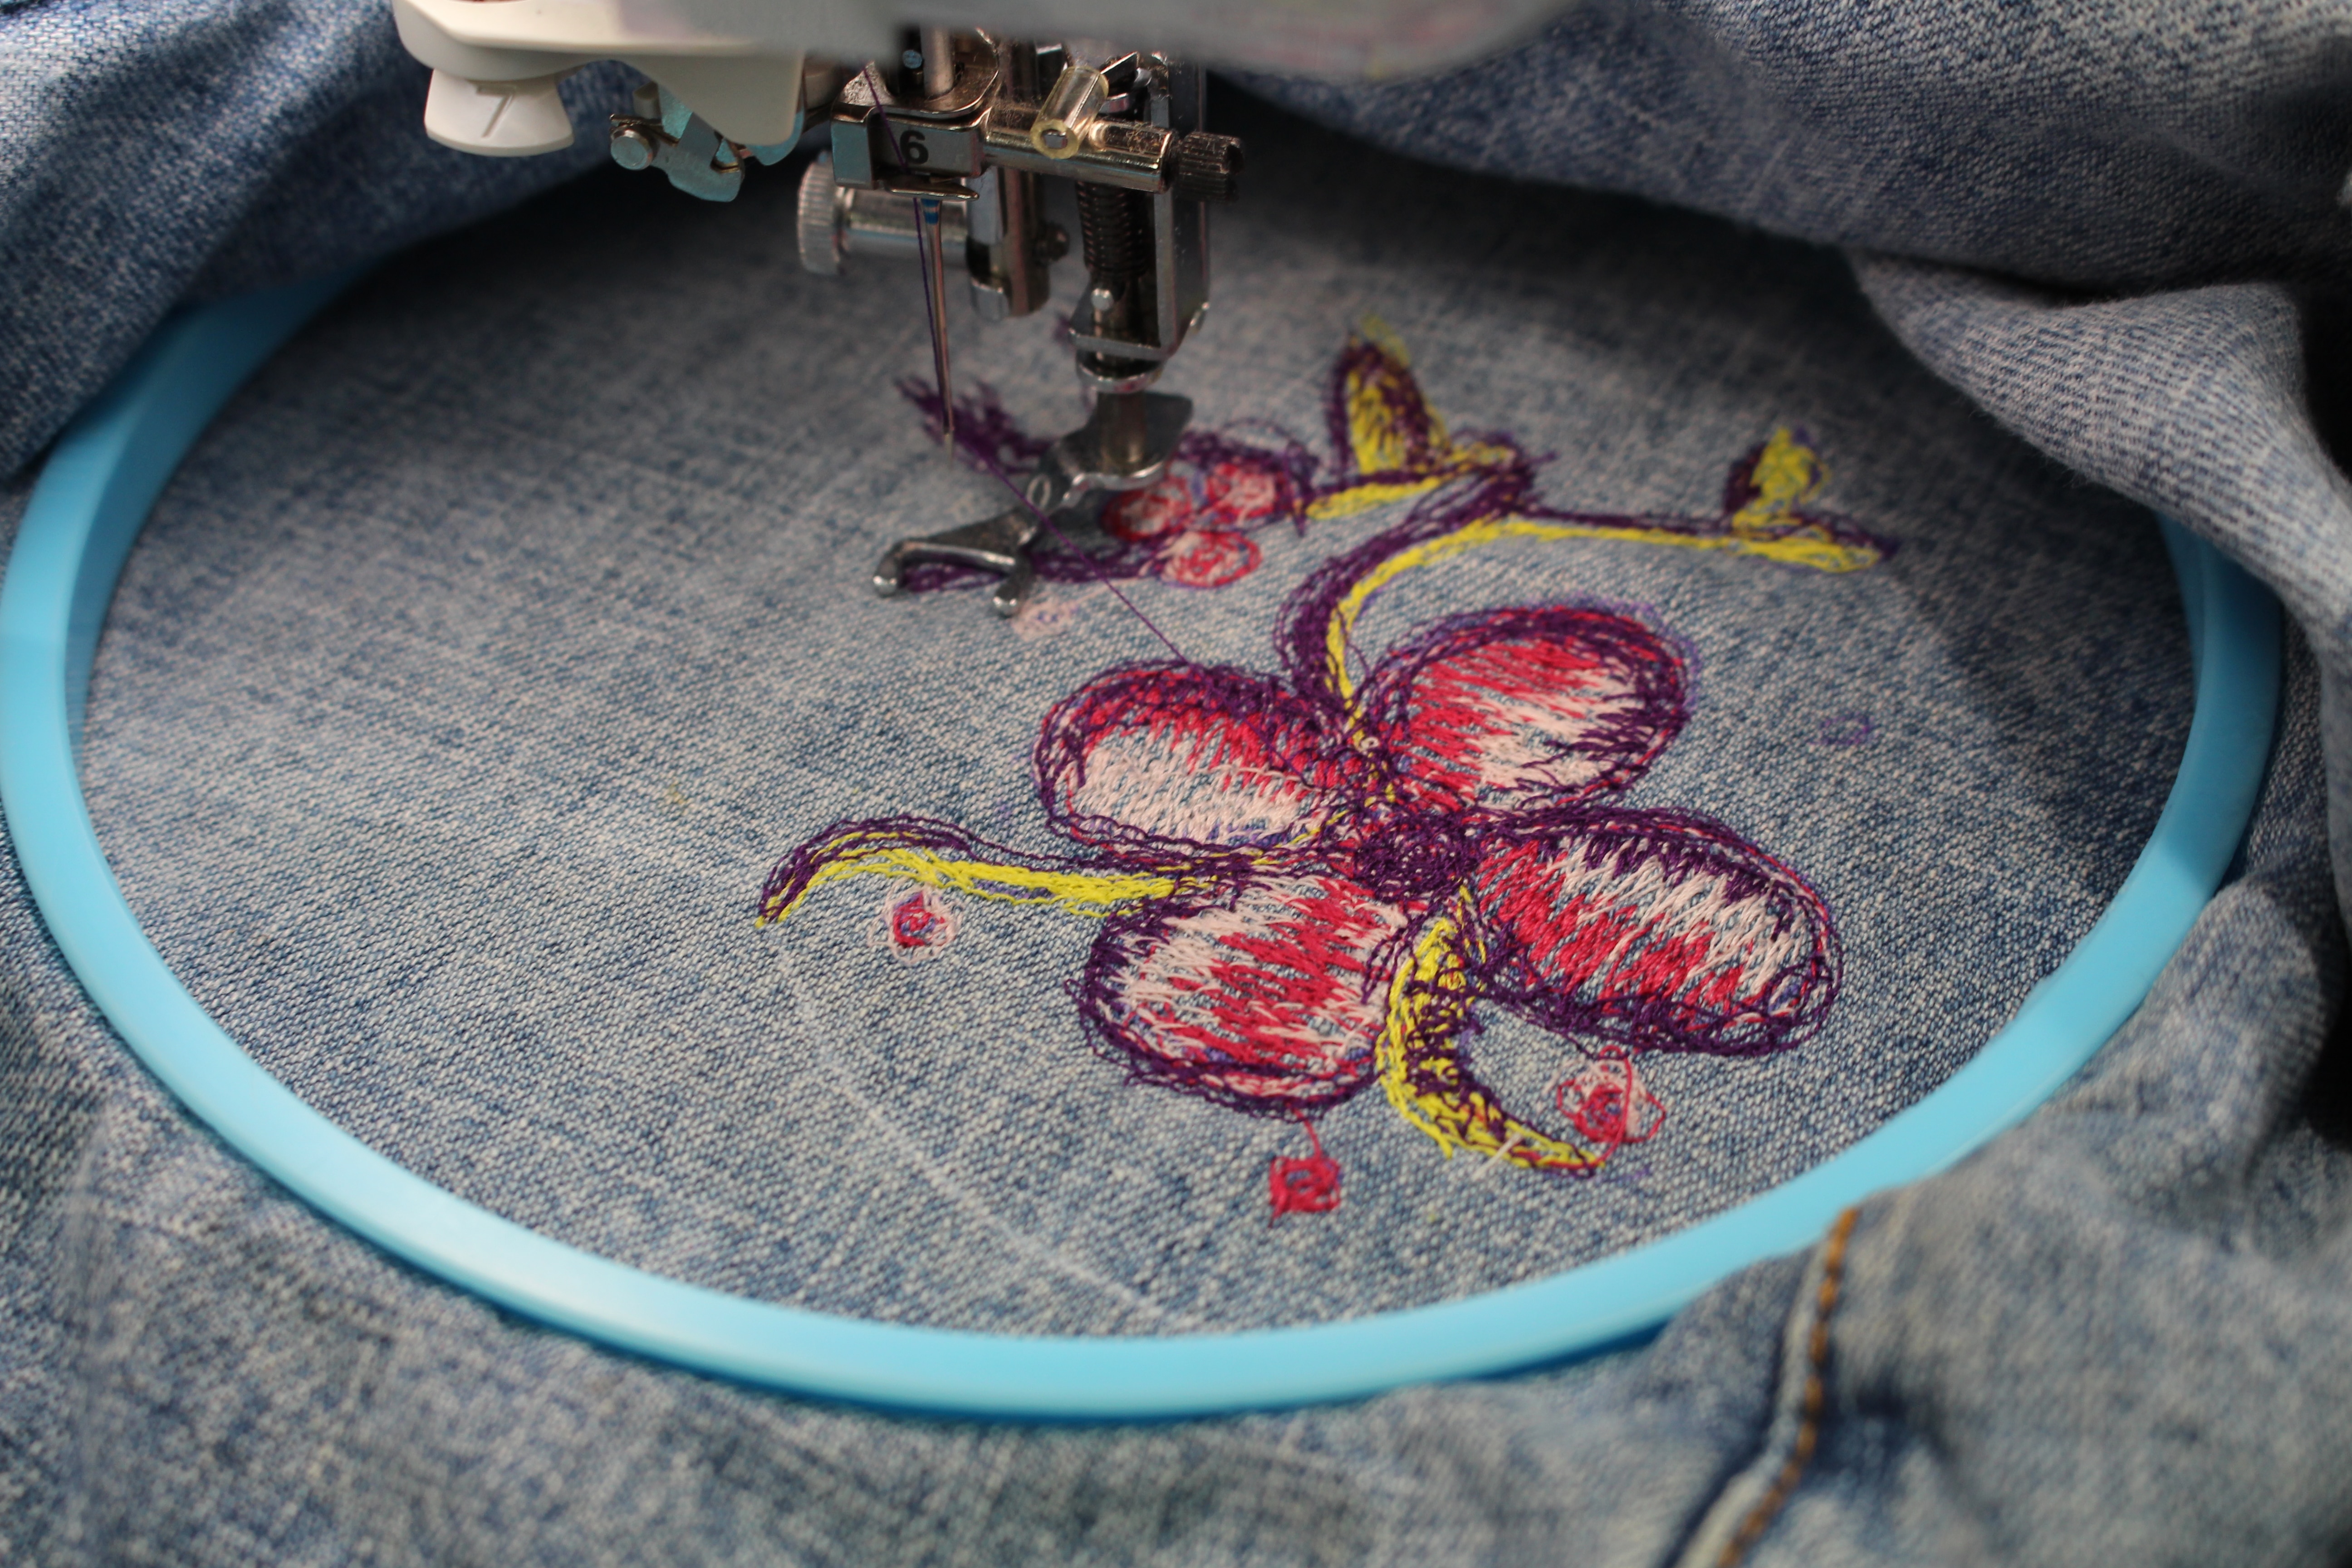
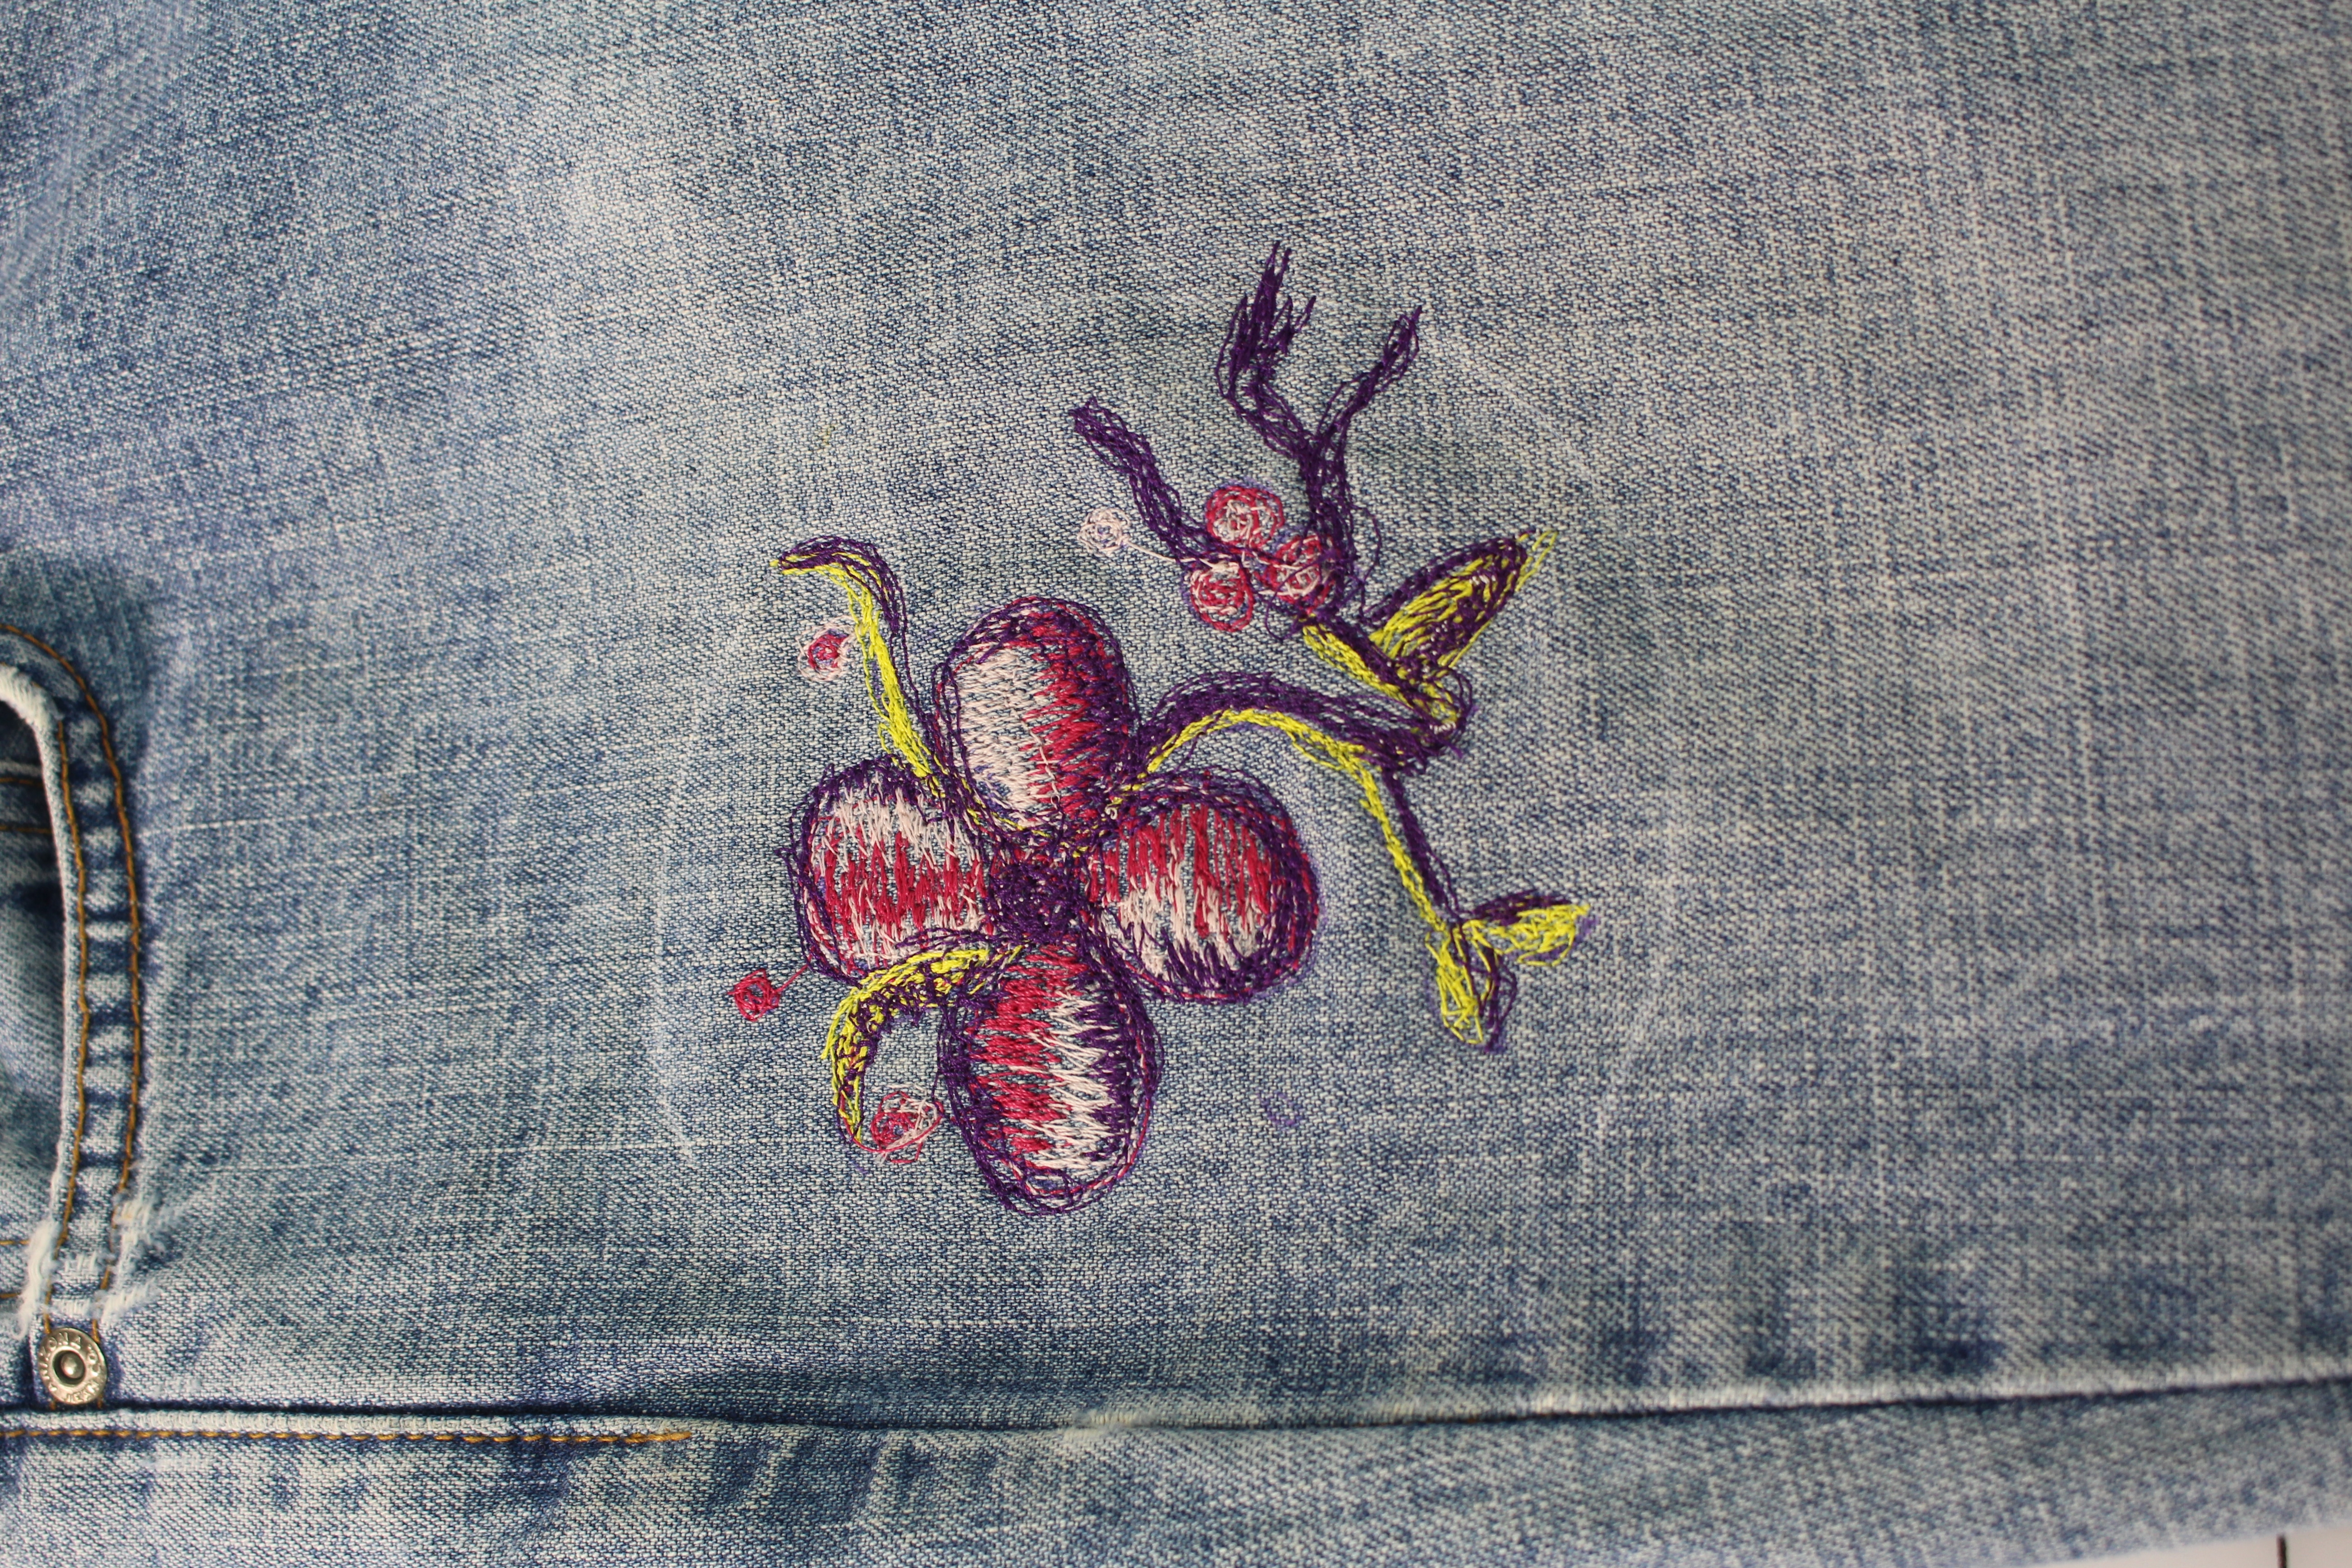
Here I have outlined the design first. Then fill in the petals by moving the machine back and forth with thread. This is your design, so don’t worry about perfection, just have fun! Continue to change colors of thread and paint away J
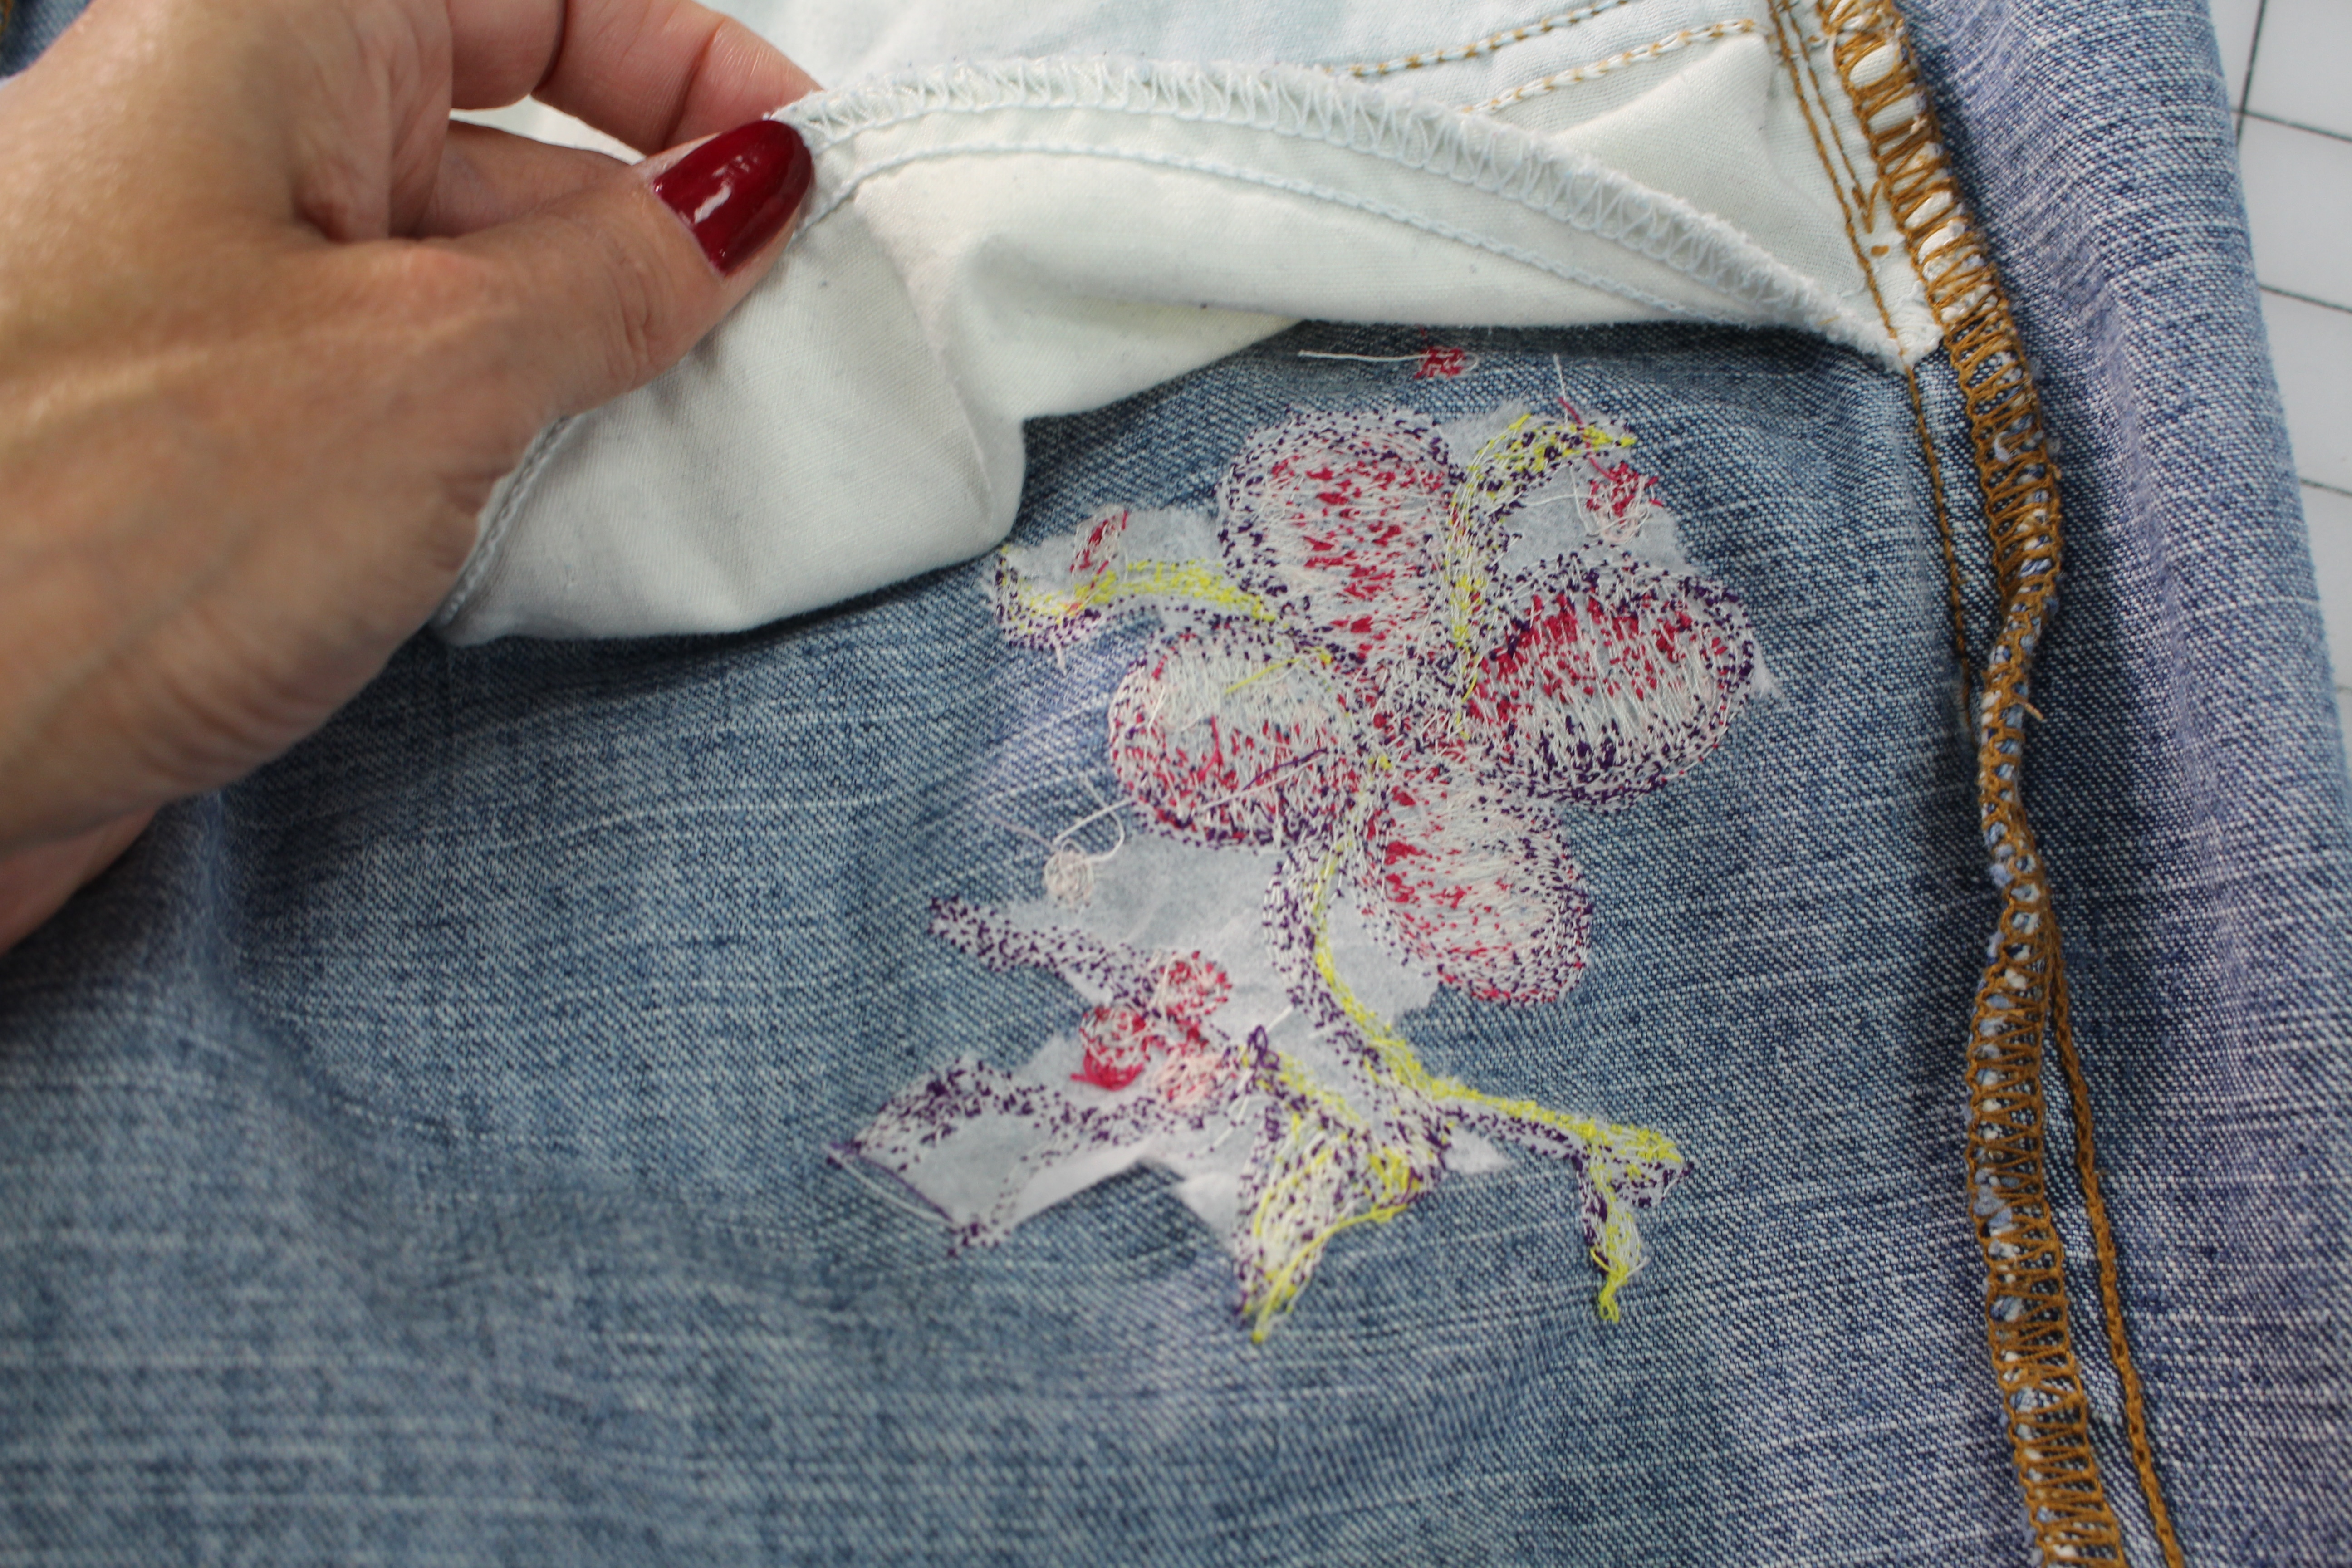
When you are all finished designing, remove the hoop and tear-a-way the stabilizer.
You can see here how my design falls just under the front pocket, perfect! Brush off the chalk marks and your new embellished jeans are ready to go! Be sure to join me on the social side using #angelawolf ♥ I always love to see what you are working on.
Cheers,
<a target="_blank" href="https://shareasale.com/r.cfm?b=1130527&u=1586241&m=29190&urllink=&afftrack="><img src="https://static.shareasale.com/image/29190/728x90.gif" border="0" alt="Craftsy Unlimited FREE 7 day trial at Craftsy.com" /></a>
Envelope Pattern There are three download versions for the envelope pattern: Full Layout - Use this for projector printing or printing on a plotter. ENVELOPE PURSE Letter Size Printing - Use this when printing letter size paper (8.5" x 11"). Print pages 1-8, the...
Quilted Grocery Bag Sewalong I am so excited to share this new grocery bag sewalong with you! This is an easy project with opportunities to make is more advanced with embroidery and embellishing. Sewalong Schedule #372 - 9/7 - Sewalong Part 1 Supplies and Pattern...
Tweed Skirt Sewalong Part 1 In part 1 of this sewalong I will share options for choosing the best fabrics and pattern. Join me in choosing the best lining to coordiante with my fabric!Skirt Patterns to choose from: ~ The Kate Skirt ~ The Fringe Skirt Pattern ~...
Episode 305 🧵 Behind the Scenes with Angela Wolf I know you have heard me say many time ... I am never going on a cruise! Winn and I are on the water all the time, why would I want to go on a cruise?!? Kelli Presley and Phyllis Batz will be joining me live to talk...
Episode 305 🧵 Behind the Scenes with Angela Wolf Featuring CraftOptics I am not sure about your, but if I am working in a low lit area or sewing beads onto a garment, I tend to lean forward and squint, this ending up with a terrible back ache! CraftOptics has changed...
Sewing jeans are really easy once you get the hang of the process, but fitting the pattern can be challenging. The next few posts are going to deal with exactly that, fitting various body shapes. This pattern alteration is needed if you have a fuller stomach, in the old days referred to as an apple shape. Although, I am not sure where the fruit terms originated from, I really don’t like them. I would rather be a glass! Wine glass, red wine glass, martini glass, goblet, water-glass, I think you get the idea. It just sounds a little more glamorous than an apple or pear 🙂 Anyway, if you made up a jean muslin and the pattern fit great in the legs, hips, and tush, but you just can’t get that center front closed … here you go:
Fitting a Jean Pattern for a Round Stomach
1. Tape the front pocket in place. Start by drawing lines on your pattern (don’t cut yet):
Draw a line (green) across the hip and up to the tip of the side seam.
Draw 2 lines (purple) perpendicular to the green line,
2. Cut along the green line, cutting up to the side seam put NOT through the edge.
3. Slide the pattern open. Look what happens, you just gave a little more room in the front tummy area in the width and height of the pattern.
4. The upper waist curve is too extreme if left like this. Cut each purple line, down to the green line, but NOT through it. Slide each line open until the waist curve angles down more like the original pattern.
5. Redraw a new waistline and center front crotch curve (red line).
If you are having difficulty redrawing the front crotch curve, slide the pattern back together. Mark the bottom edge of the facing area and trim off the front fly facing. Follow all the steps and then tape the front facing back in place once the new center front is drawn in, lining up the facing with the marking on the pattern. Draw a line extending the facing up to the waistline ( I used this pattern piece, because I knew someone would ask about that).
Here is your new front pattern piece, use this for the front and left, of course one will have a front facing section and the other will not. This is the same alteration for any pant style when you need a little more room in the tummy area.
How are your jeans coming along for March’s wardrobe challenge? The judges are almost finished with February’s winners, hope to announce them this weekend.
Looking to stock up on jean sewing supplies – zippers, jean thread, jean buttons … WAWAK Sewing is offering $10 off the next order of $80 or more! This offer is good until March 31st, use PROMO CODE: WAGW314 when checking out. What a great treat for the jean challenge! Thanks WAWAK! 🙂
That’s all for today 🙂 Sun is shining and snow is melting, thank goodness!!!!
I have a new fetish for altering fabrics and I am on a mission to test some new and old techniques and see if they will fit into high-end fashion. Embroidery is definitely high on the list, and I am not talking about embroidered bunny’s on the front of my sweatshirt or his and her towel’s (although I have to practice somewhere 🙂 I am more thinking about using embroidery to create new fabrics and using that fabric in my garments. A few ideas I am going to try:
attaching two unusual textures
quilting silk charmeuse
sleeve embellishment
embroidered jeans
embroidery + needle felting
distressing
adding faux fur
shirring
Just a touch of ideas and I am going to give them a try over the summer, looking into my fall wardrobe. I don’t expect them all to be a success, but I know this will be fun! So to kick off my experiment I thought I better learn how to embroider. These jeans were my first embroidery project last May, not too shabby if I don’t say so myself. The jean pattern is an altered version of my Angel Bootcut Jean and the embroidery design I created on Brother’s Dreamweaver . Trust me, I had no idea what I was doing but these new embroidery machines tell you what to do!
I sewed the jeans in a little different order starting with the front and back pockets and then the outside seam. A bit of a risk, after all that work, that the embroidery turns out awful. Looking back, you would think I would have tested the design on something, even a scrap of fabric. I am too stubborn for that. Each leg took 3 hooping’s and at first the total embroidery hours for both legs was tallying up to be 26 1/2 hours … YIKES! Then I realized that each color would only embroider for a few minutes and I would have to keep changing threads (this is only a one thread embroidery machine, in case you might think I have the fancy one). I decided to change the order of color, even if it altered the final design.
The embroidery design: I changed the design from being a little larger in the top (1st hooping) a little smaller in the middle (second hooping) and really small at the ankle (third hooping). Minus a few mistakes (which I won’t point out :)) I was really pleased with the final results.
One thing I learned with embroidering stretch denim – after you embroider, the denim doesn’t stretch. Just keep that in mind and make alterations to your pattern to allow for that non-stretch, especially if you are sewing skinny jeans or jeggings. I am planning on embroidering another pair of jeans with all one color of thread, I am thinking black fabric with silver thread or something along that line.
Any embroidery tips for me would be greatly appreciated, I have a lot of fabric I want to try (especially silk charmeuse). There is so much to learn and take into account. For example, embroidery thread. There are a ton of choices, any advice on the what’s the best and why? I would love to know the scoop!


 2. Cut along the green line, cutting up to the side seam put NOT through the edge.


