I woke up this morning to an email that made me very happy and I have YOU to thank 🙂 Just so you know, you made my day!!!!! In case you missed it, Craftsy is holding their 2013 blogging awards. Round one of voting is finished and your votes placed my blog into the finals in the category of Sewing – Best Craftsy Instructor Blog. There are only 4 of us and now another round of voting continues until October 29th – Of course I am hoping you will vote again 🙂
First, let me tell you how encouraging this was to hear. Writing a blog and posting video tutorials does take up quite a bit of time, but I personally do so in order to encourage you to sew. Not only sew, but to sew clothes and sew clothes that look like they walked out of a boutique with a high price tag. I have been sewing my own clothes for over 20 years (that just gives me a reason to buy more shoes and handbags LOL) and I love sharing what I have learned with you.
So what happens now? There is a final round of voting that will end on October 29th and Craftsy is offering a free class to one of the lucky voters. For me, I already feel like a winner. As a special thank you for the support you have already shown and encouragement for you to vote again during these final weeks (bribery never hurts right :)) I am going to offer a few giveaways.
Recently I offered a free Crafty class to my new Sewing Designer Jeans class that will launch later this month and a huge CONGRATULATIONS to the winner Marie C.. Well, the class doesn’t include a pattern. Why? Because maybe you copied your favorite pair in Kenneth D. Kings class or you already have a favorite jean pattern from my friend Jennifer Stern or you like the range of sizes in Jalie … just to name a few of my favorite reasons. During the class, I will be using my Angel Bootcut Jean pattern (my current pattern includes misses sizes 0 – 16 and I am diligently working on the women’s sizes 16W – 24W) and I even show you how to alter the pattern for a higher or lower waist (amongst other fitting issues). So, it only seems appropriate to giveaway one of my jean patterns. How can you win? Pretty simple – let me know why you want to sew my jean pattern and please vote in the final round on Craftsy (remember you can win a free class on Craftsy just for voting). Afraid of sewing jeans – no worries, it’s really easy. Remember back when I showed you videos on how to sew pockets. There are lots more, just scroll through my posts about sewing jeans. I will announce the winner of jeans pattern on Monday and I will announce another “thank you” giveaway tomorrow.
Again, THANK YOU so much for making my day today 🙂 xoxo Angela
I am having so much fun finding ways to use my serger, more than simply finishing the edges in my garments! With over 5,000 students in the Craftsy class Creative Serging – Beyond the Basics , many of you are already expanding your serger use. I was thrilled to see Craftsy posted a few of my videos on YouTube … below you will see how to add pintucking. A great embellishment on home dec and apparel. The video shows you how to change the settings on the Brother Project Runway Serger 5234PRW (although it doesn’t show you how to remove the stitch finger, so check your manual and don’t forget that part!) In fact, no matter what serger you use, pull out the manual and set the serger to a rolled or narrow hem. I am showing you how to do the pintucking using a blindhem foot. If you don’t have that foot, a standard foot works fine. Just serge straight 🙂
Speaking of manuals, lets take a vote … how many of you have read through your entire serger manual? I must confess, until last year I only scanned the pages referring to threading 🙂 Enjoy xoxo Angela
Getting new samples ready for It’s Sew Easy TV season 6 taping, I am finishing designing new dresses and experimenting with embellishing with embroidery. I have had this purple raw silk for years and really like the color, but it’s SO bright by itself! I will probably color block with black for one of the designs, but for this one I wanted to try adding a touch of embellishment. This is the start (obviously I have not pressed out the embroidery hoop marking) …
I found this flower in the Brother Quattro sewing machine. The flower was originally a medium size, so I tried to make it as large as possible for one of the flowers and as small as possible for the other. This was so easy to do! Using the touch screen I was able to enlarge the flower and move the design to the top left of the screen, which will embroider in the top left part of the hoop.
You can see below how the first larger flower is embroidering on the top left side of the hoop.
First flower looks great!
For the second flower – I turned the shape upside down, made the flower as small and narrow as possible, and moved the shape to the bottom right side of the hoop.
Looks pretty good!!!!! I used a silver metallic thread, although you can’t see that very well from the photo’s – clean and simple.
As far as designing, I cut the bottom of the dress to allow for a straight skirt or adding darts or pleats to the waistband. I am definitely adding the darts 🙂 I will post photos when the dress is finished.
Congratulations Wilma Coats the winner of my Creative Serging Class on Craftsy! Again, here is a coupon if you would like to join us in a fun, creative online class.
Ruching with Elastic Thread on a Serger / Coverstitch Machine
Loose flowing tops are right on trend right now, here is a quick way to add a little flair and fit with one of my favorite serging techniques; ruching with elastic thread. Add the ruching to the sleeve edge, hem or neckline. This is so cute and really easy! This ruching can be done on a sewing machine by winding the elastic thread in the bobbin, threading the machine with any silk, cotton, or polyester thread, and stitch with a narrow zigzag. What about serging with the chainstitch? The chainstitch is found on coverstitch machines or sergers with the added coverstitch function.
SET UP THE SERGER / COVERSTITCH MACHINE For this sample I am using my Brother 1034D 3 or 4 Thread Serger with Easy Lay In Threading with Differential Feed
. Thread the machine like you would for a chainstitch: use thread in the needle and elastic thread in the looper. Be patient with the elastic thread, but it will go through the machine just fine 🙂
Adjust the tension:
Loosen the needle tension (loosen by 2 notches)
Tighten the looper tension (start by tightening 1 notch)
When adjusting the tensions, my coverstitch has a standard setting at 4 – so adjust the tension on your machine accordingly. Then simply run the edge of the fabric through the serger. The photo’s below show you the front and back side of the first row of stitching.
Put the fabric back in the machine, line up the previous row of stitching with the edge of the presser foot and stitch.
That it! I usually ruch 2 – 6 rows depending on the design. Another idea is to ruch the waist on a skirt – the elastic ruching makes a great waistband and then you wear the waist high or low. I will dig up a photo of my silk bathing suit cover up that is sewn like this.
FREE SERGING CLASS GIVEAWAY!
Speaking of using a coverstitch and overlock machine – I have a class on Craftsy called Creative Serging – Beyond the basics. I am giving away a FREE CLASS to one lucky reader. All you have to do is leave a comment below telling me why you would like to take the free class. Click over and “‘like” my facebook page and you will get 2 entries. If you leave a comment on the facebook page you get an extra entry as well (that’s 3 entries total :)). One name will be drawn randomly on August 1st. I know many of you are already in my class as we are just under 5,000 students, awesome! For those of you that are already enjoying the class, leave a comment as to what you like most about the class and I will include you in the next giveaway (trust me, it will be good :))
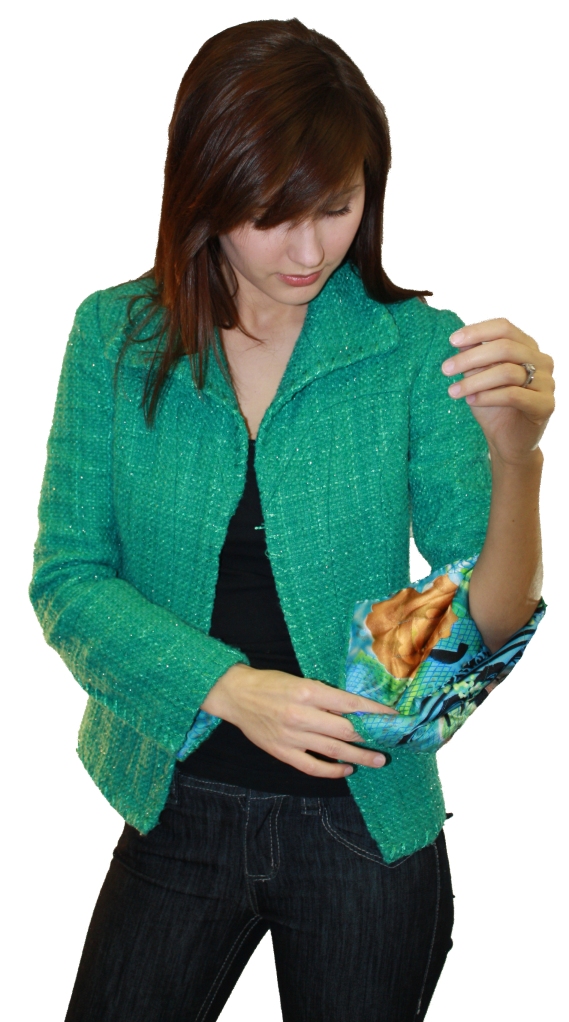
A well-made jacket can show off an outfit to its best. Join me on PatternReview for the fundamentals and fine points of creating a contemporary couture jacket (hint: my version of the traditional Chanel jacket).
You’ll love the comfort and style of this jacket… it feels more like a sweater! It’s the perfect topper for jeans or more formal dress. This couture jacket is a must-have for the modern lifestyle!
The class offers 12 videos with 2 hours and 45 minutes of HD video. There is also a 164 page PDF file with photos and close up details of every step.
Selecting fabric and lining.
Creating a 3-piece sleeve, laying out the pattern, and cutting the fashion fabric.
Attaching fusible interfacing, finishing the edges, and cutting the lining.
Using a couture technique to quilt the lining.
Sewing a jacket with a plaid.
Preparing and hand-stitching the lining.
Sewing the sleeve vent and attaching sleeves.
Covering shoulder pads.
Trim ideas, including a tutorial on how to crochet your own trim!
Closure options including custom covered buttons.
Pockets with a couture touch.
And last but not least, adding the prestigious weighted chain.
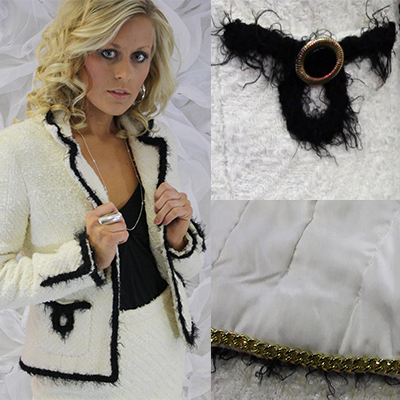
Thinking you don’t have time for a few hours of hand-stitching a couture jacket? Why not bring the jacket with you! Seriously, I hand-stitched the lining on this jacket while fishing (see the finished jacket below). The lining is hand-dyed (and not with fish blood and guts :)) Fishing and sewing might be an odd combo, but it worked. How about you, any fun sewing stories that can beat fishing? Now be nice 🙂 Cheers xoxo Angela
A well-made jacket can show off an outfit to its best. Join me on PatternReview for the fundamentals and fine points of creating a contemporary couture jacket (hint: my version of the traditional Chanel jacket).
You’ll love the comfort and style of this jacket… it feels more like a sweater! It’s the perfect topper for jeans or more formal dress. This couture jacket is a must-have for the modern lifestyle!
The class offers 12 videos with 2 hours and 45 minutes of HD video. There is also a 164 page PDF file with photos and close up details of every step.
Selecting fabric and lining.
Creating a 3-piece sleeve, laying out the pattern, and cutting the fashion fabric.
Attaching fusible interfacing, finishing the edges, and cutting the lining.
Using a couture technique to quilt the lining.
Sewing a jacket with a plaid.
Preparing and hand-stitching the lining.
Sewing the sleeve vent and attaching sleeves.
Covering shoulder pads.
Trim ideas, including a tutorial on how to crochet your own trim!
Closure options including custom covered buttons.
Pockets with a couture touch.
And last but not least, adding the prestigious weighted chain.
Thinking you don’t have time for a few hours of hand-stitching a couture jacket? Why not bring the jacket with you! Seriously, I hand-stitched the lining on this jacket while fishing (see the finished jacket below). The lining is hand-dyed (and not with fish blood and guts :)) Fishing and sewing might be an odd combo, but it worked. How about you, any fun sewing stories that can beat fishing? Now be nice 🙂 Cheers xoxo Angela
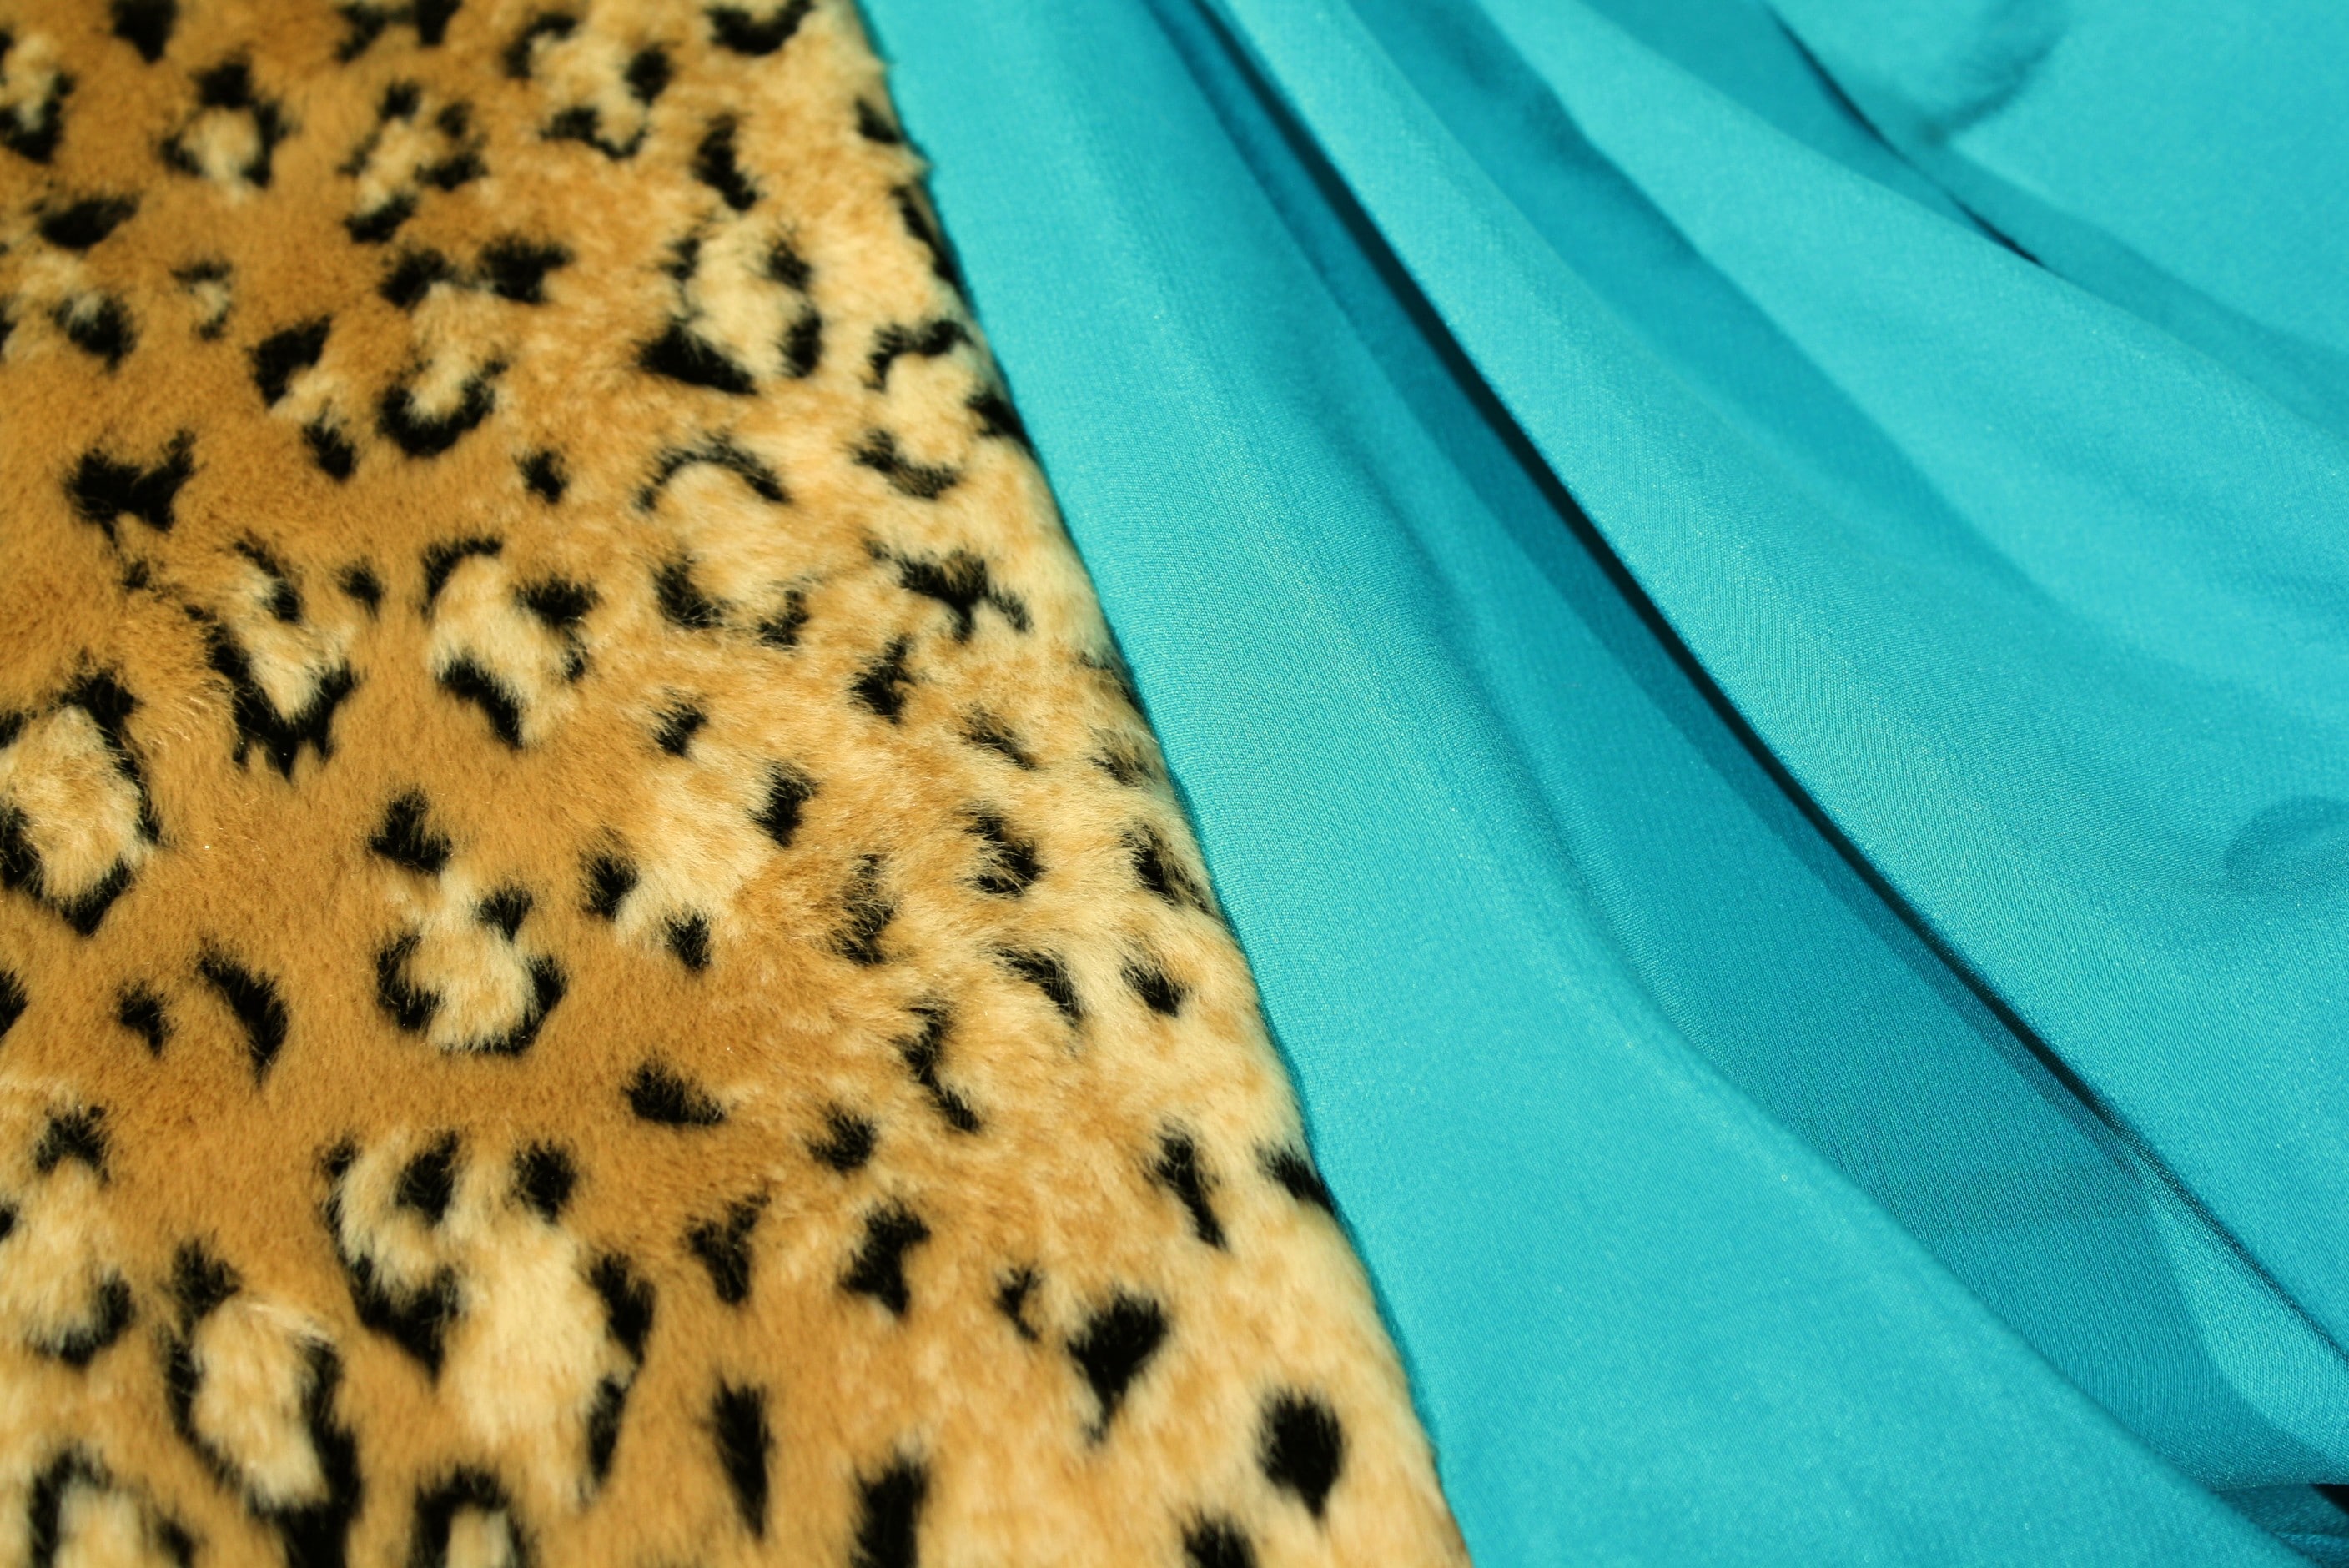
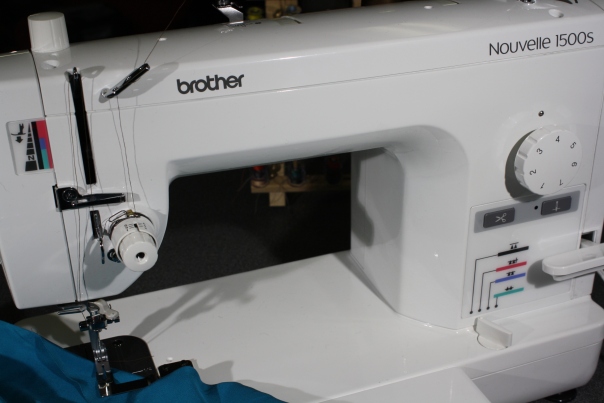
There is nothing more frustrating than sewing a gorgeous jacket with luxurious fabrics like faux fur, velvet, and leather (to name a few) and when it comes time to attach the lining to the facing, you end up with small puckers and an uneven feed – meaning one layer of the fabric ends up longer than the other. Well, I have great news for those of you that have the Brother PQ1500S.
You have already done the hard work sewing the jacket, why not use a few tools to make sewing the lining a breeze. The PQ1500 comes with an easy way to perfectly adjust your presser foot pressure and feed dog position, it’s color coded! Seriously, this takes all the testing and questioning out of the picture, heck you don’t even need to read the manual (which I know most of us are too busy to do :)).
First, look at the presser foot pressure indicator. You can see the color coding and the dial to adjust the presser foot height is on top of the machine. Simply turn it right and left to raise and lower, but here is the key … no more guessing where the height ends up. The colors on the indicator coordinate with the feed dog position and there is a fabric chart in the manual that you can use as a guide.
The main features I am going to show in this video involve the “pin feeding” that you will find in the feed dog position and the “fabric separator” that is used to join lining to the fabric. This is so easy you won’t believe it, so watch the video and if you want to see my previous post on how to mark and cut faux fur click here. Cheers 🙂 Angela
In my mission to come up with fun and unique fabric manipulations, I thought I would test out quilting (taking a short break from embroidery this week :)). And yes, I said QUILTING! I am not sure about you, but as a fashion designer when I hear the word “quilting” I typically cringe! It’s not that I don’t think quilts are beautiful and I sure wouldn’t want to offend all my friends that have a passion for this art (especially my mother :)) – but the fact of the matter is, the word itself makes many apparel sewer’s run the other way. The term quilting gives me an instant vision of cotton, LOTS of cotton, and bins of more cotton scraps that can be added to some project down the road. I know, I am so judgmental! I obviously overlook my bins of silk scraps that I know will fit into a pocket eventually.
But I think I should really take another look at this art, especially with fabric manipulation on the mind. Besides, who made the rule you can only quilt cotton. What about my favorite sewing technique, that is very Chanel inspired, where the silk charmeuse lining is “quilted” to the jacket fabric. Very luxurious and looks fabulous! Although we call it “Chanelism” not quilting. Go figure!
Or have you seen the quilted leather shown by Proenza Schouler – definitely on the short list for a fall must-have! Givenchy and Chanel both added some form of quilted leather to their collections. I really love the way you can use quilting to create a unique looking fabric or you can place the quilting in particular area of the garment to add a custom design element.
So, as to not risk ruining a large piece of luxurious fabric, I thought I would try a small sample. I am going to use silk charmeuse with batting and create Eye Candy (those of you that travel often will understand the name.) This only requires a little fabric and should be easy for testing the quilting method before I add quilted silk to a garment.
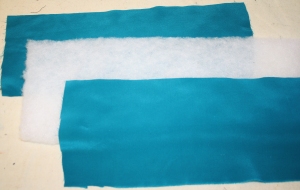
Start with 2 pieces of silk charmeuse and 1 piece of batting.
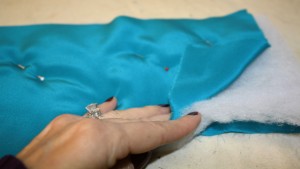
Pin together the layers.
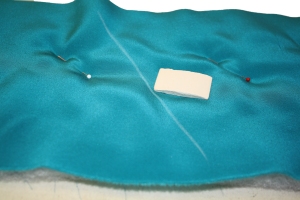
Use clay chalk to mark a straight line, diagonally across the fabric.
I am going to start the first row of stitching using my laser-vision as a guide to follow my chalk line. Although, the light is a little hard to see, probably because I have the bright light turned all the way up on the machine – I swear I can get a suntan from the brightness LOL!
Then, using my foot as a guild, I am stitching row after row. I noticed that sewing at a medium speed with the MuVit foot works the best, in fact the same is true for the walking foot on my Quattro.
After quilting the entire piece of fabric, I laid my pattern on top of the quilted fabric and cut it out.
I added an elastic band to the back, pinning in place at each side.
That was very easy! In fact this was going to be a gift, but I think I might have to keep this one for myself 🙂 So you can see the technique of quilting is pretty easy and it does work on other fabrics besides cotton. I have a few more fabrics I am going to try, I will let you know how they turn out. But I can definitely see this quilted silk charmeuse used in a jacket or vest. If you any photos of fabric manipulation post them on flickr here is my link to share or add them to facebook! Inspire others by your creativity! Cheers, xoxo Angela
Brother™ has provided me with the DreamWeaver XE, but all opinions expressed are entirely my own.
First off, thanks so much for the embroidery tips! I started with simply adding letters on sueded silk, just trying to get a grip on rotating the word and changing the overall size. I am happy to announce, embroidering letters is much easier than I thought.
I choose a font from the Brother Dreamweaver XE and all you have to do is push the letters on the touch screen. Changing from upper case to lower case is a breeze. Then another push of the button and the entire word rotated directions. (I know I said no monogram towels for Christmas gifts, but I think I changed my mind – this is way too much fun! Now I just need the machine to offer spell check :))
So here is where I screwed up … I was in a hurry and grabbed a bobbin that was 1/3 full. Instead of taking all that thread off the bobbin and starting fresh, I added more thread to that bobbin. Not a big deal, unless you run out of bobbin thread! This sewing machine has an automatic sensor that tells you when you are going to run out of thread. Very cool feature, unless the machine doesn’t know you are going to run out of thread, which is exactly what happened here. I was lucky the thread ran out at the end of my first “S”, but I still had to line up another “S” or change my idea to Princes (on pink fabric). I played around with the laser light and found that I could tell the machine where to start the last letter. Not too shabby!
I have big design ideas for my newly found passion for embroidery, but for the first few tests I am going to work on small pieces of fabric and share with those of you that are as much a novice as I am on this.
A few emails rolled in about how exactly to embroidery the jeans and I thought this photo might help. Remember there were 3 hoopings on each leg. The front pockets were already attached and the back was finished, except for the back pocket. I waited to add the back pocket because I was worried the fabric would be too thick under the embroidery hoop. You can see how the design started large near the hip, then smaller, and then even smaller at the ankle.
I am off to buy more embroidery thread and needles. Thanks to many of you for your advice, I think this is going to be fun. In the next post I will show you what the Princess is for and add more texture to the fabric. Have a great week! Cheers 🙂 Angela
I have a new fetish for altering fabrics and I am on a mission to test some new and old techniques and see if they will fit into high-end fashion. Embroidery is definitely high on the list, and I am not talking about embroidered bunny’s on the front of my sweatshirt or his and her towel’s (although I have to practice somewhere 🙂 I am more thinking about using embroidery to create new fabrics and using that fabric in my garments. A few ideas I am going to try:
attaching two unusual textures
quilting silk charmeuse
sleeve embellishment
embroidered jeans
embroidery + needle felting
distressing
adding faux fur
shirring
Just a touch of ideas and I am going to give them a try over the summer, looking into my fall wardrobe. I don’t expect them all to be a success, but I know this will be fun! So to kick off my experiment I thought I better learn how to embroider. These jeans were my first embroidery project last May, not too shabby if I don’t say so myself. The jean pattern is an altered version of my Angel Bootcut Jean and the embroidery design I created on Brother’s Dreamweaver . Trust me, I had no idea what I was doing but these new embroidery machines tell you what to do!
I sewed the jeans in a little different order starting with the front and back pockets and then the outside seam. A bit of a risk, after all that work, that the embroidery turns out awful. Looking back, you would think I would have tested the design on something, even a scrap of fabric. I am too stubborn for that. Each leg took 3 hooping’s and at first the total embroidery hours for both legs was tallying up to be 26 1/2 hours … YIKES! Then I realized that each color would only embroider for a few minutes and I would have to keep changing threads (this is only a one thread embroidery machine, in case you might think I have the fancy one). I decided to change the order of color, even if it altered the final design.
The embroidery design: I changed the design from being a little larger in the top (1st hooping) a little smaller in the middle (second hooping) and really small at the ankle (third hooping). Minus a few mistakes (which I won’t point out :)) I was really pleased with the final results.
One thing I learned with embroidering stretch denim – after you embroider, the denim doesn’t stretch. Just keep that in mind and make alterations to your pattern to allow for that non-stretch, especially if you are sewing skinny jeans or jeggings. I am planning on embroidering another pair of jeans with all one color of thread, I am thinking black fabric with silver thread or something along that line.
Any embroidery tips for me would be greatly appreciated, I have a lot of fabric I want to try (especially silk charmeuse). There is so much to learn and take into account. For example, embroidery thread. There are a ton of choices, any advice on the what’s the best and why? I would love to know the scoop!


![00180fullscreen[1]](https://angelawolf.files.wordpress.com/2013/05/00180fullscreen1.jpg)