First off, thanks so much for the embroidery tips! I started with simply adding letters on sueded silk, just trying to get a grip on rotating the word and changing the overall size. I am happy to announce, embroidering letters is much easier than I thought.
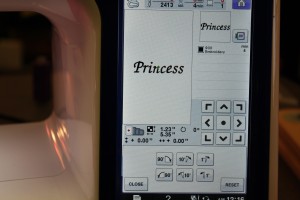
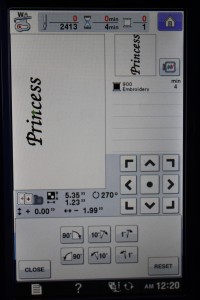
I choose a font from the Brother Dreamweaver XE and all you have to do is push the letters on the touch screen. Changing from upper case to lower case is a breeze. Then another push of the button and the entire word rotated directions. (I know I said no monogram towels for Christmas gifts, but I think I changed my mind – this is way too much fun! Now I just need the machine to offer spell check :))
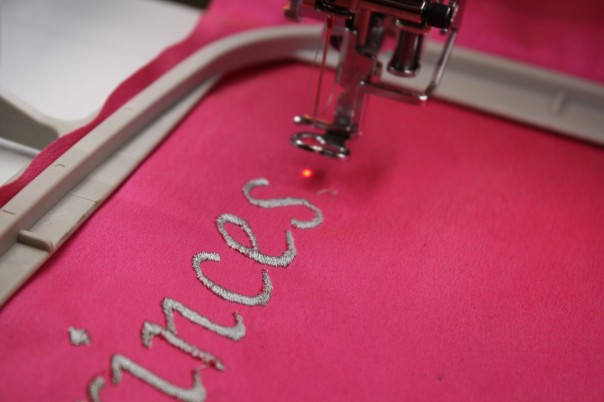
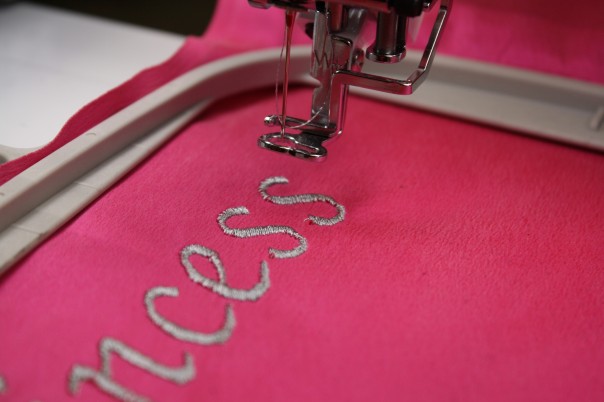
So here is where I screwed up … I was in a hurry and grabbed a bobbin that was 1/3 full. Instead of taking all that thread off the bobbin and starting fresh, I added more thread to that bobbin. Not a big deal, unless you run out of bobbin thread! This sewing machine has an automatic sensor that tells you when you are going to run out of thread. Very cool feature, unless the machine doesn’t know you are going to run out of thread, which is exactly what happened here. I was lucky the thread ran out at the end of my first “S”, but I still had to line up another “S” or change my idea to Princes (on pink fabric). I played around with the laser light and found that I could tell the machine where to start the last letter. Not too shabby!
I have big design ideas for my newly found passion for embroidery, but for the first few tests I am going to work on small pieces of fabric and share with those of you that are as much a novice as I am on this.
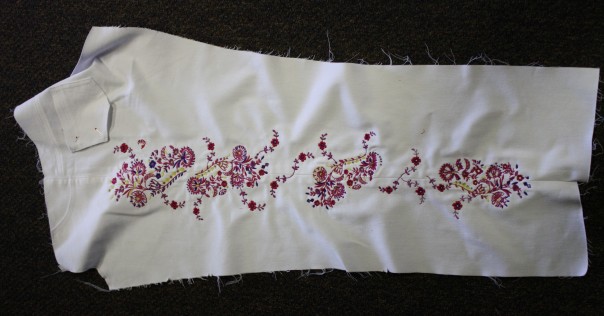
A few emails rolled in about how exactly to embroidery the jeans and I thought this photo might help. Remember there were 3 hoopings on each leg. The front pockets were already attached and the back was finished, except for the back pocket. I waited to add the back pocket because I was worried the fabric would be too thick under the embroidery hoop. You can see how the design started large near the hip, then smaller, and then even smaller at the ankle.
I am off to buy more embroidery thread and needles. Thanks to many of you for your advice, I think this is going to be fun. In the next post I will show you what the Princess is for and add more texture to the fabric. Have a great week! Cheers 🙂 Angela




I agree, the machine always starts back where it should when you remove the hoop and replace the bobbin….IF you take the time to be careful when you remove it not to slide the carriage, I usually just hold at the front of the carriage when I pull it out, and use a hand at the back of the carriage when I push it back in to be sure I don’t jam it too hard and move the carriage.
I am having difficulty finding out what the price of this machine is. Can you give us an estimate of the cost? It worries me when vendors and Brother website do not give the price. Is it so high that the ordinary person cannot purchase? One site says “available only in store” not online. As a person who lives at least an hour from any dealer, I rely on online purchases.
Here is the phone number for Brother 800-4-a-brother, call them and they will put you in contact with the closest dealer. This machine is new and would only be available at a dealer. The reason that prevents companies like Brother from posting prices is contractual. If a product is not a “covered product” by our independent dealer contract, then we are able to post the MSRP. If we decide that the product is that can be sold online, etc. then a selling price is shown. If the product is “covered” our dealers are prohibited from stating price in any way but “in person”. We have to ask that our customers understand and respect that as it helps to keep things under control.
Hope that helps 🙂
I agree with Vicki…I have often used part filled bobbins and just stopped my Brother machine, taken off the hoop (don’t remove the fabric from the hoop) replaced the bobbin and either gone back some stitches with the “return stitches” button or continued sewing. Why realign? If the design has finished it’s possible to skip forward stitches the same way as going back until you reach the right part to start again
I see what I missed – “return stitches”. There is so much to learn 🙂
I’m still trying to figure out placement for multiple hoops…kudos to you!
I have 3 Brother machines and once they tell you the bobbin thread is out, (or as in your case the stitches stop forming ) you can usually just pop off the hoop, load a new one, replace the hoop, back it up a few stitches, & keep going. I don’t understand why you had to realign the last letter? If I can be if any help let me know, but I’m sure you’ve got it covered!
That’s how it worked with my other embroidery, but I added thread to a half filled bobbin – so the machine didn’t know I was out when I was out. It was still reading the old thread, so it kept embroidering (so it thought) Lesson learned on that one!
The embroidery looks beautiful. It’s too easy to give too much credit to the machine, because there is a great deal to know about machine embroidery, so kudos to you for persisting in just doing it – it looks great. The machine is quite something as well!