I recall a class I taught years ago, one of the students gave me a review “great class, she is a pressing fanatic!” Well, that is true. In reality, pressing is what makes your sewing look professional. I thought I would share how I have my studio set up:
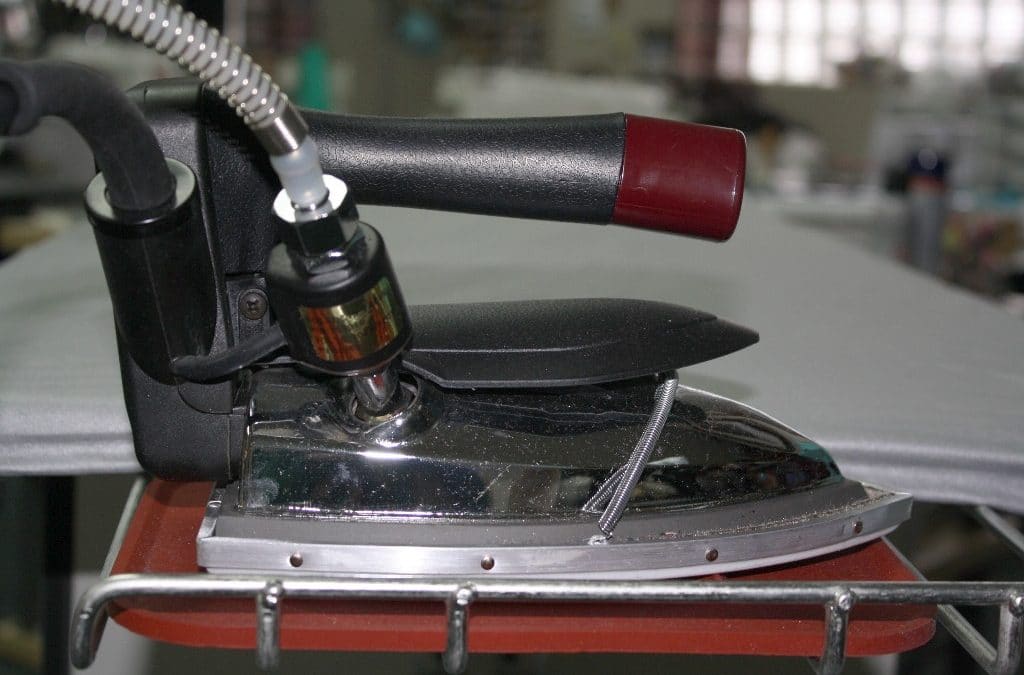
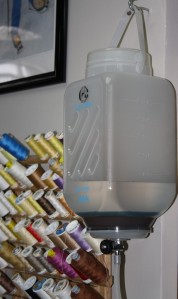
My all time favorite iron is the Hot Steam SGB-600 and I can’t believe how long I went without splurging on such a reasonably priced powerhouse steam iron. This iron plugs into a standard outlet (make sure to check that when researching commercial steam irons) and has a water container that holds almost an entire gallon of distilled water. The water container is attached to a wall and then the hose needs to hang from the ceiling or a high point. I have ceiling tiles in my studio and I am using clips that would typically hold a plant, I think I found them at Ace Hardware.
The iron came with the rubber mat, which is nice! I added the Iron Shoe which allows you press ANYTHING and it won’t leave shiny marks – even on cheap satin and poly! I will share more about that later.
One more thing, this iron has a powerful burst of steam and it DOES NOT leak, yeah! Have you ever ruined fabric from a leaky iron? Um, this brings back a memory … years ago, I was making a custom suit for a client. Just visualize a rich colored brown fabric – silk, wool blend. My iron was having a bad day and a few drips (or I should say a burst of drips) later the suit ended up in the trash. Very expensive fabric, but I couldn’t get the spots out! I have had this iron for quite a while and have never had as much as a drop.
Did I mention, I can’t stand irons that automatically turn off! What a waste of time, it’s never hot when you need it. That being said I do keep around a couple inexpensive Rowenta’s for applying interfacing. They are easy to clean, very hot, and don’t usually leak (I say that with a squint in my eye as every iron seems to have its own personality, although out of about 30 Rowenta’s I only had 2 that dripped and 1 that caught on fire – another eventful day in the studio!).
Tip: keep a tube of Ez-Off Iron cleaner around – perfect for removing interfacing gook!
Do you have a favorite iron or a dripping horror story to share?
Getting back to sewing jackets … by any chance did you happen to catch last weeks episode on It’s Sew Easy TV where I demonstrated adding a curved welt pocket. Welt pockets can be a little intimidating because once you cut into the garment, you can’t change your mind! In case you missed the episode, here is a quick recap:
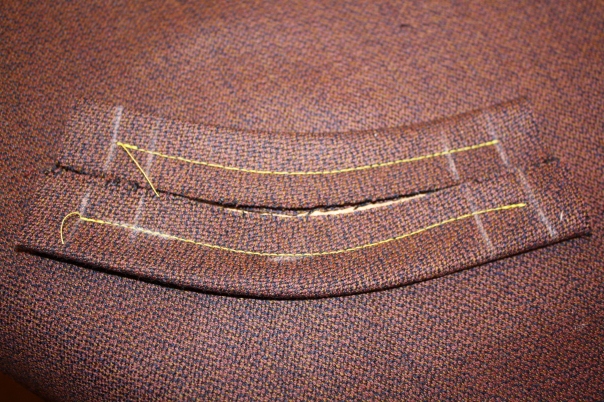
1. Interface the entire jacket front and side front pattern pieces (not only does that prevent the fabric from fraying, it supports the pocket). Similar to a standard welt pocket, take two bias strips of fashion fabric, add fusible interfacing, and press in half. Draw the curve line of the pocket onto the right side of the fashion fabric. Turn the welts with the fold side away from the chalked in line (or make sure the raw edges are touching) and stitch along the center of the welt flap. Notice how I have also chalk marked the ends of the pocket opening.
2. Turn the jacket over and on the wrong side of the garment you will see the stitch lines (I obviously used a yellow thread so you can see this :)). Starting about 1″ in from one end of the stitching, cut into the fashion fabric. Cut right in the middle of the stitch lines and end the cut about 1″ before the other stitch end. Going back to the 1″ that we left alone, snip each corner from the cut line to the edge of the stitch line. Do this for all four corners – as shown above.
3. (See below) What is left is a slit with each welt on each side. Pull the welts through the open slit, toward the wrong side of the fabric.
4. Align the welts and press. Run a basting stitch through the fold of each welt. Now the pocket opening won’t slide around while finishing the pocket.
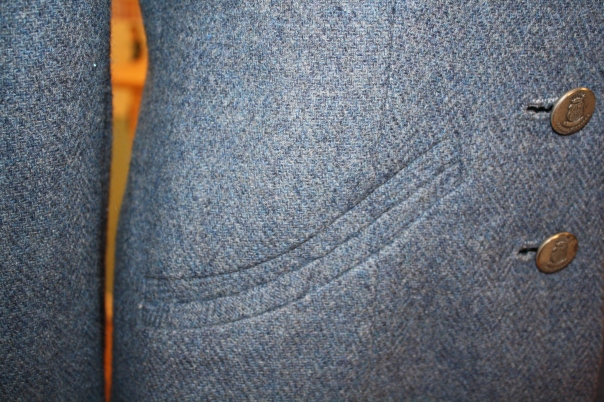
5. Topstitch 1/8″ from the edge of the welt pocket. The pocket shown above is a straight welt style, yet the topstitching you see would be the same on the curved welt. Add the pocket lining. That’s it!
This weeks It’s Sew Easy episode demonstrates preparing the jacket collar and lapel. Have you been following along and sewing your own jacket? On that note, I better giveaway another one of my online jacket classes: Beginner’s Guide to Sewing Jackets on PatternReview. Entering to win is easy, leave a comment below about what you find the most intimidating about sewing jackets. (A random winner will be drawn on Friday).
Don’t forget ALL my PatternReview online classes are on sale for the rest of the week. Why? Just a special thanks to all of you that support my teaching. Speaking of support, thanks to your votes in the Craftsy 2013 Blogger Awards, we won Runner-Up for Sewing Best Instructor’s Blog! You all are awesome!!!! Thanks 🙂
There is only one reason I have not moved South in order to enjoy beautiful sunny weather all year round … jackets and boots! This is the time of year I rearrange my wardrobe, bringing out all the cute jackets I finished last March and never had a chance to wear (remember in the fashion industry we are always designing a season ahead). Of course while I am pulling out the fall wardrobe, out come the fabulous boots. I LOVE shoes! I sew all my own clothes, I have to find something to shop for besides fabric 🙂
Speaking of sewing all my own clothes, about 15 years ago I set a goal of only wearing clothes I had sewn myself. It was a great idea, but hardly possible. I spent all my time sewing custom garments for clients and I could never find time to sew for myself. You know, like the shoemaker that wears worn-out shoes. Those of you that are in the sewing business know exactly what I am talking about.
Once I started designing a ready-to-wear line and a pattern collection for the home sewer, I found a perfect reason to sew for myself. Someone has to test the fit, right 🙂 Over the last few years I have been adding my label to the closet with jeans, tops, jackets, dresses, skirts, slacks, … In fact last night after admiring my organized closet (now is the time to admire, it never seems to stay that way very long), I realized I finally accomplished my goal! Every garment carried the Angela Wolf label. I could hardly believe it! In fact, once you get going on sewing for yourself, the outfits flow in much faster than you think. Have you ever had the desire to sew all your own clothes? I challenge you to try. I am going to celebrate this accomplishment and try to focus on doing the same for the spring wardrobe swap. I feel a 2014 wardrobe sew along coming on … what do you think?
In the last post, I mentioned how thankful I am to all of you readers and a special thanks to those that voted my blog into the finals for the category sewing – best instructor blog for the 2013 Craftsy Blogging Awards. Voting in the final round is still going on, so make sure to vote for your favorites again (hint, hint). I couldn’t think of a better way to thank you than give away a few online classes, which I will do over the next few weeks.
Not everyone can win, so I asked my friend Deepika – founder of PatternReview.com – to place all my online classes on sale for the rest of the month. In case you haven’t visited the site, PatternReview.com is a great website for learning and connecting with other garment sewer’s. I offer quite a few classes there, including sewing jackets. No, my jacket patterns are not ready to launch yet, so this is the next best thing. The next few giveaways will be for my online classes. The first one is Create a Jacket Muslin on PatternReview. Creating a perfect fitting muslin is the most important part of sewing a jacket. If you would like a chance to join my class on sewing a muslin where I offer fitting tips, solutions, and you can even upload photos of your muslin for personal fitting advice, simply share a comment about your experience in fitting jackets. Never sewn a jacket, even better reason to start with the muslin class (a random winner will be chosen and announced next Friday). Speaking of jackets, have you been watching season 5 on It’s Sew Easy and following along as I sew a jacket? If your PBS doesn’t carry It’s Sew Easy, you can catch a new episode every week on their website.
Hope you are all enjoying February, I can hardly believe it’s almost over! I spent last week taping season 5 for It’s Sew Easy TV, despite the cold and snow – we had a successful week. Here is one of my favorite photo’s on set with June Mellinger (Brother) and Christopher Straub (Project Runway). I have to say, he is one talented designer! He even left an autographed handbag for Katie, my ninth grade apprentice. She absolutely adores him and I can’t wait to see her face when she opens her gift 🙂 By the way, that handbag in the photo is fabric he designed. I foresee an order with spoonflower soon.
I have been busy working on some custom garments and my new collection, which I will be sharing over the next few weeks, including launching some new patterns. First, I have to share one of my last gown dilemma’s. The fabric was gorgeous, but challenging to work with … slipper, shiny, textured, get the idea? I was having a heck of a time inserting the back zipper. I couldn’t use a hidden zipper, as I could not find a color to matched the fabric. The problem occurred when I was topstitching around the zipper. I hand basted in the zipper, marked the center back seam with chalk (that was also basted closed), and marked the stitch line with chalk. The fabric really presented a challenge with the texture. Being a total perfectionist, I ripped the topstitching out twice because it just was not straight enough. Then I remembered the Laser Vision Guide on my Brother Dreamweaver XE VM6200D. This worked like a charm! I was able to line up the laser light with center back seam and topstitch perfectly straight, all the way around the zipper. I won’t forget about that handy tool next time. Here is the short video I put together if you want to see more details. Now, back to the cutting table. Enjoy 🙂 xoxo Angela
This is a fun and easy sewing project; sewing fleece texting gloves. You know I can’t resist coming up with a few fun gifts items to sew. How about a pair of texting gloves! I don’t know about you, but I really get annoyed when I have to take off my gloves in order to answer my phone, text, or check an email. Instead of buying gloves and cutting off the fingertips, I decided to whip up a pair of custom gloves. These are easy and fast to sew, not to mention you can customize how tight and tall you want them and not worry about your rings getting in the way. Did I mention they are GREAT for fishing!
1. Measure around your knuckles, this will be the width of your gloves.
2. Measure from your knuckles up your wrist and come up with a length measurement.
3. Chalk mark your stitch lines, making sure to block out the area for your thumb.
4. Stitch and press your seam allowance open.
5. Fold the glove in half so the folded edge is at your knuckles.
6. Hand stitch the thumb hole closed.
7. Serge the raw edge.
That’s it! You can add beading, decorative stitching, embroidery … by the way, if you add embroidery, do so before you sew the gloves together. This is such an easy project. Show everyone how creative you are and post photo’s on my facebook, Instagram, and pinterest of your new gloves. Let me know if you have any questions.
Cheers and stay warm!
Brother™ has provided me with the DreamWeaver XE, but all opinions expressed are entirely my own.



 Rowenta’s for applying interfacing. They are easy to clean, very hot, and don’t usually leak (I say that with a squint in my eye as every iron seems to have its own personality, although out of about 30 Rowenta’s I only had 2 that dripped and 1 that caught on fire – another eventful day in the studio!).