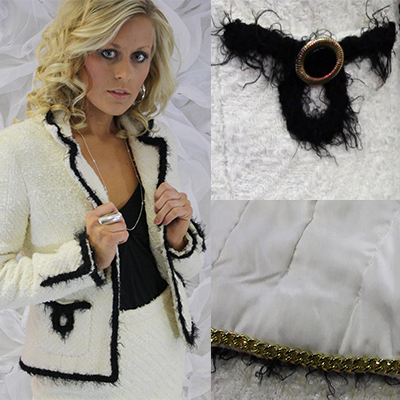
A well-made jacket can show off an outfit to its best. Join me on PatternReview for the fundamentals and fine points of creating a contemporary couture jacket (hint: my version of the traditional Chanel jacket).
You’ll love the comfort and style of this jacket… it feels more like a sweater! It’s the perfect topper for jeans or more formal dress. This couture jacket is a must-have for the modern lifestyle!
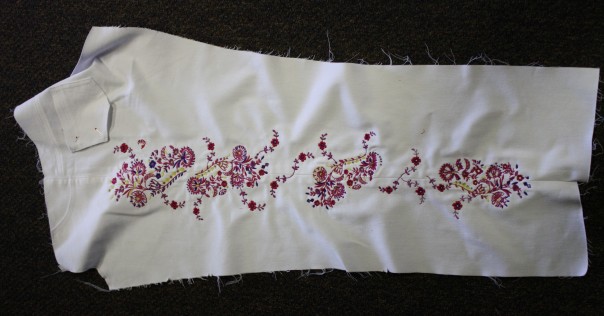
The class offers 12 videos with 2 hours and 45 minutes of HD video. There is also a 164 page PDF file with photos and close up details of every step.
- Selecting fabric and lining.
- Creating a 3-piece sleeve, laying out the pattern, and cutting the fashion fabric.
- Attaching fusible interfacing, finishing the edges, and cutting the lining.
- Using a couture technique to quilt the lining.
- Sewing a jacket with a plaid.
- Preparing and hand-stitching the lining.
- Sewing the sleeve vent and attaching sleeves.
- Covering shoulder pads.
- Trim ideas, including a tutorial on how to crochet your own trim!
- Closure options including custom covered buttons.
- Pockets with a couture touch.
- And last but not least, adding the prestigious weighted chain.
Join me 🙂
[vimeo http://www.vimeo.com/68063903 w=500&h=281]
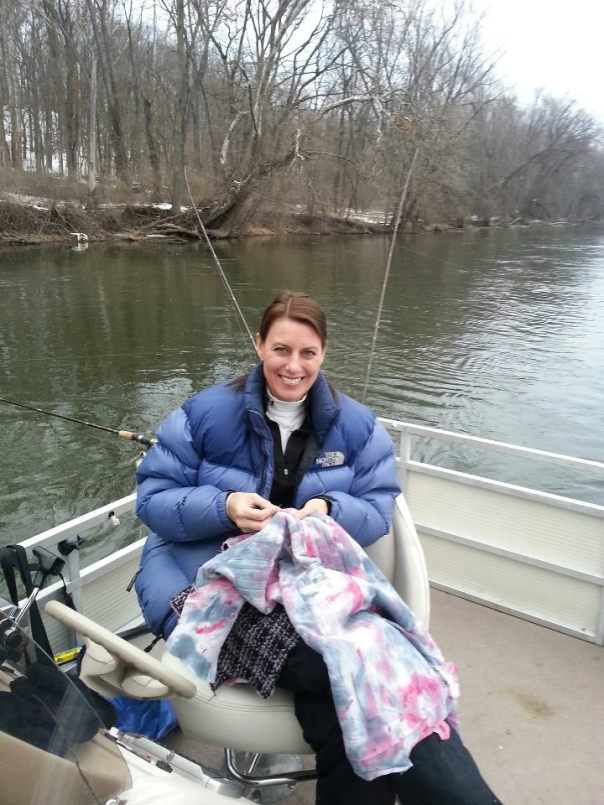
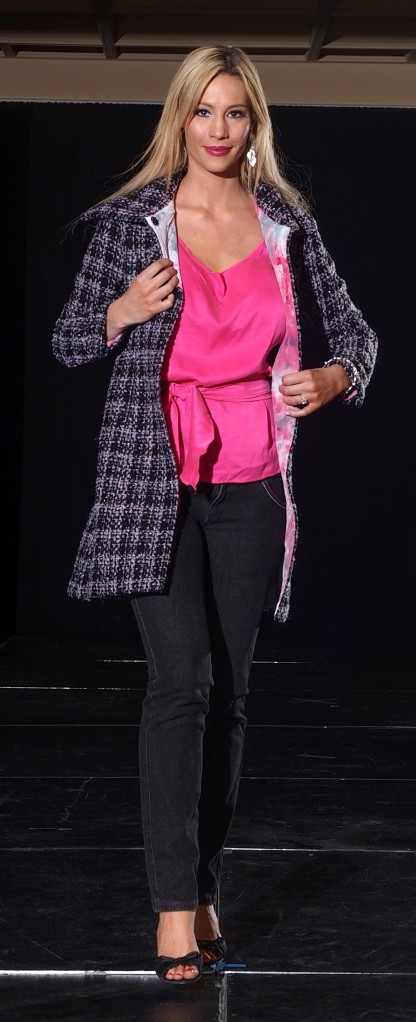
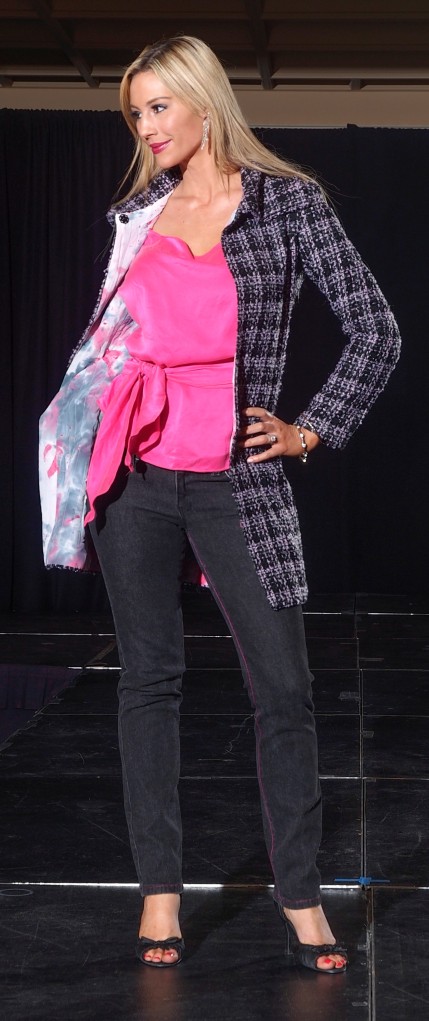
Thinking you don’t have time for a few hours of hand-stitching a couture jacket? Why not bring the jacket with you! Seriously, I hand-stitched the lining on this jacket while fishing (see the finished jacket below). The lining is hand-dyed (and not with fish blood and guts :)) Fishing and sewing might be an odd combo, but it worked. How about you, any fun sewing stories that can beat fishing? Now be nice 🙂 Cheers xoxo Angela

First off, thanks so much for the embroidery tips! I started with simply adding letters on sueded silk, just trying to get a grip on rotating the word and changing the overall size. I am happy to announce, embroidering letters is much easier than I thought.
I choose a font from the Brother Dreamweaver XE and all you have to do is push the letters on the touch screen. Changing from upper case to lower case is a breeze. Then another push of the button and the entire word rotated directions. (I know I said no monogram towels for Christmas gifts, but I think I changed my mind – this is way too much fun! Now I just need the machine to offer spell check :))
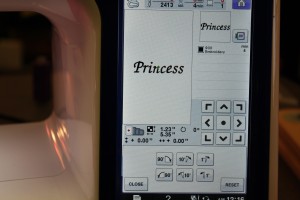
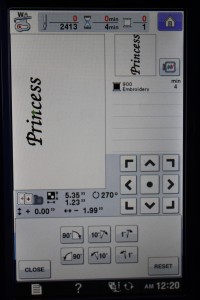
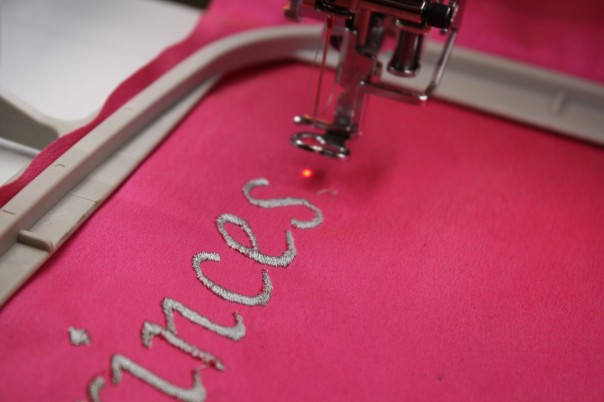
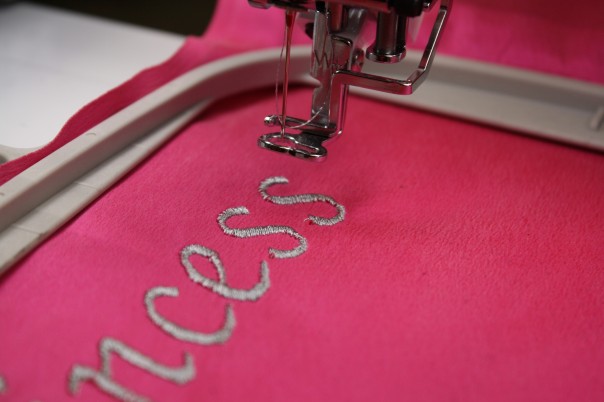
So here is where I screwed up … I was in a hurry and grabbed a bobbin that was 1/3 full. Instead of taking all that thread off the bobbin and starting fresh, I added more thread to that bobbin. Not a big deal, unless you run out of bobbin thread! This sewing machine has an automatic sensor that tells you when you are going to run out of thread. Very cool feature, unless the machine doesn’t know you are going to run out of thread, which is exactly what happened here. I was lucky the thread ran out at the end of my first “S”, but I still had to line up another “S” or change my idea to Princes (on pink fabric). I played around with the laser light and found that I could tell the machine where to start the last letter. Not too shabby!
I have big design ideas for my newly found passion for embroidery, but for the first few tests I am going to work on small pieces of fabric and share with those of you that are as much a novice as I am on this.
A few emails rolled in about how exactly to embroidery the jeans and I thought this photo might help. Remember there were 3 hoopings on each leg. The front pockets were already attached and the back was finished, except for the back pocket. I waited to add the back pocket because I was worried the fabric would be too thick under the embroidery hoop. You can see how the design started large near the hip, then smaller, and then even smaller at the ankle.
I am off to buy more embroidery thread and needles. Thanks to many of you for your advice, I think this is going to be fun. In the next post I will show you what the Princess is for and add more texture to the fabric. Have a great week! Cheers 🙂 Angela

I have a new fetish for altering fabrics and I am on a mission to test some new and old techniques and see if they will fit into high-end fashion. Embroidery is definitely high on the list, and I am not talking about embroidered bunny’s on the front of my sweatshirt or his and her towel’s (although I have to practice somewhere 🙂 I am more thinking about using embroidery to create new fabrics and using that fabric in my garments. A few ideas I am going to try:
- attaching two unusual textures
- quilting silk charmeuse
- sleeve embellishment
- embroidered jeans
- embroidery + needle felting
- distressing
- adding faux fur
- shirring
Just a touch of ideas and I am going to give them a try over the summer, looking into my fall wardrobe. I don’t expect them all to be a success, but I know this will be fun! So to kick off my experiment I thought I better learn how to embroider. These jeans were my first embroidery project last May, not too shabby if I don’t say so myself. The jean pattern is an altered version of my Angel Bootcut Jean and the embroidery design I created on Brother’s Dreamweaver . Trust me, I had no idea what I was doing but these new embroidery machines tell you what to do!
I sewed the jeans in a little different order starting with the front and back pockets and then the outside seam. A bit of a risk, after all that work, that the embroidery turns out awful. Looking back, you would think I would have tested the design on something, even a scrap of fabric. I am too stubborn for that. Each leg took 3 hooping’s and at first the total embroidery hours for both legs was tallying up to be 26 1/2 hours … YIKES! Then I realized that each color would only embroider for a few minutes and I would have to keep changing threads (this is only a one thread embroidery machine, in case you might think I have the fancy one). I decided to change the order of color, even if it altered the final design.
The embroidery design: I changed the design from being a little larger in the top (1st hooping) a little smaller in the middle (second hooping) and really small at the ankle (third hooping). Minus a few mistakes (which I won’t point out :)) I was really pleased with the final results.
One thing I learned with embroidering stretch denim – after you embroider, the denim doesn’t stretch. Just keep that in mind and make alterations to your pattern to allow for that non-stretch, especially if you are sewing skinny jeans or jeggings. I am planning on embroidering another pair of jeans with all one color of thread, I am thinking black fabric with silver thread or something along that line.
Any embroidery tips for me would be greatly appreciated, I have a lot of fabric I want to try (especially silk charmeuse). There is so much to learn and take into account. For example, embroidery thread. There are a ton of choices, any advice on the what’s the best and why? I would love to know the scoop!
Until then,
Cheers!
Angela

Is your local PBS a little behind the times and not yet airing It’s Sew Easy? No worries, every week It’s Sew Easy will show one of their weekly episodes online. Totally free of charge and if you register on the website there are even additional tutorials you can follow. A new episode starts every Friday at noon and today starts Episode 113. Rebecca Cornell and Christy Howden open the show with felting techniques for a fun toy. Next, Tricia Waddell and Katrina Loving have a mom friendly tip for reinforcing seams for heavy wear on stuffed animals and clothing. Then, Sheree Schattenmann creates a simple duvet for a baby’s room. Angela Wolf wraps up the show and the first season of It’s Sew Easy showing how to distress jeans for a fashion look suitable for kids, teens, and moms.
Is your local PBS a little behind the times and not yet airing It’s Sew Easy? No worries, every week It’s Sew Easy will show one of their weekly episodes online. Totally free of charge and if you register on the website there are even additional tutorials you can follow. A new episode starts every Friday at noon and today starts Episode 113. Rebecca Cornell and Christy Howden open the show with felting techniques for a fun toy. Next, Tricia Waddell and Katrina Loving have a mom friendly tip for reinforcing seams for heavy wear on stuffed animals and clothing. Then, Sheree Schattenmann creates a simple duvet for a baby’s room. Angela Wolf wraps up the show and the first season of It’s Sew Easy showing how to distress jeans for a fashion look suitable for kids, teens, and moms.


