Linda Tunic Sewalong

Linda Tunic Sewalong

Linda Tunic Sewalong

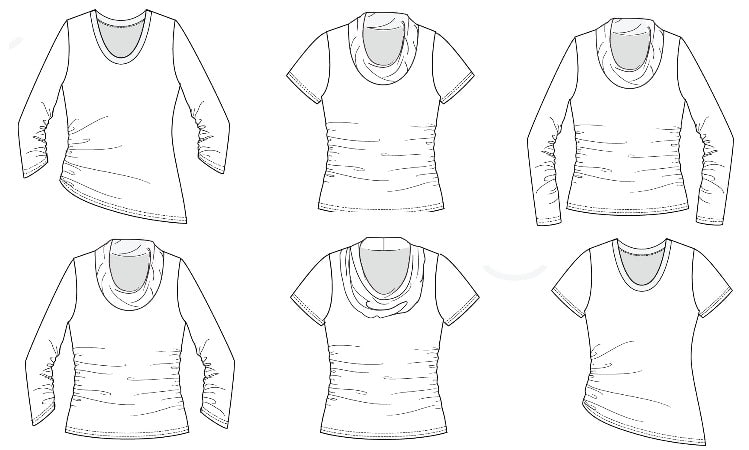
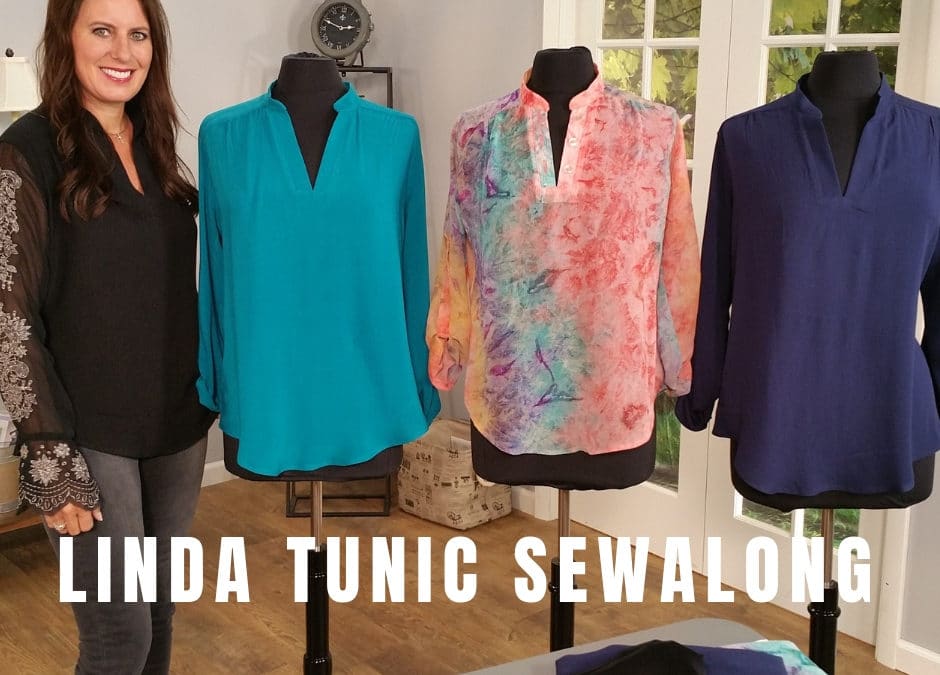
I am so excited to launch my newest pattern THE LINDA TUNIC!  I named this pattern for my mom (Linda :)) because she loves this style top and always looks so classy!  I used this pattern in taping Season 17 on It’s Sew Easy TV, which includes video tutorials for each step; including a few fun patternhacks.   

Grab your personally signed copy of the Linda Tunic in either the Paper Version with includes paper pattern printed in full color along with a spiral bound notebook for the directions or Digital Download.  

 First thing to do is catch up on this season of It’s Sew Easy in order to get an overview of the entire sewing process.  You can watch these on my YouTube channel here:

Get Started  Lesson 1  Lesson 2  Lesson 3  Lesson 4   (lesson 4 is really lesson 6 because we added a few patternhacks in there :))

We will be sharing photo’s and exchanging sewing tutorials in the  Angela Wolf Patterns Private Facebook Group.  The sewalong is a time for asking questions in a live environment and share photos of your new top with your sewing friends ♥

Official Sewalong Schedule …
Mark Your Calendar!

July 2 Getting Started!  Fabric, Size, Neckline Alterations, and Cutting

Replay of the Facebook Live is above or visit Angela Wolf Facebook Page

July 8 Fitting & Final Cut

Join for a LIVE Q&A session talking about fit and cutting the pattern

  Here is the link to save your spot!

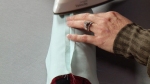
July 15 Sewing Front Placket

Join for a LIVE Q&A session showing how to sew the front placket and pattern hacks!

       Here is the link to save your spot!


powered by Crowdcast

July 17 Gathering and Yoke

Join on the weekly Behind the Scenes LIVE facebook show at the Angela Wolf Facebook Page at 1:30pm Eastern                Standard Time   Click here to join  (replay will be here immediately after the LIVE show for those not on Facebook 🙂

July 26 Sewing the Sleeve Tabs and Inserting Sleeves and Hemming!

Join for a LIVE Q&A session showing how to sew the front placket and pattern hacks!

       Here is the link to save your spot!


August 7 ♥ Show &Tell ♥

        Join on the weekly Behind the Scenes LIVE Facebook show at the Angela Wolf Facebook Page at 1:30pm Eastern                Standard Time   Click here to join  (replay will be here immediately after the LIVE show for those not on Facebook 🙂


Check back here for Live Show links and replays.  Sign up for my newsletter  and you will receive all the info right in your email box!

Can’t wait to see what you sew up!

Cheers,

Purchase the DIYStyle® Pattern and Cutting System

Click here to check out the mats!

Finally, a way to cut fabric fast and precise! No more pins or pattern weights. The new DIYStyle® MAGNETIC Pattern and Cutting System can be used to both Cut Fabrics and Make Patterns! The base set includes a multi-use double sided 24” x 36” mat, 36” Pro T-square, and a set of 12 FabricMagnets™ in storage tube.

Brother Brand Ambassador Retreat in St. Joseph, Michigan

Brother Brand Ambassador Retreat in St. Joseph, Michigan

This week I hosted the first ever Brother Brand Ambassdor Retreat at my new studio in St. Joseph, Michigan.  A good way for me to finish unpacking and get the studio organized after that big move!  Did I mention I am never moving again!!! If so, I will invite all of you over to take my fabric 🙂  Winn and I worked non-stop to roll out the red carpet (or should I say blue carpet) for this creative group.  We started by installing the new sign and planting flowers.  Then onto the inside to unpack my party platters and rearrange the studio to comfortably fit everyone.  A quick visit to the Dollar Store added a touch of color with fun table covers, napkins, and disposable plates.  Of course, what party would be complete without beautiful flowers!  We even added fresh flowers to the bathrooms 🙂

You might recognize some of these ladies from It’s Sew Easy TV, along with my interviews on Sewing News LIVE.  Here is a list of the Brand Ambassadors that were able to attend:

We also went live on Facebook and of course technology went awry, probably all the creative juiced flowing in the room!  I took the liberty of editing out the blue screen and adding bloopers to the end of the video below.  (Please excuse the sound variations, I removed the worst parts.)


The group enjoyed the Boulevard Hotel located in downtown St. Joseph, overlooking the beautiful beach on Lake Michigan.  Dinners at The Buck Burgers & Brew, RyeBelles, Schu’s Bar & Grill, Bit of Swiss, shopping, and a touch of Chocolate from Kilwins.

Two full days of learning, sharing, and inspiring creativity for future projects wouldn’t be complete without a cheers at the end of the event.  Champagne and sparkling water does the job!

One secret, wait until you see the holiday project we are all collaborating on!  Sorry, can’t share yet 😉

Enjoy the video!  We shared quite a few sewing tips and tricks.

cheers,


Embroider Lace on Tulle Fabric Tutorial

Embroider Lace on Tulle Fabric Tutorial

How to Embroider Lace on Tulle

With the launch of my new lace embroidery collection A Touch of Lace, I thought this would be a good time to share a few tutorials showing how to embroider lace.  I am going to start with my all time favorite, embroidering on tulle fabric.  You might have seen my outfits with what I call “removable tattoos”.  These sleeves are designed by embroidering on tulle fabric; then I cut out my sleeves from the embroidered tulle fabric.  Let me show you how easy this is!


Supplies:


Choosing Tulle Fabric

When you start looking for tulle fabric, you might get a little overwhelmed with the options.  The main thing is to check the texture and hand of the fabric.  For example, since I am using the tulle for a garment I want the fabric to be soft to the touch.  I also prefer a drape vs. a stiff fabric.  How can you tell?  If you get a chance to shop for the tulle fabric in person, hold the fabric in your hand.  Does the fabric lay stiff like a sheet of paper, or does the fabric drape softly?  Does the fabric feel soft or scratchy?  If you are shopping online it’s a little harder to tell, but you can always purchase a small swatch.  Although tulle fabric isn’t very expensive, you might as well order whatever you need for your project.  Worse case you can use the tulle in a gift bag!  

Fabric Color

Tulle fabric comes in numerous colors, which makes this fabric fabulous for garment projects.  Black, white, brown, and cream are my go to colors for nude or see through sleeves.  Hold the fabric up to your skin; you might be surprised at how see thru this fabric really is.  Another option is to choose a color to coordinate with a specific project.  Below is a sample using navy tulle with navy thread and black tulle with black thread.   I will talk more about the color of the fabric in the next few tutorials.  

Navy Tulle Sample

Black Tulle Sample

How to Hoop Tulle

1. Open the embroidery hoop and place the lower section of the hoop on a flat surface.  Center the Sew’N Wash Embroidery Stabilizer  over the hoop, making sure the stabilizer covers the entire hoop.

TIP: Sew’N Wash embroidery stabilizer comes in different widths. I usually keep 12″ and  20″ wide on hand; the 20″ wide is ideal for the larger hoops.

2. Layer the tulle fabric, leaving at least 2″ excess around the hoop.

3. Place the top of the embroidery hoop onto the layers.  Gently push the hoop together, leaving the tension loose.

4. Gently pull the Sew’N Wash embroidery stabilizer tight at each corner of the embroidery hoop.  Check to make sure there are no wrinkles in the stabilizer.

5. Do the same for the tulle fabric, but be very gentle when pulling the fabric as the tulle fabric can tear very easily! 

6. Tighten the hoop a little.  Slide your hand across the center of the hoop checking for wrinkles or puckers.

7.  When you are satisified with the hooping, tighten the hoop and you are ready to start embroidering.

Thread & Bobbin

I use different embroidery threads including rayon and polyester, each offers a different look to your project.  I would suggest experimenting with a few different weights and textures to determine your favorite.  Keep the samples in a notebook so you can refer back.   I typically use the same color thread in the bobbin as I use for the top embroidery.  This takes more time when embroiderying a design with multiple colors, but if you are going to see the backside of the embroidery it is worth the extra task. 

Choosing an Embroidery Design

Depending on the area of the garment this embroidered tulle will be used for, choosing a design is very important.  In my embroidery collection A Touch of Lace, I have included low density versions of each design.  A low density designs has less stitches which will offer a softer, less stiff fabric when the embroidery if finished.  If you opt for a dense design, make sure the lace will be used on a fitted area of the garment, for example the bicep area on a fitted sleeve.  The tightness of the sleeve will prevent the thicker embroidery design from curling.  

You are ready to embroider!  Hopefully this tutorial will get you started to embroider on tulle.  The next tutorials will give you some ideas for using the newly embroidered fabric.  Can’t wait to see what you embroider with my new lace collection.  Be sure to share photos of what you are embroidering using hashtag #angelawolf 

Cheers,

Choosing Easy Sewing Patterns for Beginner Sewing Success!

Choosing Easy Sewing Patterns for Beginner Sewing Success!

Sew confident beginning sewing angela wolfHopefully you had time over the weekend to spiff up your sewing room. My Craftsy class Sew Confident: Essential Techniques for Beginners” has officially launched and we are already just shy of 500 students. Very Exciting!

CONGRATULATIONS!

First things first, congratulations to Tracey McKoy from Baltimore, Maryland. Tracey was last weeks lucky winner and has already joined us in the Craftsy classroom. Guess what else I found out? She enjoys fishing! Good thing Craftsy drew her name or you might think I was swayed 🙂

Let’s Giveaway Another Class!

Angela Wolf sewing for beginners Crafty

There was such a HUGE response to the class giveaway, I am going to giveaway another Sew Confident Craftsy class! To enter this time, simply leave a comment below telling me why you would love to win this class,  joining students from all over the world – 1 random winner will be drawn Friday at midnight, EST … Good Luck! 🙂

Wondering what’s covered in the class? Here is a link to the trailer video and as promised a SPECIAL 50% DISCOUNT if you would like to join us today.


Beginners Guide to Fashion Sewing


Let’s get started! In case you missed last week’s message, the series for beginner sewing starts now.

Part 1. Choosing a Pattern

What’s the big deal about finding a pattern anyway? Scan the pattern books, find a cute cover photos, and you are ready for sewing success, right?

Angela Wolf fashion seiwng patterns for beginners

If only we can all be so fortunate, but in most cases the scenario pans out a little differently. I recall sewing my first pair of pants. The pattern cover showed a tall, elegant model (more…)

Pin It on Pinterest