

Looking for an easy DIY project for Halloween? Check out this Trick-or-Tread embroidered felt bag. This is a fast and easy project and the kids will love it 🙂
Supplies
- Inside of bag: cut 1 cotton fabric 27” by 14” and cut a 9” circle
- Outside of bag: cut 1 black felt 27” by 14” and cut a 9” circle
- Strap:
- cut 1 black felt and cut 1 orange felt 2 ½” by 19”
- cut 1 orange felt 1 19” by 11”
- Plastic or watersoluble embroidery stabilizer – cut 1 piece 19” by 11”
- Medium weight Tear-away adhesive embroidery stabilizer
- Halloween embroidery designs (I used designs in my Brother Dream Machine; there are other cute designs in ibroidery
- Embroidery thread
- Universal thread for sewing bag
- Faux fur or feather trim (optional)


Embellishing the Bag with Applique & Embroidery
in this step I decided to change the embroidered letters into applique so I could add the contrasting colored felt. You might consider other fabrics such as satin, metallic, or lace for a completely different look. I will show all the steps on my Brother Dream Machine:
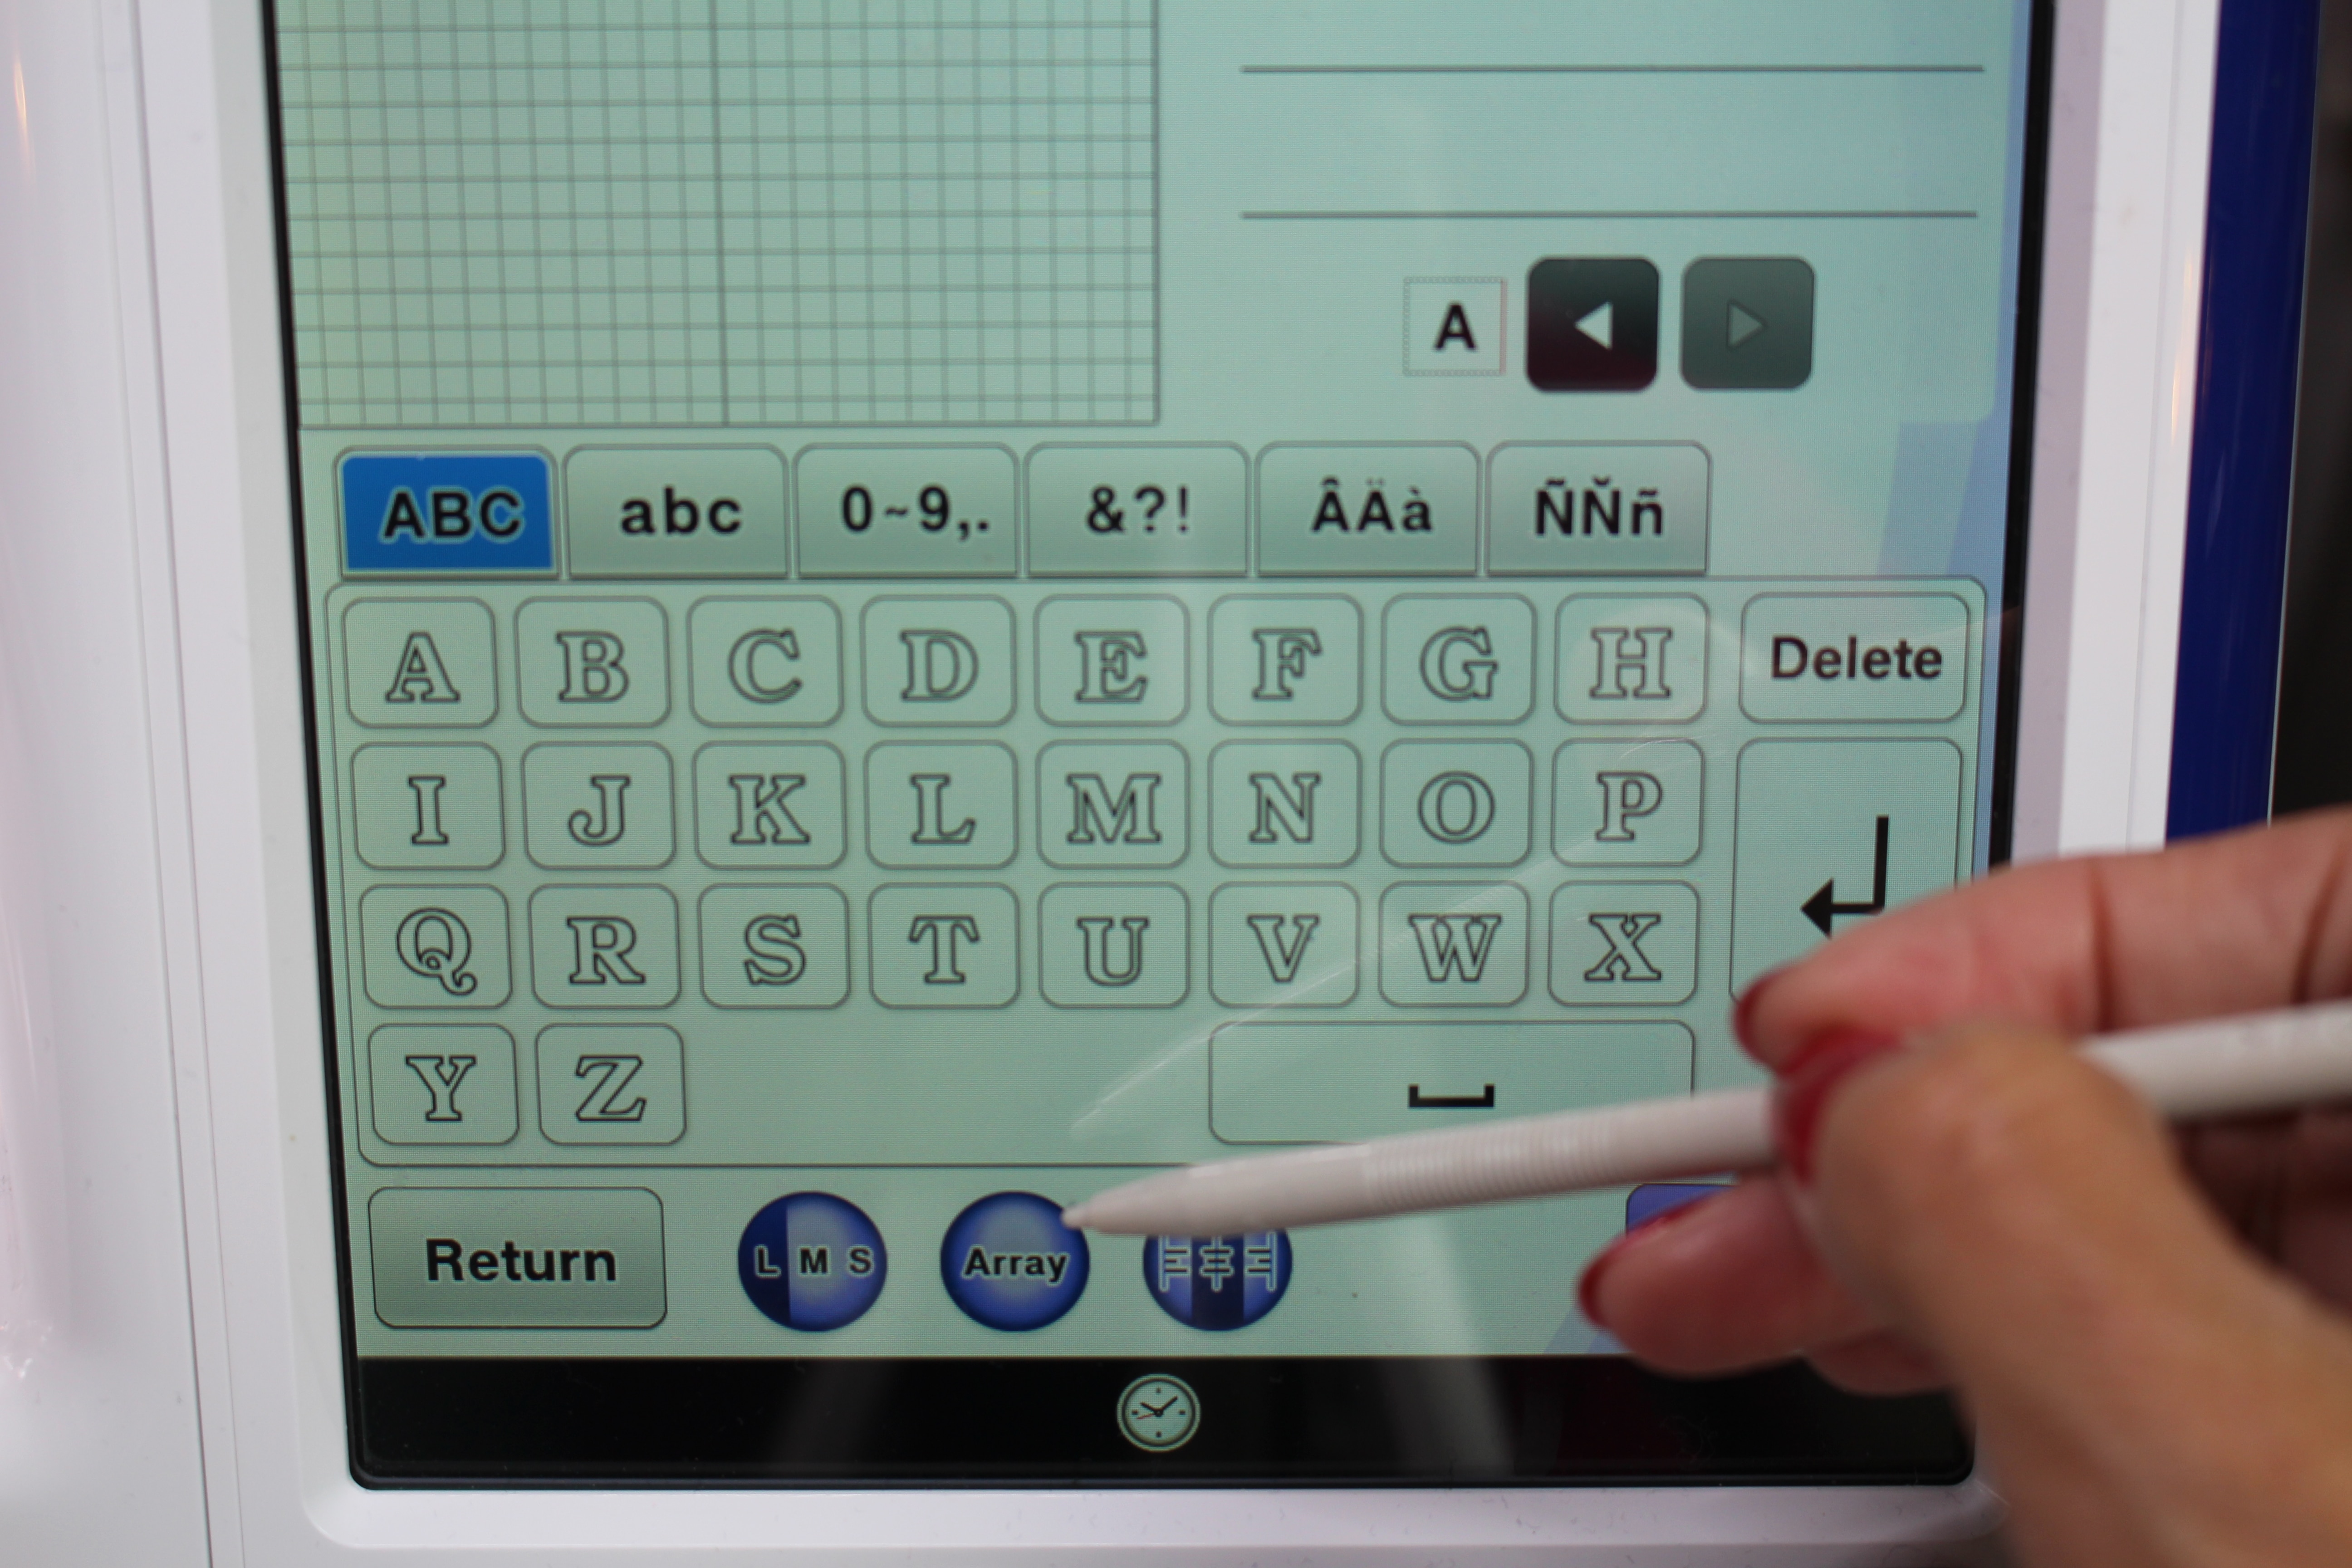
- Go to the embroidery screed and type in letters “TRICK”. Click the ARRAY.
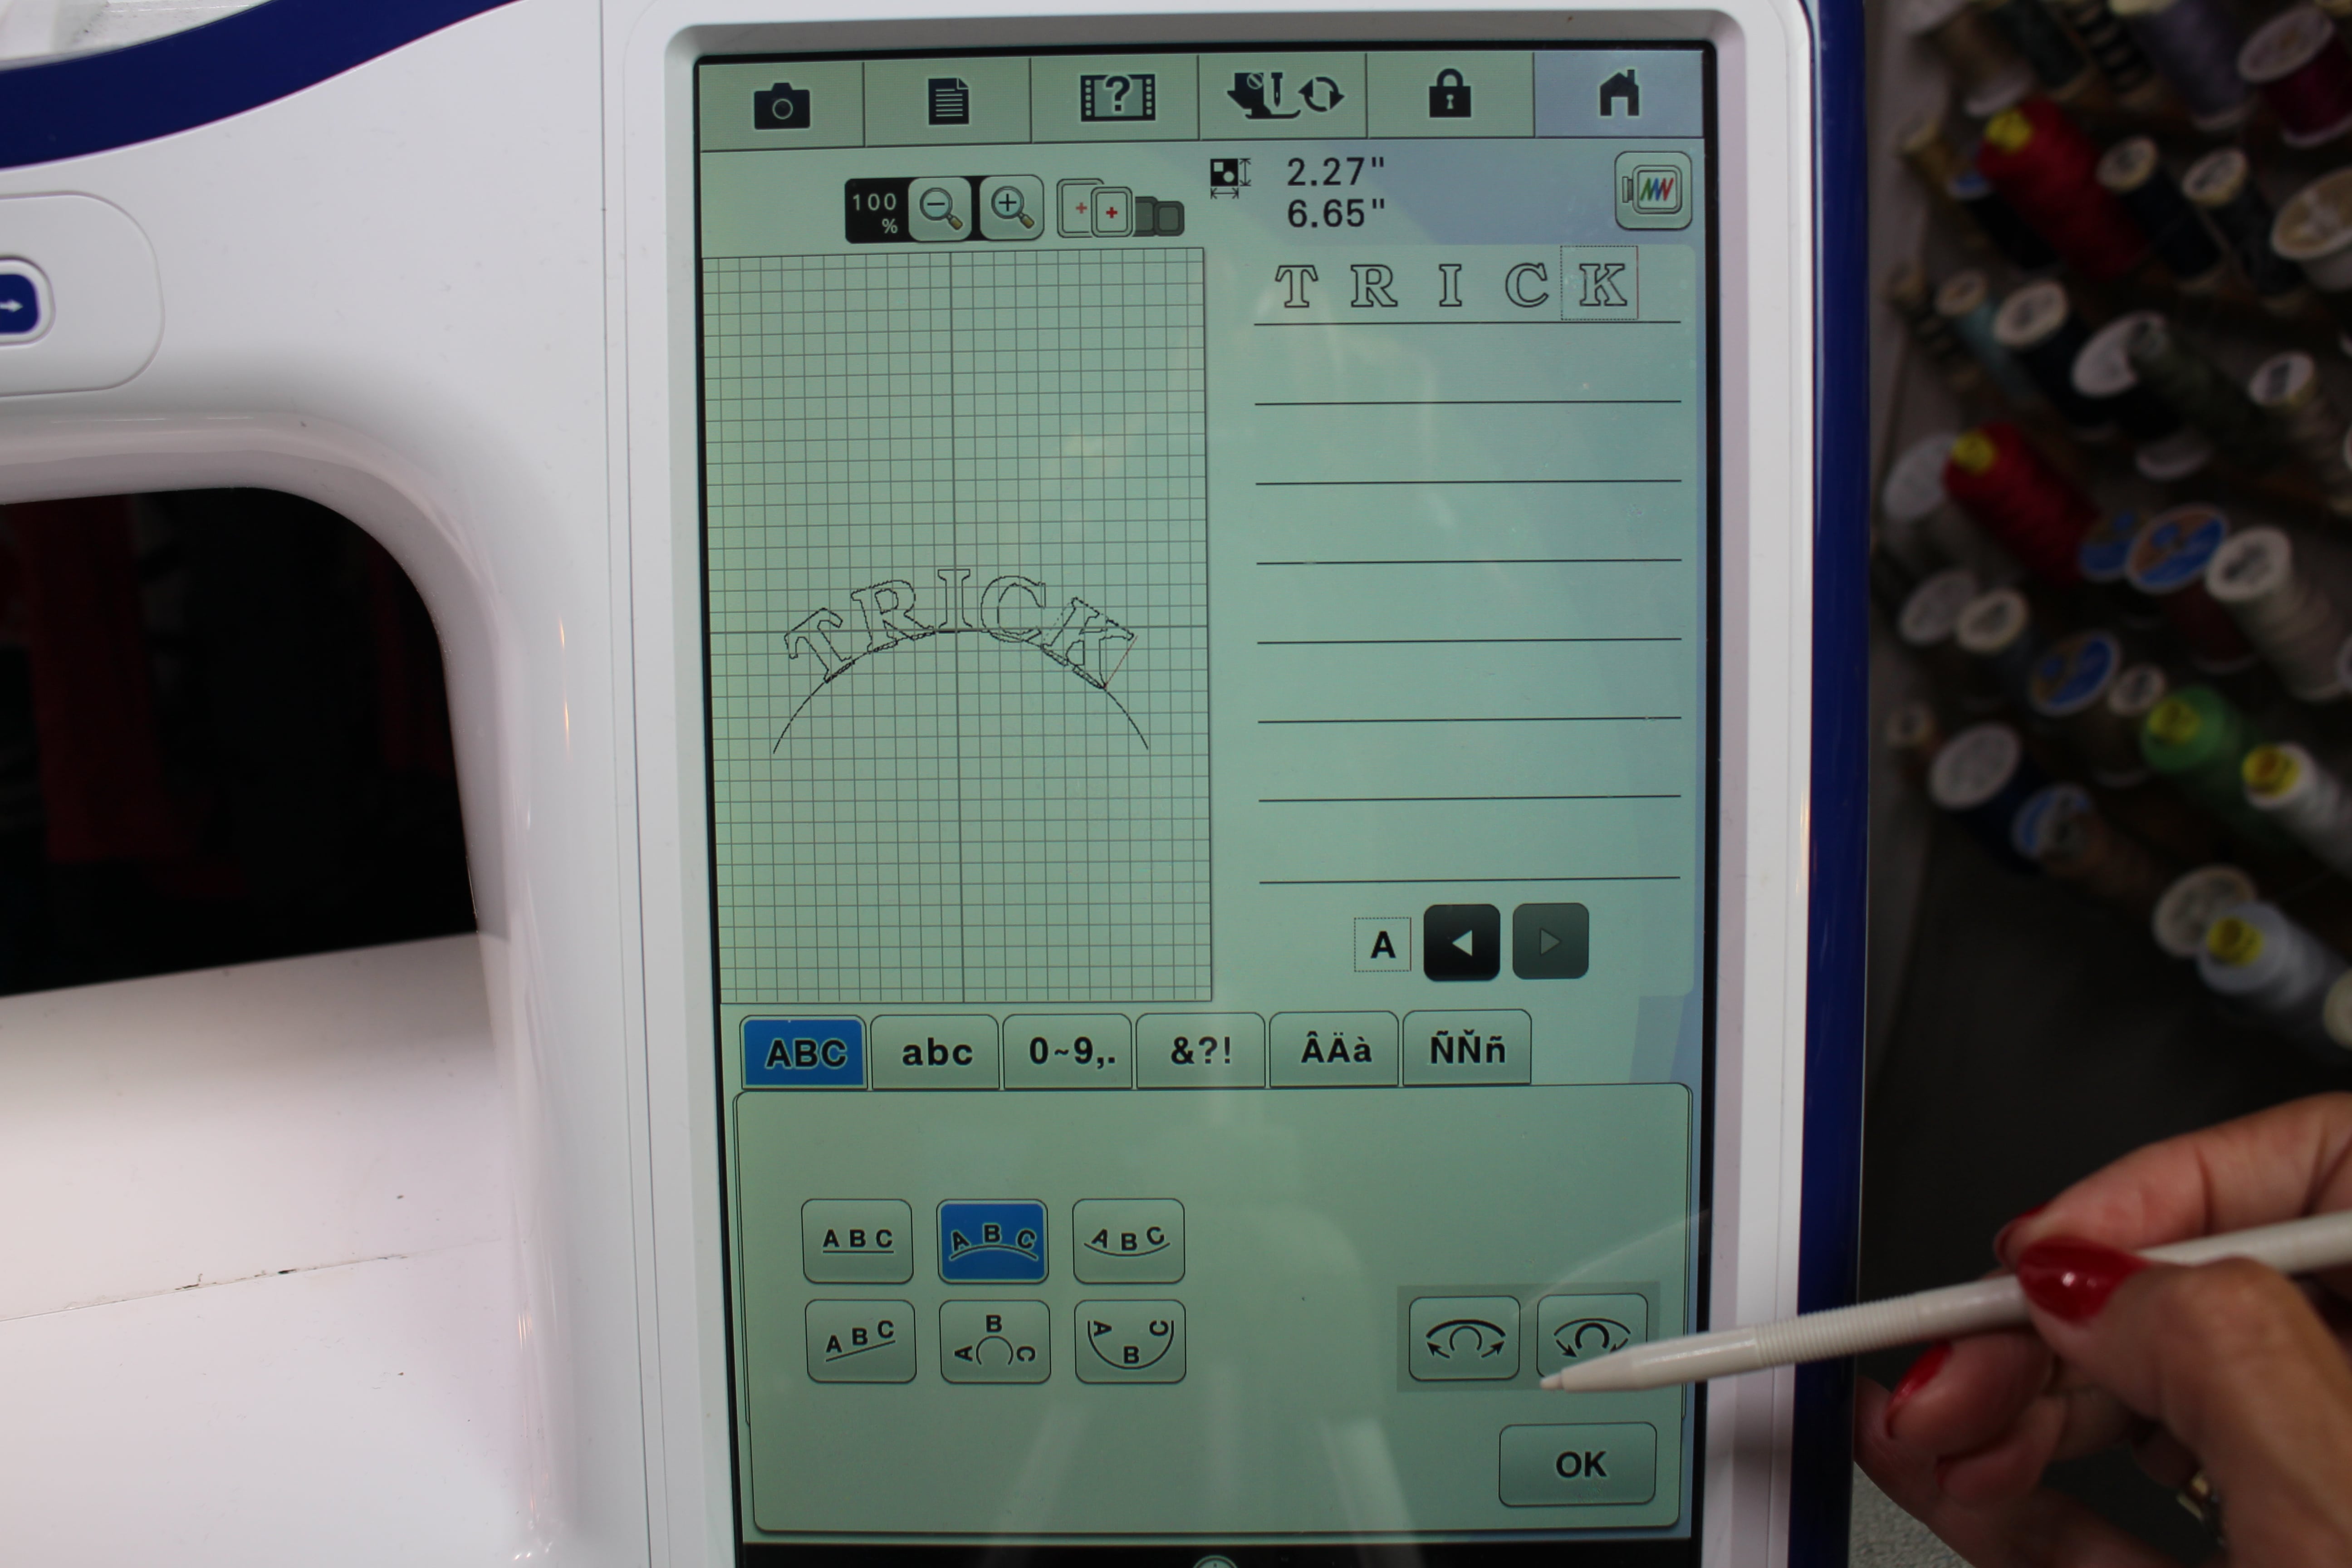
- Change the word into a semicircle.
- Move the letters into the upper section of the embroidery screen. Edit the letters a little more by spreading the letters out. This will give us a little more room for the applique.
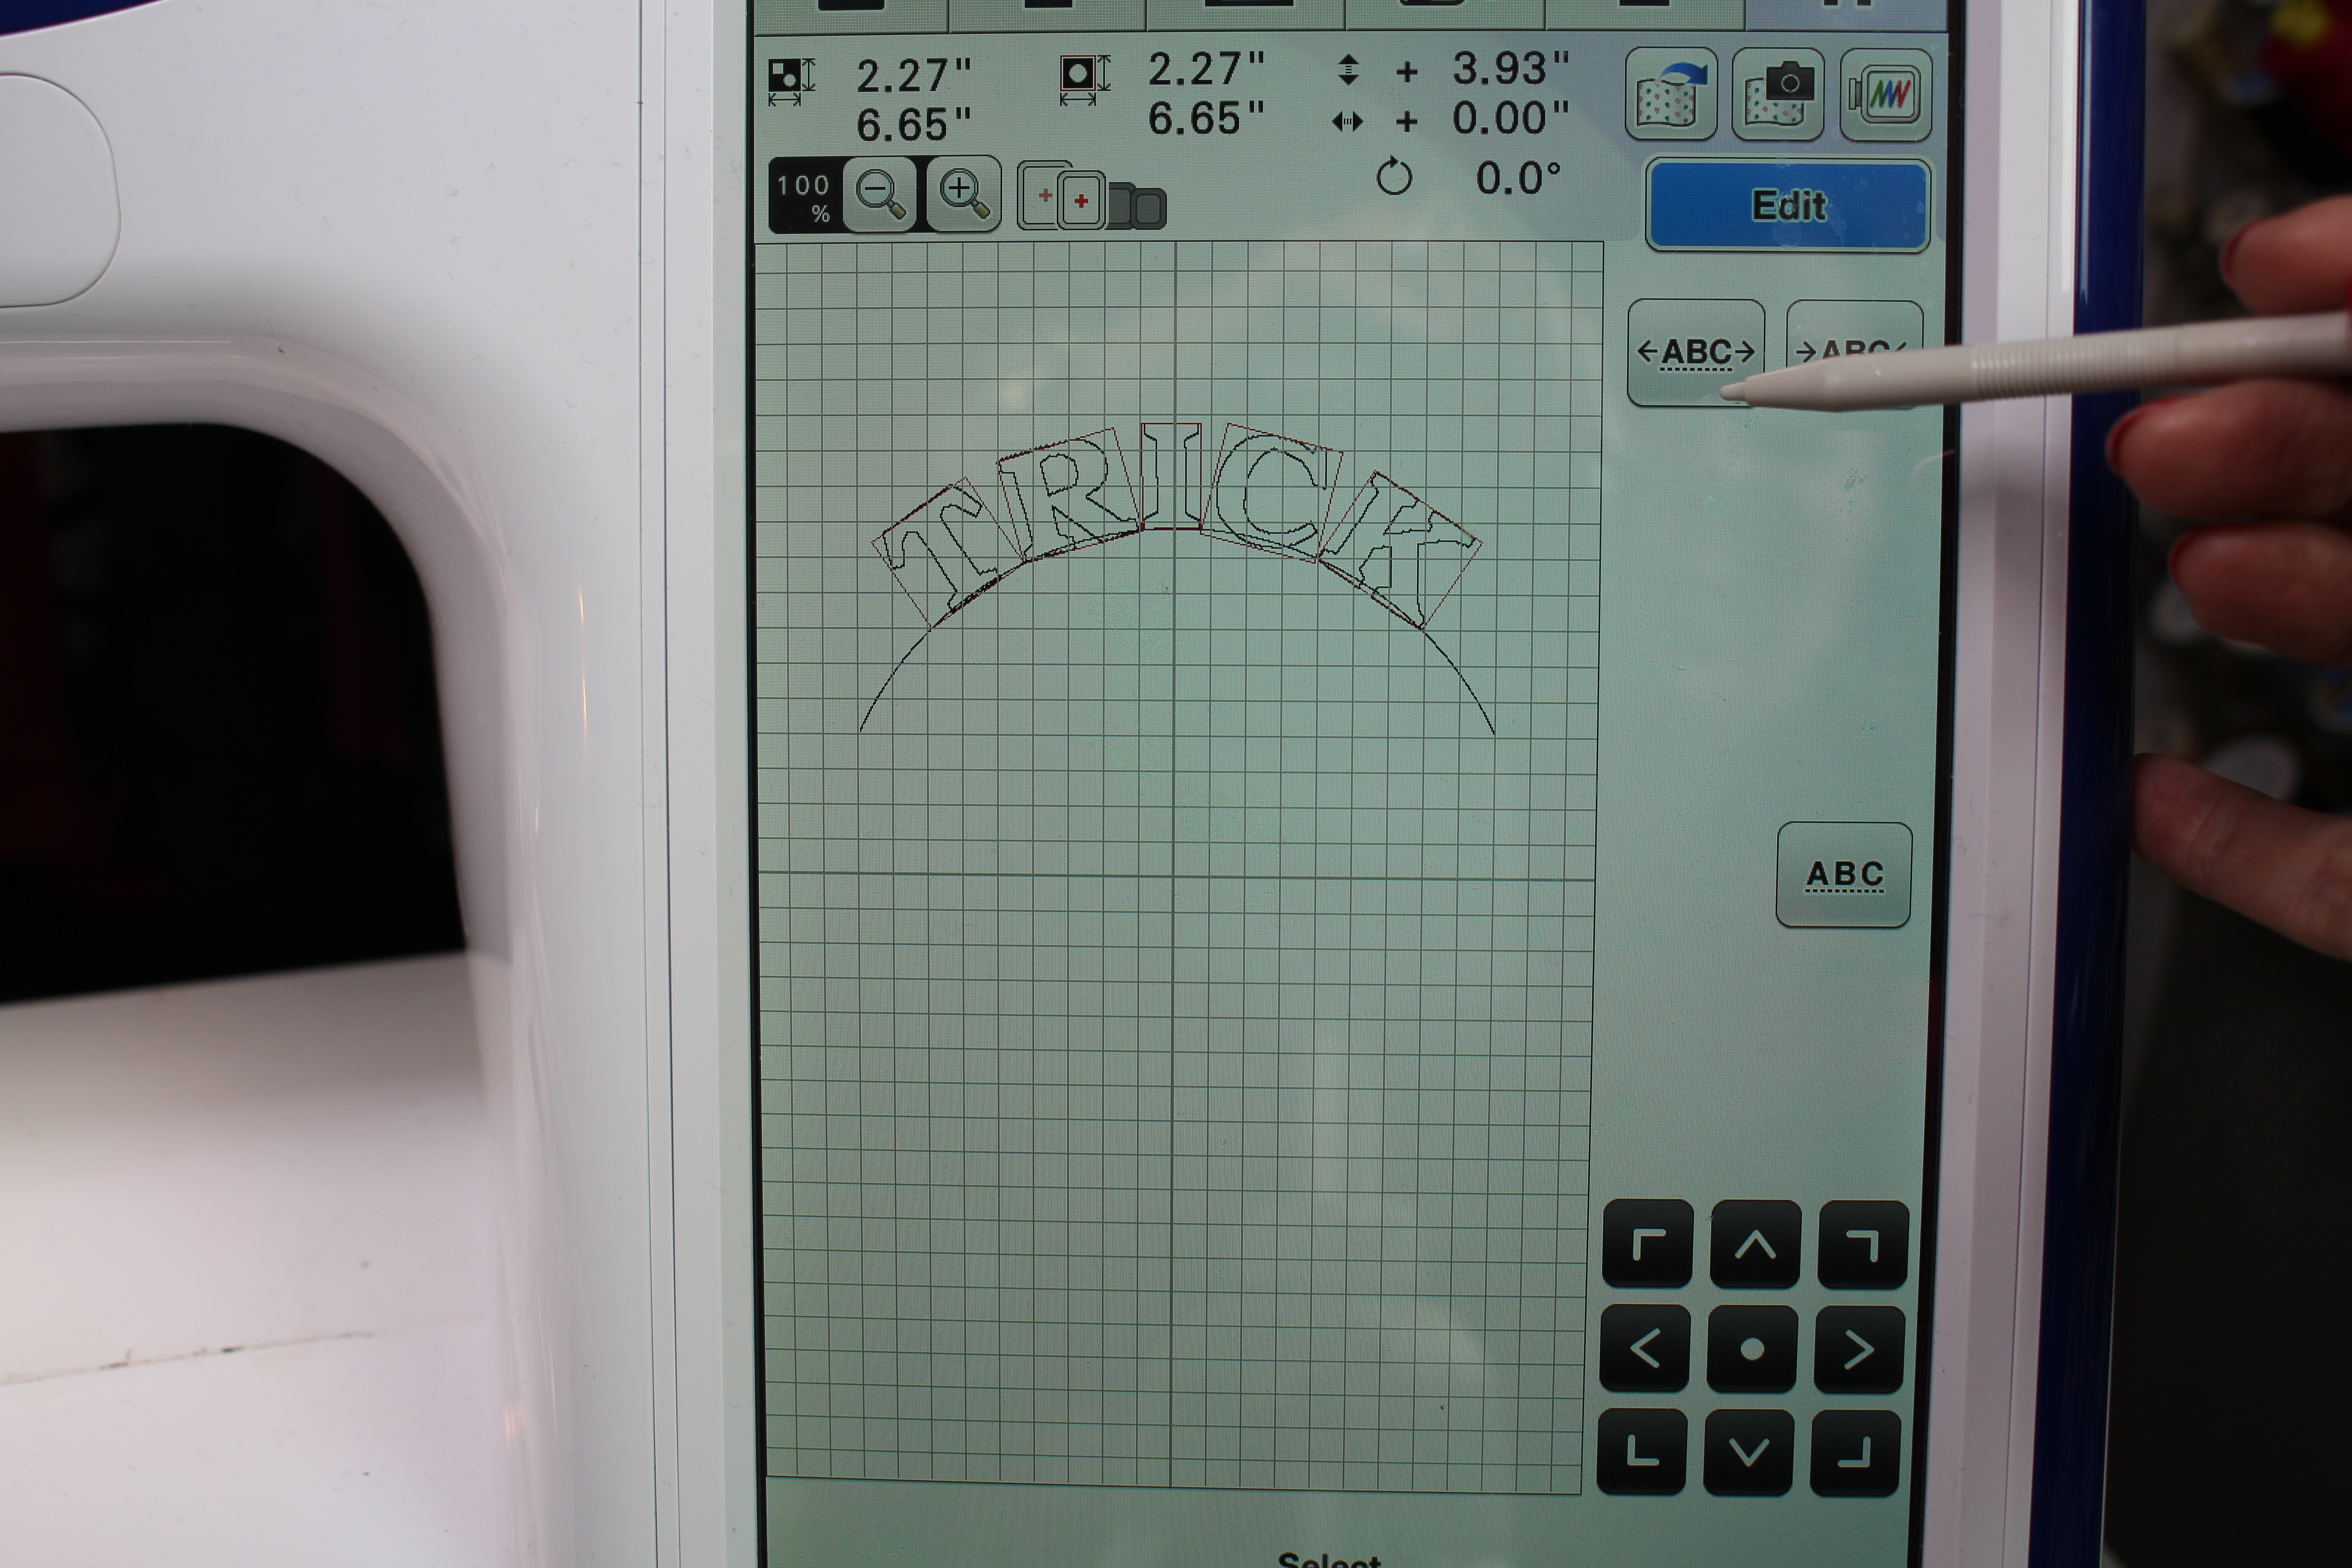
- Edit the letters a little more by spreading the letters out. This will give us a little more room for the applique.
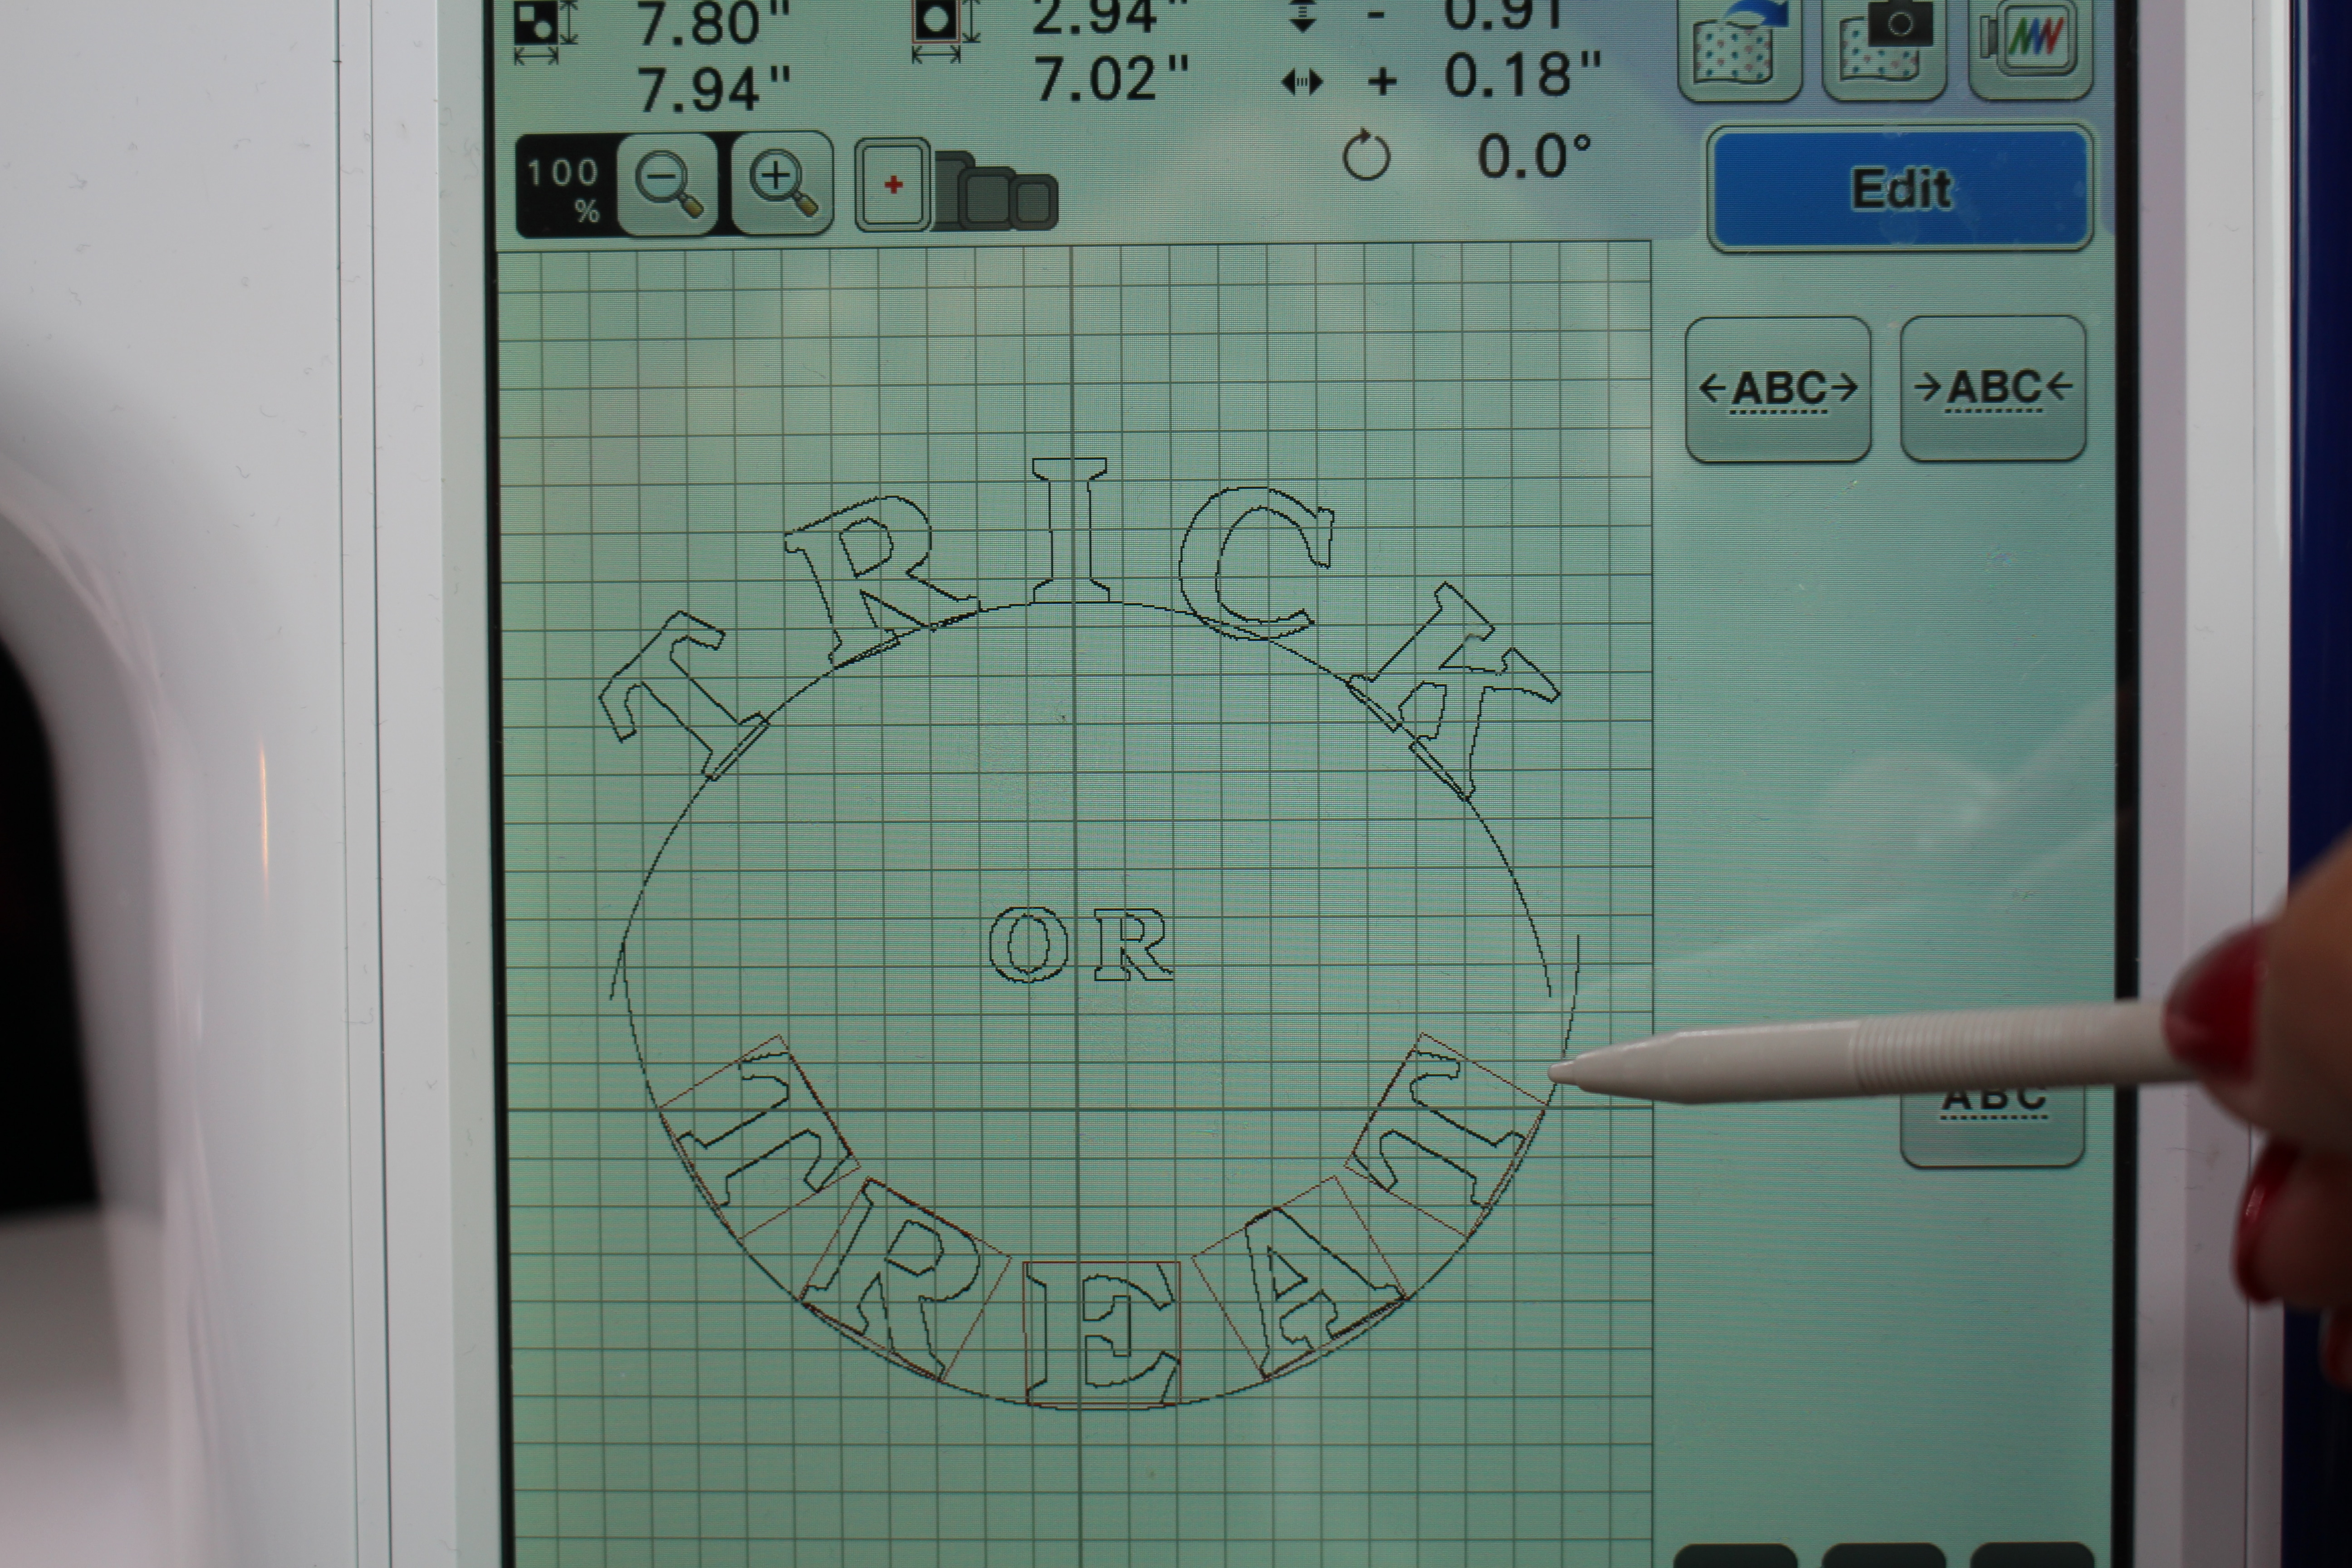
- ADD the letters “OR”.
- ADD the letters “TREAT”. Click on ARRAY to alter the curve of the word and spread the letters out.
To read the full blog, head over to my post as a Brother Expert Consultant on the Brother Stitching Sewcial. Be sure to share photos of your bags #angleawolf #brothersews
Cheers,

<iframe src="https://www.facebook.com/plugins/video.php?href=https%3A%2F%2Fwww.facebook.com%2FAngelaWolfCouture%2Fvideos%2F1685035791526862%2F&show_text=1&width=560" width="560" height="425" style="border:none;overflow:hidden" scrolling="no" frameborder="0" allowTransparency="true" allowFullScreen="true"></iframe>
<iframe src="https://www.facebook.com/plugins/video.php?href=https%3A%2F%2Fwww.facebook.com%2FAngelaWolfCouture%2Fvideos%2F1678637052166736%2F&show_text=1&width=560" width="560" height="425" style="border:none;overflow:hidden" scrolling="no" frameborder="0" allowTransparency="true" allowFullScreen="true"></iframe>


Share This
Share this post with your friends!