
[youtube=http://www.youtube.com/watch?v=FofSArIc7RM&context=C4c6673eADvjVQa1PpcFODx7nLiq6DH_2CPj4HCzz1QByuUKW2TV8=]
Making bias tape has never been easier! It is really important to make sure your bias strip are really cut on the true bias. Here are a few tips to make sure you have success:
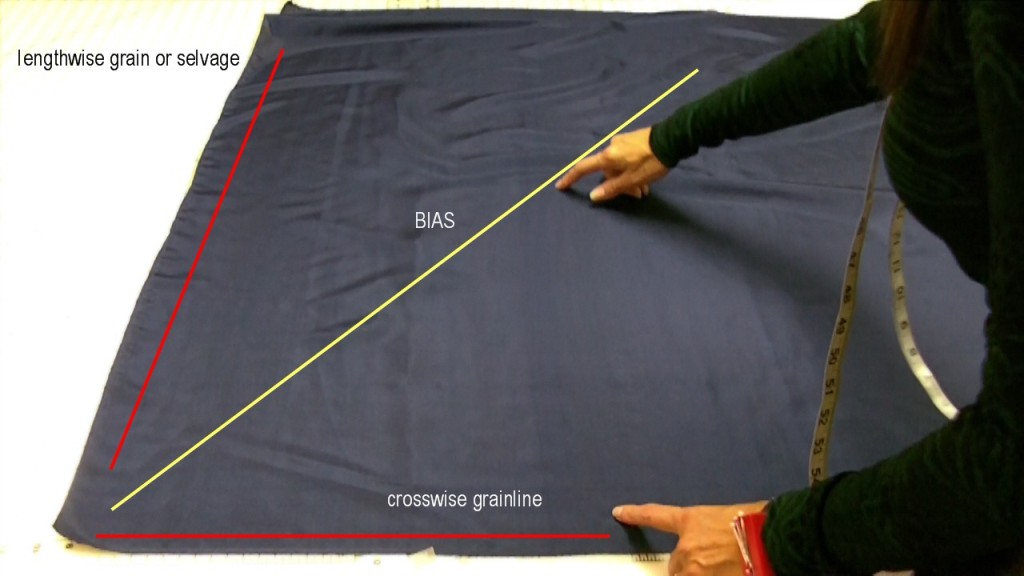
 To find the true bias: lay your fabric on a flat surface. It is easier if there is a grid to follow in order to line up your grainlines. Here I line up the crosswise grainline and the fabric salvage.

Take one corner and pull the fabric to match the selvage with the crosswise grain. This will create a triangle.

When working with slippery fabric, use a weight at one end so you can maneuver the fabric around. The bias is along the folded edge.

Align a see through ruler along the bias edge. I want 2″ bias strips so the first cut will be at the 1 inch mark because I am on the fold.

Now you will see you have a nice cut line on the bias. I then take the bias line and fold the fabric in half, so I don’t have to cut so far. I also move the fabric so I can line up the edge of the fabric along my grid underneath.

Again, using the see through ruler, cut every 2 inches.


Keep cutting strips until you run out of fabric. I always cut more than I need, you never know when you might need a strip of bias!
Does anyone have any other tips for cutting bias strips … especially when cutting slinky, slippery fabric? I would love to hear your ideas.


Have you ever thought about creating an ebook or guest authoring
on other blogs? I have a blog based upon on the same subjects you discuss and would really like to have you share some stories/information. I know my audience would value
your work. If you are even remotely interested, feel
free to send me an e-mail.
A perfect skin must be there which must be worn on the top of
the theme and the skin must be designed as per the theme.
Word – Press plugin let its users to work at a fast pace and make your page
desirable and appealing in just a short span of time.
A· Feedburner Circulation- This plugin enables one to display the subscriber counts in the
top right corner of the page.
Please contact us for more information on this
excellent post.
It’s a pity you don’t have a donate button!
I’d without a doubt donate to this outstanding blog!
I guess for now i’ll settle for book-marking and adding your RSS fed
to my Google account. I loo forward to new updates and
will share this website with my Facebook group. Talk soon!
Greetings from Colorado! I’m bored at work so I decided to
browse your website on my iphone during lunch break. I really like the knowledge you present here and can’t wait to take a look when I
get home. I’m surprised at how fast your blog loaded on my cell phone ..
I’m not even using WIFI, just 3G .. Anyways, superb blog!
Fab bias cutting tips! And Very impressive educational/professional background – no wonder you’re work is so splendid. Salmon in Lake Michigan??? What a surprise. I remember seeing a film waaay back in the day in school showing how lamprey eels were decimating the fish population in all the Great Lakes. I’m surprised there are any left: especially yummy salmon – if I were a lamprey that’d be my first choice for dinner. 🙂
That’s so funny – there are still lamprey’s. Every once in a while there will be one attached to the side of a salmon, they are so creepy!