First off, thanks so much for the embroidery tips! I started with simply adding letters on sueded silk, just trying to get a grip on rotating the word and changing the overall size. I am happy to announce, embroidering letters is much easier than I thought.
I choose a font from the Brother Dreamweaver XE and all you have to do is push the letters on the touch screen. Changing from upper case to lower case is a breeze. Then another push of the button and the entire word rotated directions. (I know I said no monogram towels for Christmas gifts, but I think I changed my mind – this is way too much fun! Now I just need the machine to offer spell check :))
So here is where I screwed up … I was in a hurry and grabbed a bobbin that was 1/3 full. Instead of taking all that thread off the bobbin and starting fresh, I added more thread to that bobbin. Not a big deal, unless you run out of bobbin thread! This sewing machine has an automatic sensor that tells you when you are going to run out of thread. Very cool feature, unless the machine doesn’t know you are going to run out of thread, which is exactly what happened here. I was lucky the thread ran out at the end of my first “S”, but I still had to line up another “S” or change my idea to Princes (on pink fabric). I played around with the laser light and found that I could tell the machine where to start the last letter. Not too shabby!
I have big design ideas for my newly found passion for embroidery, but for the first few tests I am going to work on small pieces of fabric and share with those of you that are as much a novice as I am on this.
A few emails rolled in about how exactly to embroidery the jeans and I thought this photo might help. Remember there were 3 hoopings on each leg. The front pockets were already attached and the back was finished, except for the back pocket. I waited to add the back pocket because I was worried the fabric would be too thick under the embroidery hoop. You can see how the design started large near the hip, then smaller, and then even smaller at the ankle.
I am off to buy more embroidery thread and needles. Thanks to many of you for your advice, I think this is going to be fun. In the next post I will show you what the Princess is for and add more texture to the fabric. Have a great week! Cheers 🙂 Angela
Dark jeans are really in trend this fall so that means distressing with a hammer might not be an option. I have tested the MuVit Digital Dual Feed Foot on the Brother Dreamweaver XE and believe it or not, after sewing over many thick seams there was not one skipped stitch! The only thing I added was a #14 denim jean needle and various thicknesses of denim. This foot is different from a walking foot, not only because it has a rolling belt, but the foot plugs into the sewing machine giving the foot it’s own brain … or something like that. You can then adjust the foot by pressing a few buttons on the sewing machine. I have to say technology is really making sewing fun and easy!
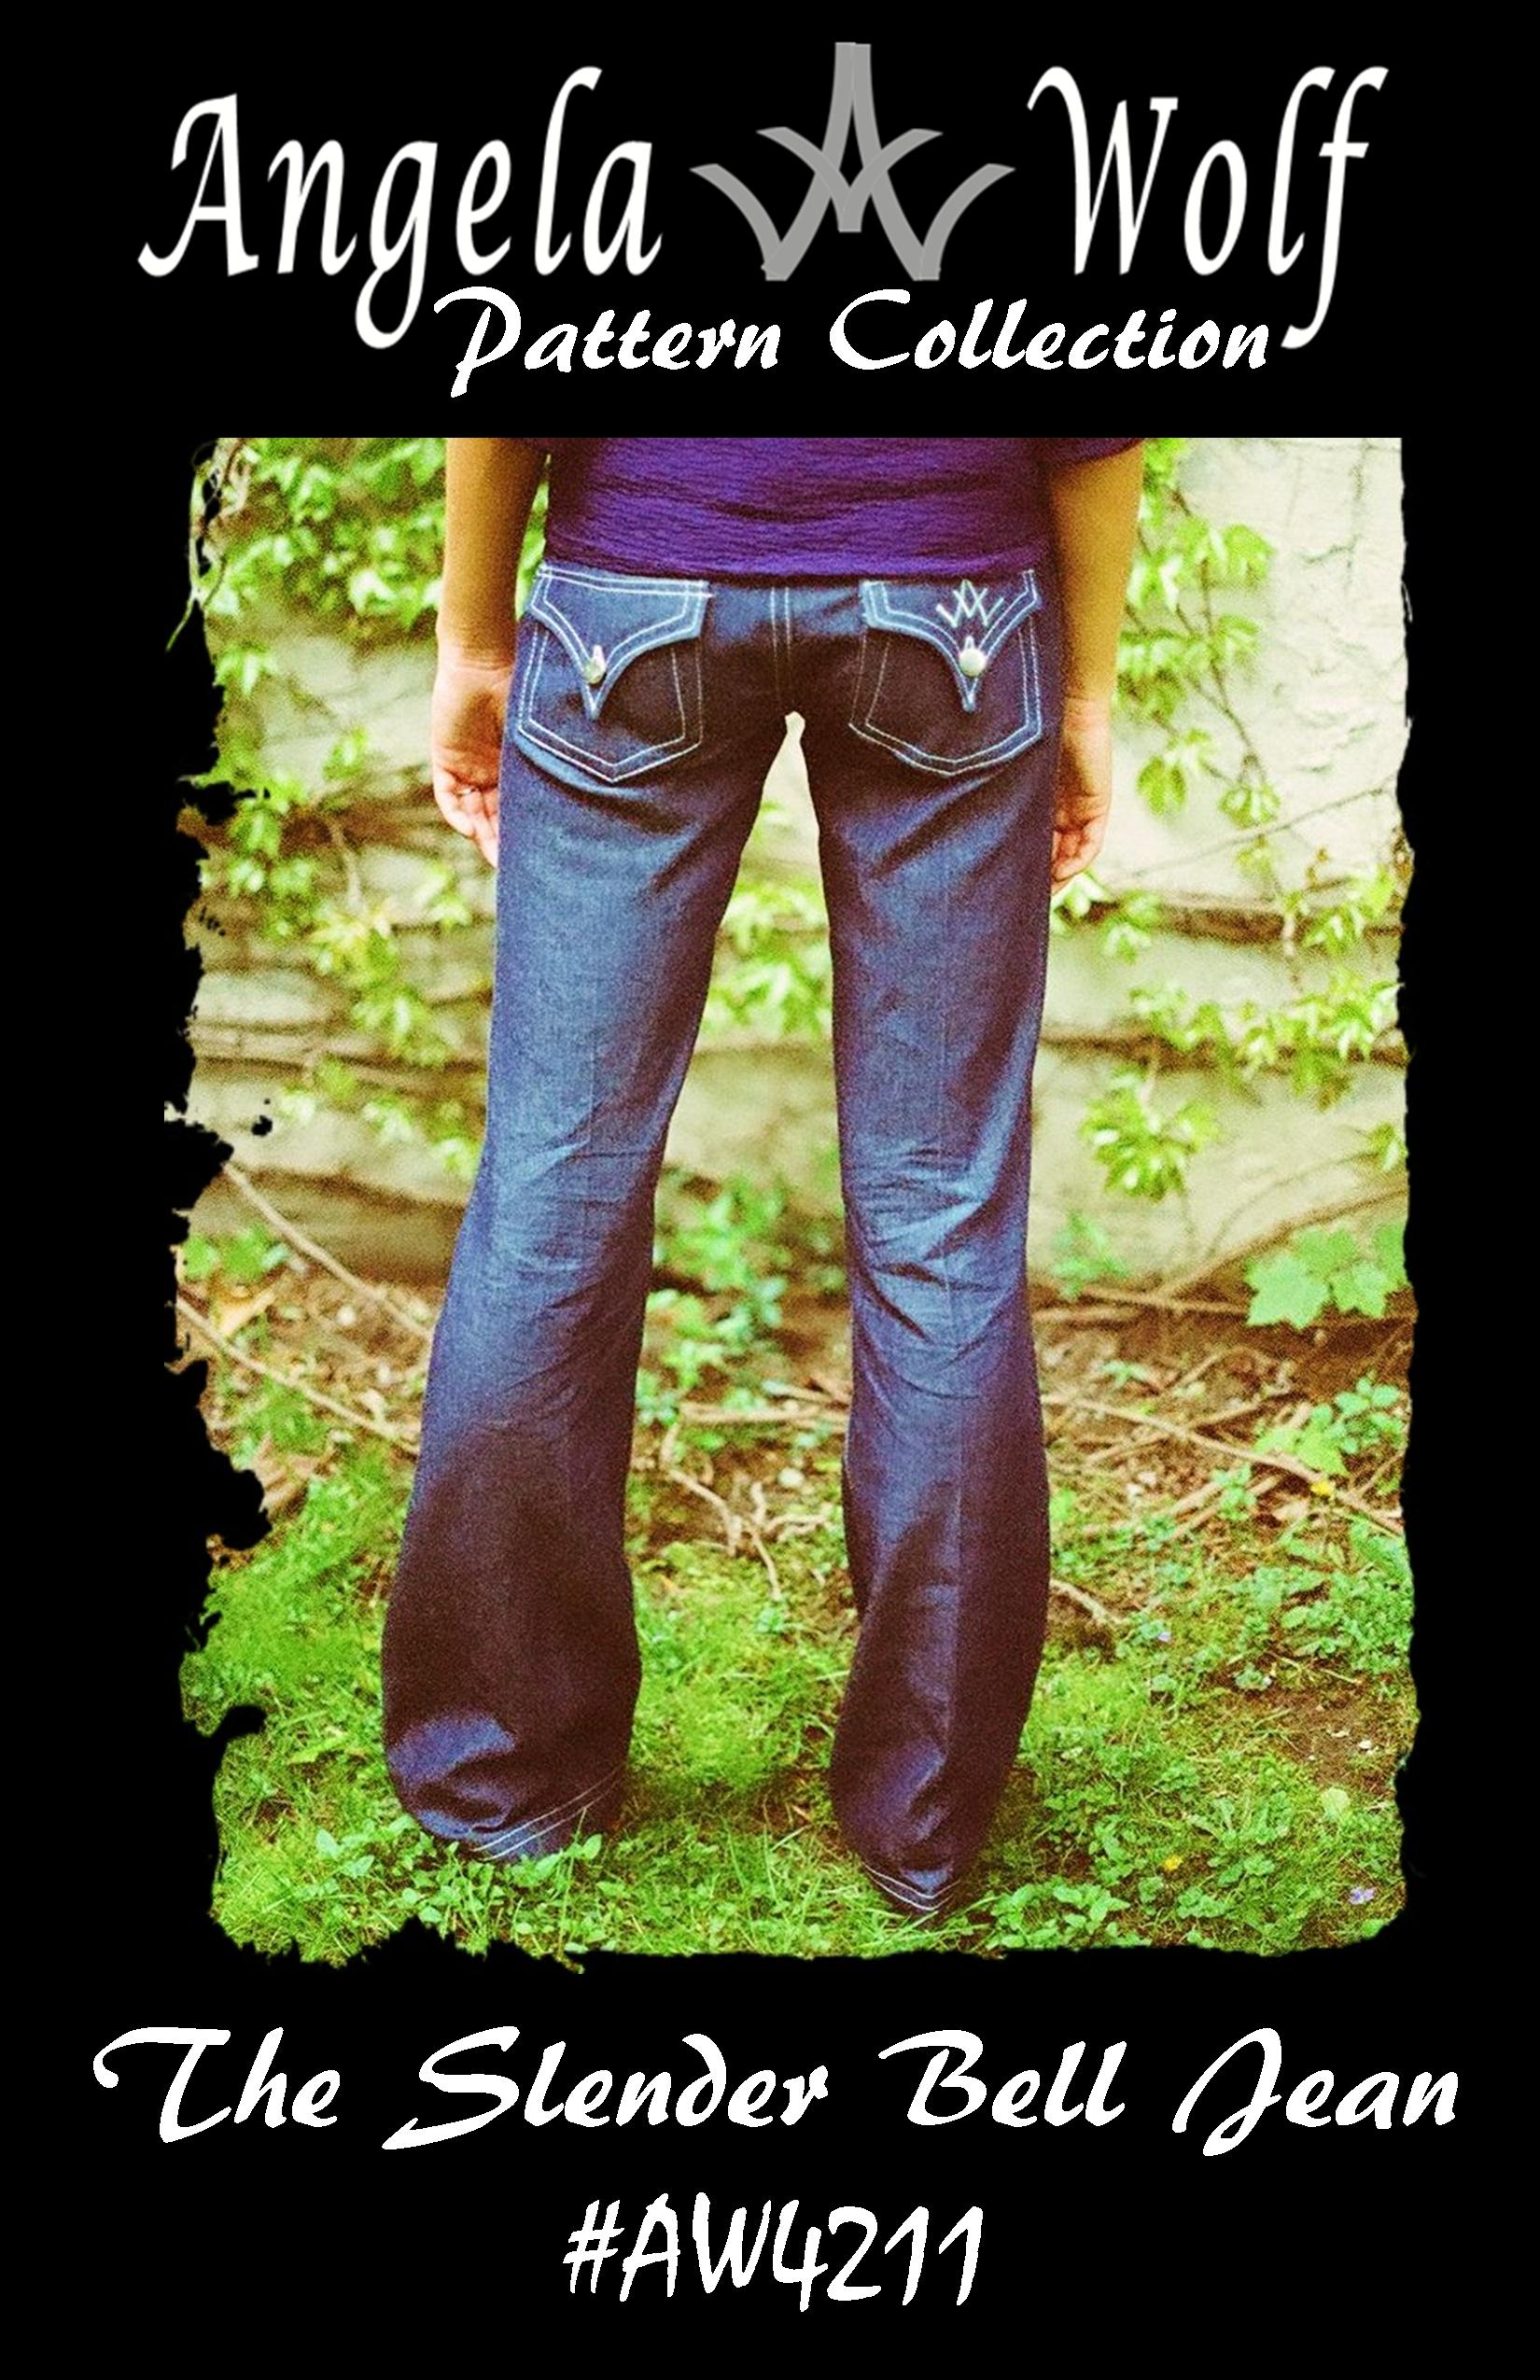
The video below shows you just how smooth this digital dual feed foot works and I even tested it on one of my new jean patterns. Which by the way, I am happy to announce my first two jean patterns are up and available! Both patterns come with detailed sewing instructions in a book format, very easy to follow. The other bonus that comes with both of these jean patterns is a downloadable PDF file, download to your tablet and you can enlarge the photos for detailed viewing. The PDF file offers color photos and details on where to distress the jeans as you sew. My goal is to help you sew jeans that fit perfect and look expensive 🙂 Enjoy and don’t forget about the previous videos on sewing jean pockets if you need a little extra help. Hope you had a great Thanksgiving weekend, lot’s of family, food and shopping on my end. Wait until you see my new shoes (and yes that’s plural!) xoxo Angela
I hope you are all safe from hurricane Sandy and my heart goes out to all those affected. We even experienced severe weather here in Michigan! I made it to the beach yesterday and after getting stuck in the sand with our SUV, I was able to snap a few shots. Unbelievable waves on Lake Michigan, over 20 footers. I think I’ll pass on fishing for a few days 🙂
Lake Michigan during hurricane Sandy …over 20 foot seas!
Now onto sewing …. more specifically topstitching. Topstitching jackets and jeans are not only a designer touch; this has become a main focus in today’s fashion. The more creative the topstitching the more expensive your garment looks. On that note, have you ever finished a great looking jacket only to discover you can’t find a matching color in the thick topstitching thread? Would you like to hem your favorite jeans – again not being able to match the original jean thread color. This video shows you an easy way to solve that problem, using two spools of Coats & Clark polyester thread and a #14 denim jean needle. You will even get a peek at the automatic needle threader on the Brother Dreamweaver XE, yes it even works with 2 threads! Enjoy 🙂