
Although I teach three Tailoring Ready-to-Wear classes on Craftsy, there are a few alterations that many students ask about that were not included in the classes. One of the most common questions: “How do I hem pants with a cuff?” Hemming cuffed pants is very simple, but its important to pay attention to the measurements or you run the risk of hemming the pants too short.
To get started these are the supplies from WAWAK SEWING you will need:

Let’s Get Started … Hemming Cuffs!
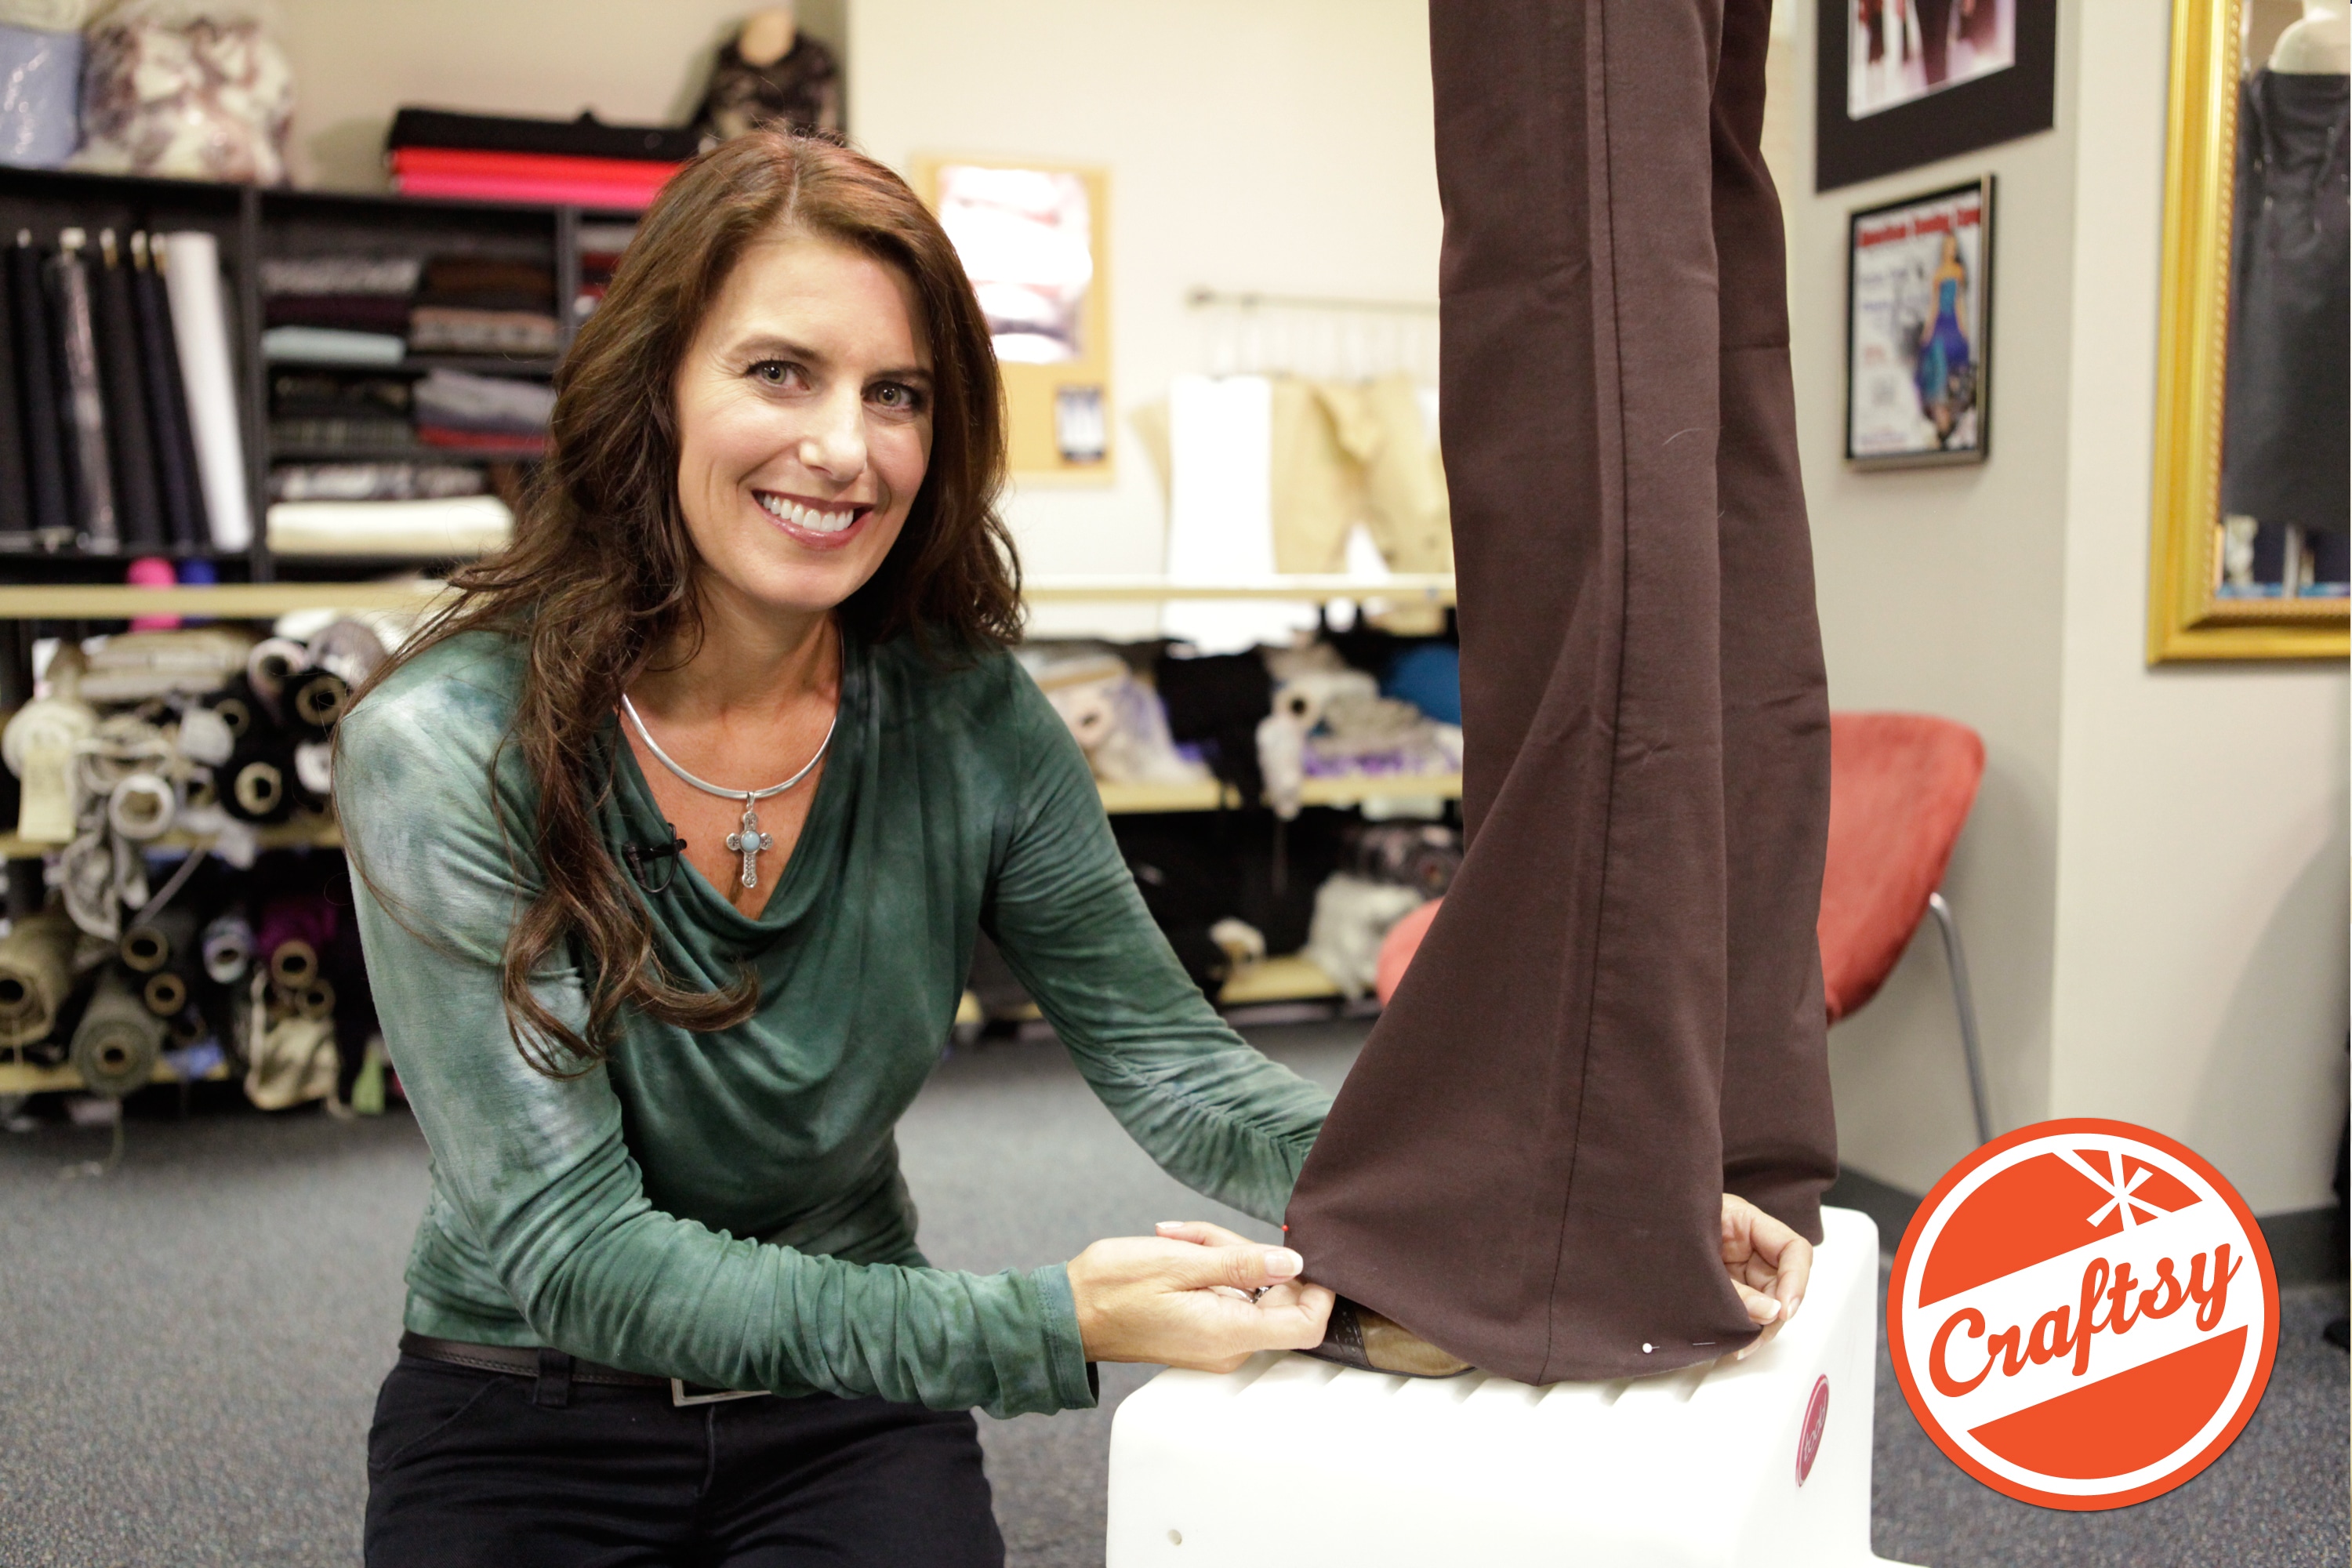
STEP 1: Mark the hem. Try on the pants and turn up each pant leg. Mark the bottom edge of the new hemline with chalk.
STEP 2: Measure the amount to be hemmed: measure from the original hemline to the chalk mark.
Designer Tip: Be sure to measure both legs, as quite often there is a difference!
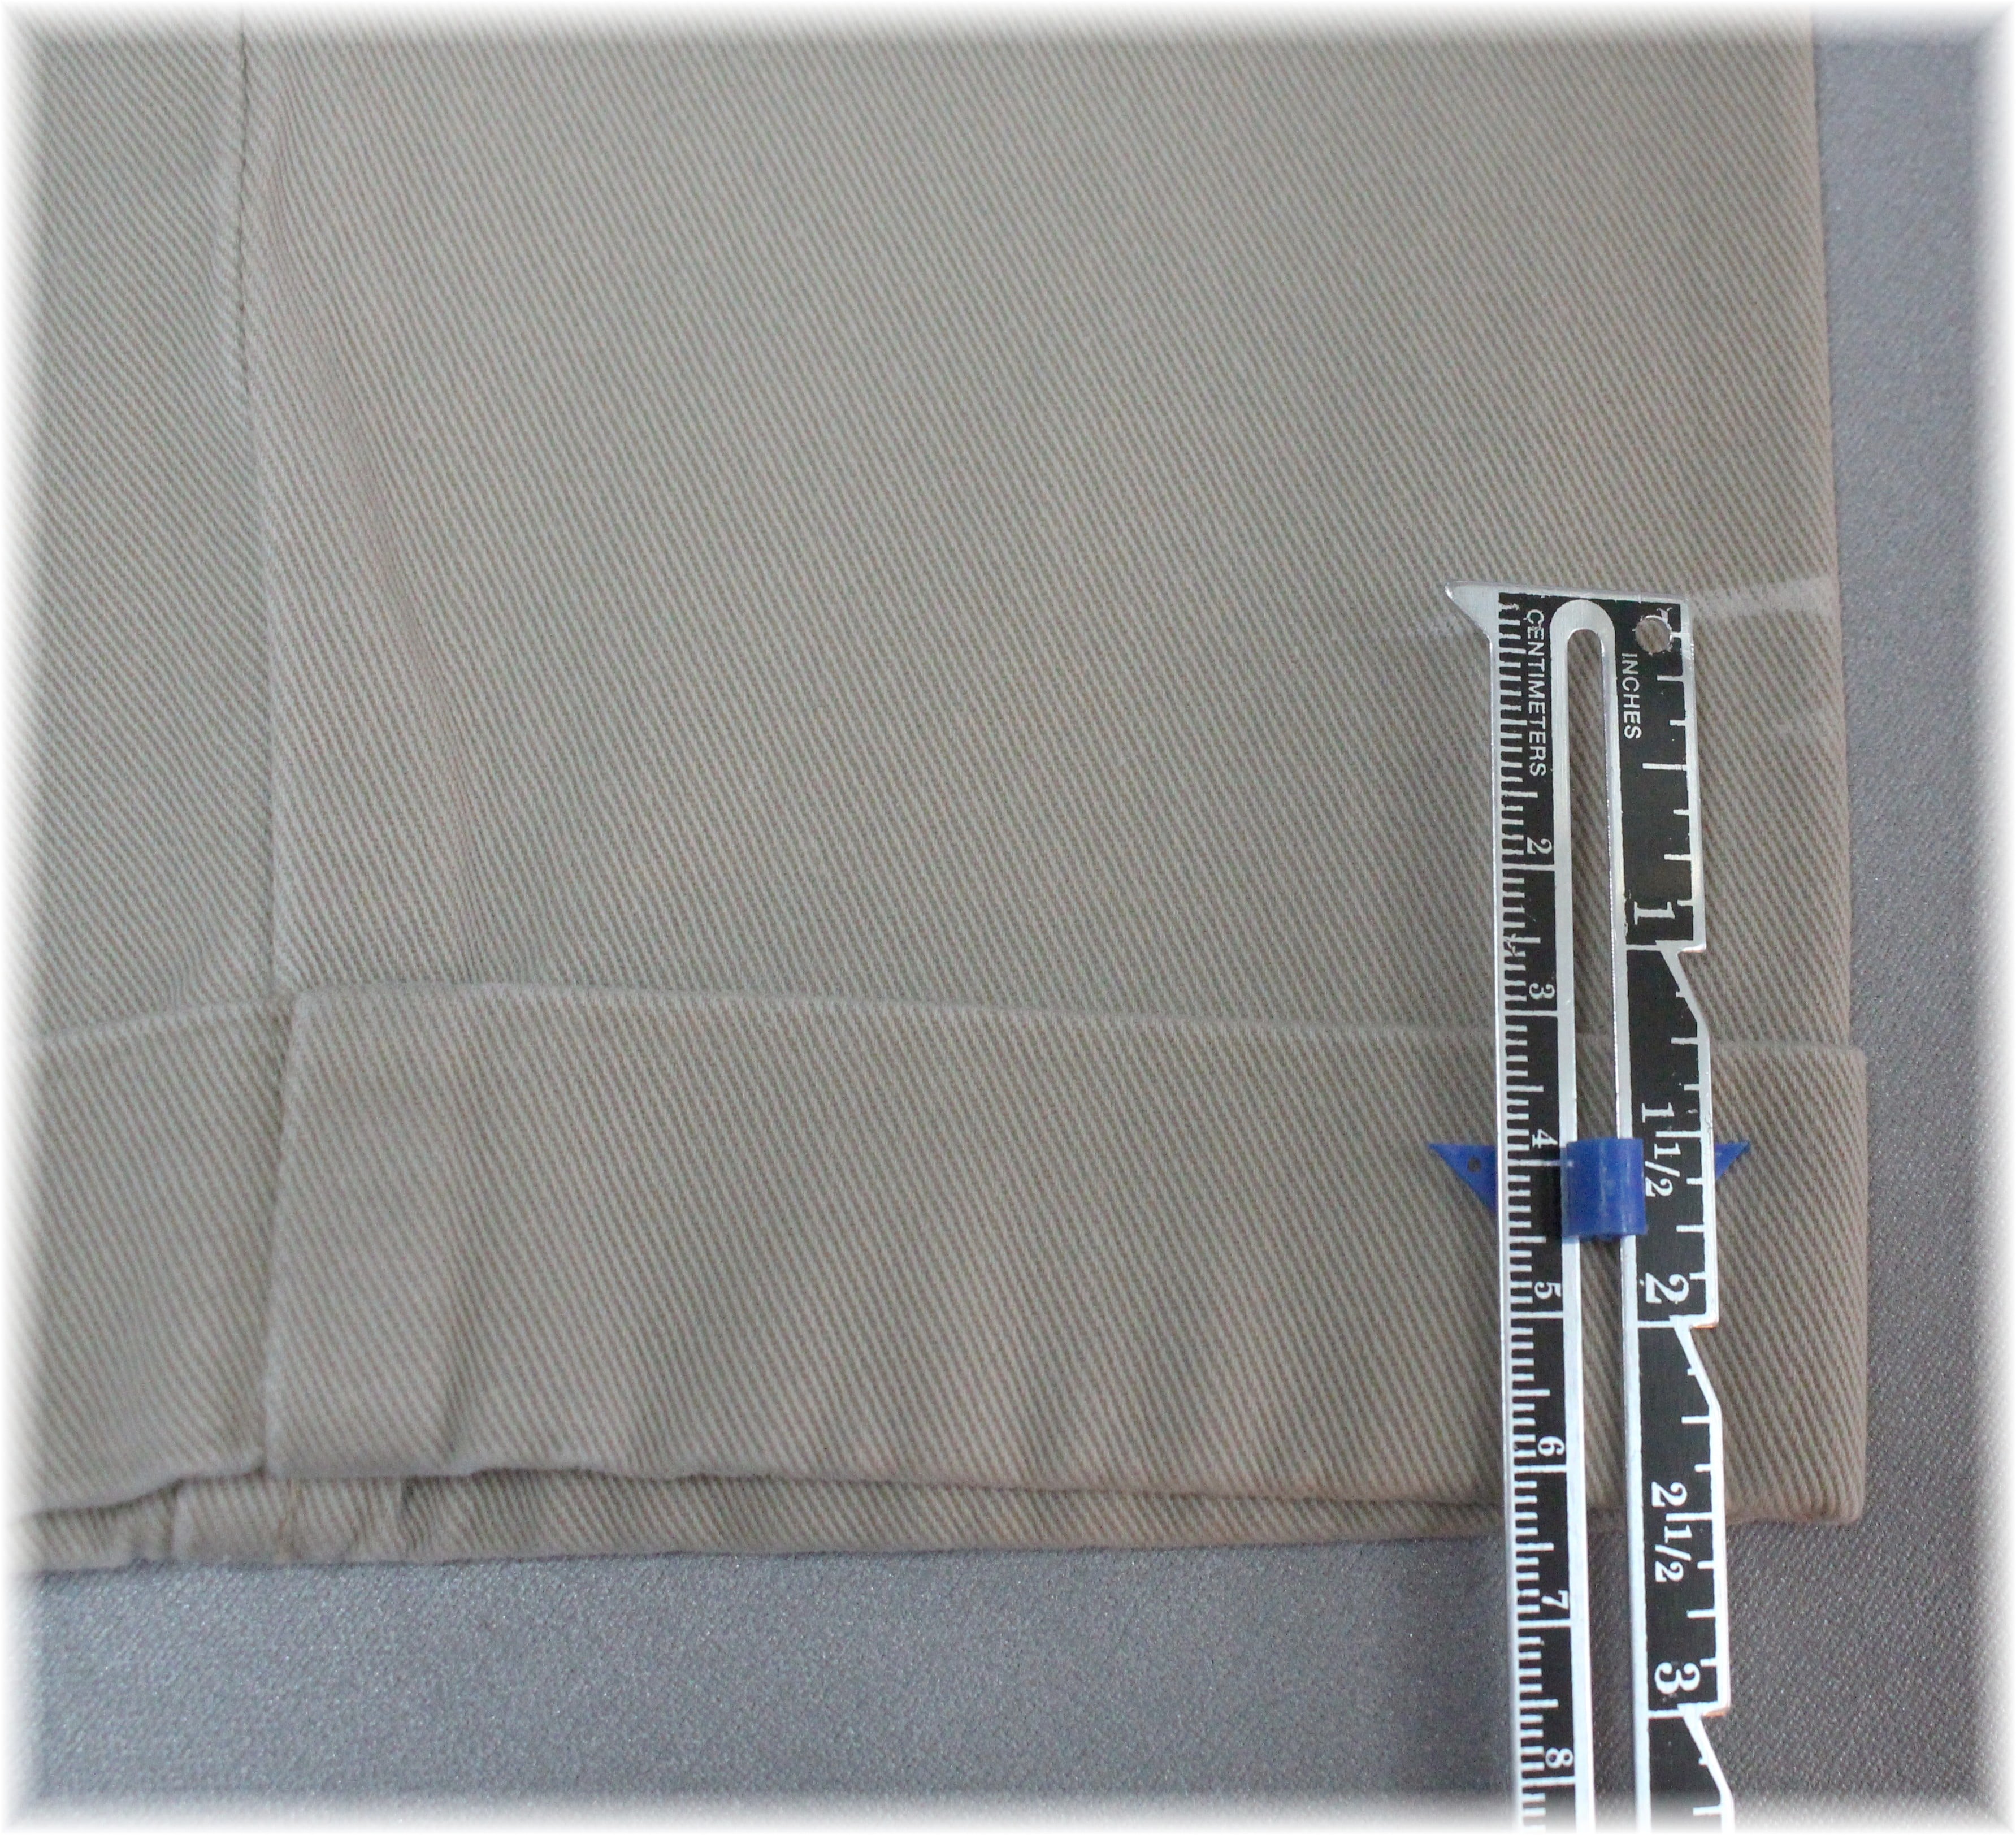
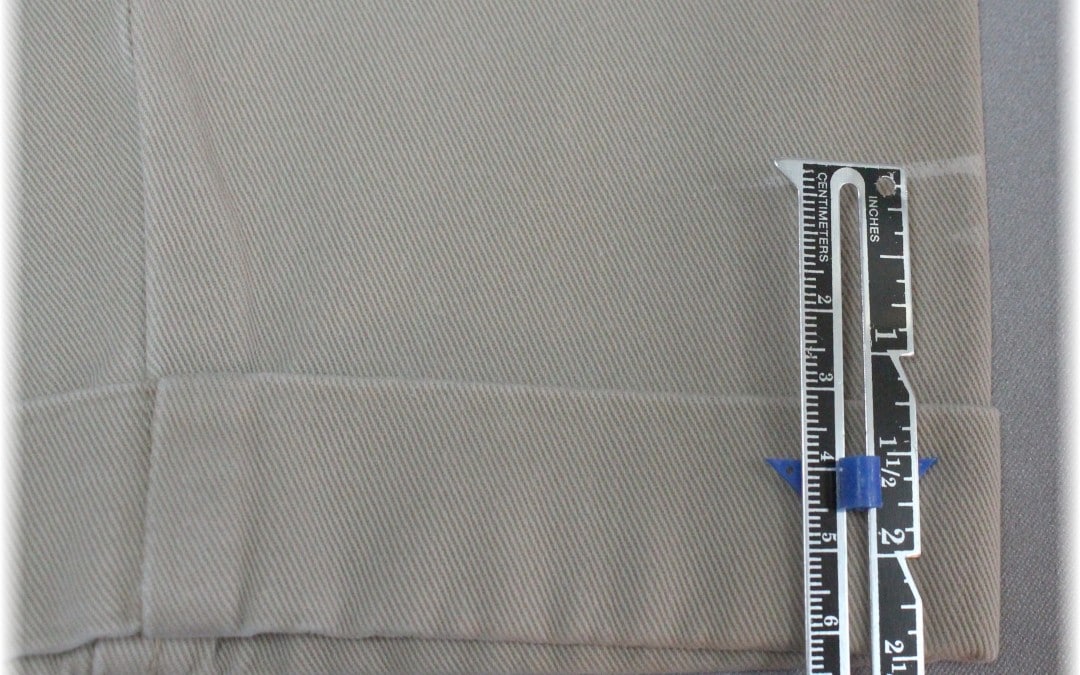
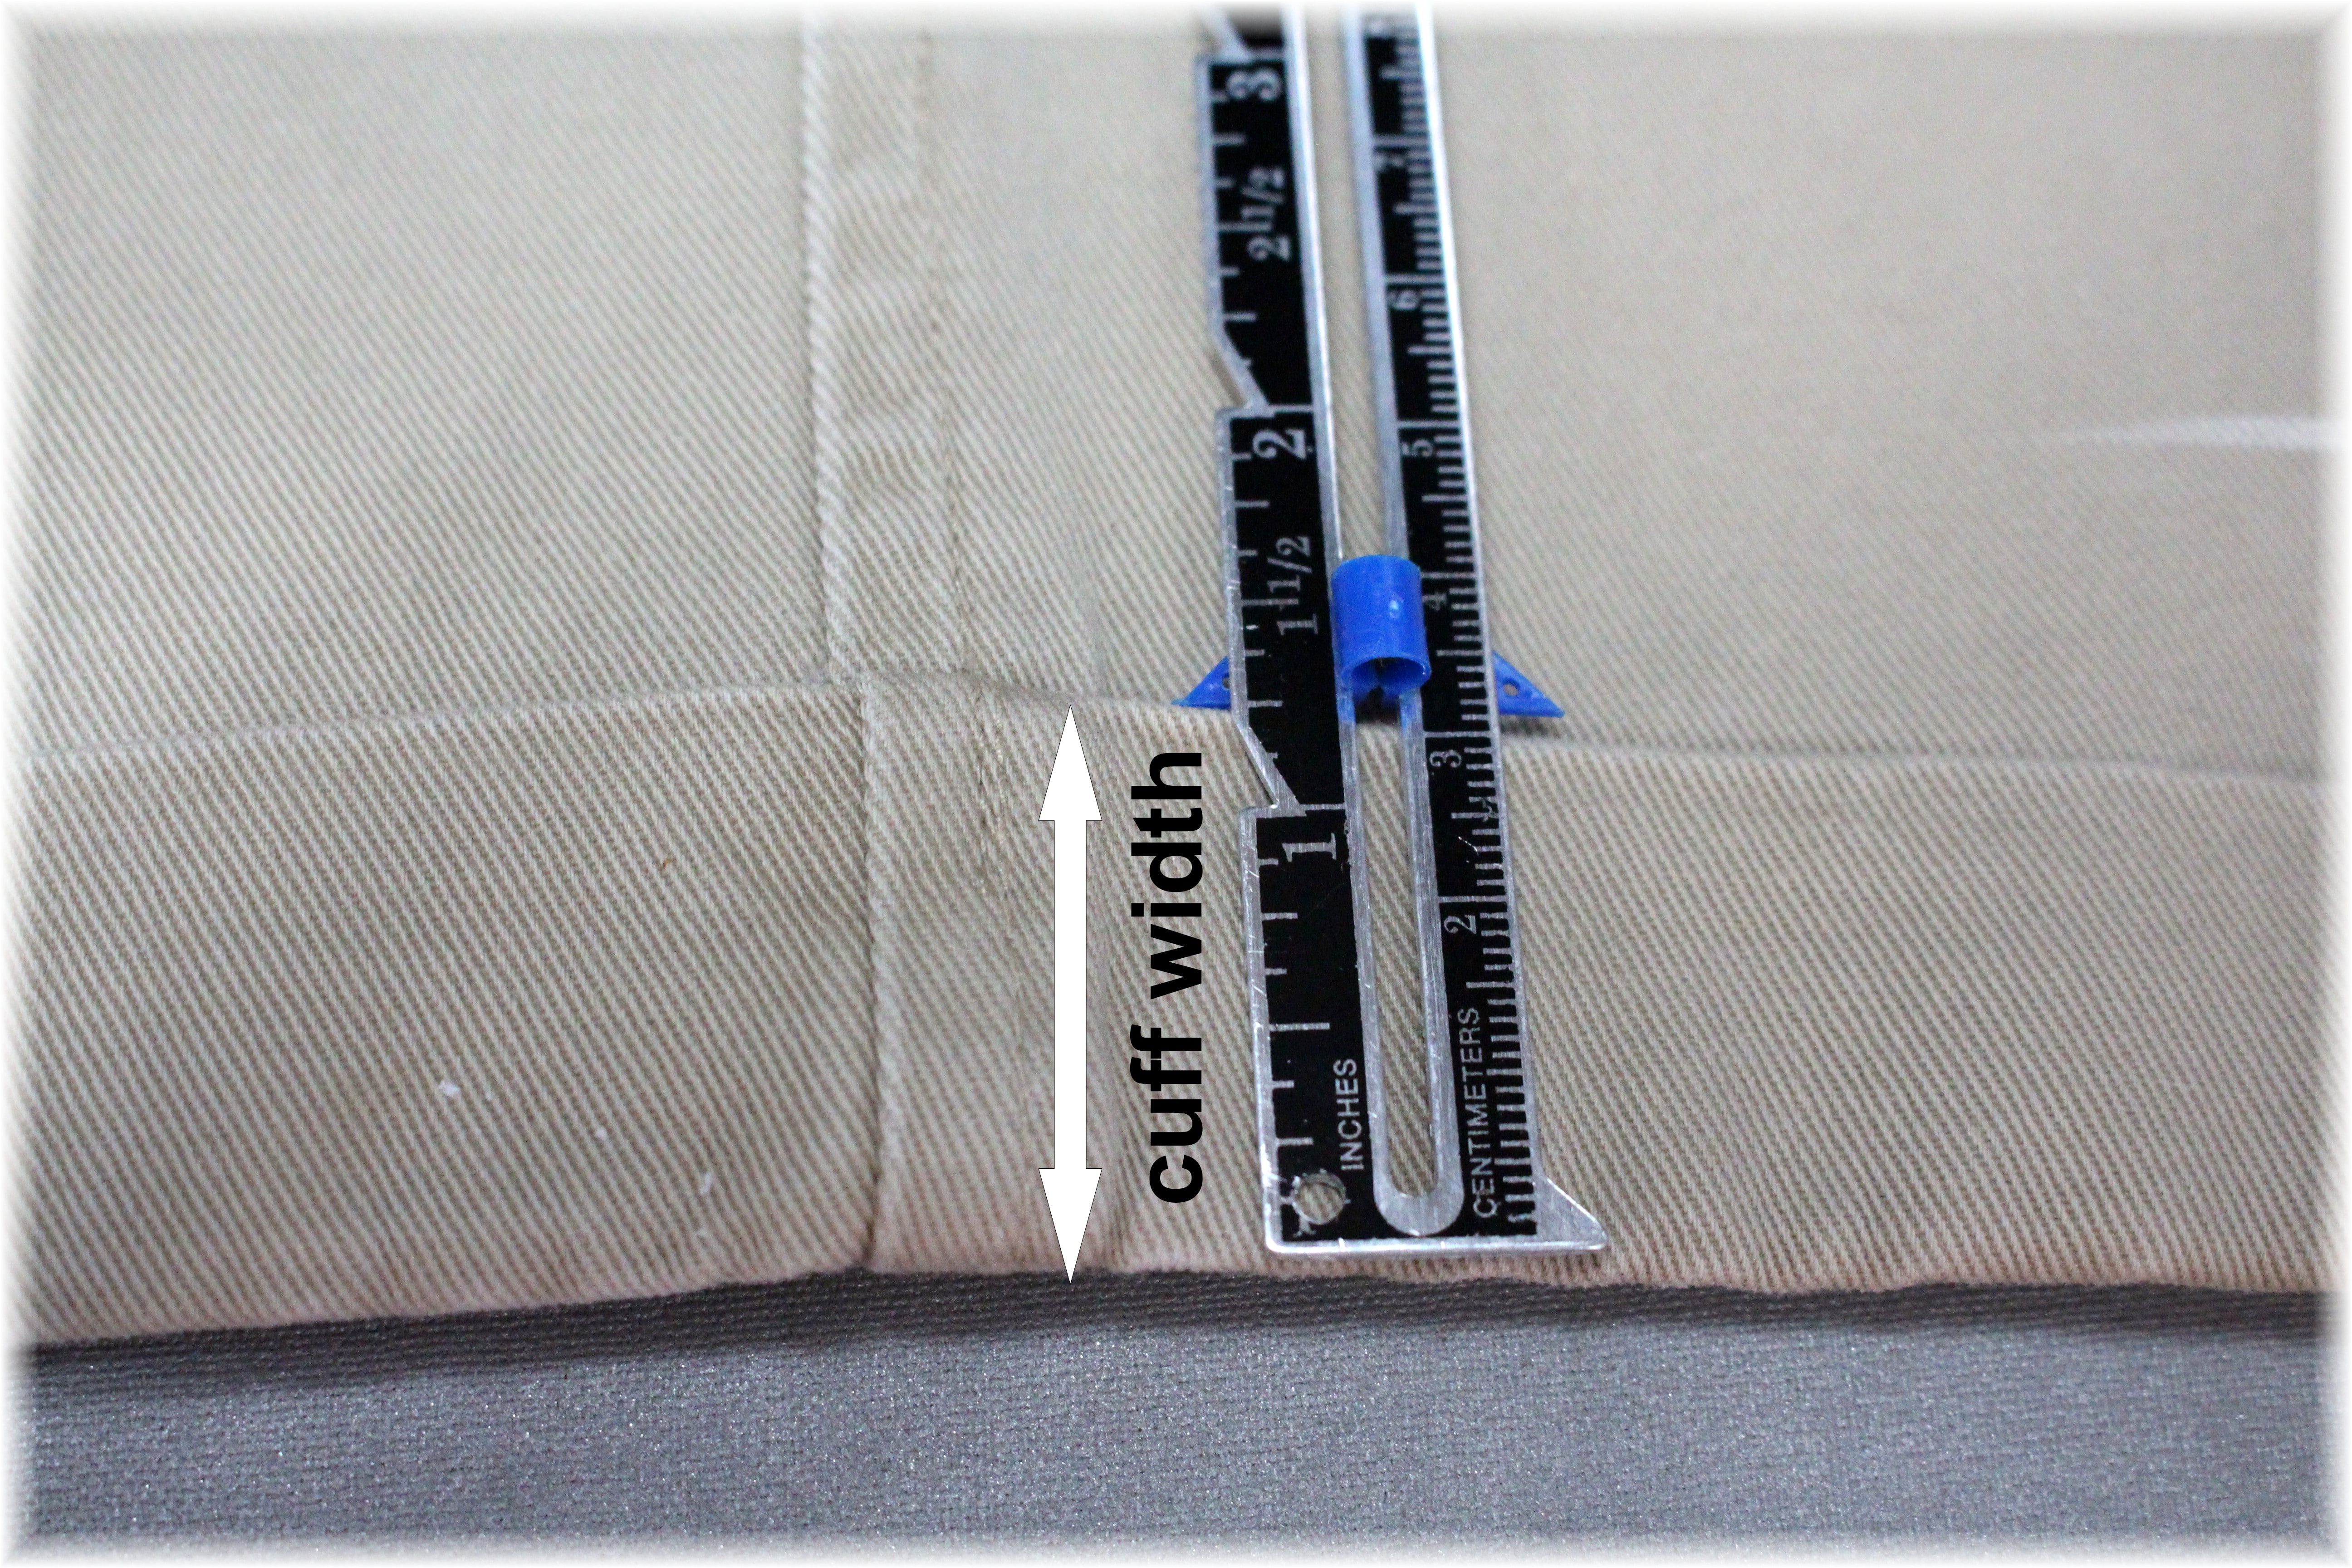
Step 3: Measure the width of the original cuff.
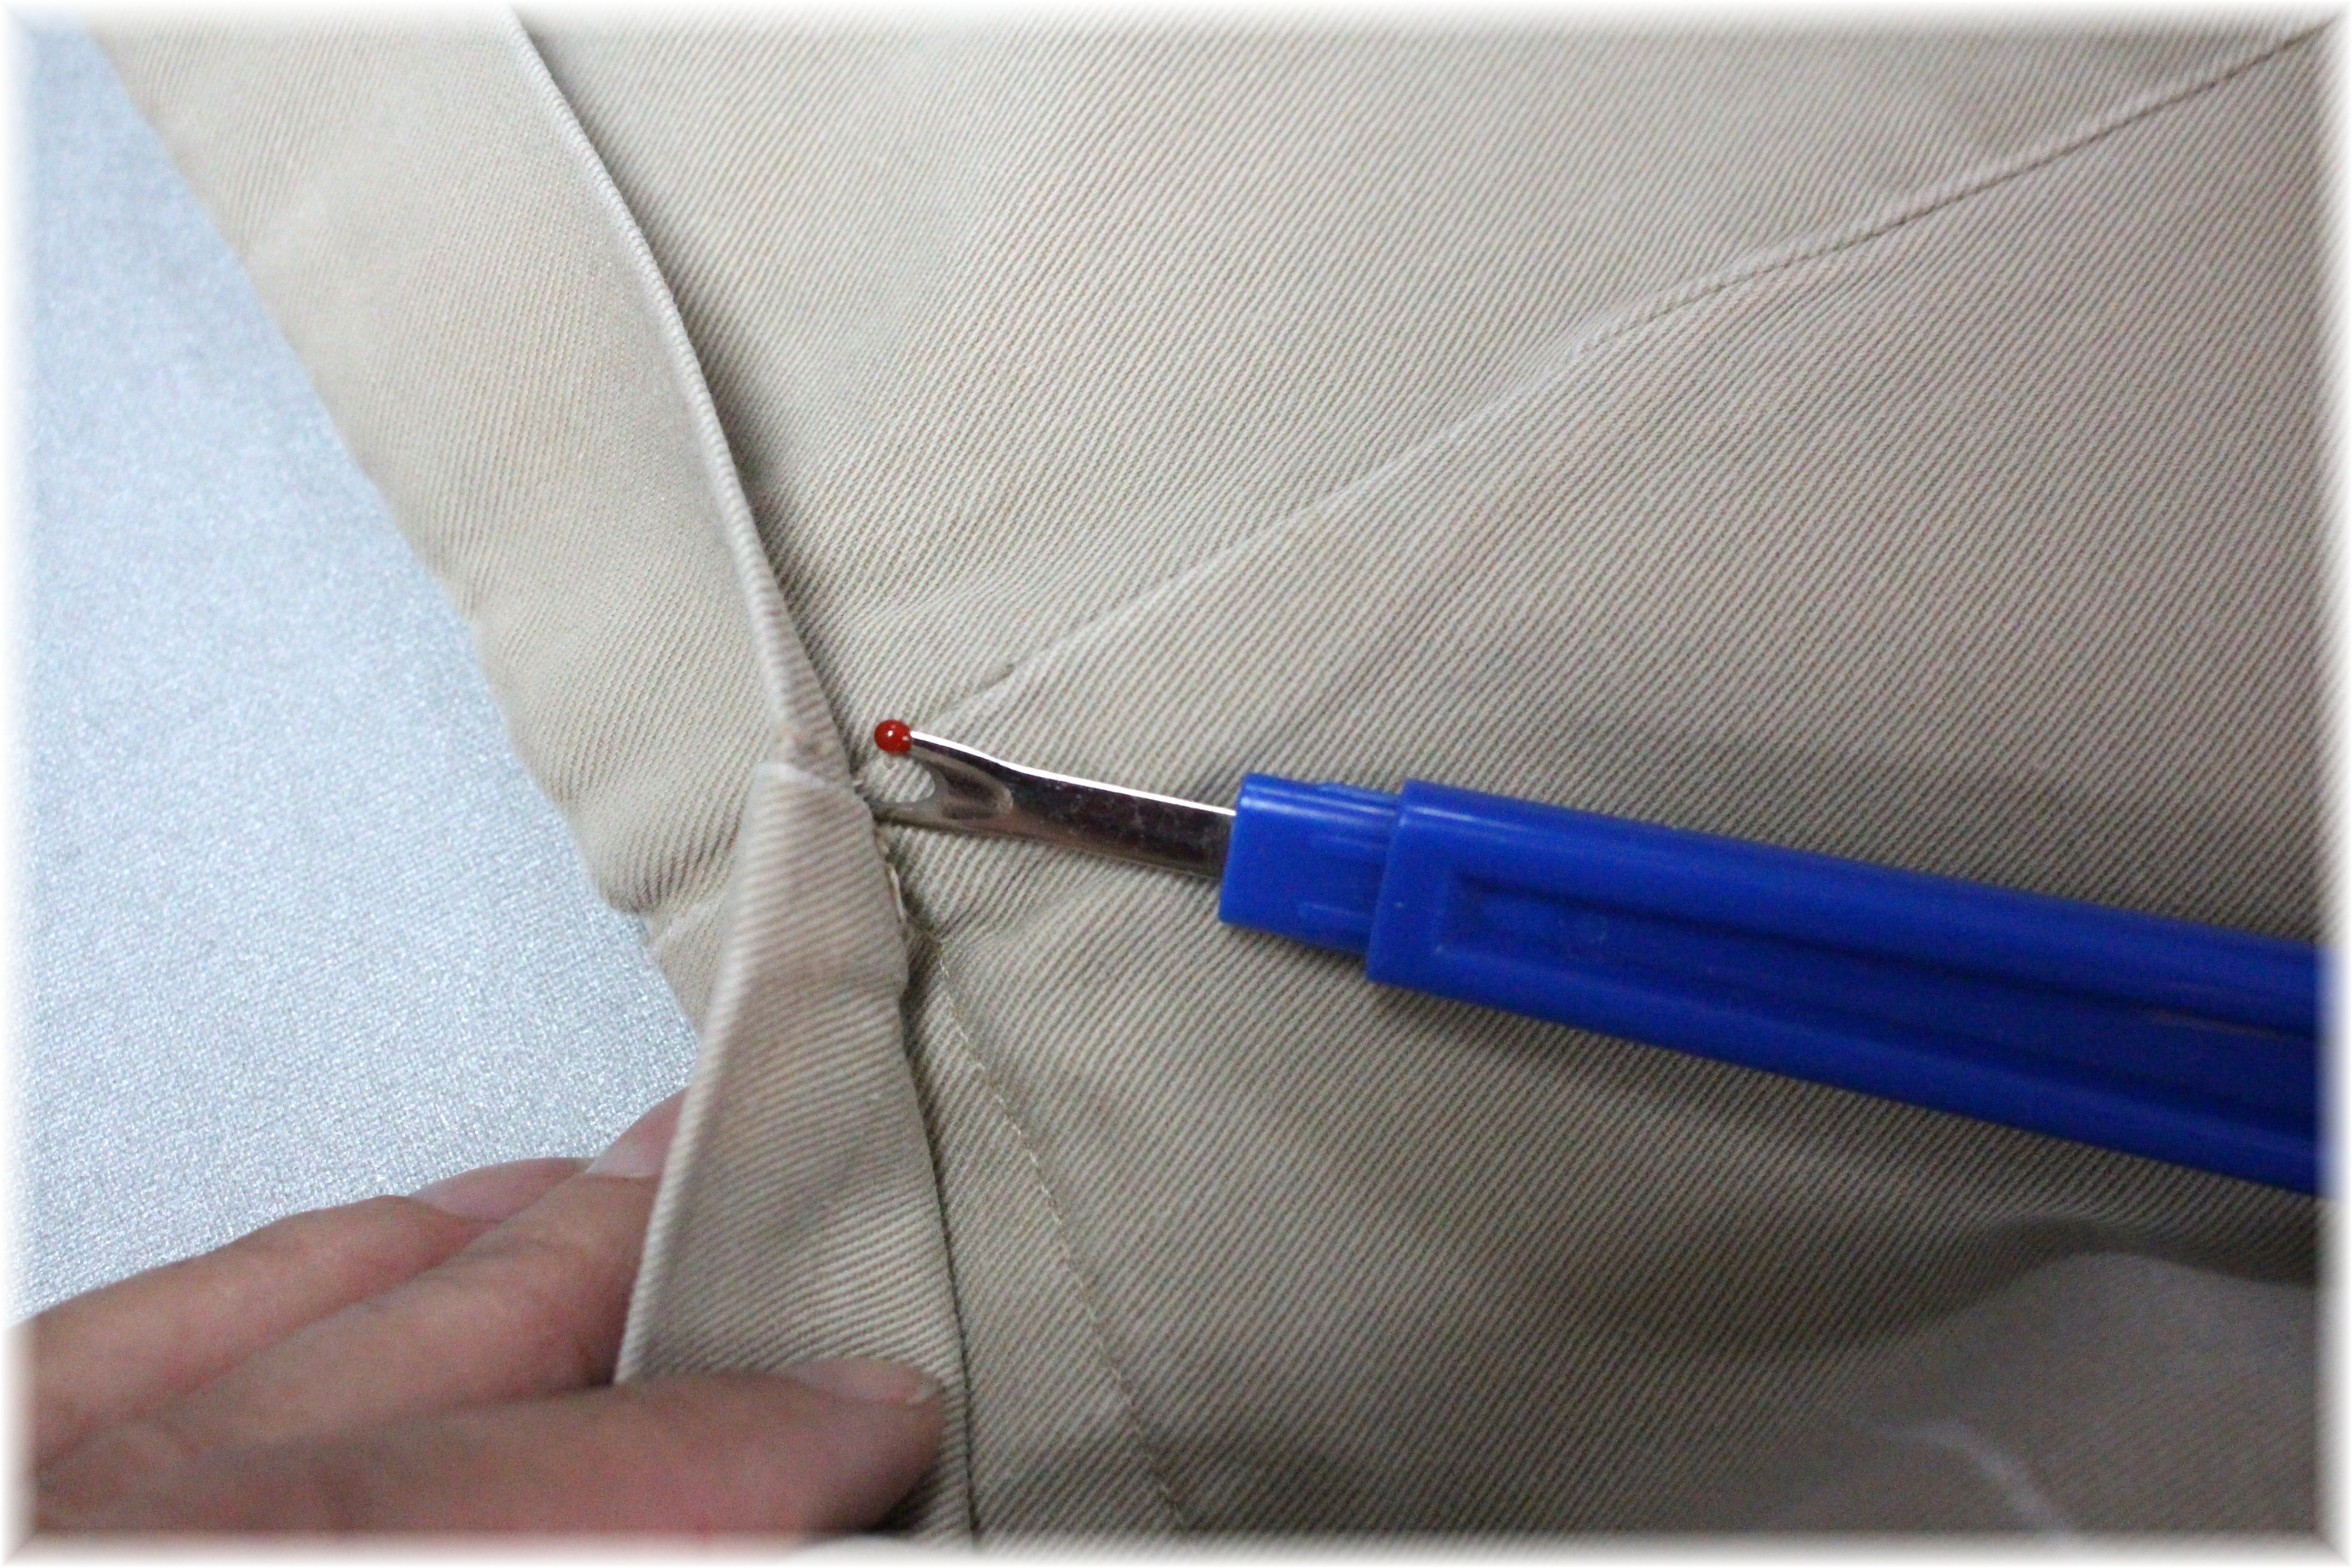
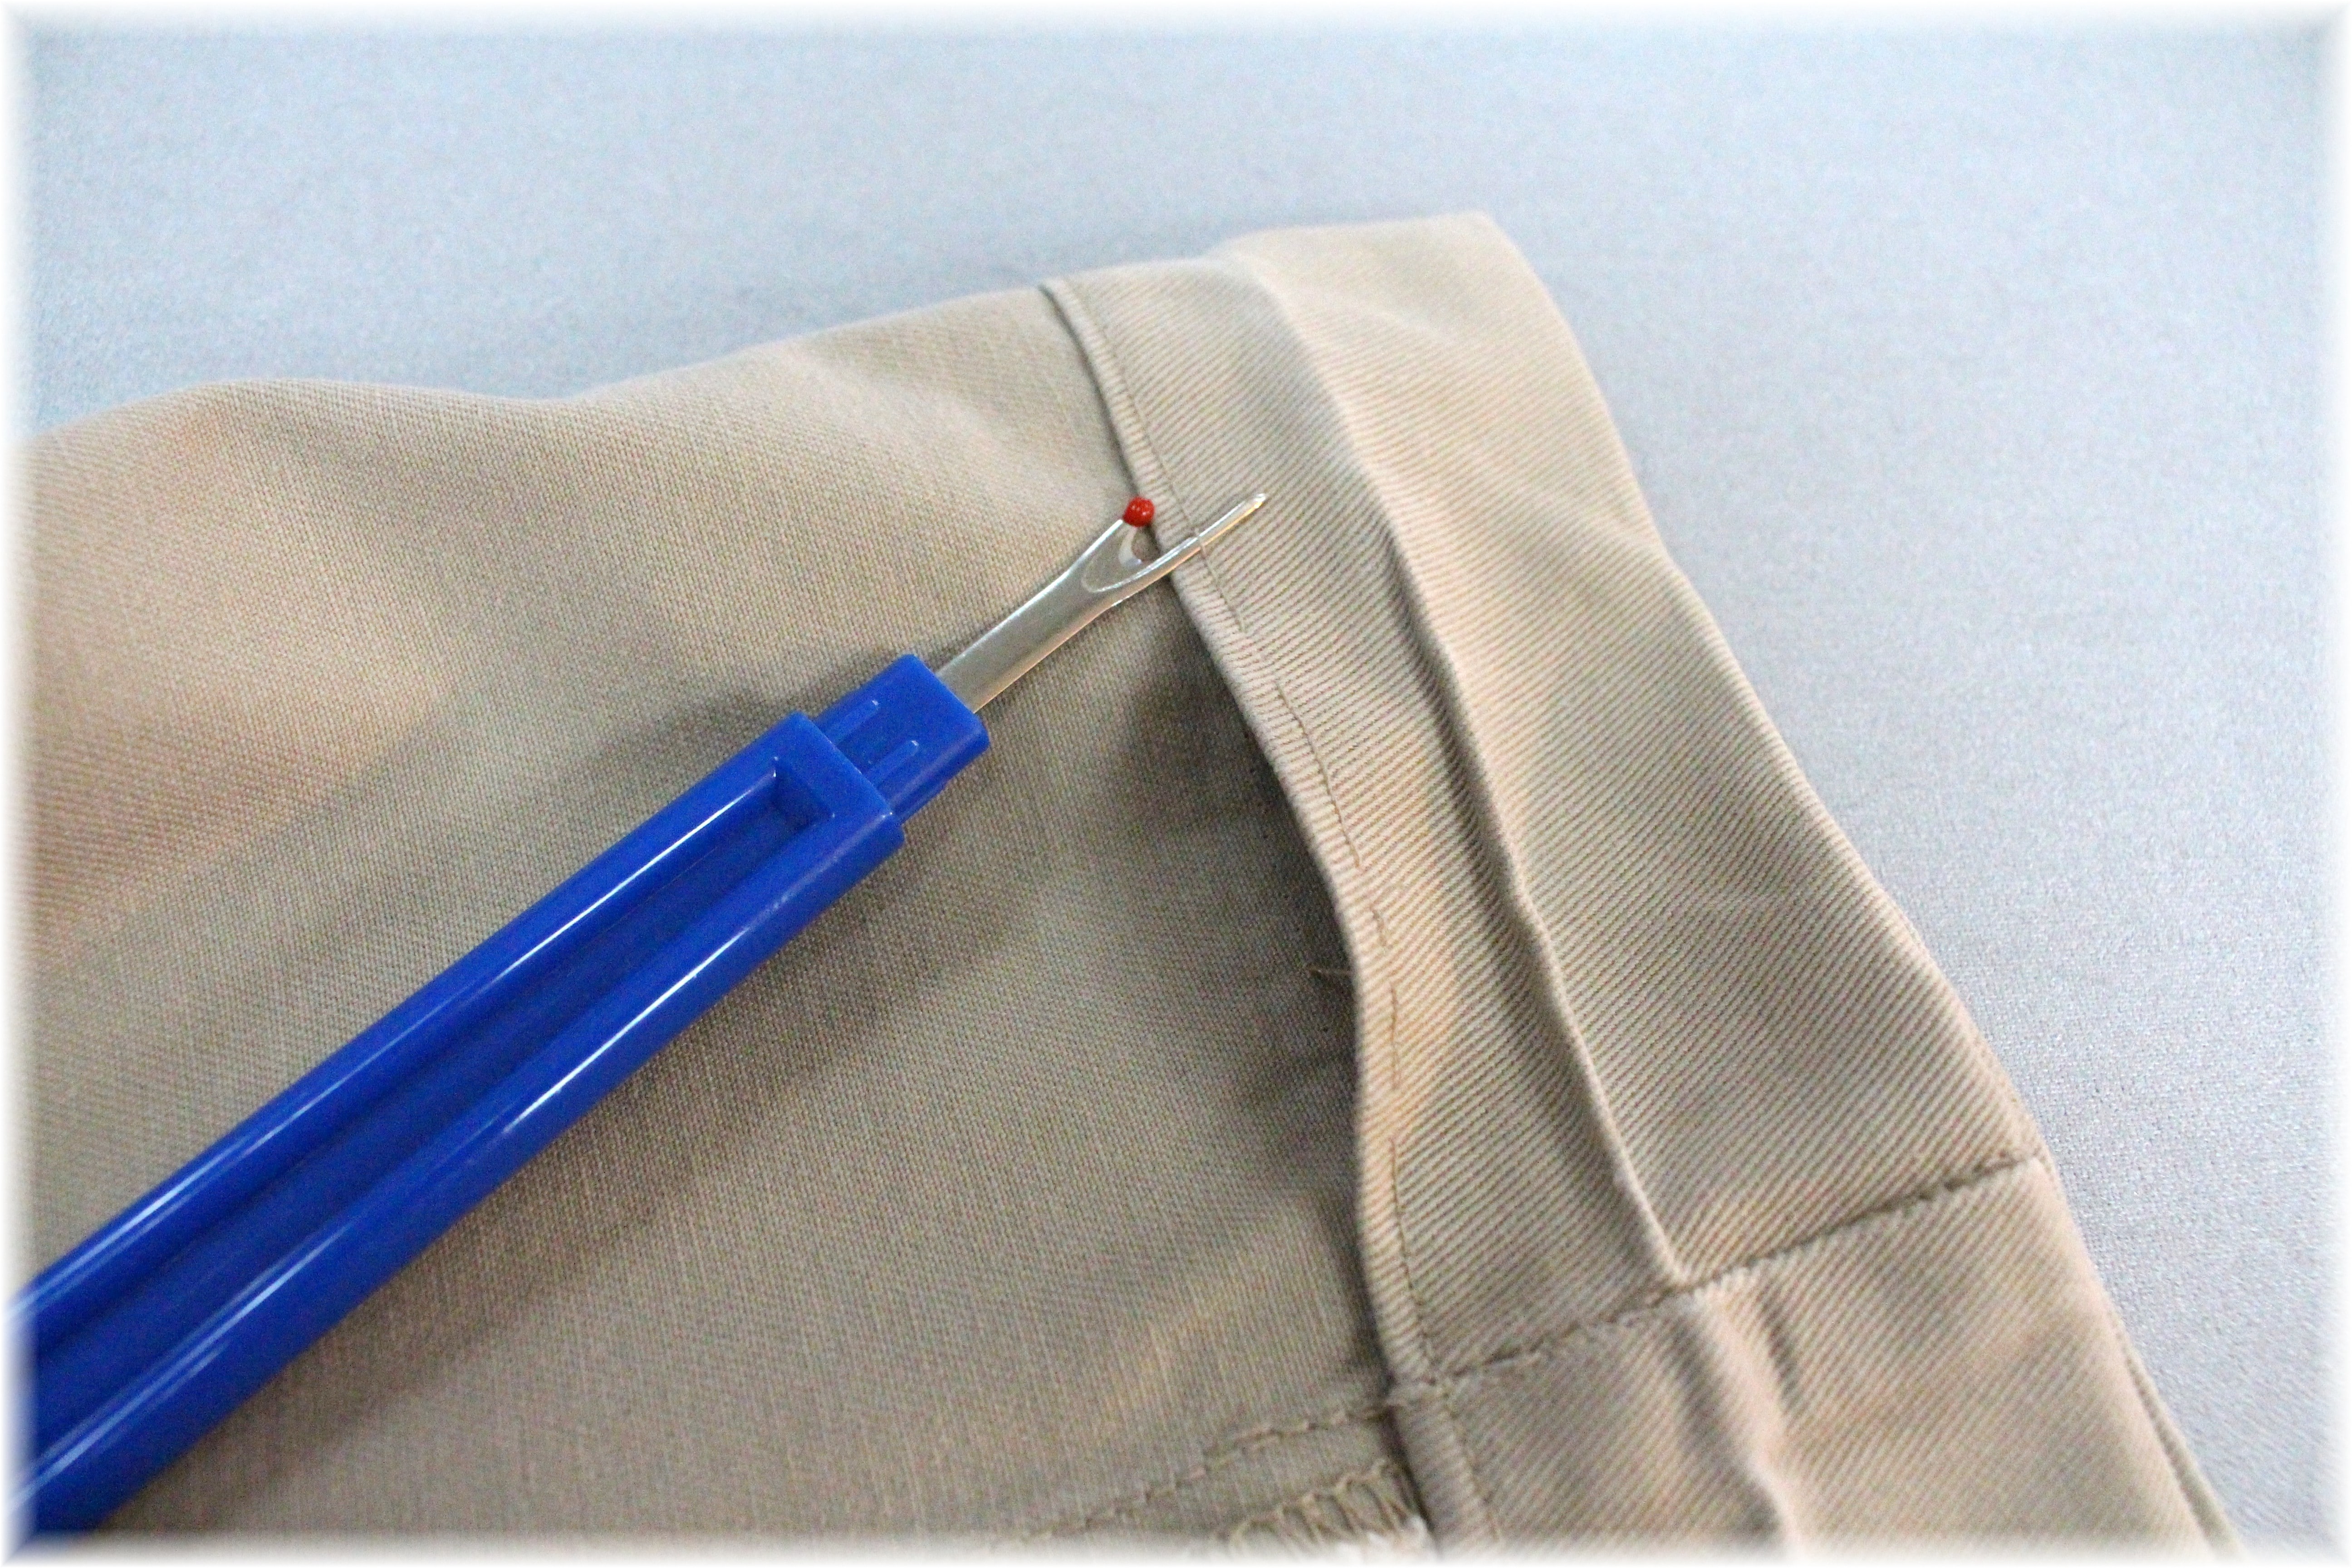
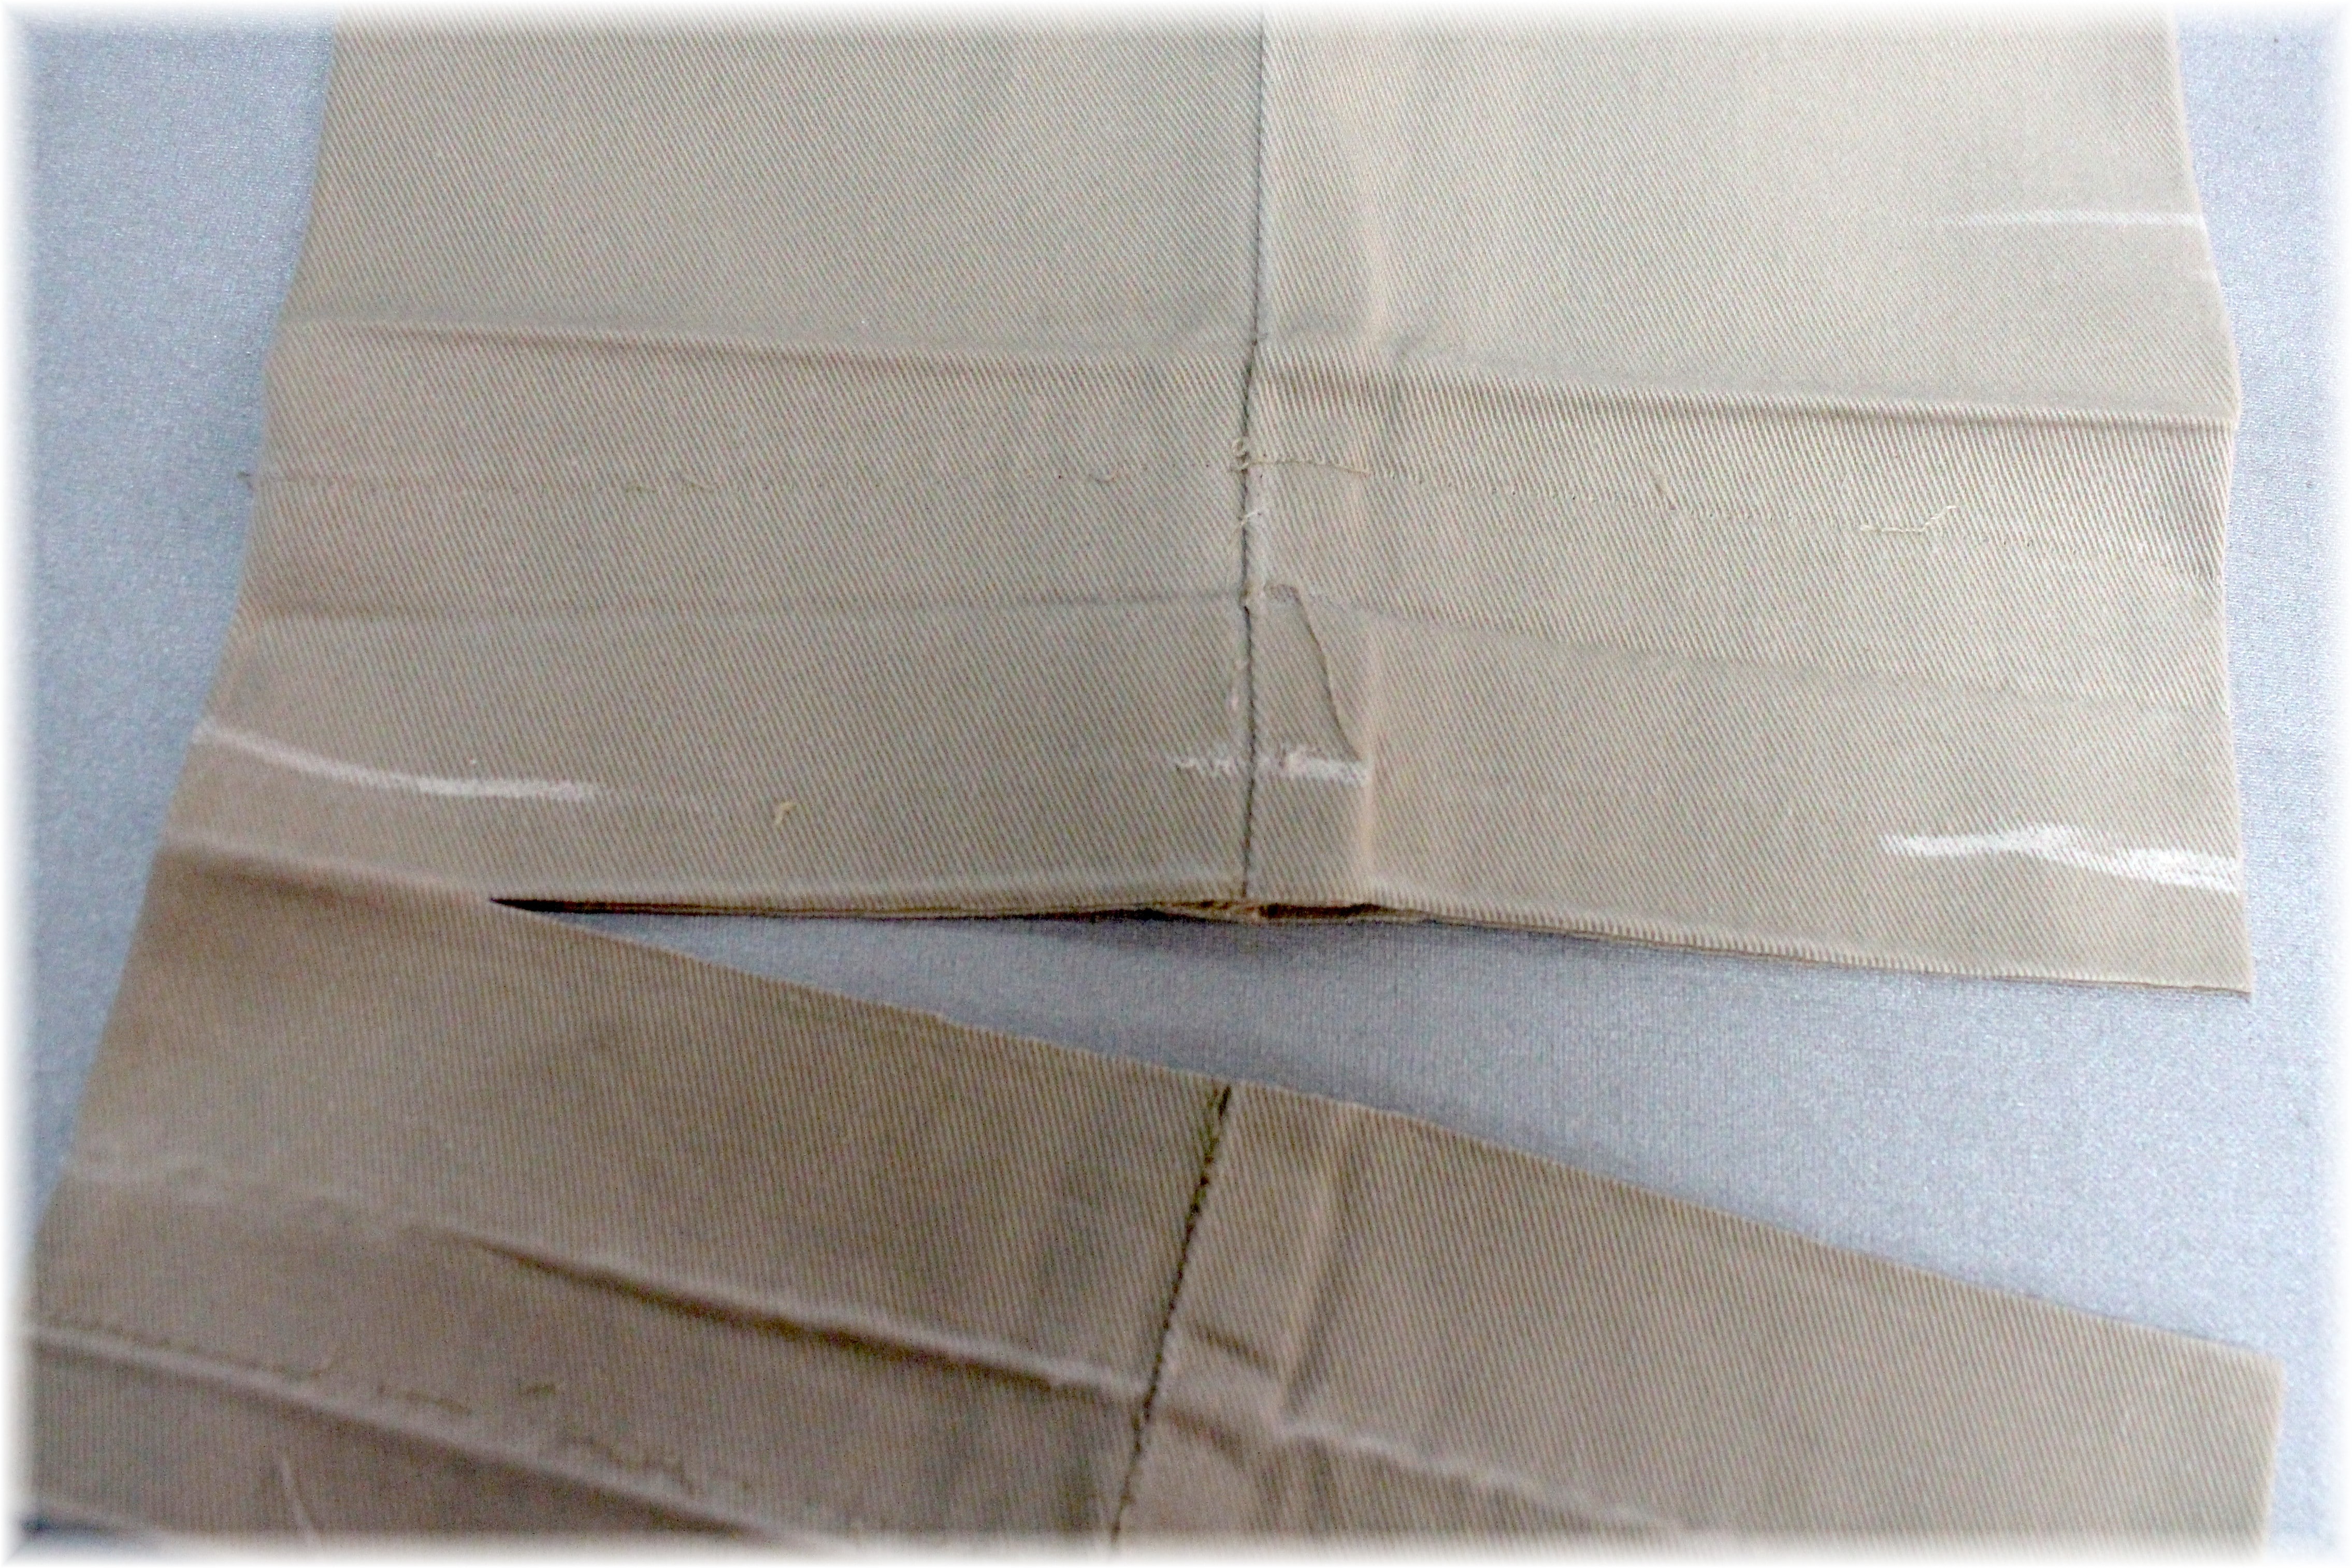
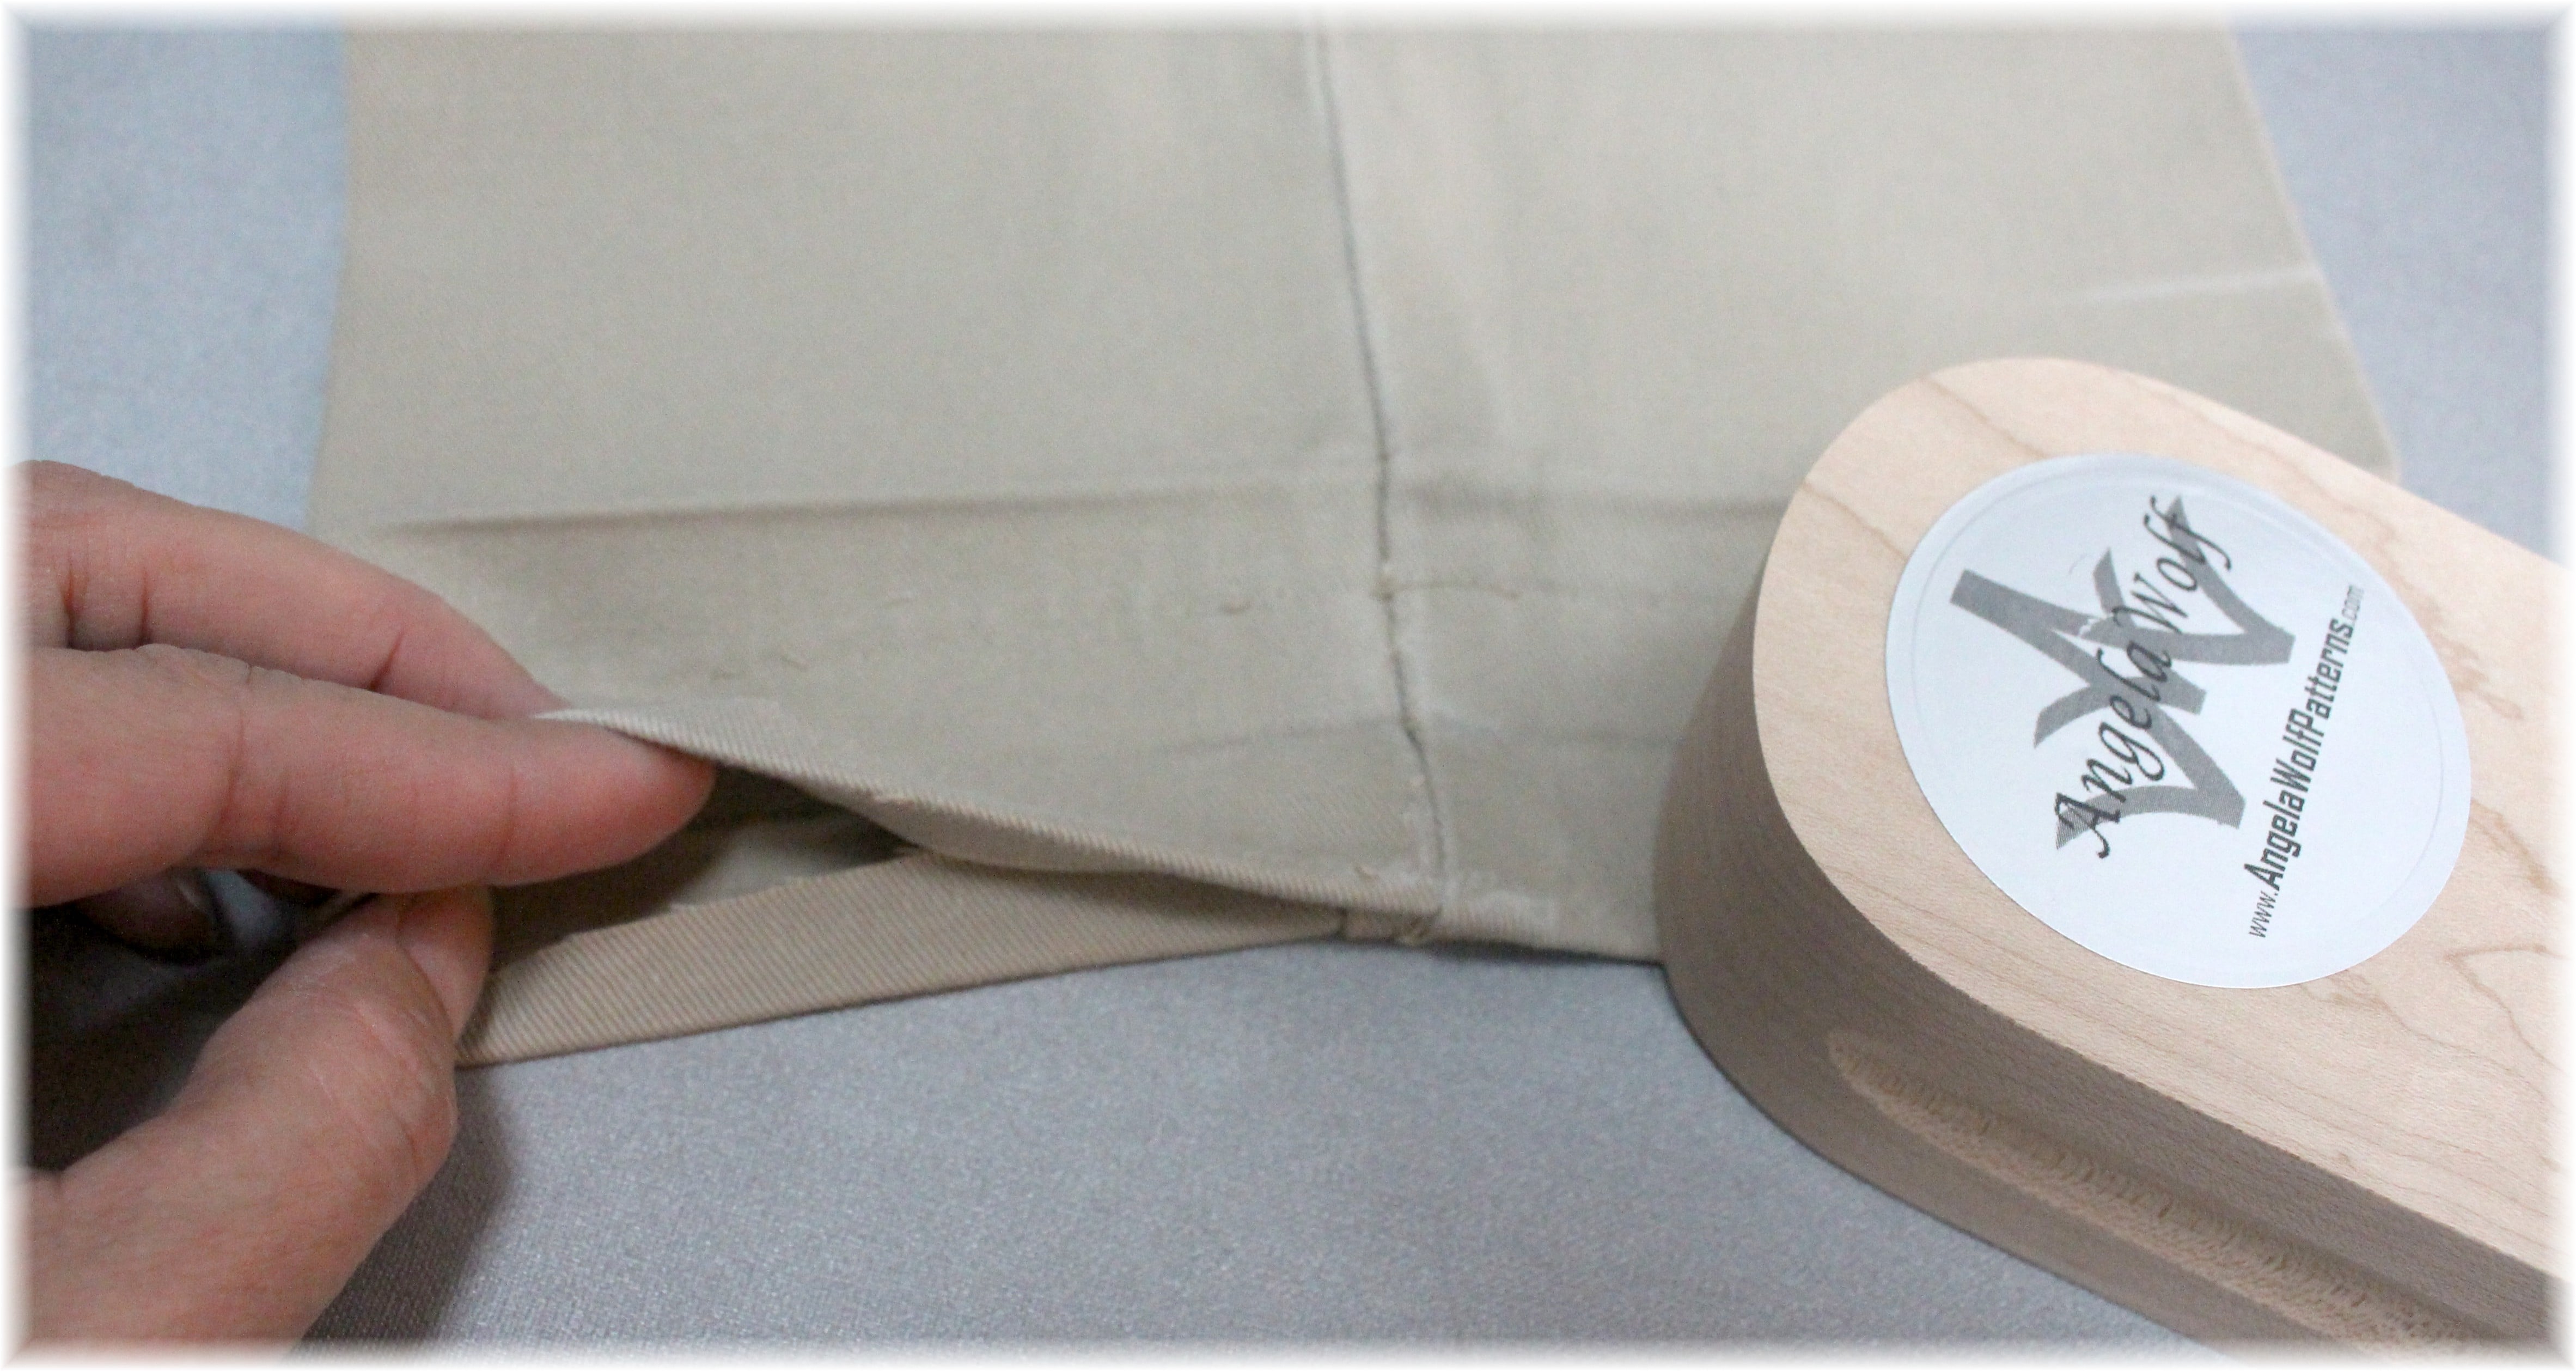
Step 4: Remove the stitches holding the cuff in place. There are usually a few stitches keeping the cuff in place along the inseam and outside leg seam.
Step 5: Fold down the cuff. Measure from the fold of the cuff up the amount to be hemmed and mark with chalk. This will be the new fold line for the hem. Chalk mark at the center front, center back and each side.
Designer Tip: The measurement between the 2 chalk marks should equal the desired width of the cuff.
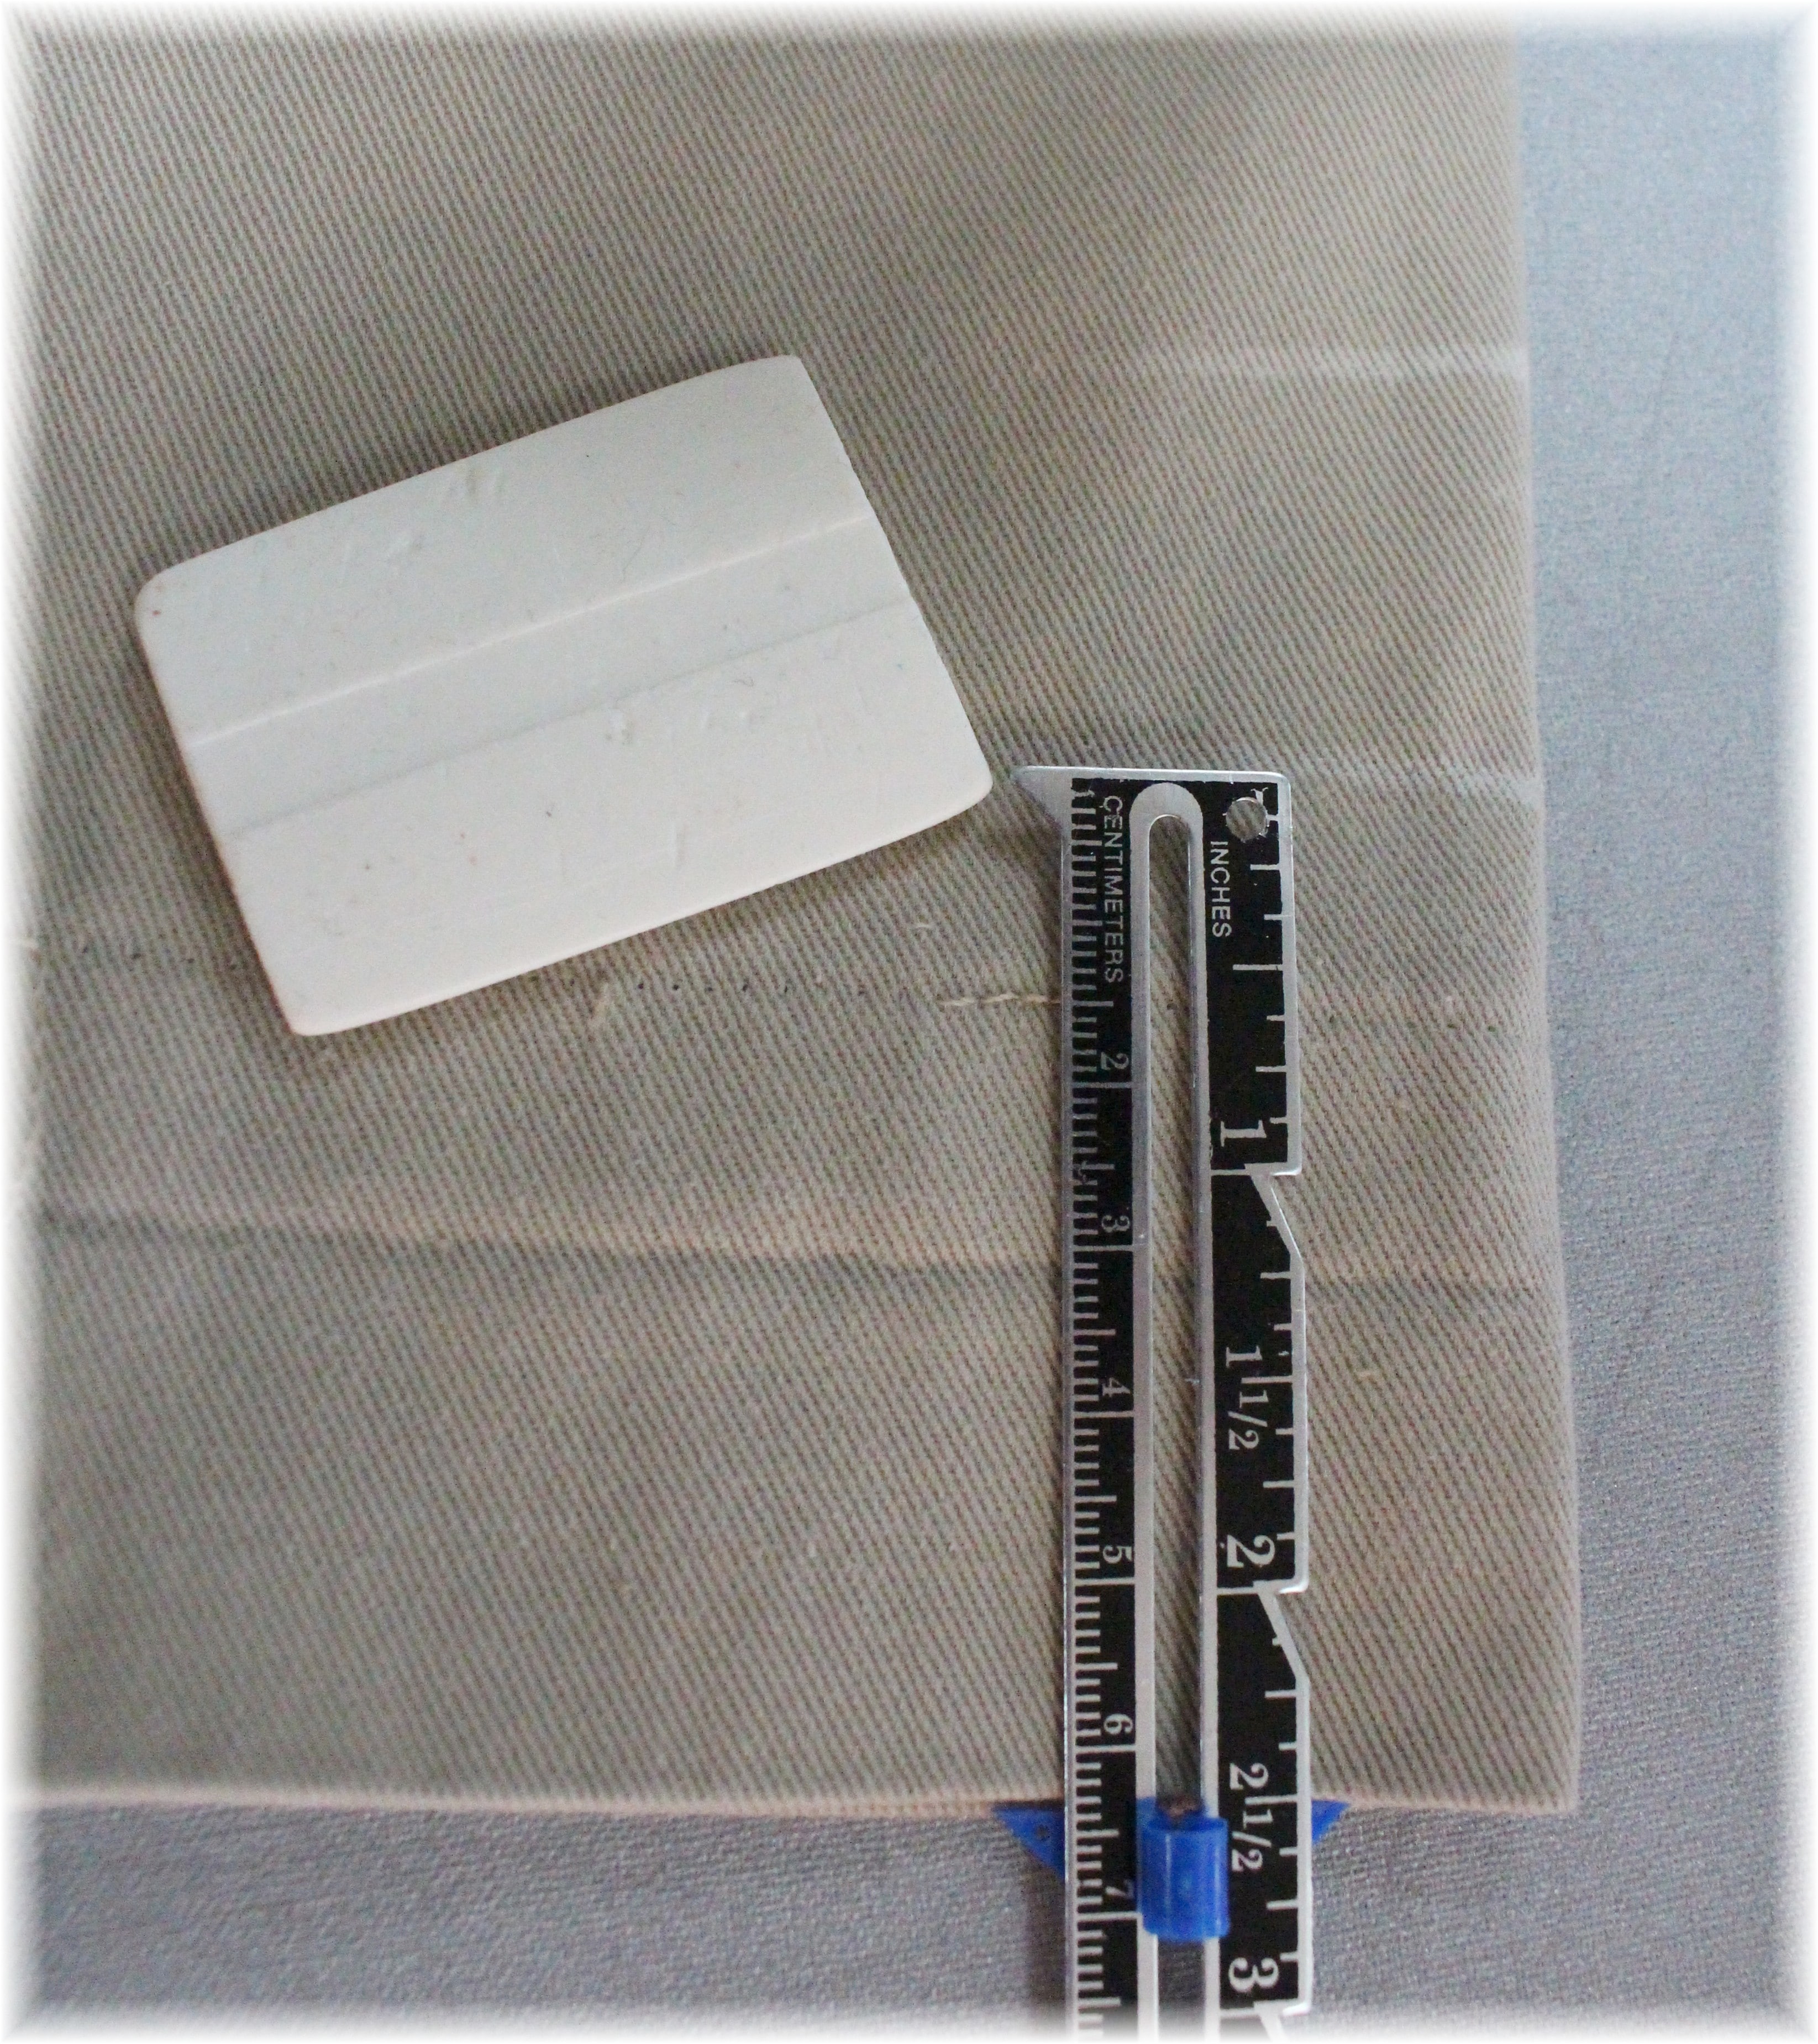
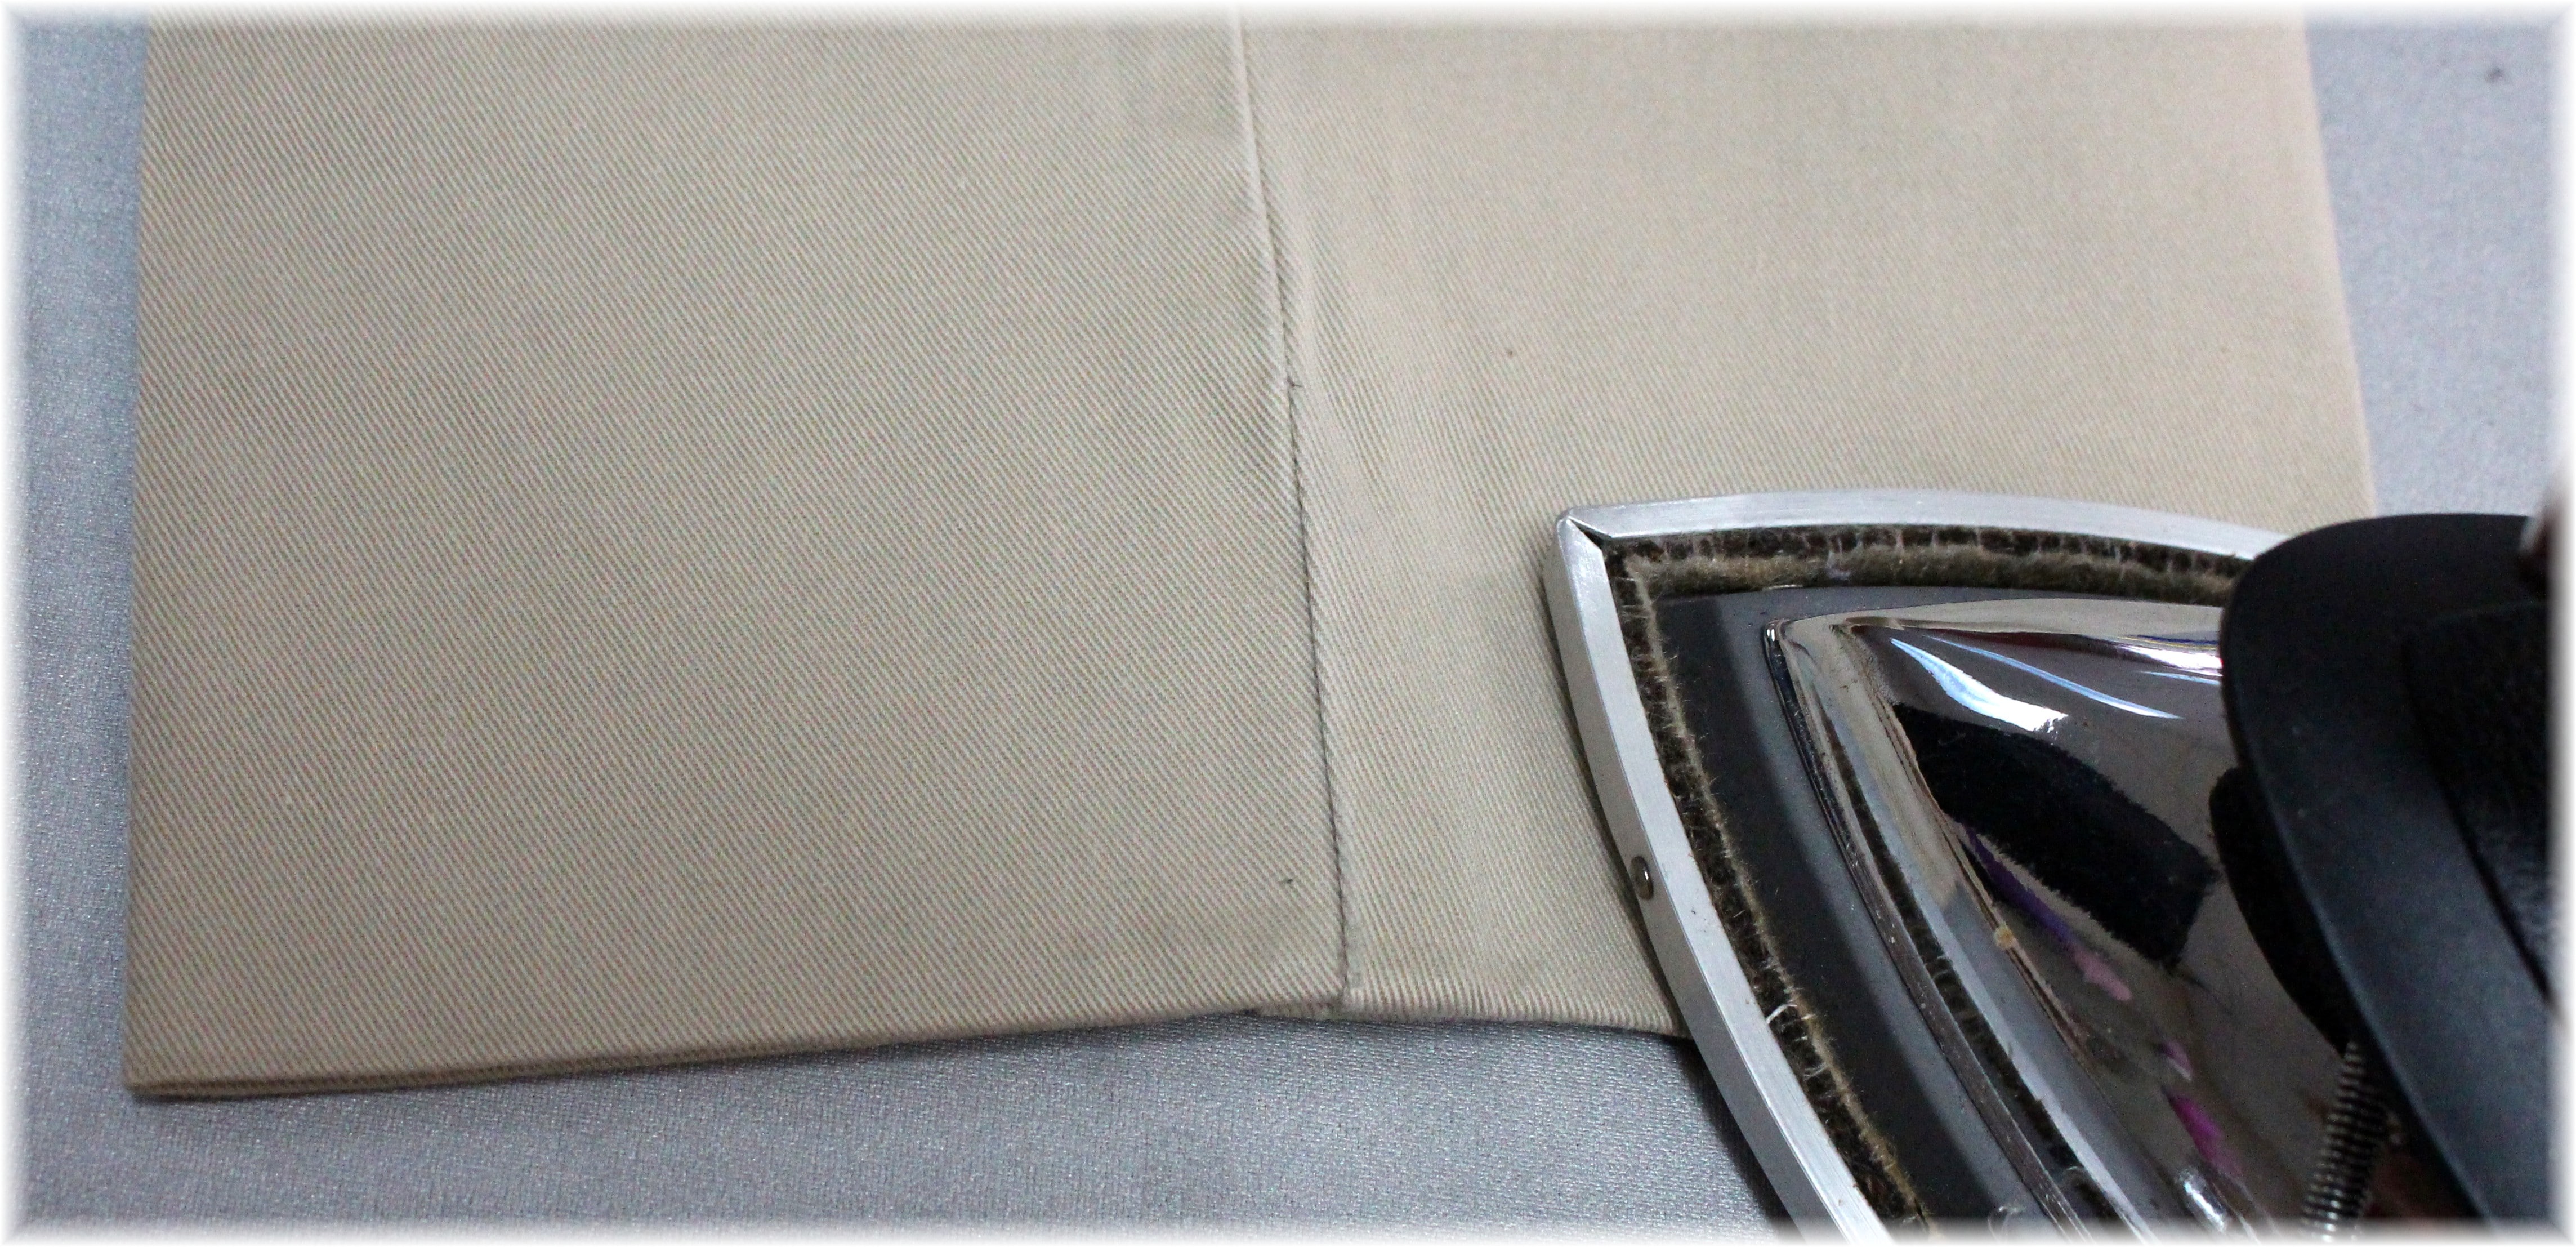
Step 6: Measure the entire seam allowance. This measurement is the width of the cuff plus 1 to 1 ½” for the actual seam allowance.

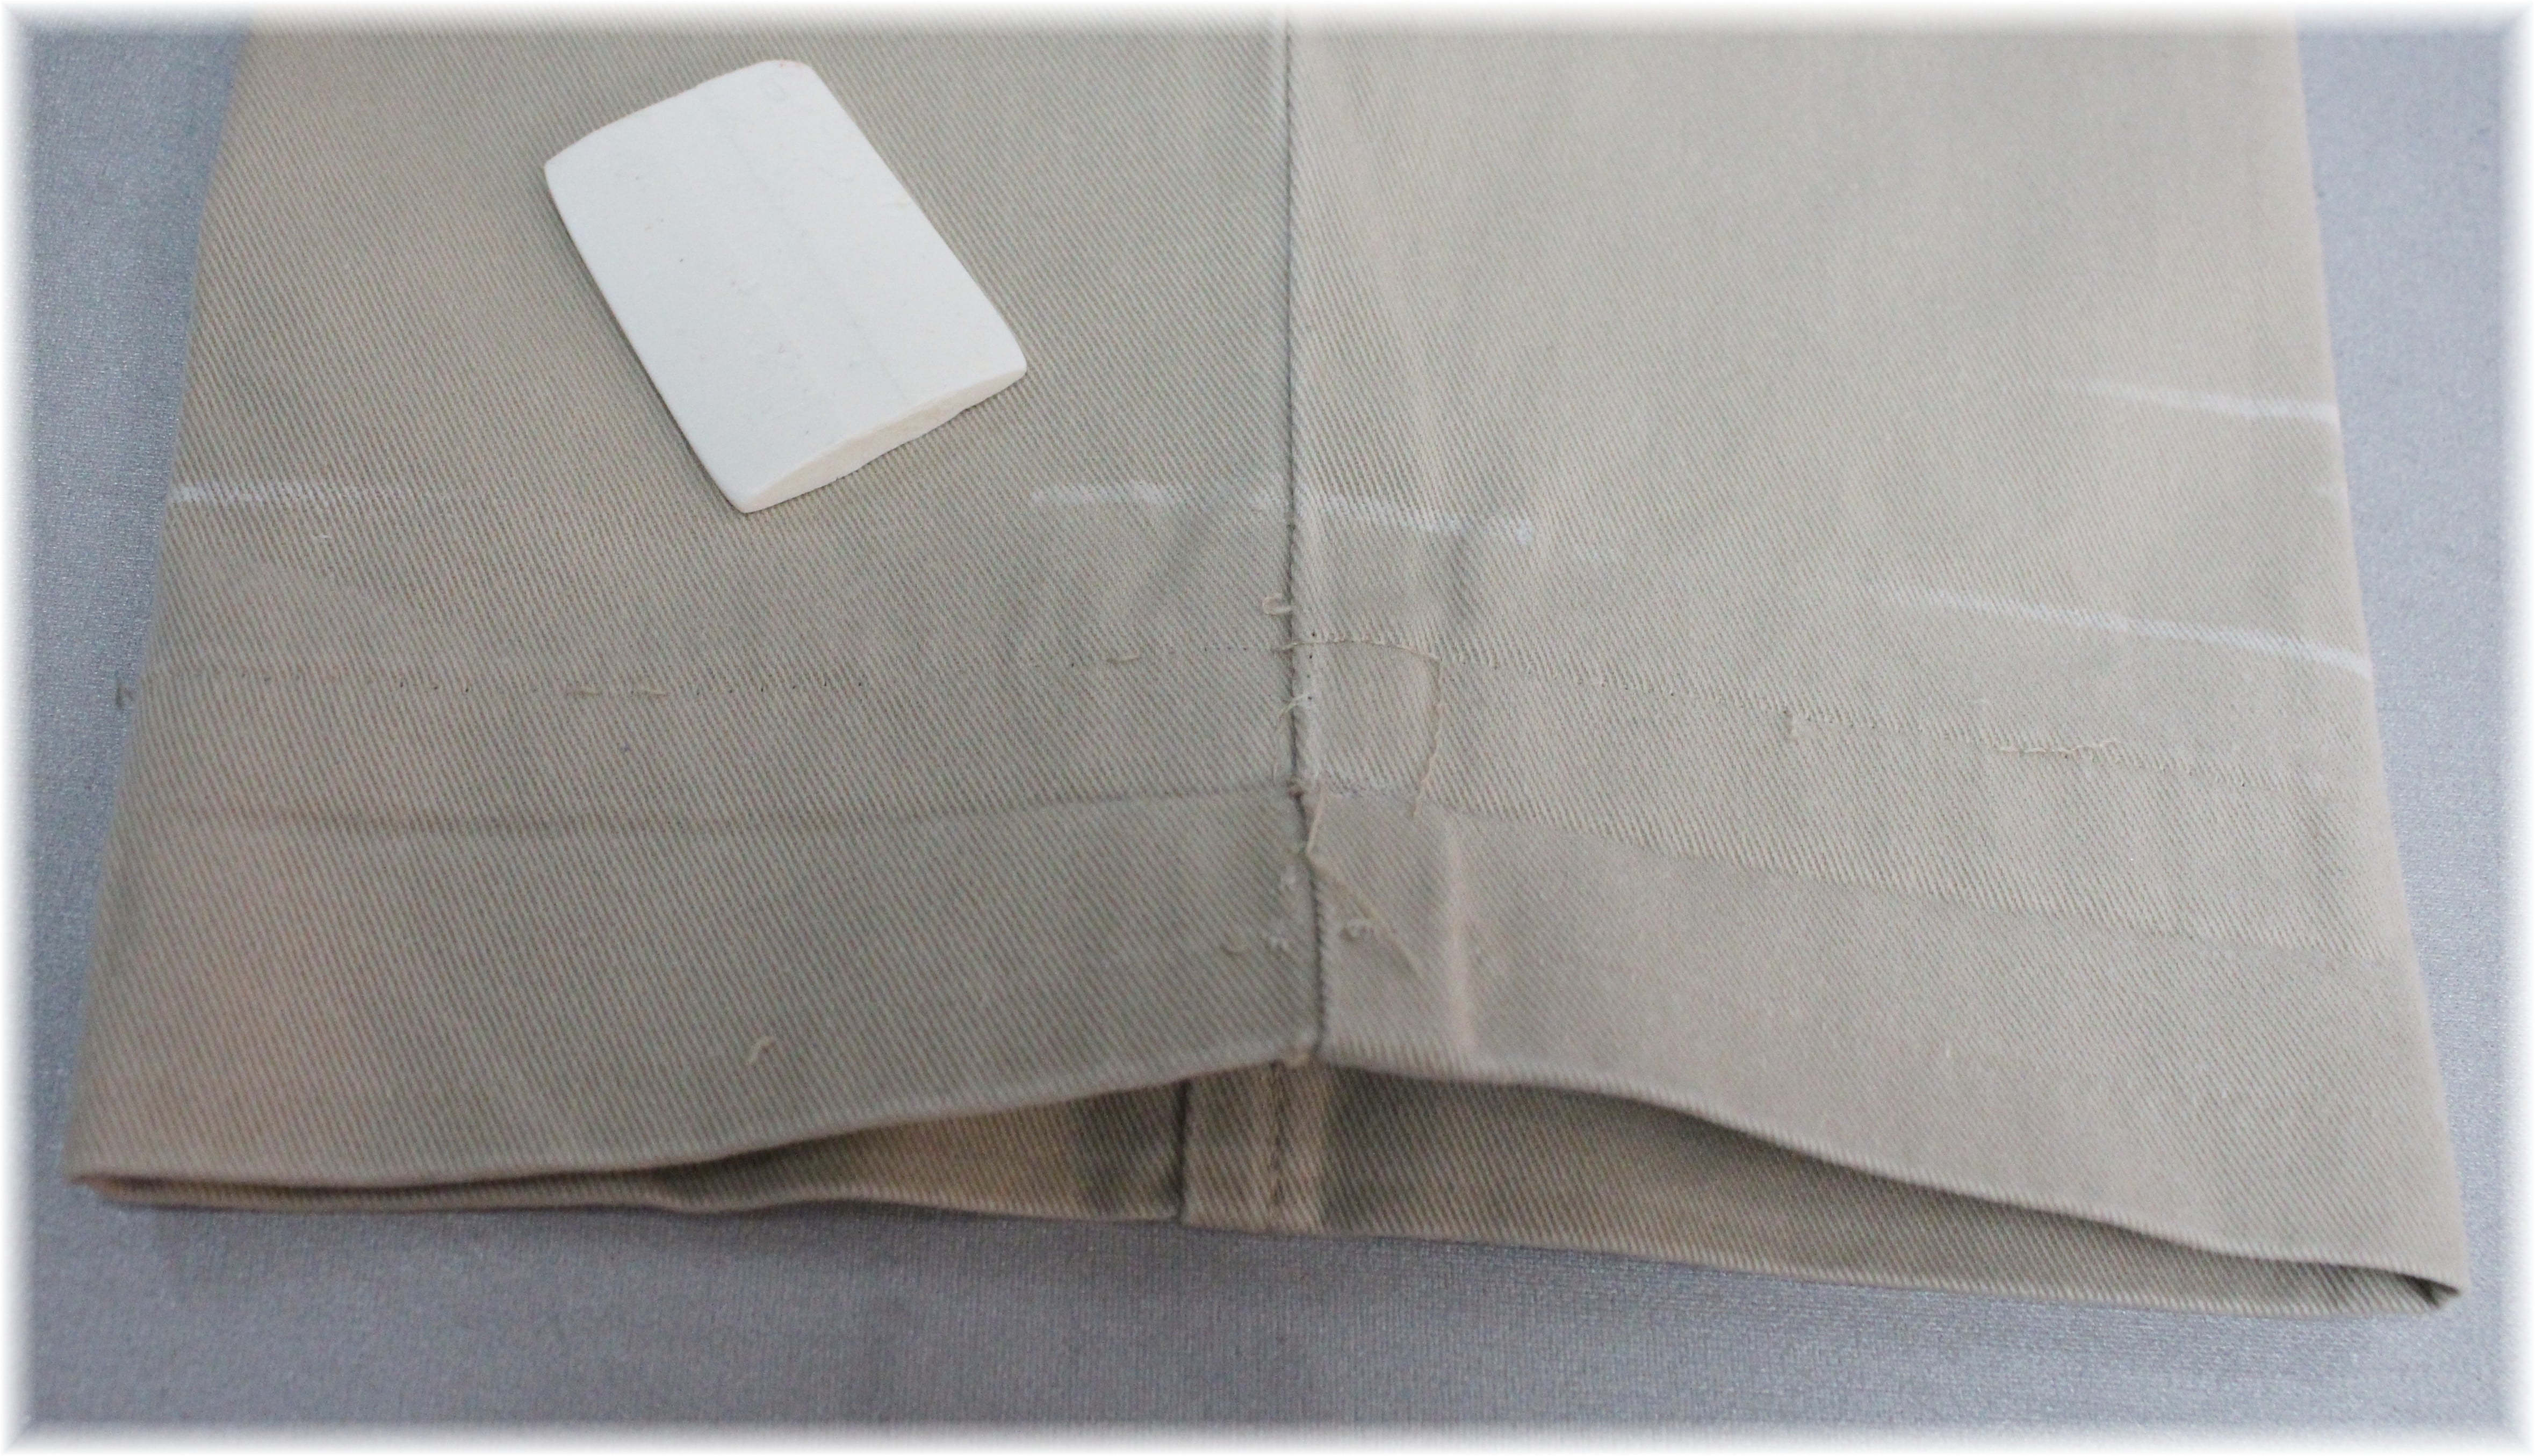
Step 7: Remove the stitches on the original hem.
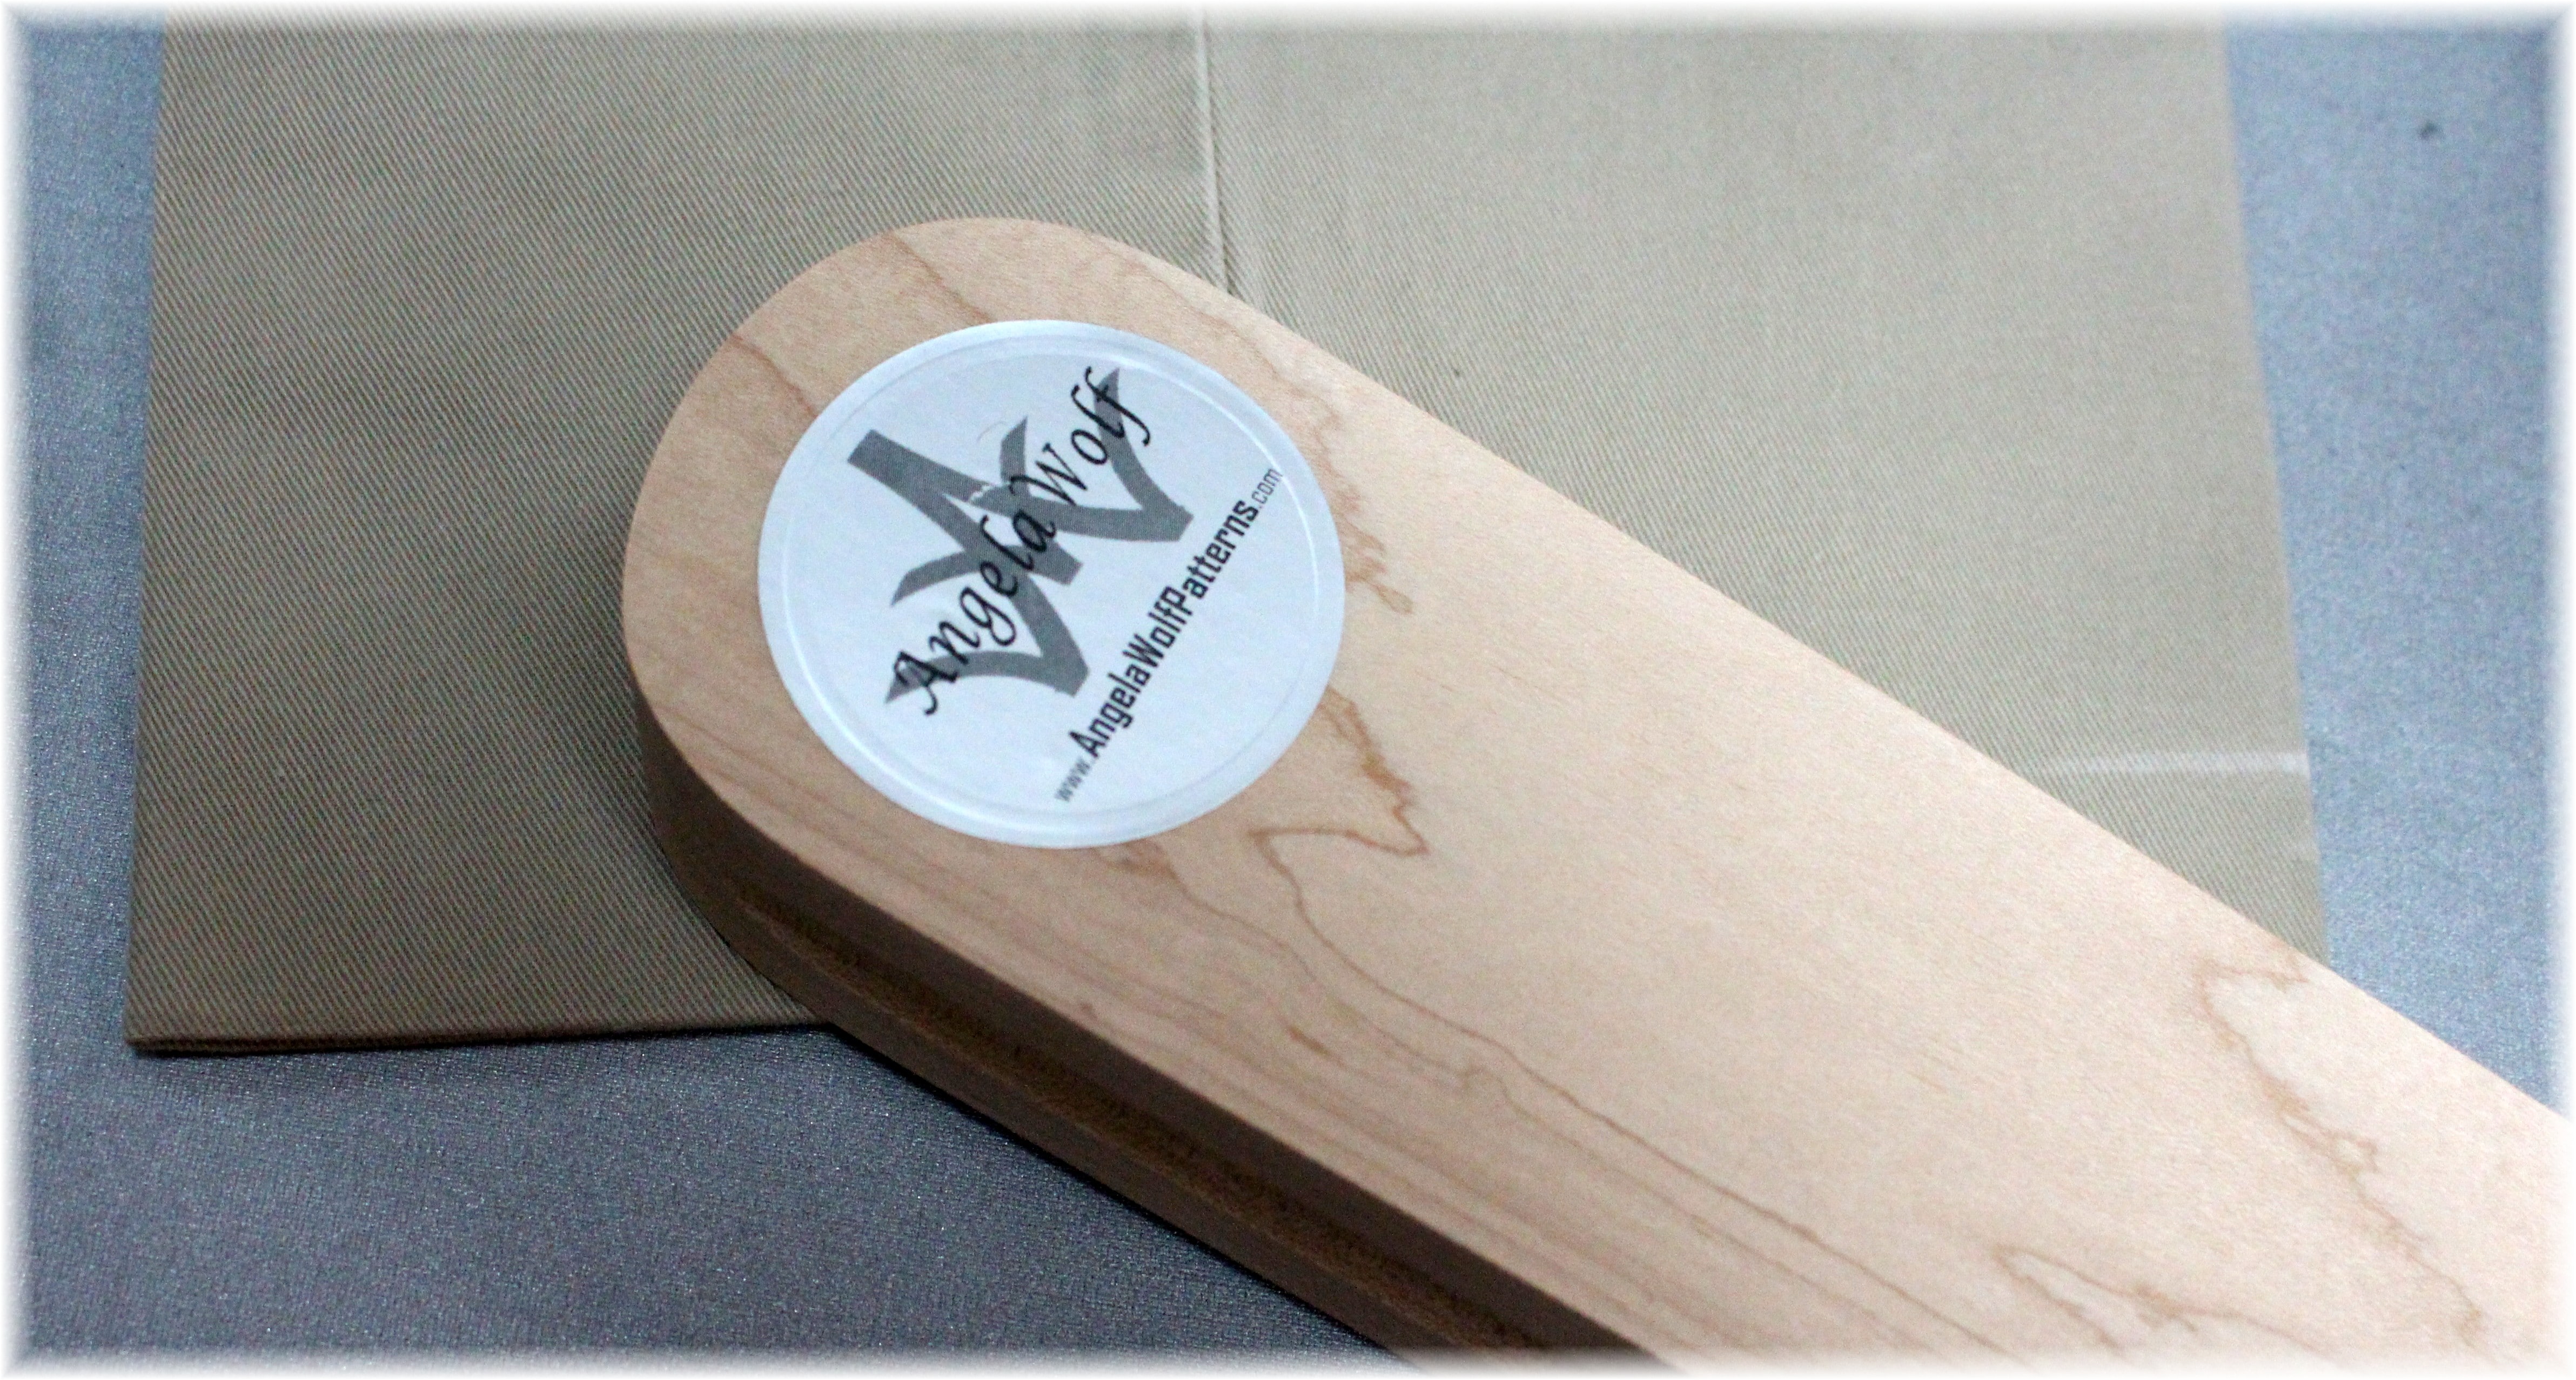
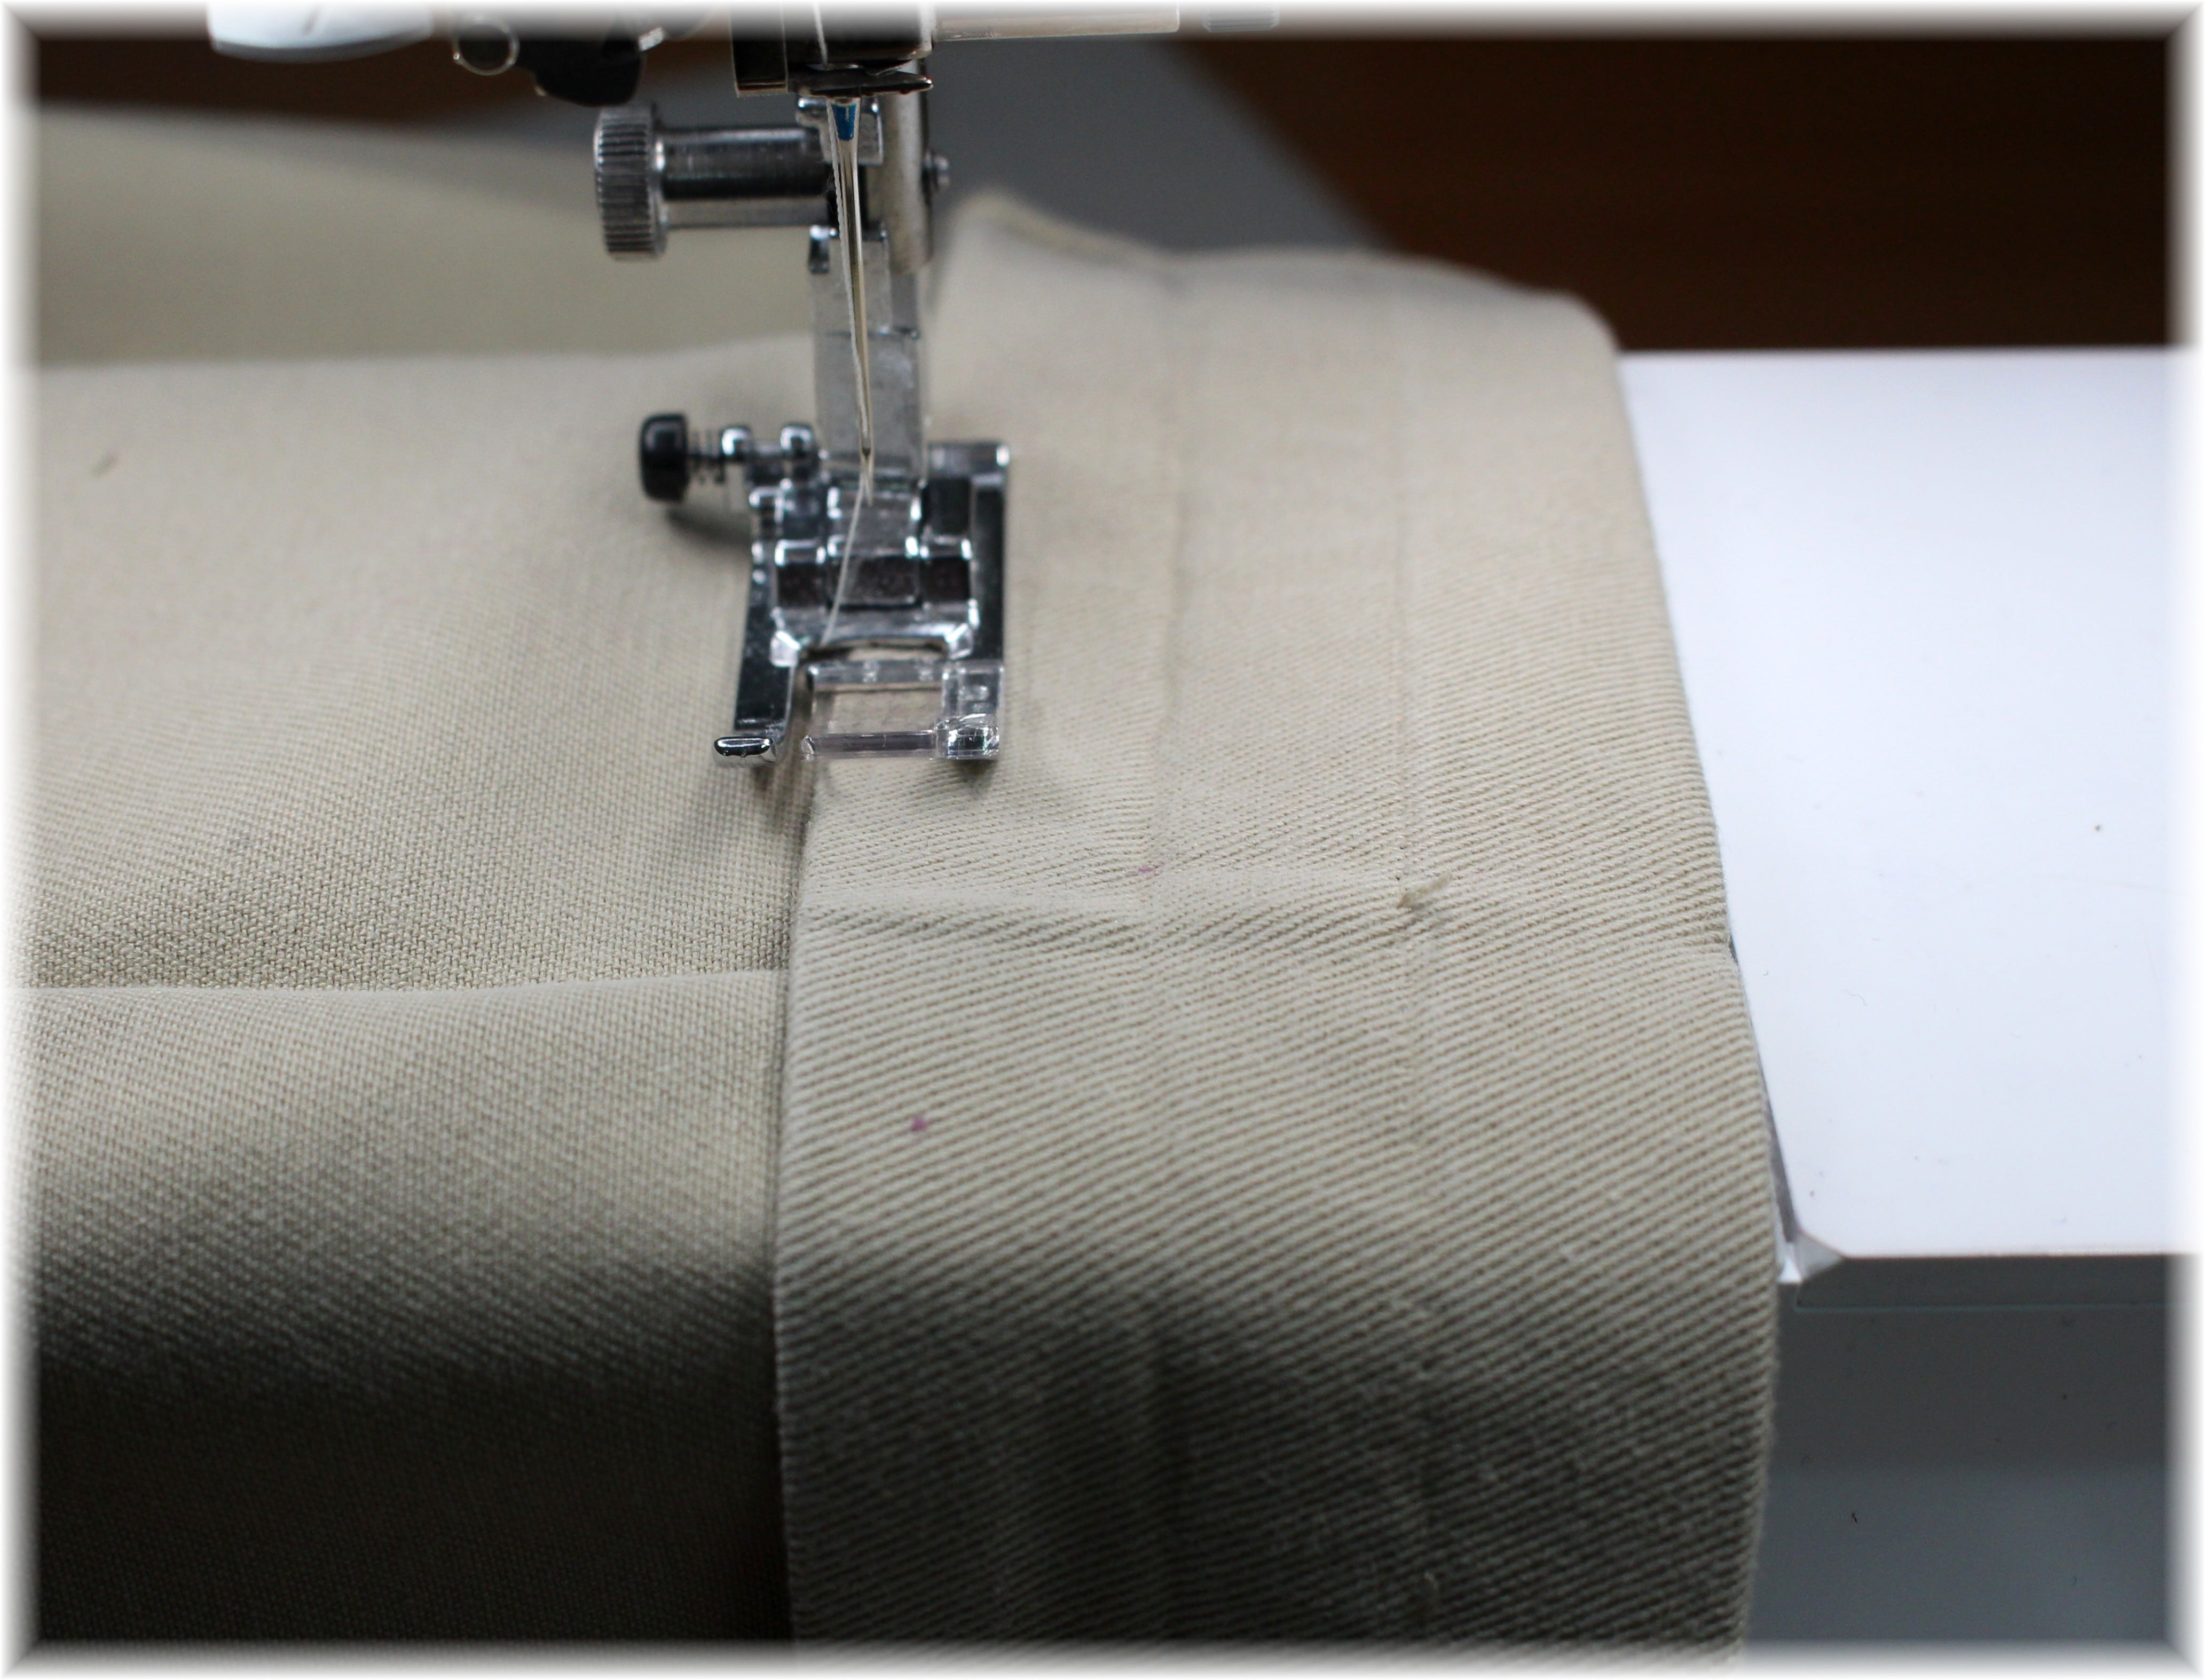
Step 8: Turn up the hem along the chalk marks and press.
Designer Tip: Use a TAILOR’S CLAPPER to create a crisp crease.
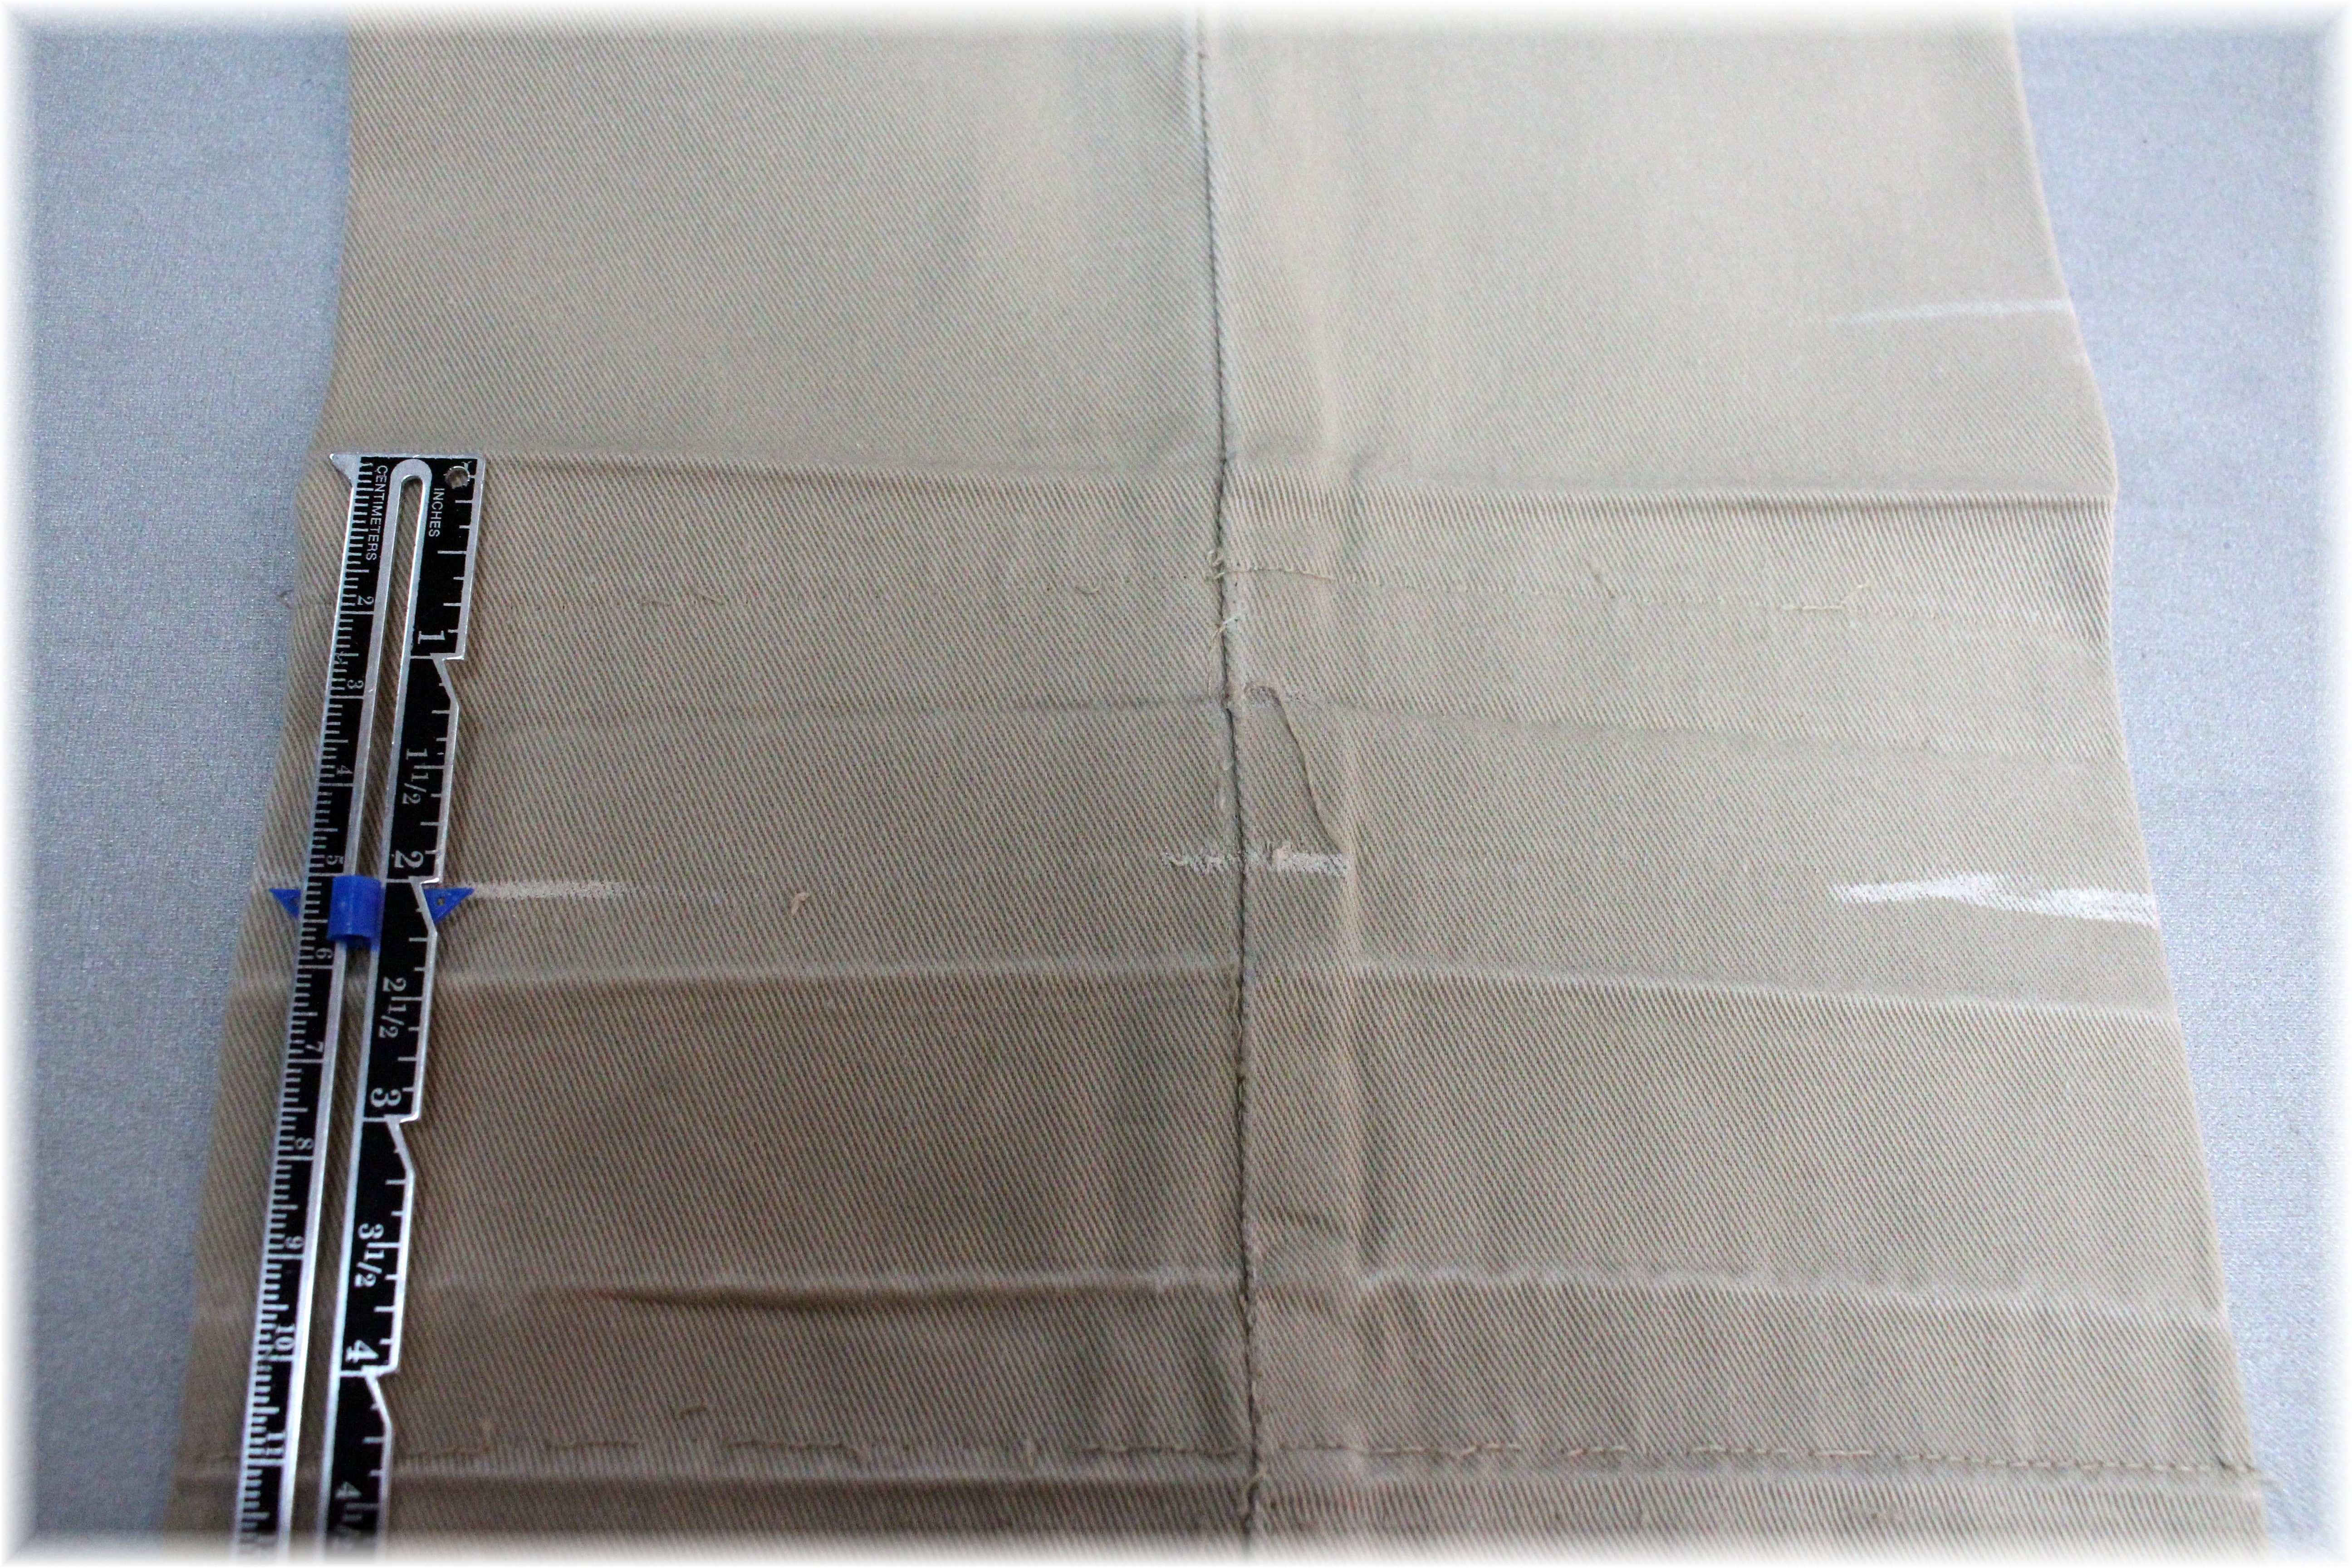
Step 9: Fold down the fabric below the pressed crease and press out the old fold lines. Measure from the new crease down for a seam allowance, mark with chalk (this is the measurement you took in step 6).
Step 10: Trim off excess fabric. Note: These pants had the edge of the fabric folded under and then topstitched in place – you can see the extra fabric I left to allow for this fold. You might prefer a serged edge as that will reduce bulk.
Step 11: Turn under the edge of the fabric ¼” for the finished edge. Press and use the tailor’s clapper for a crisp crease. (If you chose to serge the edge of the fabric, skip this step)
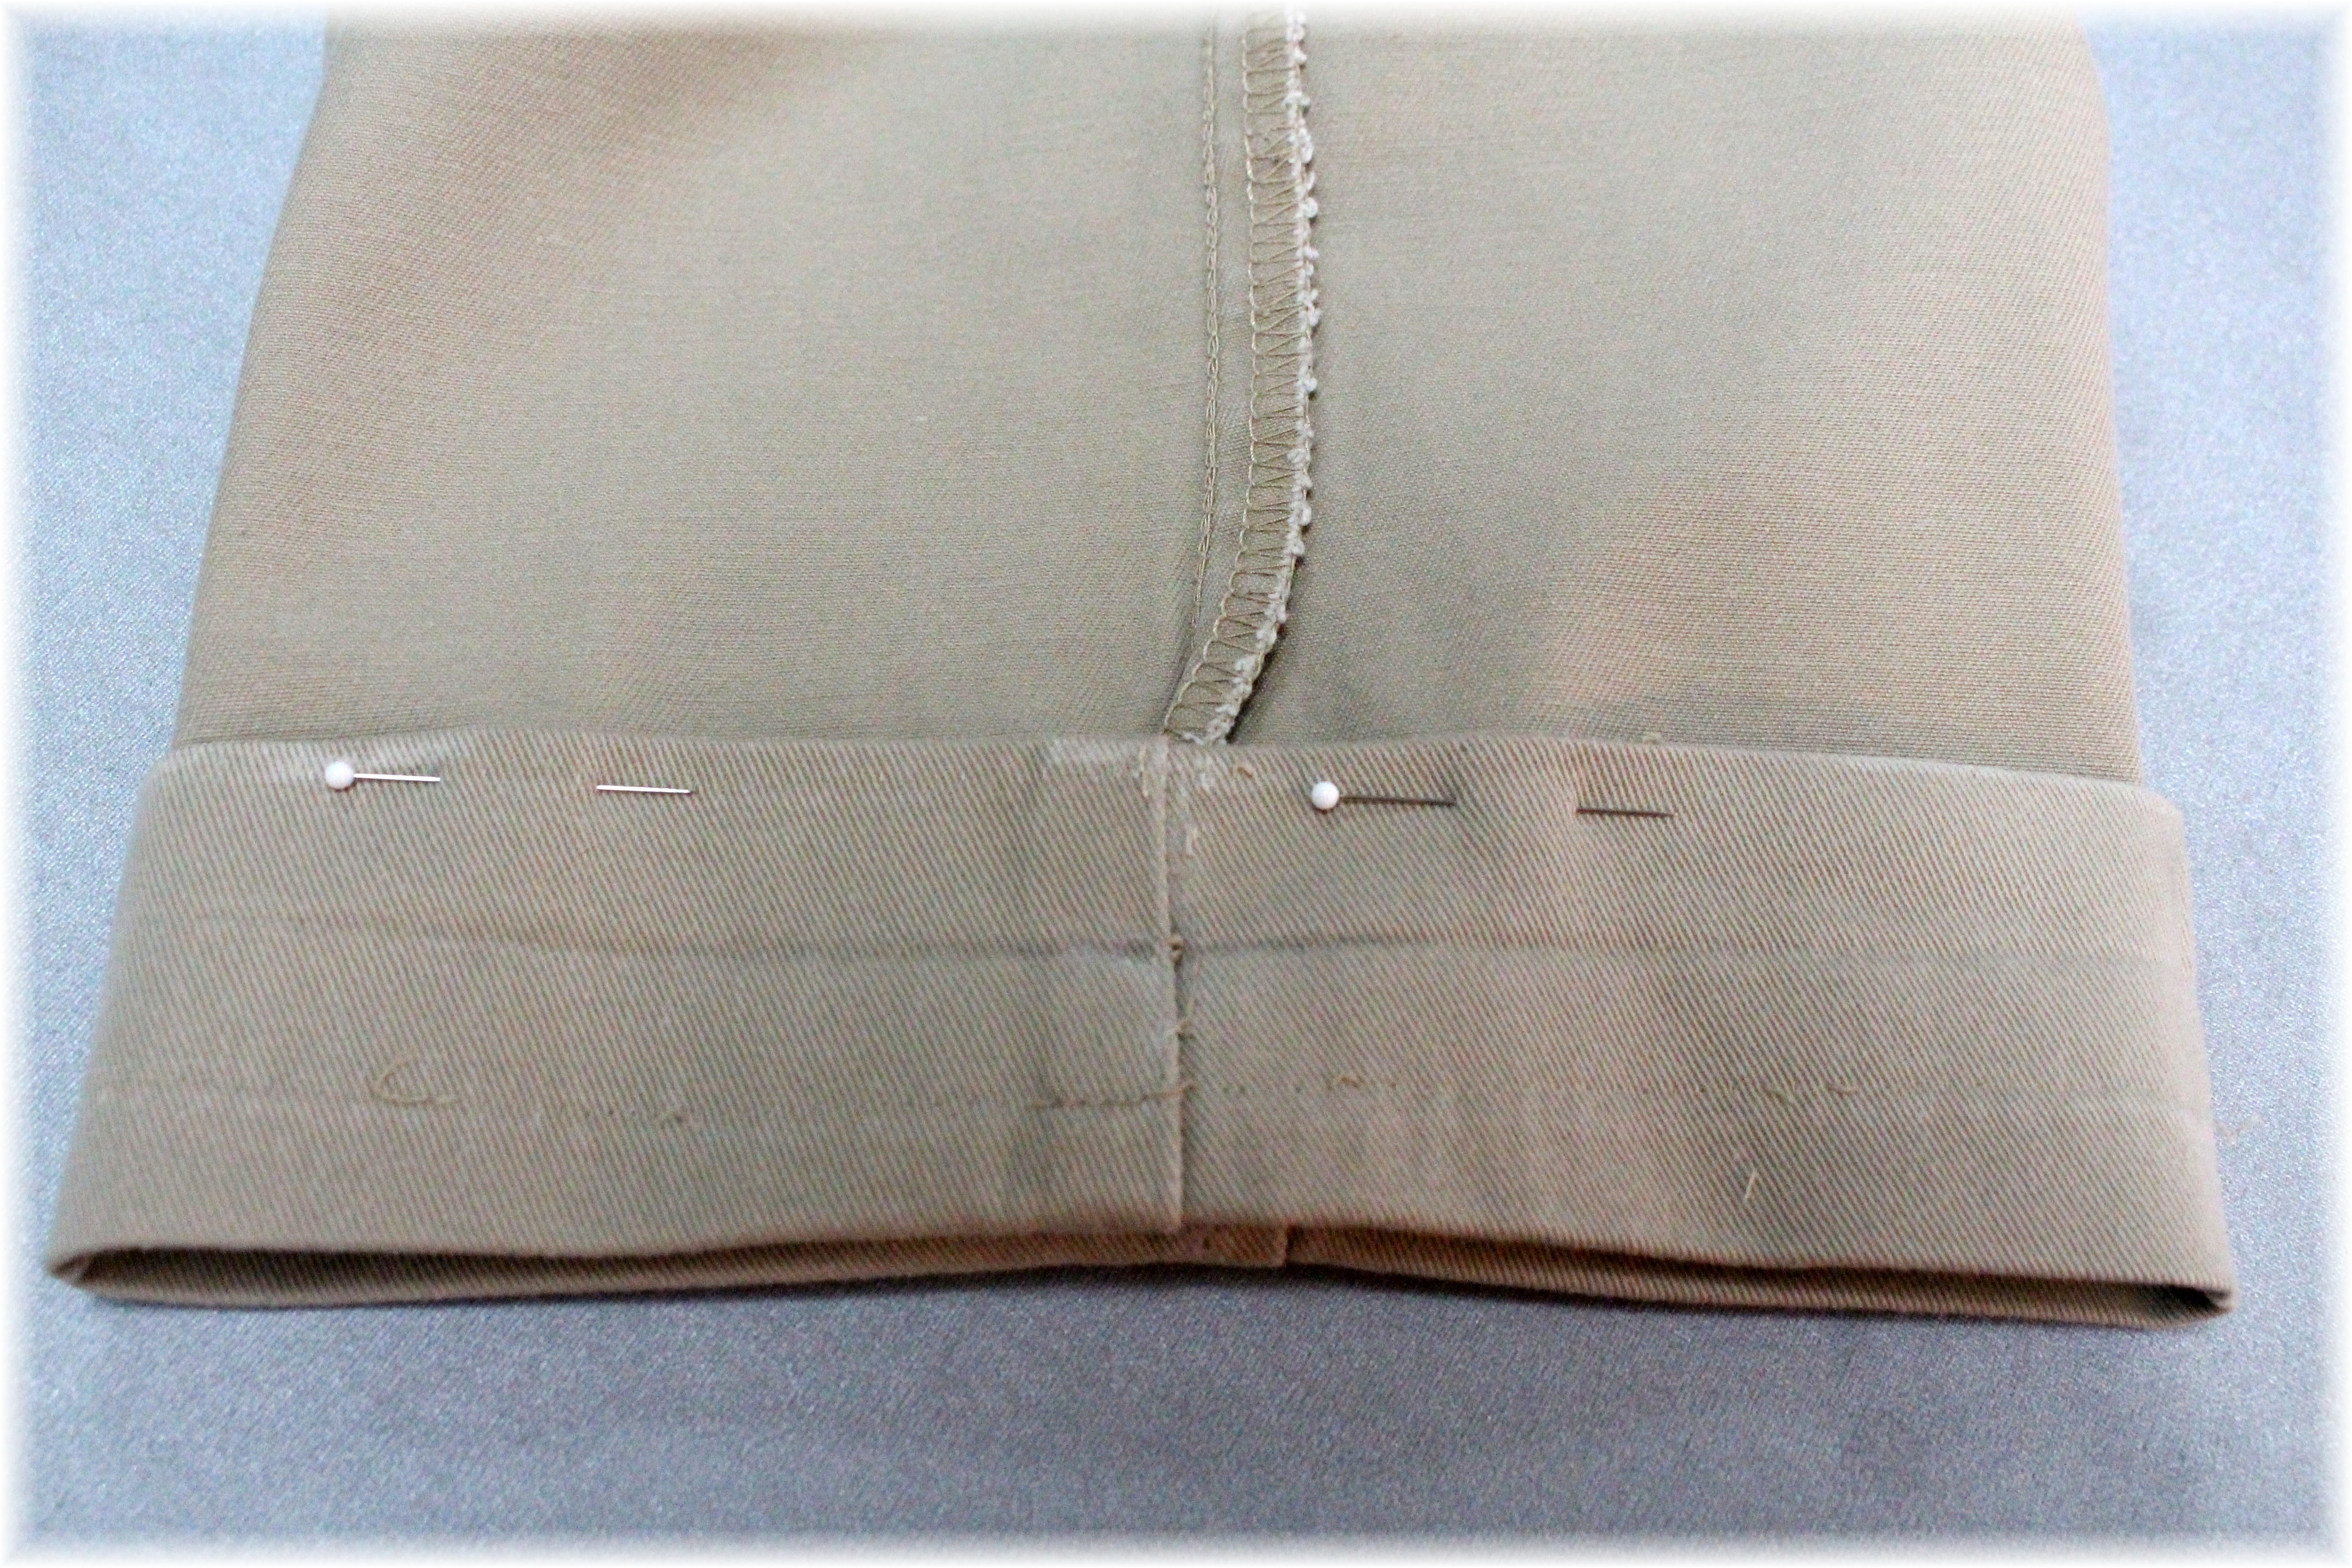
Step 12: Fold up the hem.

Step 13: Pin in the hem allowance in place.
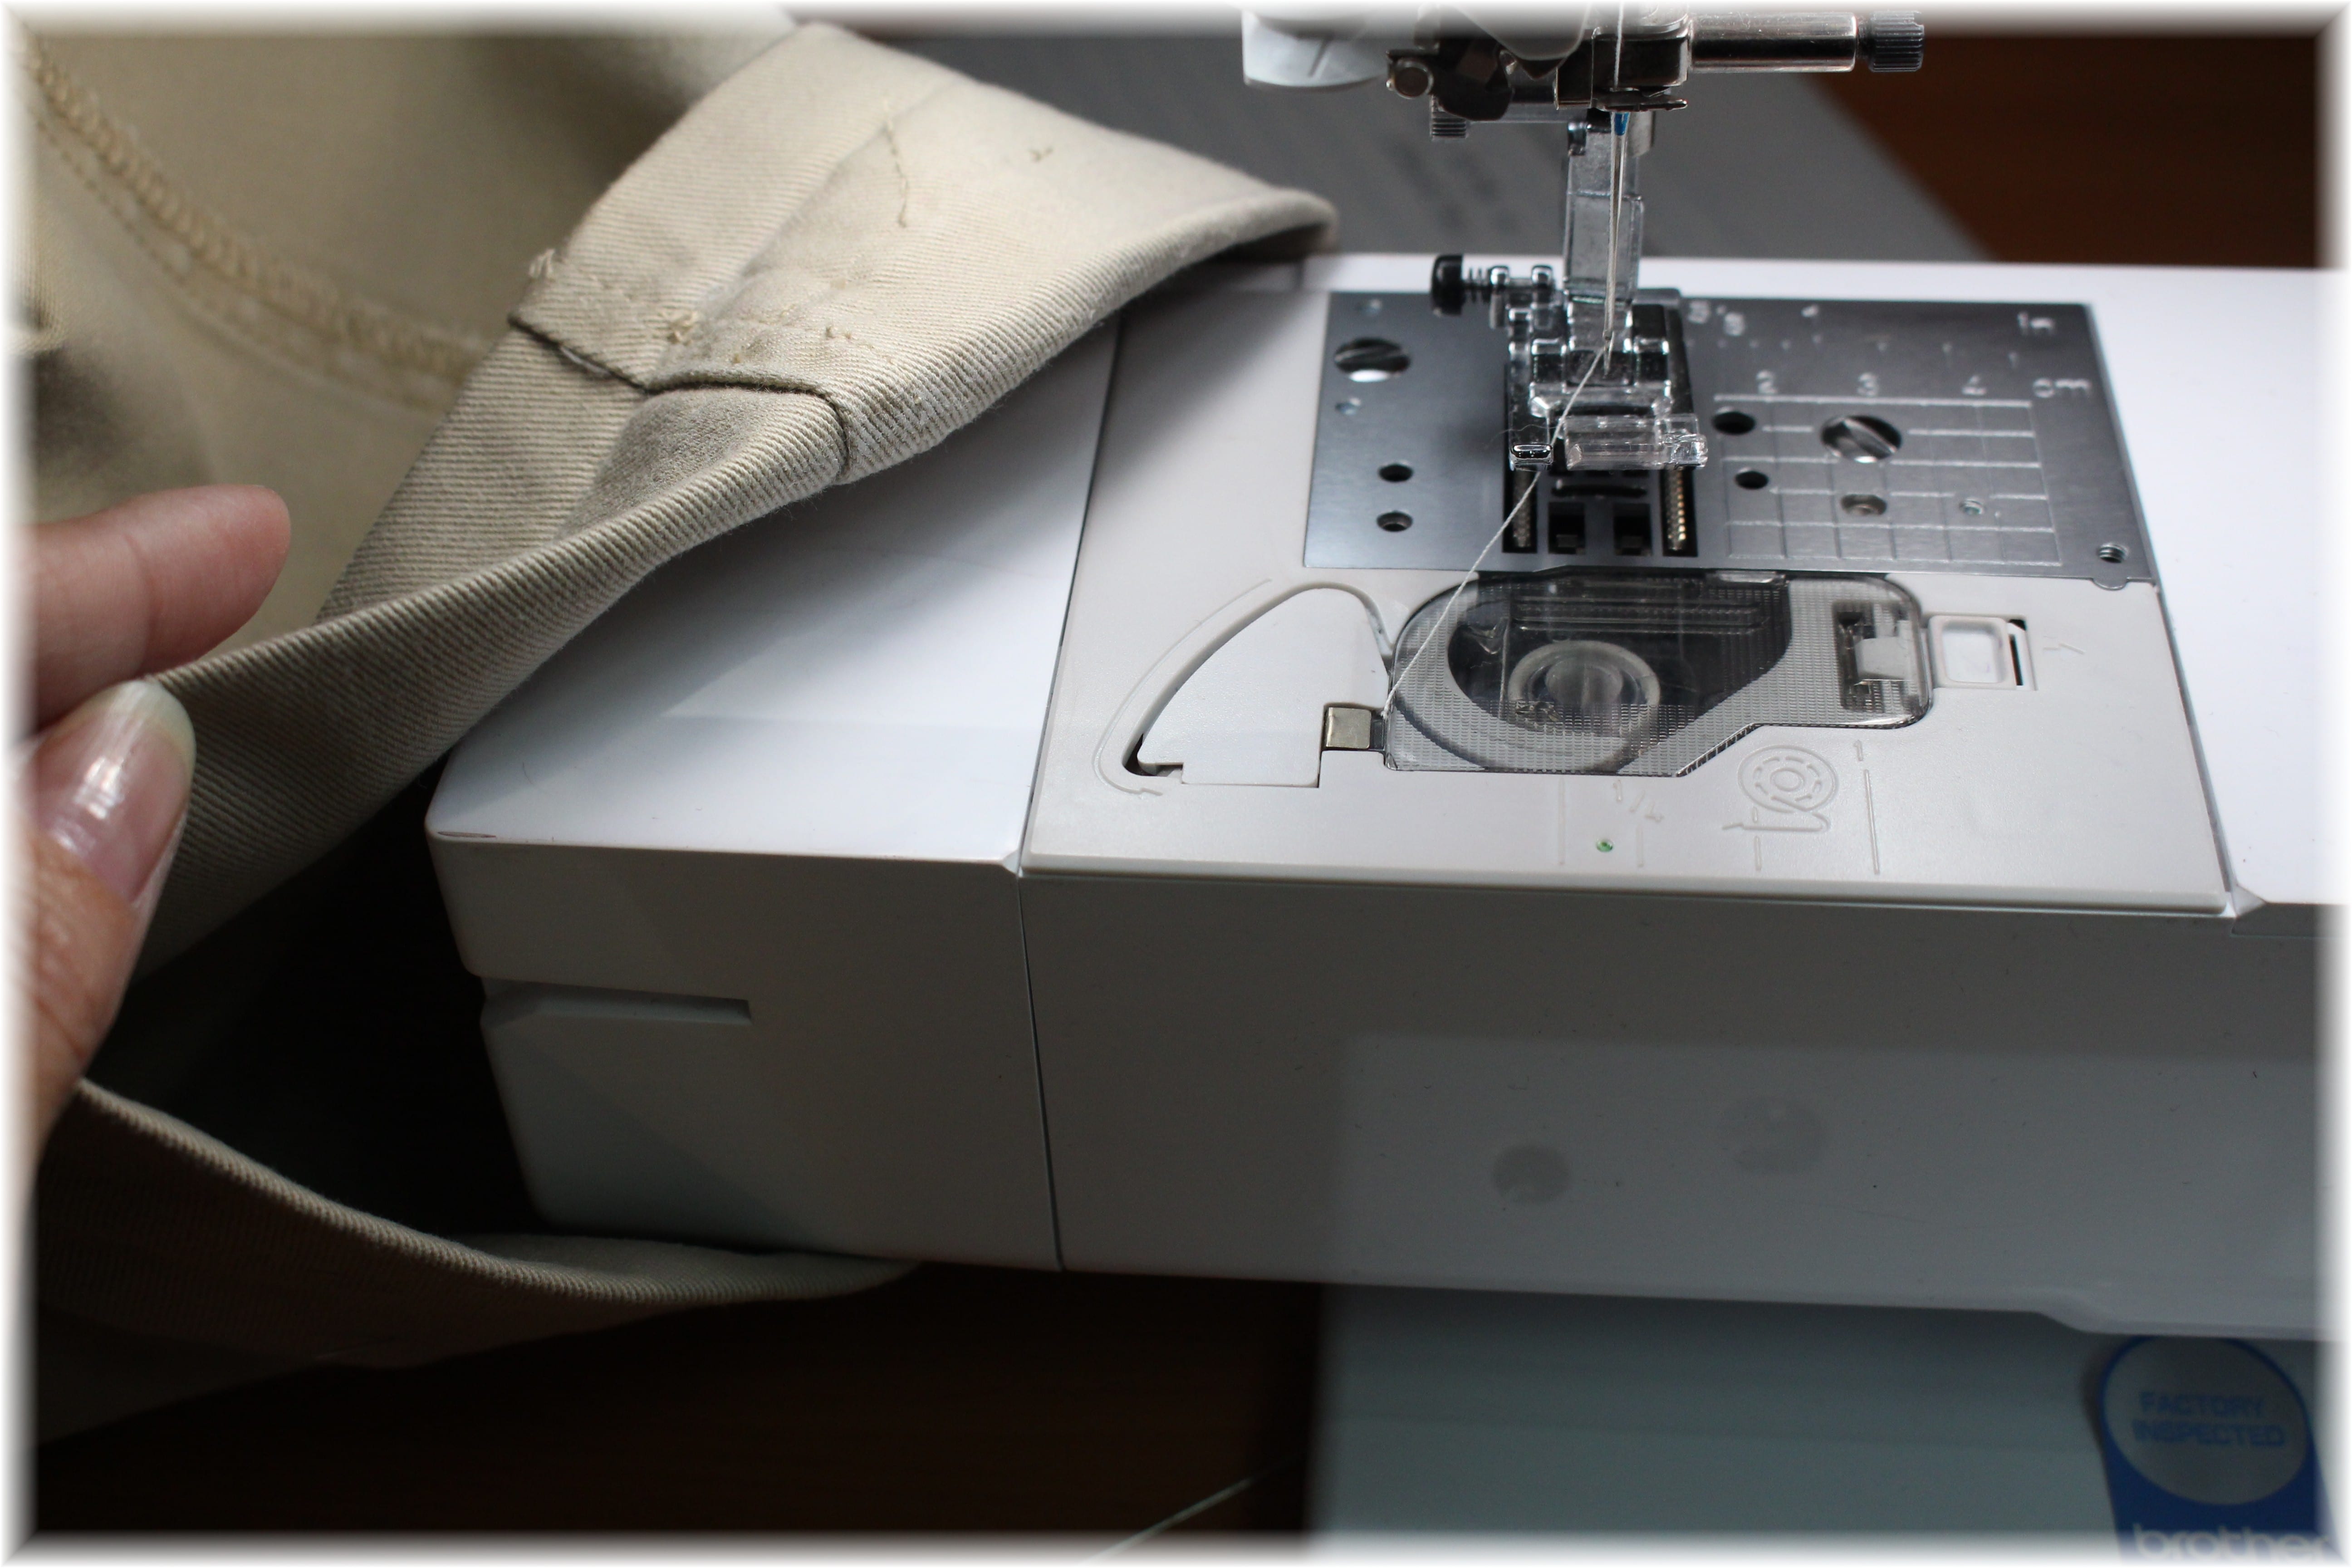
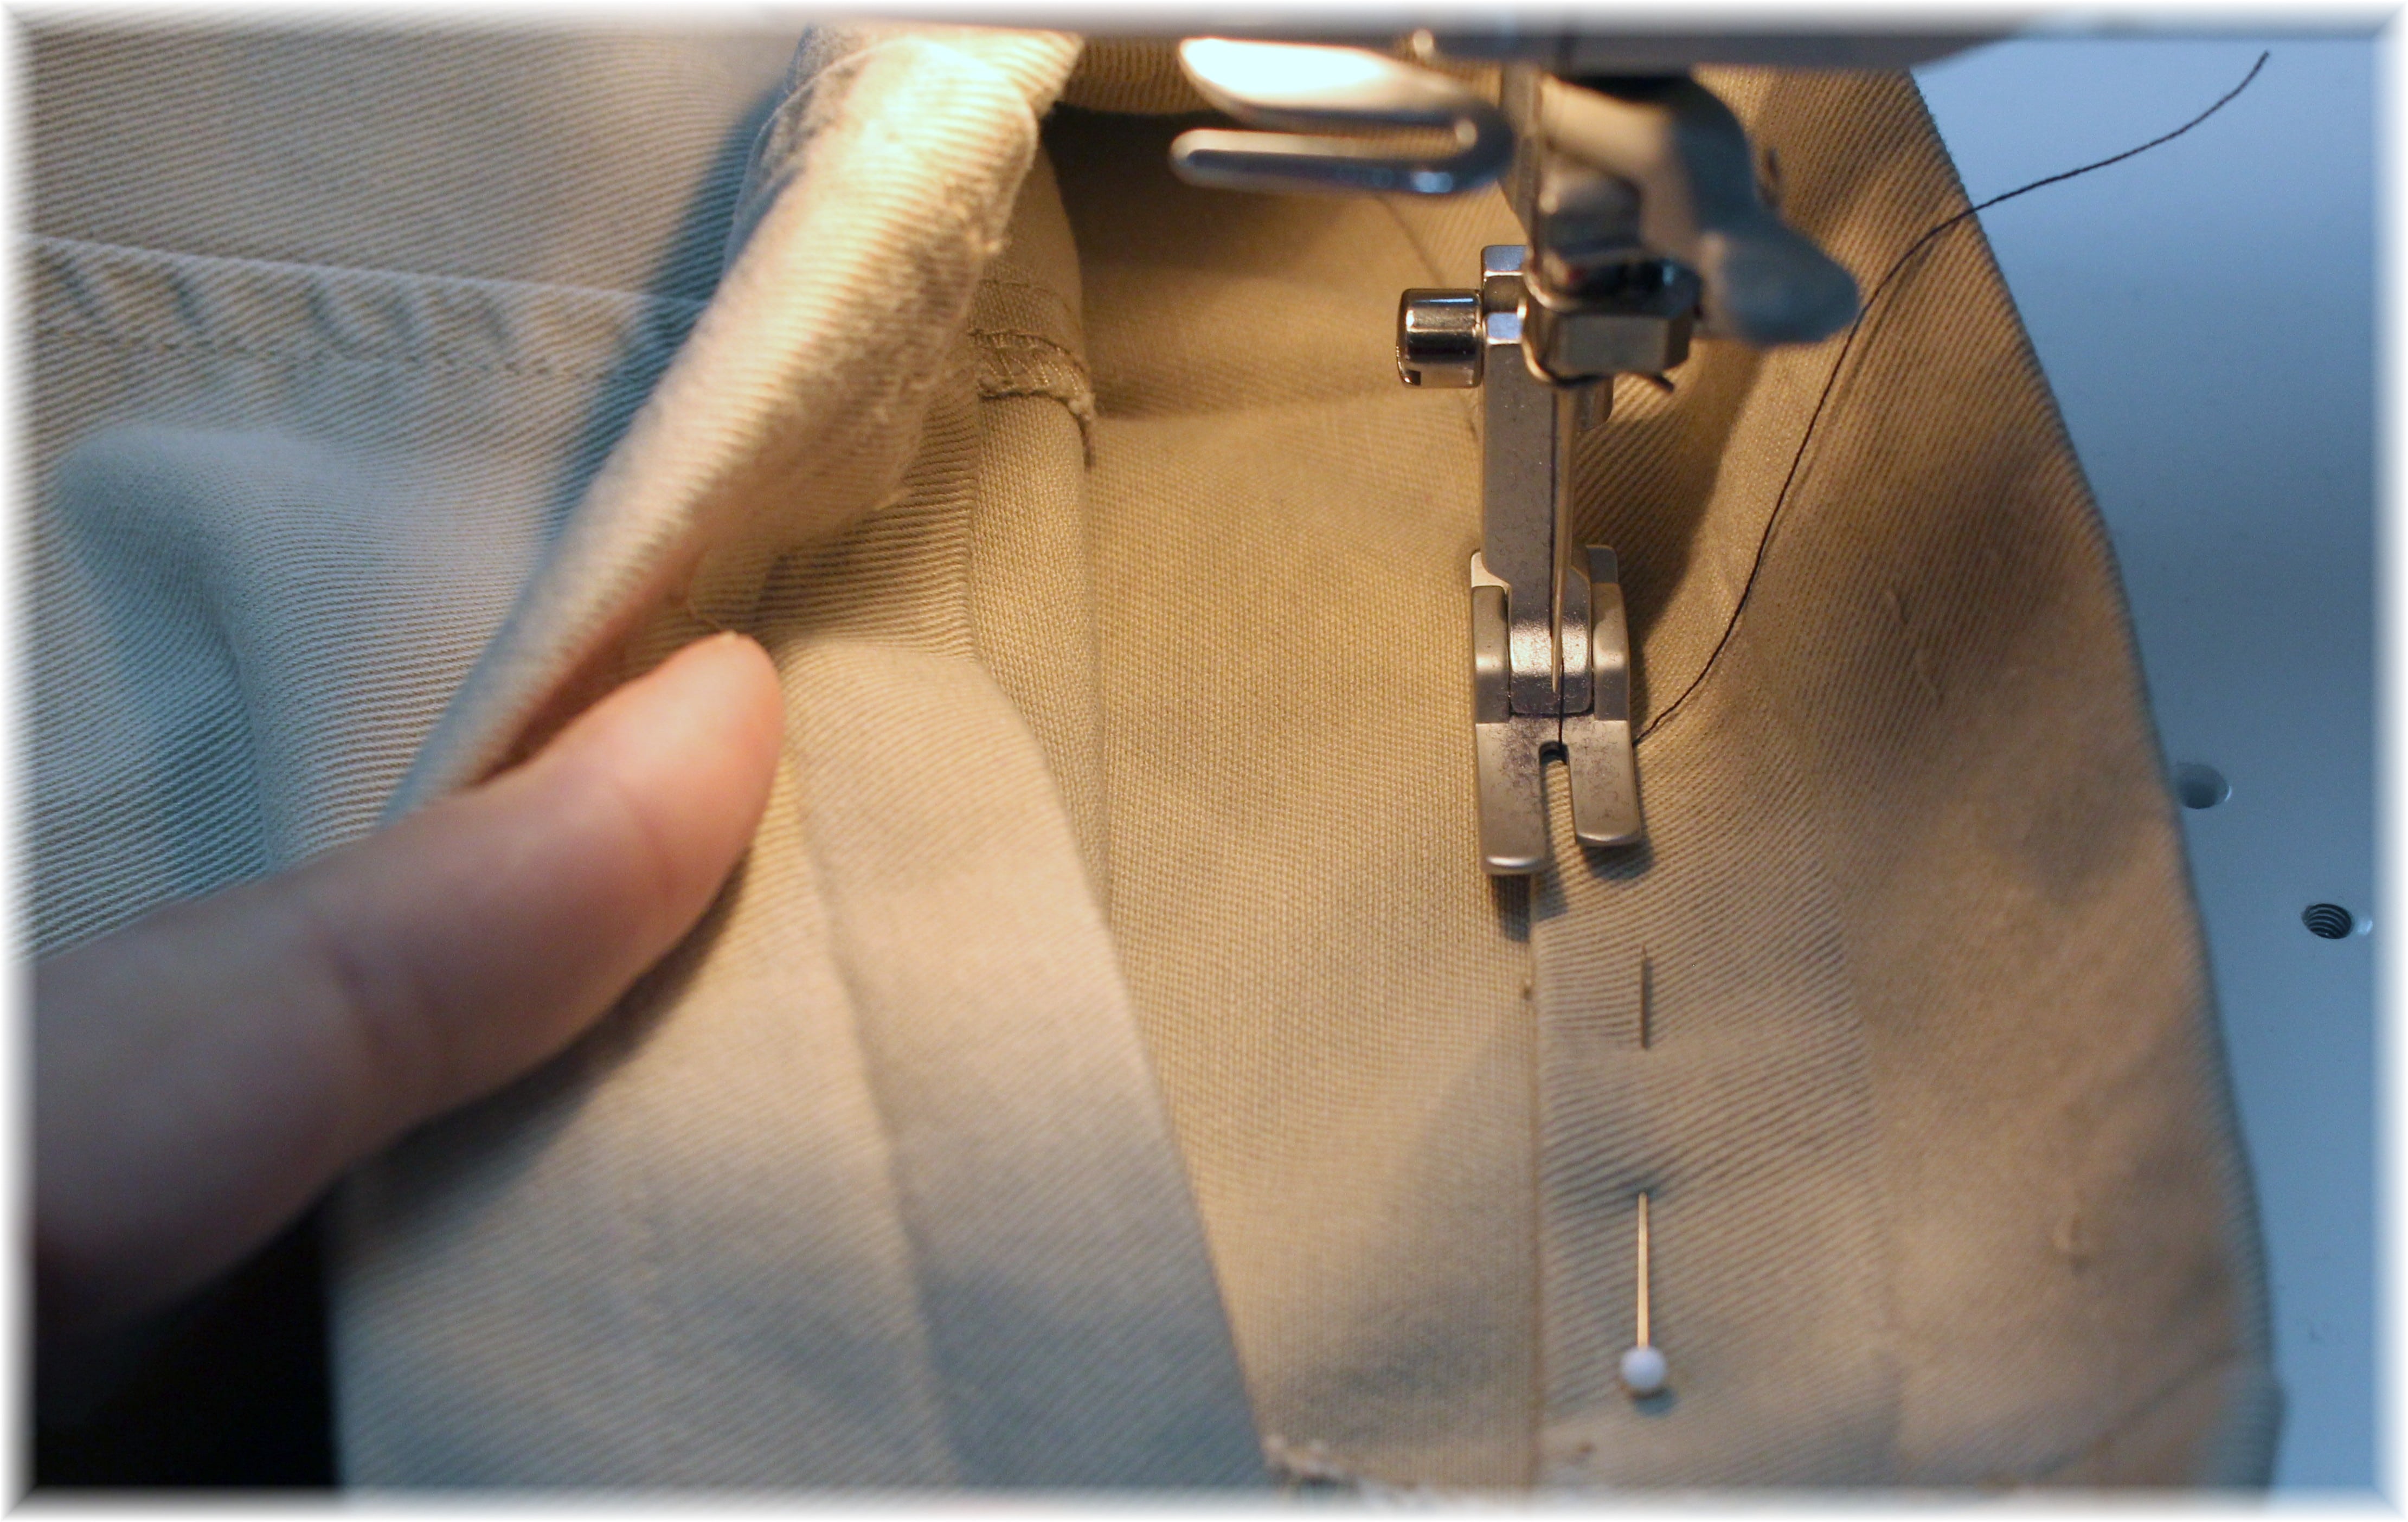
Step 14: Stitch the hem allowance closed with a straight stitch or blind-hem stitch.
Designer Tip: If your sewing machine has a removable plate that allows fabric to wrap around, it is easier to stitch from the inside if the pant leg as shown.
Designer Tip: If your sewing machine doesn’t have a removable plate, like my Brother PQ1500, it’s easier to turn the pant leg right side out and stitch while turning the pant leg from above as shown:
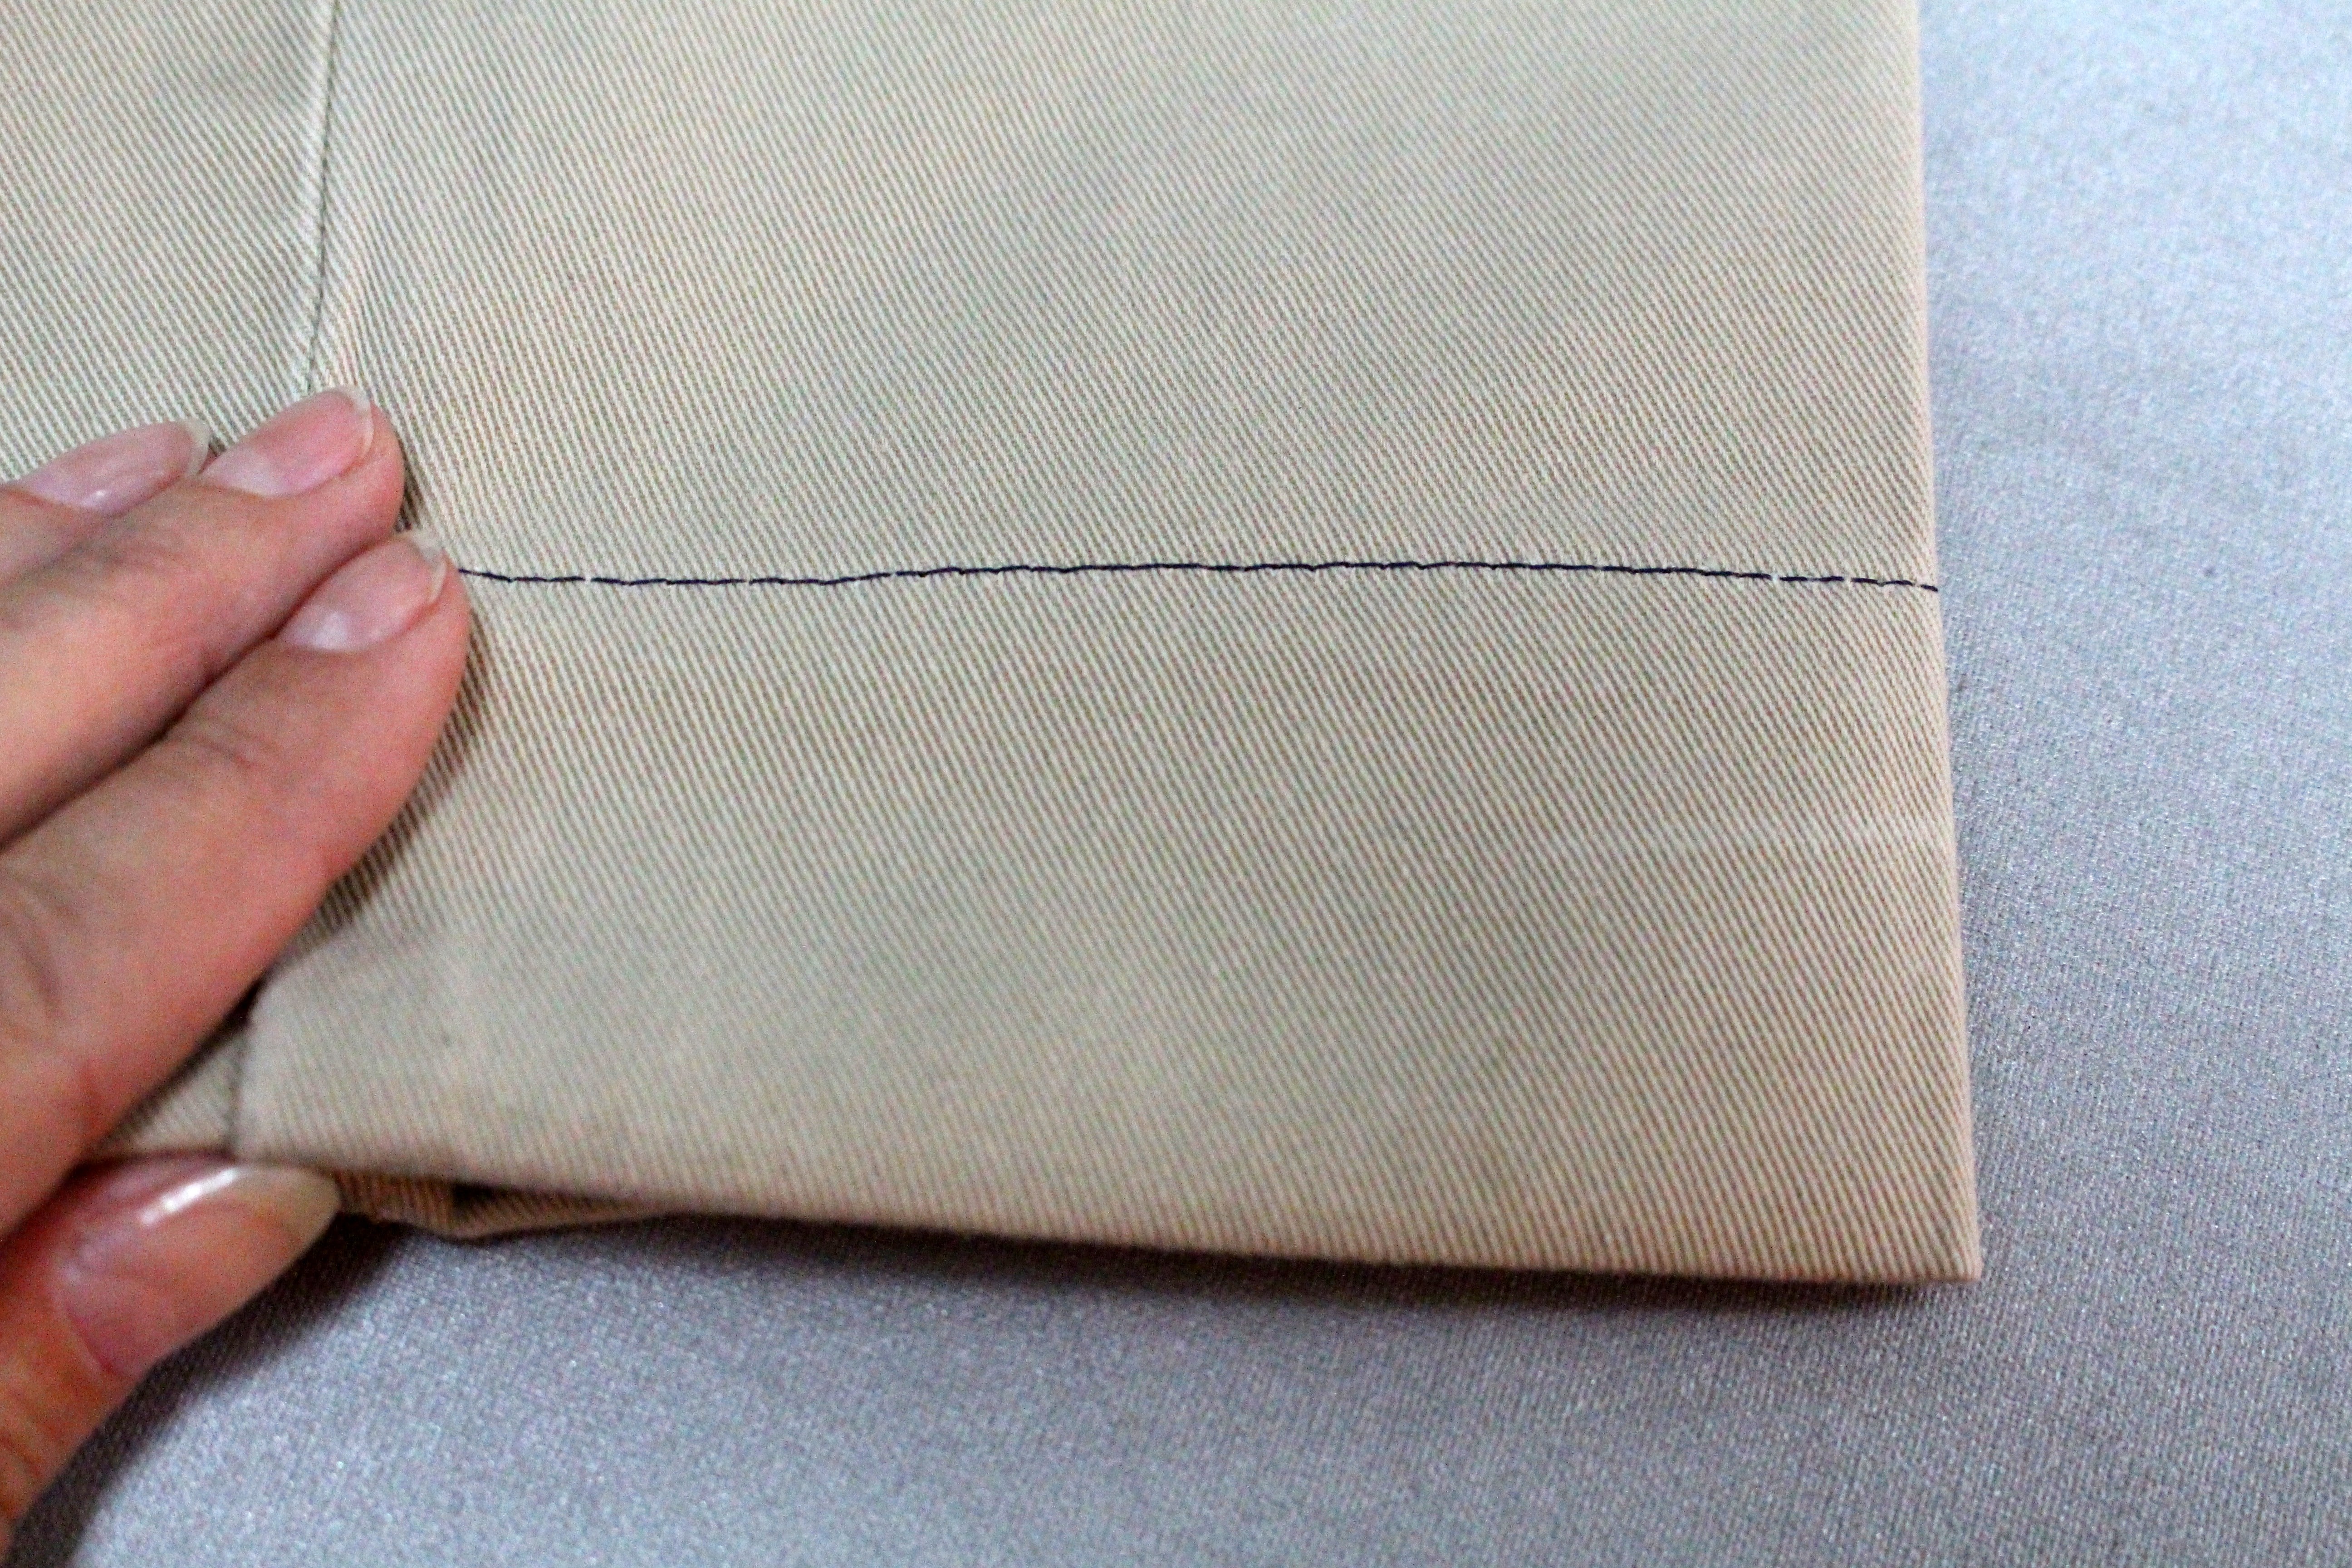
Step 16: Press.
Step 17: Turn the bottom crease up toward the right side of the pant the desired width of the cuff. Press.


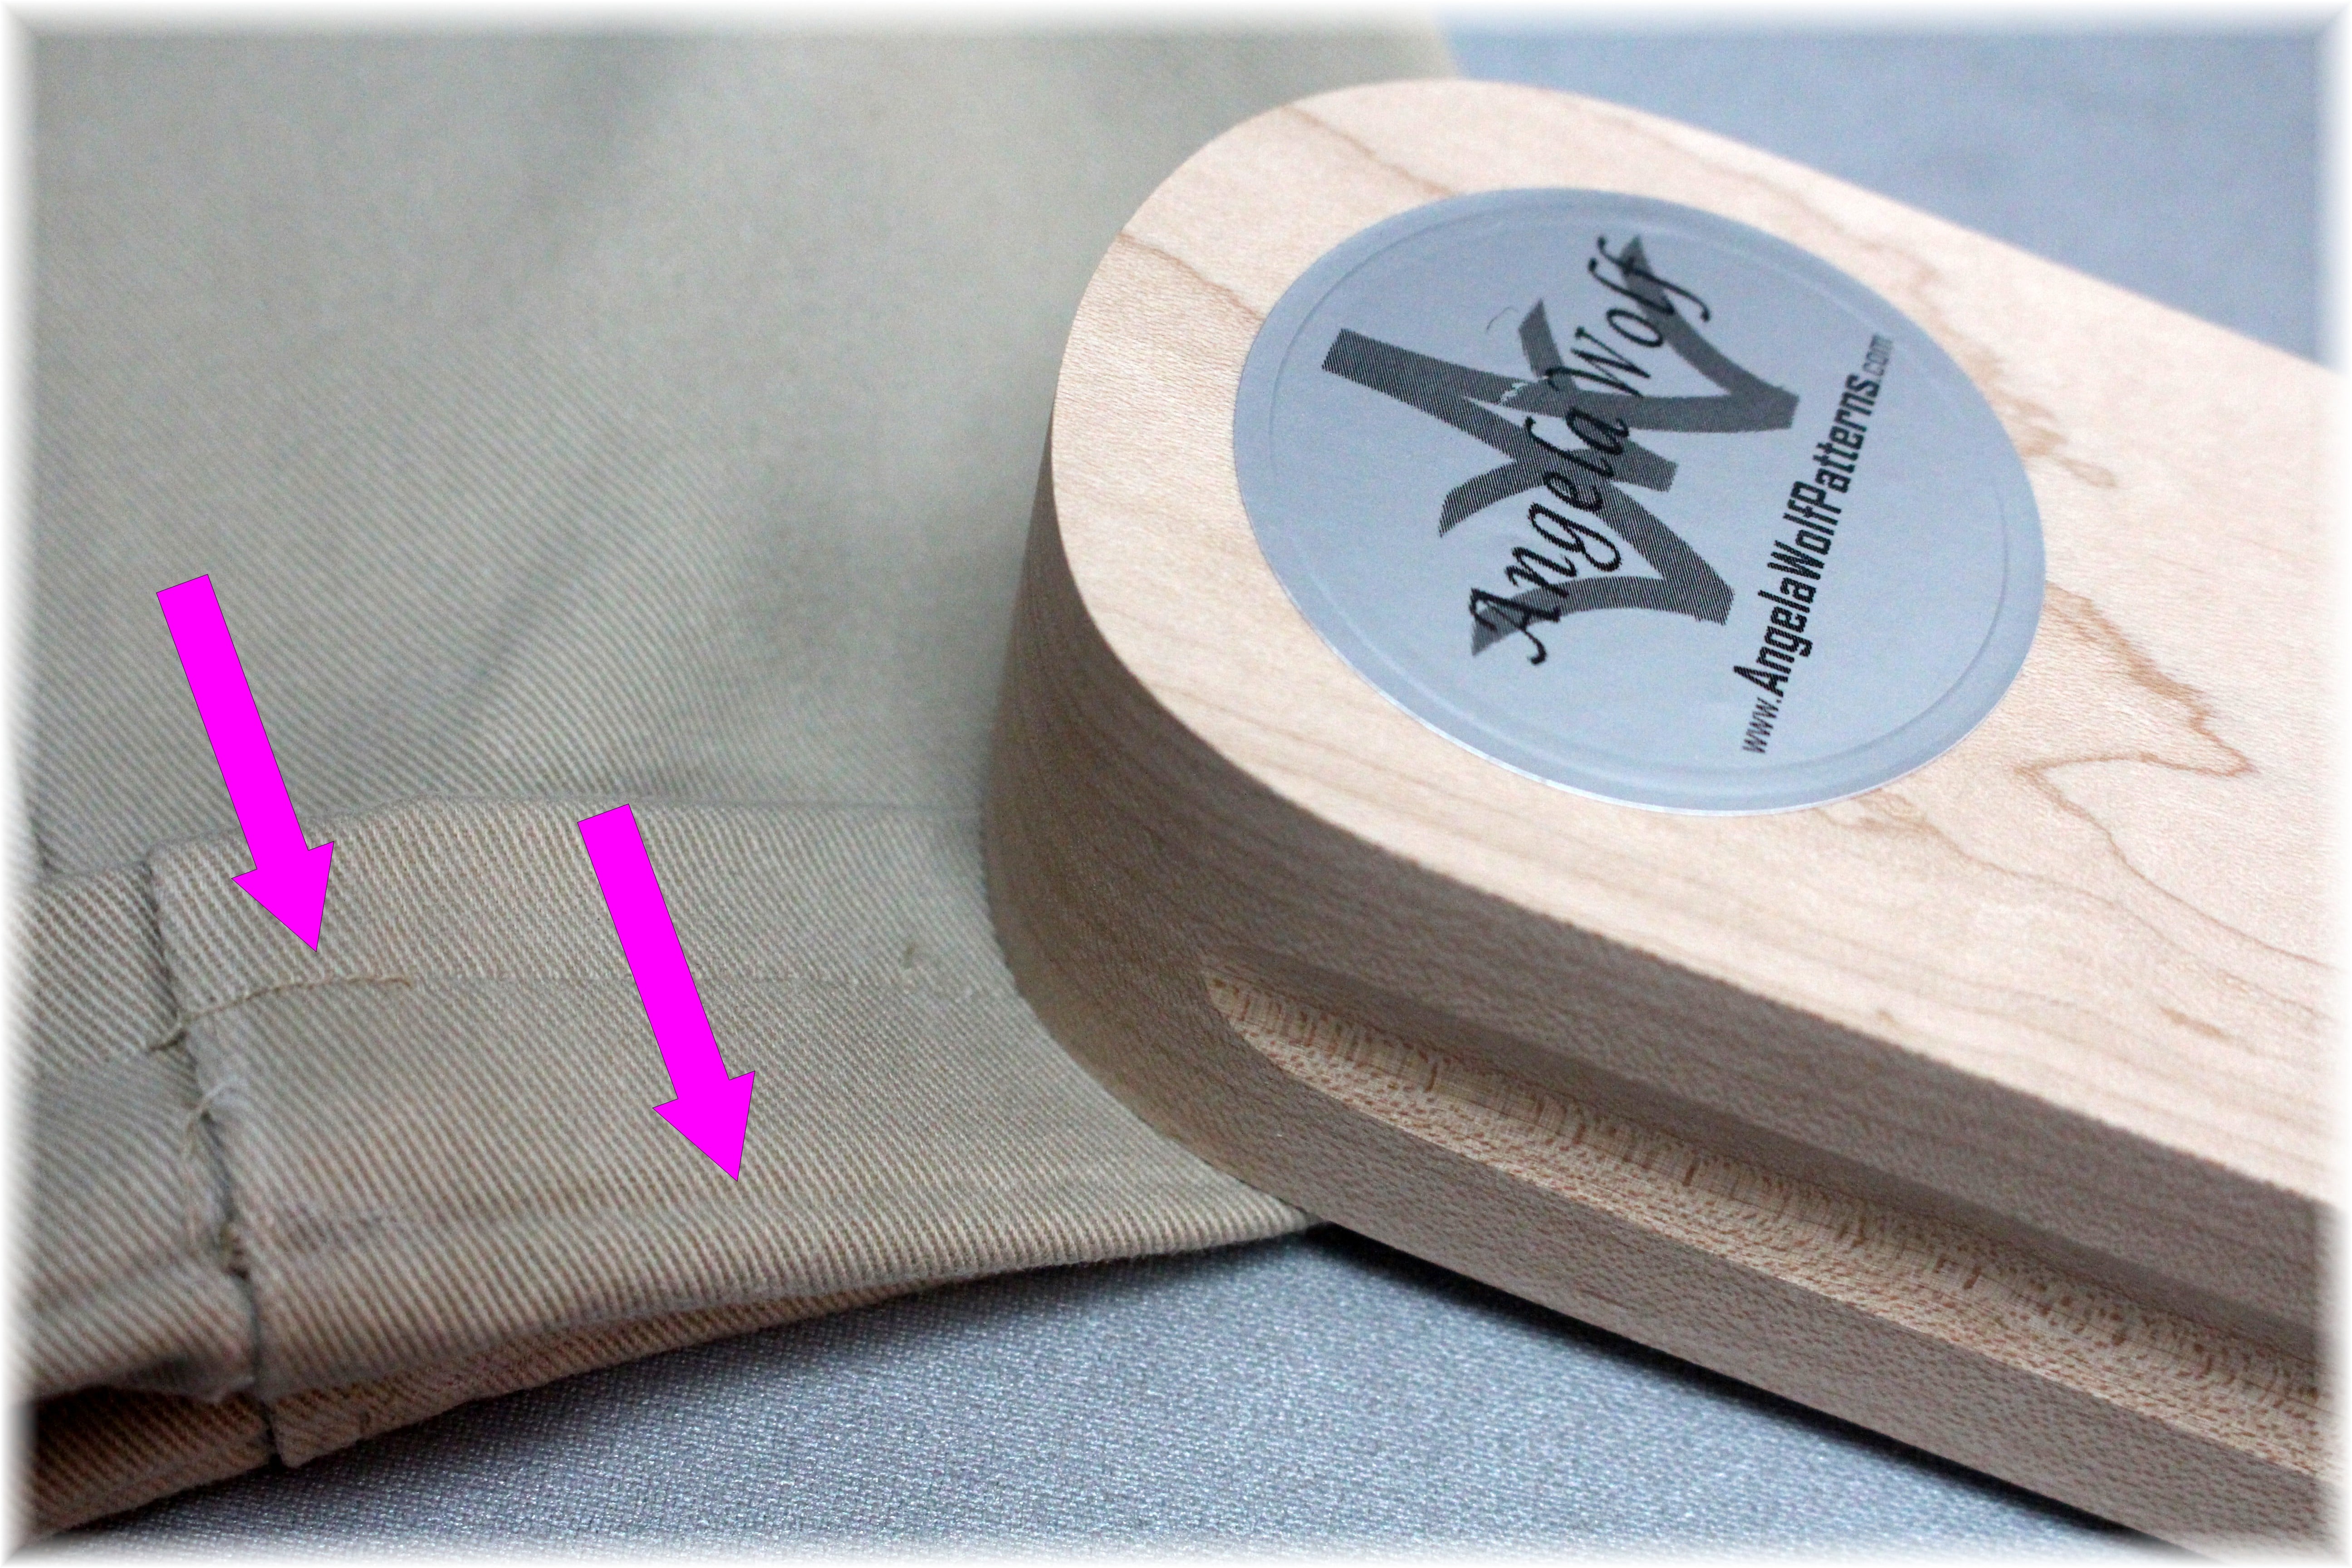
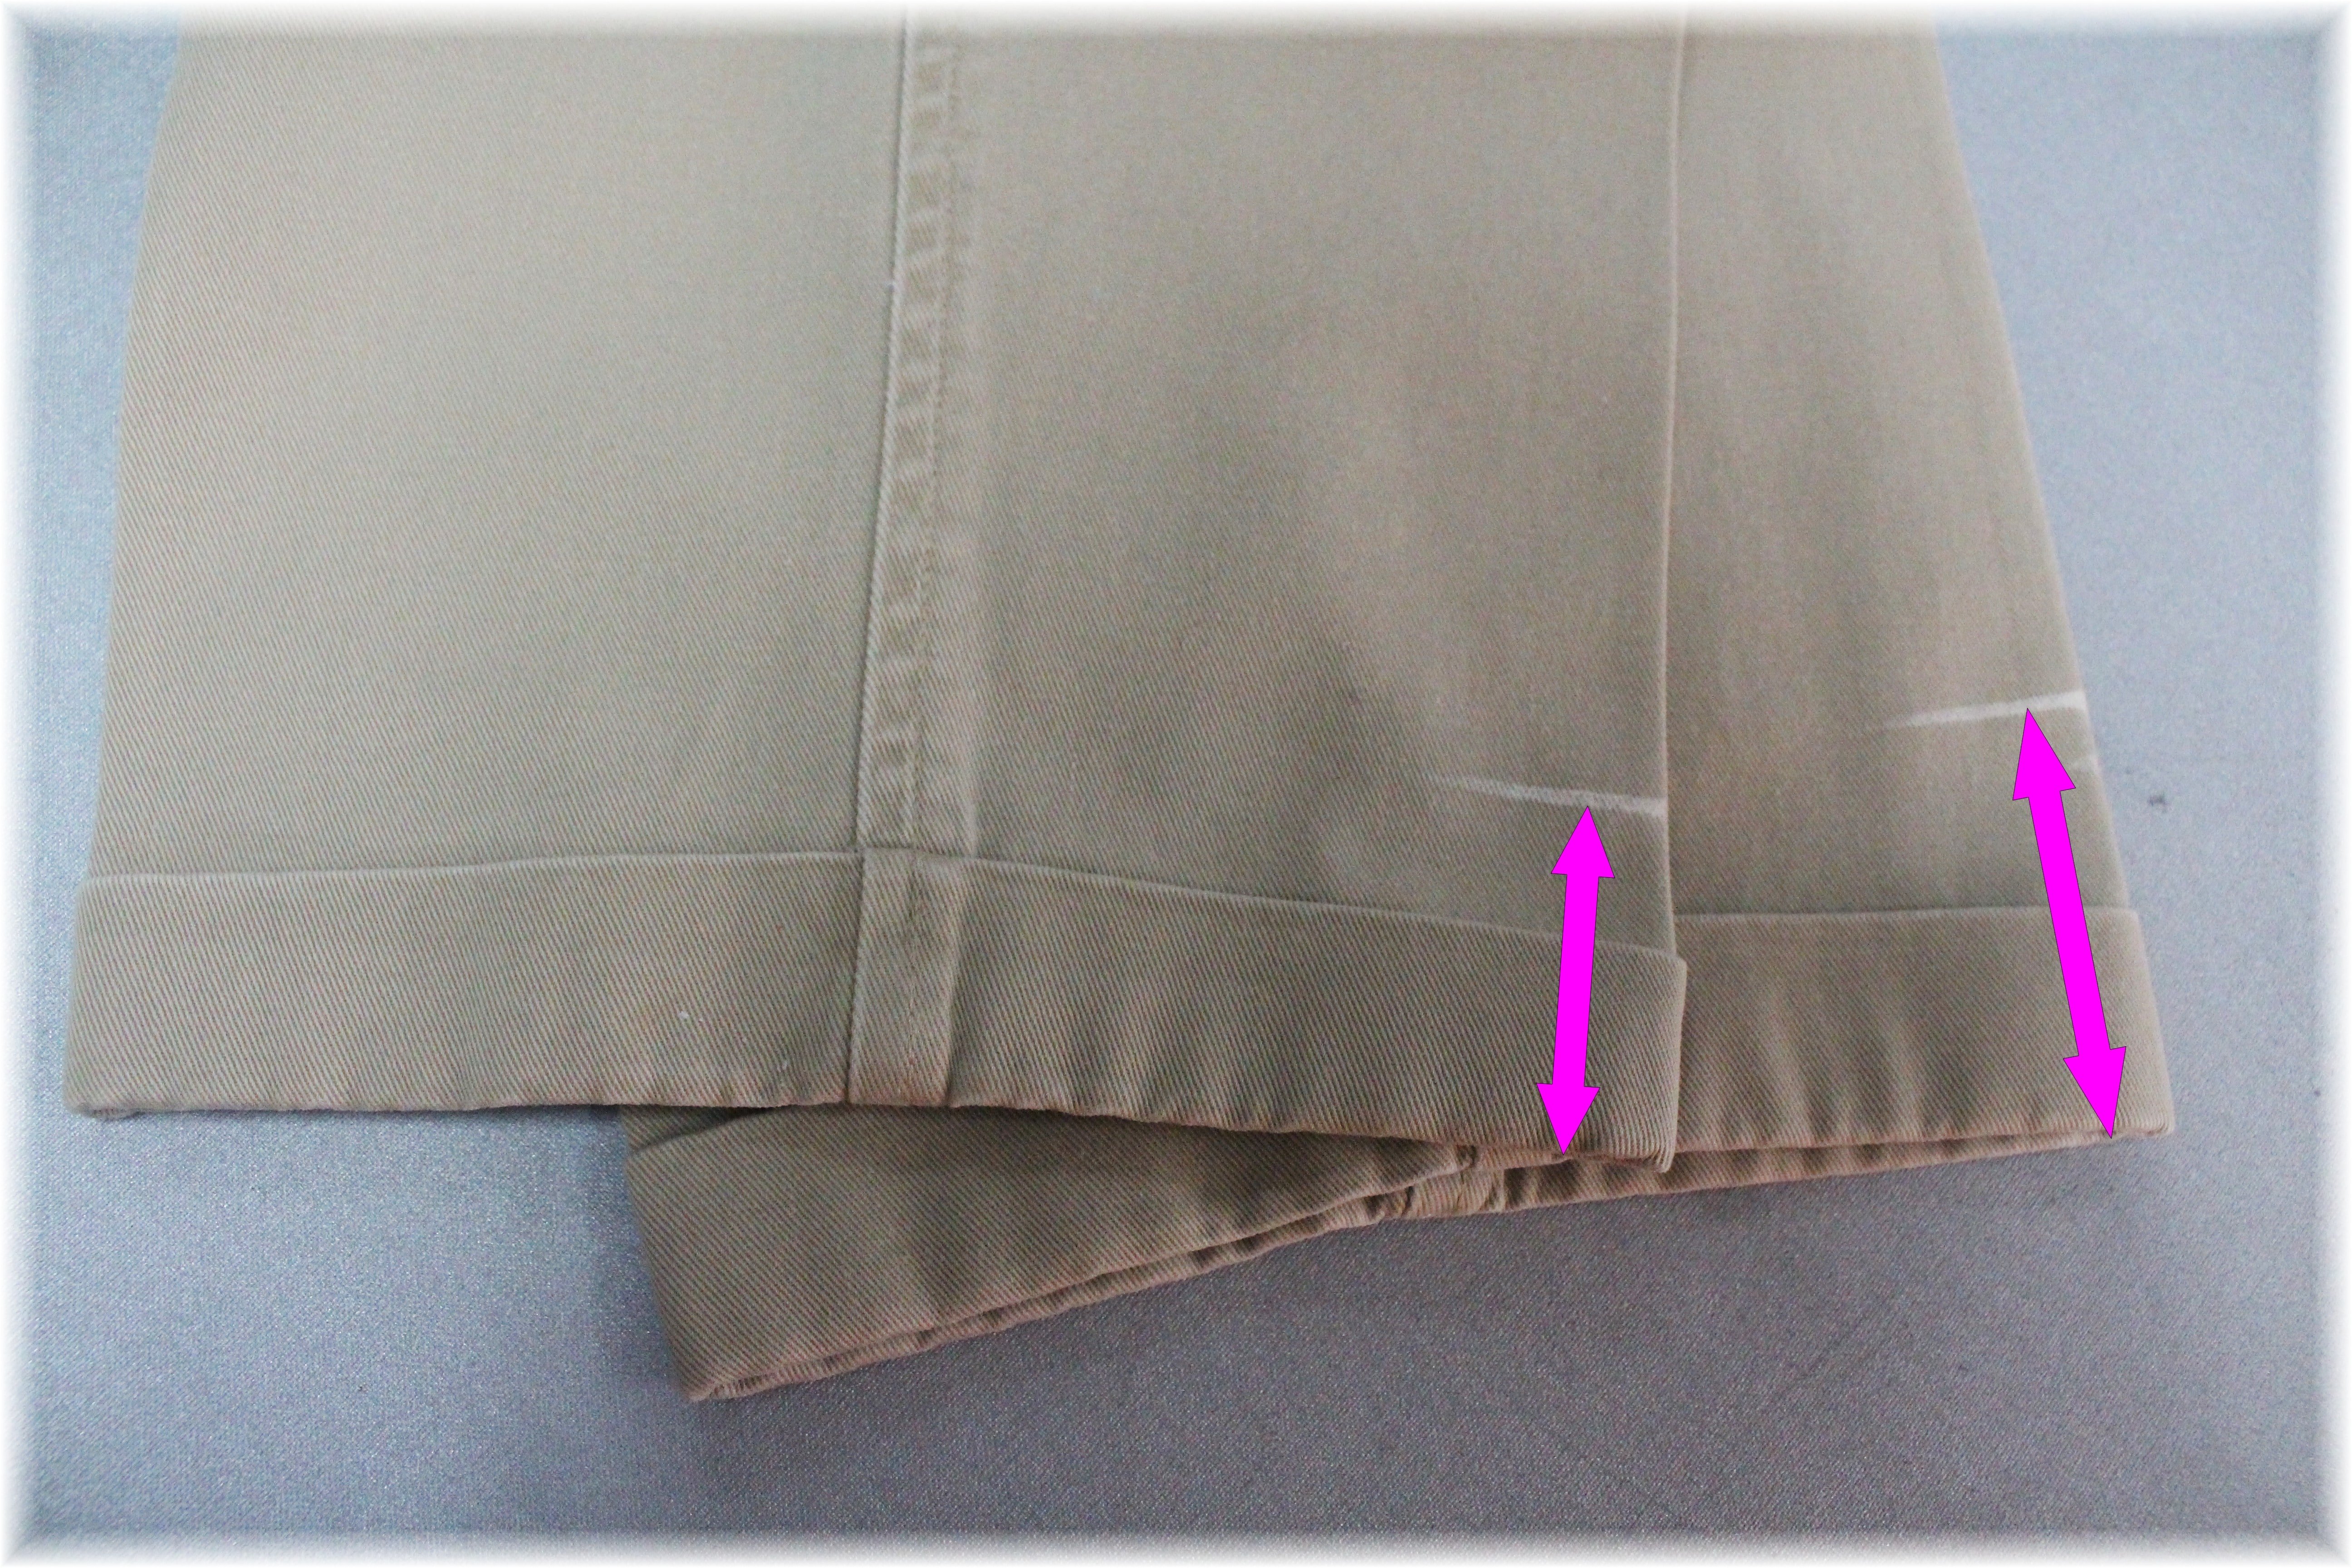
Designer Tip: Notice the pink arrows in the above photo. They are pointing to the original crease marks. If you have difficulty pressing out the original creases on use a dab of water and rub the fabric with a piece of cotton or a brush. Another trick is to use a little vinegar, but be sure to test on on the hem allowance first to make sure the technique doesn’t stain your fabric.
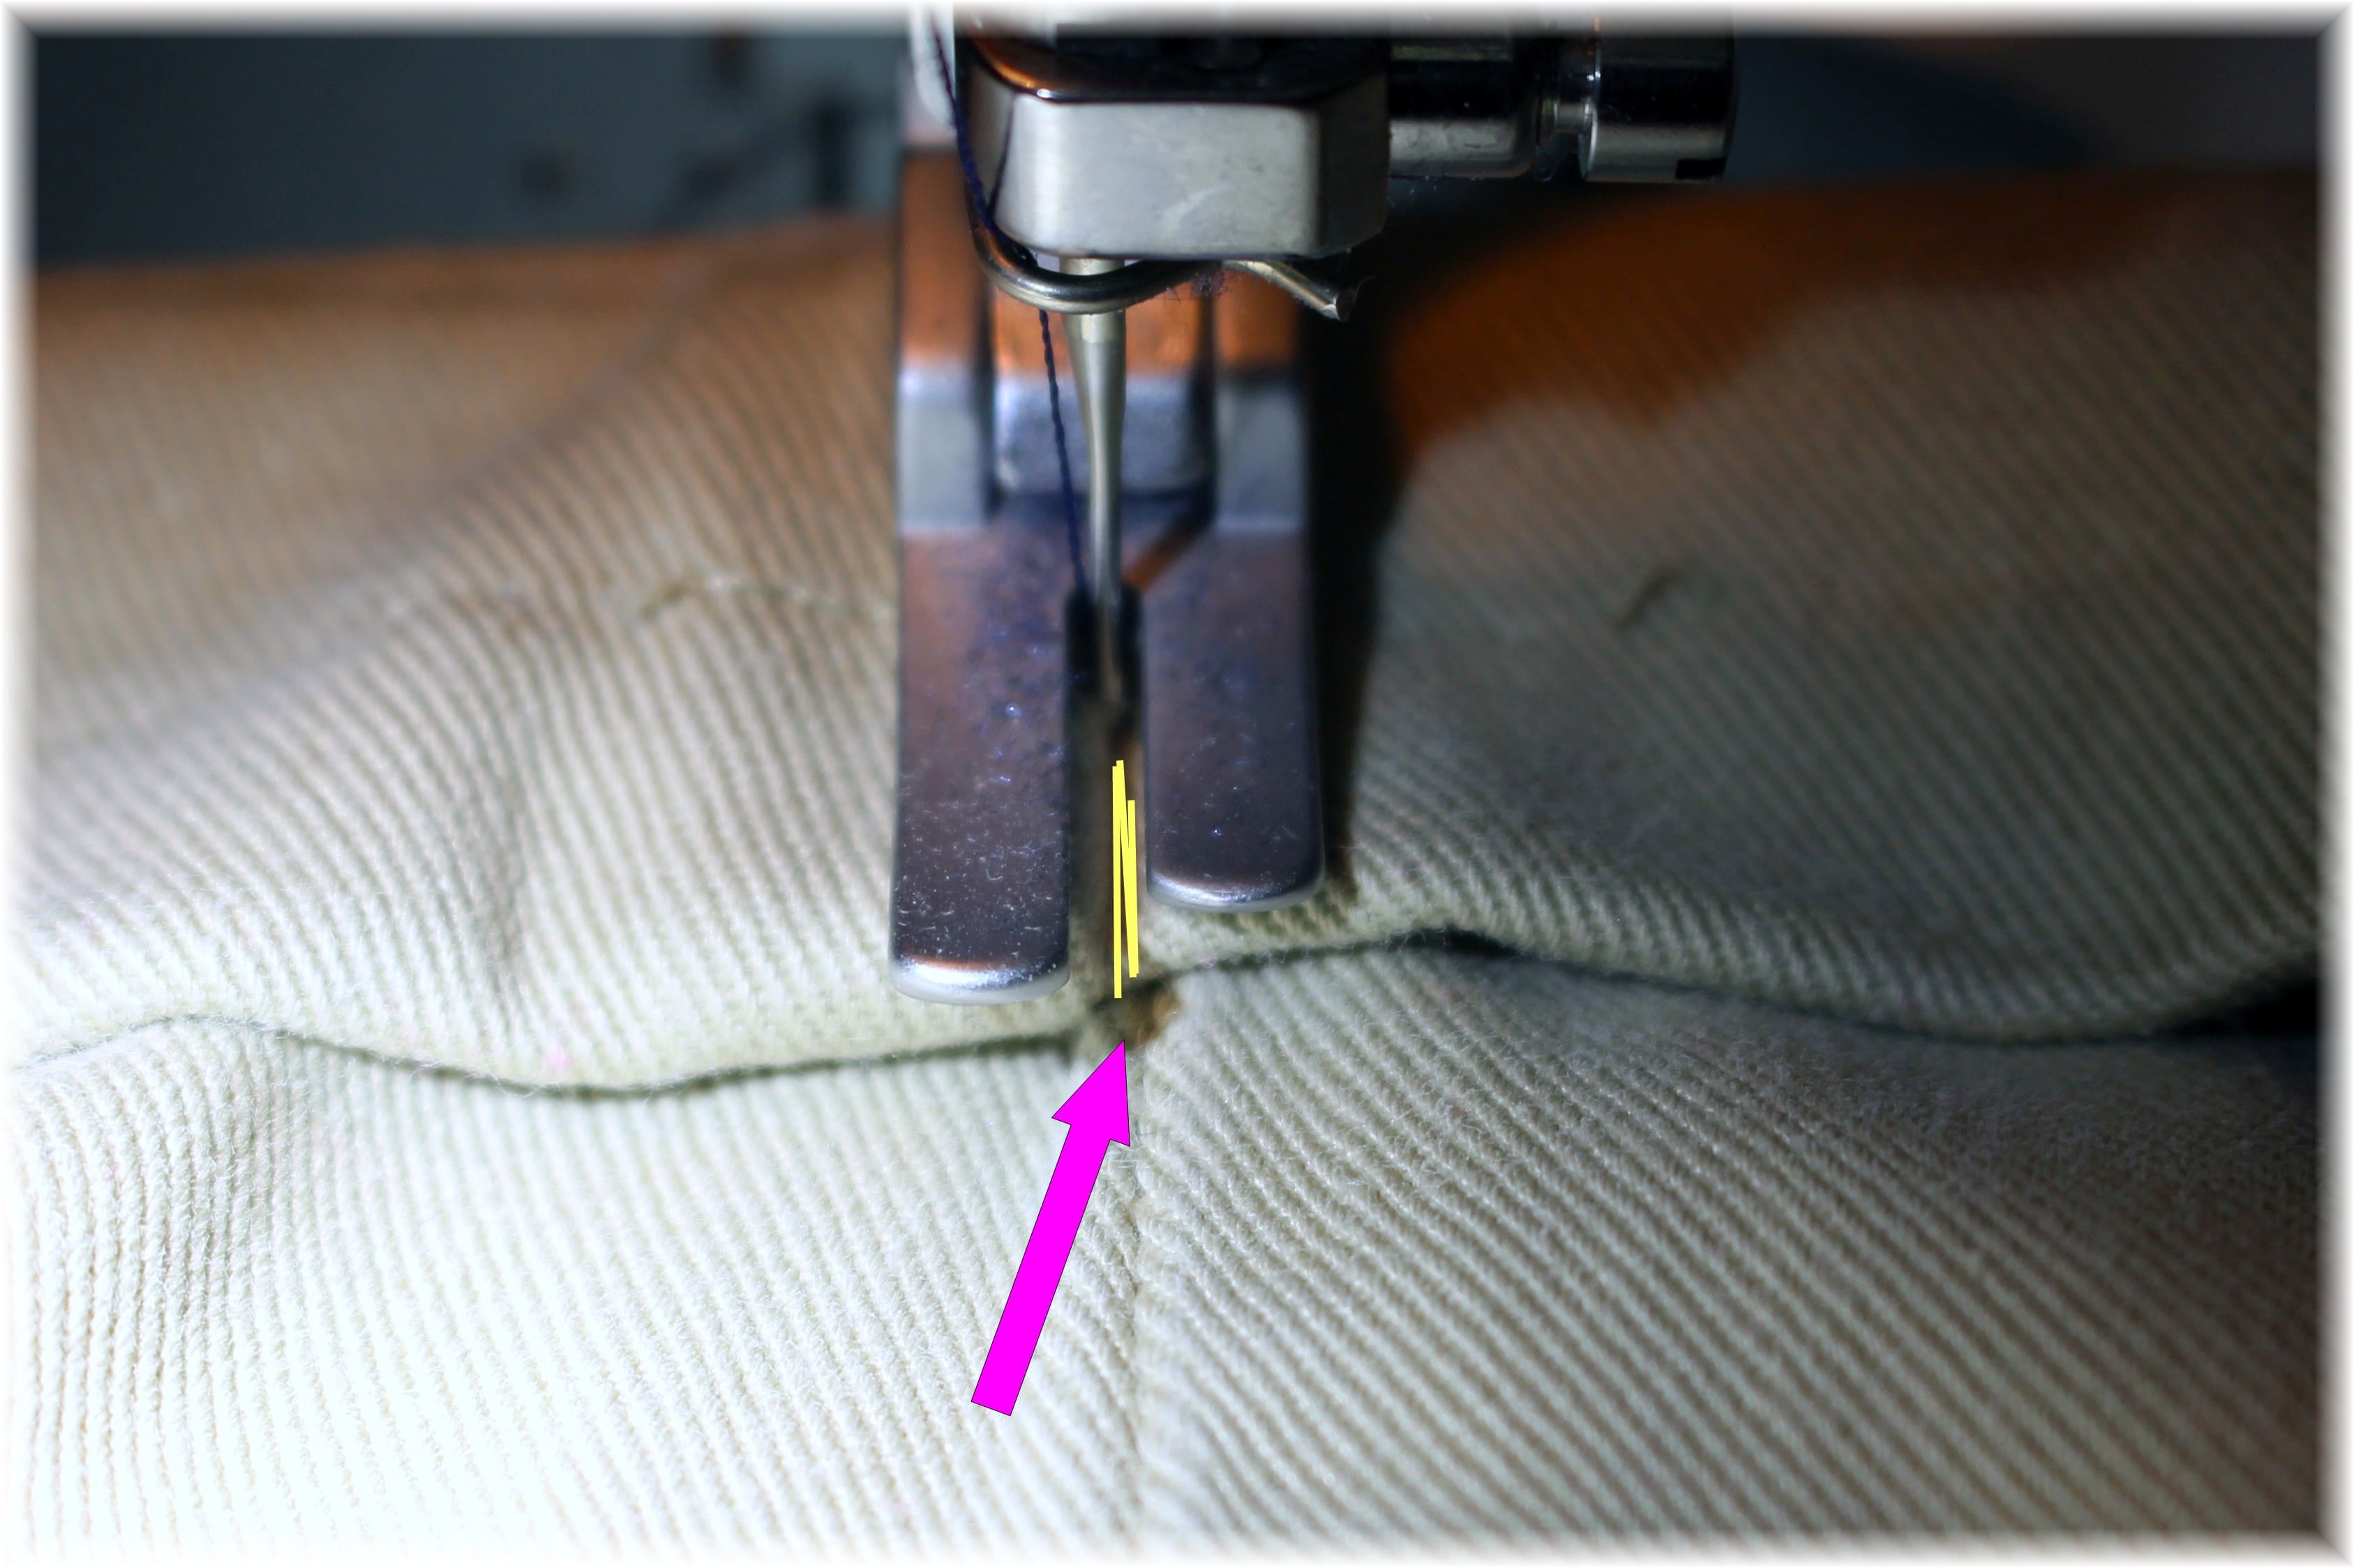
Step 18: Tack the cuff in place at the inseam and the outside leg seam. The trick is to embed your stitches into the seam so you can’t see them. Give the hem a final pressing and you are all finished!
I hope this tutorial helps take the fear out of hemming cuffed pants!
Cheers, 


Join Me on Craftsy!
Learn to alter your own clothes or start a business!


How do you adjust the leg width to accommodate the width of the new cuff? The pant leg is wider above the cuff.
How do I make a nice cuff if the pant leg is not straight? The pants I want to shorten and cuff are wider above the cuff.
Thanks so much for putting together this excellent tutorial – it will be very useful!
Thanks Susan 🙂