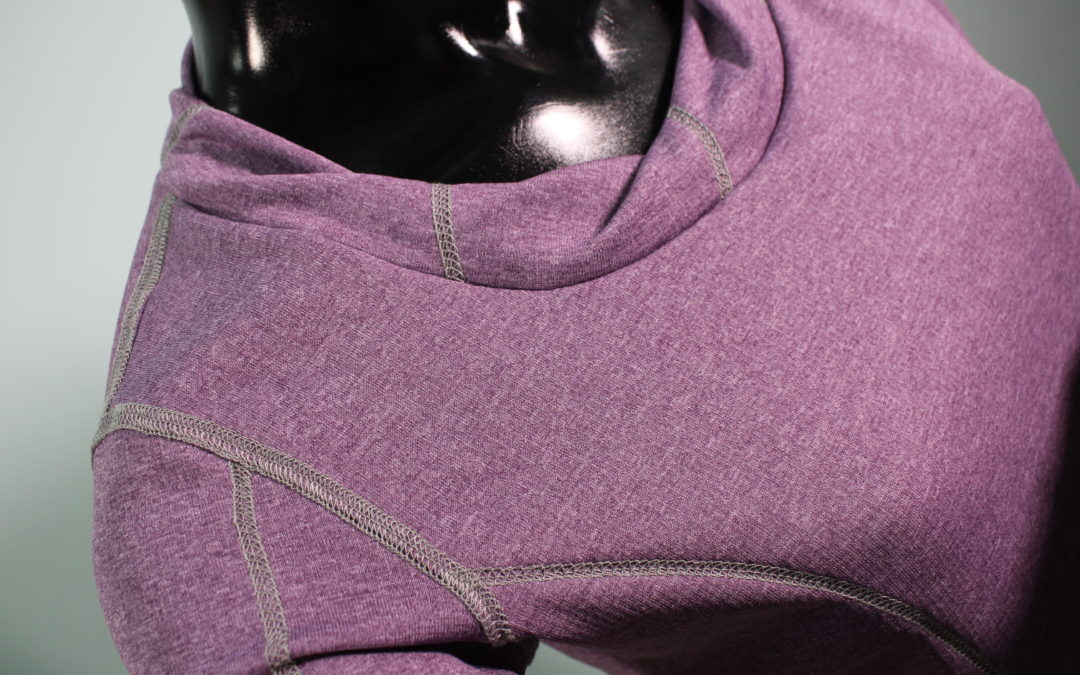
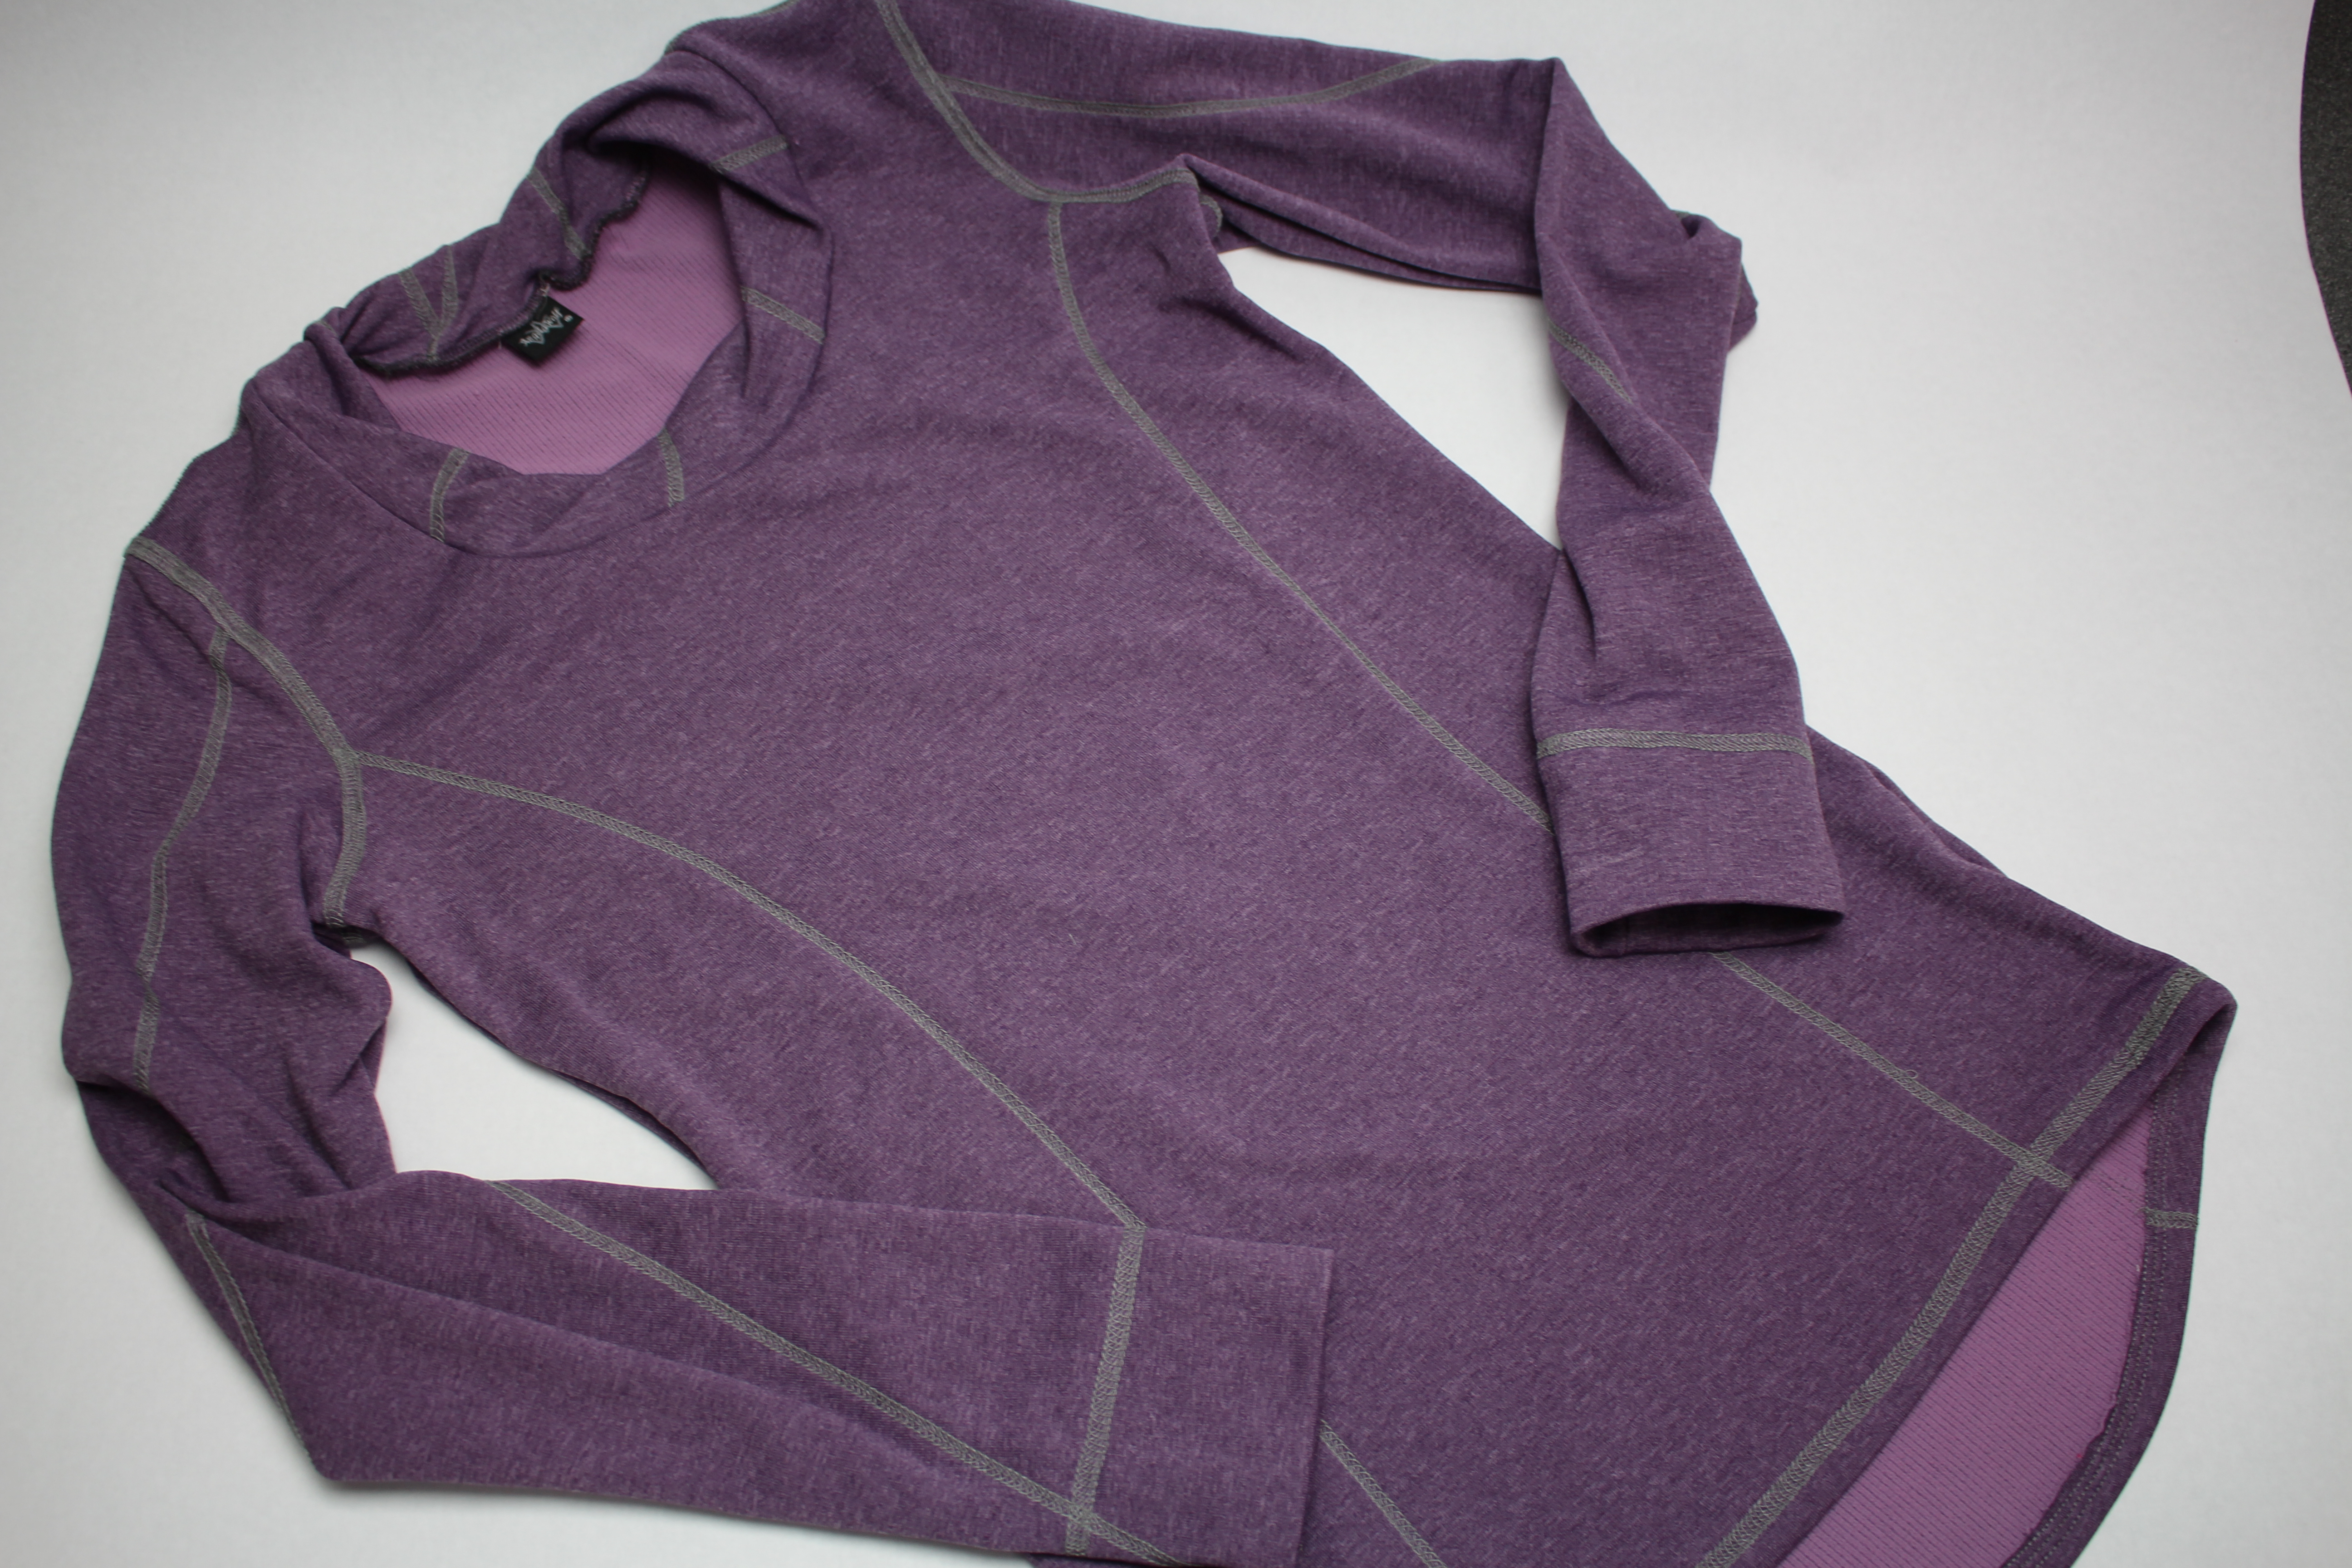
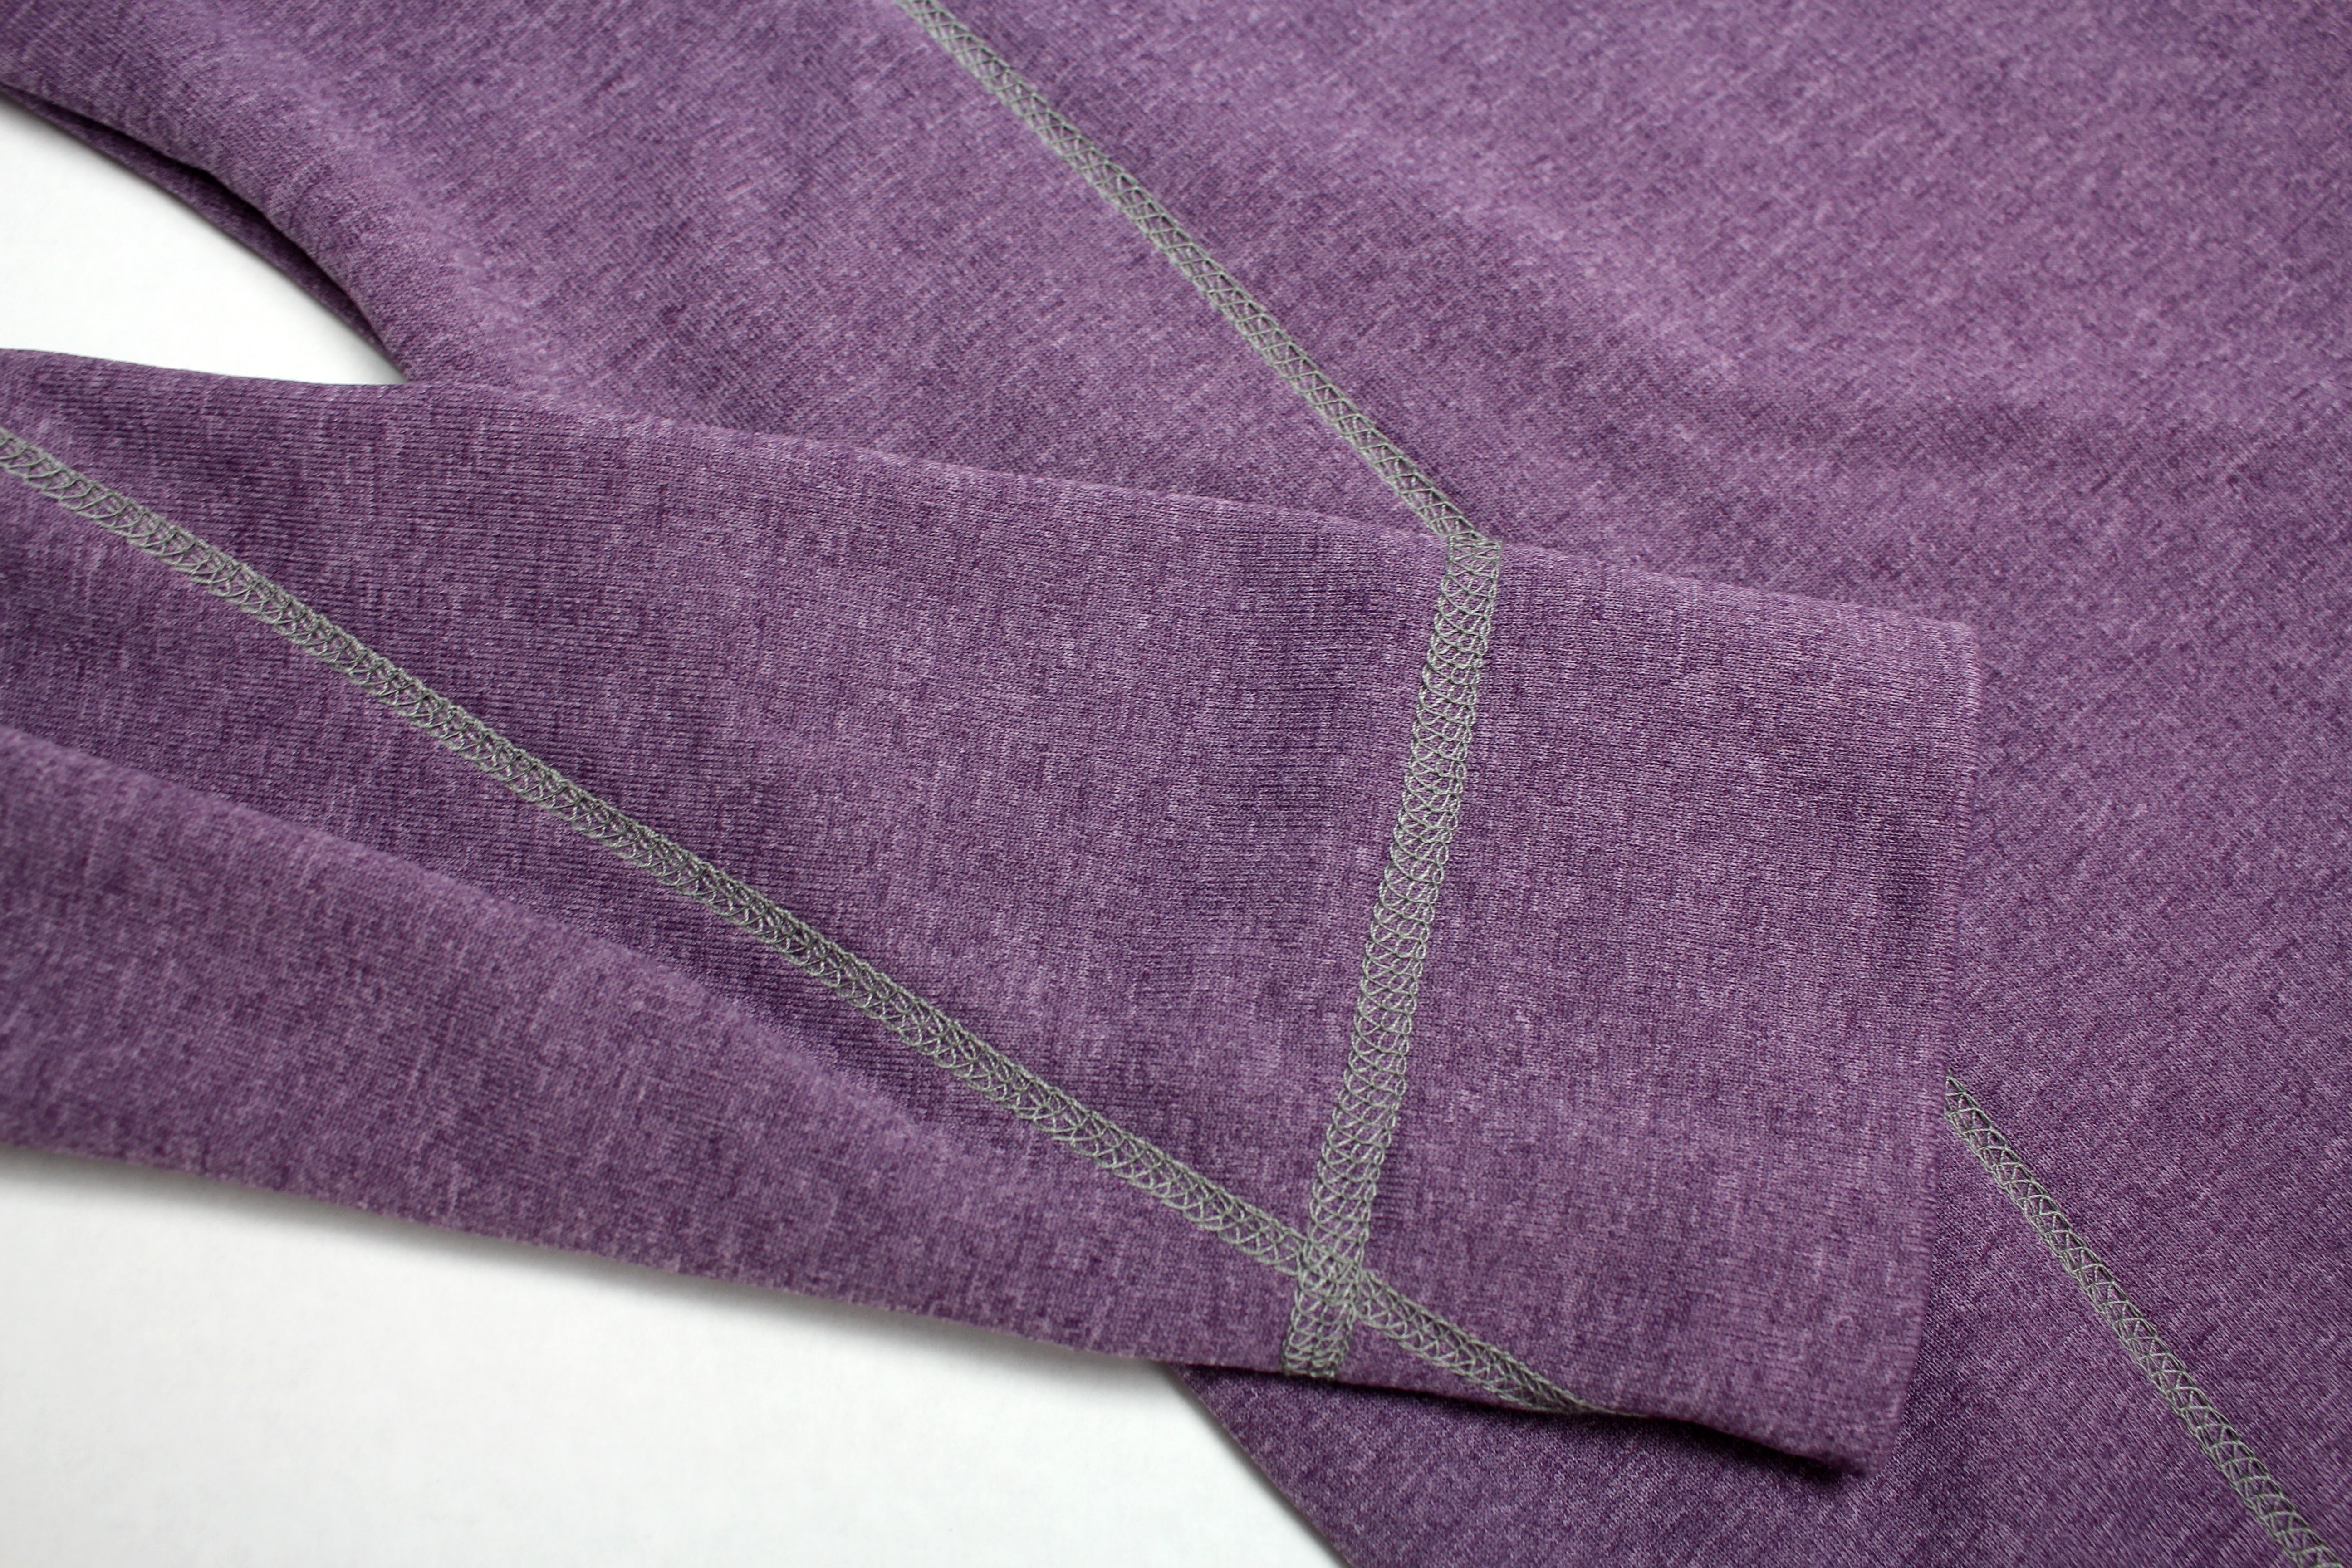
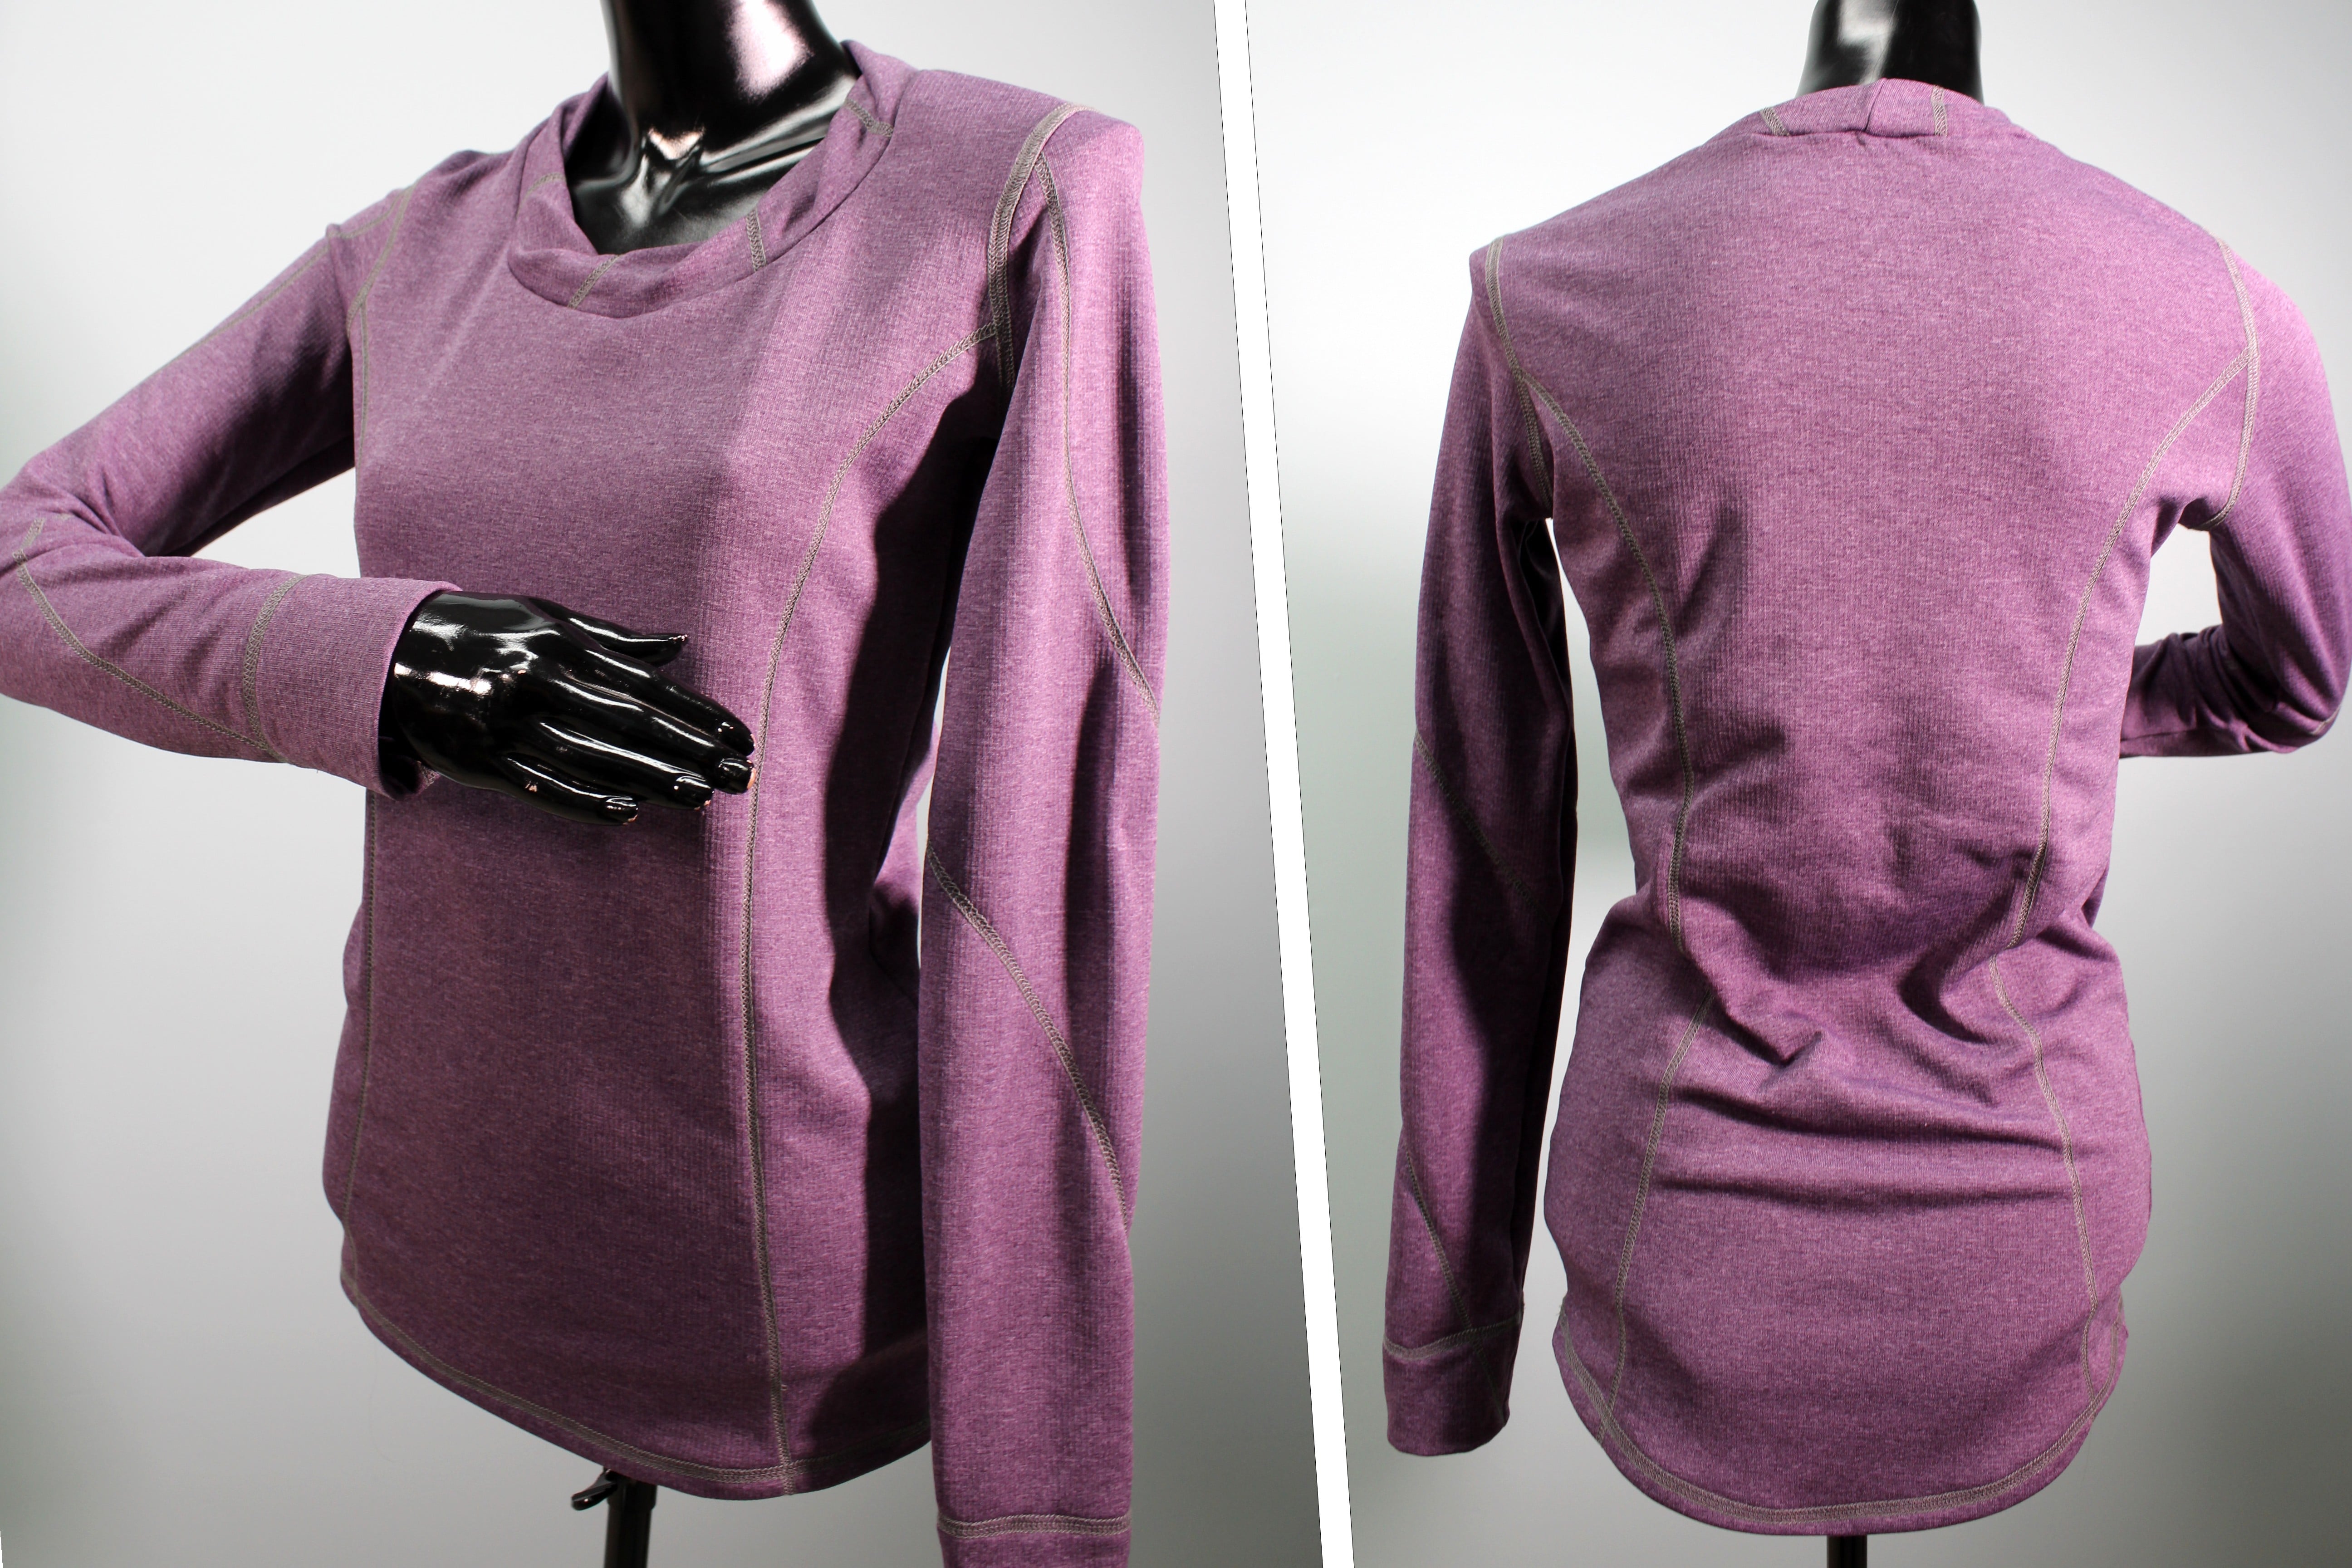
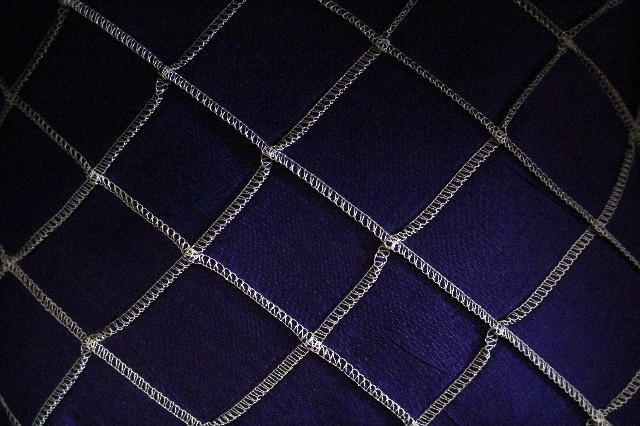
One of my favorite items to make is a simple t-shirt. It’s fast and easy when sewn with a serger. Then I use the Brother Coverstitch machine for hemming. But what about embellishing the tee with coverstitching! If you have used the Coverstitch before you will notice the back side of the coverstitch has a sporty look, similar to what we see in sportswear. For this tutorial, I am going to show you how to utilize the 3-thread Coverstitch to create this fashionable look! Let’s get started:
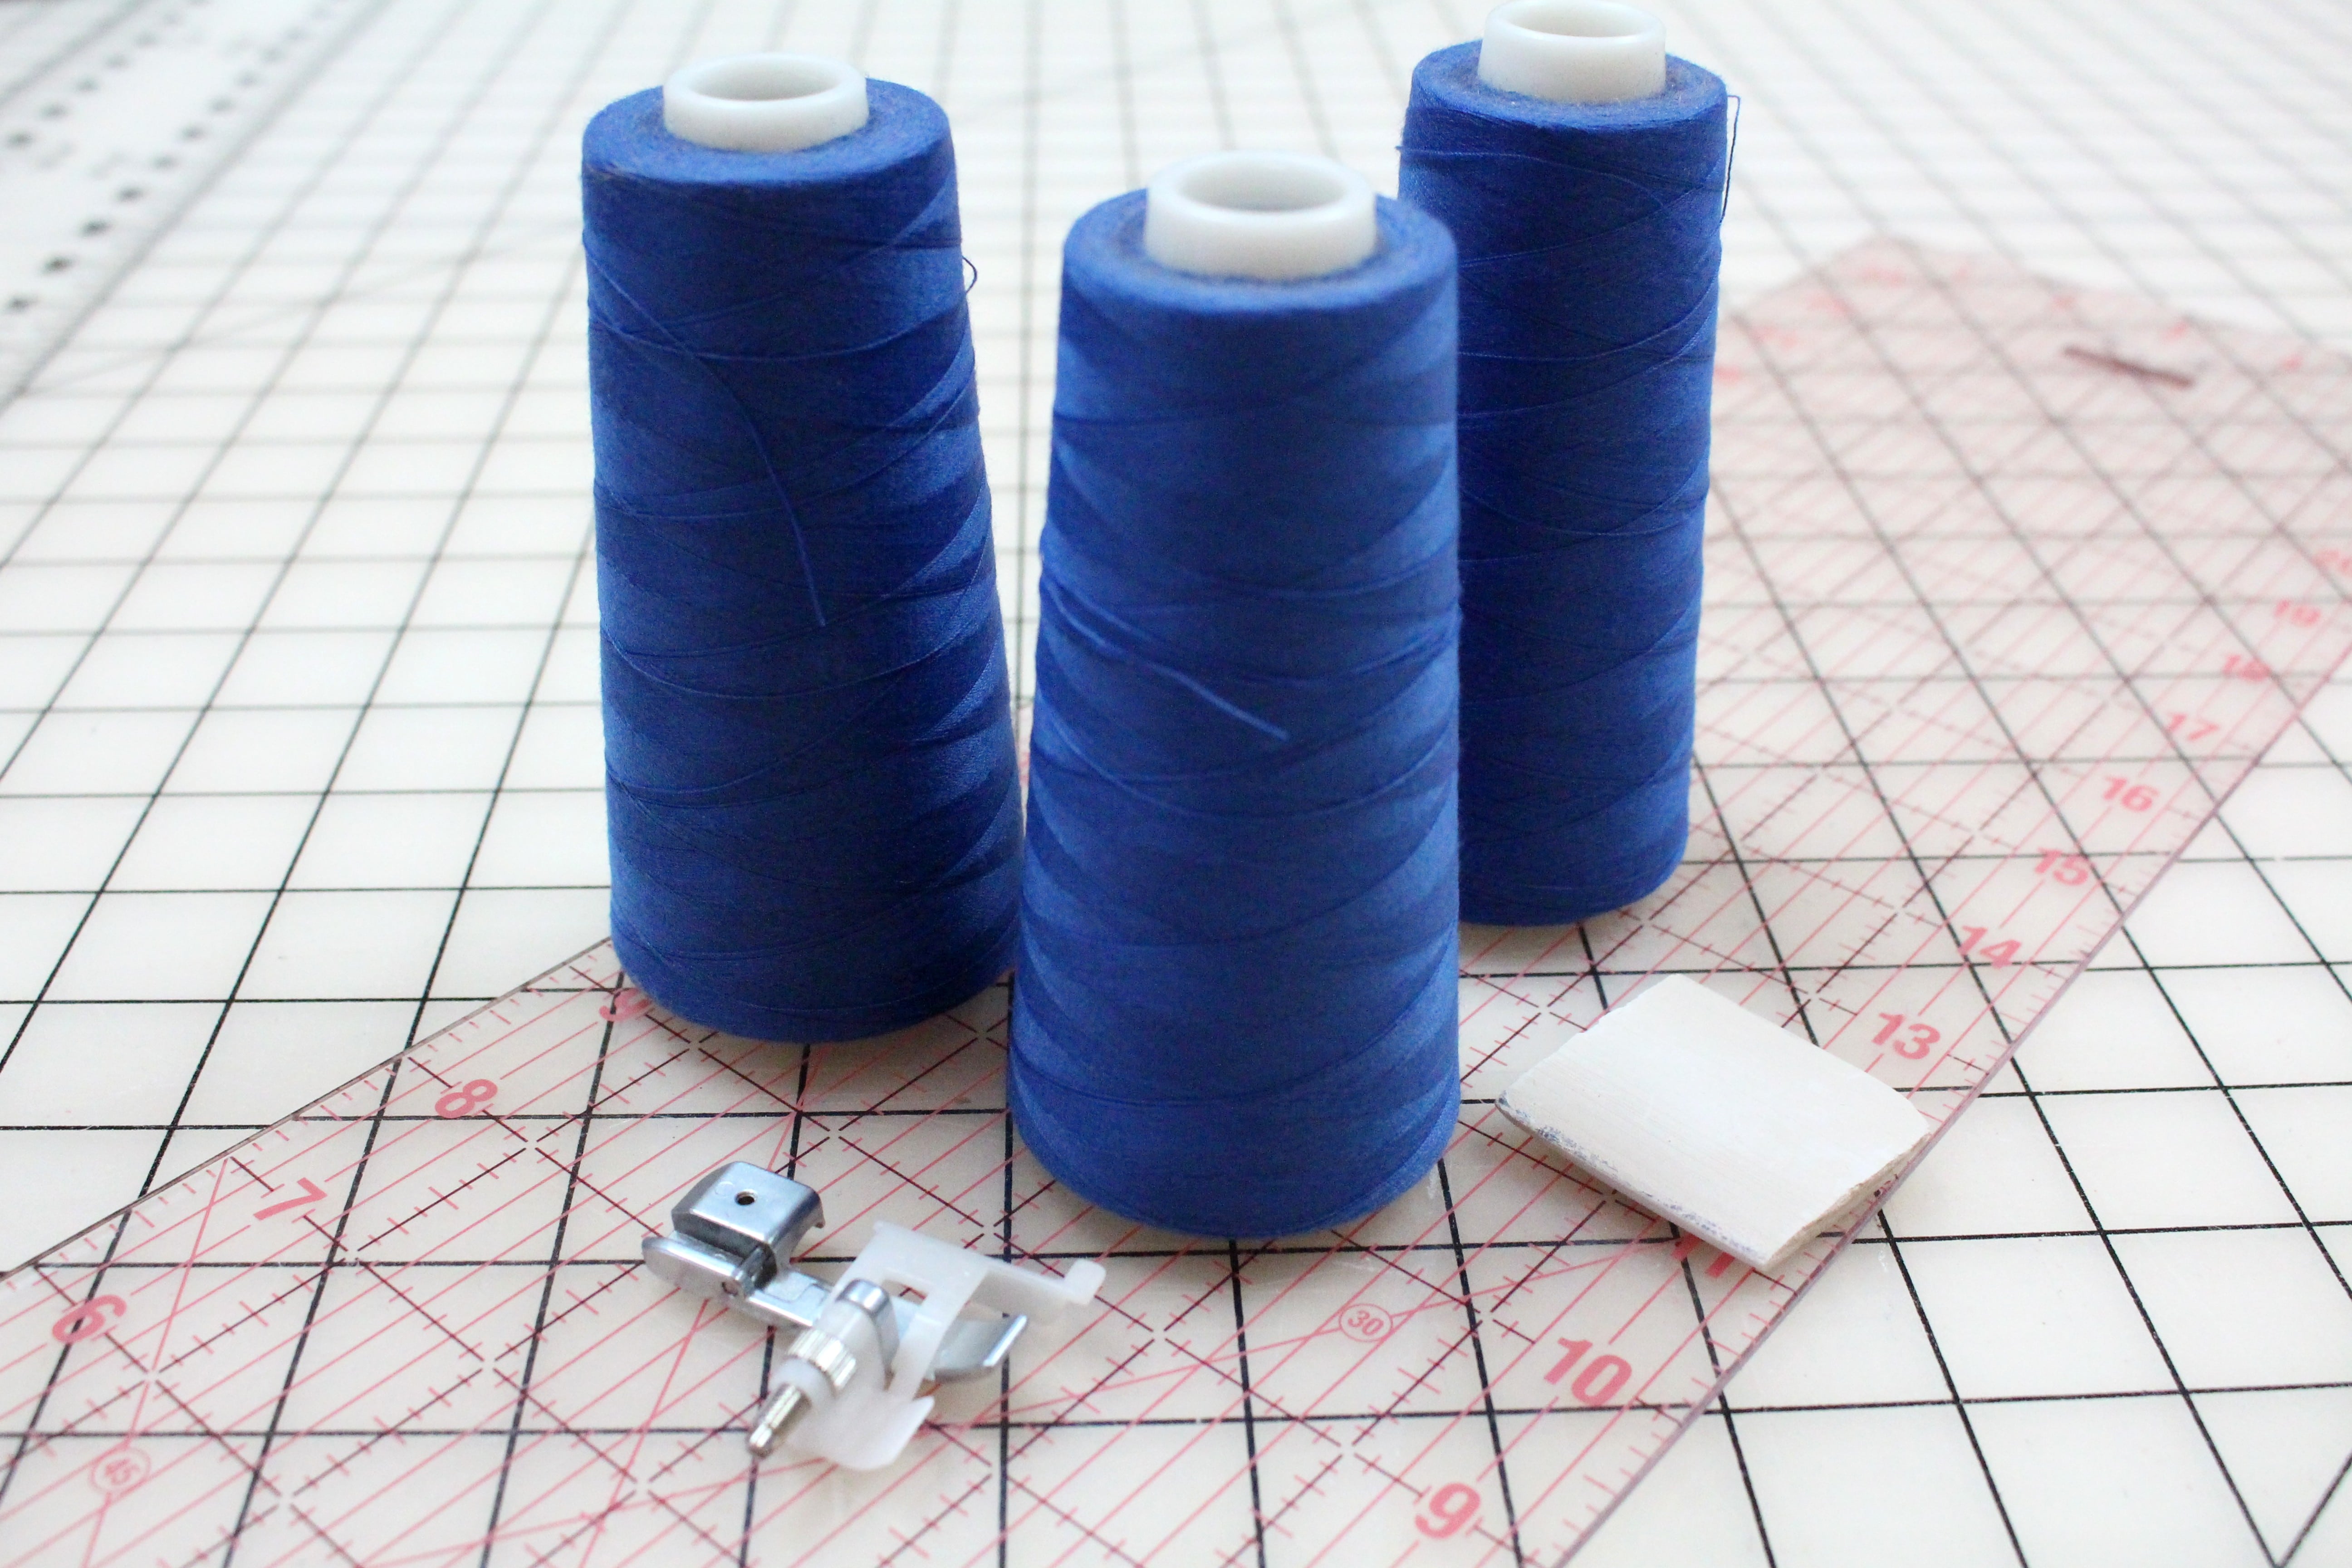
Materials:
Angela Wolf Ruched-T Pattern (Click ?? here to order and use coupon code BROTHER20 for a 20% discount)
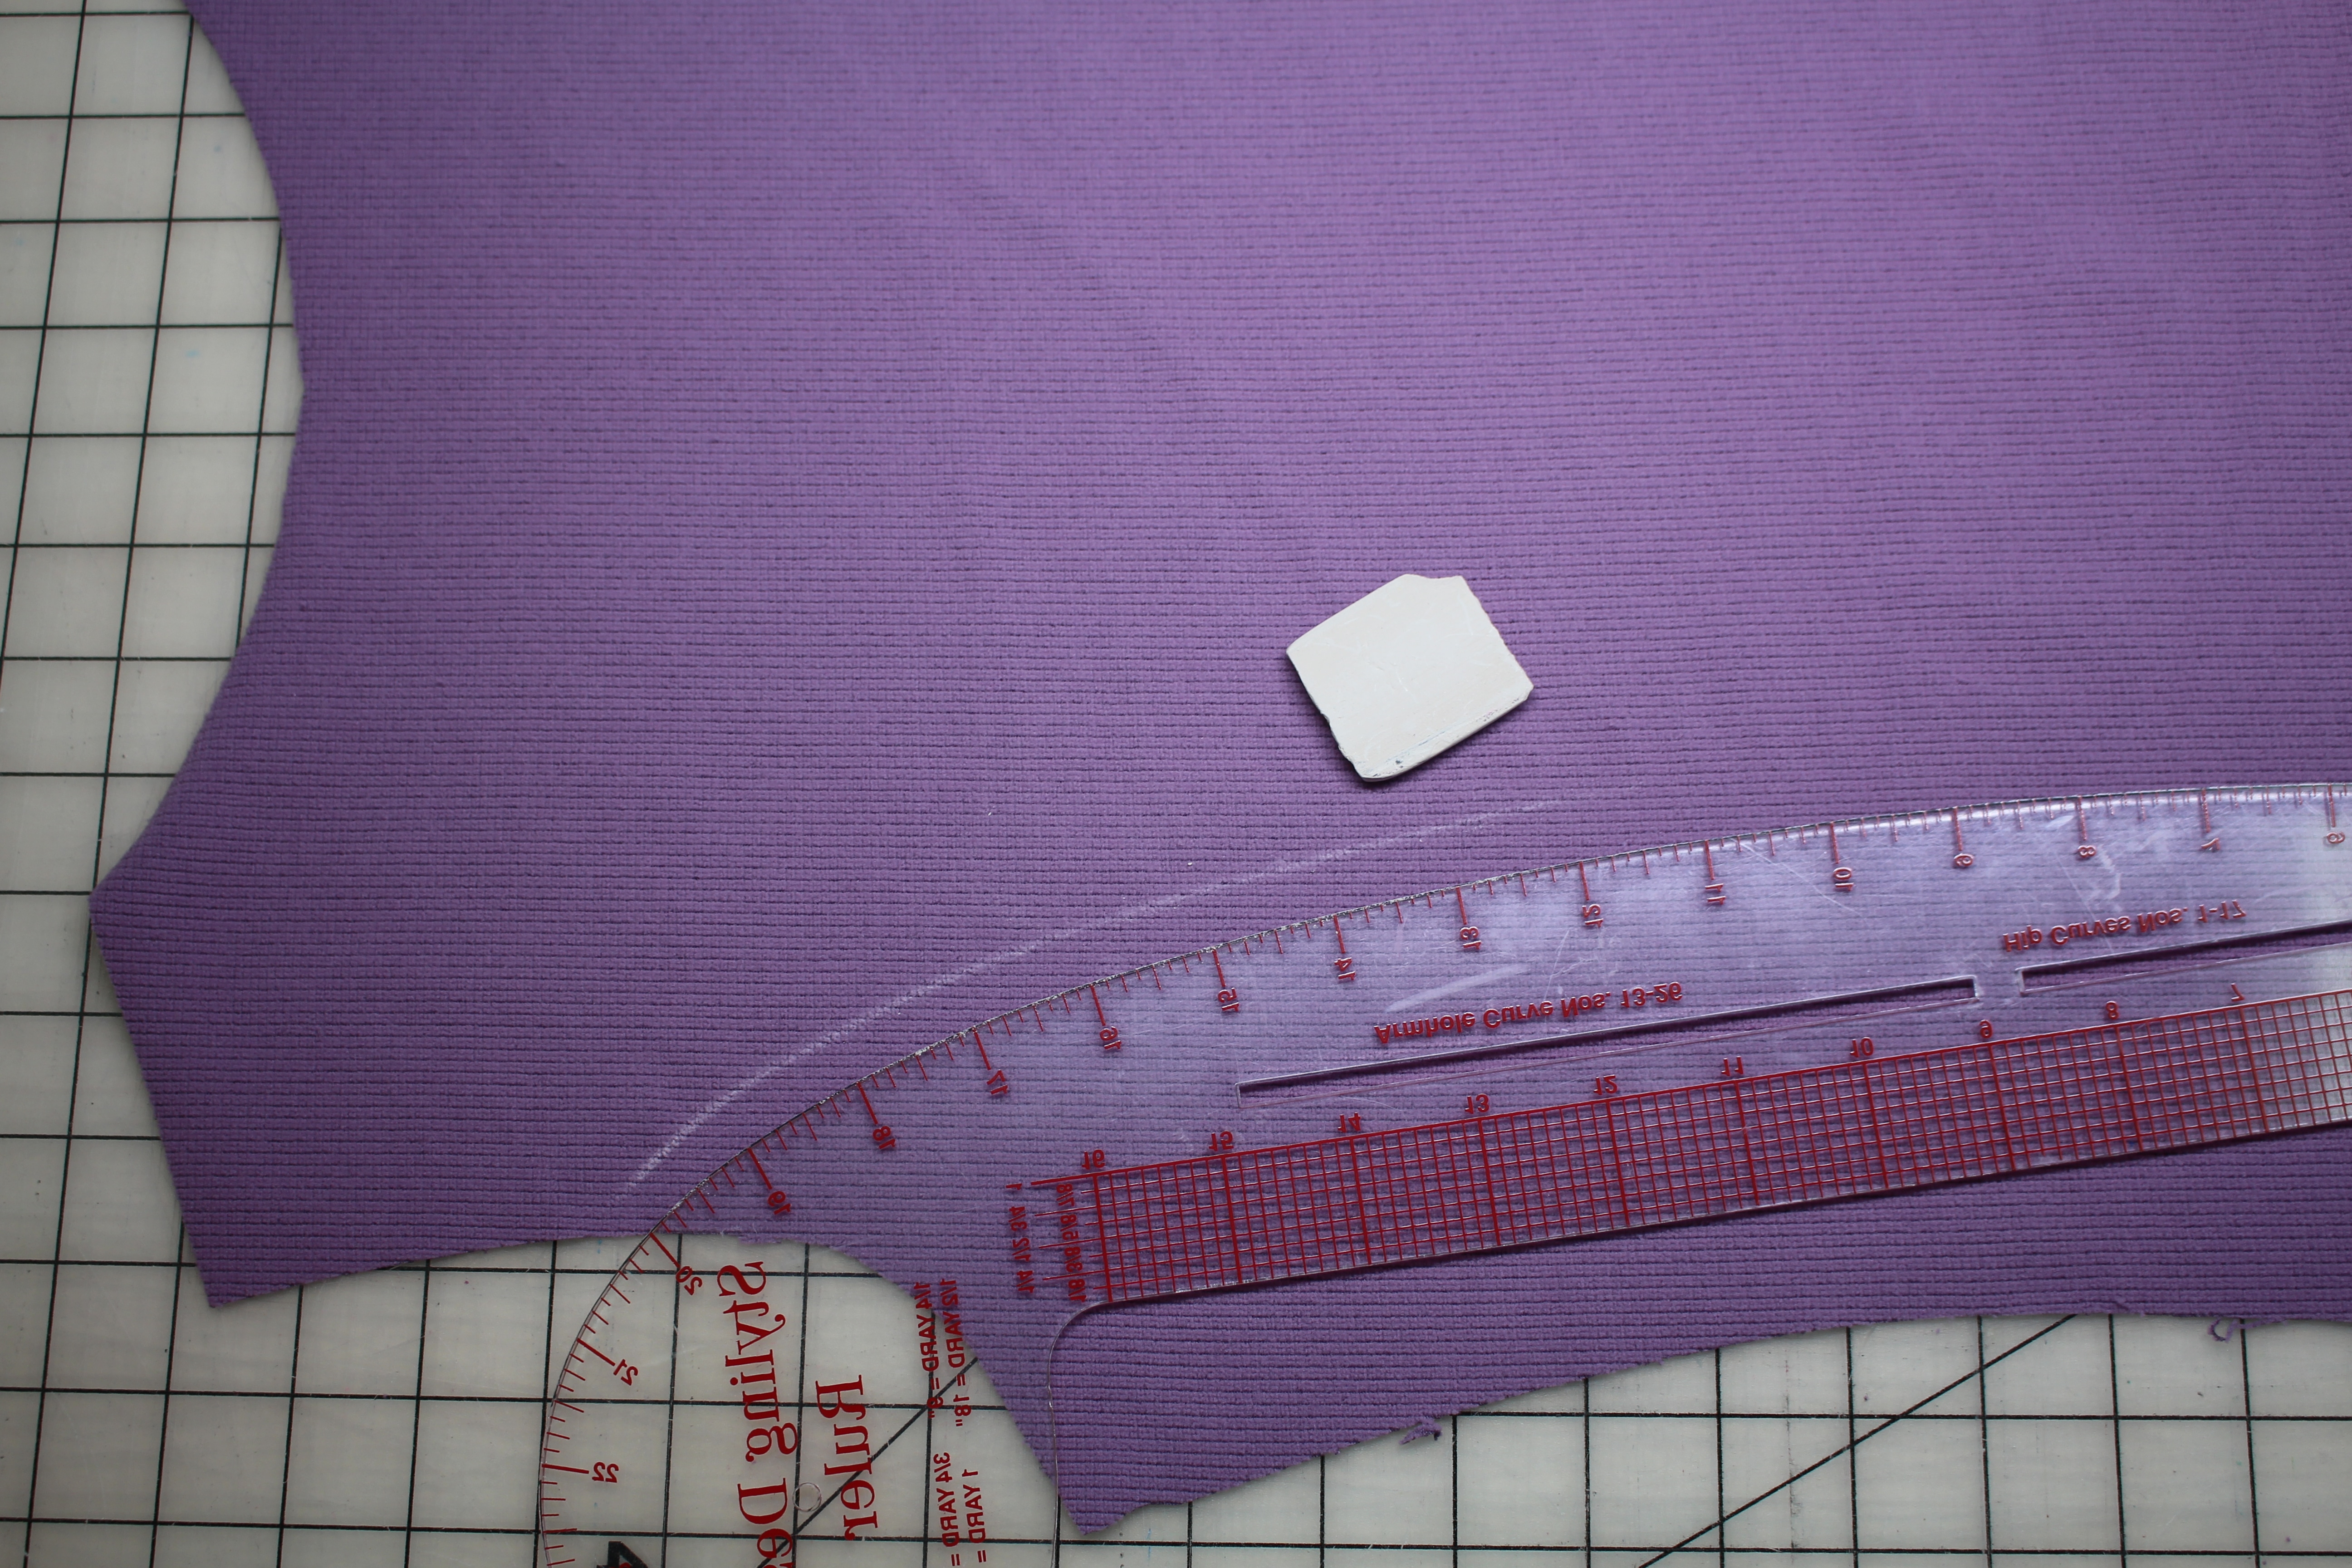
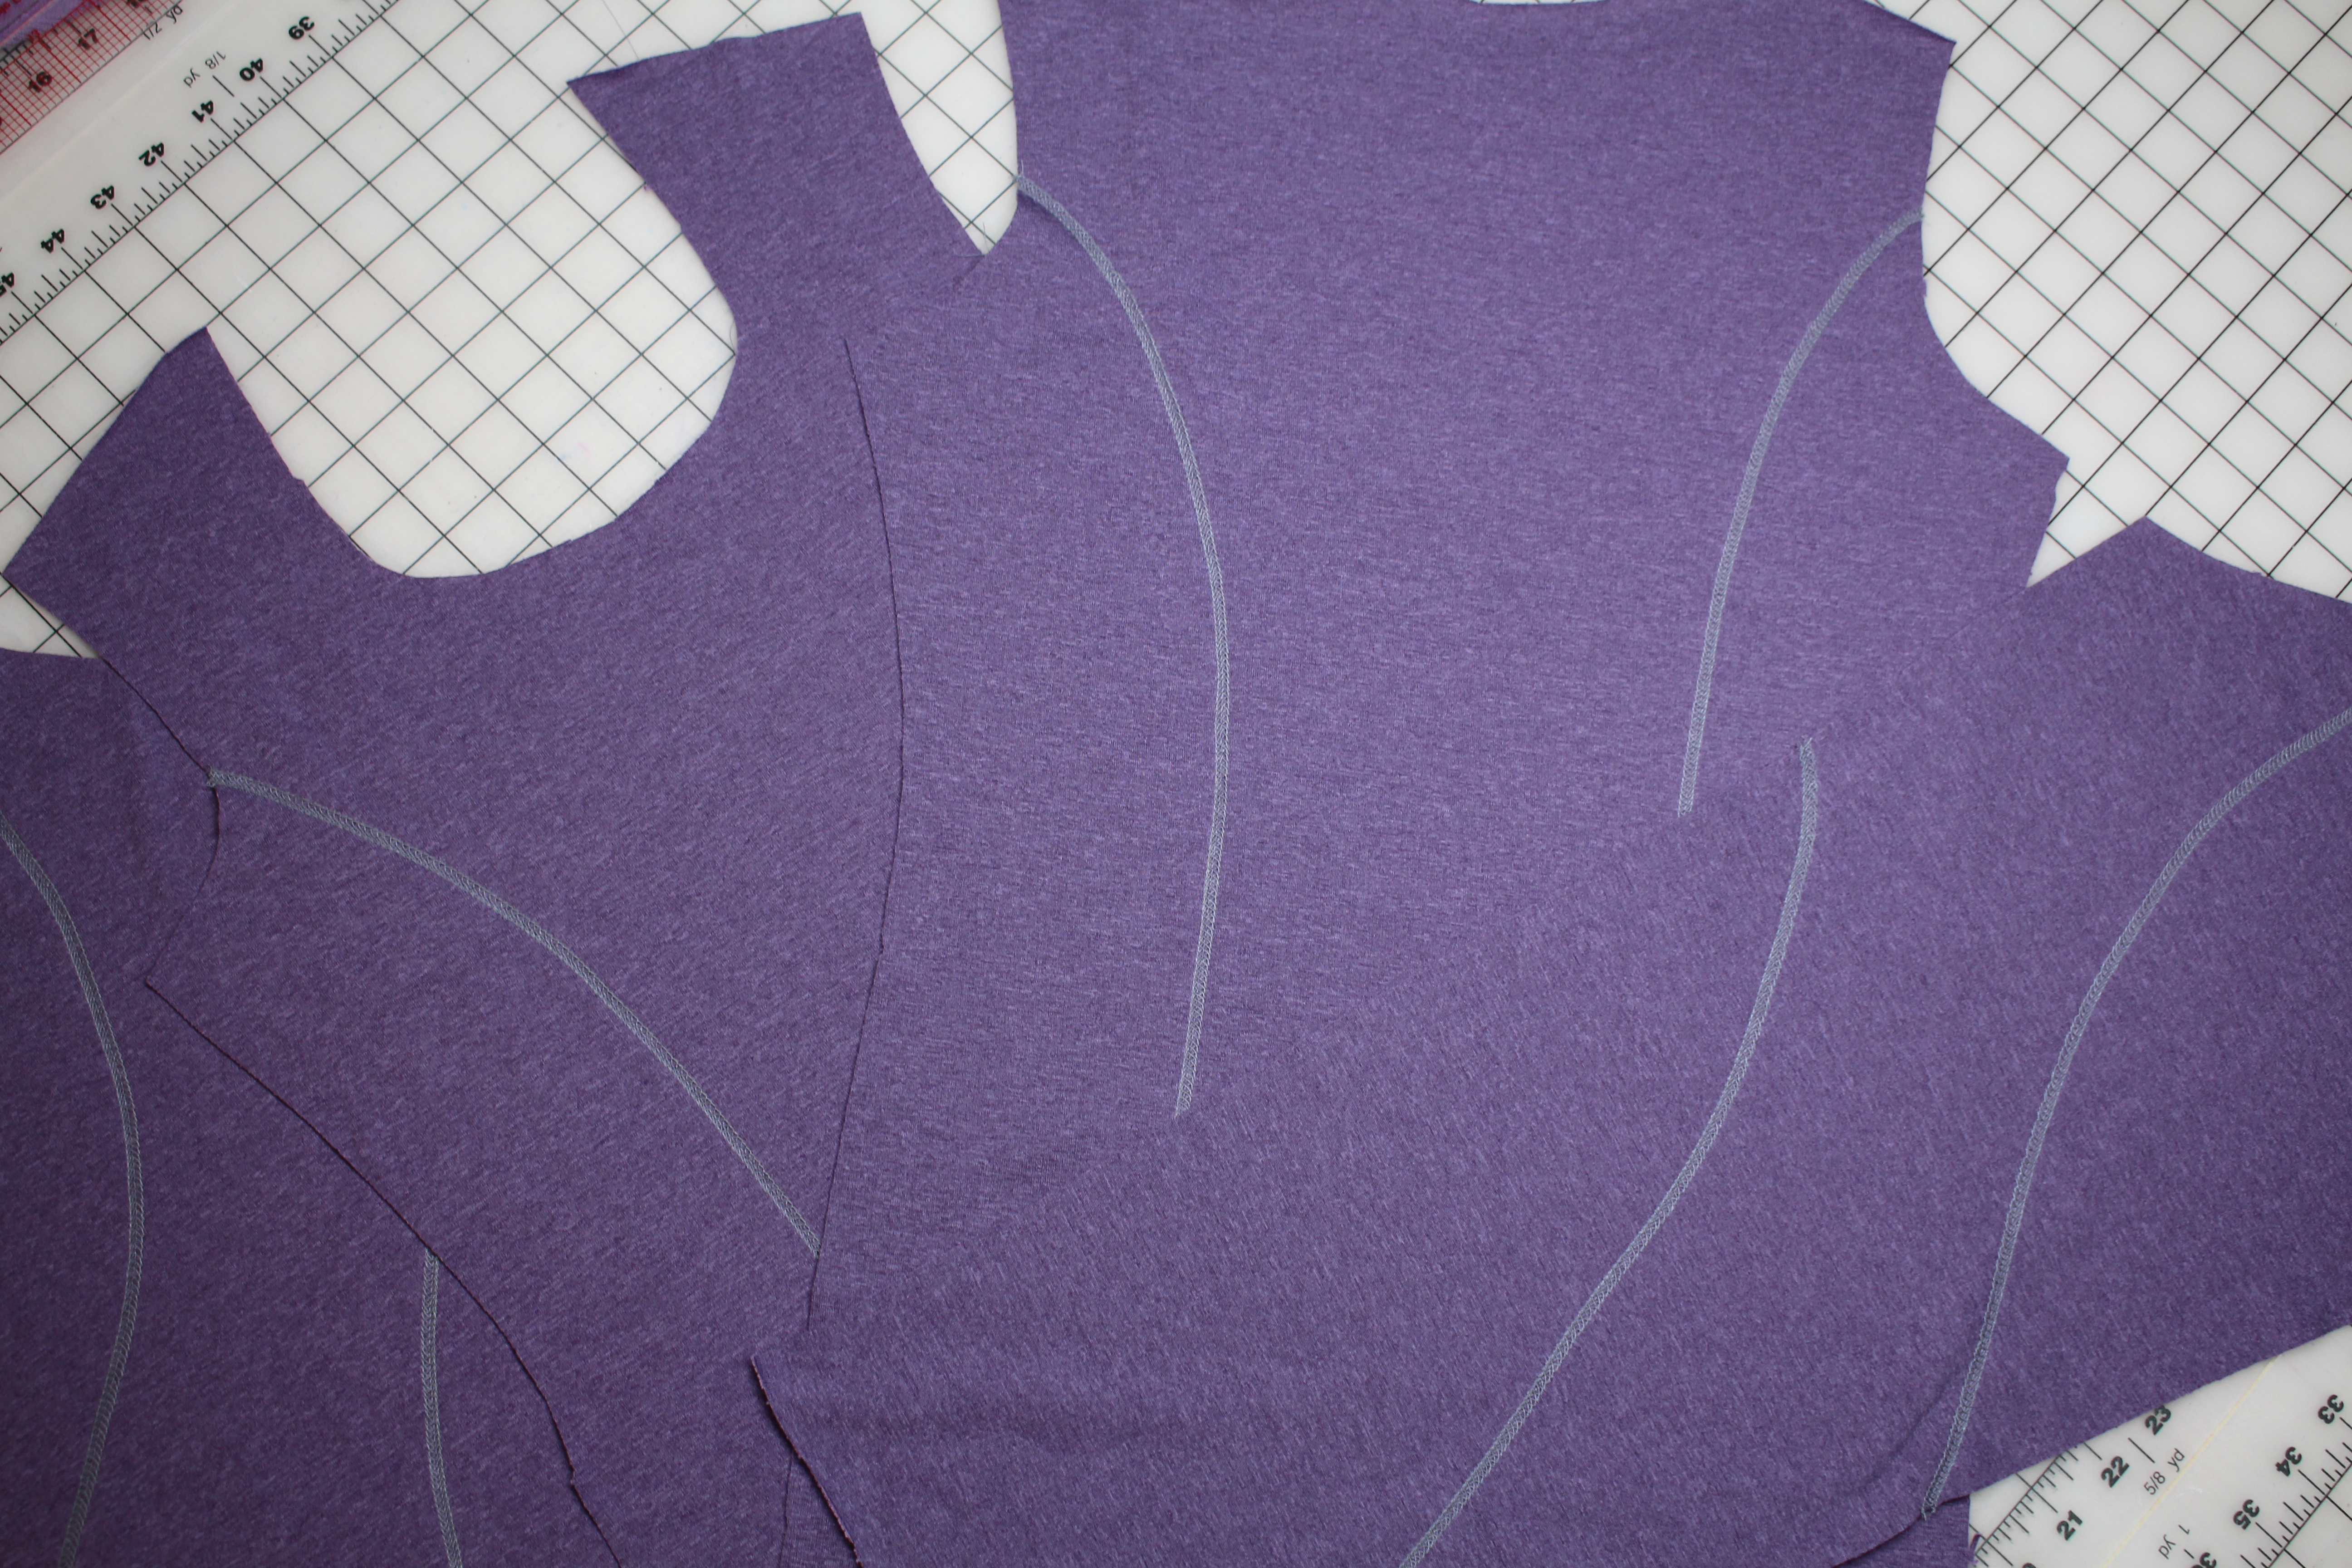
Cut out the pattern. My T-shirt pattern pieces consist of 1 Front, 1 Back, 2 Sleeves, and 1 Collar. There are not princess seams, but I want to add the illusion there are princess seams. Starting with the front pattern, on the wrong side of the fabric, draw a line from the armscye to the hem. Use a curved ruler if you need help drawing the curve .
Fold the fabric in half and use your hand to brush the fabric. This will trace the chalk mark to the other side of the fabric.
Open the fabric back up and you should see a faint line from the first chalk marking. Use the chalk to trace over this line, making it darker and easier to see. Do the same thing for the BACK pattern piece. For the collar and sleeve, draw randomly placed chalked lines.
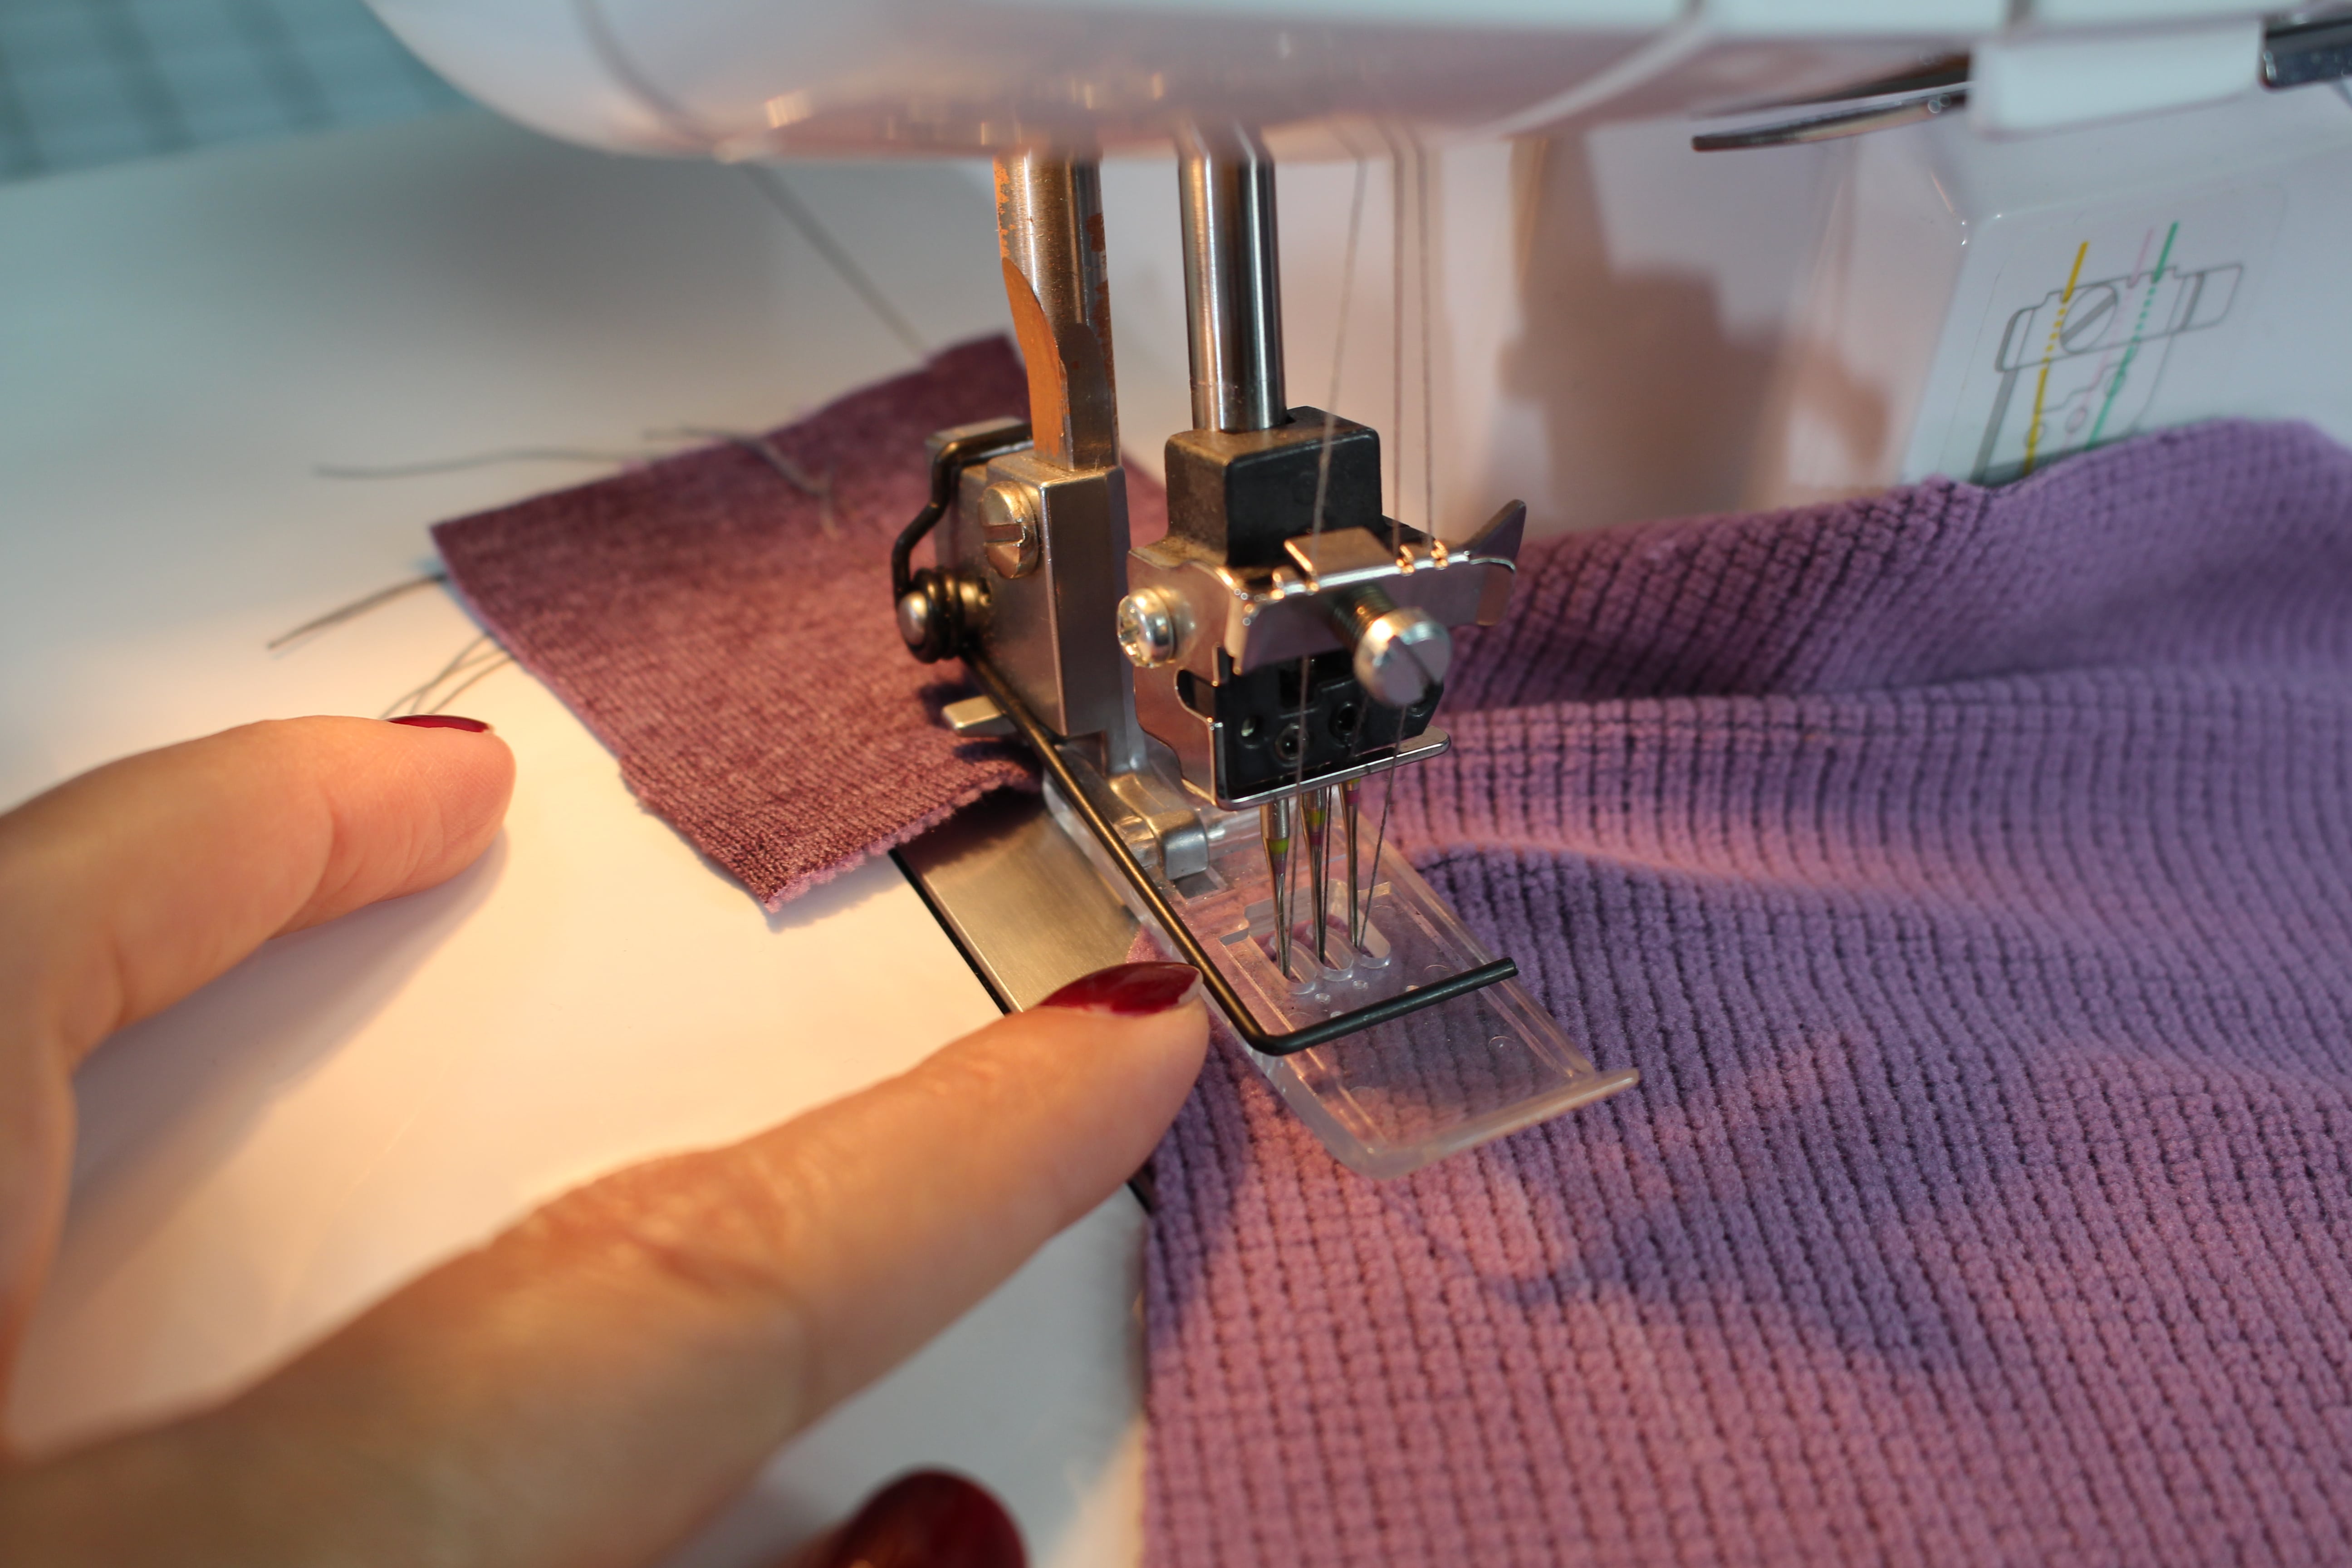
SET UP THE COVERSTITCH MACHINE
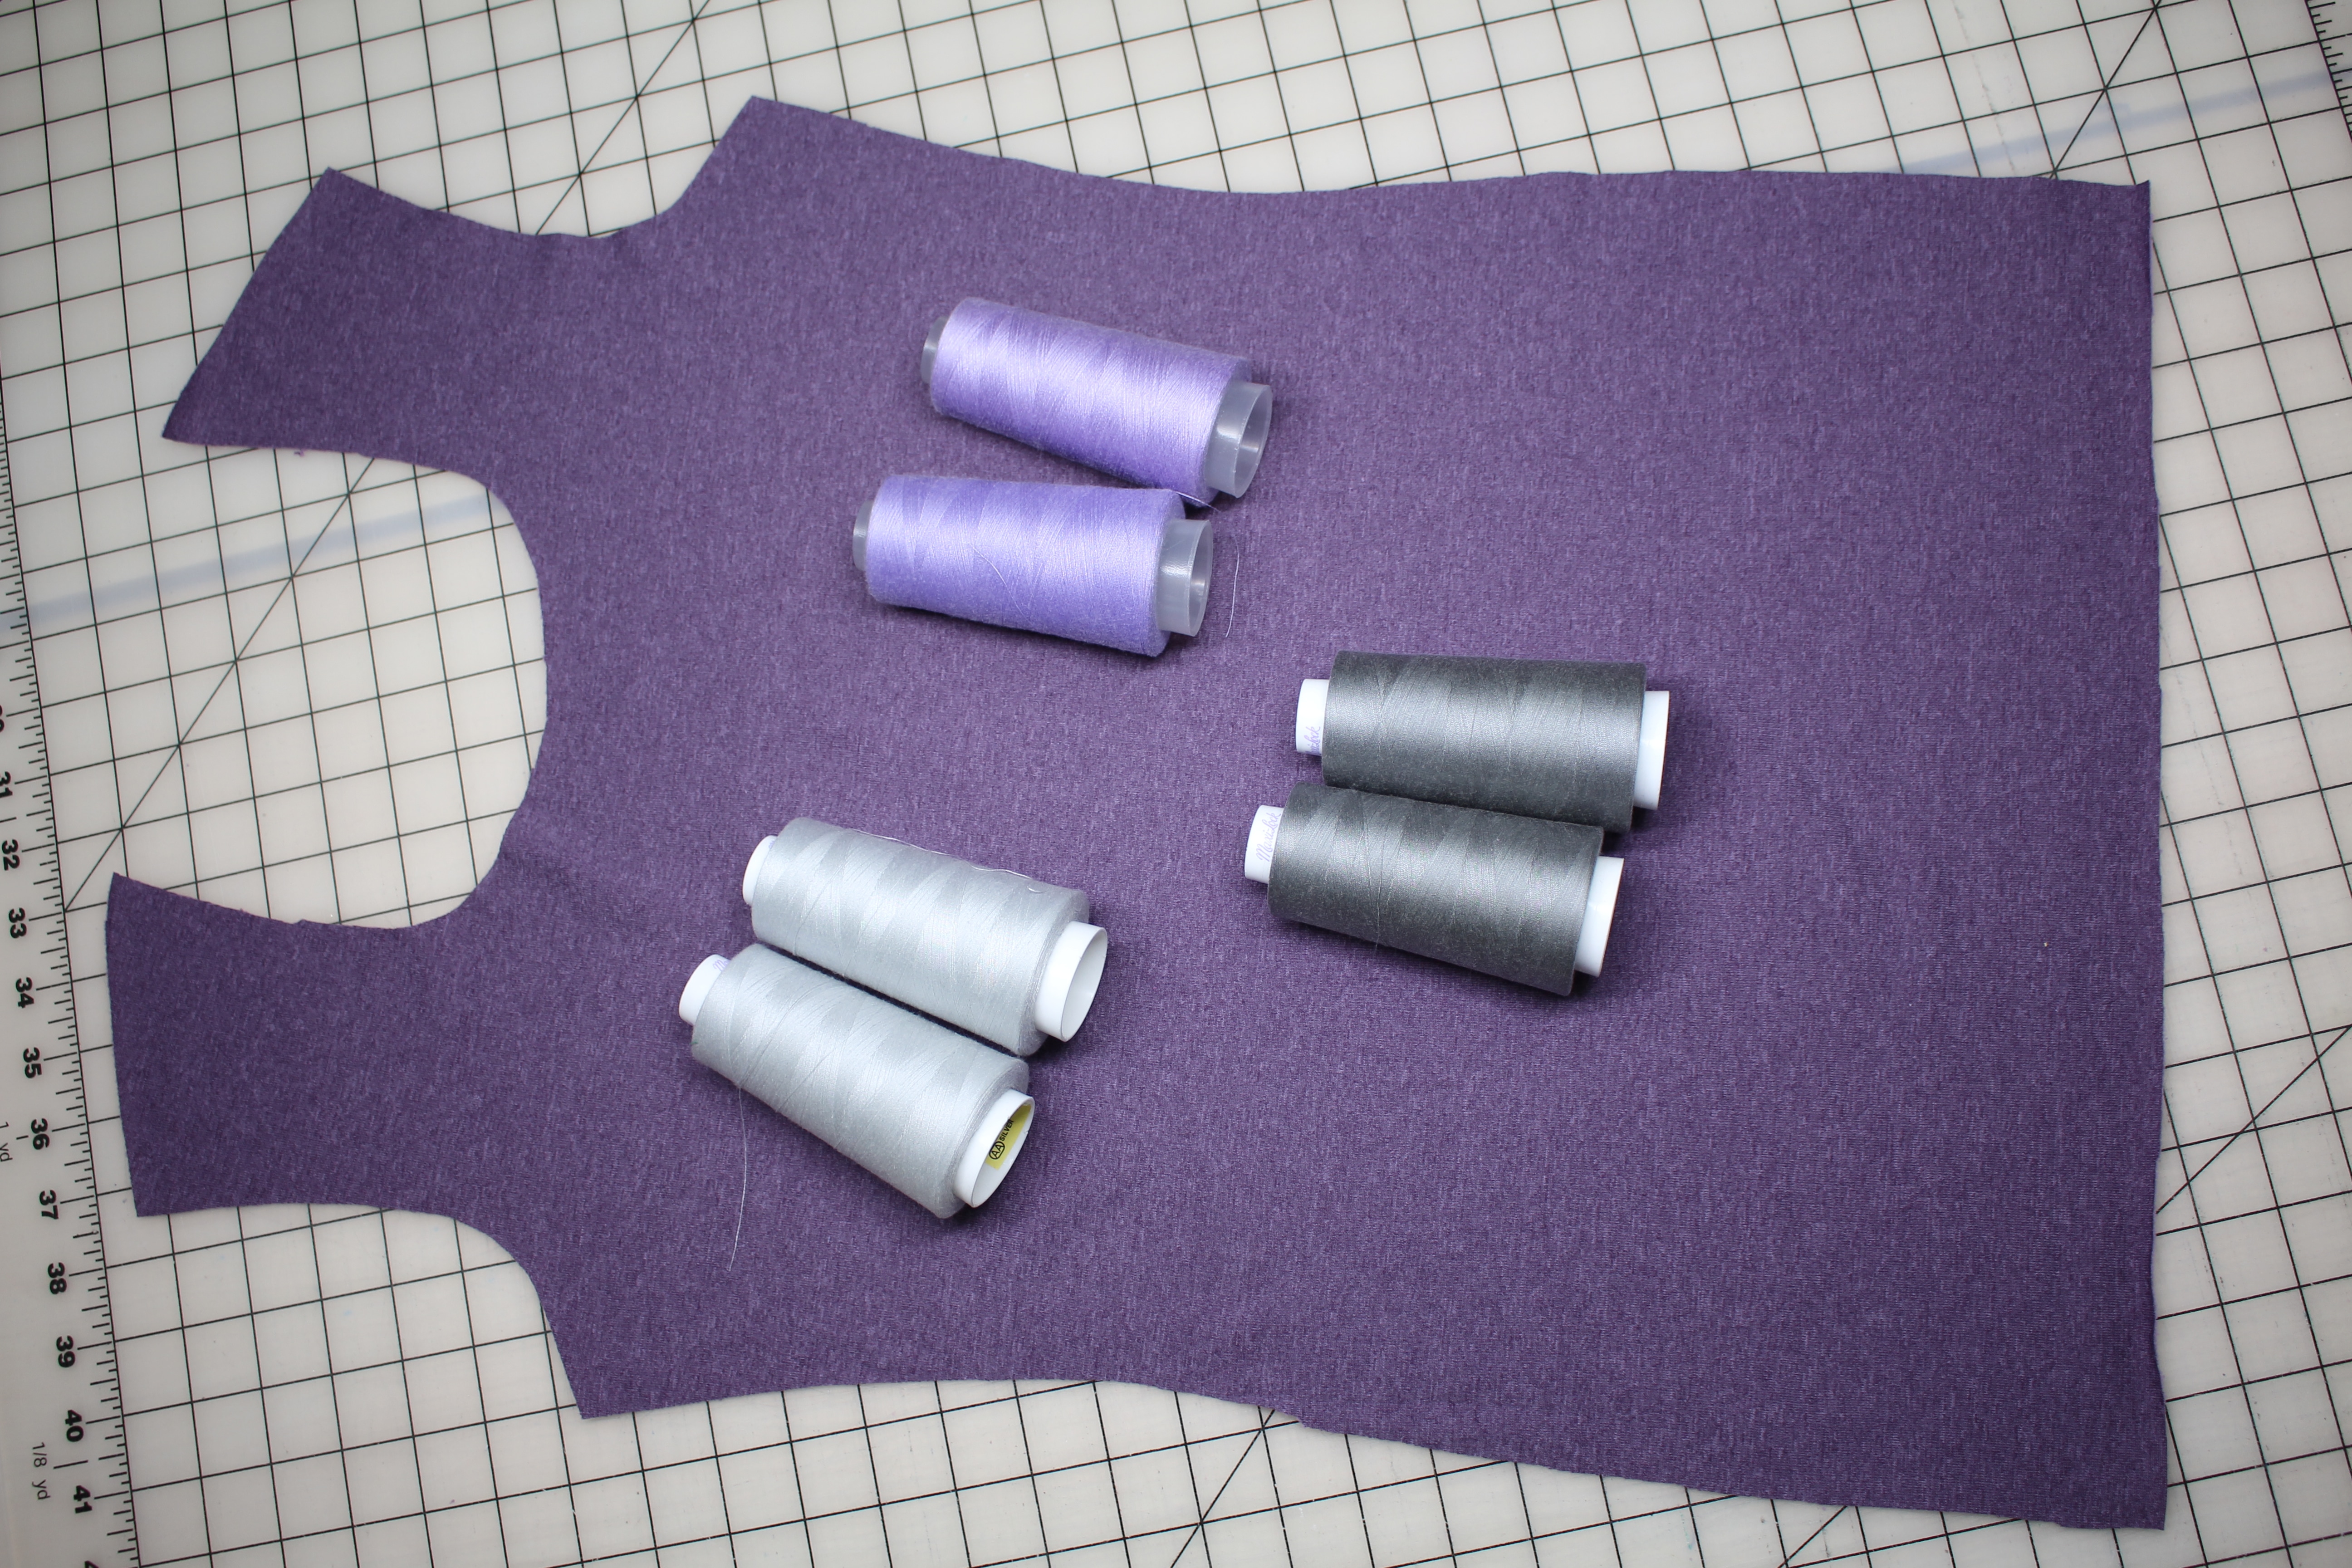
Choose the color of thread for the decorative stitch. Ideally the color should be in the same color family as the right side of the fabric, but enough of a contrast that you can see the stitches.
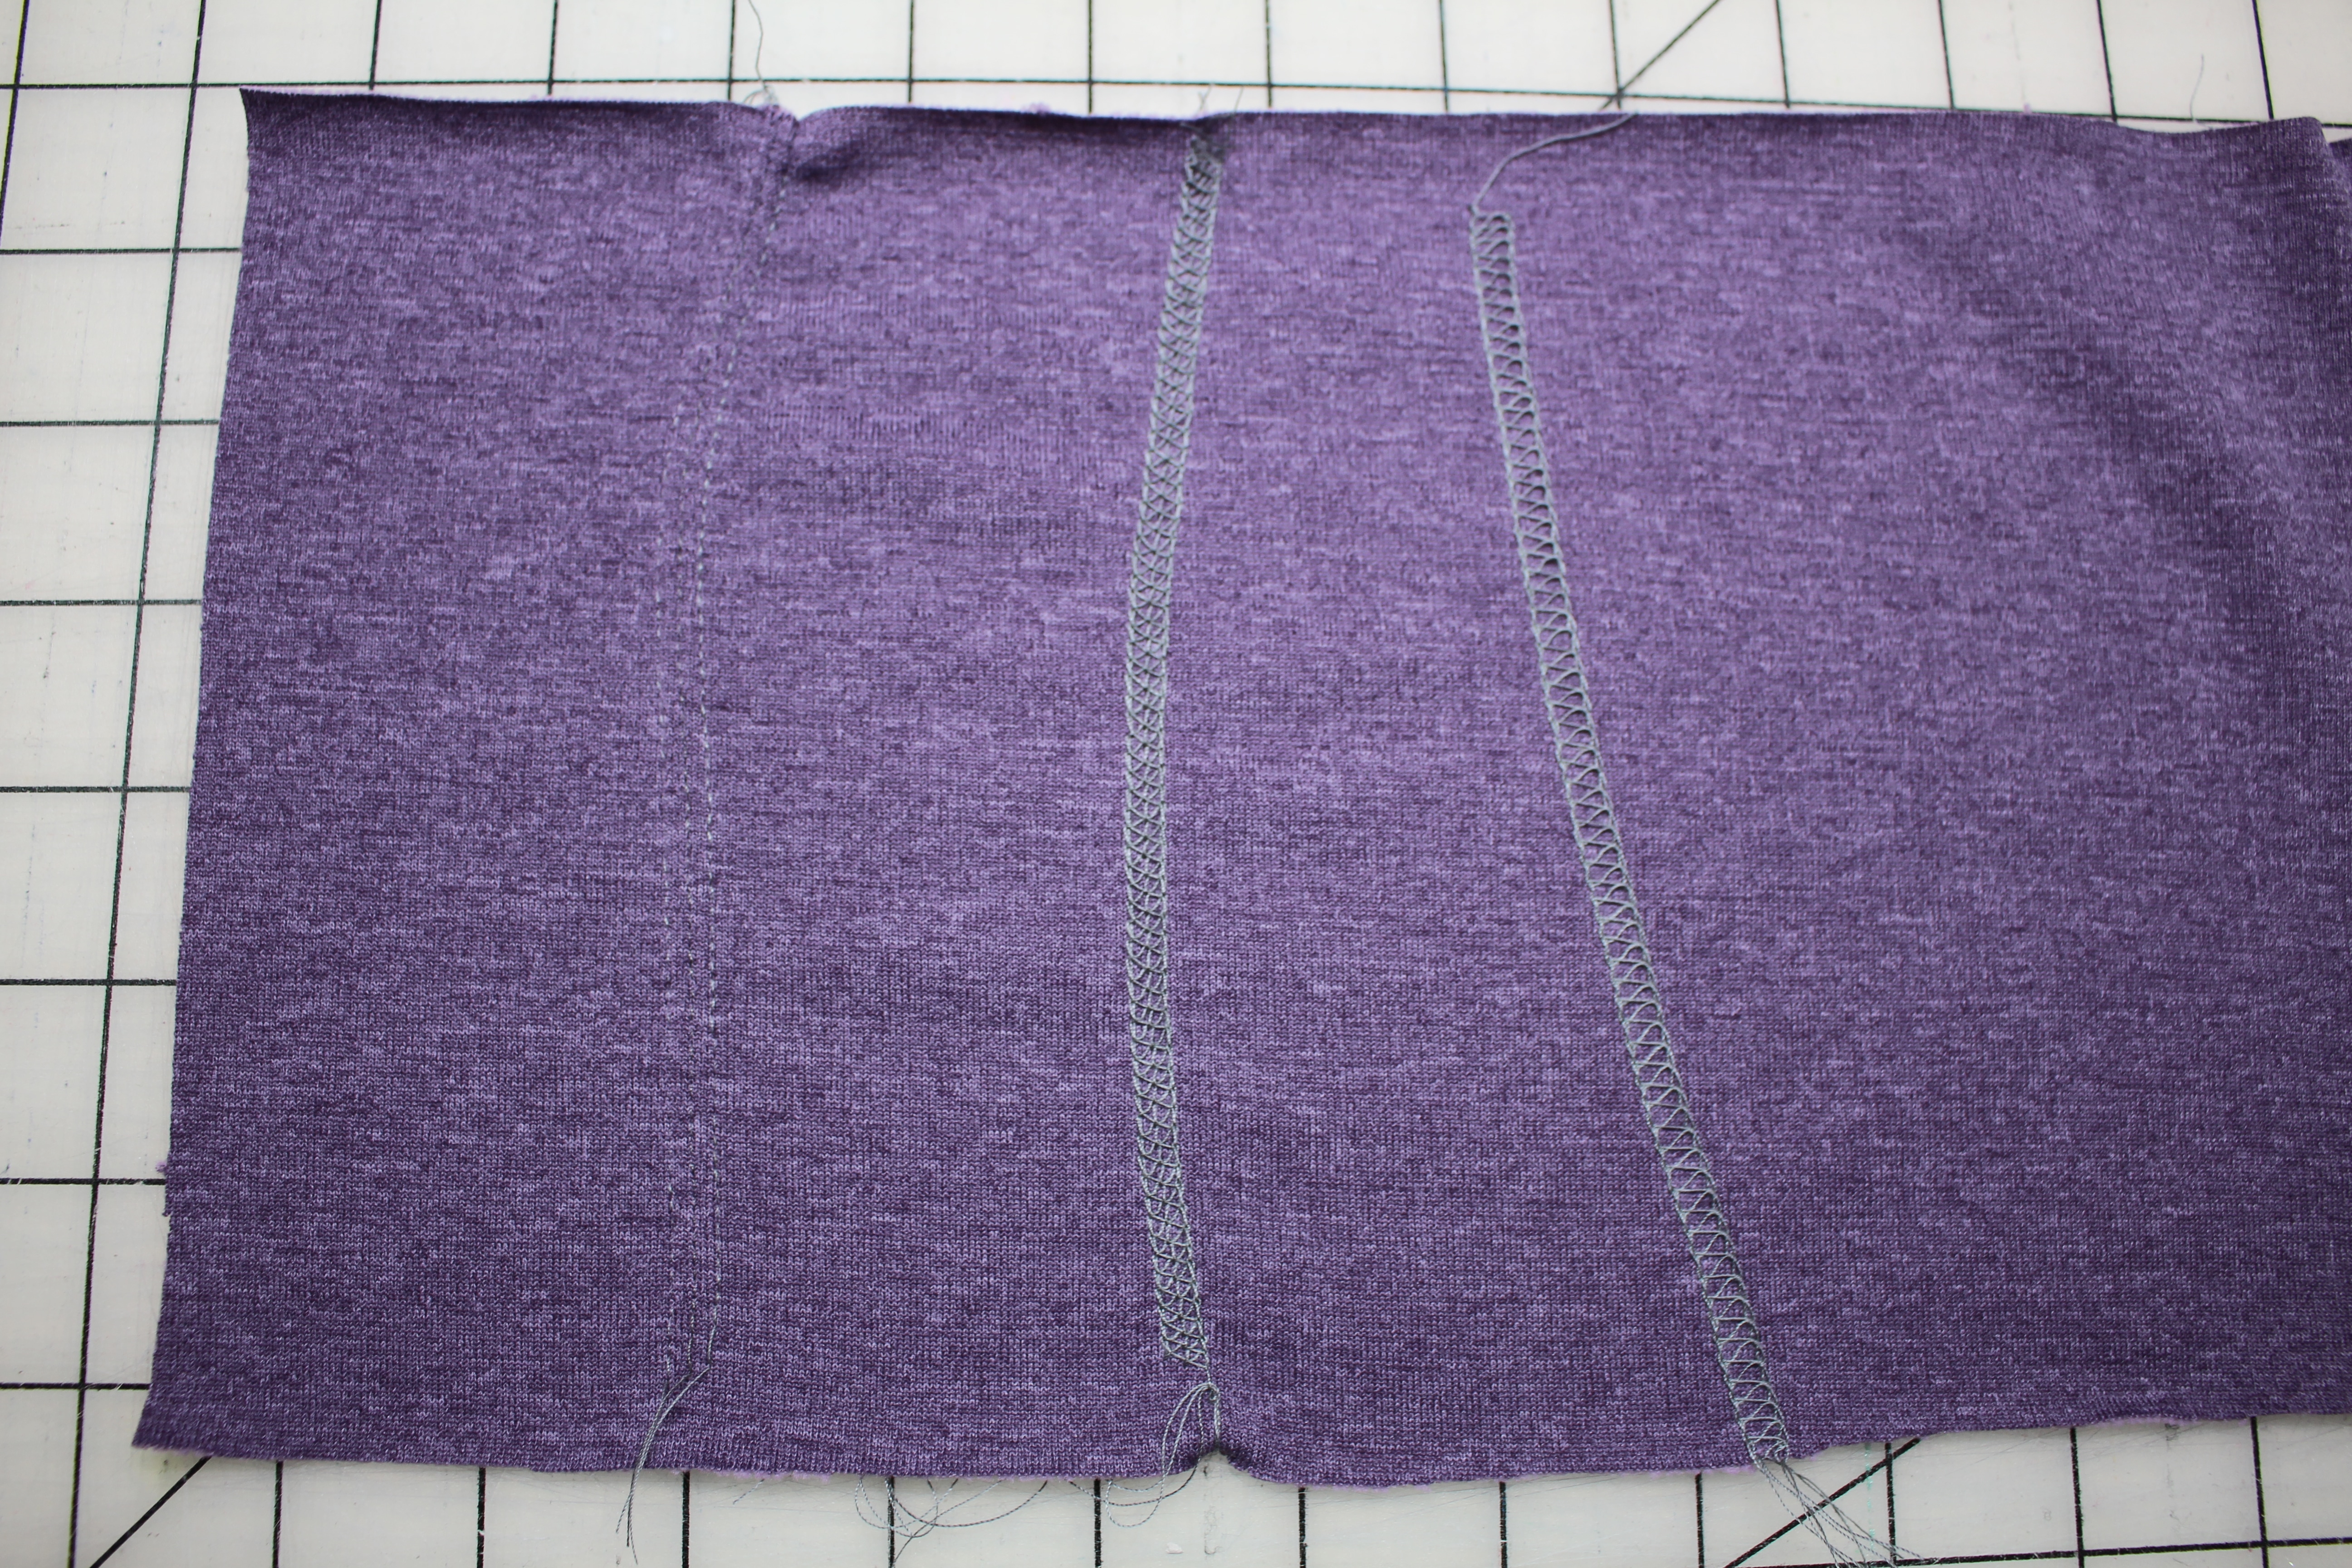
Decide which stitch looks the best on your fabric:
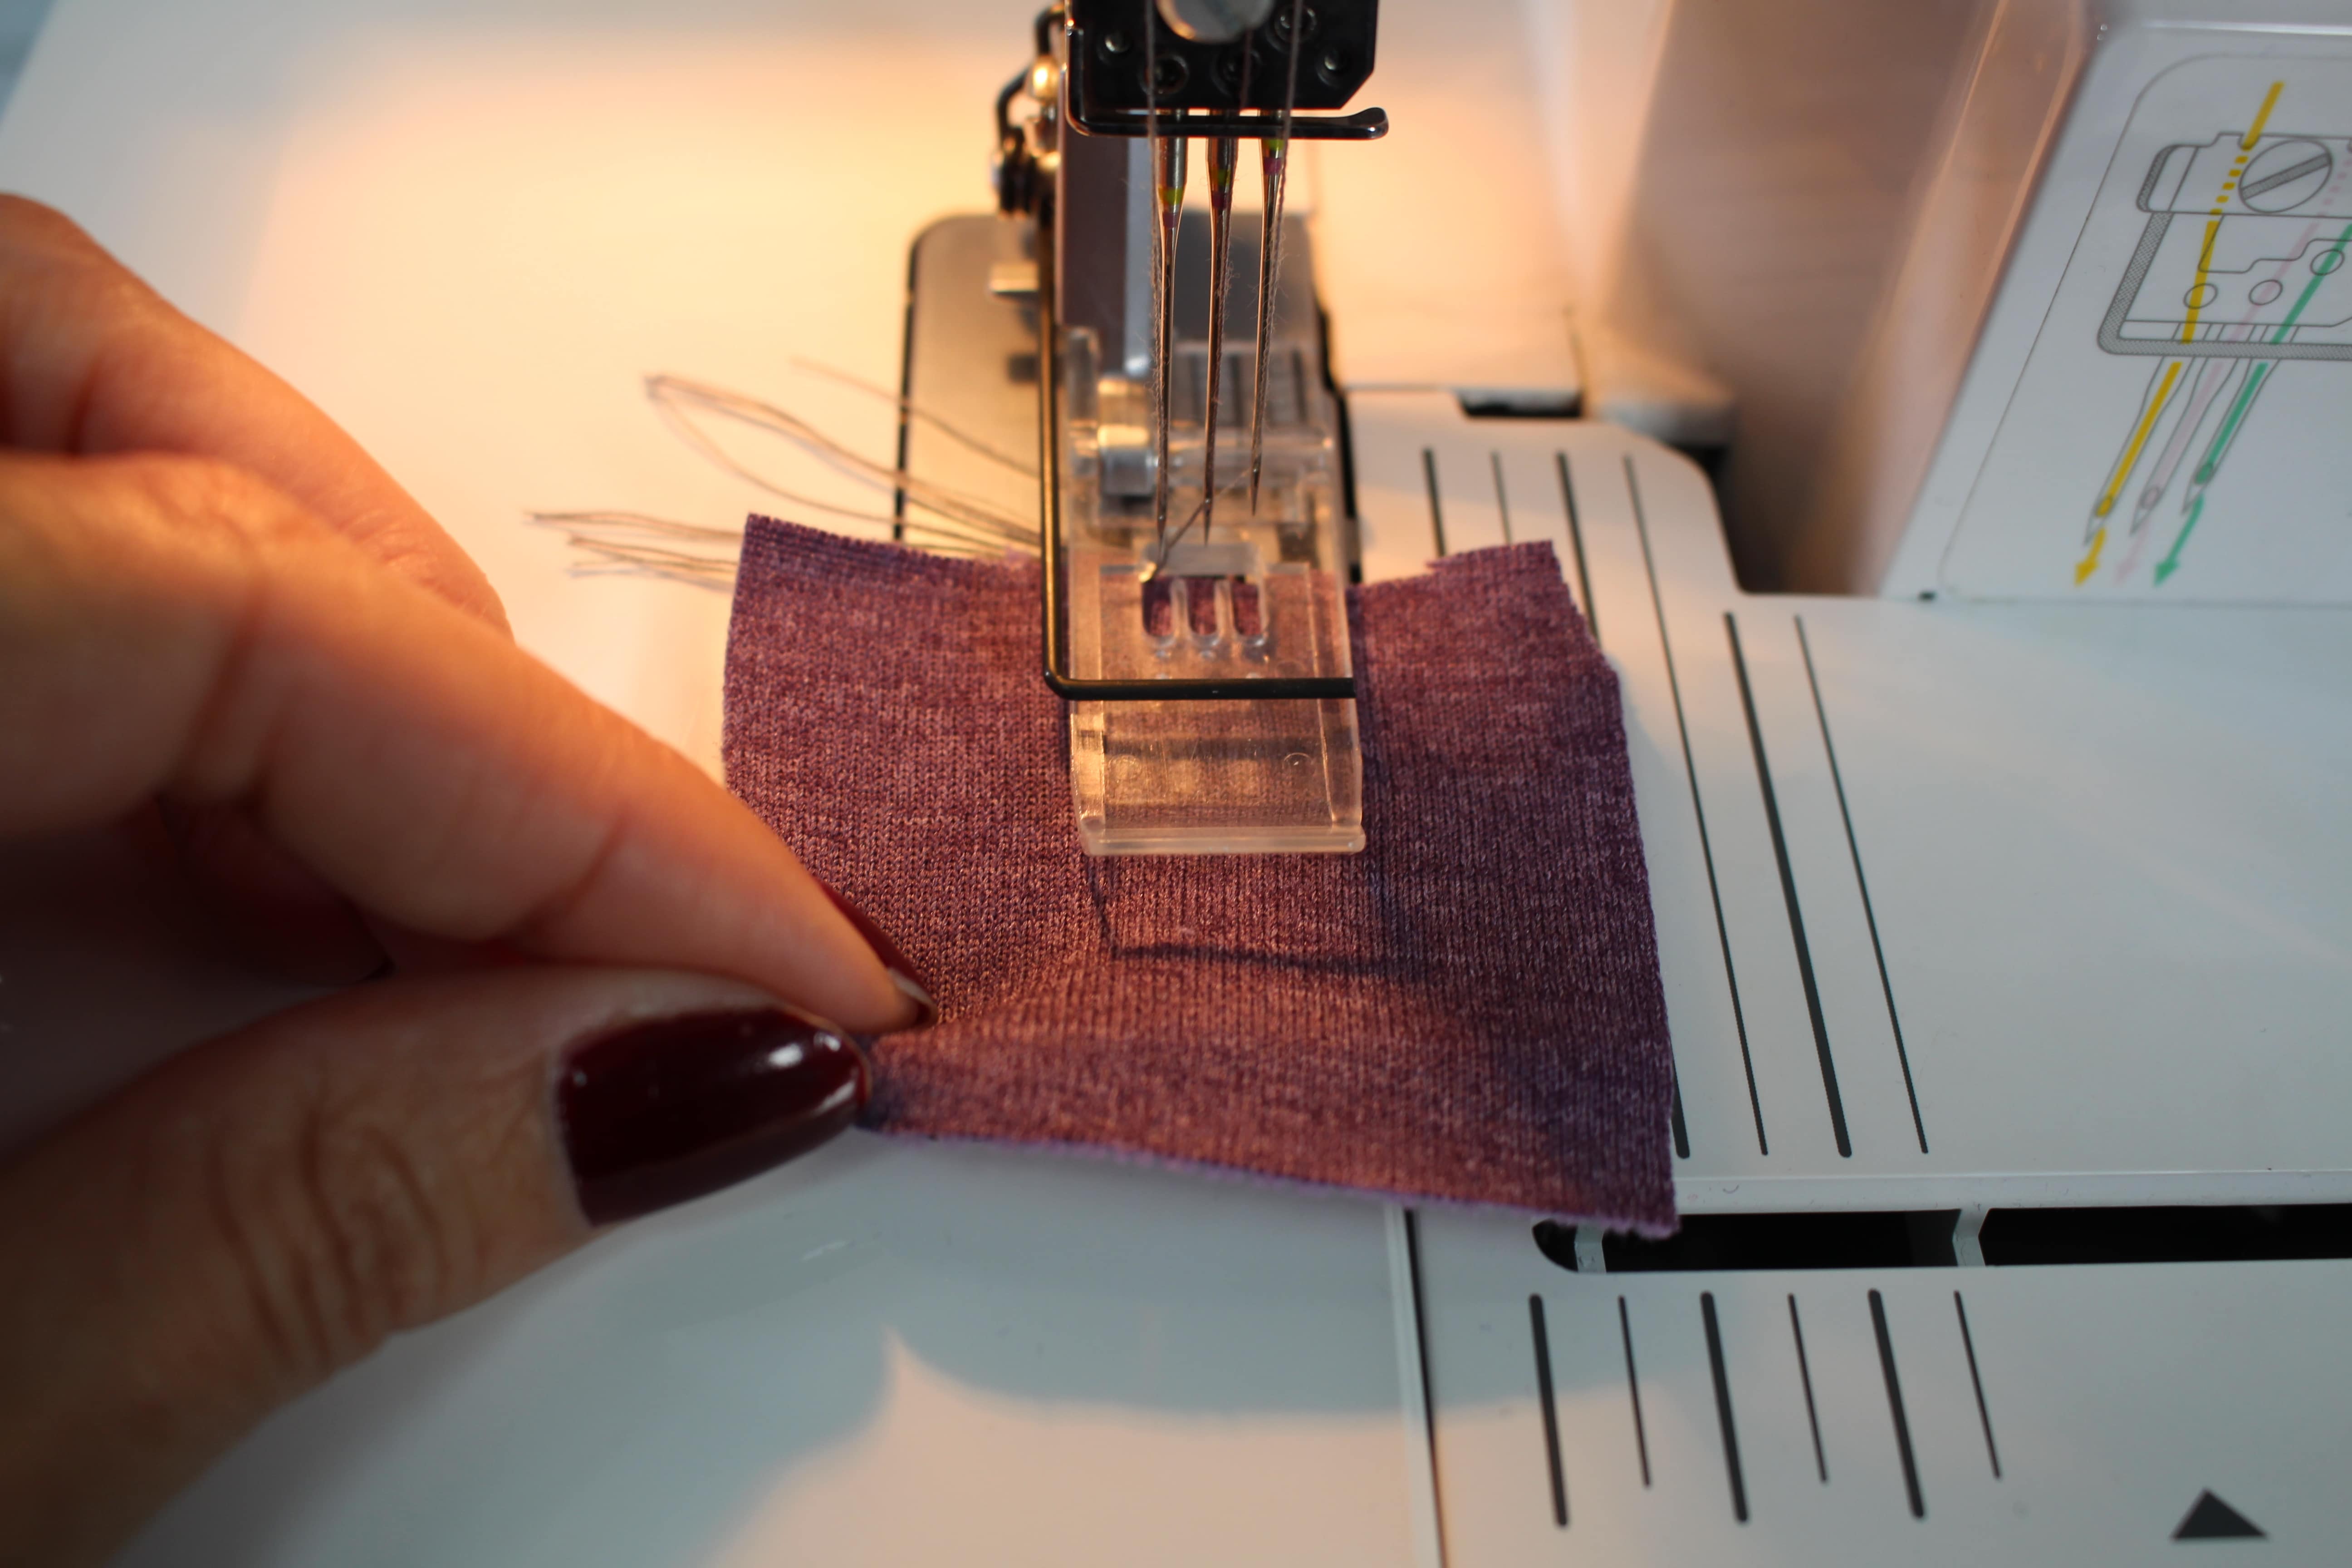
Stitch a swatch of fabric with a wide coverstitch (using the left and right needle)
Stitch a sample with the triple coverstitch.
Keep in mind you will be stitching with the wrong side of the fabric facing up. Check the look of the stitch on both sides.
I prefer the triple coverstitch on my fabric, so I will set up the coverstitch machine with all three needles using 4 spools of thread. It’s a little faster to stitch from piece to piece, so start stitching on a scrap of fabric and then add another piece of fabric. This allows me to check my stitch quality and I won’t have to worry about threads falling off at the beginning or end of my garment pieces. (All of these stitches rows will be sealed in a seam, so no worries on threads unraveling).
For the full tutorial, check out my post on the Brother Stitching Sewcial blog. I always love to see what your are working on, be sure to share photos of your sporty tops using #angelawolf #brothersews
Cheers,
Brother Expert Sewing Consultant. This blog post may contain affiliate links.
Refashion Jeans with Trim You might have noticed some of the fashions of the late 60’s and 70’s making a comeback on the store shelves, from floral fabrics to embellished jeans. How about adding crocheted ribbon trim along the outside leg! This is so...
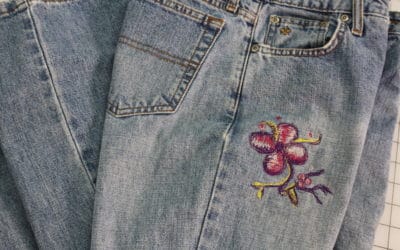
Embellishing Jeans with Free Motion Embroidery An easy way to restyle or upcycle jeans is to add a touch of embroidery. Free motion embroidery, also referred to as thread painting, is so easy and you don’t even need an embroidery machine for this...
Transform a Turtleneck into a Stylish Boatneck Top Here is another recycle project for the turtlenecks in our closet and its easy - perfect for beginners! For this sewing tutorial I am using a turtleneck that has a design, but any tank top will work. ...
Coupon Details: Get 50% off the full retail price of select Craftsy classes taught by Angela Wolf. Cannot be combined with any other coupons. Expires August 15, 2017.
Coupon Details:Coupon Details: Get 50% off the full retail price of select Craftsy classes taught by Angela Wolf. Cannot be combined with any other coupons. Expires August 15, 2017.
I have been experimenting with various ways to create custom fabrics. You might have seen photos on my Facebook page with a few of my favorites by embellishing with:
embroidery
needle felting
scanNcut
thread art with the Dream Frame
couching
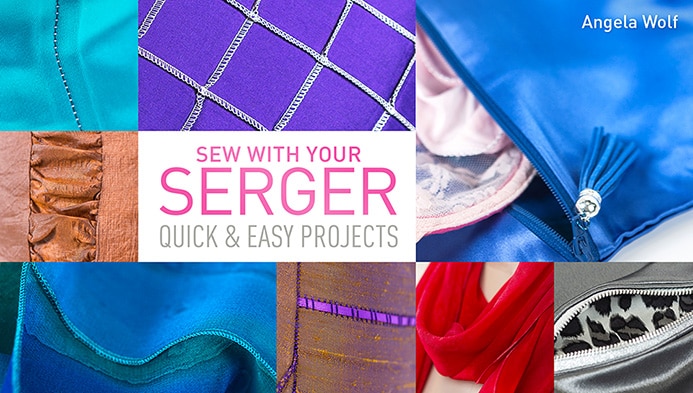
One that you might be surprised about is using the serger with a simple 3-thread overlock stitch and the blind hem foot. This purple bad is a perfect example. We made that bag in my Craftsy Class Sew with your Serger – Quick & Easy Gifts and most recently at the American Sewing Expo. I could see using this fabric as a collar or cuffs, color blocking – what about the flap on my back jean pockets!
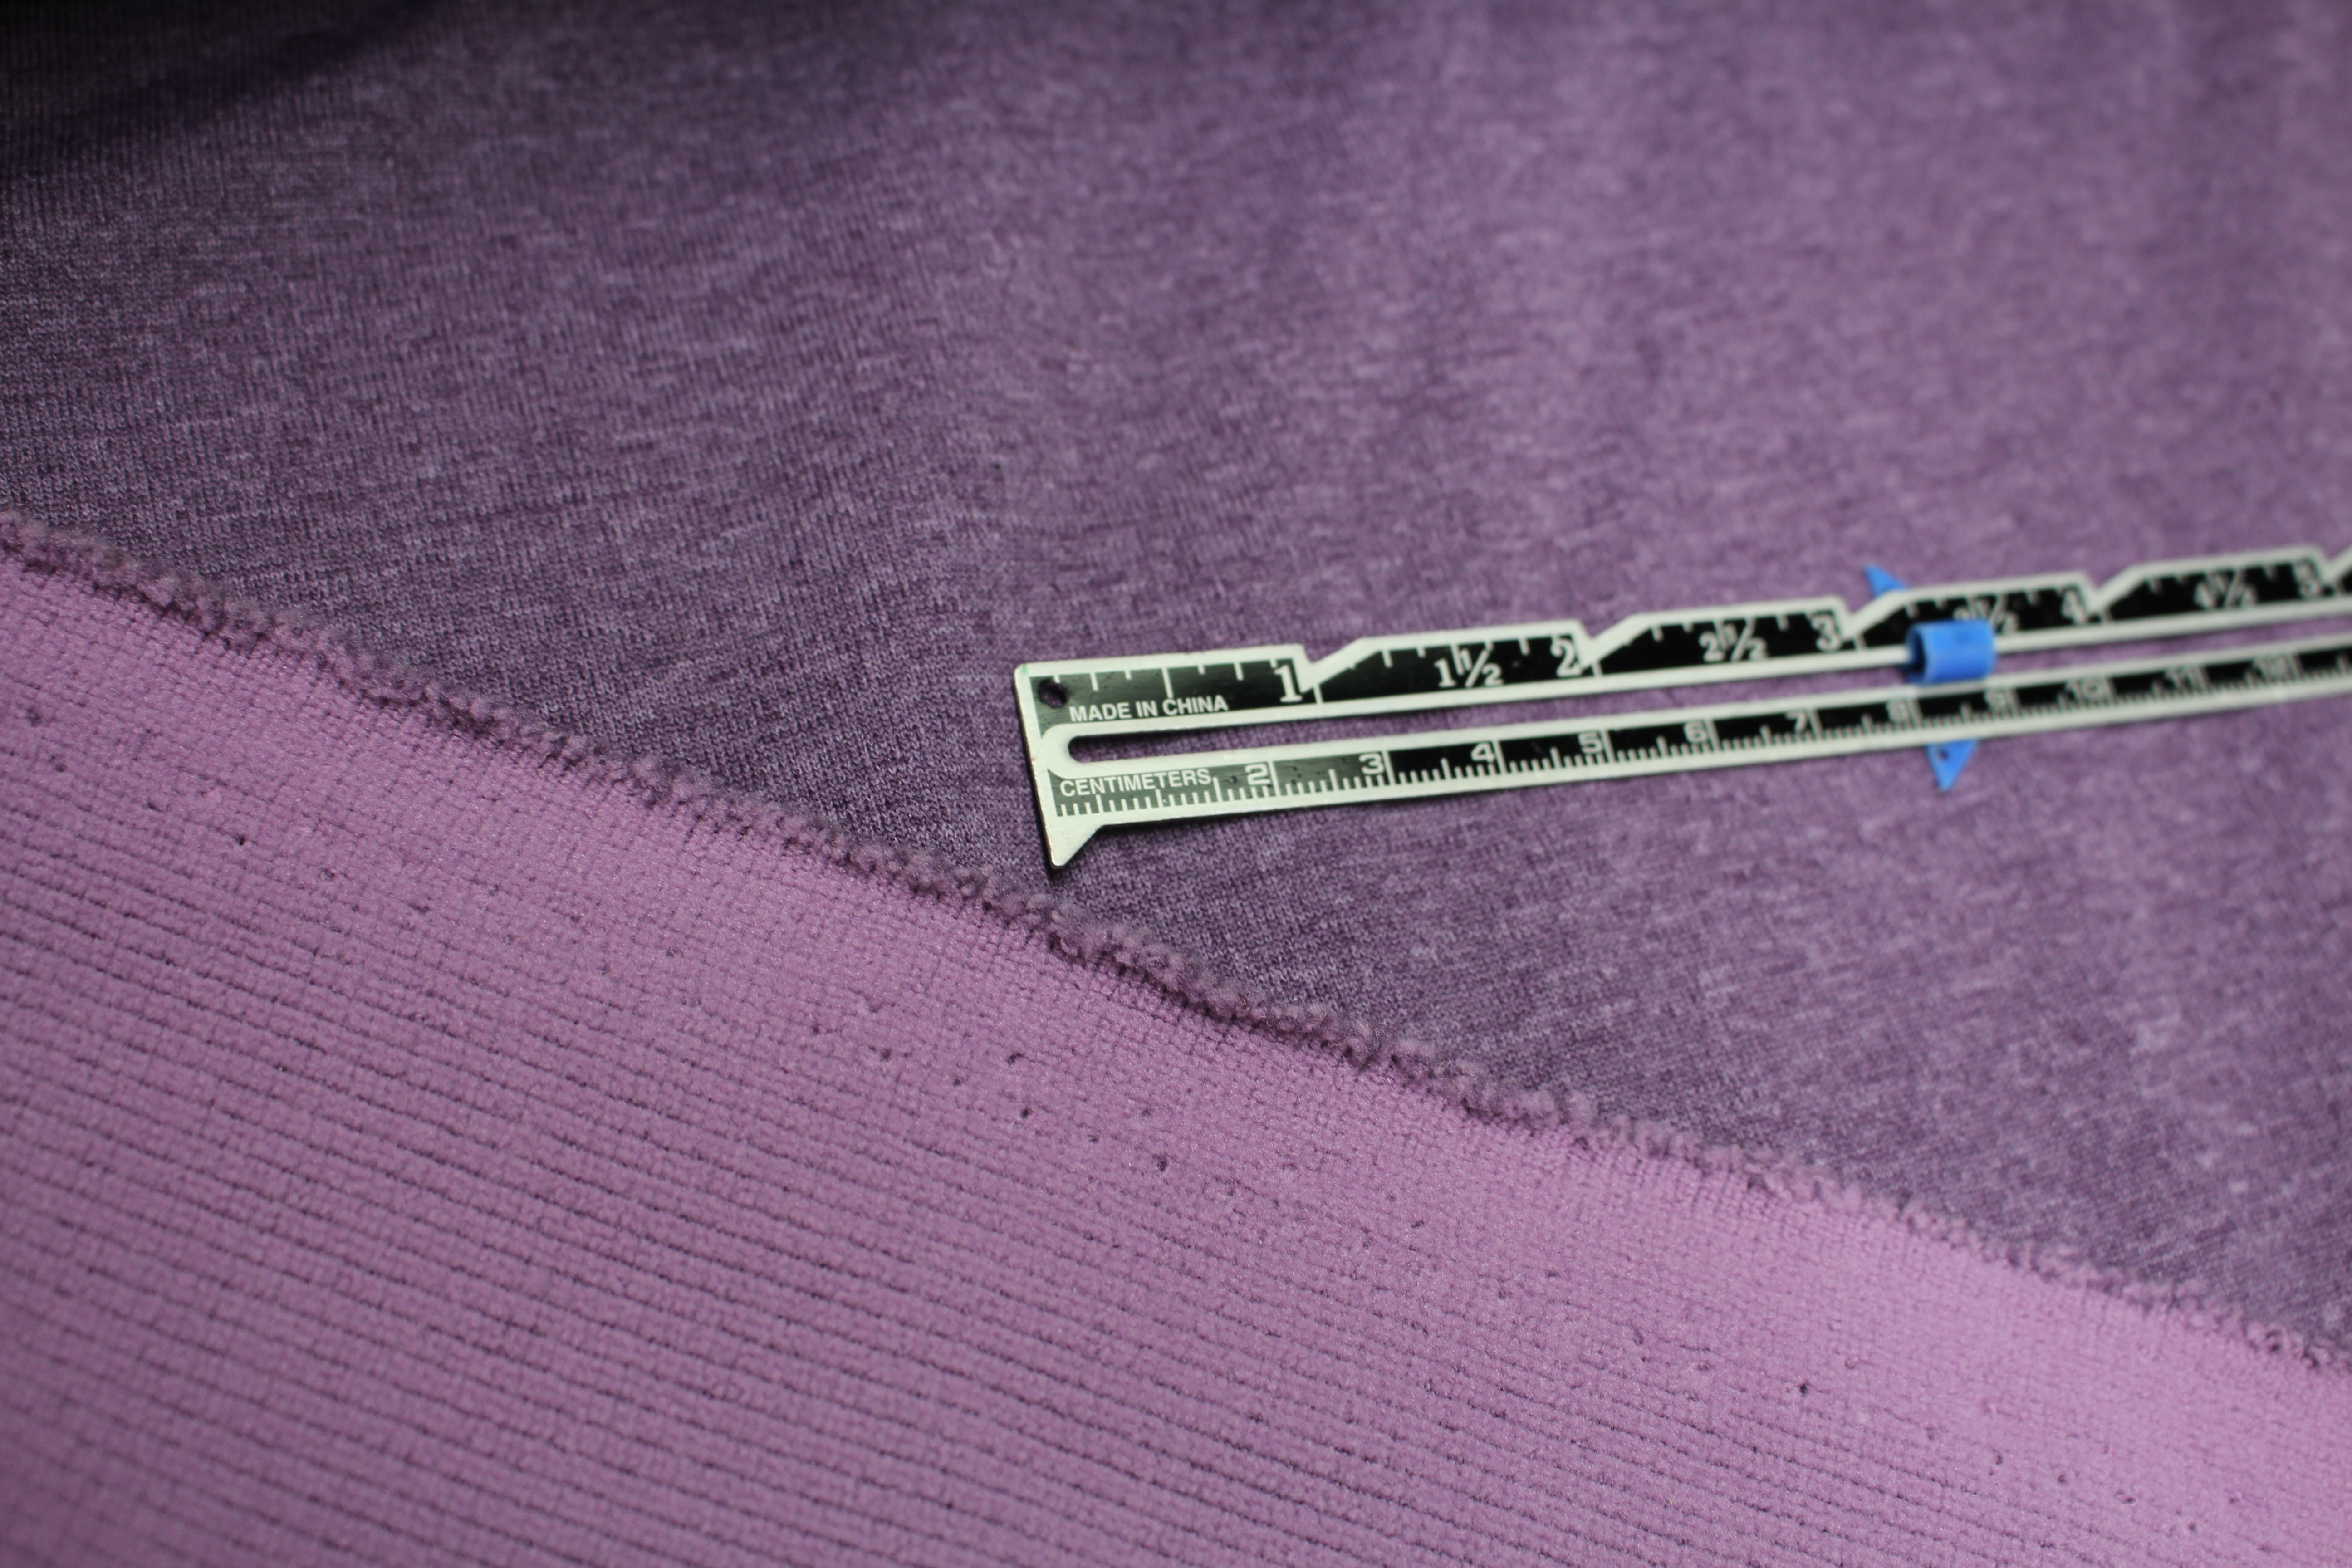
1.Cut your fabric larger than you need for the pattern piece, the serged line takes out a minimum ¼” of fabric. Chalk mark lines parallel to the grainline. Choose any width you want, these are 2” apart.
2. Chalk mark lines perpendicular to the previous chalk lines.
SET UP SERGER
3. Set up the serger for a 3-thread wide overlock stitch. Dis-engage the knife and attach the blind-hem foot (your blind hem foot might look different, check your manual)
4.Test your stitch: fold a piece of fabric and (more…)
First off, I want to wish you a Happy New Year and I hope you are off to a great start in 2015! So far so good on this end J
I started the year with a mini-vacation up north. Although, the snow didn’t arrive until after the mini-vacation, which resulted in another mini-vacation at home, not all bad J
yes, I took this fuzzy photo and it’s on the new years list to get better
I am not big into New Year’s resolutions, as I would hate to set myself up for failure – that being said I still have a very long list, as I do every year: work out, eat healthier, go to bed early and get up early, take more time for friends and family, get organized, get rid of clutter, and on and on …… I have to ask, why not just take time each month and re-evaluate life – wouldn’t it be so much easier to try changing and improving on things one month at a time versus an entire year? What a novel thought, that ultimately has become my New Year’s Resolution!
Resolutions #1: Get in Better Shape
To start, I bought Jillian Michaels ripped in 30 workout DVD and a slew of new workout clothes. You can’t work out properly without the proper clothing, right? (even if I am working out in my own living room … and yes, I bought them as I didn’t have time to sew them)
Day 1: REALLY?!? Have any of you tried this workout?!? I really thought I was in pretty good shape – she had no problem proving that different! First day, thought I would die in the middle (remember this only 30 minutes – longest 30 minutes of my life!)
Day 7: Let’s just say, this is going to be re-evaluated at the end of the month – as I am SO out of shape! And thank heaven’s I can do this in my own house and no one is taping me!!!! Oh – and by the way – I will not be offering before and after photos! J
Resolution #2: Learn How to Cook
As many of you already know, cooking is not my forte. I am not ashamed of that, as those of you that have read my book already know, for the first years out of college – my custom apparel business was my main focus and the kitchen cabinets were only to be used for fabric storage – they made excellent storage if I might add. My last cooking attempt was 7 years ago, 3 days of it and it was catastrophic, so let’s give it a go in 2015. What the heck, don’t they call it the 7 year itch J
First, let me just say, I have the best husband ever! Winn, loves to cook and he is really good at it, so I am a bit spoiled. In order to not starve the man the death, I will attempt cooking while he is away:
1st Recipe: Cooking Light Magazine – Parmesan and Pine Nut – Crusted Oven-Fried Chicken (Winn’s up north ice fishing, perfect opportunity!)
Take 1: Spent 2 hours in the grocery store trying to find all the ingredients, got home and was way too tired to attempt.
Result: Dinner served is cottage cheese and triscuits.
Take 2: Ready to go … everything went well until the “sauté the chicken for 3 minutes” and mine turned black instantly!
I will just give you a hint, Tyler (the cat) is more like a dog and love’s people food. Last weekend, my husbands chicken dish:
My dish? He snubbed, in the kindest way:
In fact, if it wasn’t for Ranch dressing (which makes anything taste good) Tyler’s dinner was even looking a bit enticing.
Cooking is just like Sewing!
This is when I realized cooking is so much like sewing! When I teach a class, I assume you know how to do certain things, just like these recipes:
2 TBSP Pine nuts, toasted (for us beginners, how do you toast these – in the toaster LOL J )
Sauté for 3 minutes or until brown – well, mine turned black so fast, there wasn’t a brown option! (Maybe the author had a better quality pan?)
Cook for 10 minutes or until chicken is done: what if my oven is hotter than yours? What if I use convection cook?
As I am pulling a blackened chicken breast out of the oven, two things occurred to me. Sewer’s have this same problem. For example: interfacing – What is it? What kind? Where do I put it? How do I press it in place?
I can just picture a new sewer in Joann fabrics staring at the rack of interfacing, as I am in the grocery store staring at the spice rack – totally lost!
And then the comparison of sewing machines and sergers to stoves and ovens. They are all different. I read the recipe and followed by the book, but maybe the person writing it has a gas stove, did they bake with a convection oven, or were they using a different pan?
After botching my dinner, I sat down to answer my online class questions and had to laugh when I got to one of my serging class questions: my gathering foot doesn’t gather like you showed. WOW! This is exactly what I am experiencing with cooking! My serger is different and all serger’s don’t offer the same stitch quality or feet accessories. See where I am going? There are so many factors to creative learning.
And to help my fellow beginner sewers, I have fun plans for you this year! I can’t tell you them all yet, but my blog will feature a “Back to the Basics” section to help you learn the basics of sewing as I am learning to cook! Let’s learn together J For my advanced sewing fans, don’t worry, I have a lot in store for you too!
Wardrobe Challenge
How can I ever thank you all for participating in my wardrobe challenge of 2014, the response in email, flickr, and pinterest was phenomenal. My wardrobe challenge started with the idea to inspire you to fill your closet with clothes sewn by you! The best part was getting sponsors to offer great gifts to inspire you even further: Brother, WAWAK sewing,Threads and SewStylish Magazines, Coats & Clark, It’s Sew Easy Tv, and myself. As you know, I extended the deadlines into 2015 for many reasons and look forward to awarding the final winners. This contest was an inspiration of mine to get you all to fill your closets with your own sewn clothes! I will be announcing a slew of past winners this week and giving you the last challenge for the grand prize, don’t worry the last challenge is the easiest J
Happy New Year! Can you share some of your resolutions for 2015? I would love to hear J
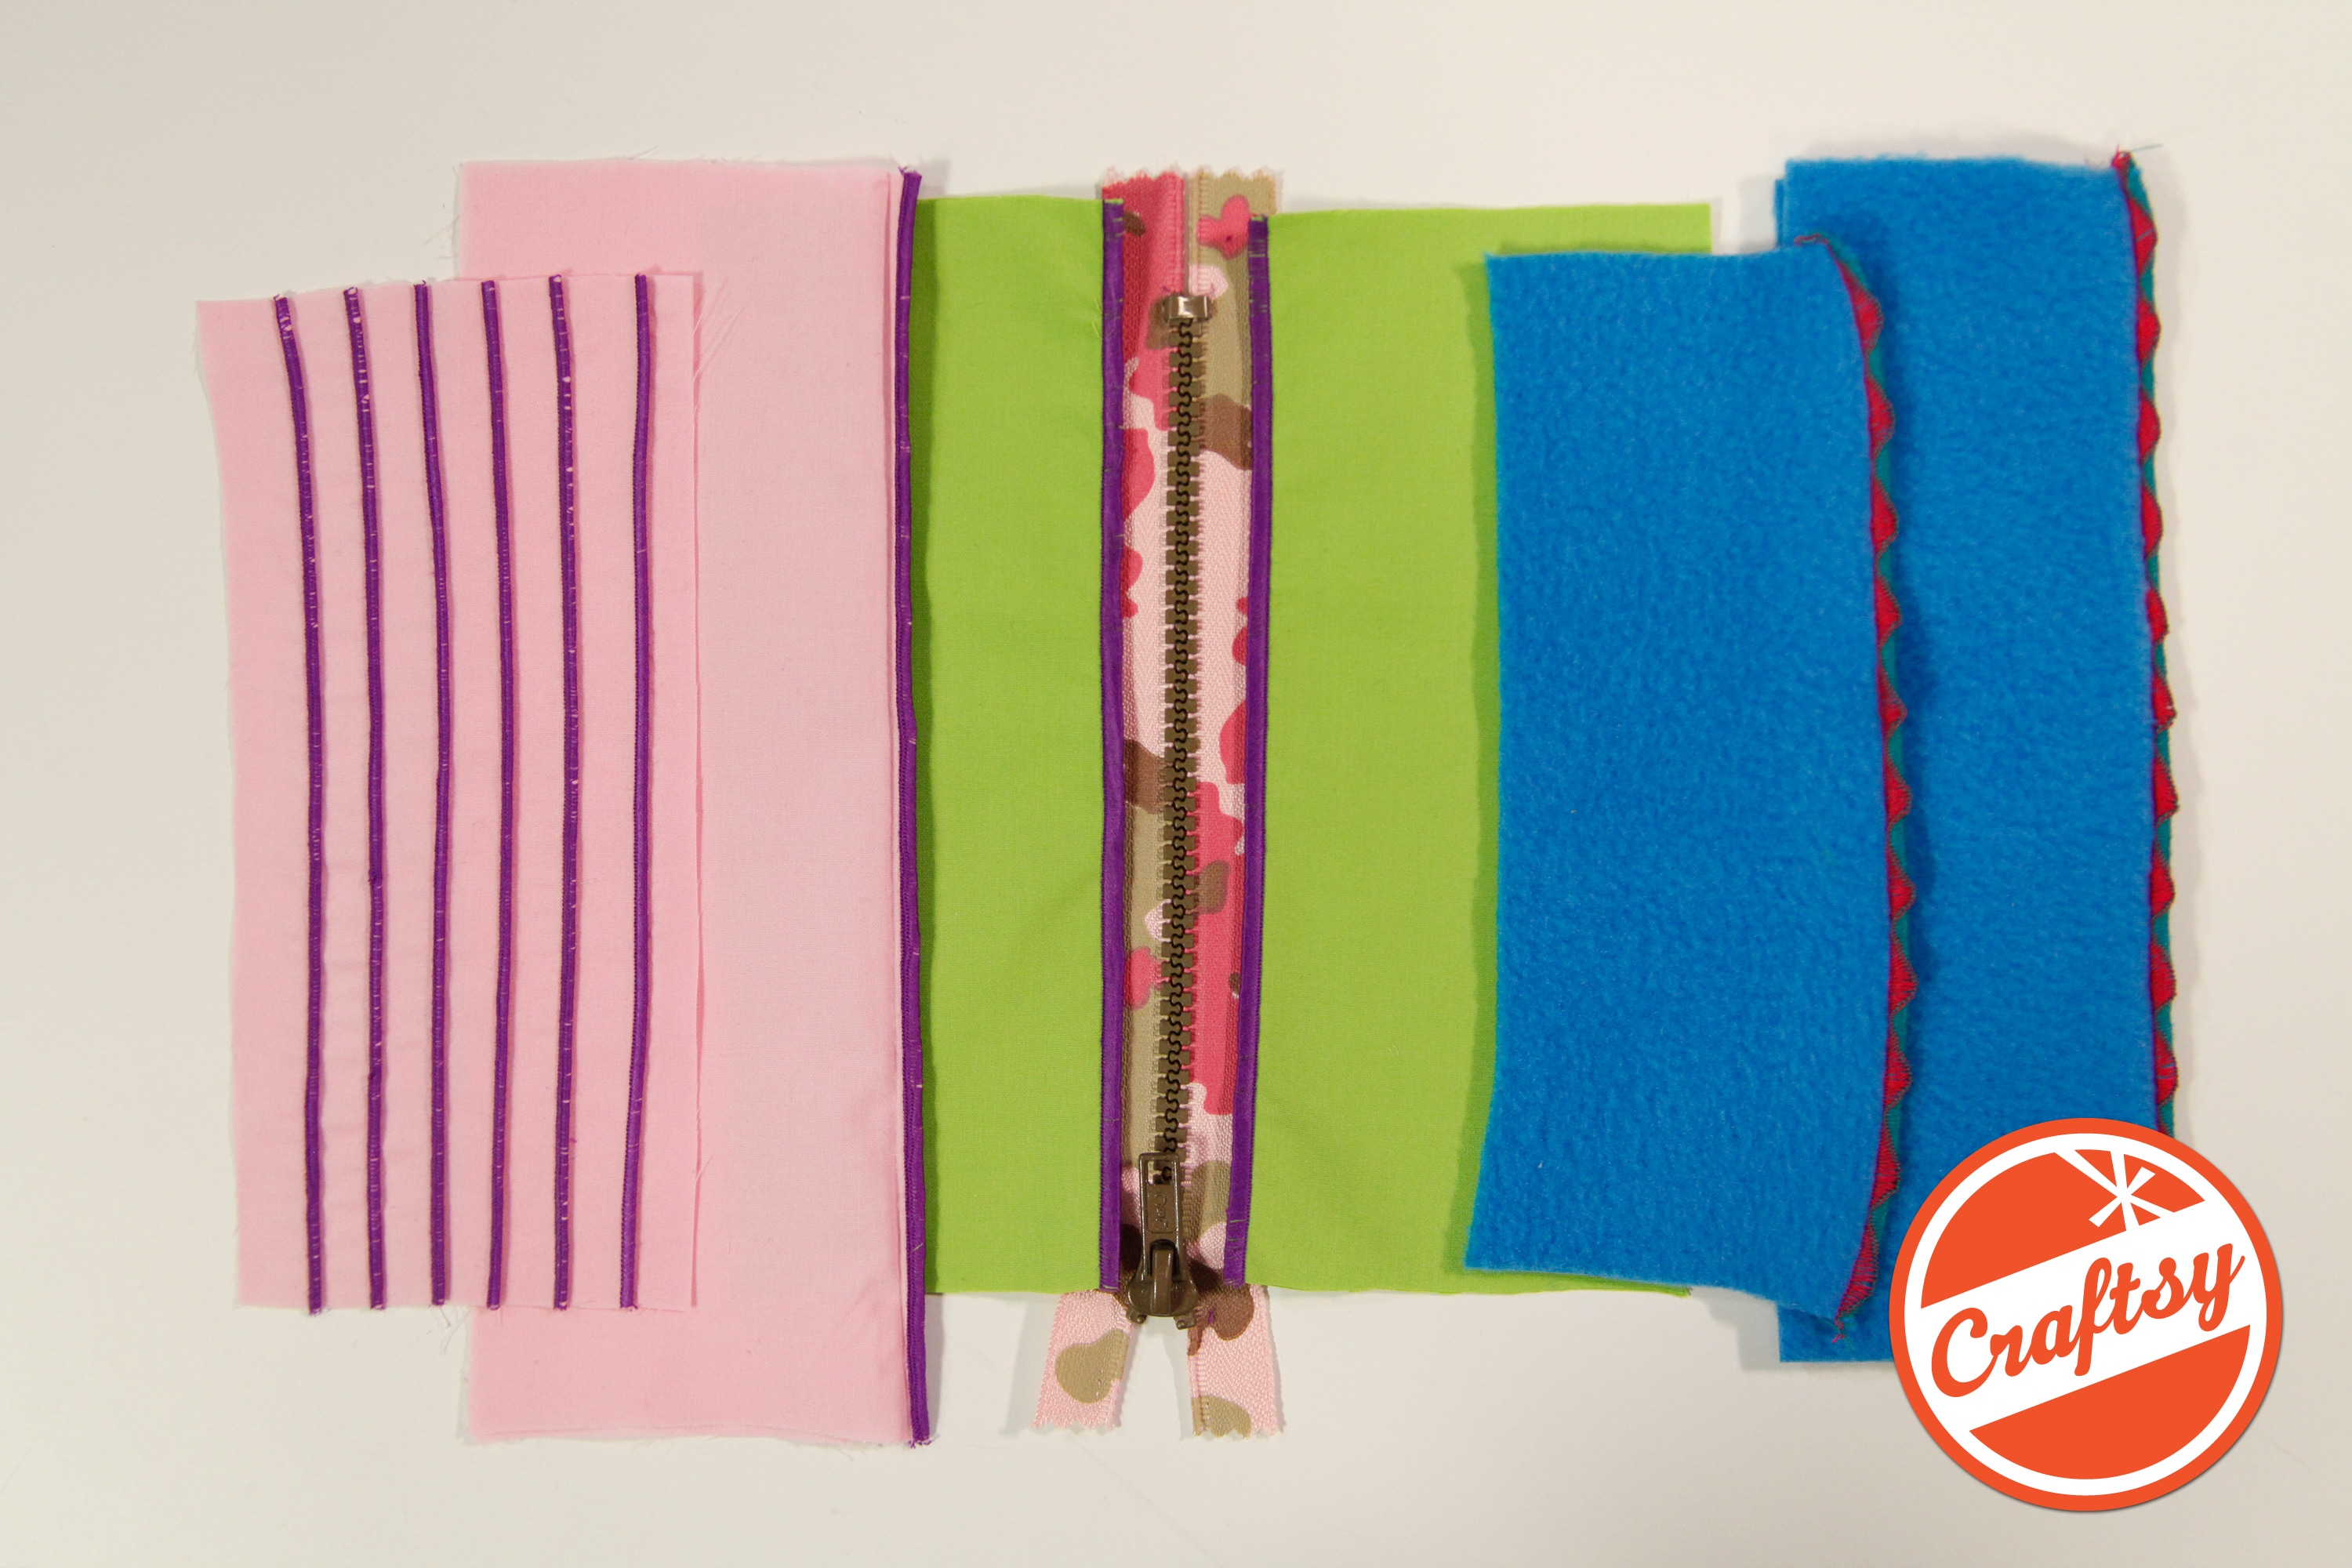
The serger can do so much more than simply finish fabric raw edges. Using crochet thread or yarn in the upper looper can create an entirely different look! This is a great way to restyle or embellishment fabric or a garment.
I am using the Brother Serger: 3-thread flatlock stitch with a decorative crochet thread in the upper looper. The left needle and lower looper have a similar color polyester thread. The photo above shows the front of the flatlock stitch and the backside. The backside looks like a ladder stitch. (the peach thread is just the serged edge of the seam).
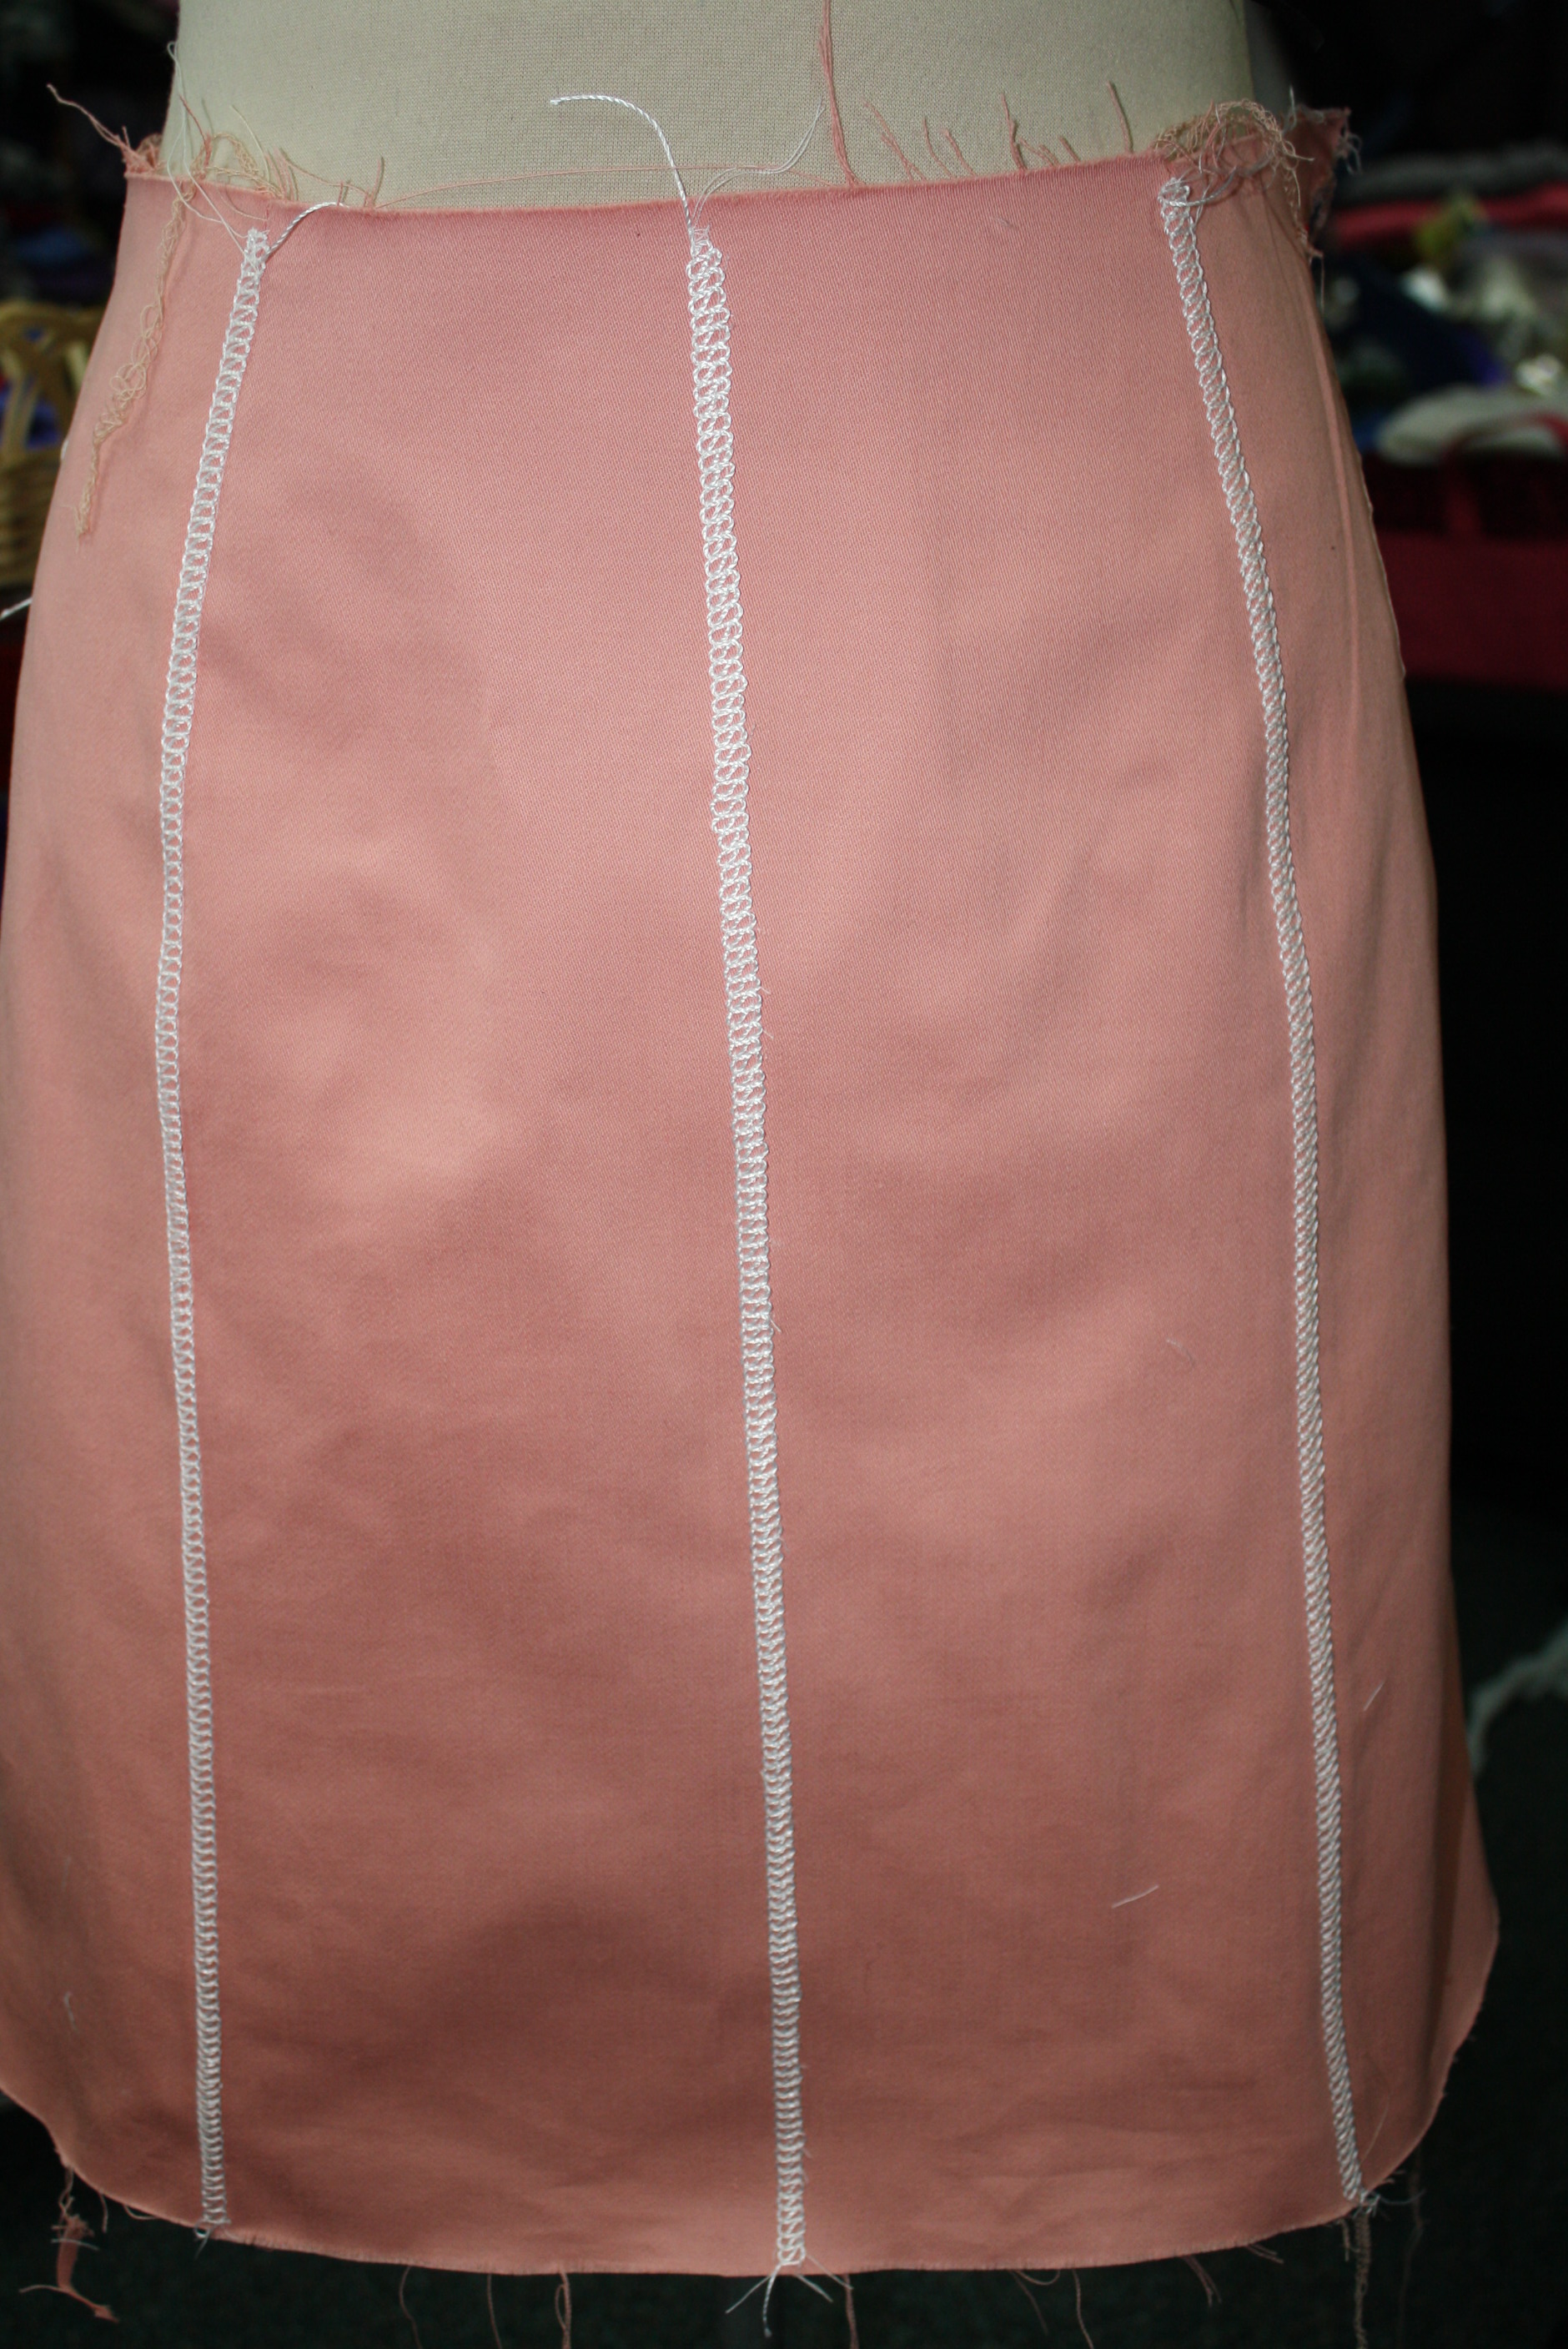
I started with the Kate Skirt Pattern. I added seams to the front and center back, but you could just pencil in a line with tailors chalk – it doesn’t need to be a seam to add the flatlock decorative stitch.
Here is the back view. Again there are 2 seams on each side back and this time there is a seam down the center back with a hidden zip. In order for this stitching to look even (with the zipper), I stitched the flat-felled embellishment down the edge of each center back seam, then added the zipper and closed the seam. That part got a little tricky and you can see the stitches are not perfectly even. I haven’t decided if I am going to rip it out and start again or hope nobody is looking at my tush that closely to notice 🙂
Setting up the Serger:
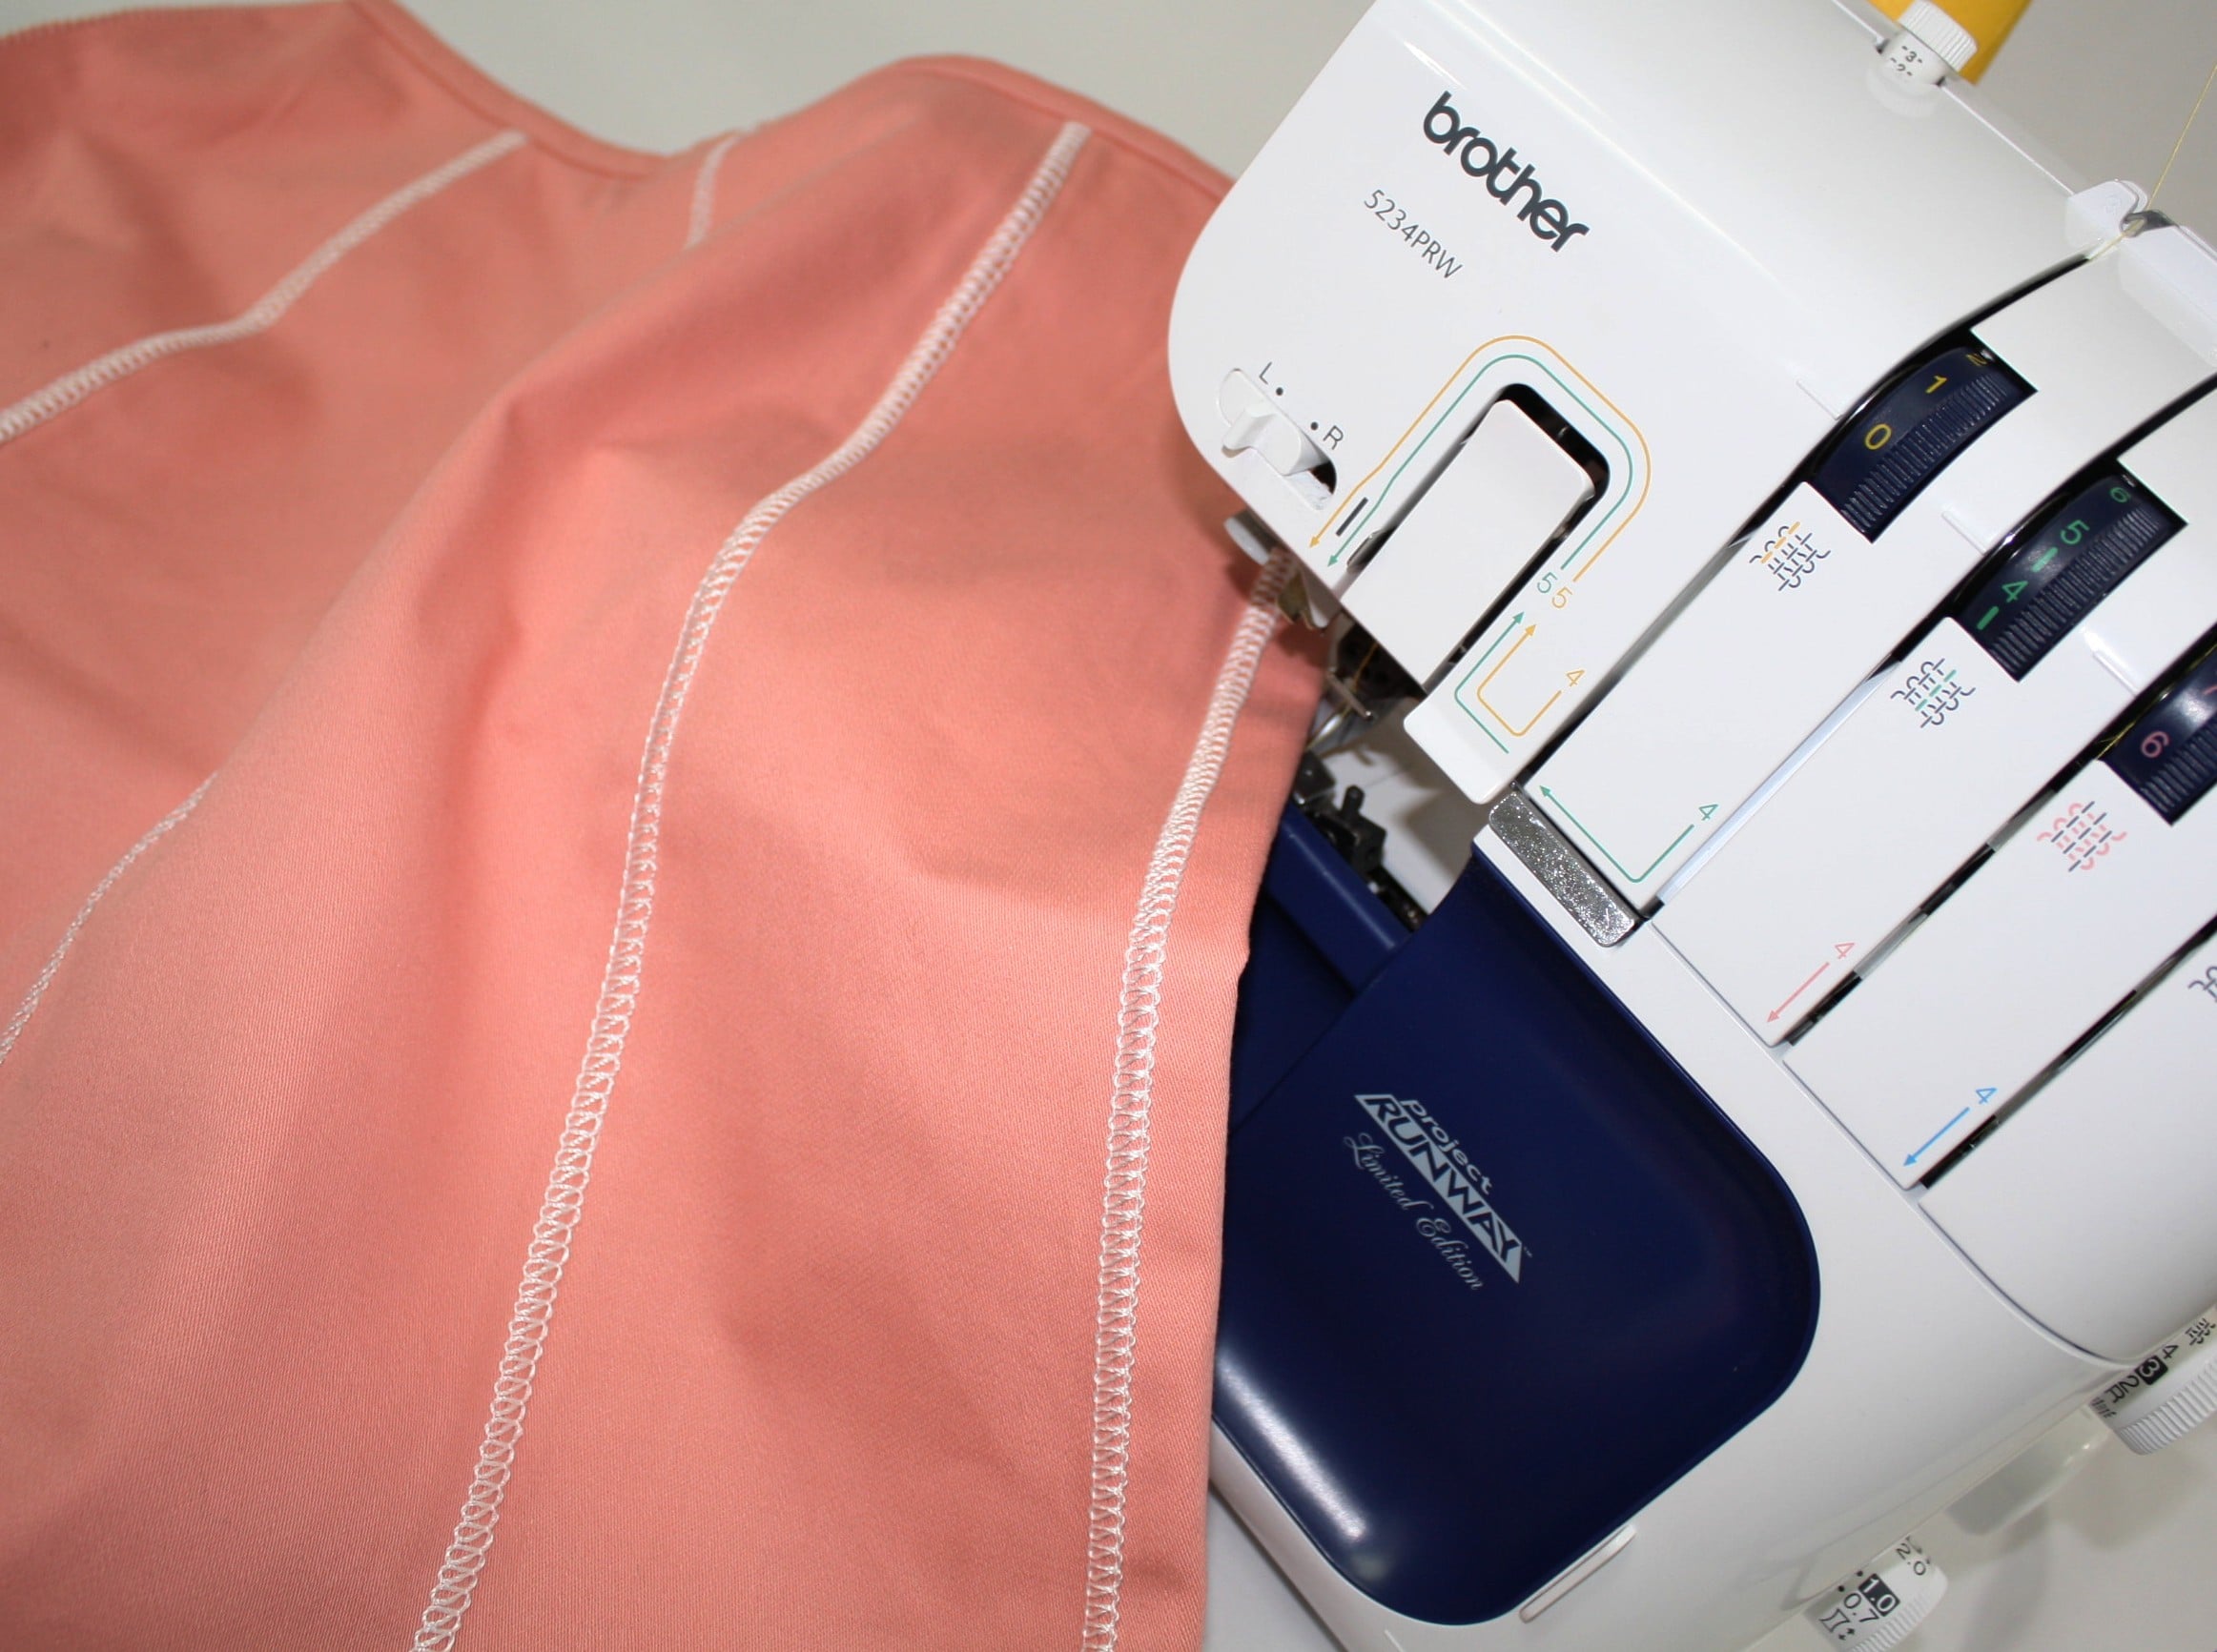
Set your serger up for a 3-thread overlock: I am using a serger from Brother and the standard setting for the needle and looper tensions are 4. When I give you new tension numbers you can compare this with your serger, if your serger has manual tension dials. If you are serging with an air-threading serger, like this Babylock, set up your serger for the 2-thread flatlock – wide.
Thread the upper looper (or the only looper for the 2-thread flatlock) with a decorative thread. Use standard poly serging thread in the needle and lower looper.
Next, there are a few changes to the serger settings:
Stitch Width: 5mm
Stitch Length: 2-4mm
Needle Tension: Decrease to 0 -3 (remember my standard setting is 4 so adjust for your serger)
Upper Looper Tension: Decrease to 2 – 3
Lower Looper Tension: Increase to 6 – 9
Disengage the knife
These setting serve as a guide. It will depend on the fabric and thread you end up serging with.
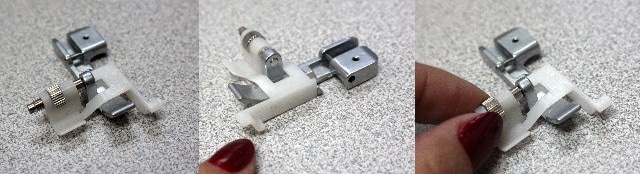
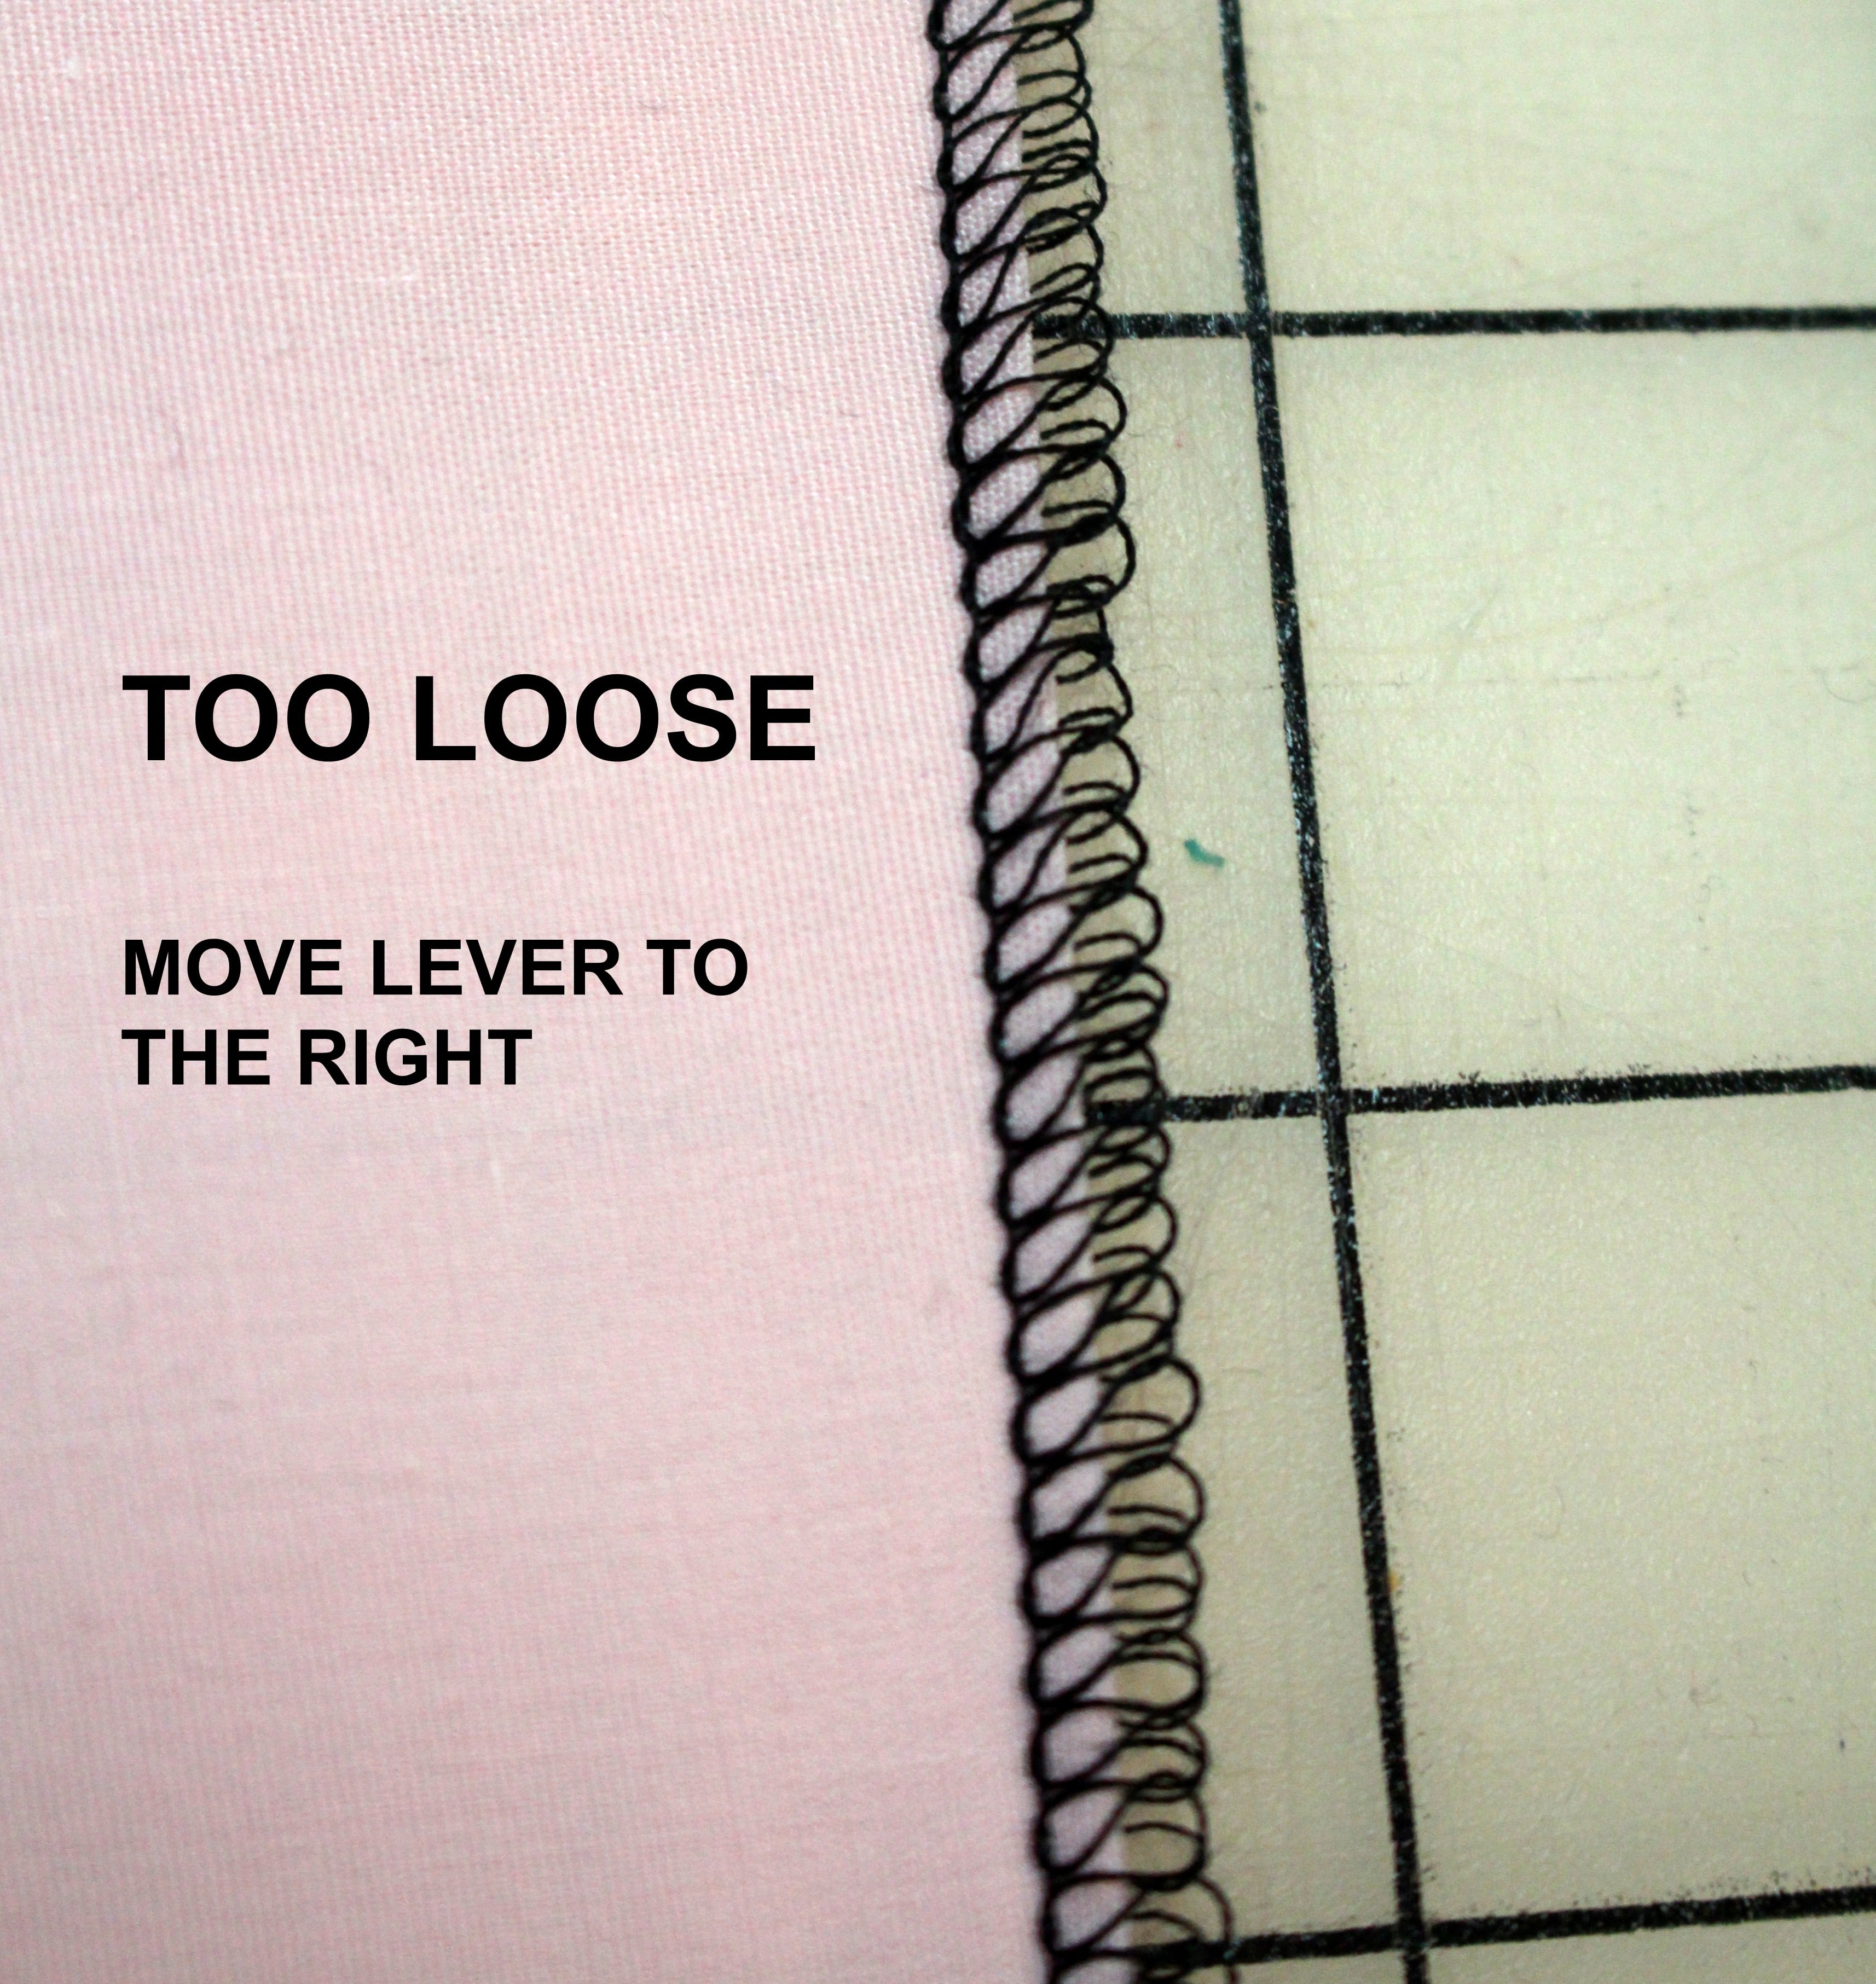
See if your serger had aBlind Hem Foot, if not you can use the standard foot.
There is a setting on the foot that moves to the plastic or metal piece to right and left, allowing the needle to pierce more or less of the fabric. Test the stitch on your fabric to determine the setting.
Fold the fabric in half or if you are embellishing a seam, fold along the seam line. Align the fabric along the shield on the blind hem foot (if using a standard foot, mark a spot to align with).
The idea is for the needle to pierce the fabric – half the stitch is on the fabric and half is off the fabric. In fact the stitch looks really messy coming out of the serger!
Stretch out the folded fabric to lie flat and press.
Pretty simple, but so fun! Have you ever tried this before? I would love some more ideas for decorative threads or yarns to use with this stitch.
Be sure to share photos of your creative serged project 🙂 #angelawolf
Episode 305 🧵 Behind the Scenes with Angela Wolf I know you have heard me say many time ... I am never going on a cruise! Winn and I are on the water all the time, why would I want to go on a cruise?!? Kelli Presley and Phyllis Batz will be joining me live to talk...
Episode 305 🧵 Behind the Scenes with Angela Wolf Featuring CraftOptics I am not sure about your, but if I am working in a low lit area or sewing beads onto a garment, I tend to lean forward and squint, this ending up with a terrible back ache! CraftOptics has changed...
Episode 303 🧵 Behind the Scenes with Angela Wolf The last part of our Delila Slit Sleeve Sewalong! Have you checked out all the Delila tops posted in our private Angela Wolf Patterns Group? So cute!!! Angie Hotchkiss ~ Angela Wolf Facebook GroupDarlene Deck ~...
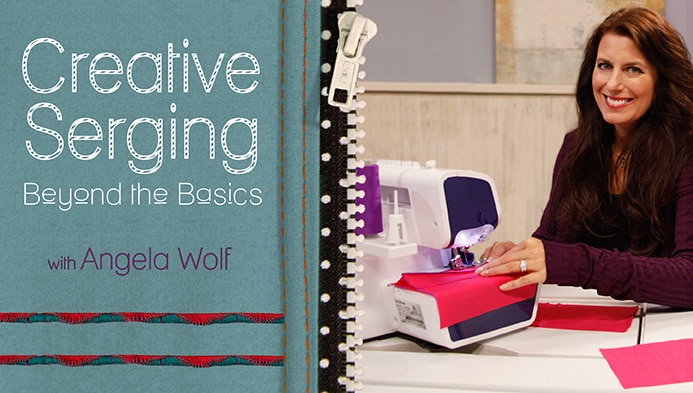
I am having so much fun finding ways to use my serger, more than simply finishing the edges in my garments! With over 5,000 students in the Craftsy class Creative Serging – Beyond the Basics , many of you are already expanding your serger use. I was thrilled to see Craftsy posted a few of my videos on YouTube … below you will see how to add pintucking. A great embellishment on home dec and apparel. The video shows you how to change the settings on the Brother Project Runway Serger 5234PRW (although it doesn’t show you how to remove the stitch finger, so check your manual and don’t forget that part!) In fact, no matter what serger you use, pull out the manual and set the serger to a rolled or narrow hem. I am showing you how to do the pintucking using a blindhem foot. If you don’t have that foot, a standard foot works fine. Just serge straight 🙂
Speaking of manuals, lets take a vote … how many of you have read through your entire serger manual? I must confess, until last year I only scanned the pages referring to threading 🙂 Enjoy xoxo Angela