Fabric Manipulation … The Trend of 2013
I have a new fetish for altering fabrics and I am on a mission to test some new and old techniques and see if they will fit into high-end fashion. Embroidery is definitely high on the list, and I am not talking about embroidered bunny’s on the front of my sweatshirt or his and her towel’s (although I have to practice somewhere 🙂 I am more thinking about using embroidery to create new fabrics and using that fabric in my garments. A few ideas I am going to try:
- attaching two unusual textures
- quilting silk charmeuse
- sleeve embellishment
- embroidered jeans
- embroidery + needle felting
- distressing
- adding faux fur
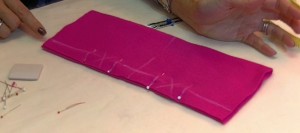
- shirring
Just a touch of ideas and I am going to give them a try over the summer, looking into my fall wardrobe. I don’t expect them all to be a success, but I know this will be fun! So to kick off my experiment I thought I better learn how to embroider. These jeans were my first embroidery project last May, not too shabby if I don’t say so myself. The jean pattern is an altered version of my Angel Bootcut Jean and the embroidery design I created on Brother’s Dreamweaver . Trust me, I had no idea what I was doing but these new embroidery machines tell you what to do!
I sewed the jeans in a little different order starting with the front and back pockets and then the outside seam. A bit of a risk, after all that work, that the embroidery turns out awful. Looking back, you would think I would have tested the design on something, even a scrap of fabric. I am too stubborn for that. Each leg took 3 hooping’s and at first the total embroidery hours for both legs was tallying up to be 26 1/2 hours … YIKES! Then I realized that each color would only embroider for a few minutes and I would have to keep changing threads (this is only a one thread embroidery machine, in case you might think I have the fancy one). I decided to change the order of color, even if it altered the final design.
The embroidery design: I changed the design from being a little larger in the top (1st hooping) a little smaller in the middle (second hooping) and really small at the ankle (third hooping). Minus a few mistakes (which I won’t point out :)) I was really pleased with the final results.
One thing I learned with embroidering stretch denim – after you embroider, the denim doesn’t stretch. Just keep that in mind and make alterations to your pattern to allow for that non-stretch, especially if you are sewing skinny jeans or jeggings. I am planning on embroidering another pair of jeans with all one color of thread, I am thinking black fabric with silver thread or something along that line.
Any embroidery tips for me would be greatly appreciated, I have a lot of fabric I want to try (especially silk charmeuse). There is so much to learn and take into account. For example, embroidery thread. There are a ton of choices, any advice on the what’s the best and why? I would love to know the scoop!
Until then,
Cheers!
Angela