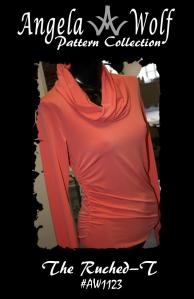
Learn How to Ruch a Simple Tee

[youtube=http://www.youtube.com/watch?v=iXH2H-QdQNw&feature=g-upl]
Brother™ has provided me with the DreamWeaver XE, but all opinions expressed are entirely my own.


[youtube=http://www.youtube.com/watch?v=iXH2H-QdQNw&feature=g-upl]
Brother™ has provided me with the DreamWeaver XE, but all opinions expressed are entirely my own.

I hope you are all safe from hurricane Sandy and my heart goes out to all those affected. We even experienced severe weather here in Michigan! I made it to the beach yesterday and after getting stuck in the sand with our SUV, I was able to snap a few shots. Unbelievable waves on Lake Michigan, over 20 footers. I think I’ll pass on fishing for a few days 🙂
Now onto sewing …. more specifically topstitching. Topstitching jackets and jeans are not only a designer touch; this has become a main focus in today’s fashion. The more creative the topstitching the more expensive your garment looks. On that note, have you ever finished a great looking jacket only to discover you can’t find a matching color in the thick topstitching thread? Would you like to hem your favorite jeans – again not being able to match the original jean thread color. This video shows you an easy way to solve that problem, using two spools of Coats & Clark polyester thread and a #14 denim jean needle. You will even get a peek at the automatic needle threader on the Brother Dreamweaver XE, yes it even works with 2 threads! Enjoy 🙂
[youtube=http://www.youtube.com/watch?v=HtKotSXYreI&feature=plcp]
Brother™ has provided me with the DreamWeaver XE, but all opinions expressed are entirely my own.
[youtube=http://www.youtube.com/watch?v=4OH2uiaZXyc]
Here is part 2 for finishing off the front of your designer jean pockets. This video will show you how to add a coin pocket, which is totally optional. Sometimes I add a logo instead, just depends what kind of mood I am in 🙂 Of course I have to show off a few other features on the Brother Dreamweaver XE VM6200D, like using the V-Sonic PenPal to determine how wide my zigzag stitch will be – you really have to see it to believe it. Now, I just have to finalize the last of the Angela Wolf Jean Patterns so we can ship them out soon, wish me luck! xoxo Angela
Brother™ has provided me with the DreamWeaver XE, but all opinions expressed are entirely my own

Another quick lesson on sewing designer jeans, sewing the front pockets. I have broken this into two parts as this lesson will cover attaching the silk charmeuse lining and topstitching the pocket edge. The next lesson shows how to add a coin pocket and closing up the lining. To get started you will need your front jean pieces and the pocket lining. You will usually find cotton as the fabric for the pocket lining, but I prefer to use something a little more luxurious, like silk charmeuse. Because the silk is so thin you can’t see the pockets through the outside of the jean, not to mention the fabric feels awesome against the skin.
Again, experimenting with some of the new features on my Brother Dreamweave
Onto sewing the pockets … pin your silk charmeuse lining to the denim fabric along the curve of your pocket. You can stitch from either side, I chose to stitch with the denim on the top so you can see the sew straight laser vision guide a little better. I have aligned the laser with the raw edge of the fabric, allowing me to sew the entire pocket curve with a precise seam allowance.
Press the Pocket Lining … Turn the lining to the inside of the pocket and steam press, using the tailor’s clapper to permanently hold that crease (shown on video below).
Topstitch the Pocket Edge … Again, utilizing the laser light to make sure my first topstitch line is perfectly placed 1/8″ from the edge of the pocket curve. Then I move the laser light to align with the previous topstitch line, but here is a new one for you. I am able to use the v-sonic pen pal to touch where I want the laser light to move to. You have to check out the video below to get the full visual of this unique feature, but simply put … engage the pen pal, touch the bed of the sewing machine where you want the laser light to shine, and hit OK. That’s it! Just imagine how easy sewing straight rows of topstitching will be 🙂
[youtube=http://www.youtube.com/watch?v=9AOuS5b7lrw]
Brother™ has provided me with the DreamWeaver XE, but all opinions expressed are entirely my own


Since my Angela Wolf Jean Pattern’s are ready to launch in October, I thought it would be fun to put together some blog posts sewing my jeans to help you follow along and brag about the new Brother Dreamweaver XE VM6200D. This machine just came out so if you are thinking of picking up a new machine, you have to check this one out.
So, I have to tell you about this sew straight laser vision light. When I heard this, I really couldn’t imagine how this could work. I sew all the time, how on earth can this help me sew a straight line? First off, if you need help sewing a straight line – this feature is incredible! For me, I usually use the foot or guide on the plate to sew straight. I have to admit, after using the laser light for an entire day I noticed my eyes felt better (from not staring) and I was able to sit up straighter, instead of leaning over the machine. I know your thinking, go buy glasses 🙂
Anyway, this is how this works. The laser is shown on the main sewing screen. Simply touch the icon and you are given a range of 10.5mm to adjust the laser position. In the pictures below you can see the laser light on my fingers. The lighting on this machine is so bright (perfect for sewing black fabric), I had to lower the light level to less than half to take this picture.
Brother™ has provided me with the DreamWeaverTM XE, but all opinions expressed are entirely my own.