VLOG 250 Behind the Scenes ✂️ Unbox Craft Optics & Sleeve Hack

VLOG 250 Behind the Scenes ✂️ Unbox Craft Optics & Sleeve Hack

Episode 250 ~ At your side 🧵 Virtually!  Unboxing Craft Optics & Sleeve Hack

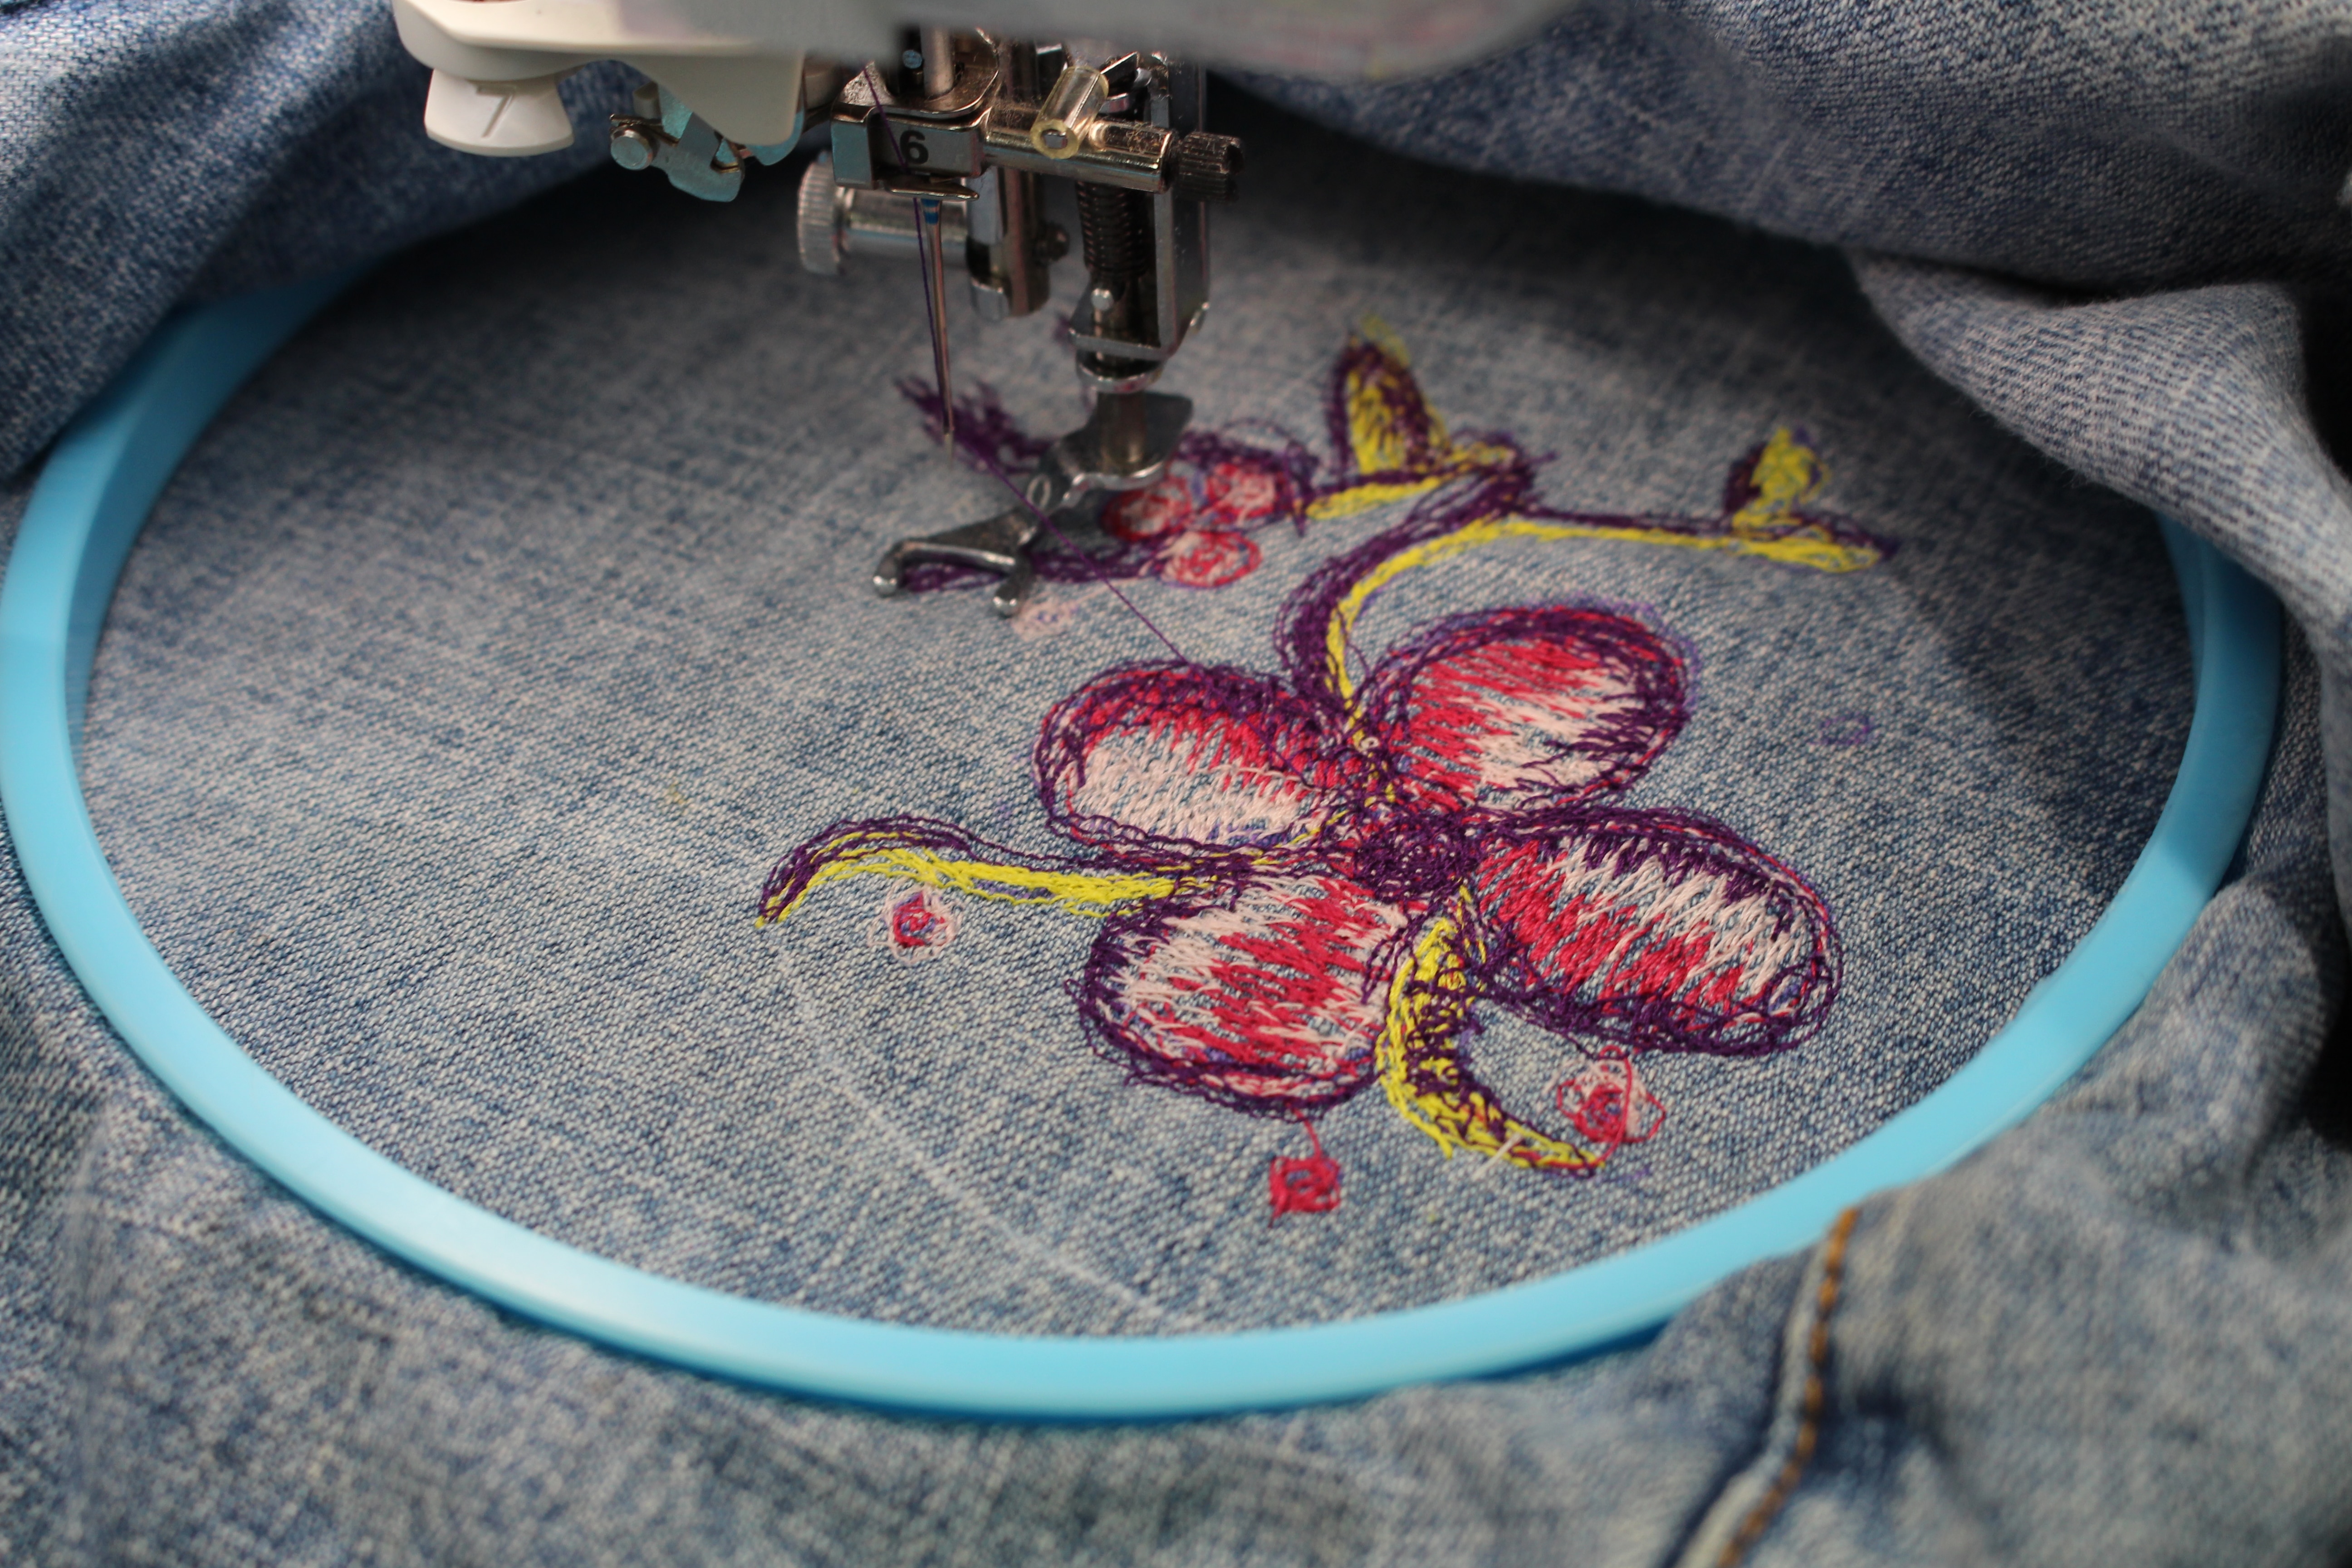
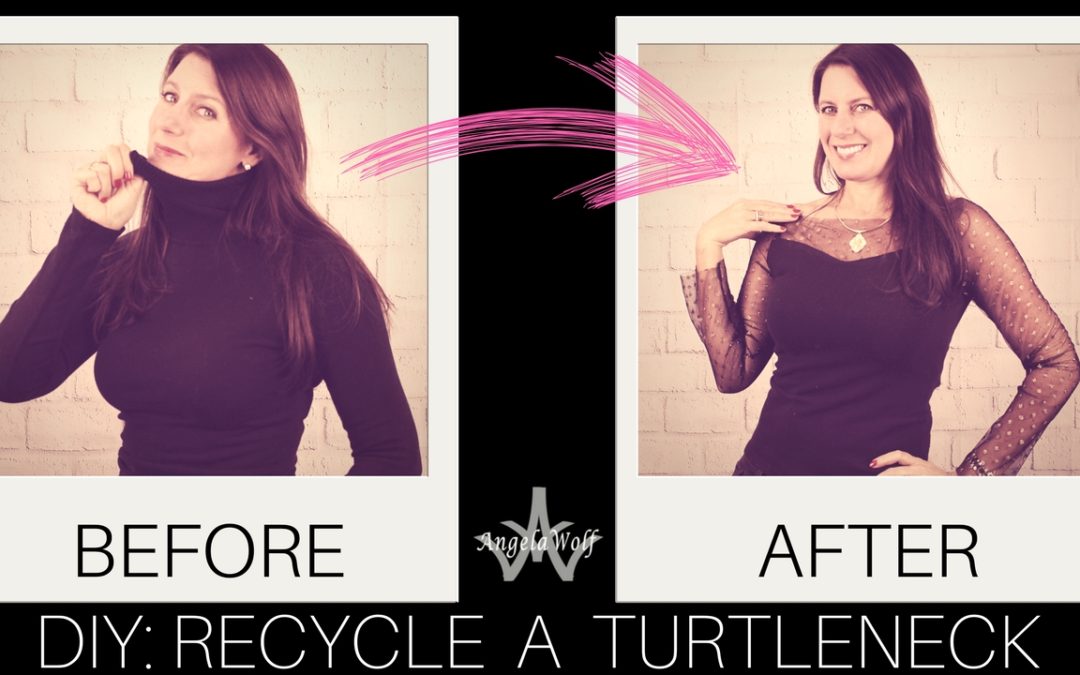
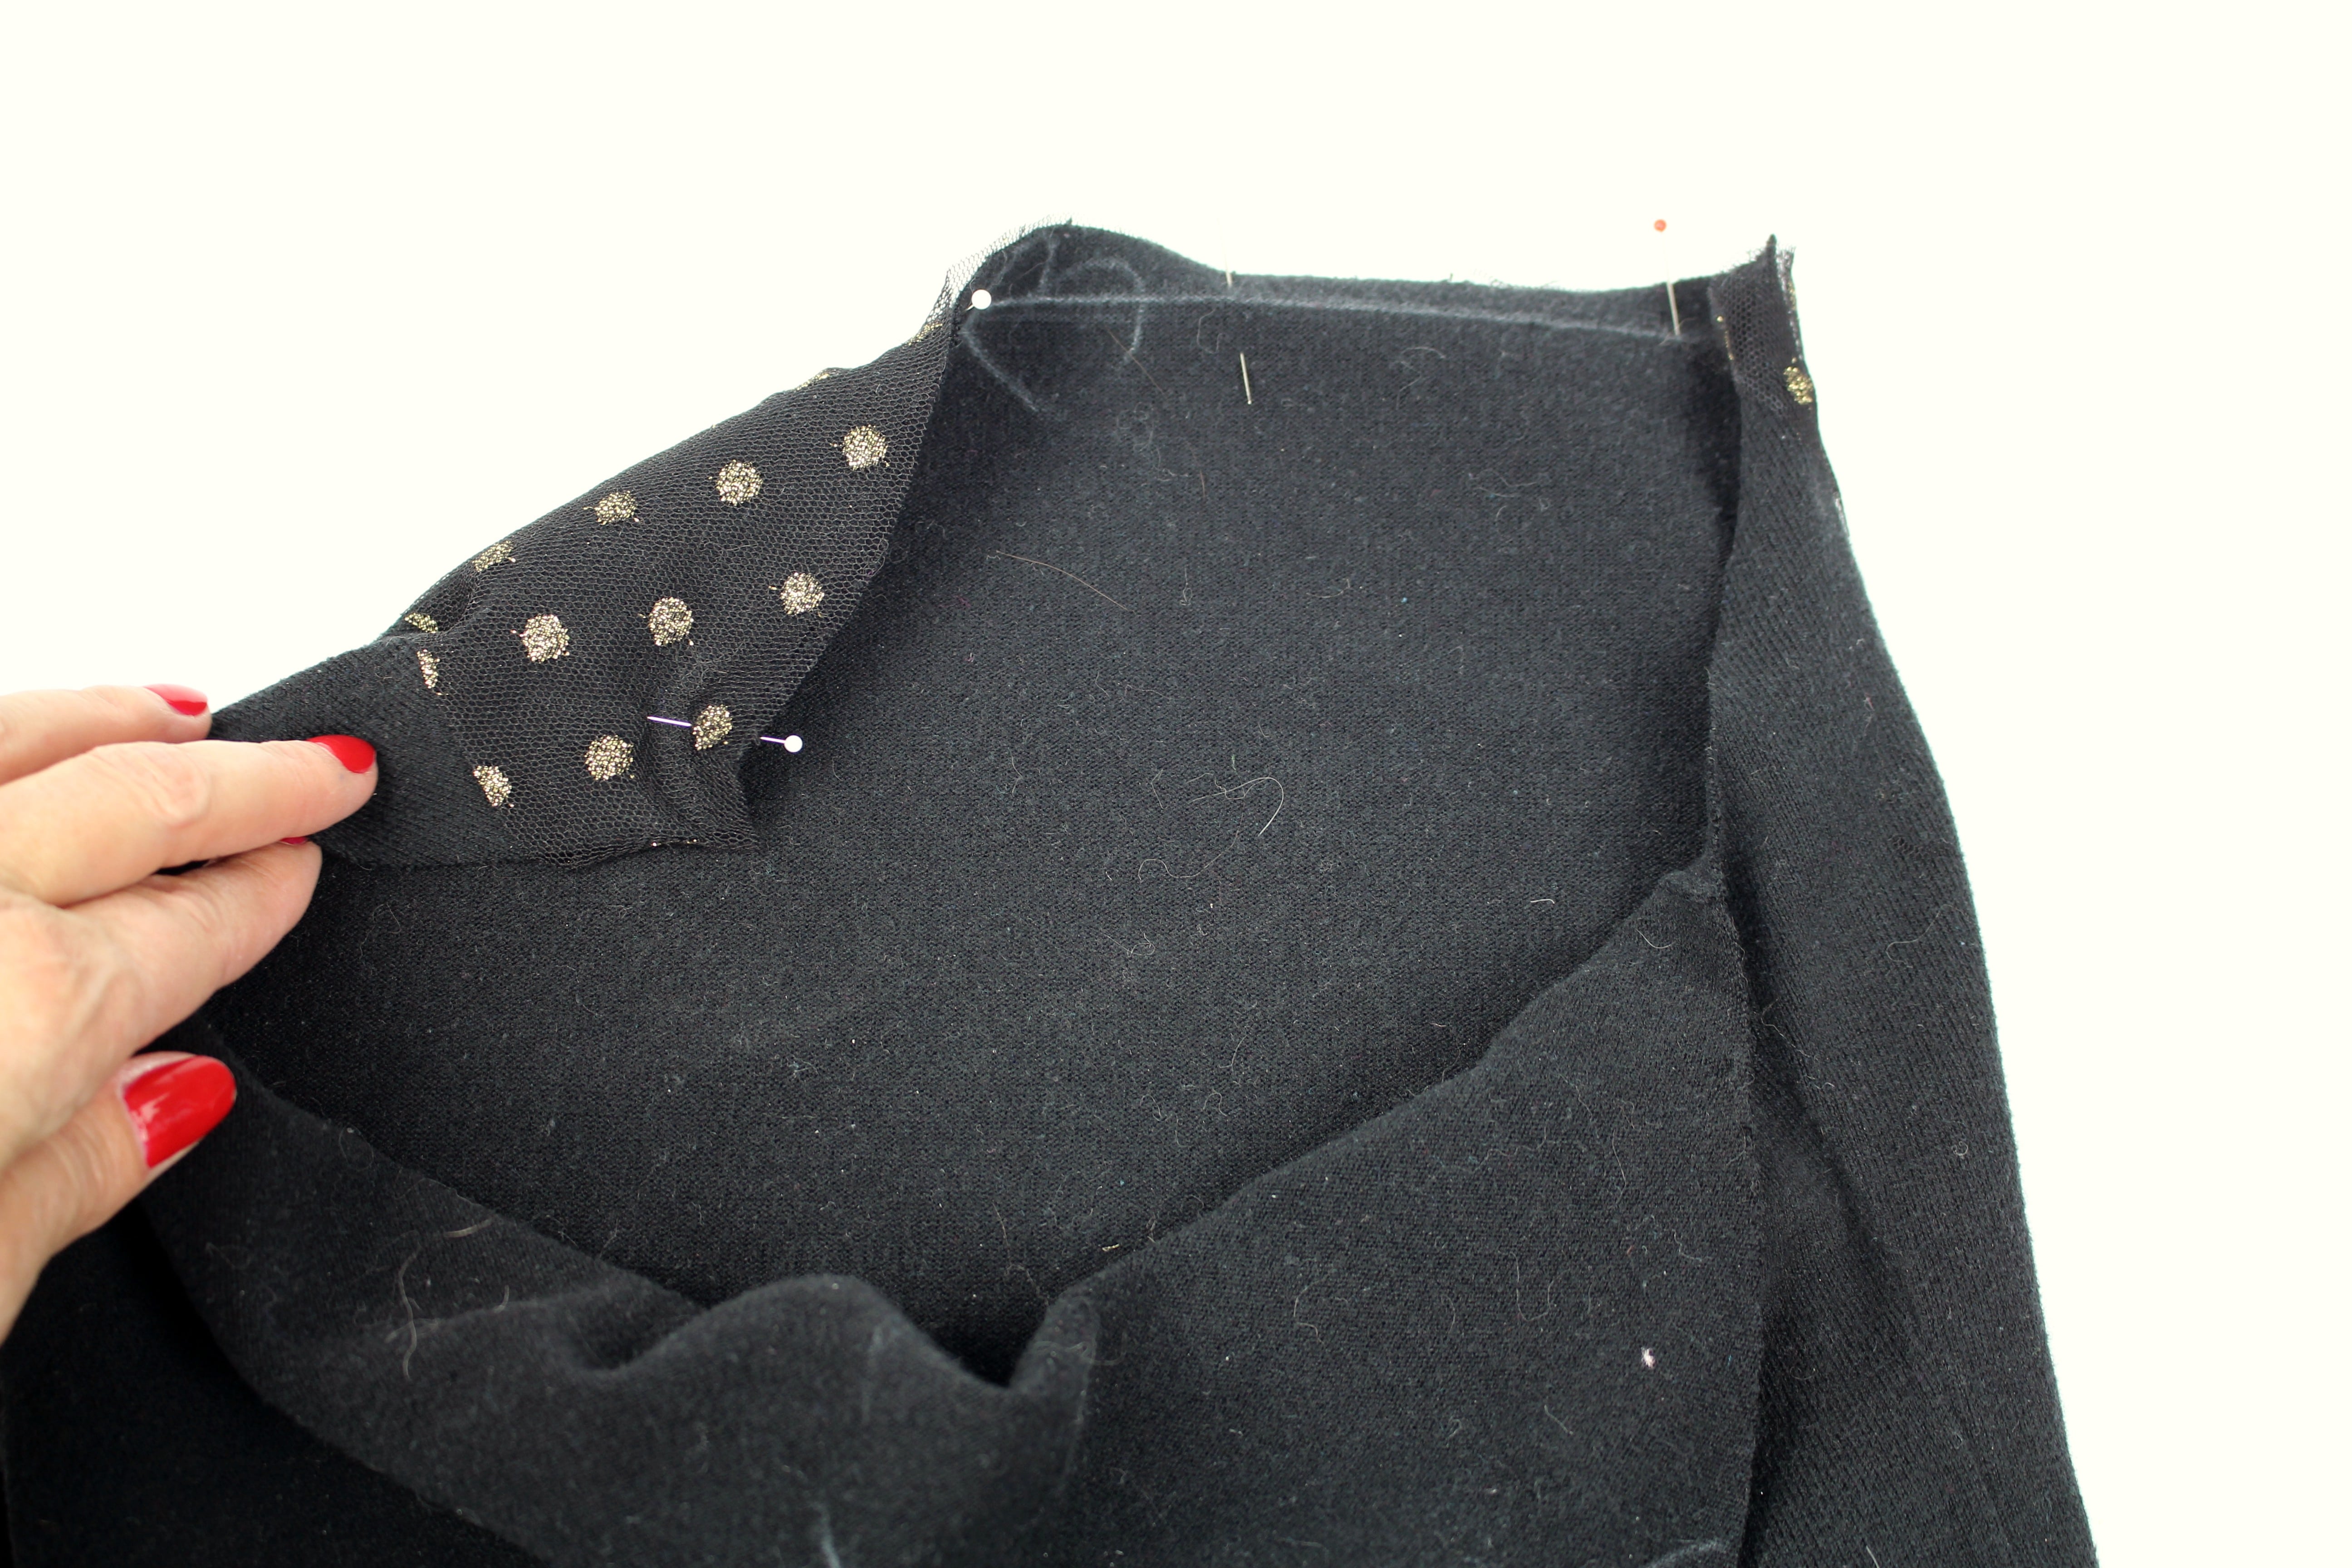
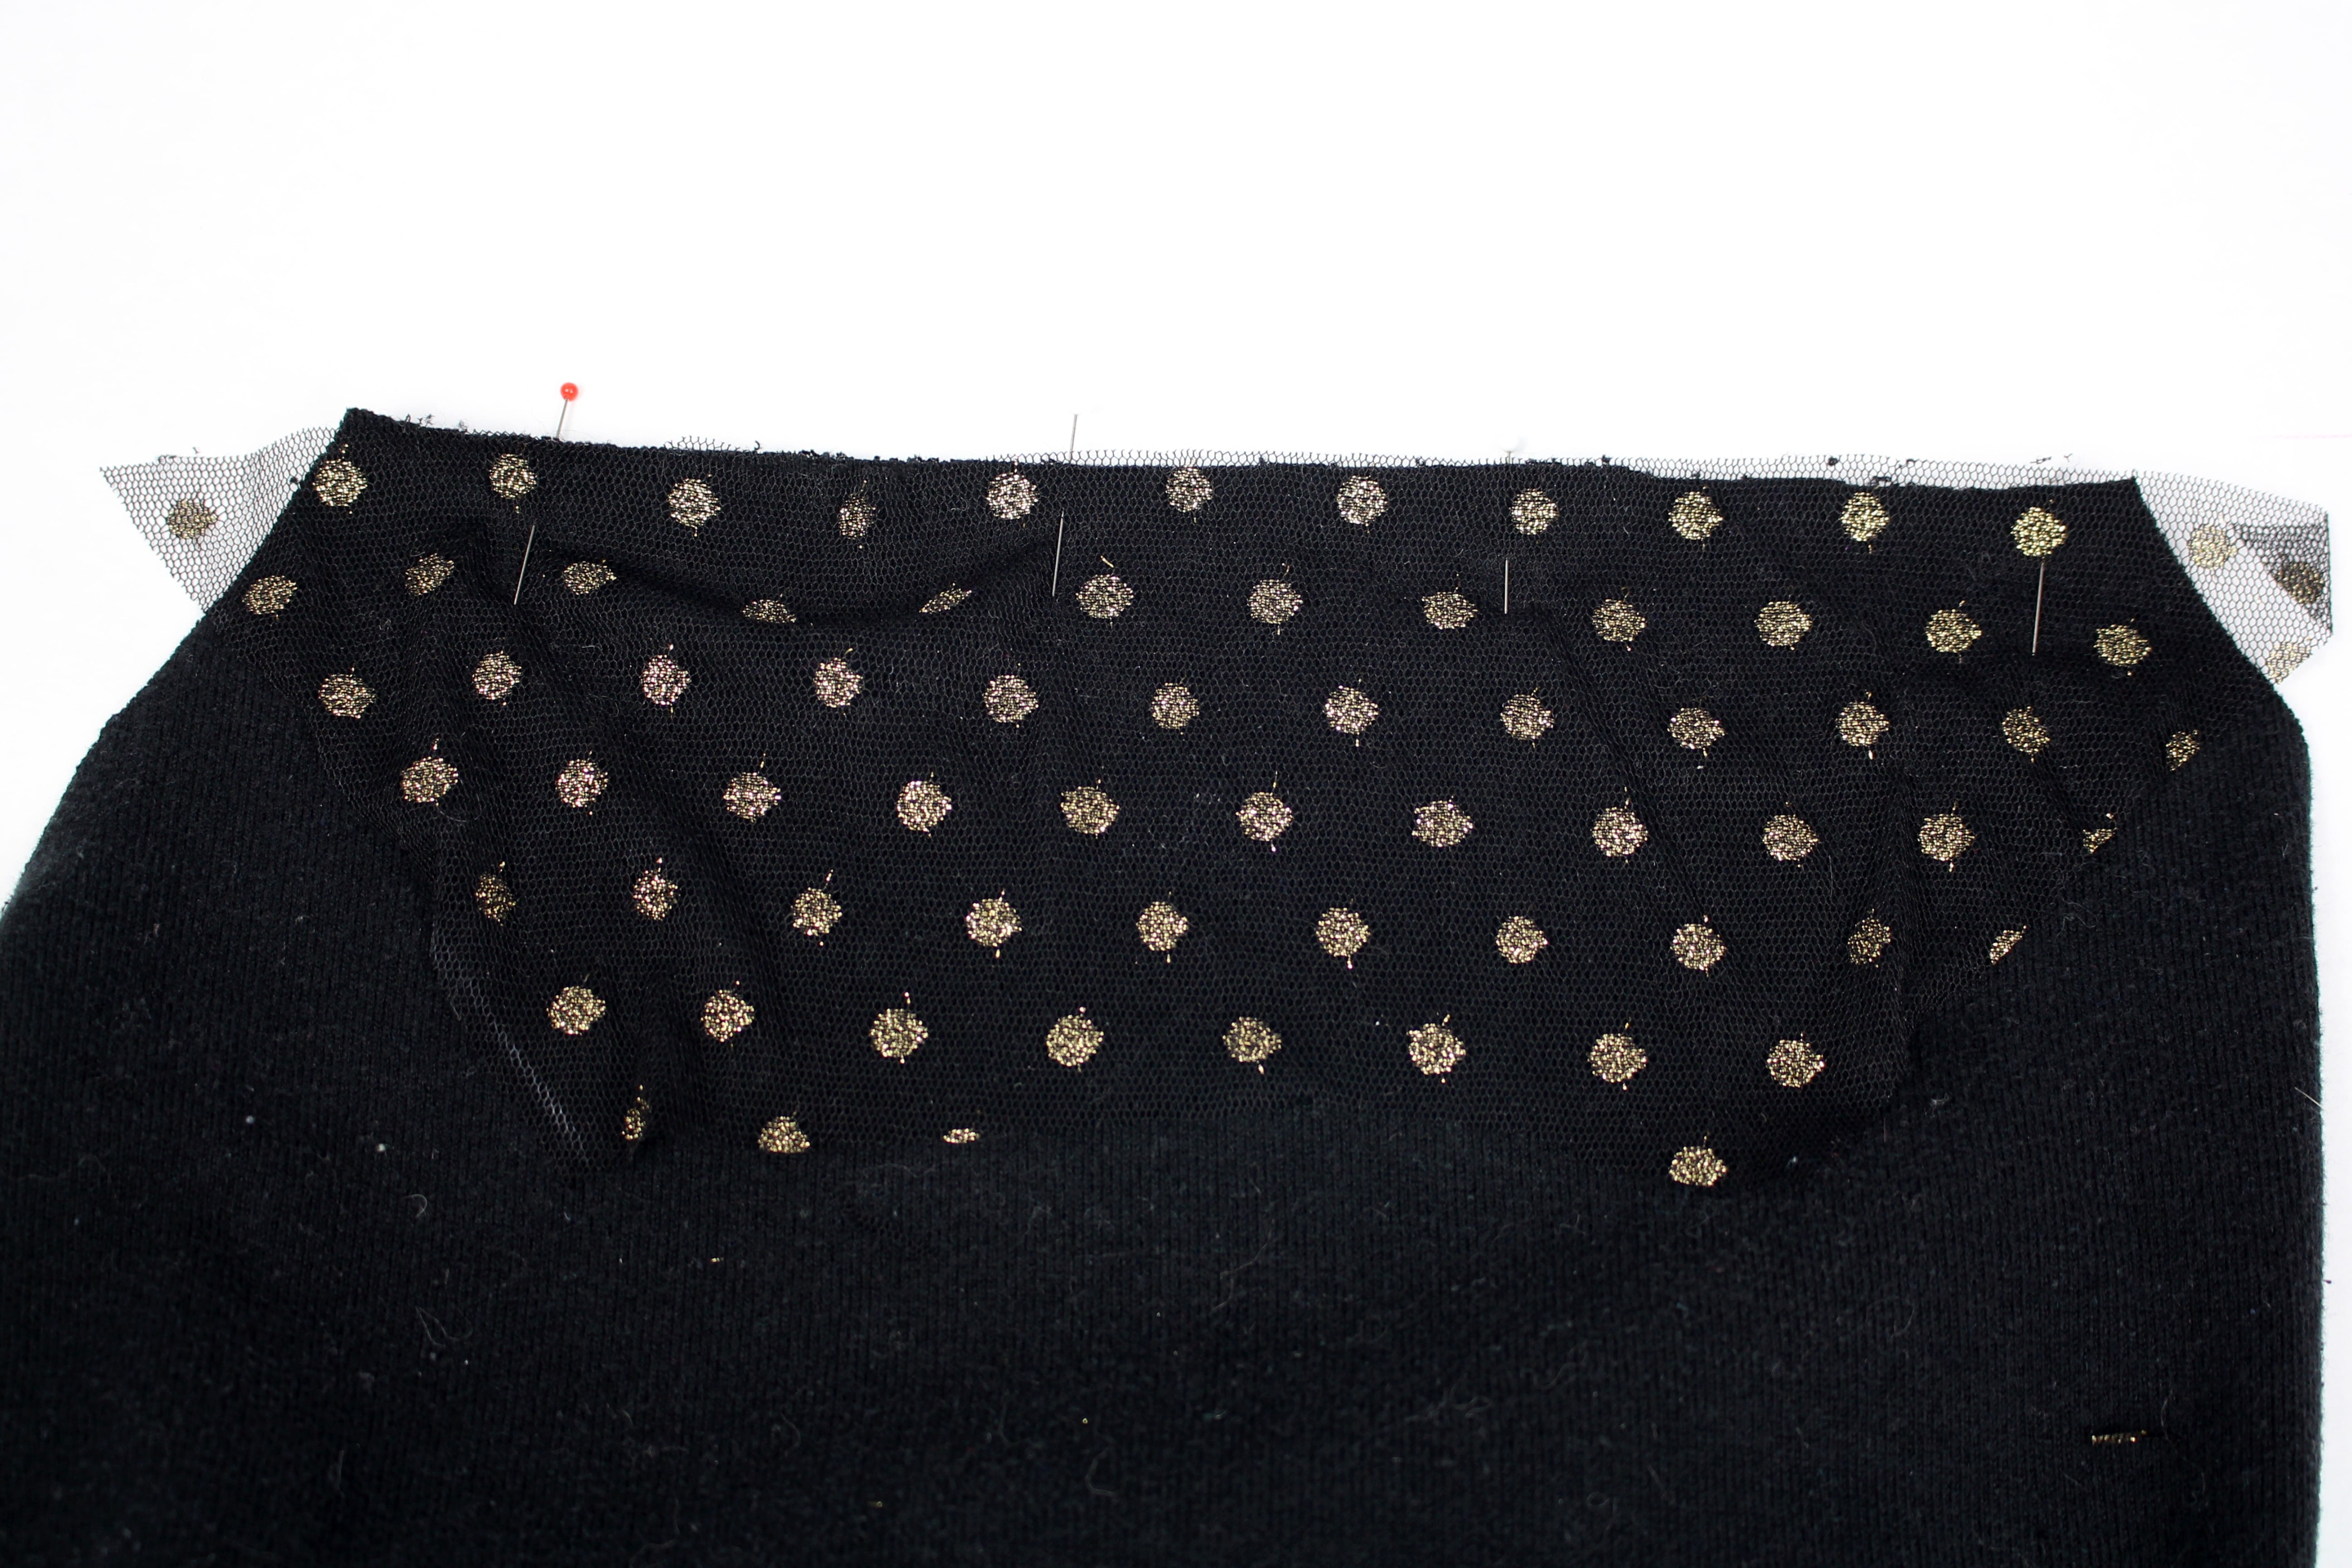
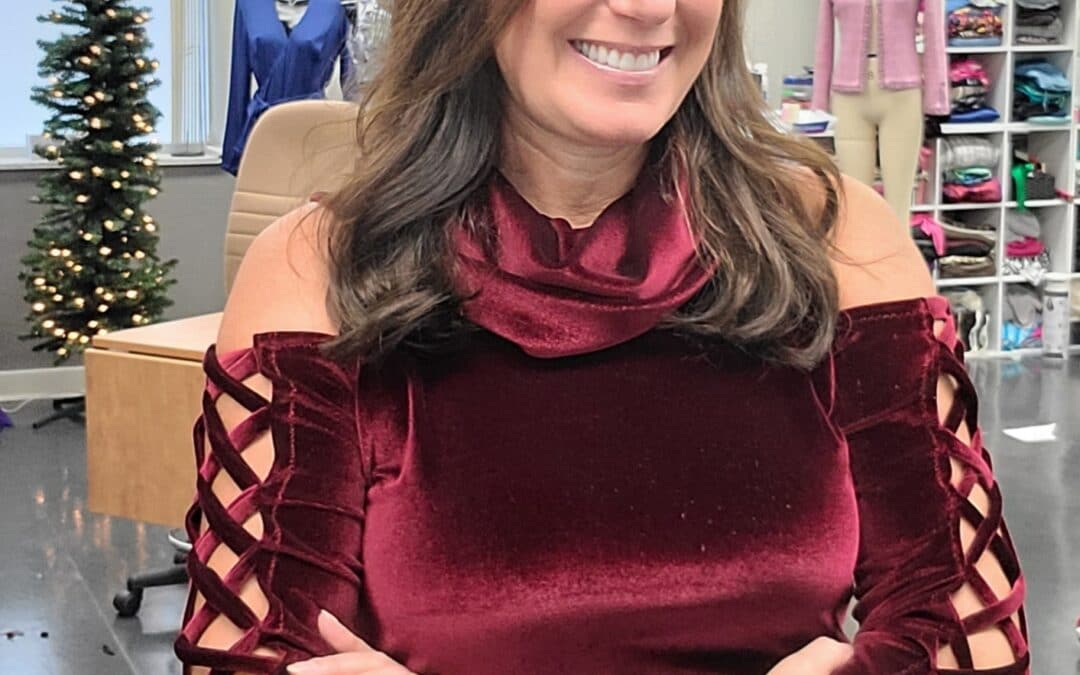
Behind the Scenes Episode 250 Included an interview with Jeff from CraftOptics and an unboxing of my new WOW glasses.  Then I kick off Birthday sewing month with a sleeve hack for another fabulous velvet top!     

Jeff has offered the Wolfpack two awesome discounts (expire 1/1/2022) including:
 
$125 OFF the WOW Package with coupon code:  WOWANGELA
$60 OFF Glasses Only with coupon code: ANGELA60
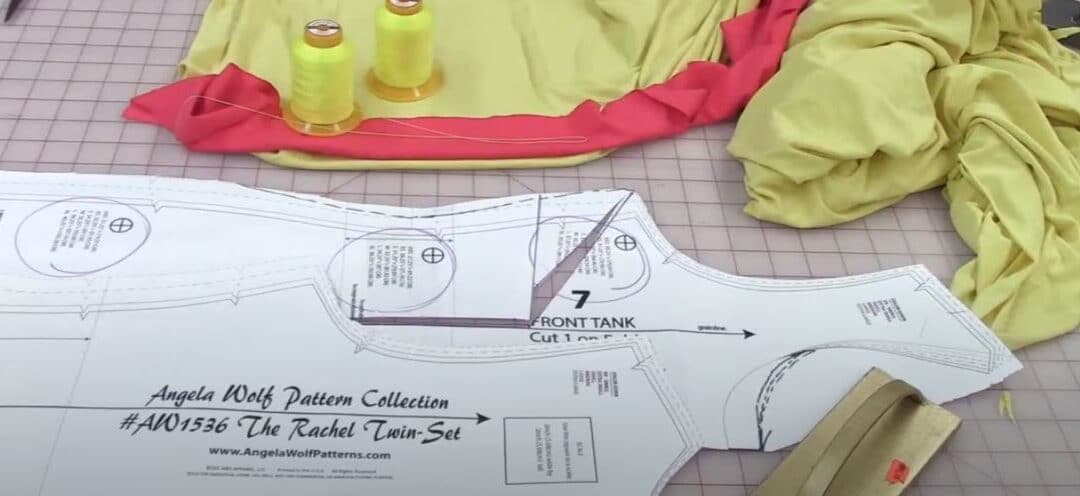
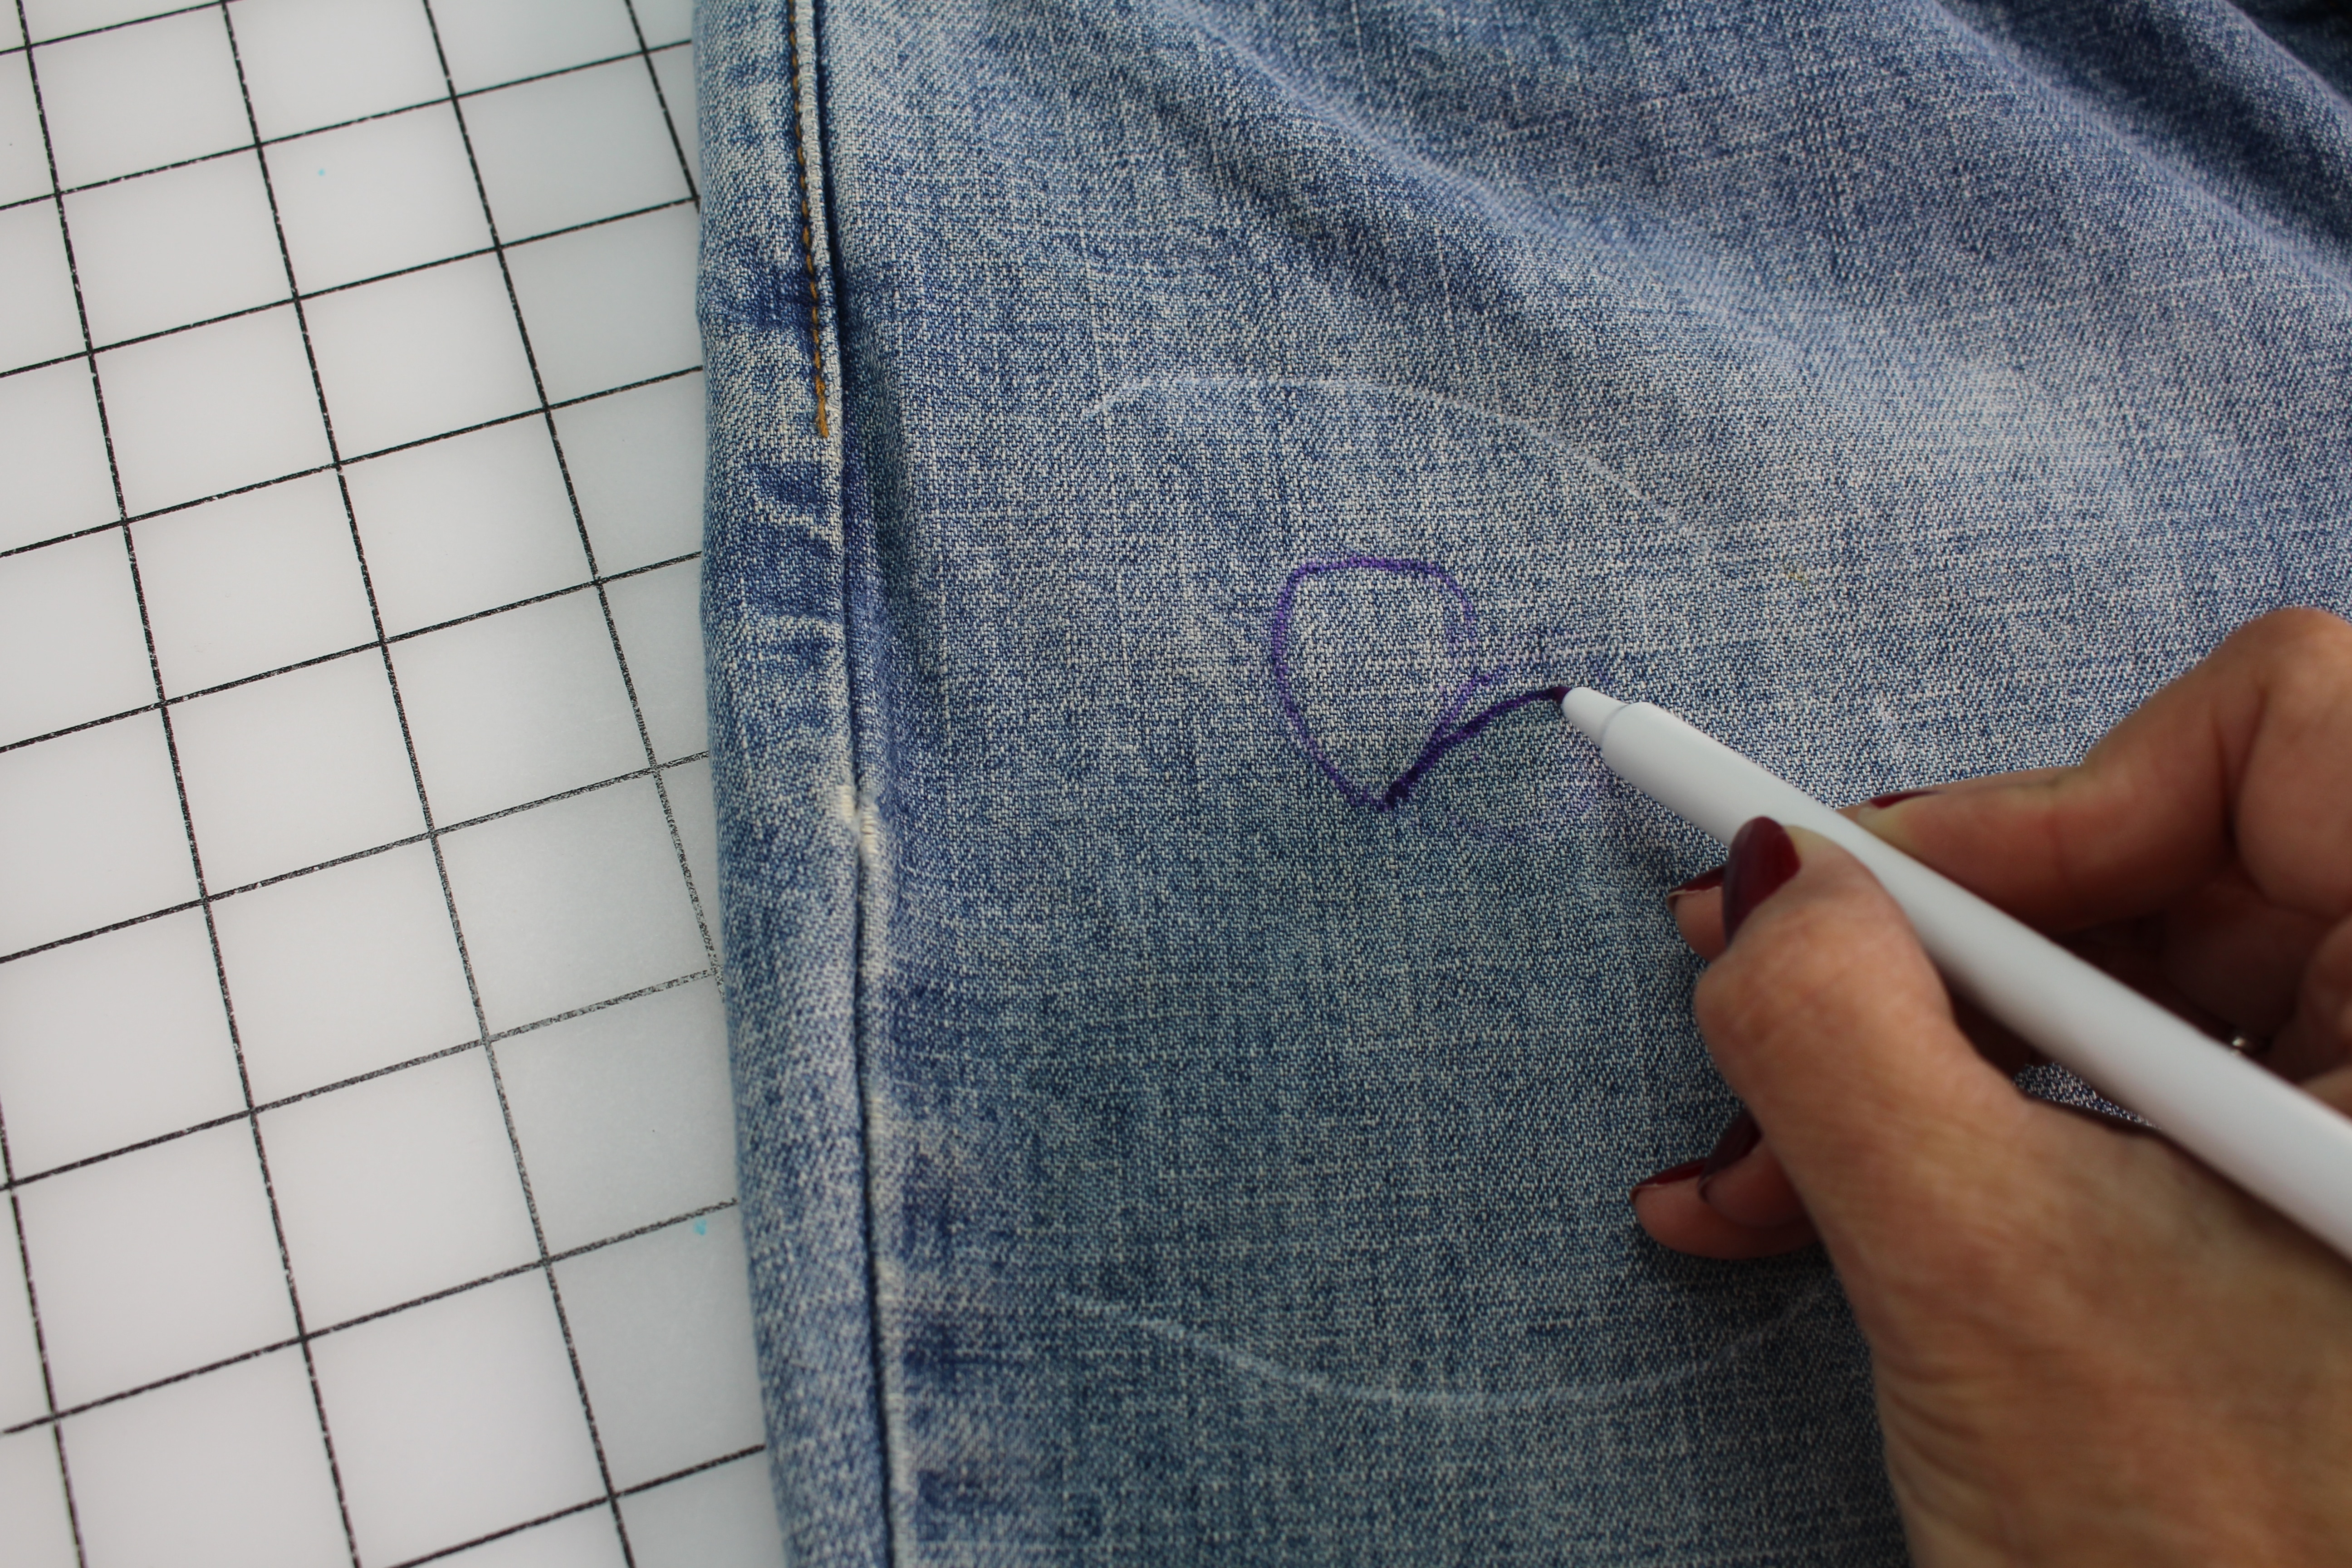
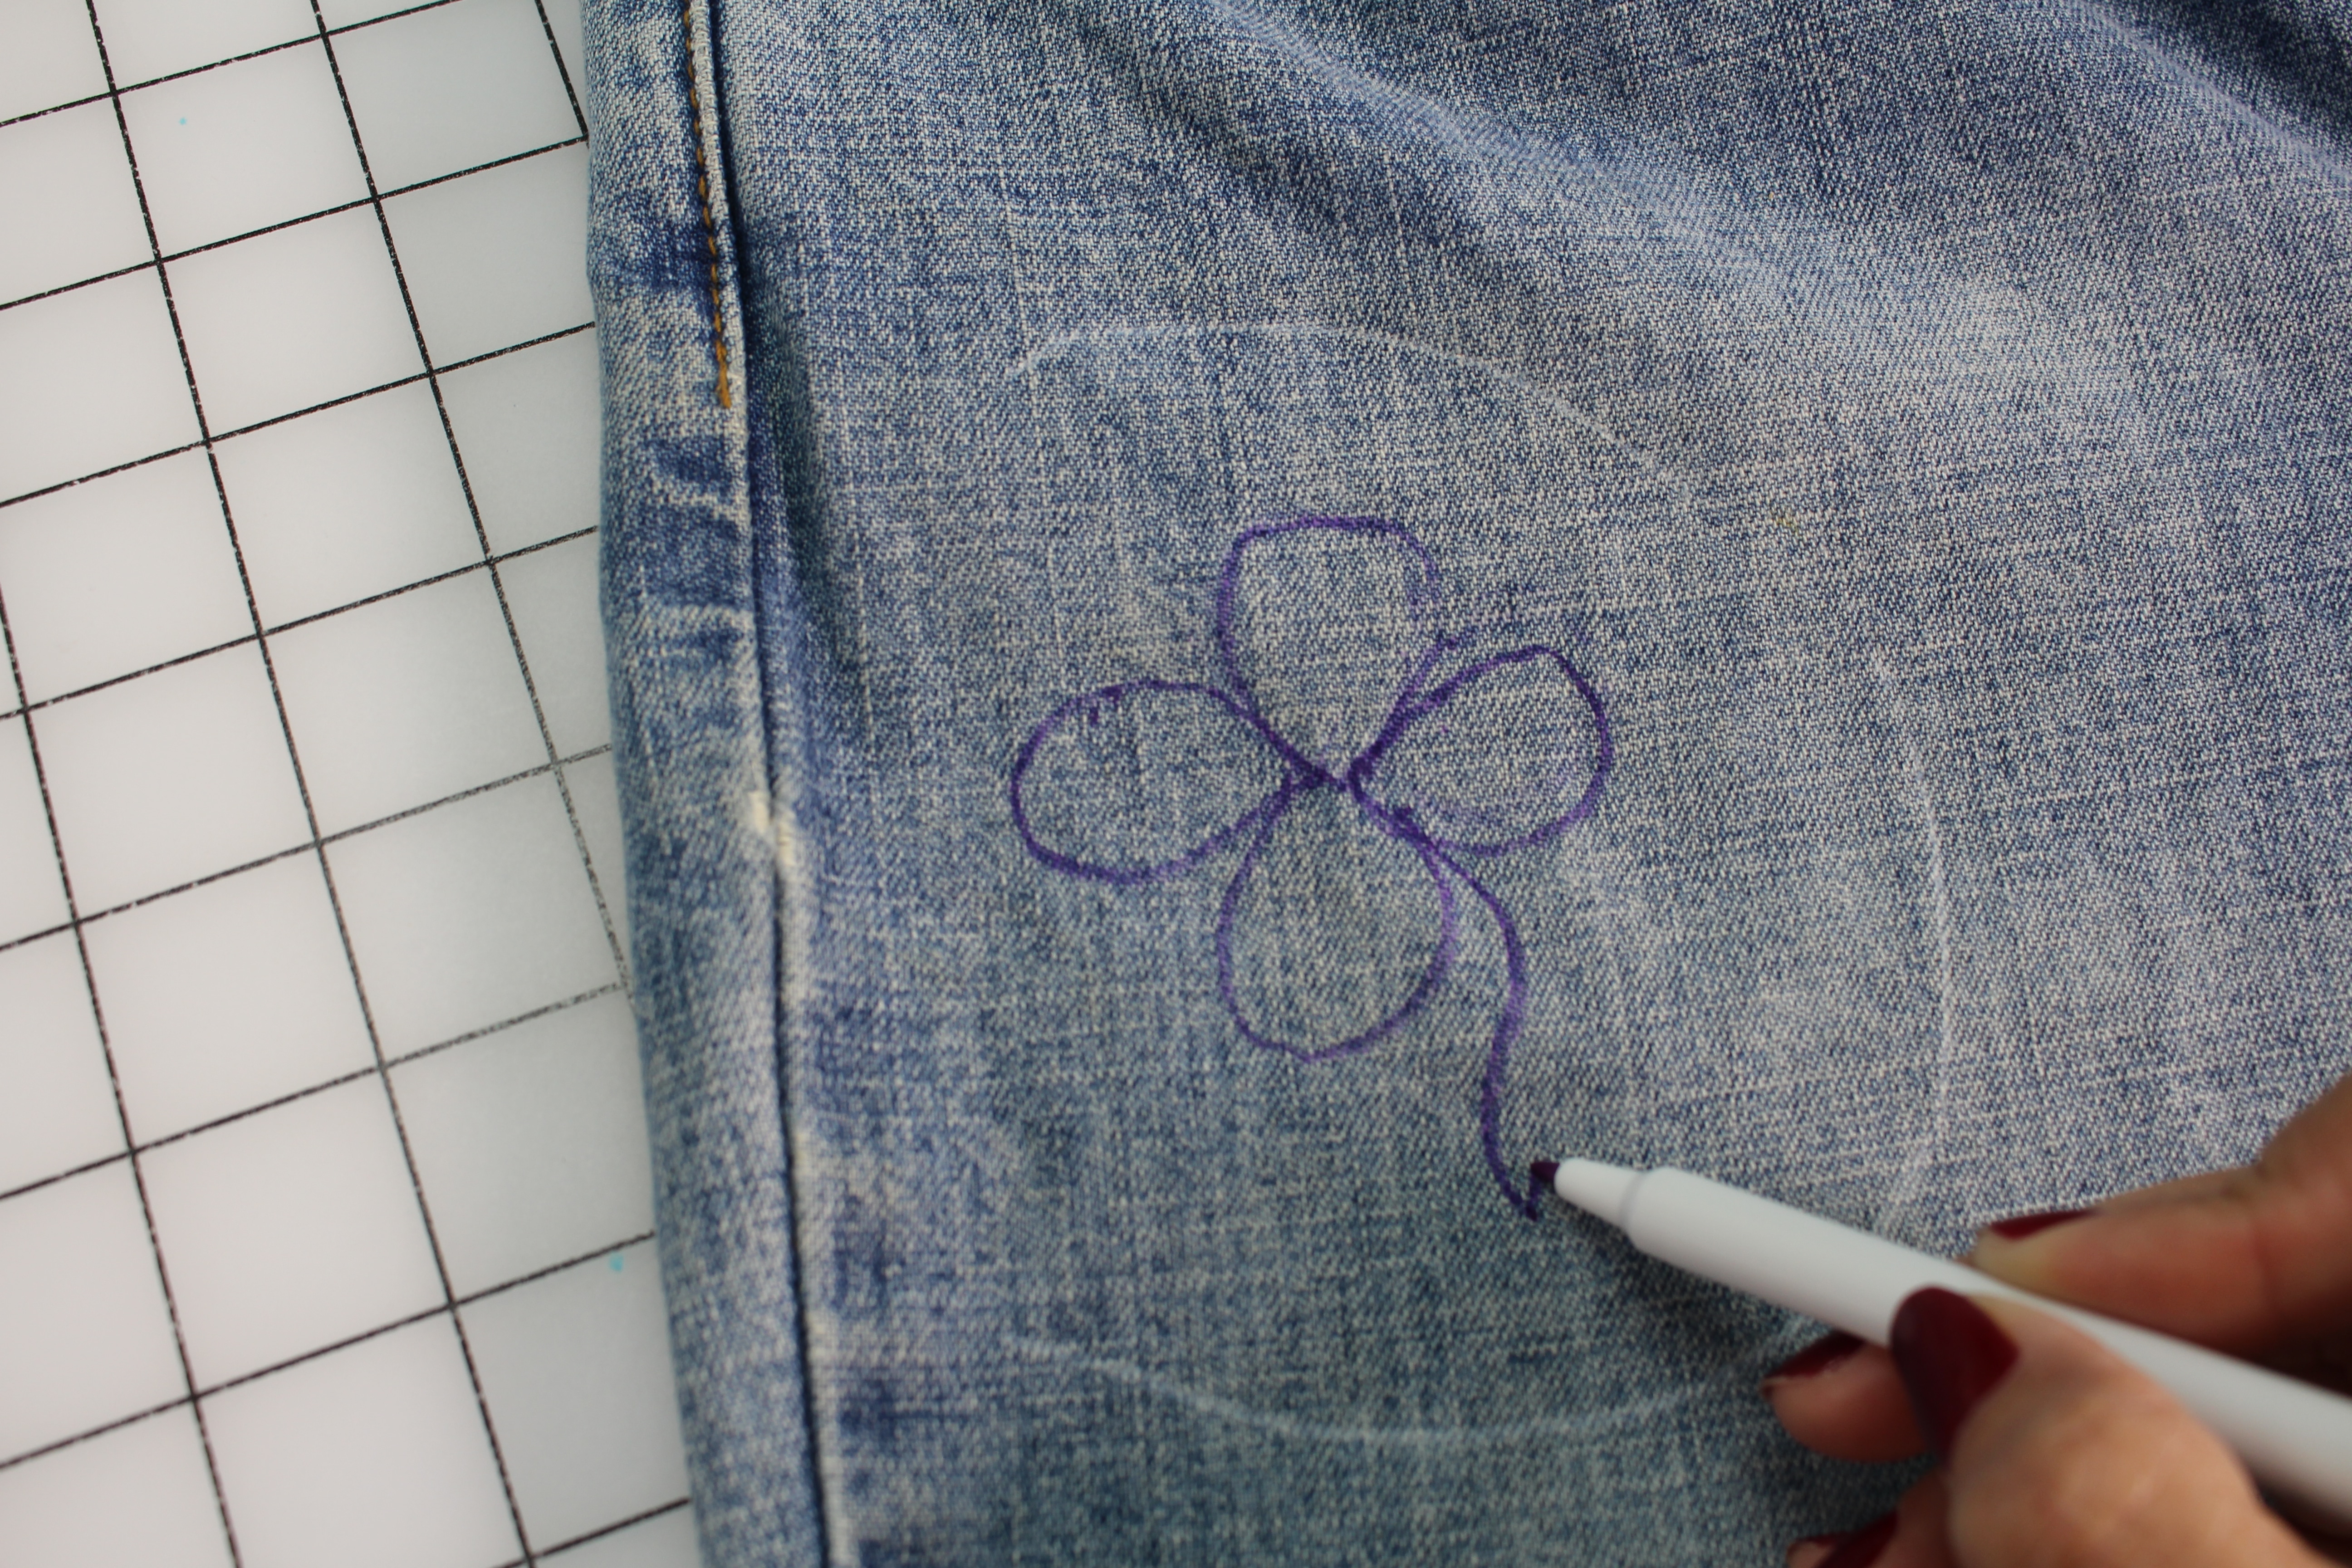
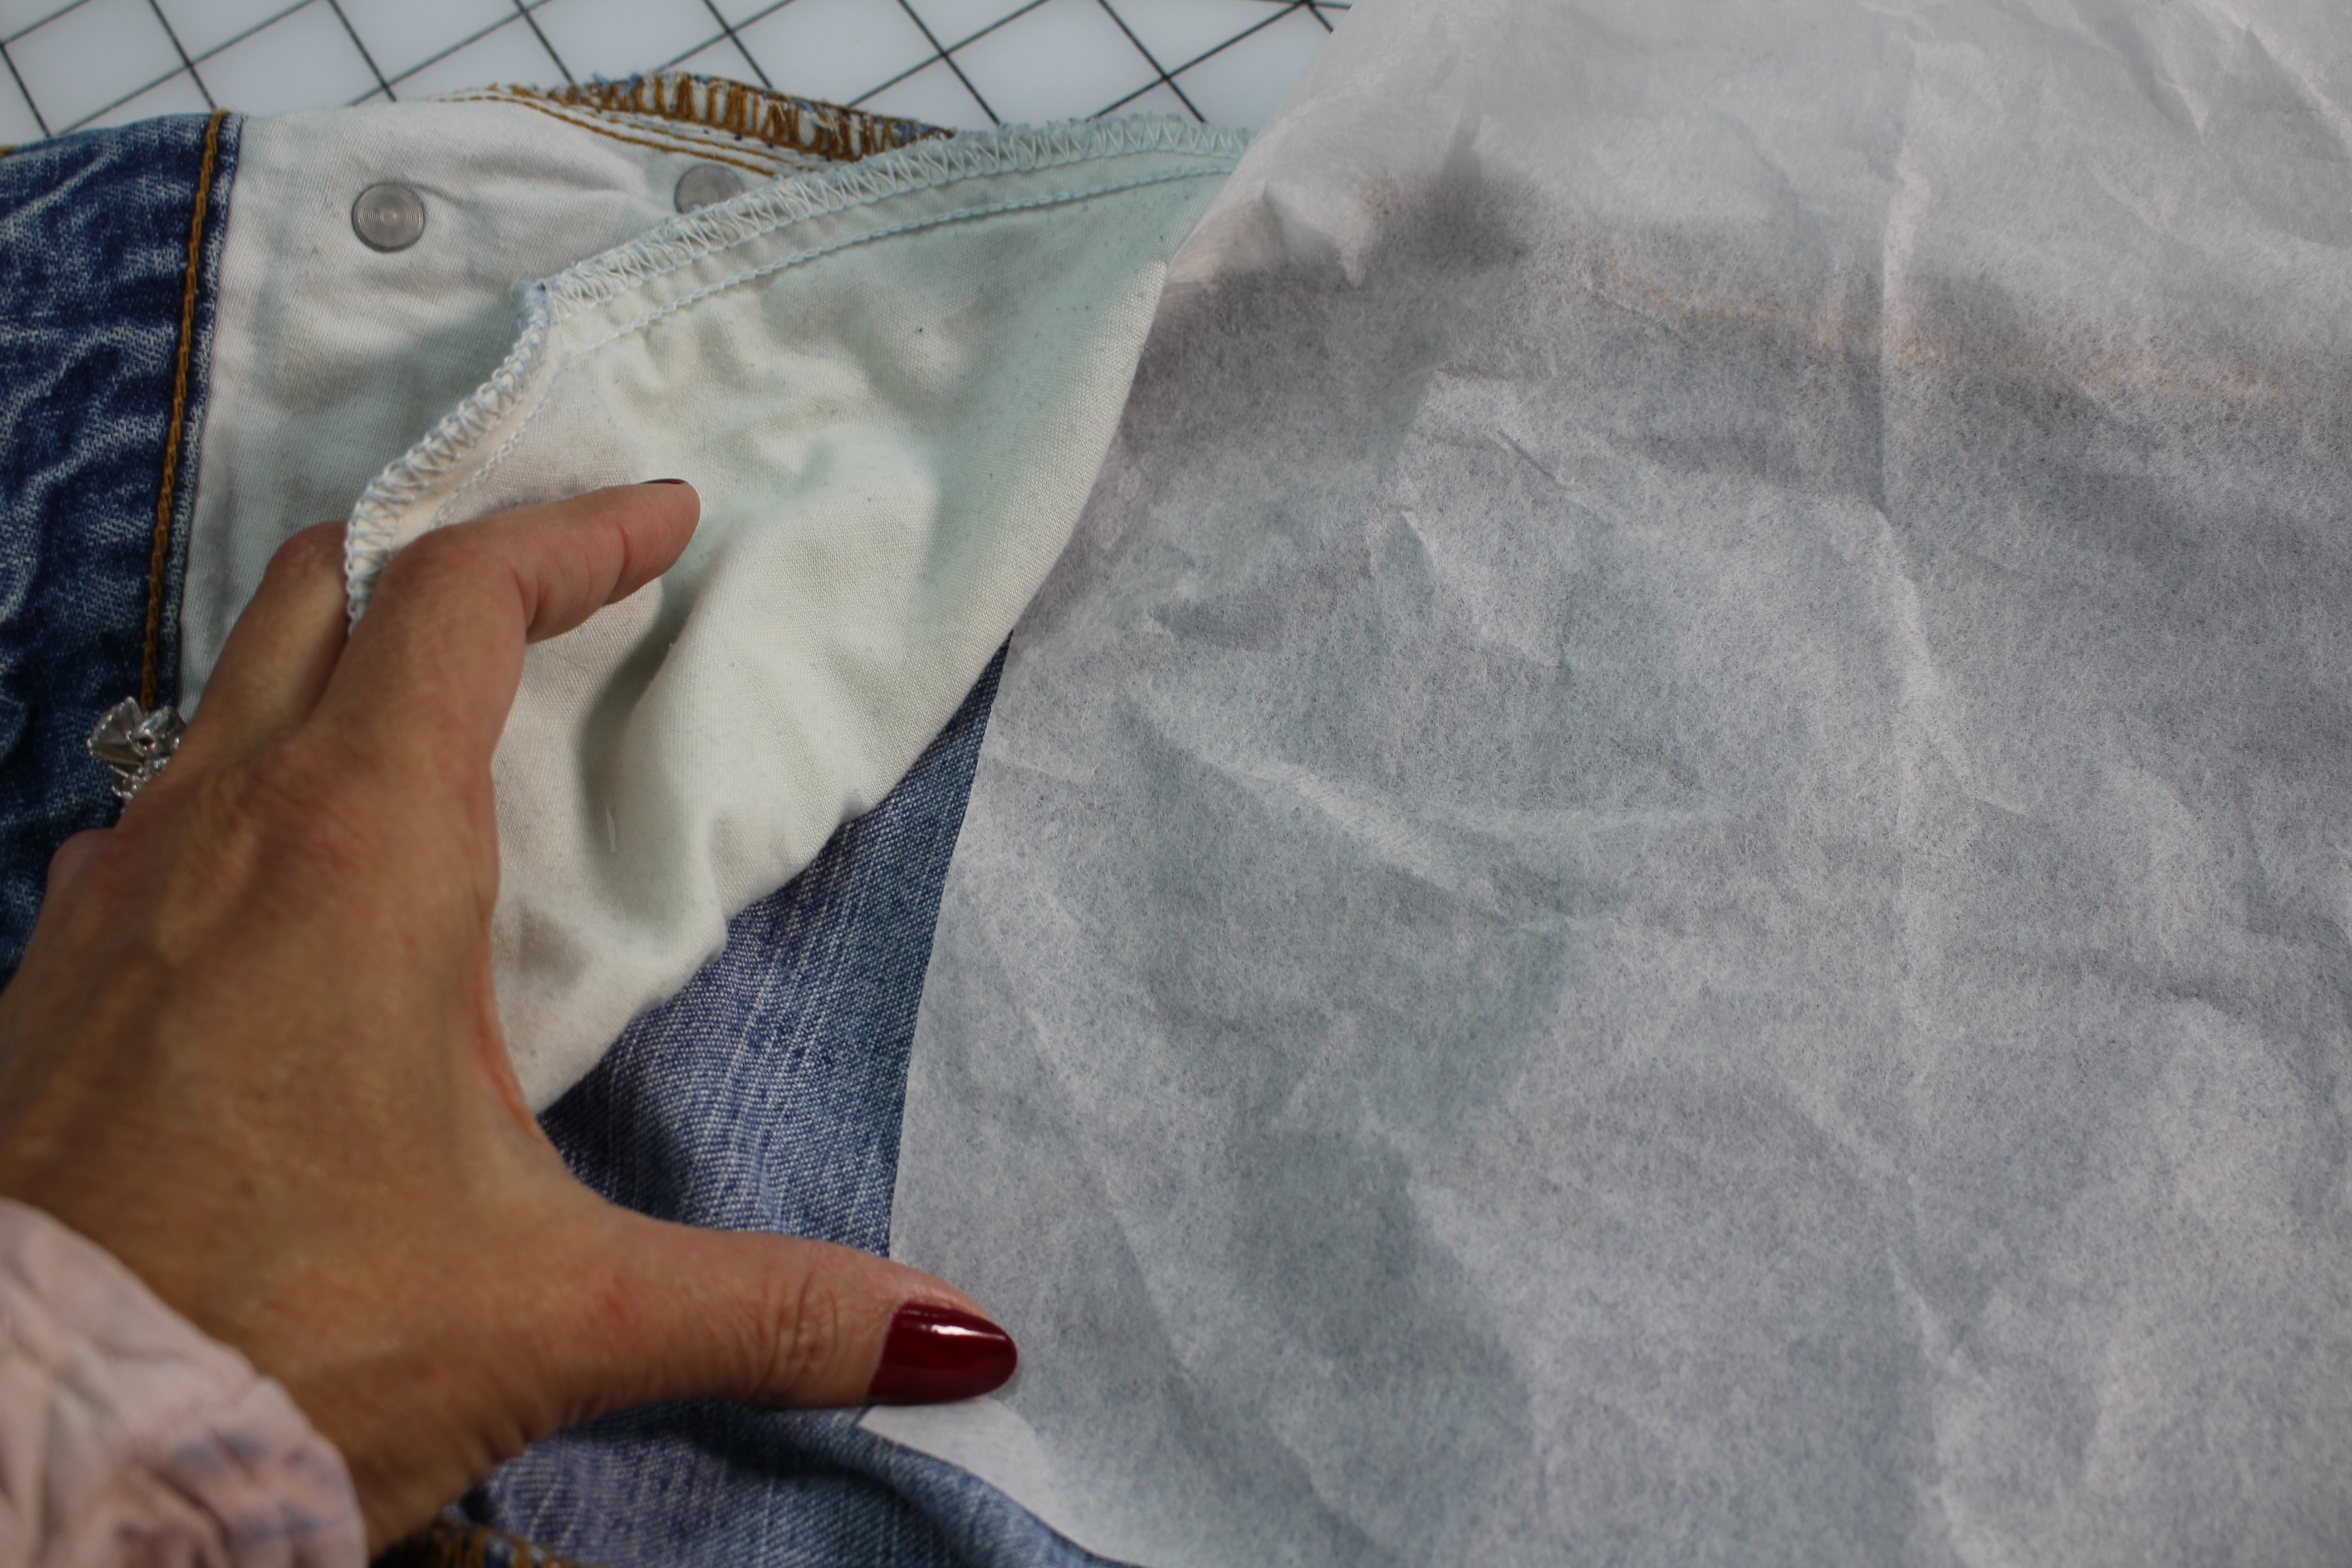
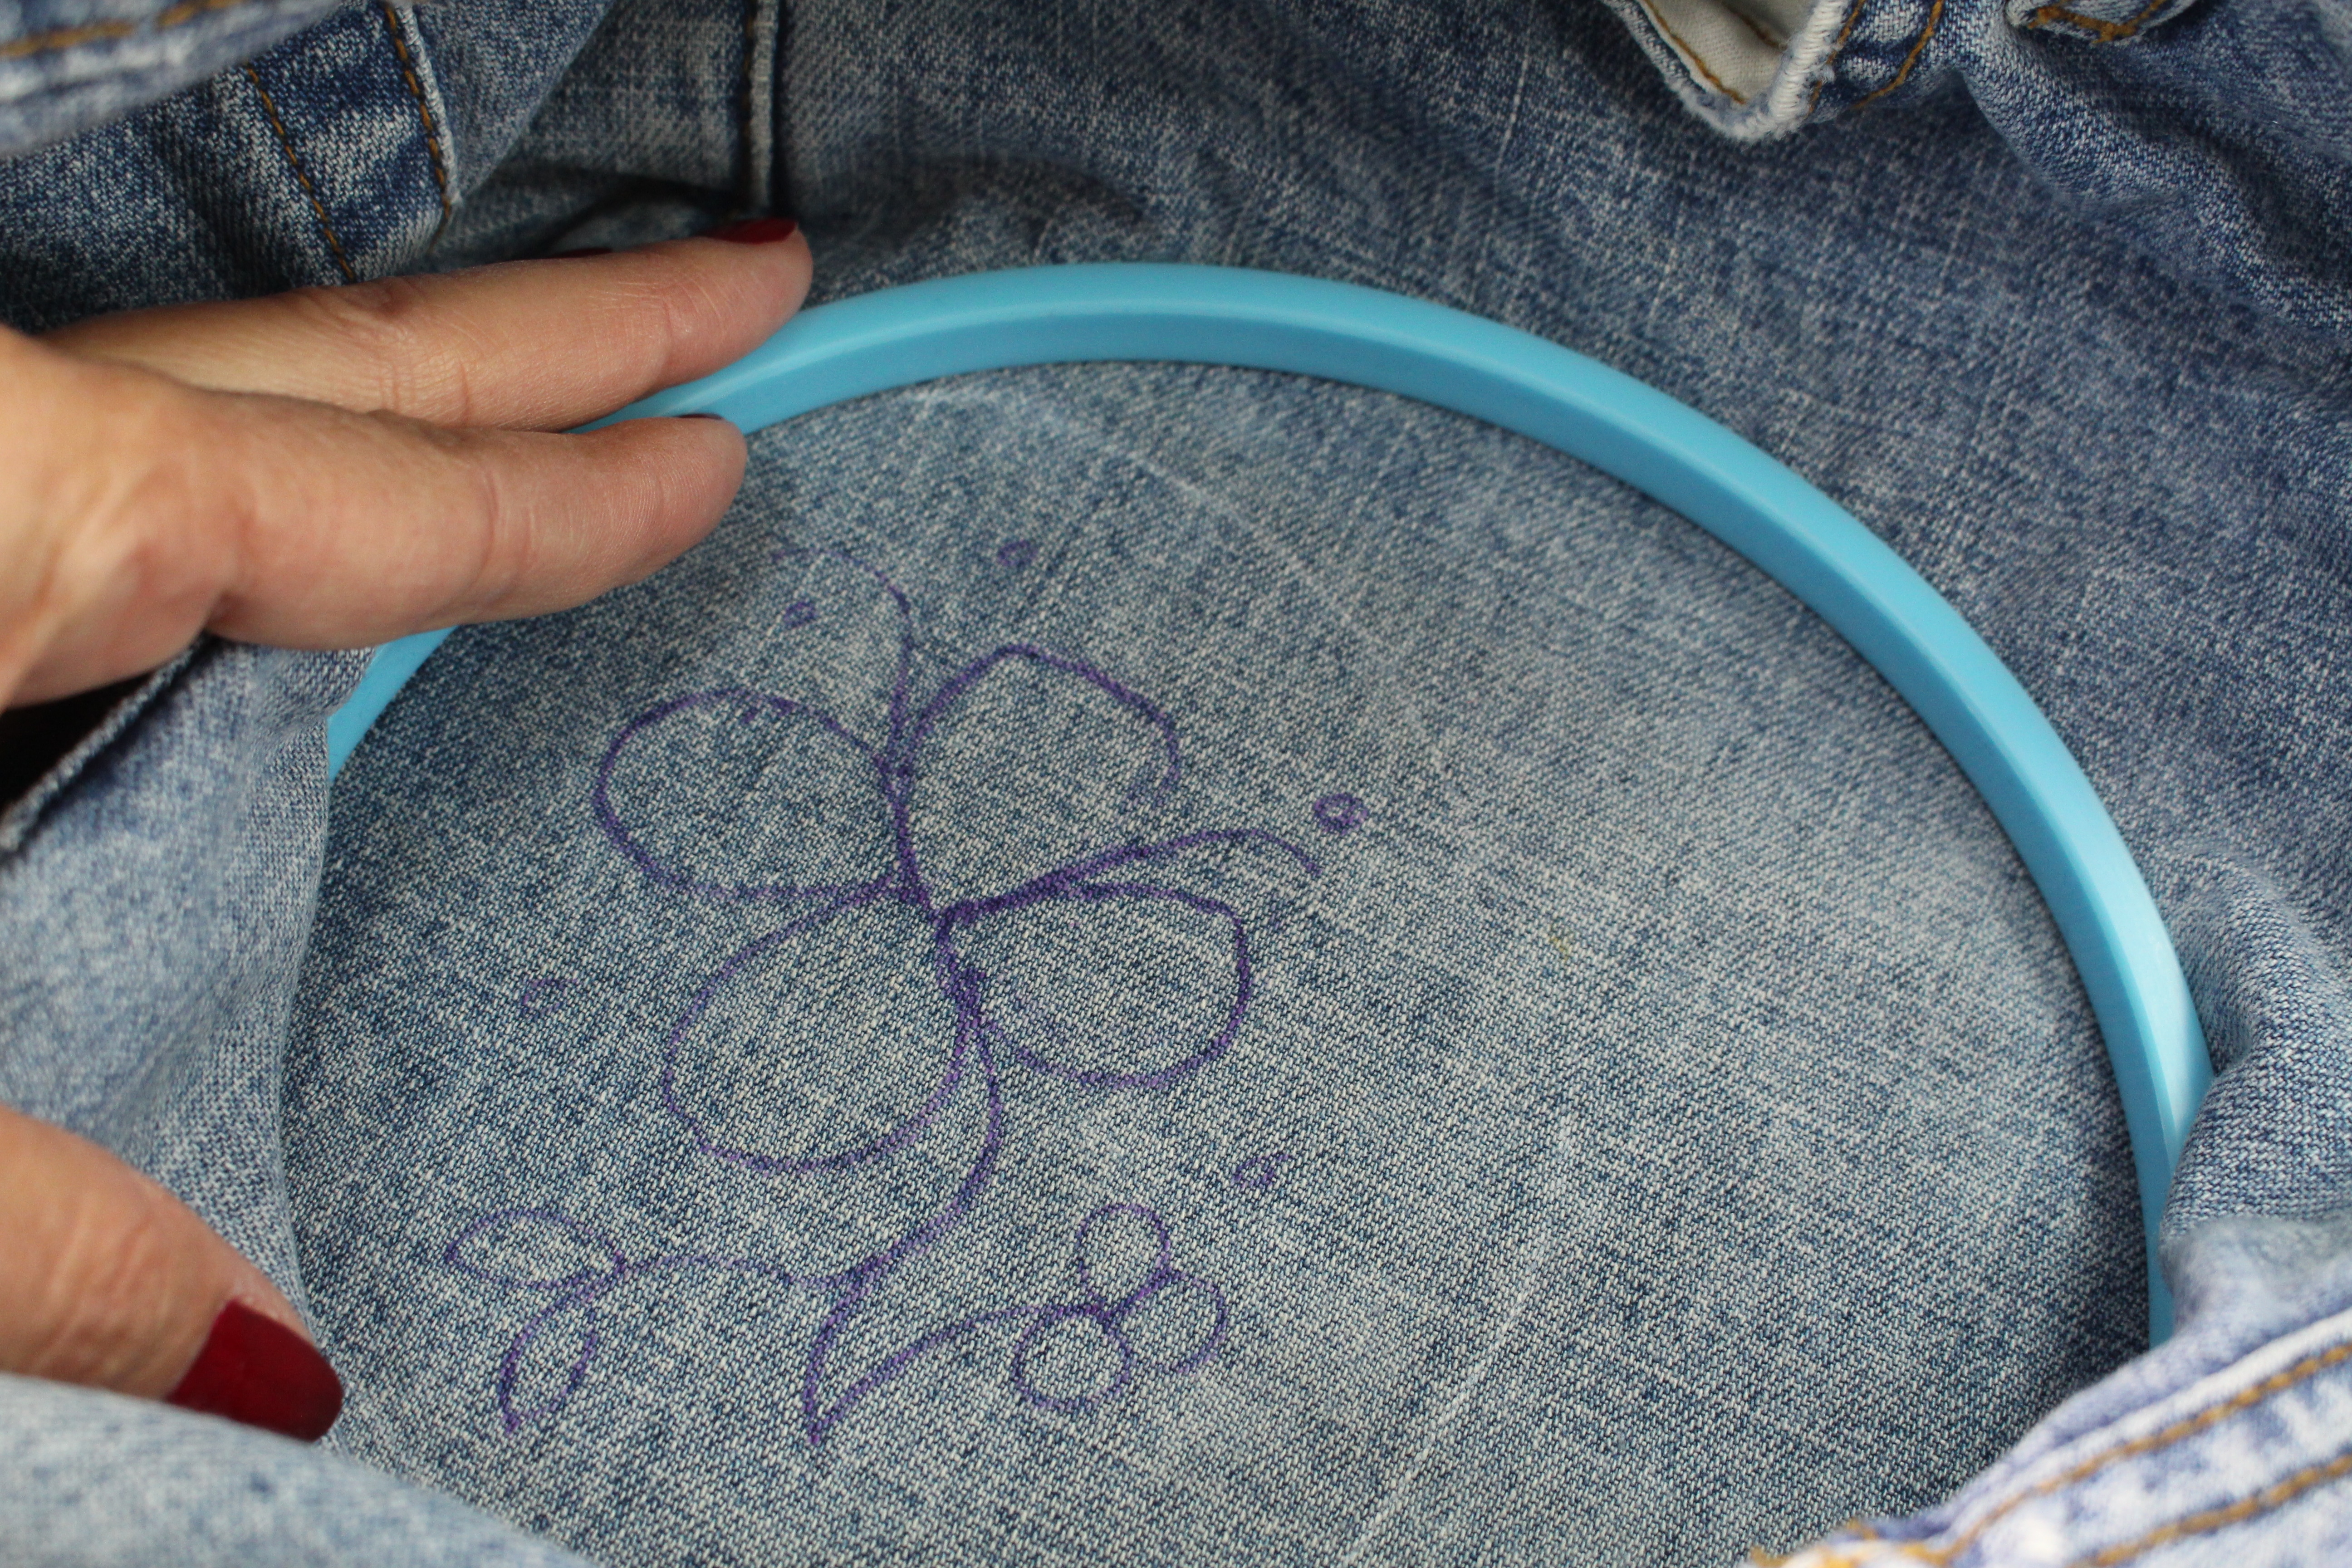
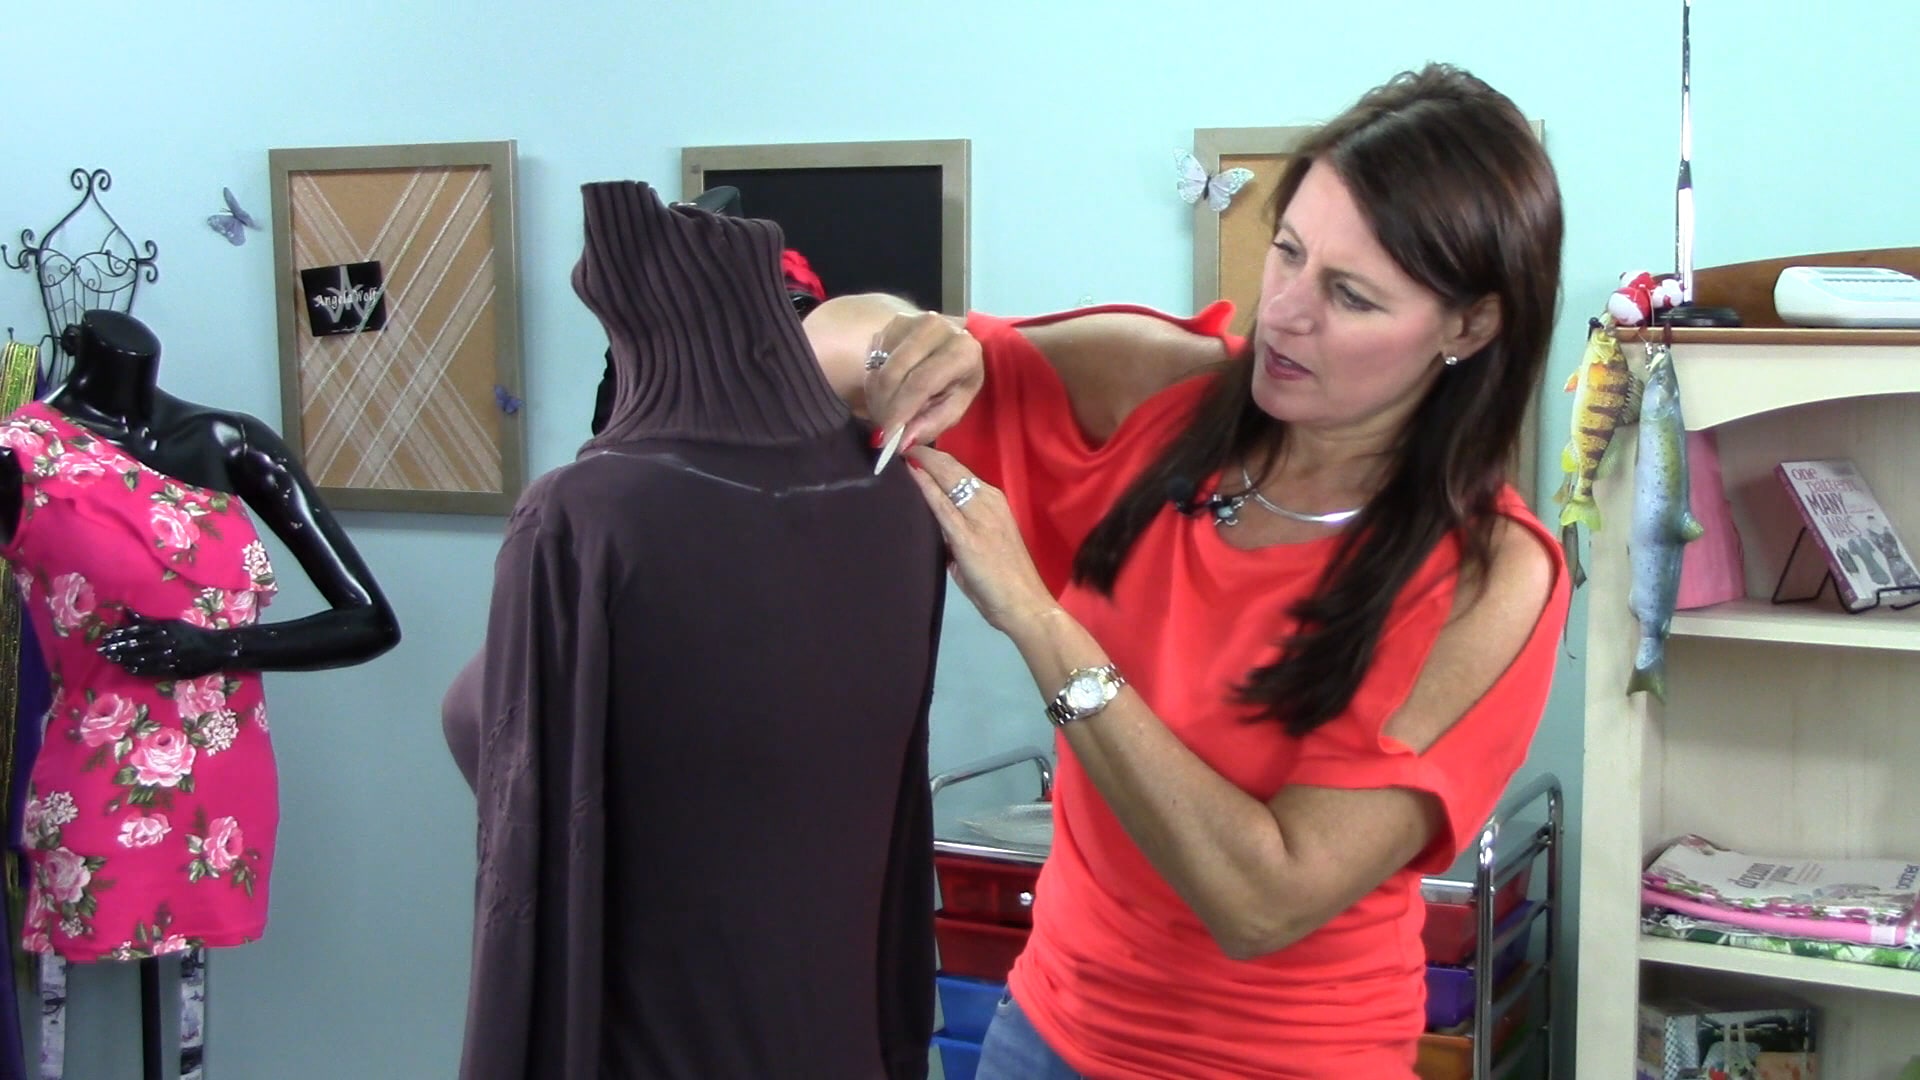
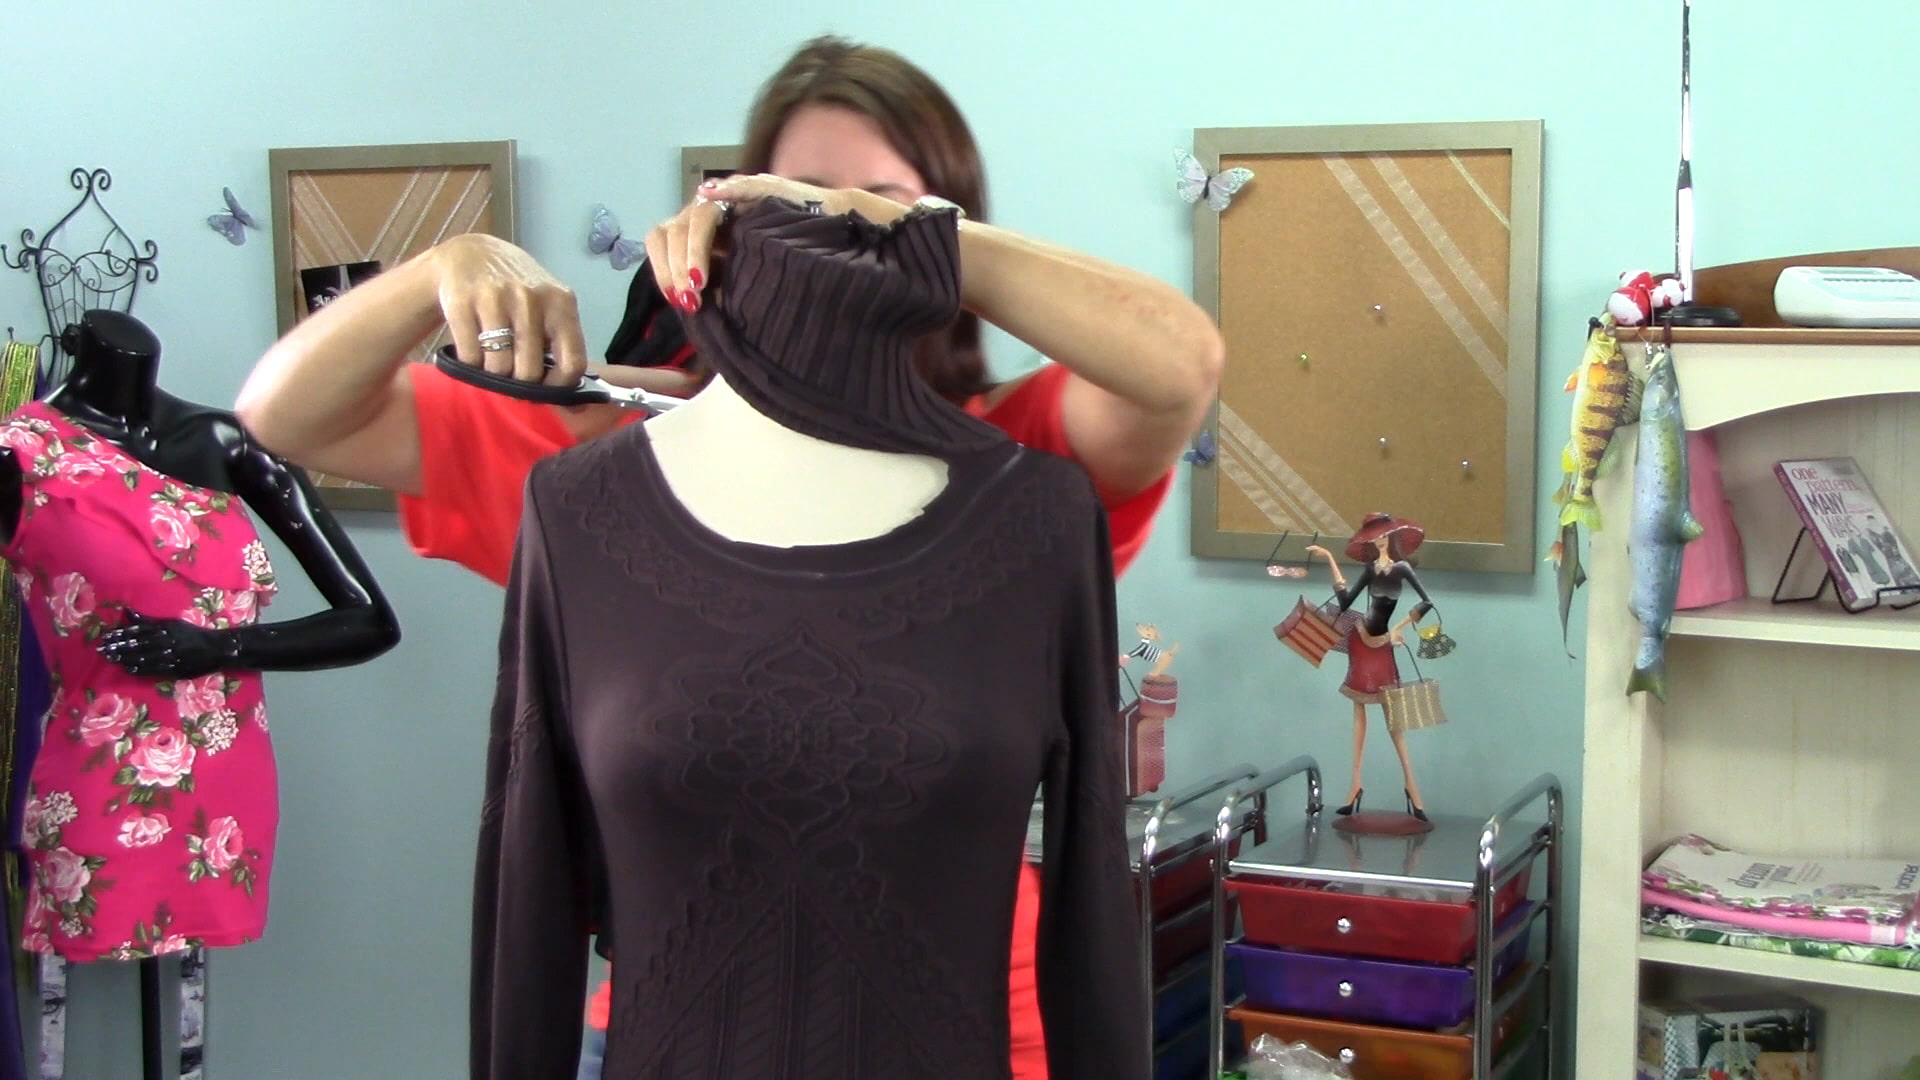
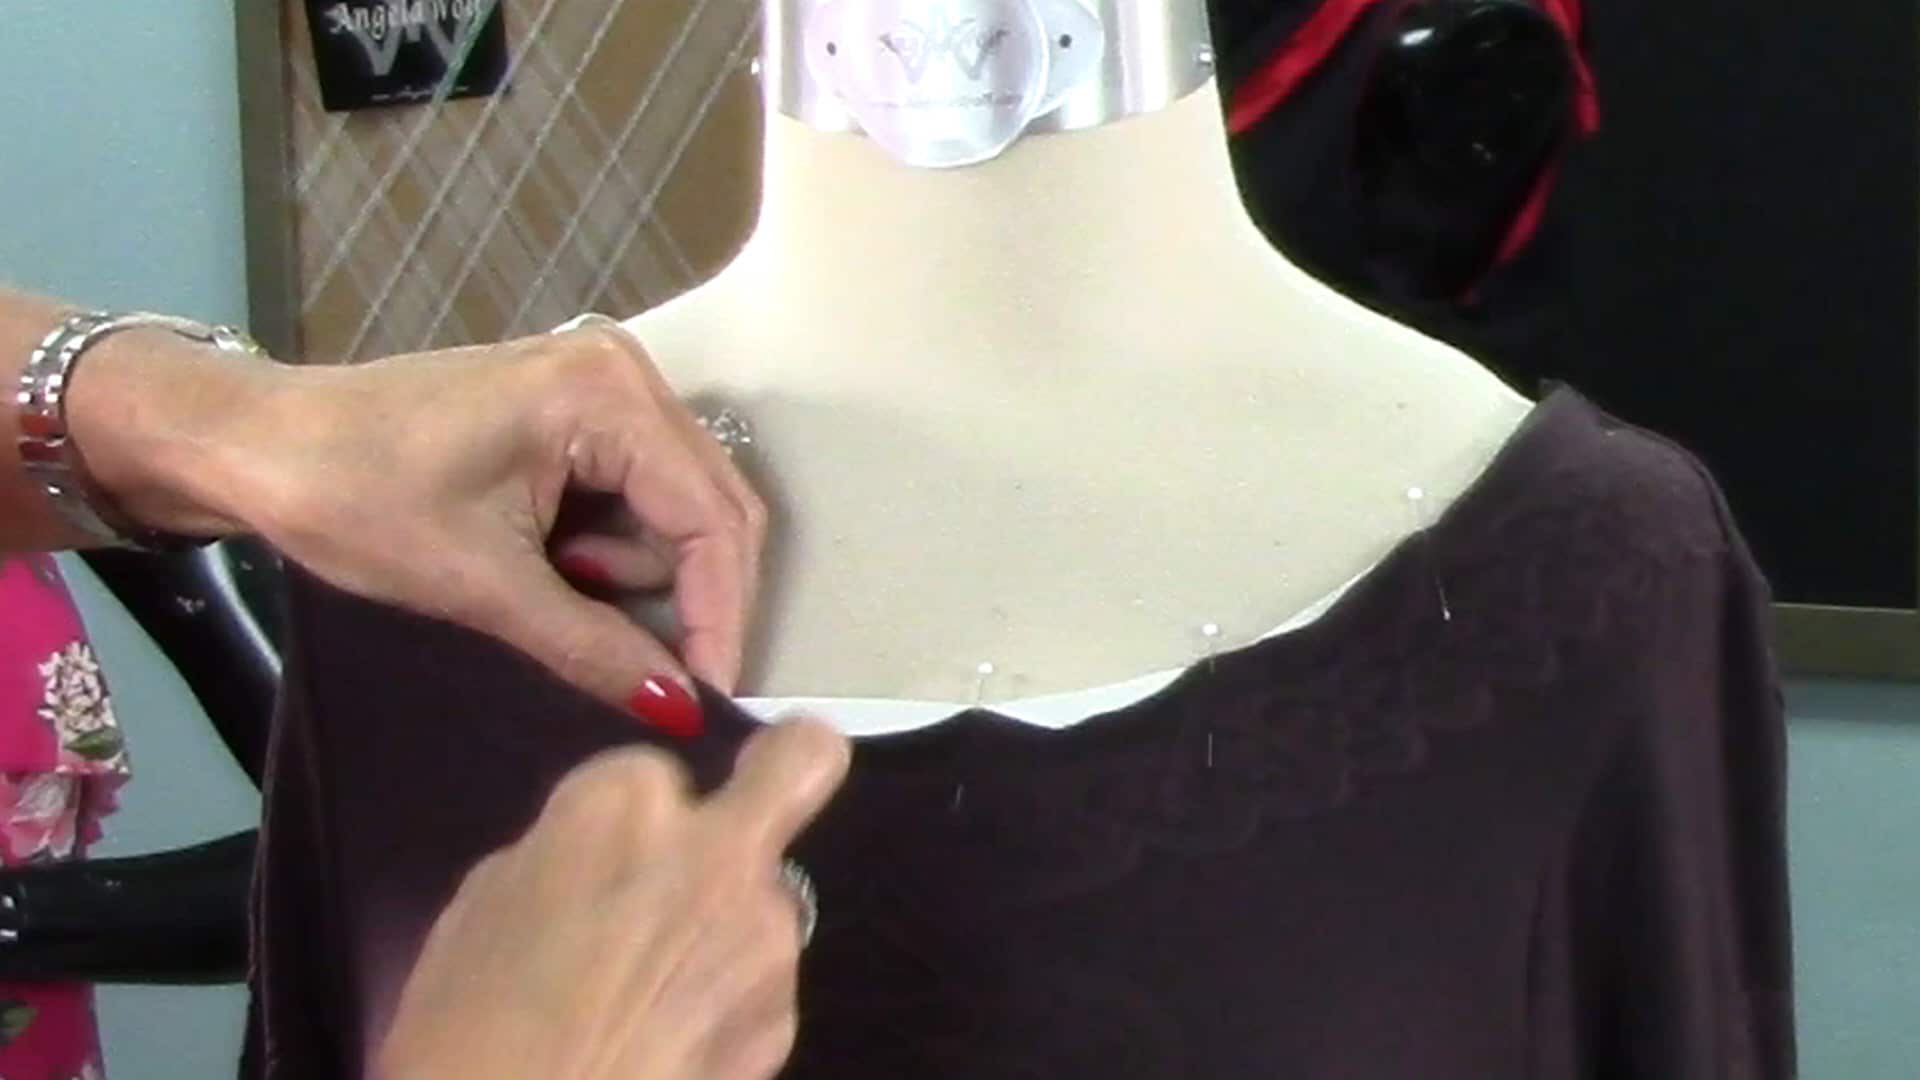
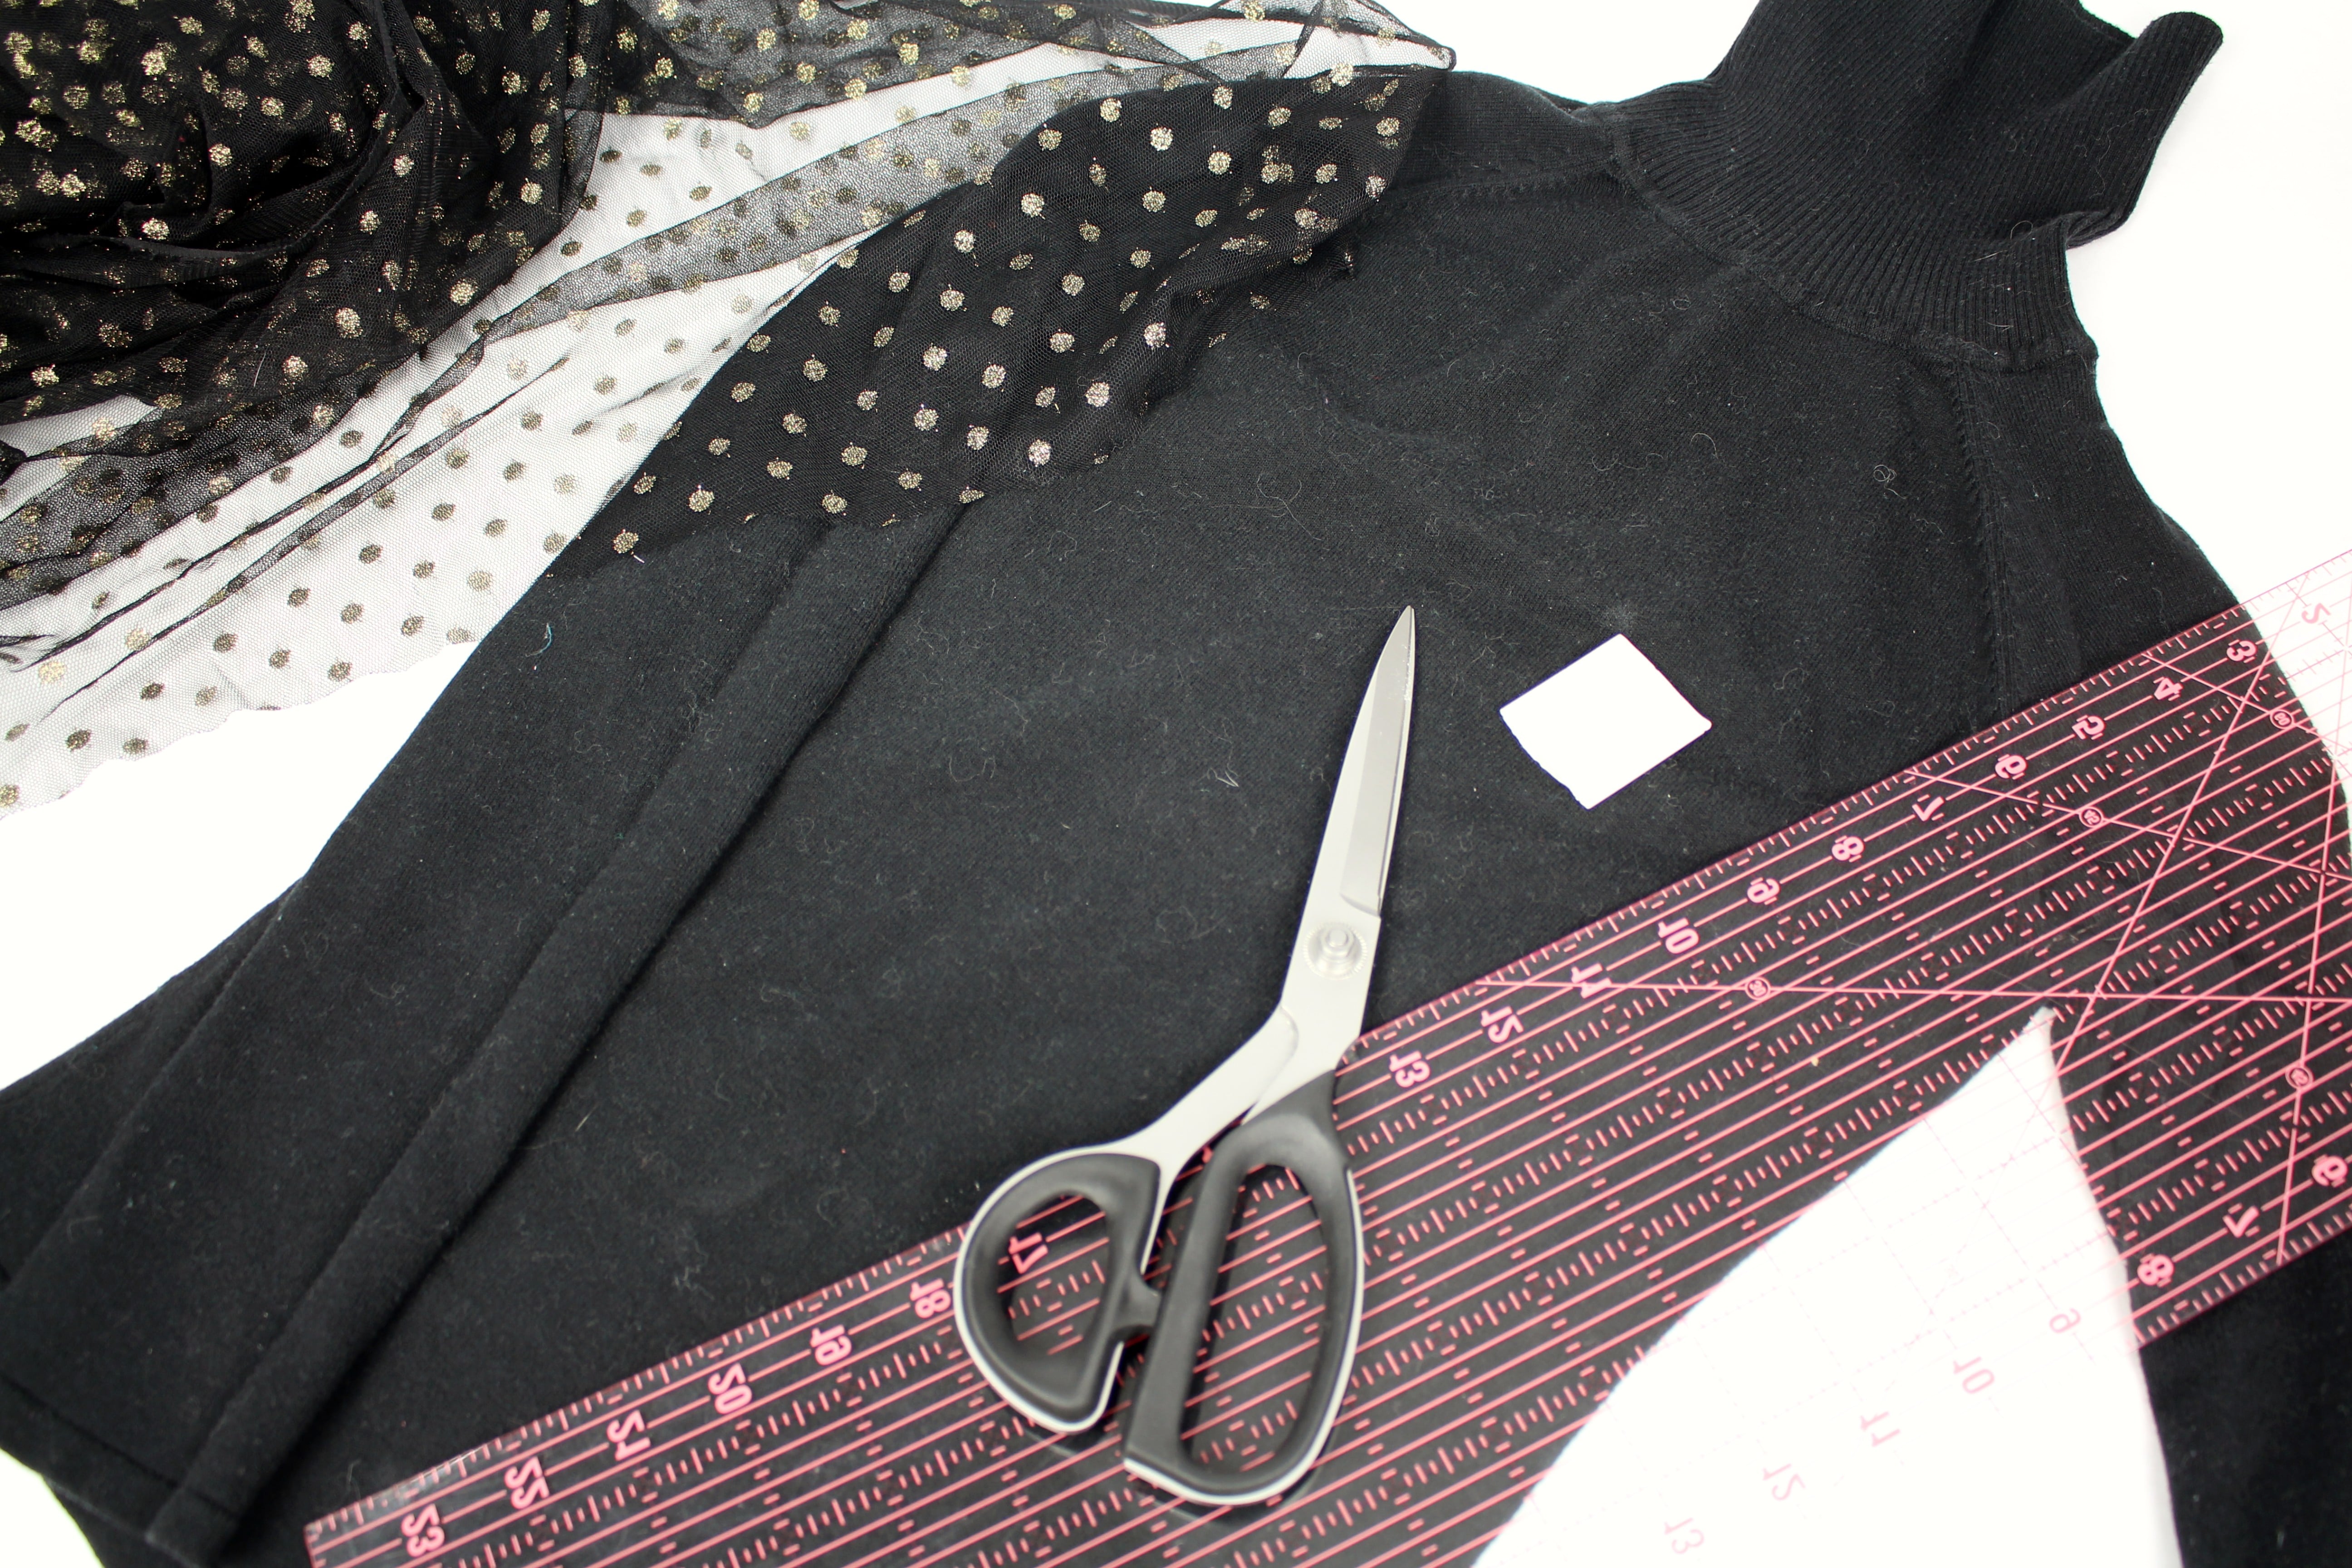
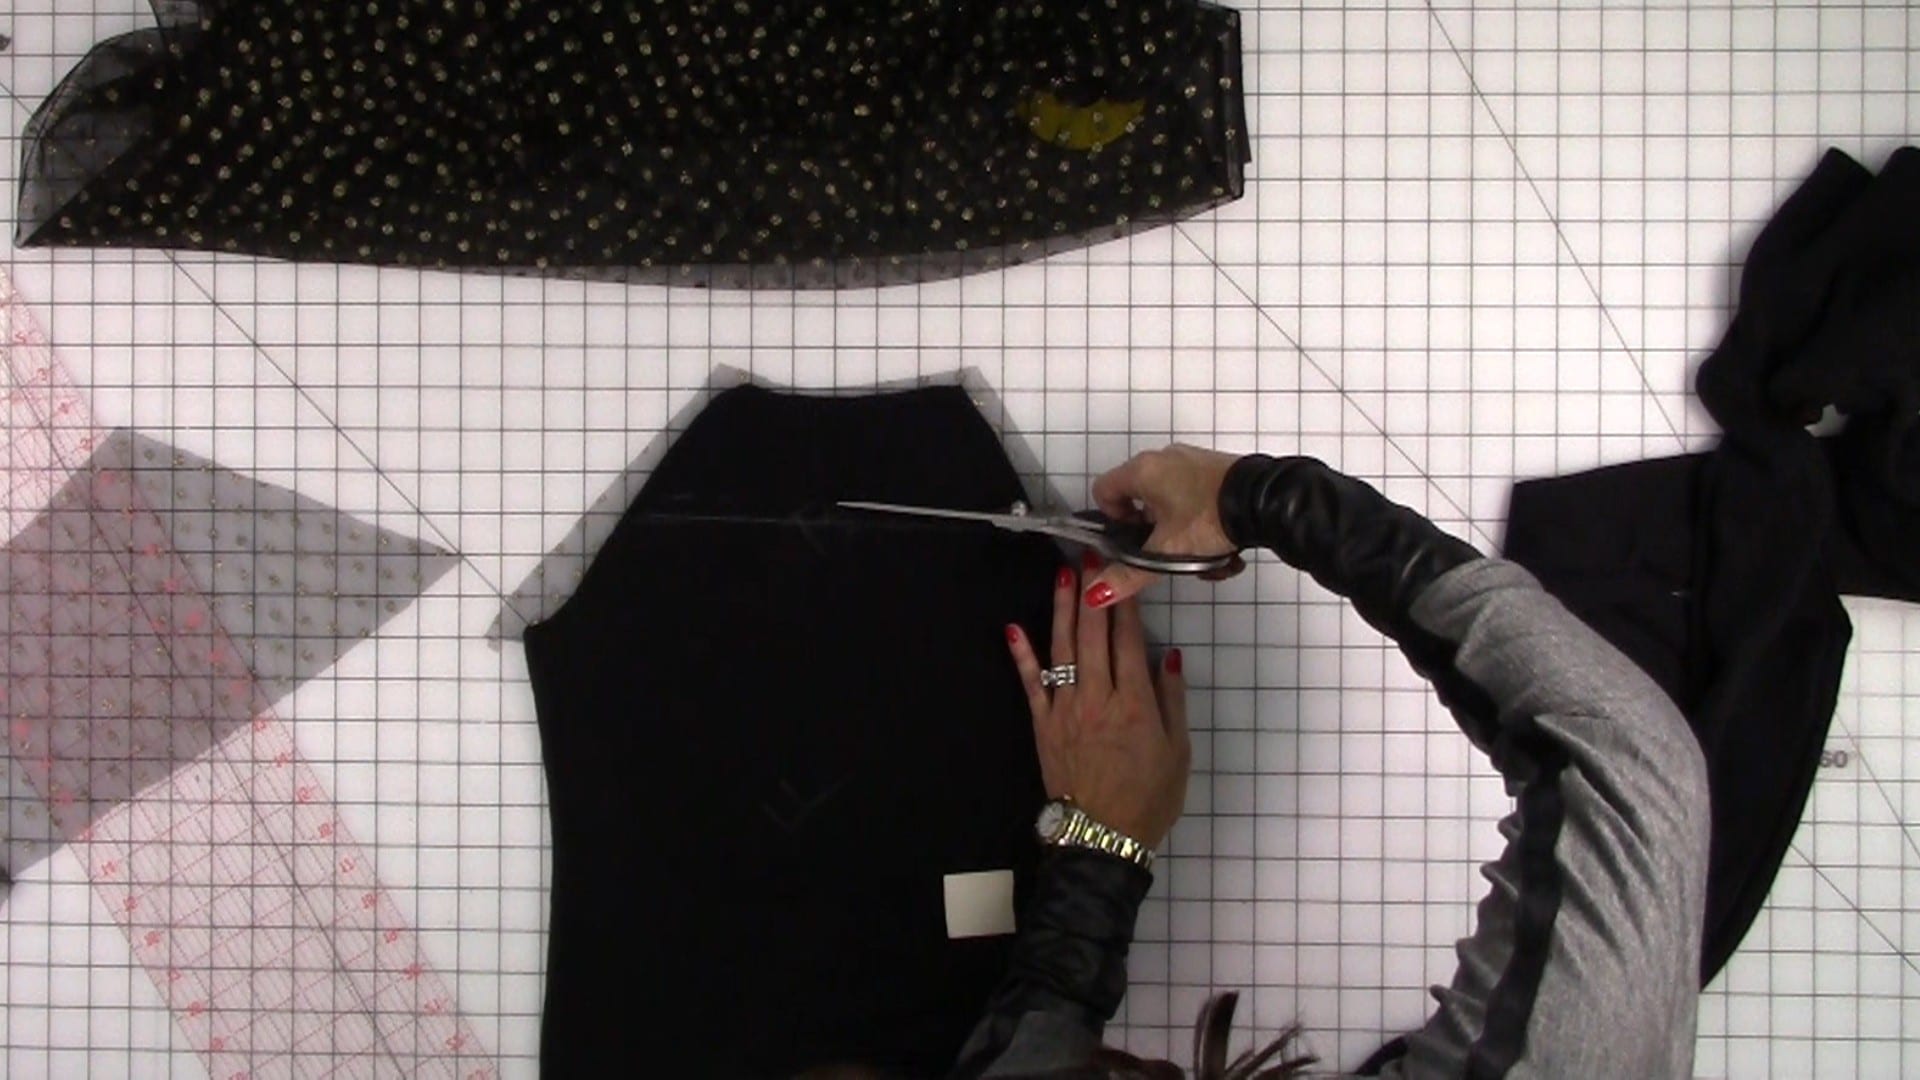
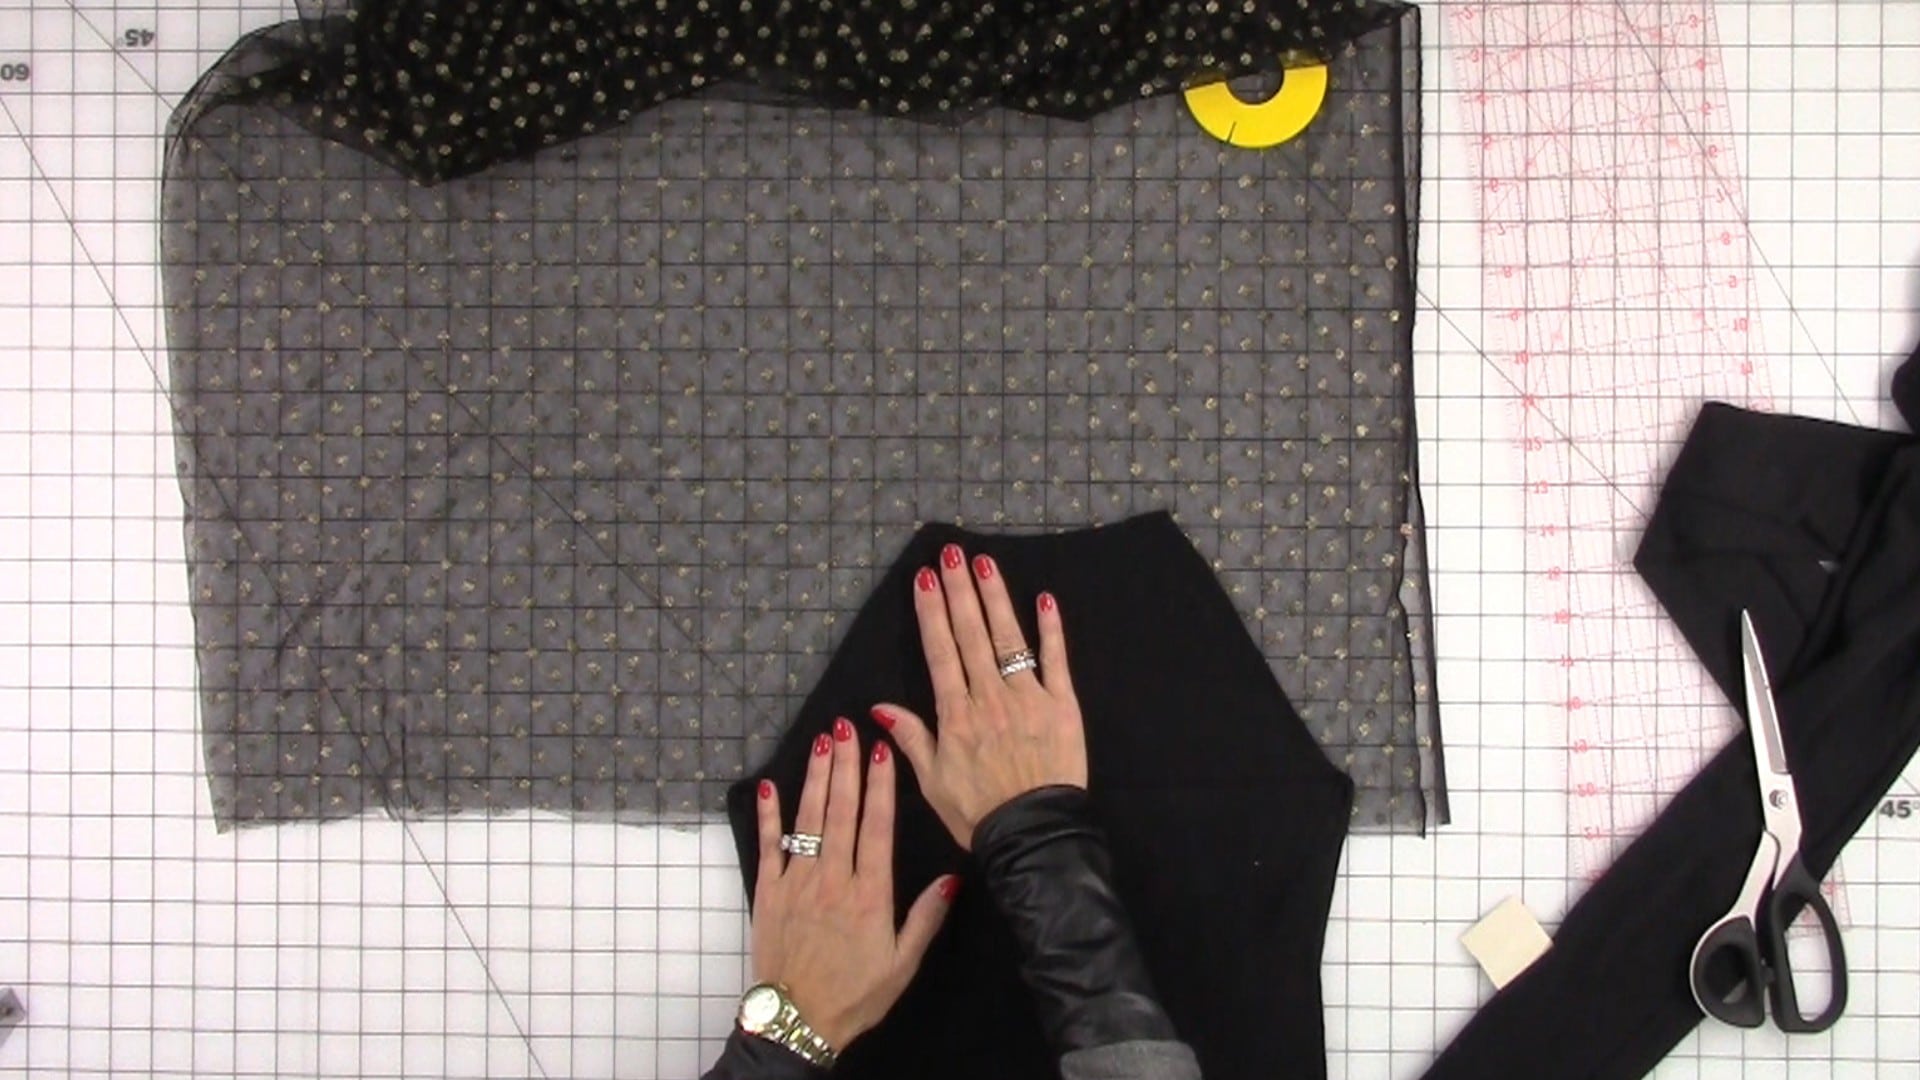
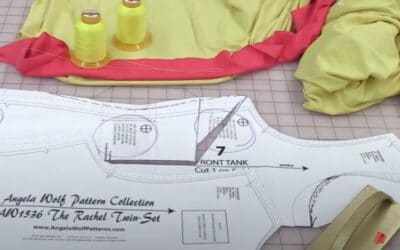
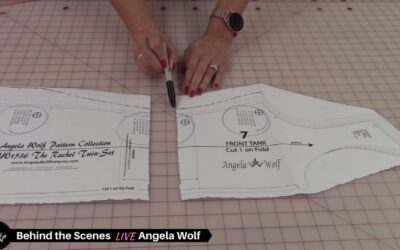
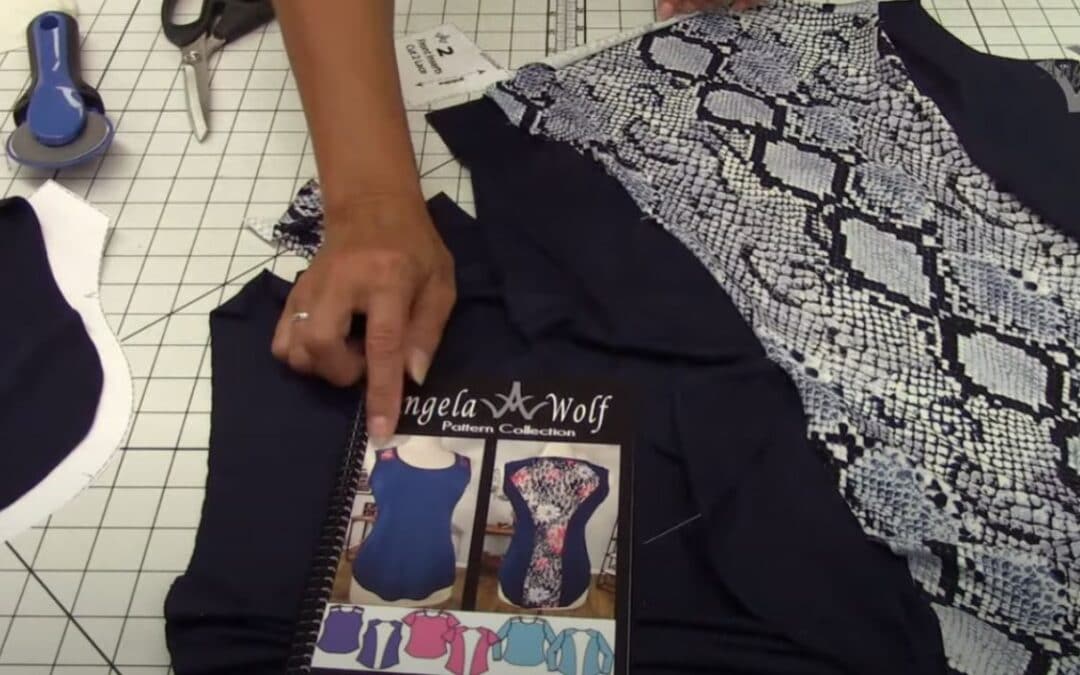
 
You can visit their website here and be sure to call them with any questions 1-888-444-7728

Sleeve Pattern-Hack

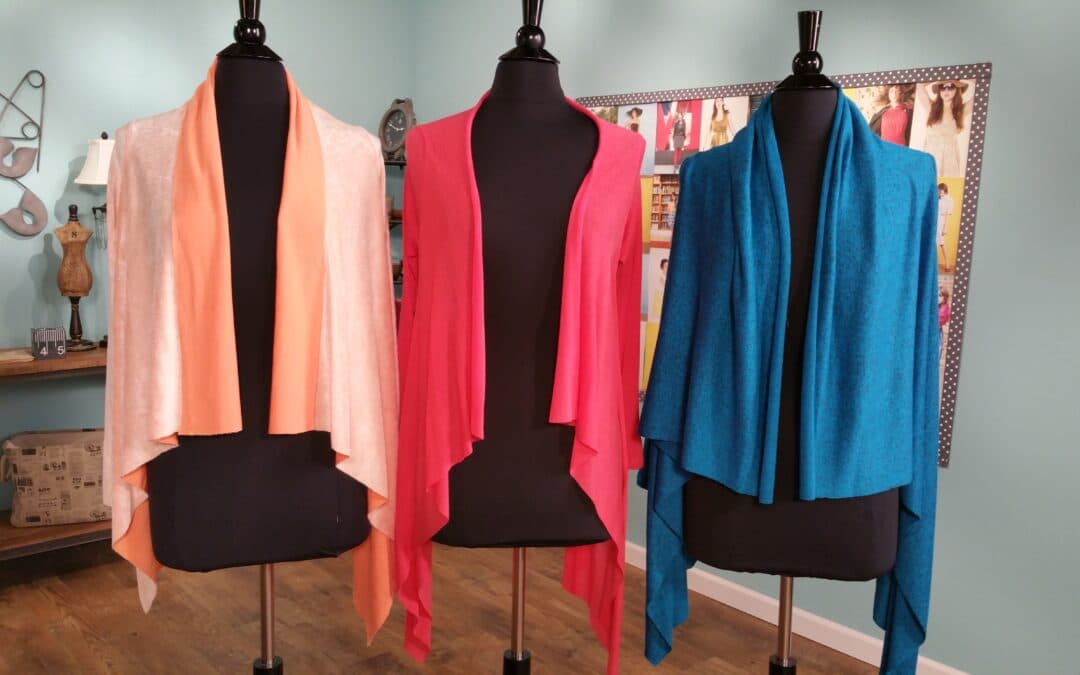
Looking to jazz up your next Ruched-t?  I had fun with this one!  Start with a sleeve pattern and follow along in the video below. 

Catch the Next Show …

Be sure to catch At Your Side Virtually! every Tuesday and Thursday at NOON Eastern and Behind the Scenes live on Facebook and YouTube every Wednesday at 1:30pm Eastern.  I will post the replays here on the blog too 🙂 

cheers,


325: Learn to Sew an Envelops Purse Clutch with Angel Wolf

Envelope Pattern There are three download versions for the envelope pattern: Full Layout - Use this for projector printing or printing on a plotter.   ENVELOPE PURSE Letter Size Printing - Use this when printing letter size paper (8.5" x 11").  Print pages 1-8, the...

Quilted Grocery Bag Sewalong

Quilted Grocery Bag Sewalong  I am so excited to share this new grocery bag sewalong with you!  This is an easy project with opportunities to make is more advanced with embroidery and embellishing. Sewalong Schedule #372 - 9/7 - Sewalong Part 1 Supplies and Pattern...

309: Boucle Skirt + Quilted Lining = Touch of Couture Part 1

Tweed Skirt Sewalong Part 1 In part 1 of this sewalong I will share options for choosing the best fabrics and pattern.  Join me in choosing the best lining to coordiante with my fabric!Skirt Patterns to choose from: ~ The Kate Skirt ~ The Fringe Skirt Pattern ~...

Ep. 305: Learn What is Planned for the Sew Fun Cruise in February 2024

Episode 305 🧵 Behind the Scenes with Angela Wolf  I know you have heard me say many time ... I am never going on a cruise!  Winn and I are on the water all the time, why would I want to go on a cruise?!?  Kelli Presley and Phyllis Batz will be joining me live to talk...

Ep. 304 Meet Jeff – Founder of CraftOptics

Episode 305 🧵 Behind the Scenes with Angela Wolf Featuring CraftOptics I am not sure about your, but if I am working in a low lit area or sewing beads onto a garment, I tend to lean forward and squint, this ending up with a terrible back ache!  CraftOptics has changed...

Ep. 303 Delila Knit Top Part 3

Episode 303 🧵 Behind the Scenes with Angela Wolf The last part of our Delila Slit Sleeve Sewalong!  Have you checked out all the Delila tops posted in our private Angela Wolf Patterns Group?   So cute!!! Angie Hotchkiss ~  Angela Wolf Facebook GroupDarlene Deck ~...

Ep. 302 Delila Knit Top Sewalong Part 2

Episode 302 🧵 Behind the Scenes with Angela Wolf We are onto part 2 in the Delila sew along!  We have cut our fabric and ready to sew.  Did you have any questions about fitting?  If so, be sure to take your photos with questions to the Angela Wolf Patterns Facebook...

Ep. 301 Delila Knit Top Sewalong Part 1

Episode 301 🧵 Behind the Scenes with Angela Wolf Getting into summer and looking for stylish tops to wear with jeans, shorts, or skirts and one of my fist patterns always shows up ... The DelilaDelila Pattern has 9 Options  I designed this pattern to be able to sew...

Ep. 260 Sewing the Shirley Wrap Top with a Sweater Knit

Episode 260 🧵 Behind the Scenes with Angela Wolf ~ Sew the Shirley Wrap with a Sweater Knit The Shirley Wrap pattern is so versatile and this time we will use a thicker, sweater knit fabric.    You can find the Shirley pattern in PDF and paper patterns in size XXS -...

VLOG 259 Behind the Scenes ✂️ Pressing with a Tailors Clapper

Episode 259 ~ At your side 🧵 Virtually!  Organizing and Sewing Clear Vinyl Join Angela Wolf with the next steps in sewing the Shirley Wrap with a sweater knit. Pressing hems with a tailors clapper, prepping neckline, and marking gathering.Catch the Next Show ... Be...
DIY: Refashion Jeans with Trim

DIY: Refashion Jeans with Trim

Refashion Jeans with Trim 

You might have noticed some of the fashions of the late 60’s and 70’s making a comeback on the store shelves, from floral fabrics to embellished jeans. How about adding crocheted ribbon trim along the outside leg!  This is so easy!!!

Supplies:

  • Jeans
  • Measuring tape
  • Pins
  • Ribbon or trim (check that the trim is washable)

PREPPING

  1. Measure the outside of the jean leg from the bottom edge of the waistband to the hem.

2. Add 6 inches to the outside leg measurement and cut 2 pieces of trim that exact length.

3. Starting at the edge of the waistband, center the trim with the outside leg seam. Fold under the raw edge of the trim about ½” and pin.

4. Continue to pin the trim along the outside leg seam. Be sure to look for metal rivets or other hardware! Here I have a rive and I will make sure to mark this spot as to not break the sewing machine needle.

5. Pin the ribbon/ trim all the way to the hemline. If you plan on folding up the jeans, measure 4 inches below the hemline and cut the trim.  If you are not going to fold up the jean hem, measure 2 inches and cut off any excess ribbon.

6. Turn the jeans inside out. Center the ribbon on the seam allowance, fold under the raw edge ½” and pin in place.

7. Follow these steps on both outside leg seams.


SEWING

Depending on the style and size of the jeans, it can be challenging sewing all the way down to the narrow hemline.  To make is easier we are going to utilize the sewing sideways feature!

8. Set up the machine for sewing a straight stitch and move the needle all the way to the far-right position. Slide the jeans under the foot starting at the waistline. To read the full blog post, head over to my post as a Brother Expert Consultant on the Brother Stitching Social.

Looking for more ideas on refashioning jeans, check out my blog post on embellishing jeans with embroidery.Be sure to share photos on the social side #angelawolf – I always love to see what you are working on!

Cheers,

<iframe style="width:120px;height:240px;" marginwidth="0" marginheight="0" scrolling="no" frameborder="0" src="//ws-na.amazon-adsystem.com/widgets/q?ServiceVersion=20070822&OneJS=1&Operation=GetAdHtml&MarketPlace=US&source=ss&ref=as_ss_li_til&ad_type=product_link&tracking_id=angel0df-20&language=en_US&marketplace=amazon®ion=US&placement=B071Z2SX53&asins=B071Z2SX53&linkId=34a5a3fa8e0e9521990c5e781b560157&show_border=true&link_opens_in_new_window=true"></iframe>
<iframe style="width:120px;height:240px;" marginwidth="0" marginheight="0" scrolling="no" frameborder="0" src="//ws-na.amazon-adsystem.com/widgets/q?ServiceVersion=20070822&OneJS=1&Operation=GetAdHtml&MarketPlace=US&source=ss&ref=as_ss_li_til&ad_type=product_link&tracking_id=angel0df-20&language=en_US&marketplace=amazon®ion=US&placement=B07DCVHH5Z&asins=B07DCVHH5Z&linkId=c9d70b3a4f4346aad36d9f2bd43b7210&show_border=true&link_opens_in_new_window=true"></iframe>
<a target="_blank" href="https://shareasale.com/r.cfm?b=1173404&u=1586241&m=29190&urllink=&afftrack="><img src="https://static.shareasale.com/image/29190/300x2509.jpg" border="0" alt="FREE 7 Day Bluprint Trial at Craftsy.com" /></a>
SHANNON FABRIC GIVEAWAY!

SHANNON FABRIC GIVEAWAY!

SHANNON FABRIC GIVEAWAY! Are you looking for an amazingly SOFT fabric?!?  SHANNON FABRICS was a sponsor on It's Sew Easy tv and continues to inspire us with gorgeous fabrics.  This new batch of fabric is called LUXE CUDDLE and the colors are so fun!  If you look...

Embroider 103 Learn How to Embroider on Hats

Embroider 103 Learn How to Embroider on Hats

Learn How to Embroider Hats Join Angela Wolf and Cindy Hogan for a 90 minute virtual class and learn how to embroider hats with any embroidery machine and a 4" by 4" hoop! Learn the best stabilizers and hooping techniques.   This is a virtual class, live with Angela...

Drape a Square Sweater Jacket

Drape a Square Sweater Jacket

In this tutorial you will learn how to drape a square sweater jacket with Angela Wolf. Fabrics, techniques, and measurements will be taught in this lesson.

EMBELLISHING JEANS WITH FREE MOTION EMBROIDERY

EMBELLISHING JEANS WITH FREE MOTION EMBROIDERY

Embellishing Jeans with Free Motion Embroidery

An easy way to restyle or upcycle jeans is to add a touch of embroidery.  Free motion embroidery, also referred to as thread painting, is so easy and you don’t even need an embroidery machine for this technique.  Instead we are going to use free motion quilting / embroidery techniques.

Supplies Needed:

  • Jeans
  • Medium Weight Tear-away Stabilizer
  • Any type of thread (all-purpose, rayon, embroidery, silk, cotton)
  • Embroidery Hoop
  • Fabric marking pen or chalk
  • Open toe quilting foot

Layout the Design

Try on the jeans and determine where you want the embellishment to go.  A few things to keep in mind:

Don’t place the embroidery:

    • too close to the zipper
    • on top of thick seams
    • over thick pockets
    • on top of metal rivets
    • Too far down the leg (remember you need to get to the area to stitch J)

Good places for the embroidery:

  • Above the hemline
  • Along the back yoke (avoiding the center back seam)
  • Front hip
  • Waistband

Choose a hoop size that can easily fit into the jean pant leg and large enough for the design you have in mind.  Using tailors chalk, mark the placement for the design.

Draw a design with a fabric pen.

Hooping the Jeans

Slide the stabilizer into the jeans leg behind the design area.  My design is close to the front pocket, so I will pull the pocket lining out of the hooping area.

Align the smaller inside hoop on the outside of the jean leg with the larger hoop and stabilizer inside the jeans leg.

Push the hoop closed, encasing the jean fabric and stabilizer, and tighten the screw on the hoop.

Free Motion Embroidery

Set the sewing machine up for free motion quilting and slide the hoop under the presser foot, making sure to keep the back of the jean leg out of the way.  We only want the fabric in the hoop under the needle on the machine.

Start in the middle of the design and fill in the design with thread.

Here I have outlined the design first. Then fill in the petals by moving the machine back and forth with thread.  This is your design, so don’t worry about perfection, just have fun!  Continue to change colors of thread and paint away J

When you are all finished designing, remove the hoop and tear-a-way the stabilizer.

You can see here how my design falls just under the front pocket, perfect! Brush off the chalk marks and your new embellished jeans are ready to go!  Be sure to join me on the social side using #angelawolf ♥ I always love to see what you are working on.

Cheers,

<a target="_blank" href="https://shareasale.com/r.cfm?b=1130527&u=1586241&m=29190&urllink=&afftrack="><img src="https://static.shareasale.com/image/29190/728x90.gif" border="0" alt="Craftsy Unlimited FREE 7 day trial at Craftsy.com" /></a>

325: Learn to Sew an Envelops Purse Clutch with Angel Wolf

Envelope Pattern There are three download versions for the envelope pattern: Full Layout - Use this for projector printing or printing on a plotter.   ENVELOPE PURSE Letter Size Printing - Use this when printing letter size paper (8.5" x 11").  Print pages 1-8, the...

Quilted Grocery Bag Sewalong

Quilted Grocery Bag Sewalong  I am so excited to share this new grocery bag sewalong with you!  This is an easy project with opportunities to make is more advanced with embroidery and embellishing. Sewalong Schedule #372 - 9/7 - Sewalong Part 1 Supplies and Pattern...

309: Boucle Skirt + Quilted Lining = Touch of Couture Part 1

Tweed Skirt Sewalong Part 1 In part 1 of this sewalong I will share options for choosing the best fabrics and pattern.  Join me in choosing the best lining to coordiante with my fabric!Skirt Patterns to choose from: ~ The Kate Skirt ~ The Fringe Skirt Pattern ~...

Ep. 305: Learn What is Planned for the Sew Fun Cruise in February 2024

Episode 305 🧵 Behind the Scenes with Angela Wolf  I know you have heard me say many time ... I am never going on a cruise!  Winn and I are on the water all the time, why would I want to go on a cruise?!?  Kelli Presley and Phyllis Batz will be joining me live to talk...

Ep. 304 Meet Jeff – Founder of CraftOptics

Episode 305 🧵 Behind the Scenes with Angela Wolf Featuring CraftOptics I am not sure about your, but if I am working in a low lit area or sewing beads onto a garment, I tend to lean forward and squint, this ending up with a terrible back ache!  CraftOptics has changed...

Tutorial: Transform a Turtleneck into a Boatneck

Tutorial: Transform a Turtleneck into a Boatneck

Transform a Turtleneck into a Stylish Boatneck Top

Here is another recycle project for the turtlenecks in our closet and its easy – perfect for beginners! For this sewing tutorial I am using a turtleneck that has a design, but any tank top will work.  Click below for the video tutorial and here is a quick recap.

SUPPLIES:

  • SCISSORS
  • ½” WIDE ELASTIC
  • PINS
  • TAILORS CHALK OR FABRIC MARKING PEN / PENCIL
  • TURTLENECK

Start by marking the new boat neckline on the turtleneck. I am using a dress form and following the design on the turtleneck.  Another option is to measure from the center front and back neck down to the top of the newly desired neckline.

Add a ½” seam allowance and mark the new cutting line.  Start cutting higher than the new marking to test the fabric for fraying. 

If it is determined the fabric does not fray, then go ahead and cut along the last chalk marked line.  If the fabric does fray, leave an extra 1” of fabric from the chalk marked line until after you attach the elastic. 

Measure around the circumference around the new neckline.  Subtract 1” from that measurement and cut the elastic the same length.  Start from the center front and pin the elastic to the wrong side of the fabric.  Stretch the elastic as you pin so the elastic is a little shorter in length than the fabric.  Continue to pin all the way around the top.  When you get to the center back, cross the elastic ends and pin to secure.  To read the full blog, head over to my post as a Brother Expert Consultant on the Brother Stitching Sewcial or watch the video below.

I would love to see your creative designs, be sure to tag me if you post a photo #angelawolf #brothersews

Cheers,

I would love to see your creative designs, be sure to tag me if you post a photo #angelawolf #brothersews

Cheers,

<a target="_blank" href="https://shareasale.com/r.cfm?b=1130527&u=1586241&m=29190&urllink=&afftrack="><img src="https://static.shareasale.com/image/29190/728x90.gif" border="0" alt="Craftsy Unlimited FREE 7 day trial at Craftsy.com" /></a>

325: Learn to Sew an Envelops Purse Clutch with Angel Wolf

Envelope Pattern There are three download versions for the envelope pattern: Full Layout - Use this for projector printing or printing on a plotter.   ENVELOPE PURSE Letter Size Printing - Use this when printing letter size paper (8.5" x 11").  Print pages 1-8, the...

Quilted Grocery Bag Sewalong

Quilted Grocery Bag Sewalong  I am so excited to share this new grocery bag sewalong with you!  This is an easy project with opportunities to make is more advanced with embroidery and embellishing. Sewalong Schedule #372 - 9/7 - Sewalong Part 1 Supplies and Pattern...

309: Boucle Skirt + Quilted Lining = Touch of Couture Part 1

Tweed Skirt Sewalong Part 1 In part 1 of this sewalong I will share options for choosing the best fabrics and pattern.  Join me in choosing the best lining to coordiante with my fabric!Skirt Patterns to choose from: ~ The Kate Skirt ~ The Fringe Skirt Pattern ~...

Ep. 305: Learn What is Planned for the Sew Fun Cruise in February 2024

Episode 305 🧵 Behind the Scenes with Angela Wolf  I know you have heard me say many time ... I am never going on a cruise!  Winn and I are on the water all the time, why would I want to go on a cruise?!?  Kelli Presley and Phyllis Batz will be joining me live to talk...

Ep. 304 Meet Jeff – Founder of CraftOptics

Episode 305 🧵 Behind the Scenes with Angela Wolf Featuring CraftOptics I am not sure about your, but if I am working in a low lit area or sewing beads onto a garment, I tend to lean forward and squint, this ending up with a terrible back ache!  CraftOptics has changed...

DIY RESTYLE PROJECT: TURTLENECK MAKE OVER

DIY RESTYLE PROJECT: TURTLENECK MAKE OVER


I have a few turtlenecks that are made of beautiful fabrics, but I can’t stand the high, tight neckline. Time for another DIY recycle project to  makeover this sweater!  The look of see through fabric, embroidered, and embellished tulle are so trendy right now – why not add a touch of glamour 🙂   I have listed all the steps here and included a video below with the full tutorial.

Supplies:  Turtleneck, Tulle Fabric, Sewing Supplies including scissors, quilters ruler, tailors chalk, pins, universal or stretch thread (you can find the sewing supplies here on my amazon page)


The first thing we are going to do is cut off the sleeves and collar (my turtleneck has a raglan sleeve, but any sleeve style will work).  Cut inside of the sleeve seamline and underneath the collar.  Save the sleeves to use as a pattern.

Mark the back of the sweater: Trace the back for the sweater outline onto the tulle fabric from the underarm up.

Mark a line across the sweater where you want the sweater fabric to meet the tulle fabric.  Add a seam allowance and cut.  Align the sweater with the tulle fabric. add a seam allowance onto the tulle fabric and cut.  (the video below shows all these steps in detail).

With right sides together, pin the tulle fabric to the sweater fabric.

Click on the video below to watch the full tutorial or head over to my post as a Brother Expert Consultant on the Brother Stitching Sewcial. 

Are you going to try this cute restyle?  Leave a comment below and tell me what you think 🙂

Cheers,

Previous DIY Restyling, Recycling, and Makeover Blog Posts …

DIY RESTYLE PROJECT: TURTLENECK MAKE OVER

DIY RESTYLE PROJECT: TURTLENECK MAKE OVER

  I have a few turtlenecks that are made of beautiful fabrics, but I can’t stand the high, tight neckline. Time for another DIY recycle project to  makeover this sweater!  The look of see through fabric, embroidered, and embellished tulle are so trendy right now...

read more
UPCYCLE ? DESIGN A SKIRT WITH EMBROIDERY

UPCYCLE ? DESIGN A SKIRT WITH EMBROIDERY

Embroidery is such a hot trend this spring!  Whether you are sewing a skirt from scratch or recycling one from the back of your closet, adding a touch of embroidery can create an entirely fresh look.  Keep in mind this would look great on a dress too ?  ...

read more
DIY: REFASHION A SWEATER INTO A SWEATER JACKET

DIY: REFASHION A SWEATER INTO A SWEATER JACKET

I bought this sweater a few years back because the fabric is soft and fluffy, but I never wear it because the collar is too tight!  I leave it in the drawer and pet it every once in a while 🙂  Even when I would attempt wear the sweater on a cold, wintry...

read more
<a target="_blank" href="https://shareasale.com/r.cfm?b=1130527&u=1586241&m=29190&urllink=&afftrack="><img src="https://static.shareasale.com/image/29190/728x90.gif" border="0" alt="Craftsy Unlimited FREE 7 day trial at Craftsy.com" /></a>

UPCYCLE ? DESIGN A SKIRT WITH EMBROIDERY

UPCYCLE ? DESIGN A SKIRT WITH EMBROIDERY

Embroidery is such a hot trend this spring!  Whether you are sewing a skirt from scratch or recycling one from the back of your closet, adding a touch of embroidery can create an entirely fresh look.  Keep in mind this would look great on a dress too ?

Supplies:

DESIGNER TIP: My skirt fabric is a linen blend, but the stabilizer I am using would work great on rayon, cotton sateen, denim, wool, and cotton blends.  JUST be careful with satin, silk blends, and velvet (to name a few).  You don’t want to damage the fabric from the iron when pressing on the fusible stabilizer; it’s best to test the stabilizer on a swatch of fabric first.

Determine the placement for the embroidery on the skirt.  I am going to focus on one side of the front of the skirt; marking that spot with a fabric pen or tailors chalk.   Press the embroidery stabilizer on the wrong side of the fabric covering the area to be embroidered.

Hoop the fabric and insert the hoop into the machine.  Choose an embroidery design or add a couple of designs onto the screen.  Scan the fabric in and move the embroidery design as needed. If you don’t have the scanning feature on your sewing machine, use an embroidery placement marker such as the snowman or other tools.

You can read the full blog, head over to my post as a Brother Expert Consultant on the Brother Stitching Sewcial. Be sure to share photos of embellished Kate skirt #angelawolf #brothersews

Cheers,


<a target="_blank" href="http://shareasale.com/r.cfm?b=1130527&u=1586241&m=29190&urllink=&afftrack="><img src="https://static.shareasale.com/image/29190/728x90.gif" border="0" alt="Craftsy Unlimited FREE 7 day trial at Craftsy.com" /></a>
SHANNON FABRIC GIVEAWAY!

SHANNON FABRIC GIVEAWAY!

SHANNON FABRIC GIVEAWAY! Are you looking for an amazingly SOFT fabric?!?  SHANNON FABRICS was a sponsor on It's Sew Easy tv and continues to inspire us with gorgeous fabrics.  This new batch of fabric is called LUXE CUDDLE and the colors are so fun!  If you look...

read more
Embroider 103 Learn How to Embroider on Hats

Embroider 103 Learn How to Embroider on Hats

Learn How to Embroider Hats Join Angela Wolf and Cindy Hogan for a 90 minute virtual class and learn how to embroider hats with any embroidery machine and a 4" by 4" hoop! Learn the best stabilizers and hooping techniques.   This is a virtual class, live with Angela...

read more
Drape a Square Sweater Jacket

Drape a Square Sweater Jacket

In this tutorial you will learn how to drape a square sweater jacket with Angela Wolf. Fabrics, techniques, and measurements will be taught in this lesson.

read more
Coverstitch 103 ~ Learn How to Use Your Coverstitch Machine

Coverstitch 103 ~ Learn How to Use Your Coverstitch Machine

Learn How to Use the Coverstitch Machine Do you find yourself sewing a lot of knits?  If so, you will eventually want to add a coverstitch machine to your sewing room.  Hemming knits has never been easier! But the Coverstitch is not just for knits, you can also do a...

read more

Pin It on Pinterest