
EMBELLISHING JEANS WITH FREE MOTION EMBROIDERY
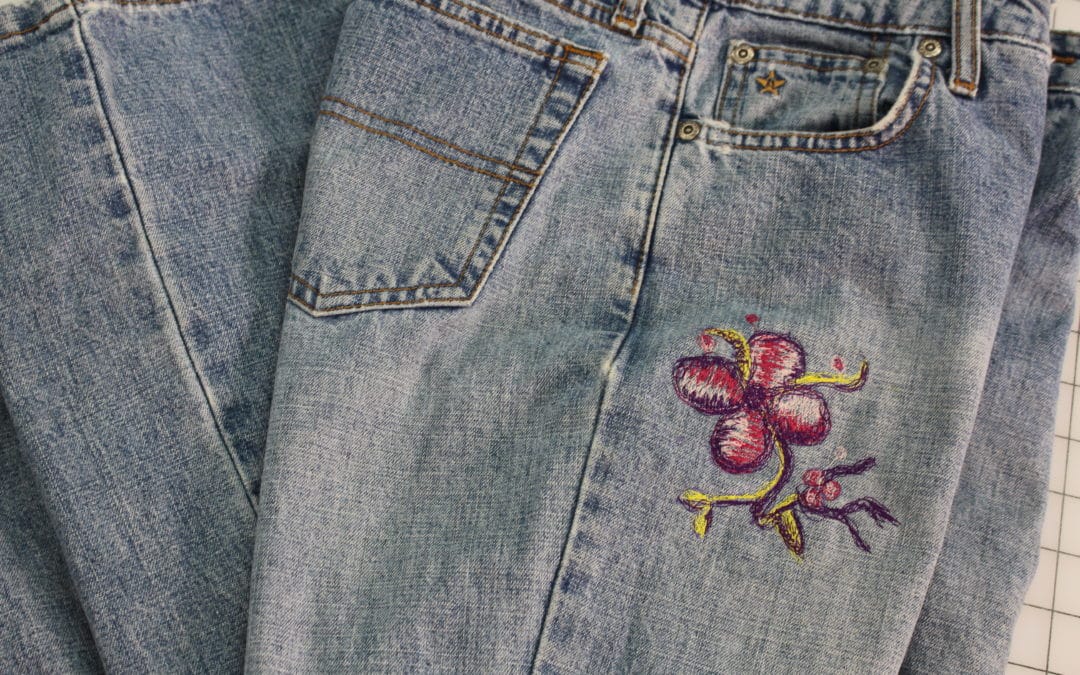
Embellishing Jeans with Free Motion Embroidery An easy way to restyle or upcycle jeans is to add a touch of embroidery. Free motion embroidery, also referred to as thread painting, is so easy and you don’t even need an embroidery machine for this technique. Instead...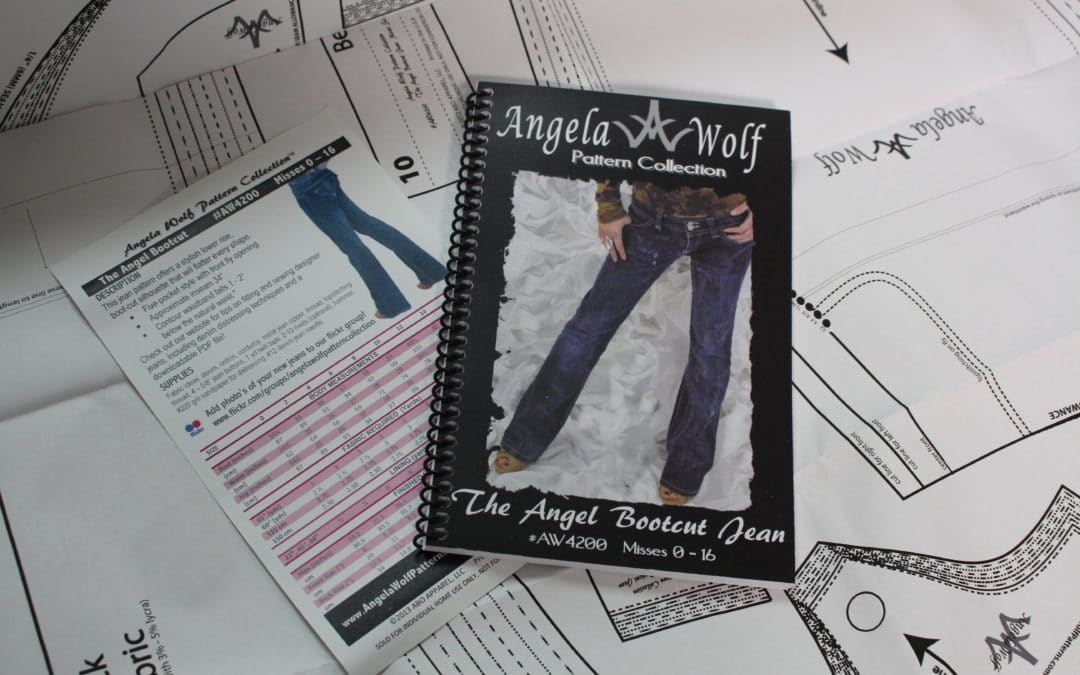
Jeans Sewalong
Welcome to the Jeans Sewalong! I am so excited for this jeans sewalong! Not only to see your creativity, but I really need a few new pair of jeans myself. Each week this sewalong will focus on a main part of the jean sewing process. We will start with altering the...How to Sew Exposed Zippers in Jeans and Jeggings!
With October’s Wardrobe Challenge including zippers, I thought now would be a good time to share a few easy ways to embellish with exposed zippers.

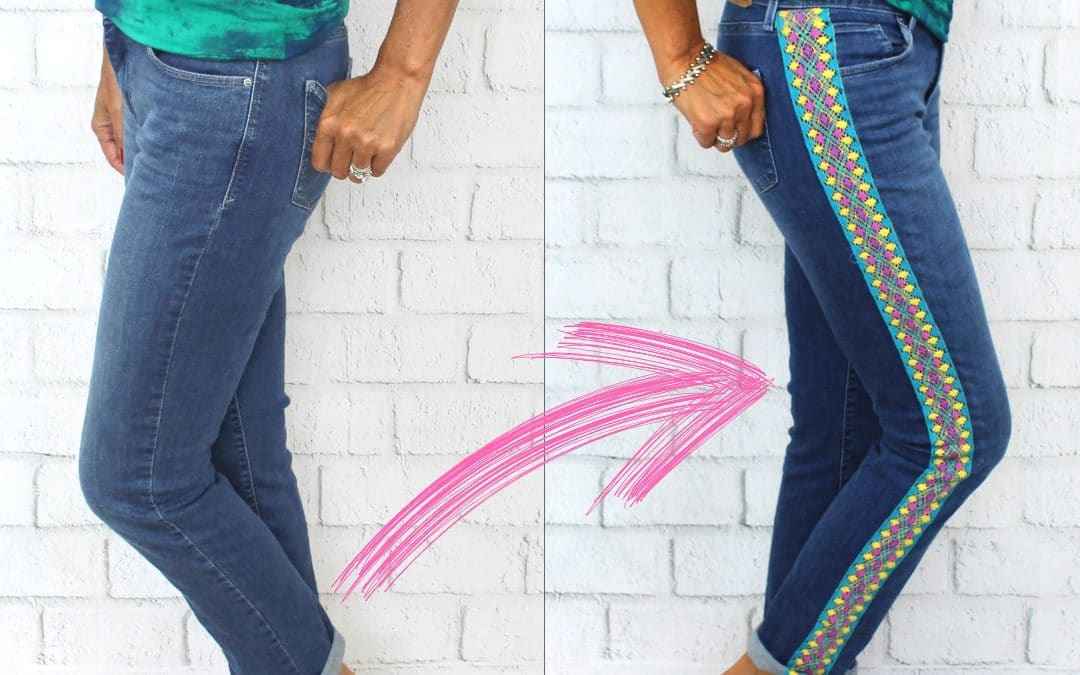
A fun way to change the look of a pair of jeans is to embellish the leg with an exposed zipper. Follow along:
 Supplies Needed:
- Strip of fusible interfacing cut 3″ wide and at least 2″ longer the zipper,
- 2 metal zippers (any length)
- #14 denim Jean needle
- Thread of choice
- Fabric pen
- Quilter’s Ruler
- Scissors
- Tailor’s Clapper

Step 1: On the wrong side of the fabric, mark the center of the pant leg (could be front or back, wherever you want the zipper).
If marking an existing pair of jeans, rip out the hem at least 5″ from each side of new mark. Press the fusible interfacing along the newly marked center line.

Step 2: Mark the hem, hem allowance, and the length of the zipper opening down center of the pant leg.

Step 3: Determine the width of the zipper opening (depends on the width of the zipper teeth). Draw in opening, top edge, and then add a triangle from the center cut line to each corner (as shown above).
 Step 4: Cut along center marking. Cut each triangle point (if you are worried about the fabric fraying, add Fray Check to the top corners)

Step 5: Press the seam allowances back and press triangle tip up.

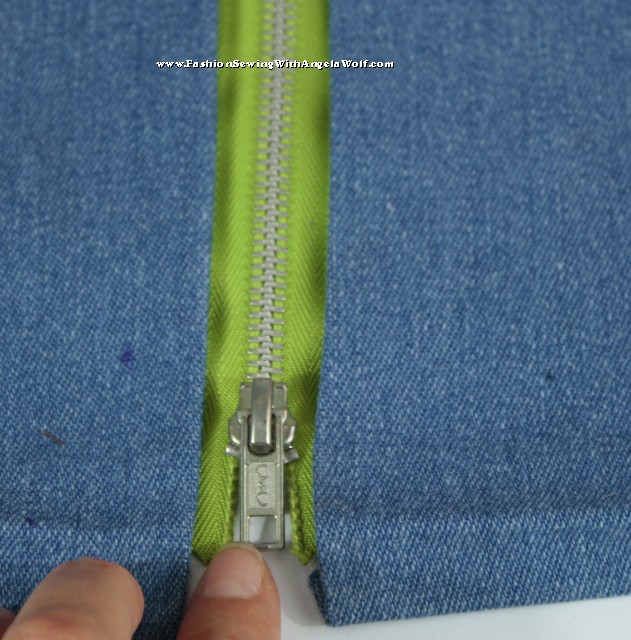
Step 6: Line up the zipper with the metal teeth in the center of the opening. Check the placement of the zipper stop and zipper tab.

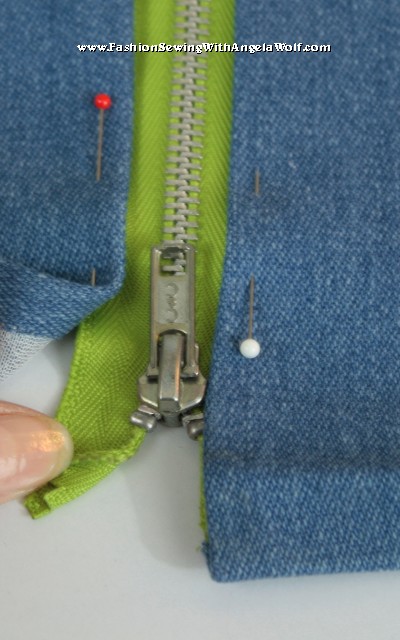
Step 7: Fold back the zipper tape and press in place at the hemline.


Step 8: Pin zipper in place.


Step 9: In this example, I am using standard polyester thread, cotton or silk thread would work too. Set the sewing machine to a triple stitch and lengthen the stitch length to 4.0. (Note: if you don’t have this feature, use denim thread, straight stitch, stitch length 4.0)

Step 10: Stitch along the edge of the zipper. Open and close the zipper as needed in order to get the foot by the zipper tab.  Step 11: Notice how I have lined up the edge of the zipper foot with the metal teeth, a very easy to get a straight stitch … or this would be a great time to utilize the laser vision guide feature on your machine! 🙂

Step 12: Press up the hem with the tailor’s clapper for a crisp crease. By the way, did I mention WAWAK Sewing is now carrying my tailor’s clapper! Yeah!

Step 13: Hem the jeans and move onto the other leg.
That’s it! Now this is just one quick, easy way to install a hidden zipper. I will give you some more ideas next time.
Cheers,


How to Hem Jeans with the Brother MuVit Digital Dual Feed Foot
Dark jeans are really in trend this fall so that means distressing with a hammer might not be an option. I have tested the MuVit Digital Dual Feed Foot on the Brother Dreamweaver XE and believe it or not, after sewing over many thick seams there was not one skipped stitch! The only thing I added was a #14 denim jean needle an d various thicknesses of denim. This foot is different from a walking foot, not only because it has a rolling belt, but the foot plugs into the sewing machine giving the foot it’s own brain … or something like that. You can then adjust the foot by pressing a few buttons on the sewing machine. I have to say technology is really making sewing fun and easy!
The video below shows you just how smooth this digital dual feed foot works and I even tested it on one of my new jean patterns. Which by the way, I am happy to announce my first two jean patterns are up and available! Both patterns come with detailed sewing instructions in a book format, very easy to follow. The other bonus that comes with both of these jean patterns is a downloadable PDF file, download to your tablet and you can enlarge the photos for detailed viewing. The PDF file offers color photos and details on where to distress the jeans as you sew. My goal is to help you sew jeans that fit perfect and look expensive 🙂 Enjoy and don’t forget about the previous videos on sewing jean pockets if you need a little extra help. Hope you had a great Thanksgiving weekend, lot’s of family, food and shopping on my end. Wait until you see my new shoes (and yes that’s plural!) xoxo Angela


[youtube=http://youtu.be/2584thCSUoo]
Brother™ has provided me with the DreamWeaver XE, but all opinions expressed are entirely my own.


