I just got back from a 6 day Sit & Sew tour visiting all the Allbrands stores which started in Louisiana and ended in Texas. Fabulous trip, but definitely dragging a little today. I will be sharing details of the week as soon as I organize all the photos. In short, I met so many wonderful people, ate some amazing food, got over my fear of bridges, I now have official Mardi Gras beads …
In the meantime, I posted this message to facebook and realized not all of you are on facebook, so I thought I would THANK YOU again.
Saturday was the last day of teaching and I was flying out the next morning. Super tired, but before crashing I decided to scan my emails and came across one from Craftsy with the title “Are you a blogger award finalist?”. I clicked on the link and couldn’t believe it! You nominated my blog to the top 4 Best Sewing Instructor Blog again. You all are AWESOME! This means so much to me, thank you, thank you. I also know it is a little work to nominate a blog at the first stage, you have to fill out a lot of things. Thanks so much for going through the effort, you inspire me to keep at it 🙂
One More Round of Voting
Now, there is a last round of voting that ends Wednesday at midnight. This vote is quick and easy:
Click here to vote: Scroll down the page to Vote Now! Best Craftsy Sewing Instructor’s Blog and you will see my name. Vote and then watch the tally live.
Just being in the top 4 is such an honor and knowing it’s because of your effort to nominate me really makes my day and a huge THANK YOU is all I can say! By the way, while you are scanning the page you might want to check out a few of my friends blogs that also made the top 4 in their category: Leah Day has a great one for quilting and Lisa Shaw in Embroidery.
WARDROBE CHALLENGE
The 2014 Wardrobe Challenge was so much fun! Seeing your outfits on flickr and following your Pinterest boards has been a treat and a quick way to get in the sewing mood, I hope you have enjoyed it as much as I have. There have been a few hiccups on my end, so thanks for your patience. (Note to self: Never plan anything while I am traveling to teach, tape It’s Sew Easy, or shoot online classes – just not enough time and brain space ) In fact, I still need to post the list of winners, but I wanted to give you the last challenge.
LAST CHALLENGE
I told you the last challenge would be an easy one. Take a picture of the clothes in your closet that you have sewn this past year and post it on Flickr before February 15th (the same way you posted the other photos – click here if you need help uploading to flickr). Even if you only have 1 garment, your photo qualifies you for this last challenge. Winners will be all random drawings from the entrants, so even if you haven’t participated yet or you feel intimidated by the rock stars who have really used the challenge to fill their closet, let us see what you have made. Again this is just 1 photo, just like mine. Good luck and thanks again to all that have participated.
I don’t know if you read my last post about the cooking adventure, but many of you gave the best tips for cleaning the pan! the baking soda worked like a charm and I wrote all the cleaning tips down so I am ready for the next burn. Well, I am off to edit pictures and explain to Winn how I got my mardi gras beads 🙂
There are so many sewing machine feet to choose from, it can get overwhelming deciding which foot is best for the job. Why bother, right? If using a specific foot for a specific job could drastically cut the sewing time down and offer professional looking results, wouldn’t you want to try? I sure would.
Home sewing machines usually come with a fabulous manual explaining what each foot is for and a tutorial explaining how to use it. Industrial machines don’t always offer such advice, at least mine didn’t. With a 5 page manual, written in a language I don’t speak, I am surprised I got the thing put together in the first place! I don’t use this machine as frequently as all the others, mainly because it’s loud, doesn’t have a thread cutting feature and I don’t have any accessories for it. I bought it for speed and that it has.
Scanning the list of additional feet for industrial machines, I found the feet to be are very inexpensive, but again I ran into the issue of which foot is the right foot for the job. I thought I would start testing some of these feet and share with you my findings.
A Narrow Rolled Hem
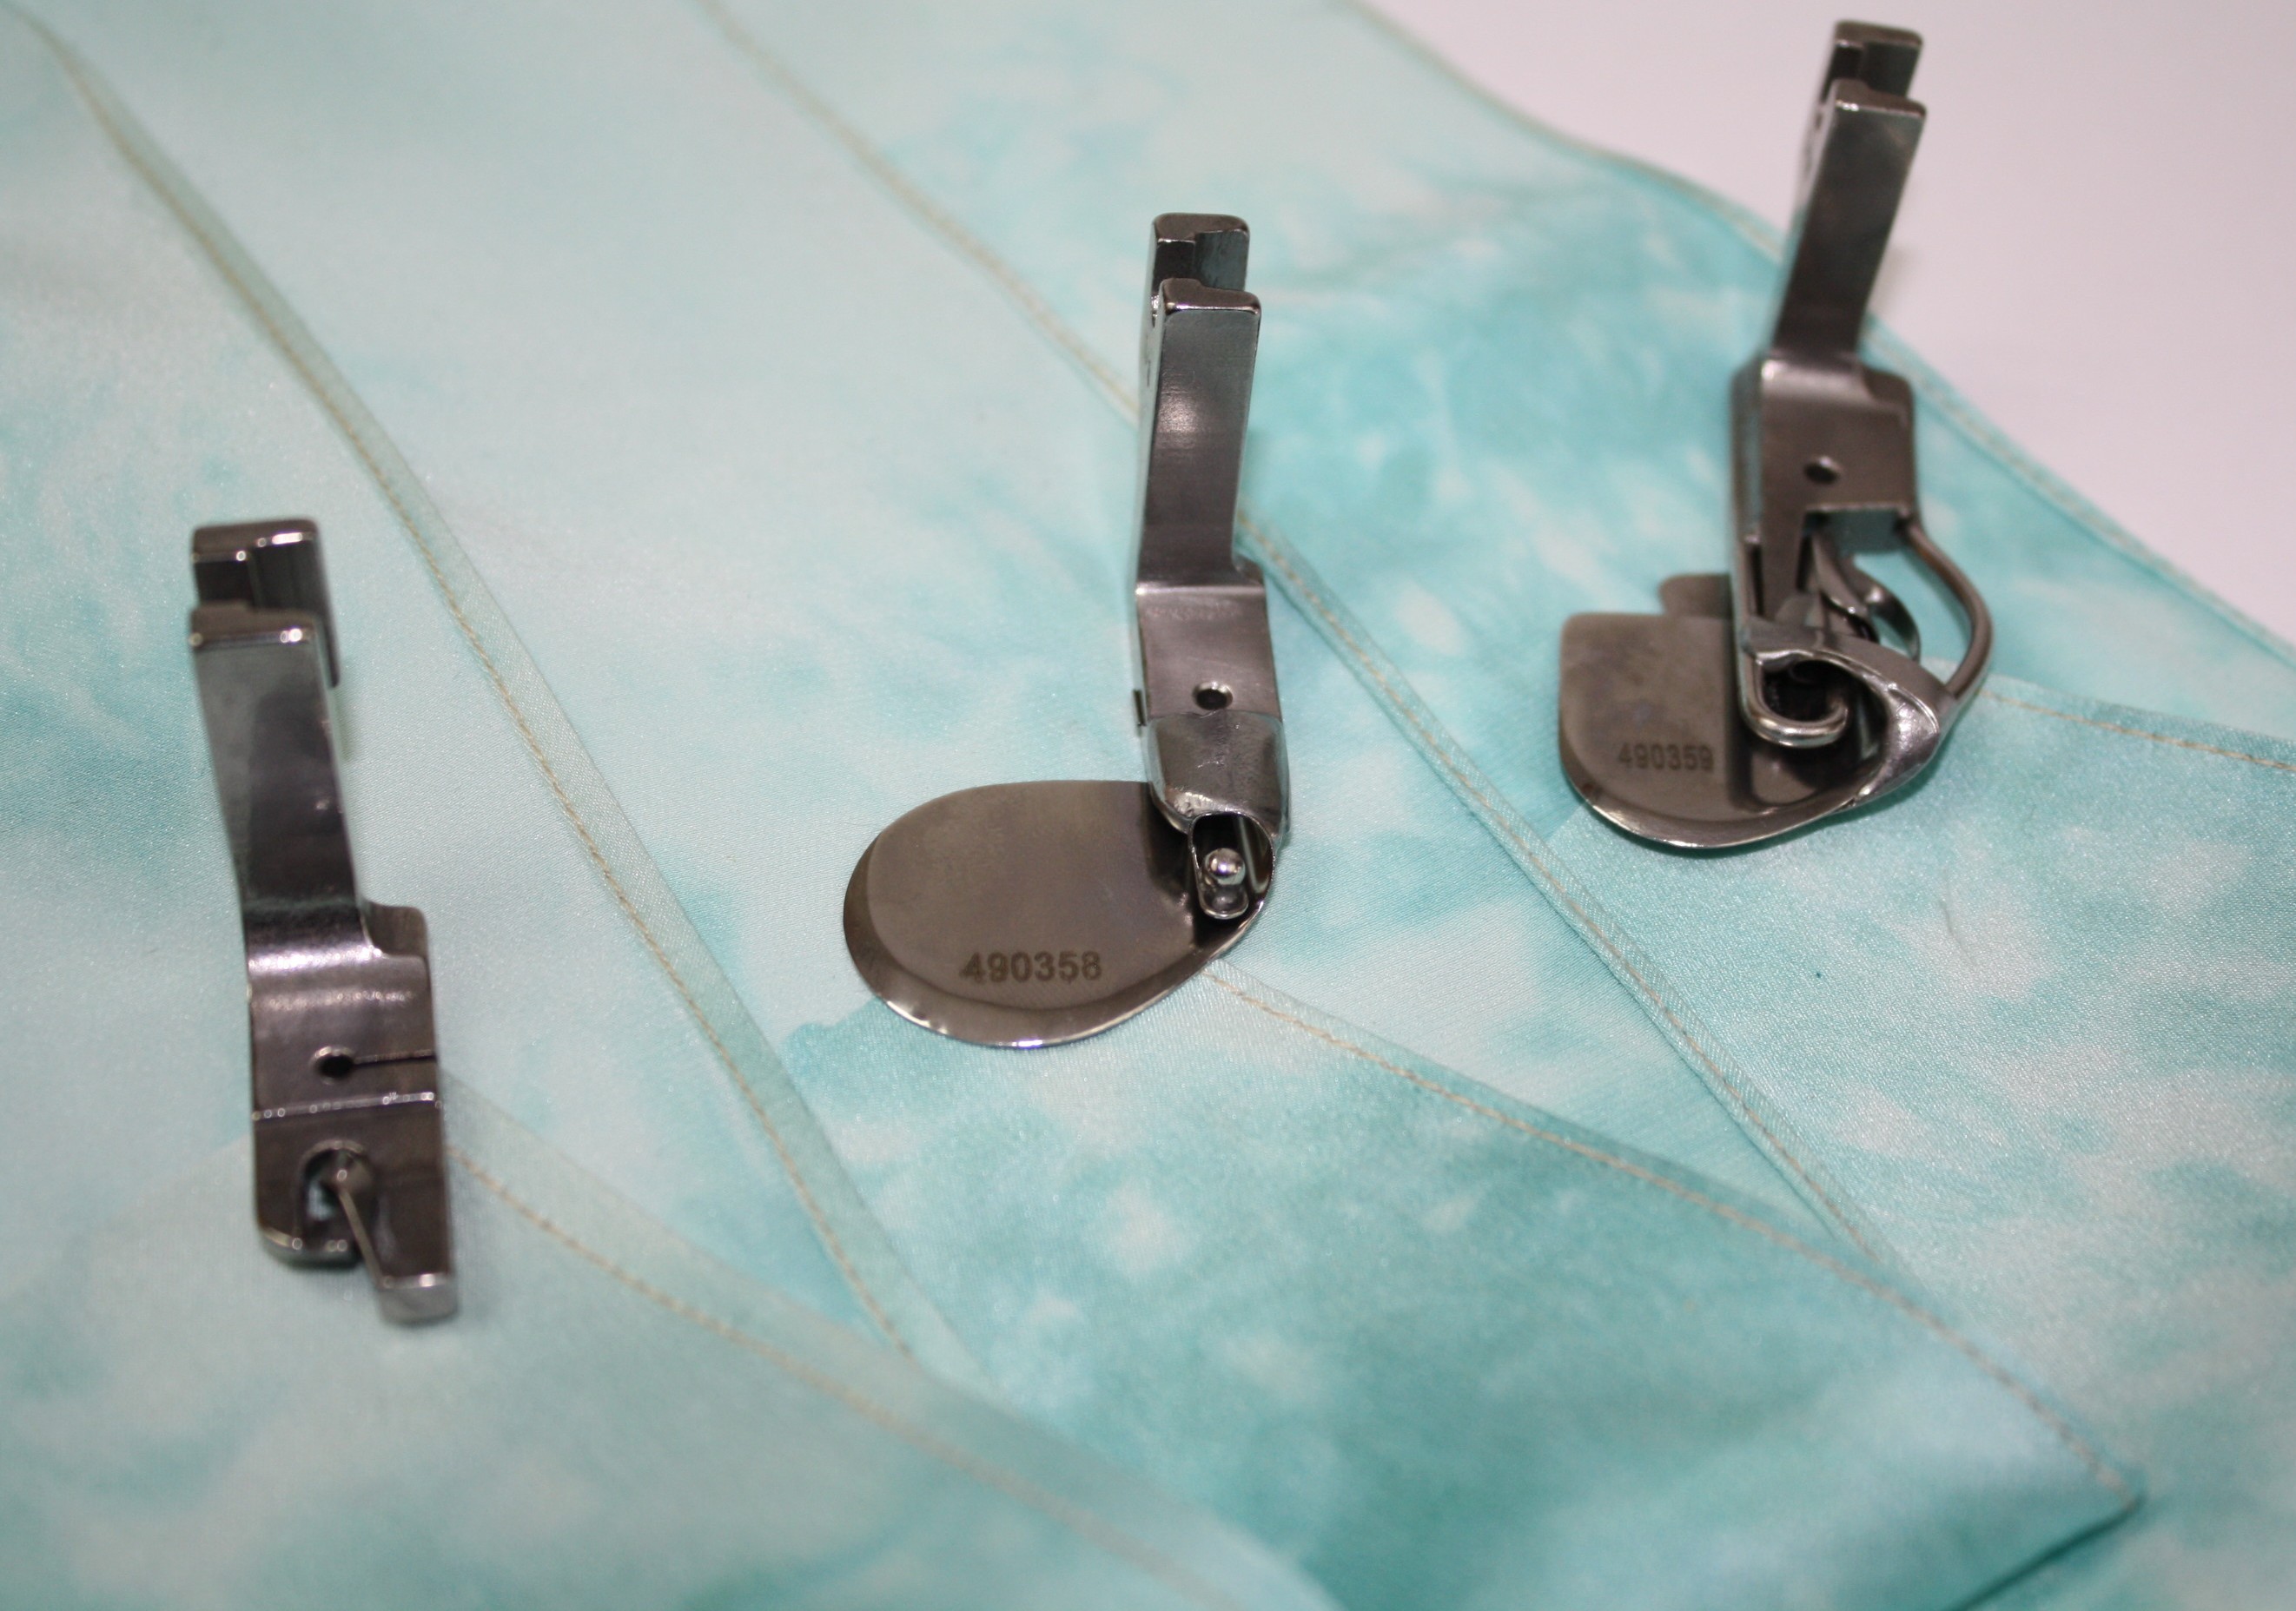
I sew a lot of garments with sheer fabrics (especially this months wardrobe challenge; Dress the Part) and my go-to stitch is usually a narrow rolled hem on the serger – its super fast and looks professional. But sometimes a rolled hem on the sewing machine would be more appropriate. I found 3 different feet for the industrial machine:
You have probably seen the Rolled Hem Foot, as it comes with most home sewing machines. This is the only foot I had ever seen used for the job. It does make a rolled hem easy, but has its challenges as well. Getting over thick seams can be interesting and sometimes the fabric doesn’t feed evenly. Of course there are tricks:
Hold the fabric to the left side of the foot as it feeds into the machine and trimming seam allowances for less bulk.
Results: A nice rolled hem, I had to use the tweezers to get the fabric started and the rolled hem is a little uneven. With practice this foot will work.
If you have an industrial machine, you have more options and each offers different results:
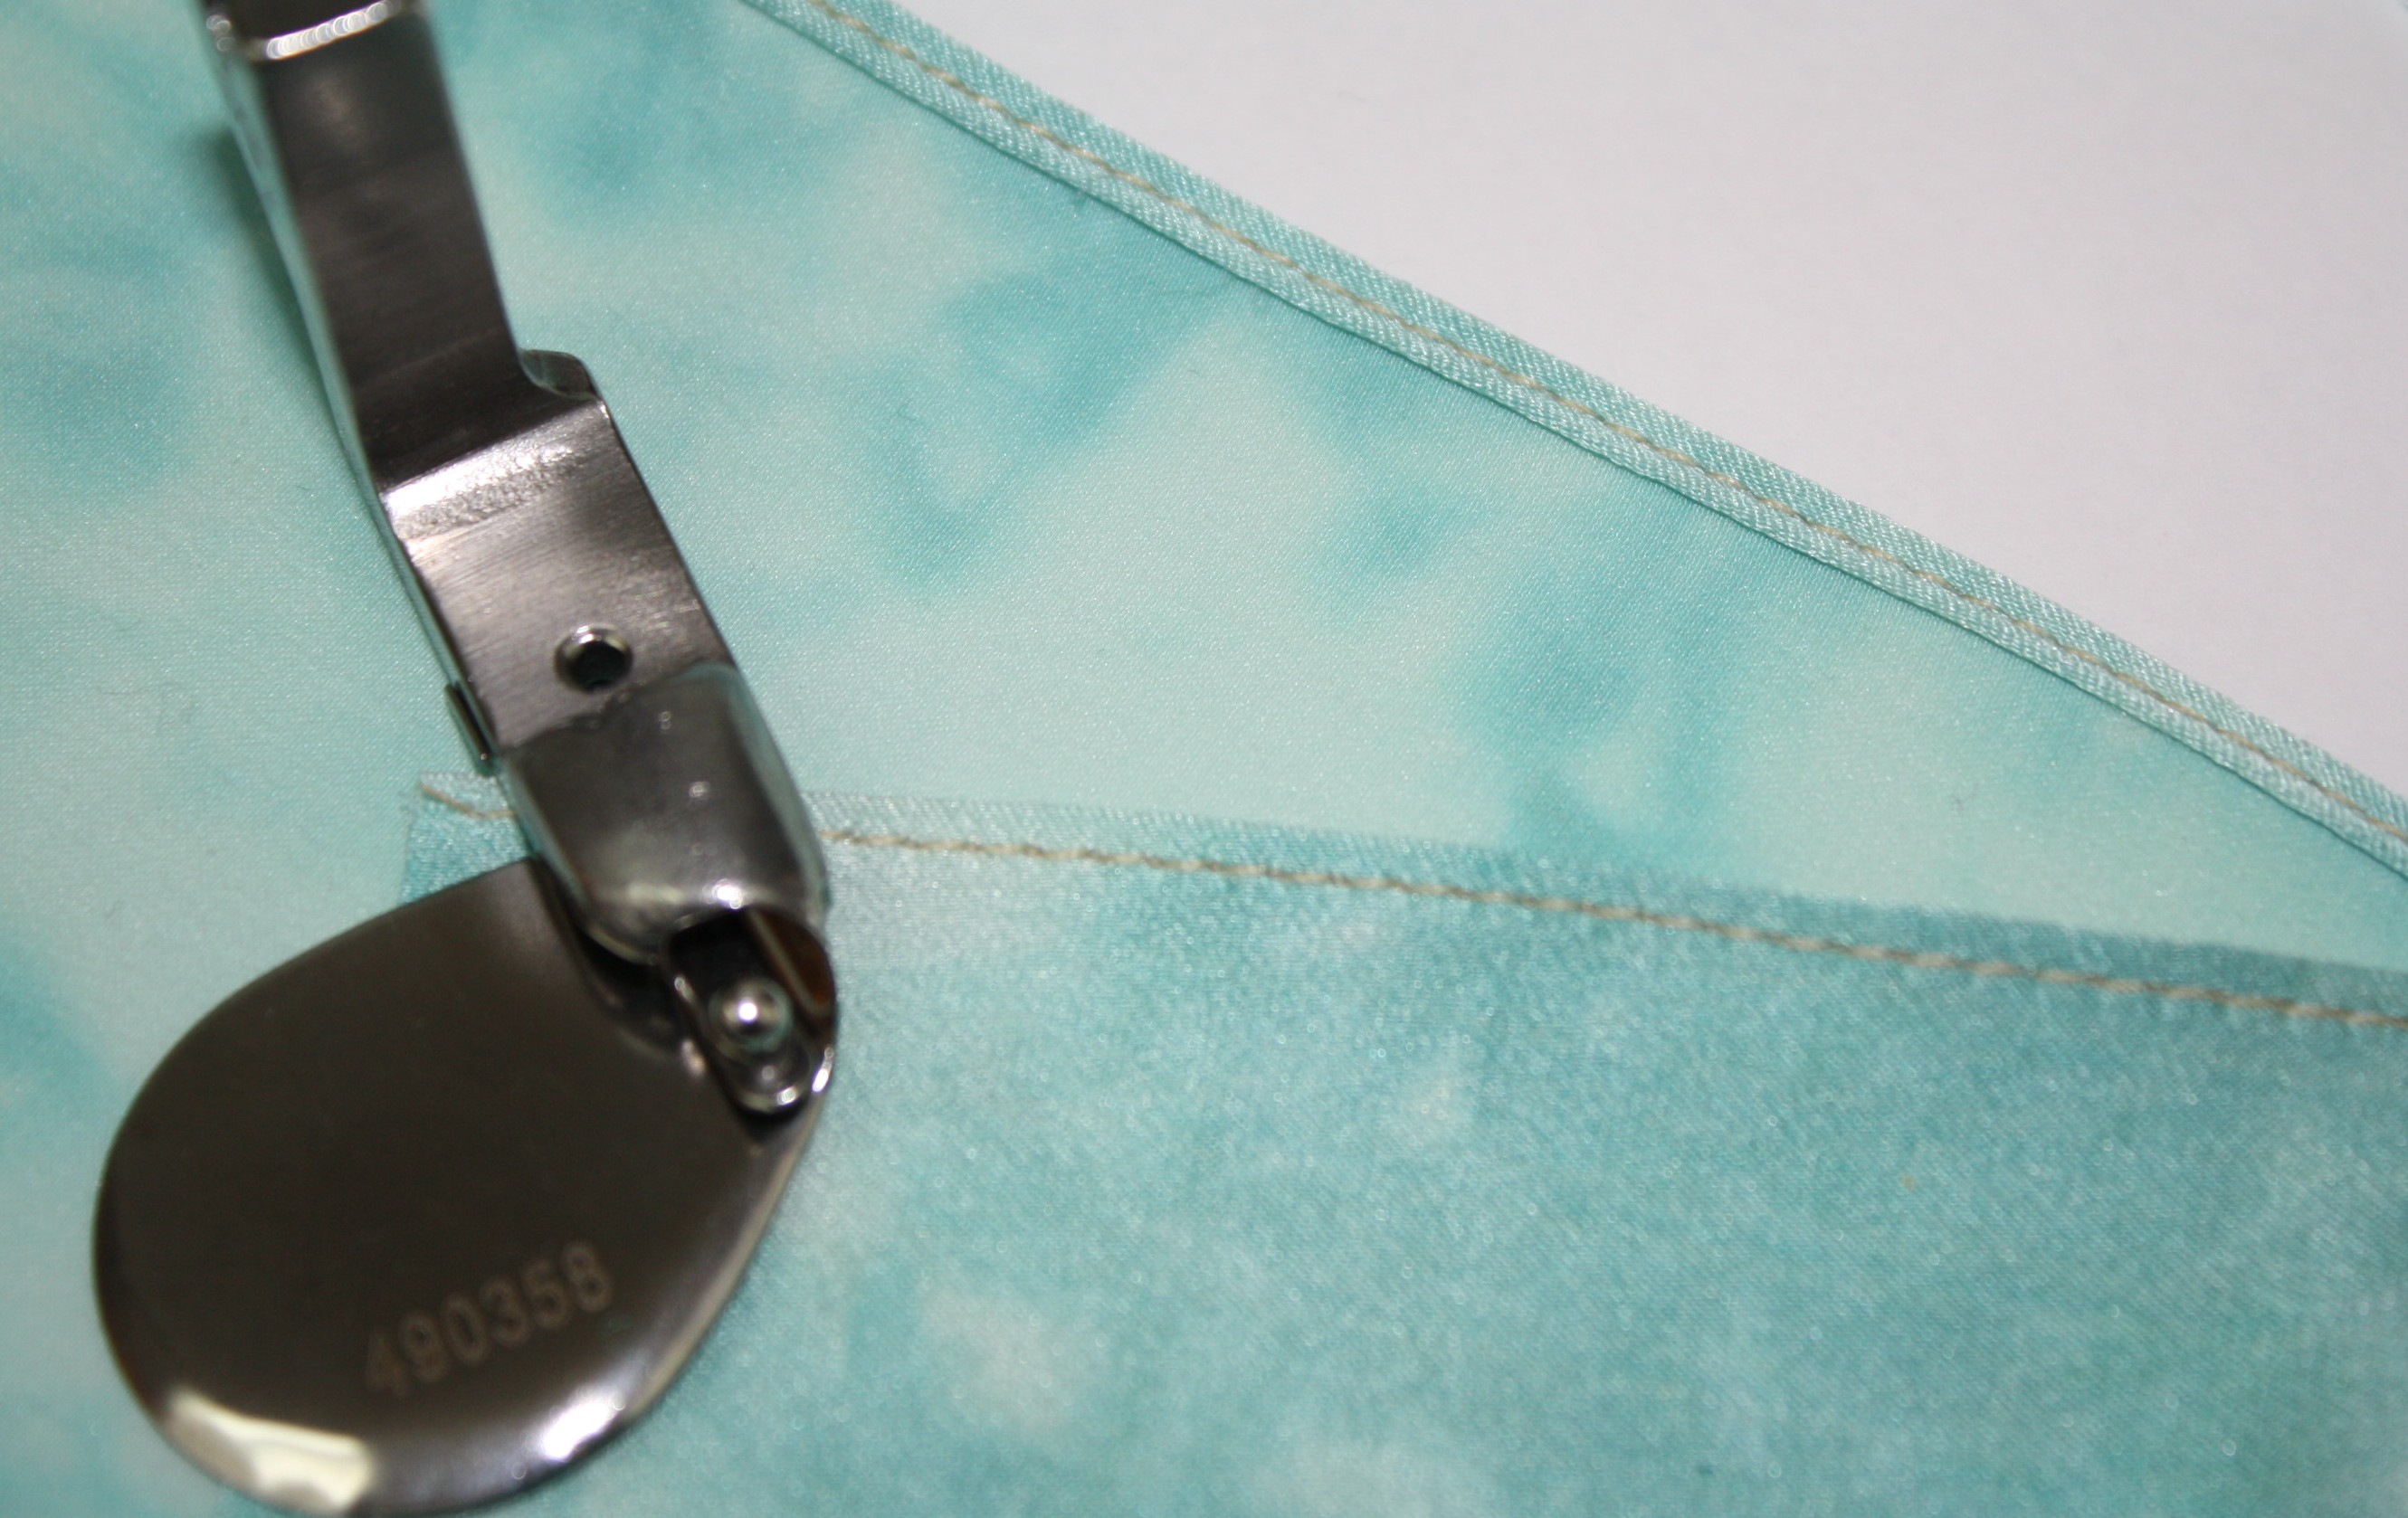
This foot has a plate that covers the front feed dogs allowing the fabric to feed perfectly. You can see the ball at the tip of the foot, the fabric will roll over that ball as it double folds into a narrow hem. I must say, I love this foot! This is how it works:
Feed the fabric into the foot, above the plate. Notice how the place covers the front feed dogs. Insert the fabric the same way you would for the rolled hem foot.
The fabric folds over the ball.
Hold the fabric a little to the left side of the foot as the fabric feeds into the foot (as shown above). Stitch.
Results: A perfect narrow hem! This foot offers the easiest rolled hem I have ever tried! I hardly had to do anything with the fabric except guide it into the foot. I even sewed at a high-speed and the rolled hem is perfectly even. A definite A+++++
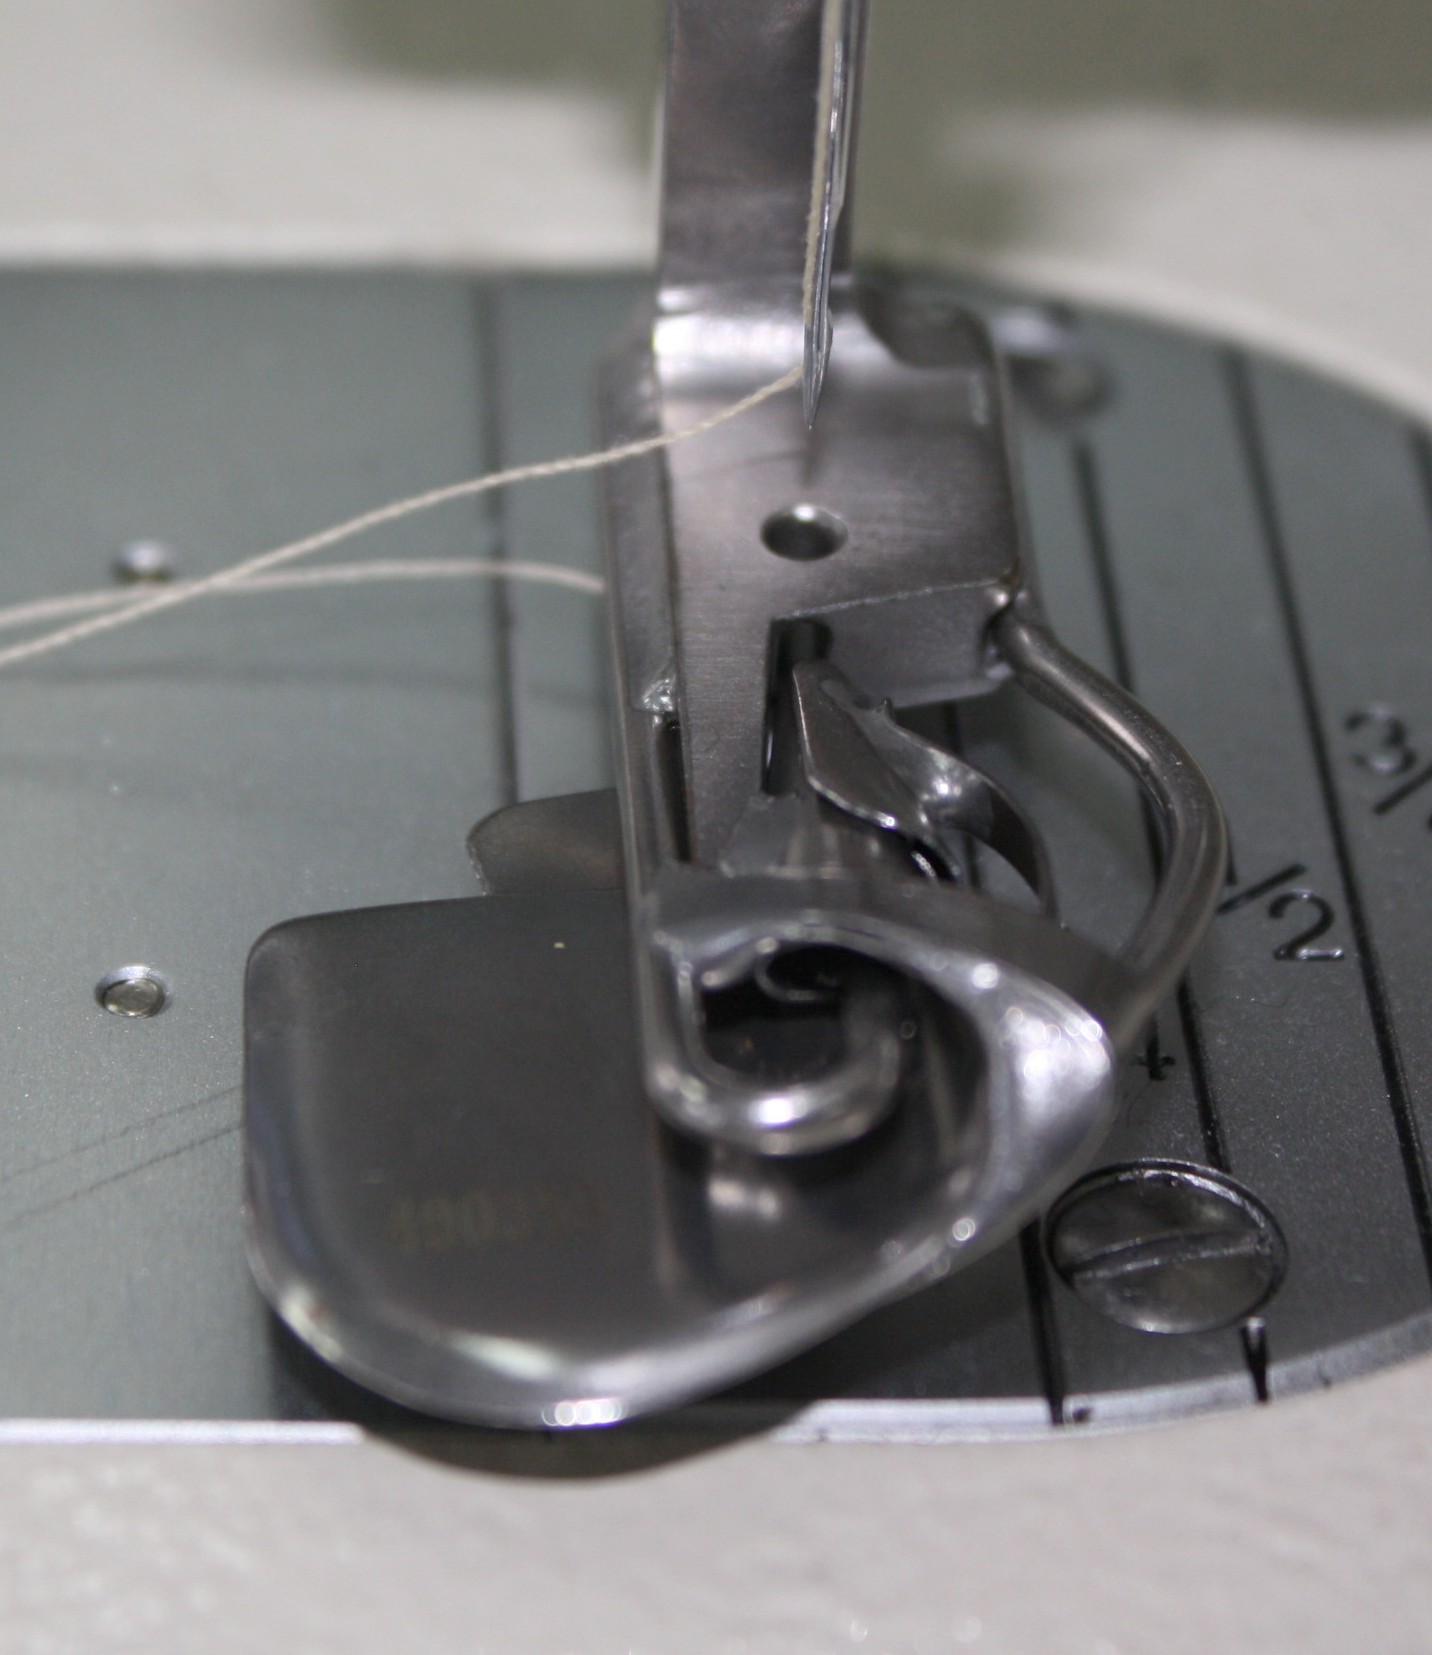
The “spring” part is what intrigued me about this foot. You can see the foot looks very similar to the Ball Hemmer Foot, yet there is not a ball. Instead, there is a movable area that the fabric will go through. Look closely, this is the back of the foot:
Looking at the left photo first: see the corner touching my finger tip. When I do nothing with that corner, the opening on the foot remains unchanged (see opening at yellow arrow).
Take a look at the right photo: Here I have pushed that corner in and the opening gets larger (see yellow arrow).
Now we know what the “spring” means. This opening adjusts for the thickness of fabric as the fabric flows through.
There is a plate protecting the fabric from the front feed dogs, just like the ball hemmer. Slide the fabric on the top of the plate.
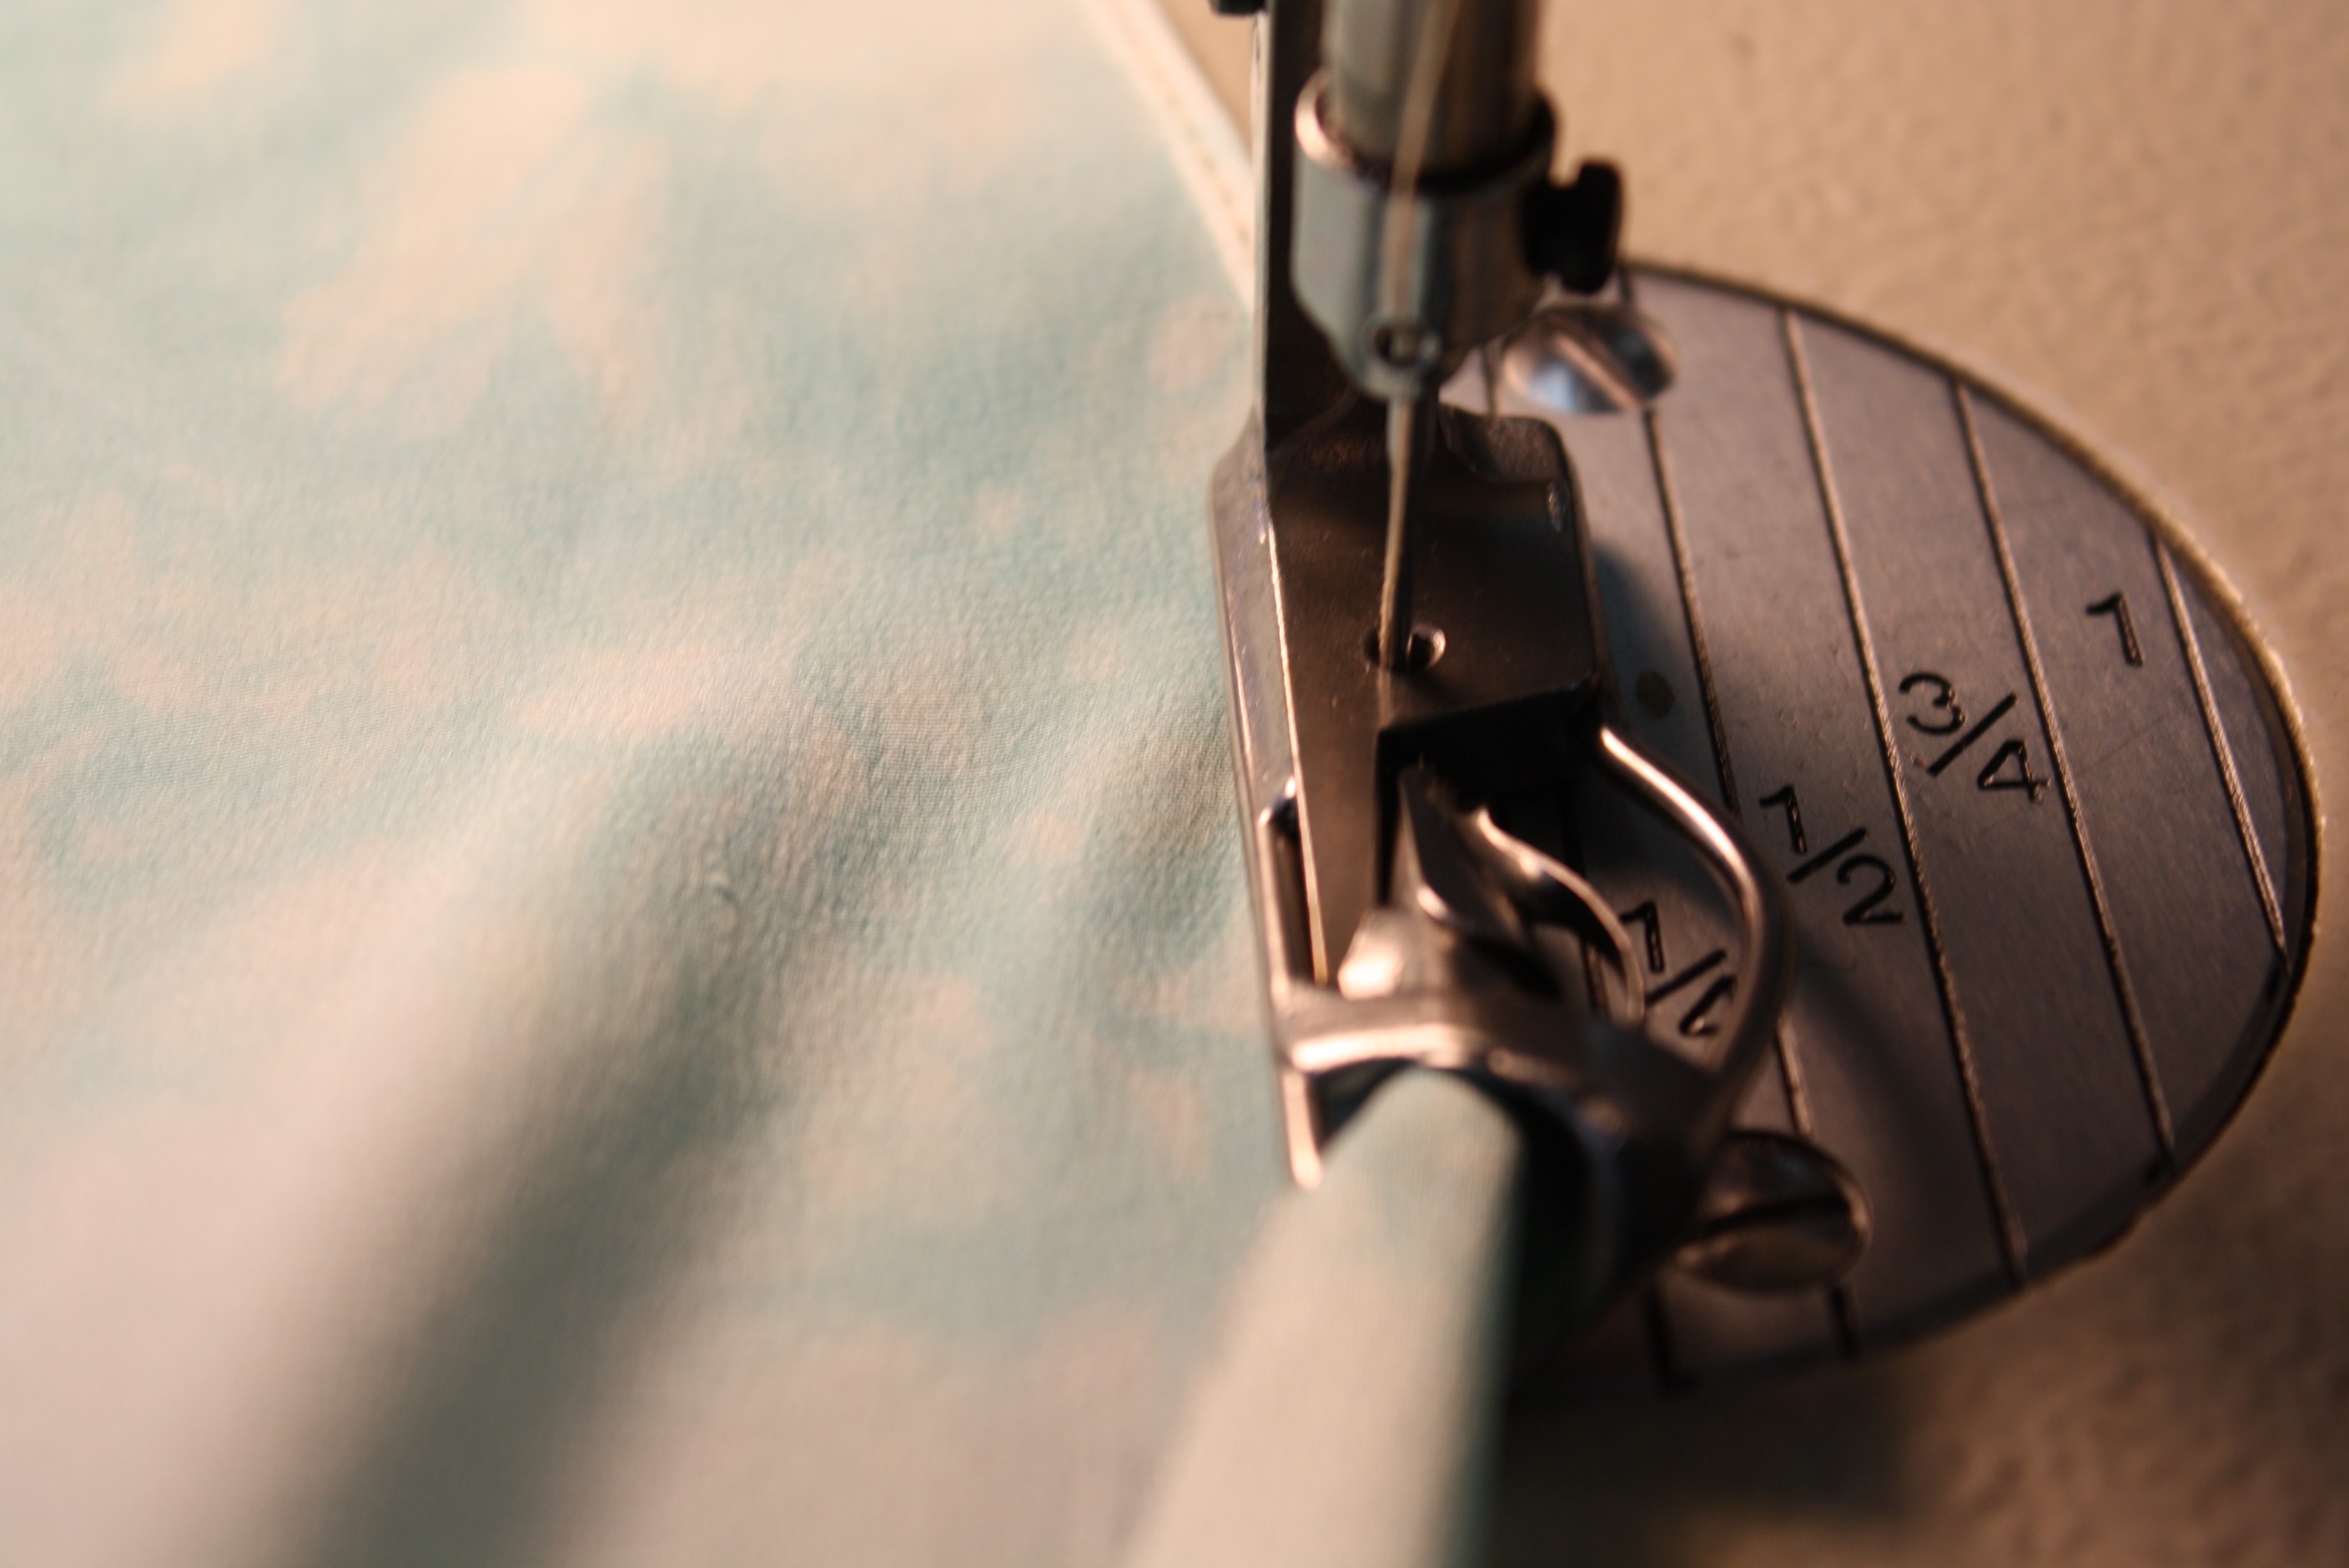
Again, feed the fabric into the foot and stitch.
Results: Another perfect rolled hem! Just as easy as the ball hemmer foot.
My favorite foot for the rolled hem on silk charmeuse is the Ball Hemmer Foot. The rolled hem was a little thicker than the other two and perfect!
What about crossing seams and thicker fabrics? I will test these and more, and let you know the results. So far both feet are winners!
I also have to check to see if these feet will work on my Brother PQ1500. The PQ1500 straight stitch machine is just like an industrial machine with speed and ease of use, plus it’s not attached to a large table and easy to move around. Fingers crosses on that one! Otherwise, I have my eye on the Brother Industrial Machine used on Project Runway. Do you have an industrial machine? Have you tried these rolled hem feet?
I am thrilled to see all of the excitement for my 2014 Wardrobe Challenge! The month of January is so full of new years resolutions, crazy weather and catching up from the holidays, I wanted to make this month’s challenge simple and fun. All you have to do is create a Pinterest board “wardrobe challenge 2014” and pin photos that inspire you. This is not a trick, just post anything that inspires you to design and sew, this can be absolutely anything. Ideas: colors, animals, architecture, food (that is the downfall of pinterest, everyone posts such fabulous looking food, I swear I can smell it through the computer screen!) Pin something from each sponsor – that can be a repin from their pinterest board or pin something from their website and leave a comment here or on my pinterest board with a link to your new board. In case you need the links to the sponsors here they are again: Brother, Threads and Sew Stylish Magazines, WAWAK sewing, It’s Sew Easy, Angela Wolf Patterns, and some of you couldn’t find my pinterest page. Again, if you need an invitation to pinterest email me info@angelawolf.com. For more details on January’s Challenge, there is still a week to enter, then we move on to February’s challenge! Good Luck 🙂
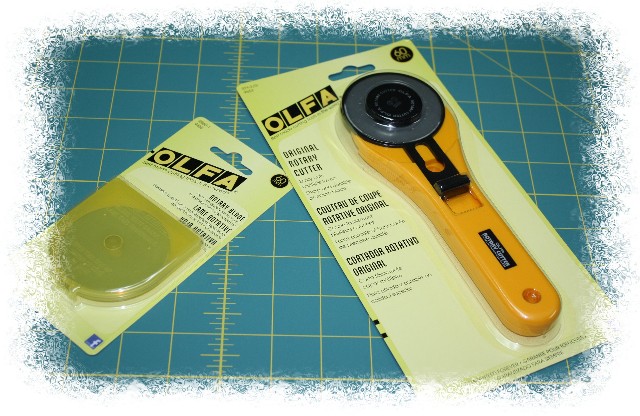
Olfa 60mm Rotary Jumbo Cutter, Replacement Blade, and Cutting Mat from WAWAKsewing.com
Now, onto a quick time-saving tip. When I sit down to sew, there are a few items that I quite often need and I find it faster to prepare these in advance. One example is fusible interfacing: hemming jacket sleeves, plackets, zipper placement, bound button holes, these are just the first few areas I need the interfacing and to get up, unfold the interfacing and cut 1 strip is a total “time sucker”, my new word for the year! For jacket hem’s I typically use 3″ to 4″ wide strips of interfacing and for the zipper placement 1″ to 1-1/2″ strips.
This is light-weight fusible interfacing (HTC fusi-knit) and with two layers you can still see through the interfacing to line up the 1″ grid on the Olfa cutting mat.
Keeping the grainlines and stretch of the interfacing in mind:
cut strips parallel to the selvage 28″ long by 1 1/2″ wide. The most common use for these strips is to support the center back seams on a dress when inserting a hidden zipper (I am hooked on sewing dresses lately!) and it is rare that I would need longer than 28″ for a zipper.
cut strips perpendicular to the selvage 4″ long by the width of the interfacing (in this case 22″ wide). These strips are perfect for re-hemming jackets and sleeve hems. If you do alterations, this is really a bonus to have these cut strips on hand.
Store these strips in a photo box next to your sewing station and you are all set!
A few tips on the rotary blade:
Always clear your cutting area from pins! It always amazes me how one little dent in the blade can ruin the cutting, but it is true. Maybe it’s not quite as noticeable when cutting thick fabric, but try cutting bias strips of silk chiffon. If the blade is damaged, even in the slightest bit, the cutting is fragmented and you end up cutting the strips over with scissors. Pain in the tush 🙂 I used to try to sharpen the blades, but seriously I am trying to save time not cause more work. The blades are not that expensive, especially this month they are 25% off at WAWAK sewing, time to stock up for a few months! The replacement blades come in a nice plastic container. As I am always fearful of throwing a blade in the trash, I use one of the containers to store bad blades. See the blue dot in the photo above, that dot tells me this package is bad blades. When its full, snap the container closed, add a piece of tape for extra security, and toss with no worries.
Lastly, take extra precaution and close the blade cover when not in use. It makes me crazy when anyone in my studio leaves the blade exposed when they are not using it! I have a pretty long cutting table and I am often grabbing bolts of fabric and sliding patterns around, one slip could end up being a bloody mess. Thankfully that hasn’t happened, but I have heard a few horror stories 🙁
My question to you – Have you ever tried sharpening your old blades and did you have any luck or do you prefer stocking up on replacement blades when a great sale hits?
Have fun filling your pinterest board, remember to add #wardrobechallenge when sharing your experience!


 Saturday was the last day of teaching and I was flying out the next morning. Super tired, but before crashing I decided to scan my emails and came across one from Craftsy with the title “Are you a blogger award finalist?”. I clicked on the link and couldn’t believe it! You nominated my blog to the top 4 Best Sewing Instructor Blog again. You all are AWESOME! This means so much to me, thank you, thank you. I also know it is a little work to nominate a blog at the first stage, you have to fill out a lot of things. Thanks so much for going through the effort, you inspire me to keep at it 🙂
 but many of you gave the best tips for cleaning the pan! the baking soda worked like a charm and I wrote all the cleaning tips down so I am ready for the next burn. Well, I am off to edit pictures and explain to Winn how I got my mardi gras beads 🙂


