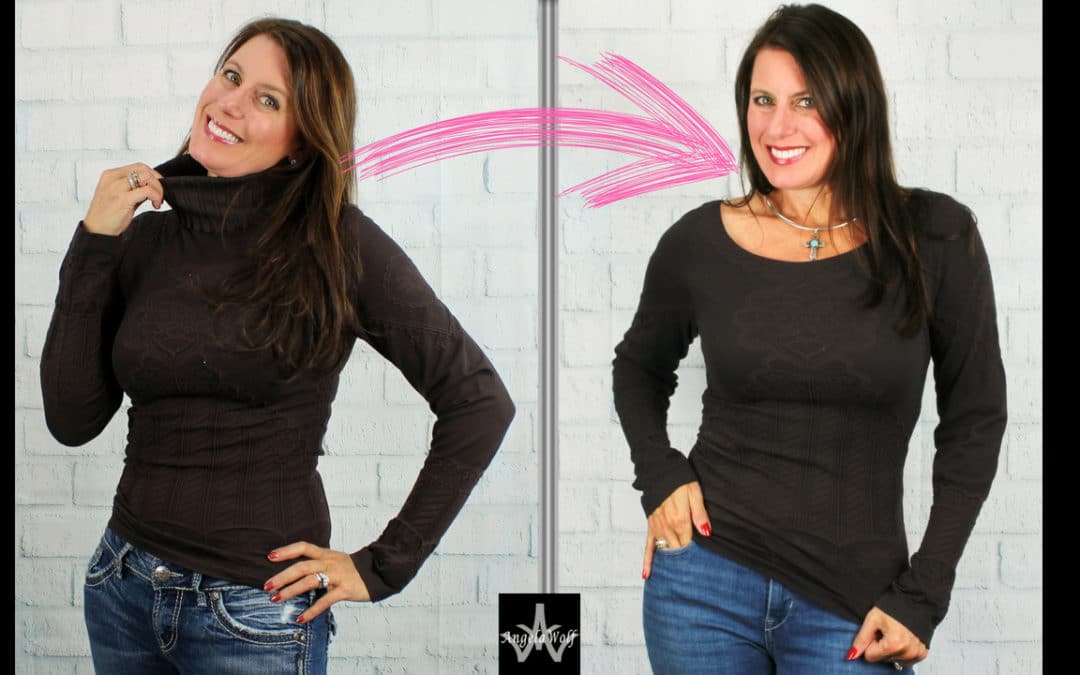
Transform a Turtleneck into a Stylish Boatneck Top
Here is another recycle project for the turtlenecks in our closet and its easy – perfect for beginners! For this sewing tutorial I am using a turtleneck that has a design, but any tank top will work. Click below for the video tutorial and here is a quick recap.
SUPPLIES:
SCISSORS
½” WIDE ELASTIC
PINS
TAILORS CHALK OR FABRIC MARKING PEN / PENCIL
TURTLENECK
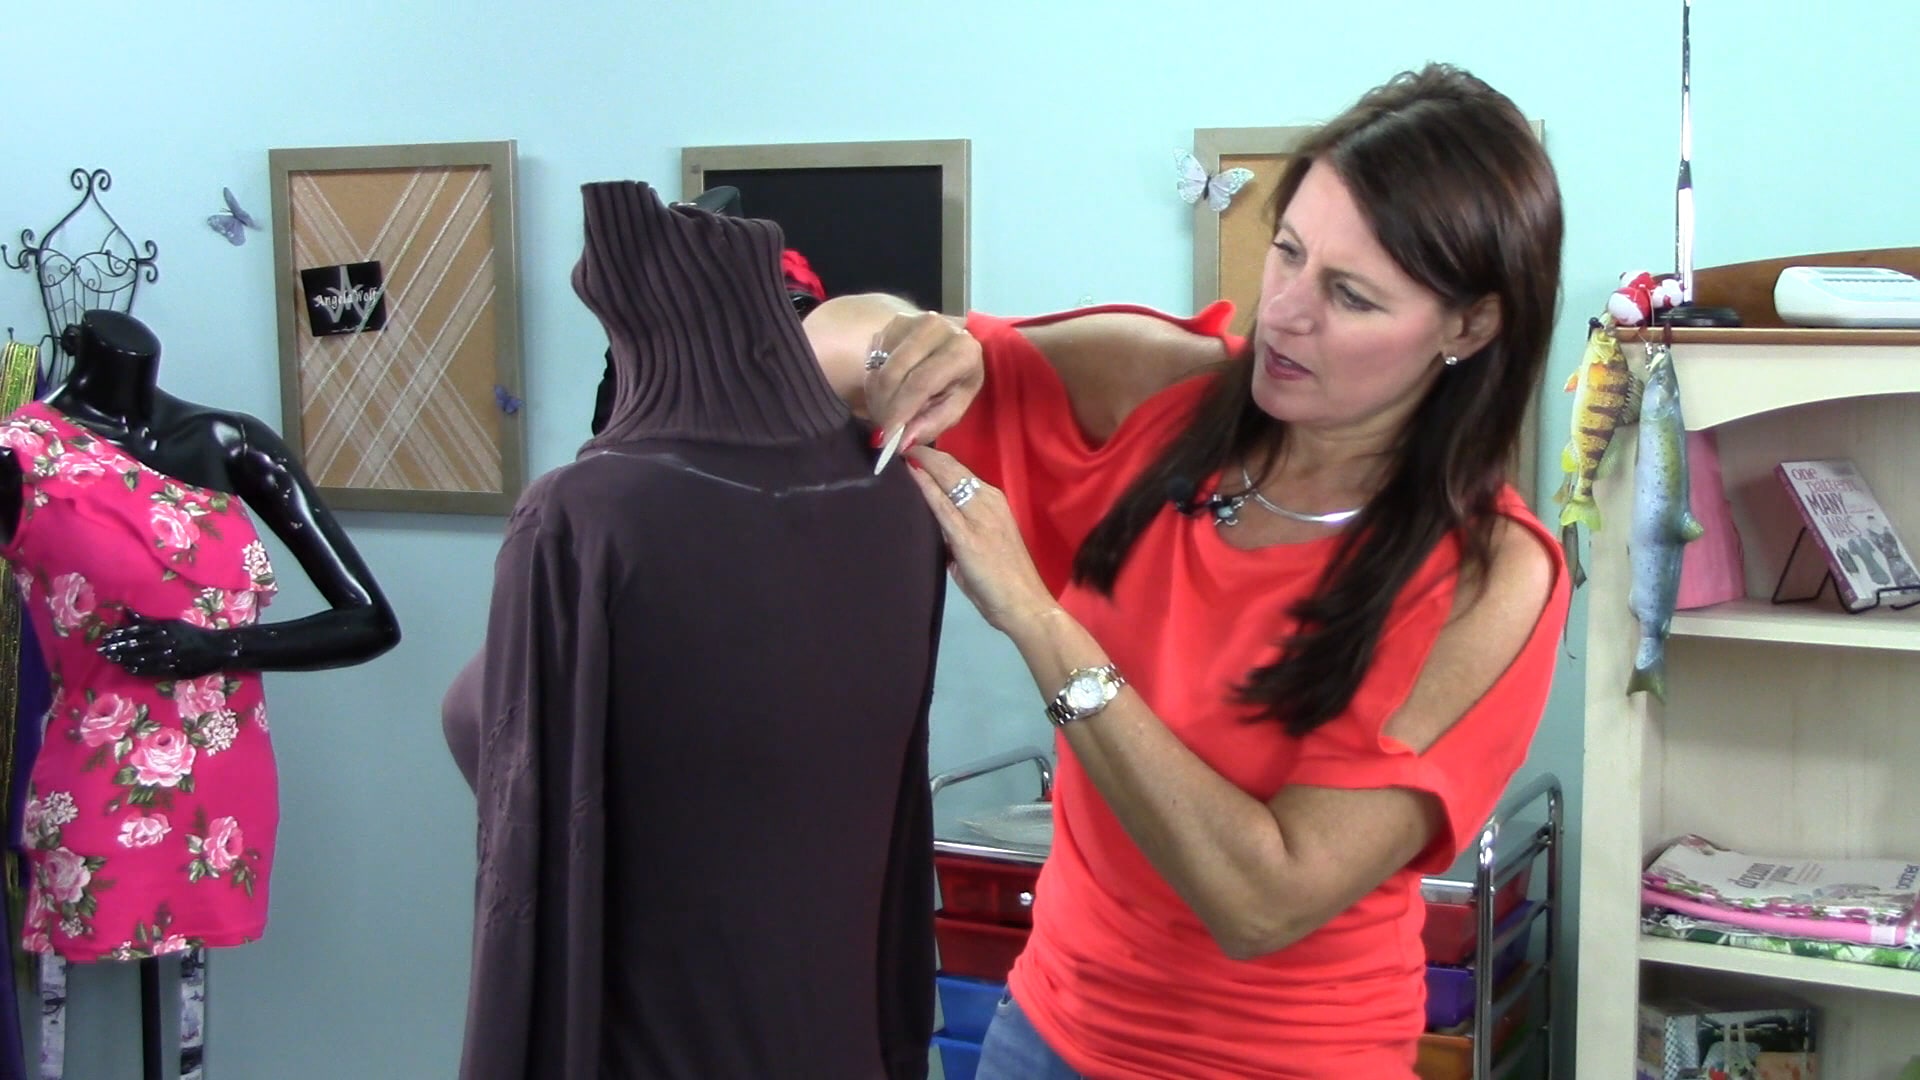
Start by marking the new boat neckline on the turtleneck. I am using a dress form and following the design on the turtleneck. Another option is to measure from the center front and back neck down to the top of the newly desired neckline.
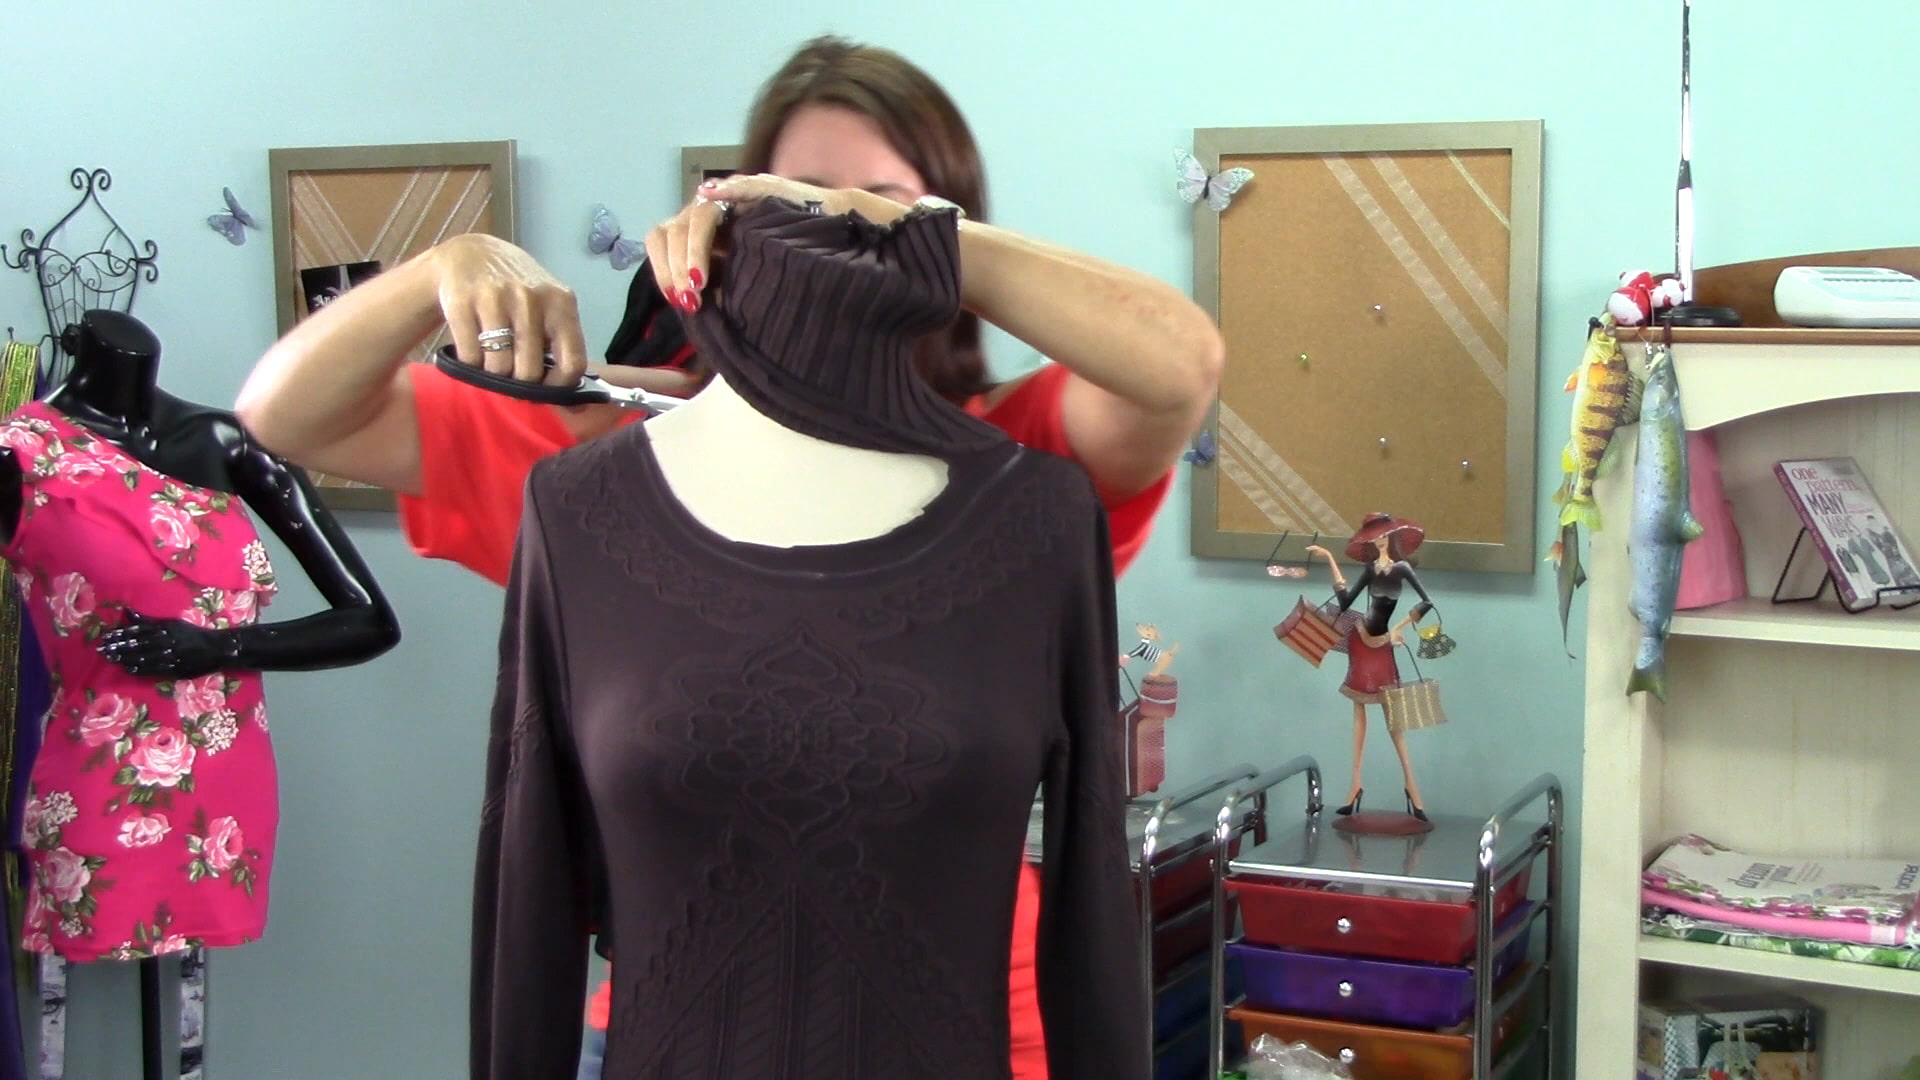
Add a ½” seam allowance and mark the new cutting line. Start cutting higher than the new marking to test the fabric for fraying.
If it is determined the fabric does not fray, then go ahead and cut along the last chalk marked line. If the fabric does fray, leave an extra 1” of fabric from the chalk marked line until after you attach the elastic.
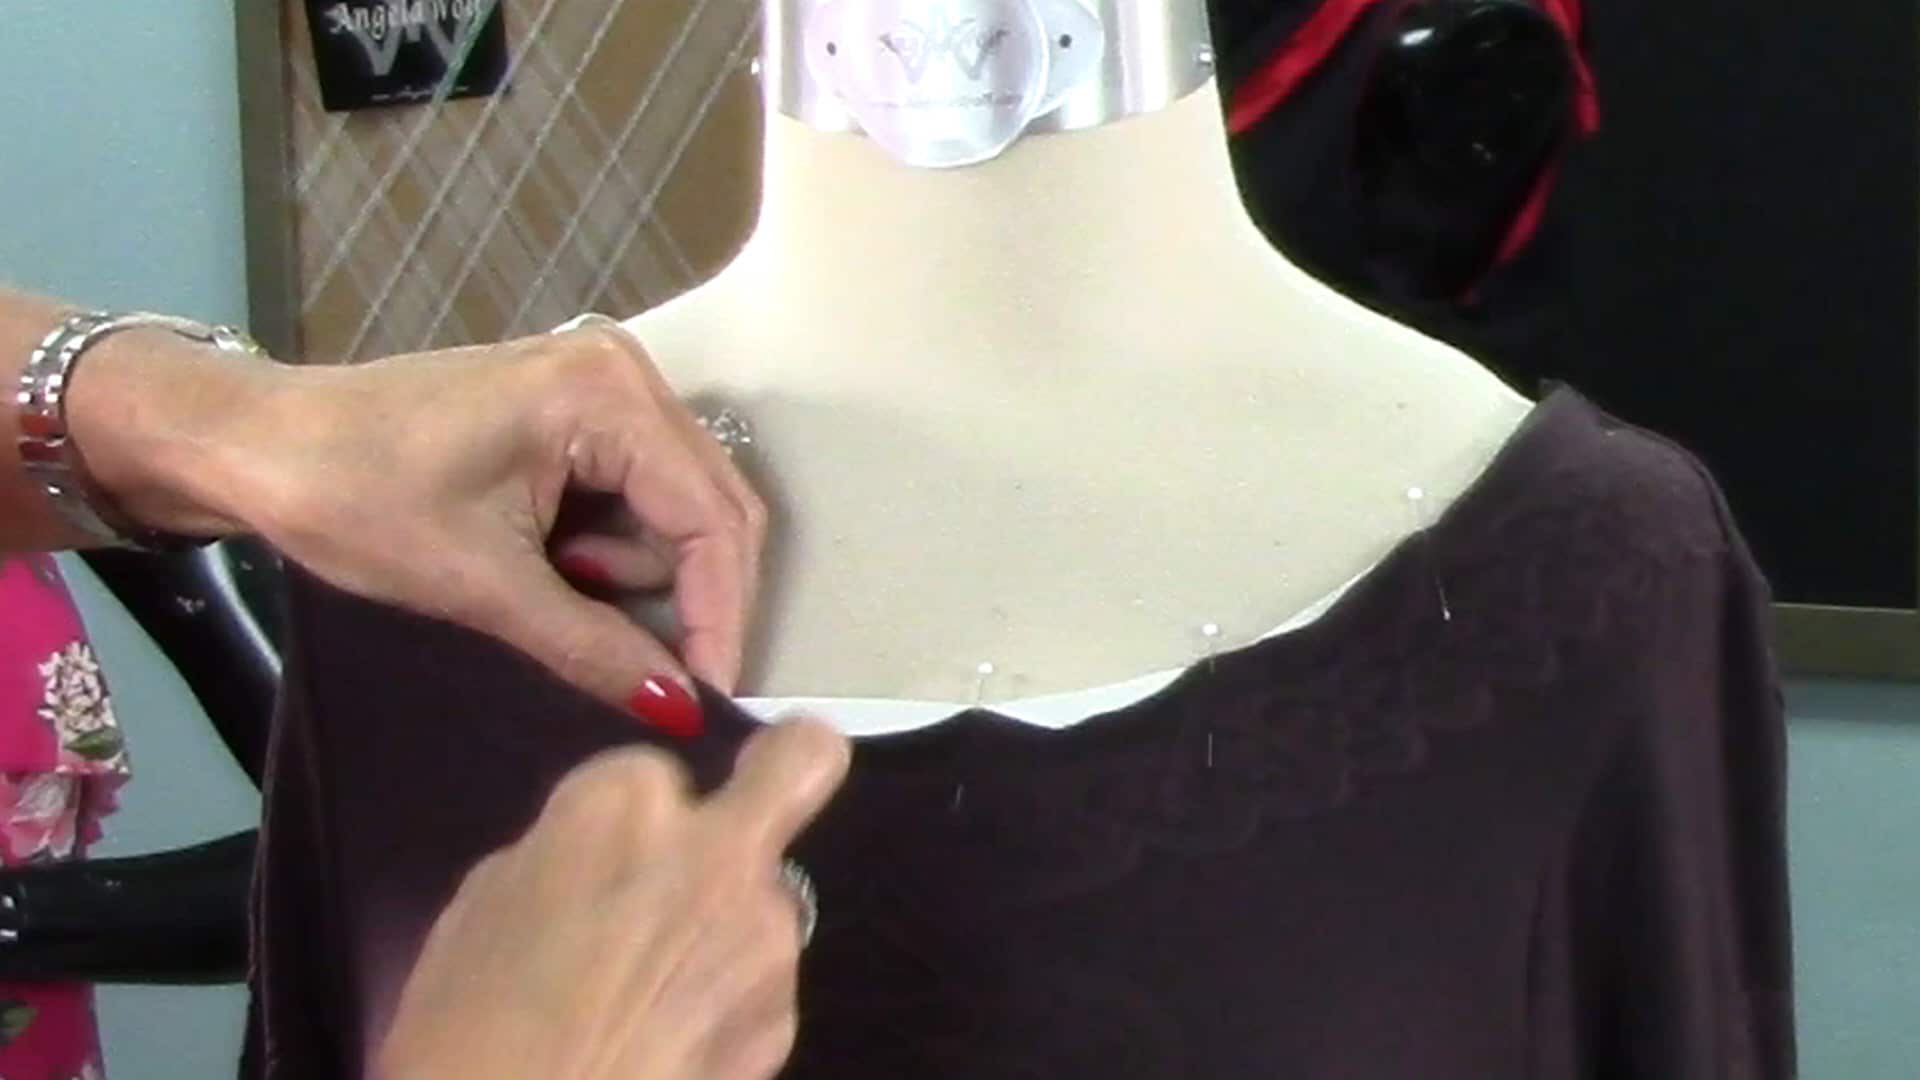
Measure around the circumference around the new neckline. Subtract 1” from that measurement and cut the elastic the same length. Start from the center front and pin the elastic to the wrong side of the fabric. Stretch the elastic as you pin so the elastic is a little shorter in length than the fabric. Continue to pin all the way around the top. When you get to the center back, cross the elastic ends and pin to secure. To read the full blog, head over to my post as a Brother Expert Consultant on the Brother Stitching Sewcial or watch the video below.
I would love to see your creative designs, be sure to tag me if you post a photo #angelawolf #brothersews
Cheers,
I would love to see your creative designs, be sure to tag me if you post a photo #angelawolf #brothersews
Cheers,
<a target="_blank" href="https://shareasale.com/r.cfm?b=1130527&u=1586241&m=29190&urllink=&afftrack="><img src="https://static.shareasale.com/image/29190/728x90.gif" border="0" alt="Craftsy Unlimited FREE 7 day trial at Craftsy.com" /></a>
Envelope Pattern There are three download versions for the envelope pattern: Full Layout - Use this for projector printing or printing on a plotter. ENVELOPE PURSE Letter Size Printing - Use this when printing letter size paper (8.5" x 11"). Print pages 1-8, the...
Quilted Grocery Bag Sewalong I am so excited to share this new grocery bag sewalong with you! This is an easy project with opportunities to make is more advanced with embroidery and embellishing. Sewalong Schedule #372 - 9/7 - Sewalong Part 1 Supplies and Pattern...
Tweed Skirt Sewalong Part 1 In part 1 of this sewalong I will share options for choosing the best fabrics and pattern. Join me in choosing the best lining to coordiante with my fabric!Skirt Patterns to choose from: ~ The Kate Skirt ~ The Fringe Skirt Pattern ~...
Episode 305 🧵 Behind the Scenes with Angela Wolf I know you have heard me say many time ... I am never going on a cruise! Winn and I are on the water all the time, why would I want to go on a cruise?!? Kelli Presley and Phyllis Batz will be joining me live to talk...
Episode 305 🧵 Behind the Scenes with Angela Wolf Featuring CraftOptics I am not sure about your, but if I am working in a low lit area or sewing beads onto a garment, I tend to lean forward and squint, this ending up with a terrible back ache! CraftOptics has changed...
I woke up this morning to an email that made me very happy and I have YOU to thank 🙂 Just so you know, you made my day!!!!! In case you missed it, Craftsy is holding their 2013 blogging awards. Round one of voting is finished and your votes placed my blog into the finals in the category of Sewing – Best Craftsy Instructor Blog. There are only 4 of us and now another round of voting continues until October 29th – Of course I am hoping you will vote again 🙂
First, let me tell you how encouraging this was to hear. Writing a blog and posting video tutorials does take up quite a bit of time, but I personally do so in order to encourage you to sew. Not only sew, but to sew clothes and sew clothes that look like they walked out of a boutique with a high price tag. I have been sewing my own clothes for over 20 years (that just gives me a reason to buy more shoes and handbags LOL) and I love sharing what I have learned with you.
So what happens now? There is a final round of voting that will end on October 29th and Craftsy is offering a free class to one of the lucky voters. For me, I already feel like a winner. As a special thank you for the support you have already shown and encouragement for you to vote again during these final weeks (bribery never hurts right :)) I am going to offer a few giveaways.
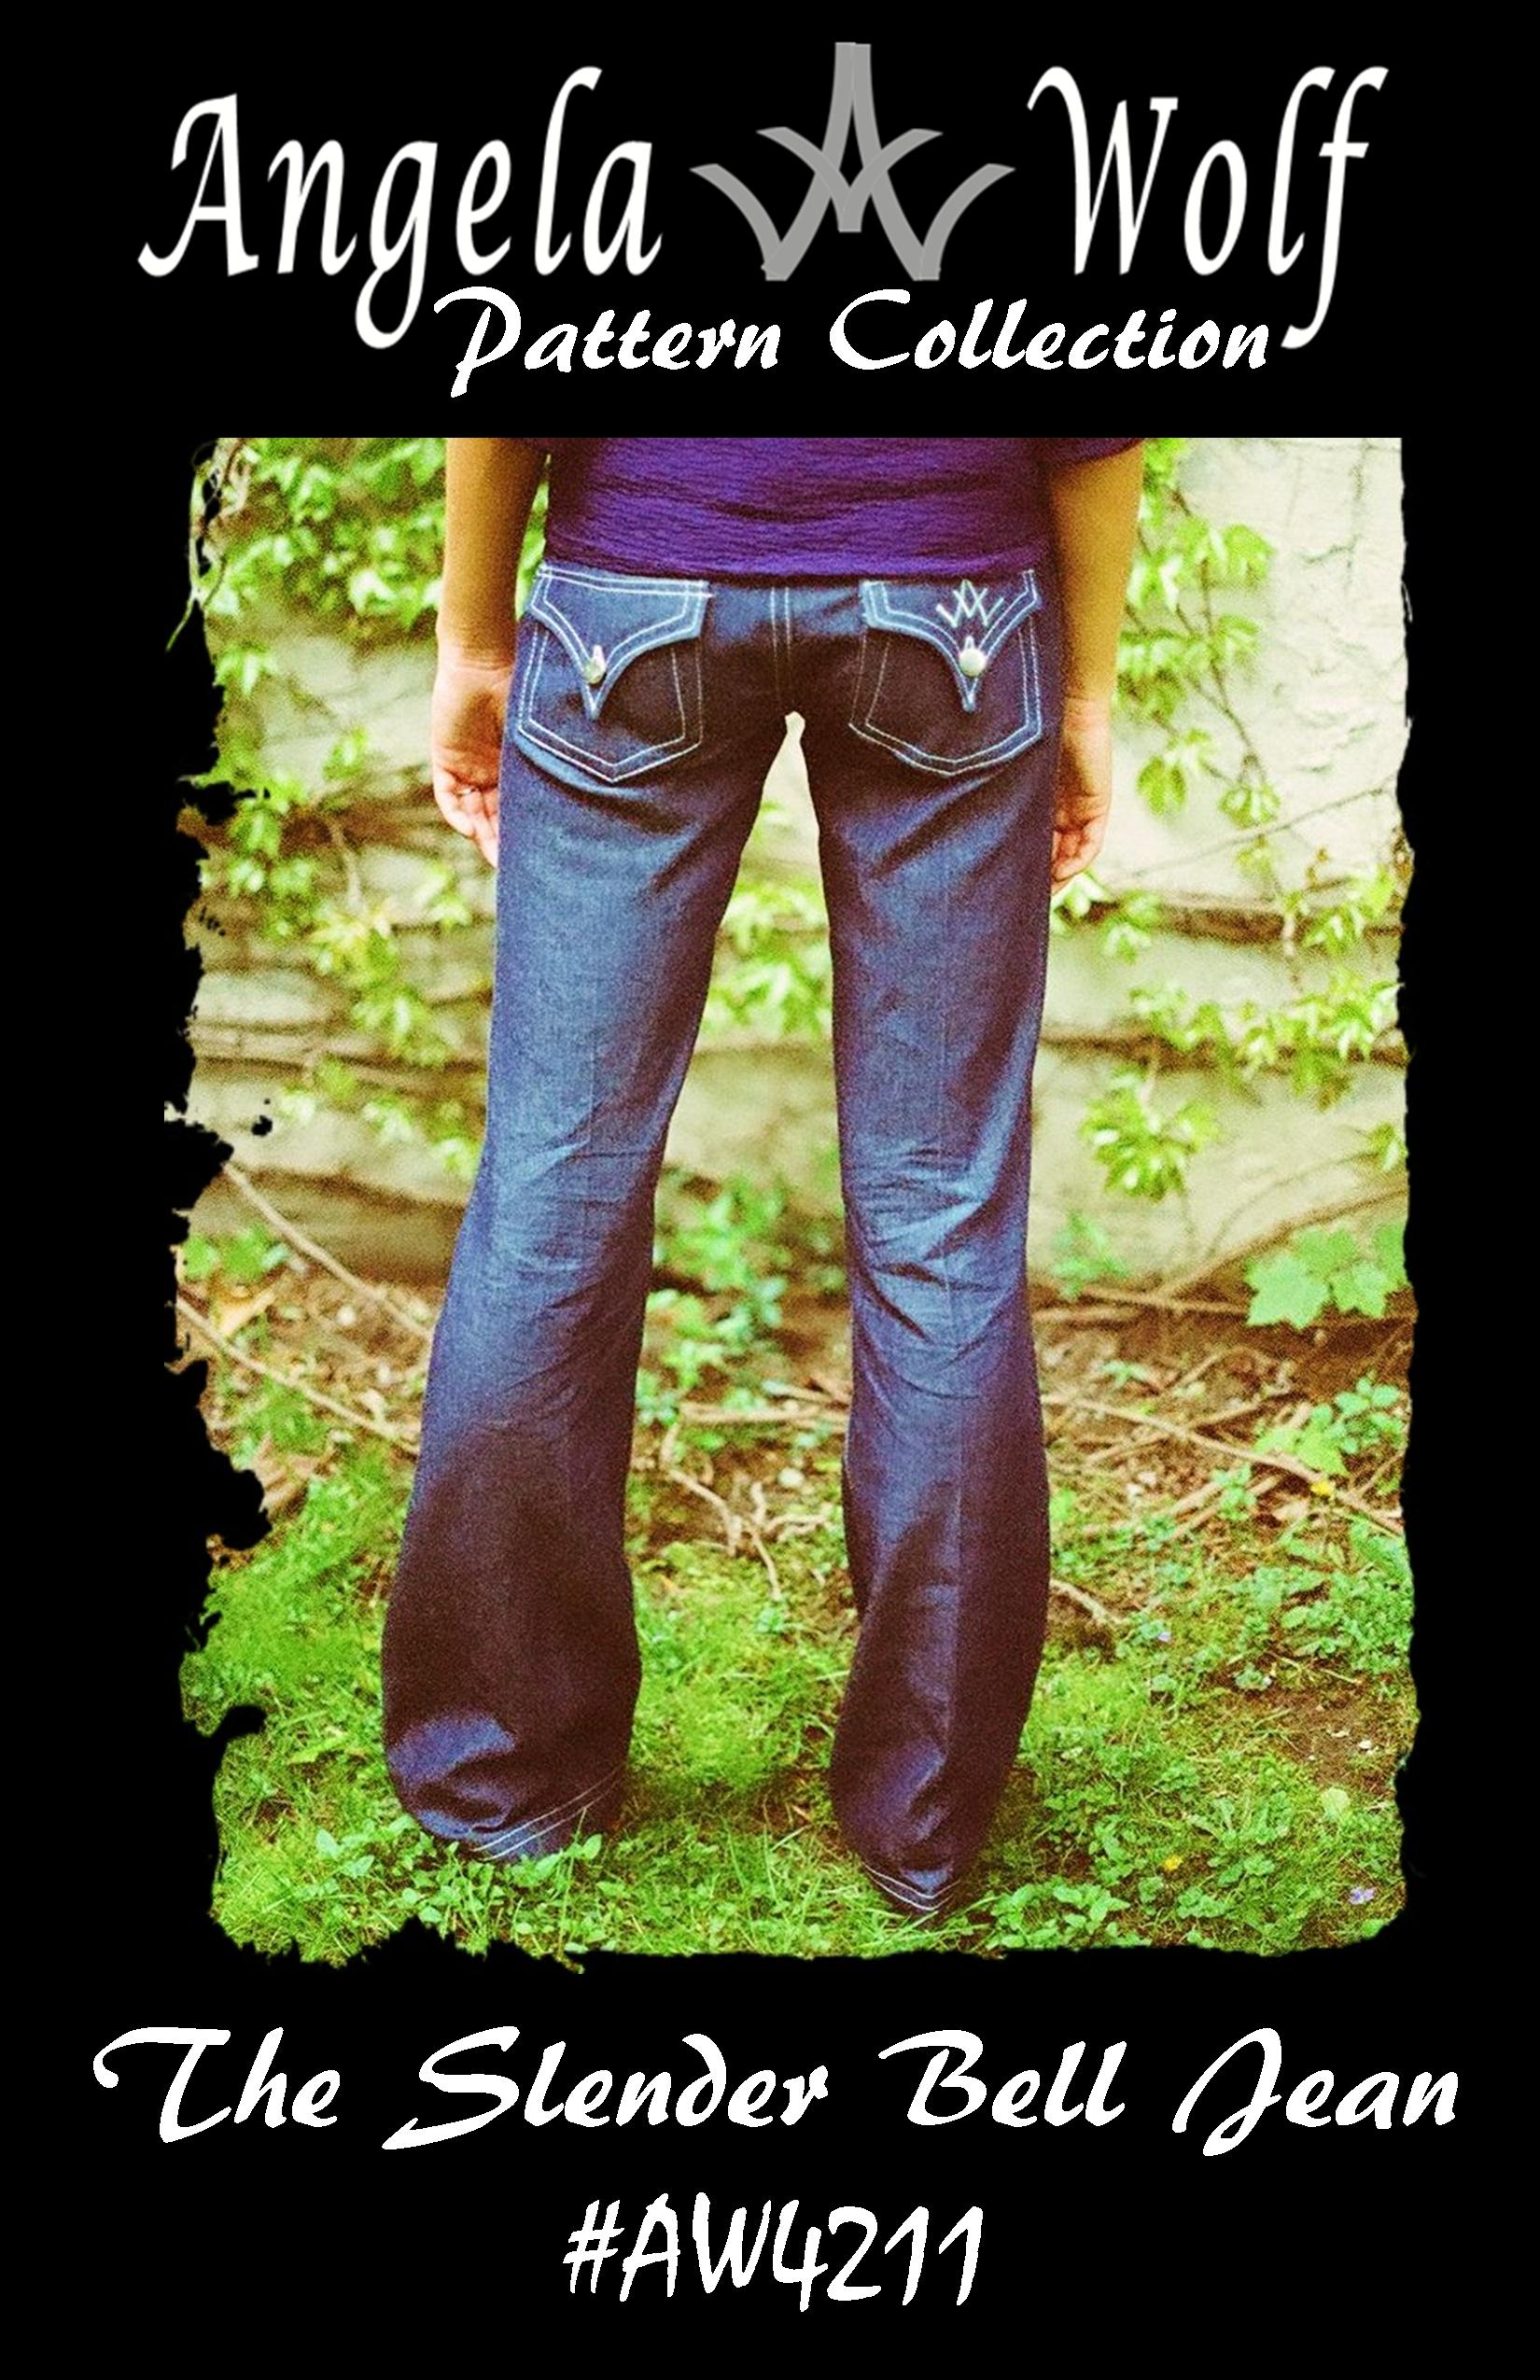
Recently I offered a free Crafty class to my new Sewing Designer Jeans class that will launch later this month and a huge CONGRATULATIONS to the winner Marie C.. Well, the class doesn’t include a pattern. Why? Because maybe you copied your favorite pair in Kenneth D. Kings class or you already have a favorite jean pattern from my friend Jennifer Stern or you like the range of sizes in Jalie … just to name a few of my favorite reasons. During the class, I will be using my Angel Bootcut Jean pattern (my current pattern includes misses sizes 0 – 16 and I am diligently working on the women’s sizes 16W – 24W) and I even show you how to alter the pattern for a higher or lower waist (amongst other fitting issues). So, it only seems appropriate to giveaway one of my jean patterns. How can you win? Pretty simple – let me know why you want to sew my jean pattern and please vote in the final round on Craftsy (remember you can win a free class on Craftsy just for voting). Afraid of sewing jeans – no worries, it’s really easy. Remember back when I showed you videos on how to sew pockets. There are lots more, just scroll through my posts about sewing jeans. I will announce the winner of jeans pattern on Monday and I will announce another “thank you” giveaway tomorrow.
Again, THANK YOU so much for making my day today 🙂 xoxo Angela
Dark jeans are really in trend this fall so that means distressing with a hammer might not be an option. I have tested the MuVit Digital Dual Feed Foot on the Brother Dreamweaver XE and believe it or not, after sewing over many thick seams there was not one skipped stitch! The only thing I added was a #14 denim jean needle and various thicknesses of denim. This foot is different from a walking foot, not only because it has a rolling belt, but the foot plugs into the sewing machine giving the foot it’s own brain … or something like that. You can then adjust the foot by pressing a few buttons on the sewing machine. I have to say technology is really making sewing fun and easy!
The video below shows you just how smooth this digital dual feed foot works and I even tested it on one of my new jean patterns. Which by the way, I am happy to announce my first two jean patterns are up and available! Both patterns come with detailed sewing instructions in a book format, very easy to follow. The other bonus that comes with both of these jean patterns is a downloadable PDF file, download to your tablet and you can enlarge the photos for detailed viewing. The PDF file offers color photos and details on where to distress the jeans as you sew. My goal is to help you sew jeans that fit perfect and look expensive 🙂 Enjoy and don’t forget about the previous videos on sewing jean pockets if you need a little extra help. Hope you had a great Thanksgiving weekend, lot’s of family, food and shopping on my end. Wait until you see my new shoes (and yes that’s plural!) xoxo Angela
Another quick lesson on sewing designer jeans, sewing the front pockets. I have broken this into two parts as this lesson will cover attaching the silk charmeuse lining and topstitching the pocket edge. The next lesson shows how to add a coin pocket and closing up the lining. To get started you will need your front jean pieces and the pocket lining. You will usually find cotton as the fabric for the pocket lining, but I prefer to use something a little more luxurious, like silk charmeuse. Because the silk is so thin you can’t see the pockets through the outside of the jean, not to mention the fabric feels awesome against the skin.
Again, experimenting with some of the new features on my Brother Dreamweaver XE VM6200Dstitching this pocket is painless. First off, look at the size of the new “J” foot. (The picture has the original foot alongside the new foot). The longer length really makes a difference when sewing across layers of fabric. The foot glides across humps, thicker seams, even uneven edges as the pocket we will topstitch. I call this a BIG plus!
Onto sewing the pockets … pin your silk charmeuse lining to the denim fabric along the curve of your pocket. You can stitch from either side, I chose to stitch with the denim on the top so you can see the sew straight laser vision guide a little better. I have aligned the laser with the raw edge of the fabric, allowing me to sew the entire pocket curve with a precise seam allowance.
Press the Pocket Lining … Turn the lining to the inside of the pocket and steam press, using the tailor’s clapper to permanently hold that crease (shown on video below).
Topstitch the Pocket Edge … Again, utilizing the laser light to make sure my first topstitch line is perfectly placed 1/8″ from the edge of the pocket curve. Then I move the laser light to align with the previous topstitch line, but here is a new one for you. I am able to use the v-sonic pen pal to touch where I want the laser light to move to. You have to check out the video below to get the full visual of this unique feature, but simply put … engage the pen pal, touch the bed of the sewing machine where you want the laser light to shine, and hit OK. That’s it! Just imagine how easy sewing straight rows of topstitching will be 🙂