Quilting Silk with the Muvit Foot creates Eye Candy!

Quilting Silk with the Muvit Foot creates Eye Candy!

Angela Wolf Pattern CollectionIn my mission to come up with fun and unique fabric manipulations, I thought I would test out quilting (taking a short break from embroidery this week :)). And yes, I said QUILTING!  I am not sure about you, but as a fashion designer when I hear the word “quilting” I typically cringe! It’s not that I don’t think quilts are beautiful and I sure wouldn’t want to offend all my friends that have a passion for this art (especially my mother :)) – but the fact of the matter is, the word itself makes many apparel sewer’s run the other way.  The term quilting gives me an instant vision of cotton, LOTS of cotton, and bins of more  cotton scraps that can be added to some project down the road.  I know, I am so judgmental!  I obviously overlook my bins of silk scraps that I know will fit into a pocket eventually.

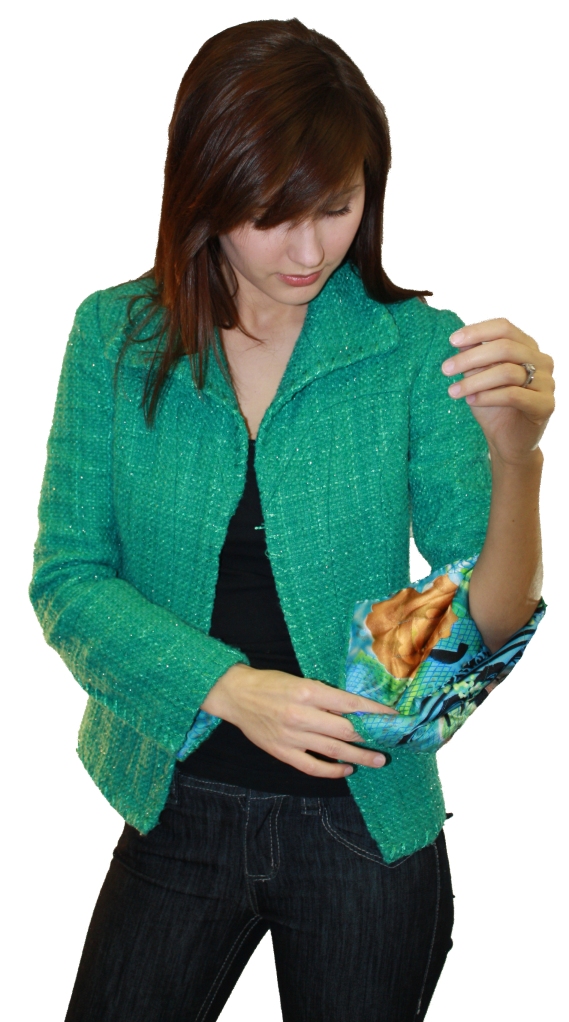
But I think I should really take another look at this art, especially with fabric manipulation on the mind.  Besides, who made the rule you can only quilt cotton.  What about my favorite sewing technique, that is very Chanel inspired, where the silk charmeuse lining is “quilted” to the jacket fabric.  Very luxurious and looks fabulous!  Although we call it “Chanelism” not quilting.  Go figure!

Angela Wolf Kristy Jacket

Or have you seen the quilted leather shown by Proenza Schouler – definitely on the short list for a fall must-have!  Givenchy and Chanel both added some form of quilted leather to their collections.  I really love the way you can use quilting to create a unique looking fabric or you can place the quilting in particular area of the garment to add a custom design element.

00180fullscreen[1]

So, as to not risk ruining a large piece of luxurious fabric, I thought I would try a small sample.  I am going to use silk charmeuse with batting and create Eye Candy (those of you that travel often will understand the name.)  This only requires a little fabric and should be easy for testing the quilting method before I add quilted silk to a garment.

Angela Wolf Eye Candy

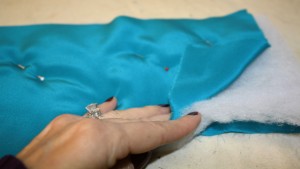
Start with 2 pieces of silk charmeuse and 1 piece of batting.

eye candy hannah katie1

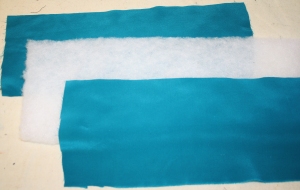
Pin together the layers.

eye candy hannah katie2

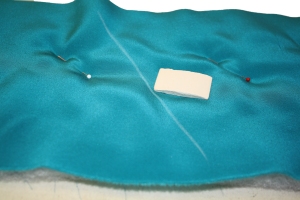
Use clay chalk to mark a straight line, diagonally across the fabric.

eye candy hannah katie4

I am using the MuVit Digital Dual Feed Foot on the Brother Dreamweaver XE .  You could also use a walking foot or just a standard foot if you don’t have a the fancies 🙂

eye candy hannah katie5

I am going to start the first row of stitching using my laser-vision as a guide to follow my chalk line.  Although, the light is a little hard to see, probably because I have the bright light turned all the way up on the machine – I swear I can get a suntan from the brightness LOL!

eye candy hannah katie7

Then, using my foot as a guild, I am stitching row after row.  I noticed that sewing at a medium speed with the MuVit foot works the best, in fact the same is true for the walking foot on my Quattro.

eye candy hannah katie9

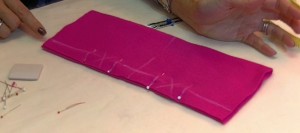
After quilting the entire piece of fabric, I laid my pattern on top of the quilted fabric and cut it out.

eye candy hannah katie12eye candy hannah katie13

I added an elastic band to the back, pinning in place at each side.

eye candy hannah katie16

Then finished the edges with bias tape.  Here is a quick video if you want to see an easy way to make your own bias tape.

eye candy hannah katie17

eye candy hannah katie18eye candy hannah katie19

 That was very easy!  In fact this was going to be a gift, but I think I might have to keep this one for myself 🙂  So you can see the technique of quilting is pretty easy and it does work on other fabrics besides  cotton.  I have a few more fabrics I am going to try, I will let you know how they turn out.  But I can definitely see this quilted silk charmeuse used in a jacket or vest.   If you any photos of fabric manipulation post them on flickr here is my link to share or add them to facebook!  Inspire others by your creativity!  Cheers, xoxo Angela

Angela Wolf Eye Candy

Brother™ has provided me with the DreamWeaver XE, but all opinions expressed are entirely my own.

Sewing a Zipper with the Laser Vision Guide with Brother Dreamweaver

Sewing a Zipper with the Laser Vision Guide with Brother Dreamweaver

season 5 It's Sew Easy TVHope you are all enjoying February, I can hardly believe it’s almost over! I spent last week taping season 5 for It’s Sew Easy TV, despite the cold and snow – we had a successful week. Here is one of my favorite photo’s on set with June Mellinger (Brother) and Christopher Straub (Project Runway). I have to say, he is one talented designer! He even left an autographed handbag for Katie, my ninth grade apprentice. She absolutely adores him and I can’t wait to see her face when she opens her gift 🙂  By the way, that handbag in the photo is fabric he designed.  I foresee an order with spoonflower soon.

laser light on zipper brother

I have been busy working on some custom garments and my new collection, which I will be sharing over the next few weeks, including launching some new patterns. First, I have to share one of my last gown dilemma’s.  The fabric was gorgeous, but challenging to work with … slipper, shiny, textured, get the idea? I was having a heck of a time inserting the back zipper. I couldn’t use a hidden zipper, as I could not find a color to matched the fabric. The problem occurred when I was topstitching around the zipper. I hand basted in the zipper, marked the center back seam with chalk (that was also basted closed), and marked the stitch line with chalk.  The fabric really presented a challenge with the texture. Being a total perfectionist, I ripped the topstitching out twice because it just was not straight enough. Then I remembered the Laser Vision Guide on my Brother Dreamweaver XE VM6200D.  This worked like a charm!  I was able to line up the laser light with center back seam and topstitch perfectly straight, all the way around the zipper.  I won’t forget about that handy tool next time.  Here is the short video I put together if you want to see more details.  Now, back to the cutting table.  Enjoy 🙂  xoxo Angela

[youtube=http://www.youtube.com/watch?v=af20N8dbmE8]

Brother™ has provided me with the DreamWeaver XE, but all opinions expressed are entirely my own.

DIY Project: How to Sew Fleece Texting Gloves

DIY Project: How to Sew Fleece Texting Gloves

texting gloves angela wolfThis is a fun and easy sewing project; sewing fleece texting gloves.  You know I can’t resist coming up with a few fun gifts items to sew. How about a pair of texting gloves! I don’t know about you, but I really get annoyed when I have to take off my gloves in order to answer my phone, text, or check an email. Instead of buying gloves and cutting off the fingertips, I decided to whip up a pair of custom gloves. These are easy and fast to sew, not to mention you can customize how tight and tall you want them and not worry about your rings getting in the way.  Did I mention they are GREAT for fishing!

The video below walks you through the entire process, including another glimpse at the V-Sonic Pen Pal feature on the Brother Dreamweaver XE.  In short, here are the steps:

1.  Measure around your knuckles, this will be the width of your gloves.

2.  Measure from your knuckles up your wrist and come up with a length measurement.

3.  Chalk mark your stitch lines, making sure to block out the area for your thumb.

4.  Stitch and press your seam allowance open.

5.  Fold the glove in half so the folded edge is at your knuckles.text gloves Angela Wolf

6.  Hand stitch the thumb hole closed.

7.   Serge the raw edge.

That’s it!  You can add beading, decorative stitching, embroidery … by the way, if you add embroidery, do so before you sew the gloves together.  This is such an easy project.  Show everyone how creative you are and post photo’s on my facebook, Instagram, and pinterest of your new gloves.  Let me know if you have any questions.

Cheers and stay warm!


Brother™ has provided me with the DreamWeaver XE, but all opinions expressed are entirely my own.

www.AngelaWolfPatterns.com

Learn How to Ruch a Simple Tee

Learn How to Ruch a Simple Tee

My first pattern The Ruched-T  (now available in sizes XXS – 5X and paper or downloadable :))has been out a few months now and I have really enjoyed all the emails and facebook postings from everyone wearing their new tops 🙂   A few of you have asked how I do the ruching and I thought the best way to explain is to just show you.  So I have put together a short video and of course I had to show another awesome feature on the Brother Dreamweaver XE VM6200D, the multi function foot controller.  This special foot allows you to use your feet to backstitch,  cut the thread, put the needle down, etc. and then you can keep your hands on the fabrics while sewing!  Wait until you see this one!  Anyway, enjoy ruching your tee’s and keep sending me photo’s, I love it 🙂   xoxo Angela

[youtube=http://www.youtube.com/watch?v=iXH2H-QdQNw&feature=g-upl]

Brother™ has provided me with the DreamWeaver XE, but all opinions expressed are entirely my own.

How to Sew Designer Jean Pockets … Part 2 Adding the Coin Pocket

[youtube=http://www.youtube.com/watch?v=4OH2uiaZXyc]

Here is part 2 for finishing off the front of your designer jean pockets.  This video will show you how to add a coin pocket, which is totally optional.  Sometimes I add a logo instead, just depends what kind of mood I am in 🙂   Of course I have to show off a few other features on the Brother Dreamweaver XE VM6200D, like using the V-Sonic PenPal to determine how wide my zigzag stitch will be – you really have to see it to believe it.  Now, I just have to finalize the last of the Angela Wolf Jean Patterns so we can ship them out soon, wish me luck!  xoxo Angela

Brother™ has provided me with the DreamWeaver XE, but all opinions expressed are entirely my own

Pin It on Pinterest